如果您对如何管理共享库中的spring-cloudbootstrap属性?感兴趣,那么本文将是一篇不错的选择,我们将为您详在本文中,您将会了解到关于如何管理共享库中的spring-cloudboots
如果您对如何管理共享库中的spring-cloud bootstrap属性?感兴趣,那么本文将是一篇不错的选择,我们将为您详在本文中,您将会了解到关于如何管理共享库中的spring-cloud bootstrap属性?的详细内容,我们还将为您解答springbootsession共享原理的相关问题,并且为您提供关于Bootstrap-Switch开关控件使用指南,springcloud实战视频、J2EE企业开发架构源码SpringCloud SpinrgBoot2 Spring Cloud Spring Boot2 分布式 微服务 快速开放架构 脚手架 后台管理平台、java 版 spring cloud springcloud spring boot springboot b2b2c o2o 微服务 分布式 电子商务 电子商城 saas 小程序商城系统相关资料、JAVA入门教学之快速搭建基本的springboot(从spring boot到spring cloud)的有价值信息。
本文目录一览:- 如何管理共享库中的spring-cloud bootstrap属性?(springbootsession共享原理)
- Bootstrap-Switch开关控件使用指南,springcloud实战视频
- J2EE企业开发架构源码SpringCloud SpinrgBoot2 Spring Cloud Spring Boot2 分布式 微服务 快速开放架构 脚手架 后台管理平台
- java 版 spring cloud springcloud spring boot springboot b2b2c o2o 微服务 分布式 电子商务 电子商城 saas 小程序商城系统相关资料
- JAVA入门教学之快速搭建基本的springboot(从spring boot到spring cloud)
")
如何管理共享库中的spring-cloud bootstrap属性?(springbootsession共享原理)
我正在构建一个库,该库为使用我们的Spring CloudConfig/Eureka设置的应用程序提供了合理的配置。这个想法是作为单个微服务应用程序中很少或没有与Spring云相关的样板的定制启动程序提供此配置的。
此时,我要放入此库中的大多数共享配置都包含中的内容bootstrap.yml。我想bootstrap.yml在我的自定义启动器中提供,但是使用该库的应用程序仍然需要能够提供自己的bootstrap.yml,即使这样也可以正确设置spring.application.name。
由于bootstrap.yml是从类路径加载的,因此,如果应用程序具有自己的,Spring似乎会忽略共享库中的那个bootstrap.yml。ApplicationContextInitializer由于引导上下文对待的特殊方式,我什至无法使用自定义环境ApplicationContextInitializers。
有人对在这里可行的方法有任何建议吗?我想提供一个嵌入式库,使我们自以为是的引导程序配置工作,而不必bootstrap.yml在所有项目中都复制样板。
答案1
小编典典我能够找到解决方案。该解决方案的目标是:
- 从共享库中的yaml文件加载值。
- 允许使用该库的应用程序引入自己的bootstrap.yml,并将它们也加载到环境中。
- bootstrap.yml中的值应覆盖共享yaml中的值。
主要挑战是在应用程序生命周期的适当时间点注入一些代码。具体来说,我们需要在将bootstrap.yml
PropertySource添加到环境中之后执行此操作(以便我们可以按照相对于它的正确顺序注入自定义PropertySource),但也需要在应用程序开始配置Bean之前(作为配置值控件)行为)。
我发现的解决方案是使用自定义的EnvironmentPostProcessor
public class CloudyConfigEnvironmentPostProcessor implements EnvironmentPostProcessor, Ordered { private YamlPropertySourceLoader loader; public CloudyConfigEnvironmentPostProcessor() { loader = new YamlPropertySourceLoader(); } @Override public void postProcessEnvironment(ConfigurableEnvironment env, SpringApplication application) { //ensure that the bootstrap file is only loaded in the bootstrap context if (env.getPropertySources().contains("bootstrap")) { //Each document in the multi-document yaml must be loaded separately. //Start by loading the no-profile configs... loadProfile("cloudy-bootstrap", env, null); //Then loop through the active profiles and load them. for (String profile: env.getActiveProfiles()) { loadProfile("cloudy-bootstrap", env, profile); } } } private void loadProfile(String prefix, ConfigurableEnvironment env, String profile) { try { PropertySource<?> propertySource = loader.load(prefix + (profile != null ? "-" + profile: ""), new ClassPathResource(prefix + ".yml"), profile); //propertySource will be null if the profile isn''t represented in the yml, so skip it if this is the case. if (propertySource != null) { //add PropertySource after the "applicationConfigurationProperties" source to allow the default yml to override these. env.getPropertySources().addAfter("applicationConfigurationProperties", propertySource); } } catch (IOException e) { throw new RuntimeException(e); } } @Override public int getOrder() { //must go after ConfigFileApplicationListener return Ordered.HIGHEST_PRECEDENCE + 11; }}可以通过META-INF / spring.factories注入此自定义的EnvironmentPostProcessor:
#Environment PostProcessorsorg.springframework.boot.env.EnvironmentPostProcessor=\com.mycompany.cloudy.bootstrap.autoconfig.CloudyConfigEnvironmentPostProcessor需要注意的几件事:
- YamlPropertySourceLoader按配置文件加载yaml属性,因此,如果您使用的是多文档yaml文件,则实际上需要分别从其中分别加载每个配置文件,包括无配置文件的配置。
- ConfigFileApplicationListener是EnvironmentPostProcessor,负责将bootstrap.yml(或常规上下文中的application.yml)加载到环境中,因此,为了相对于bootstrap.yml属性正确地优先放置自定义yaml属性,您需要对命令进行排序ConfigFileApplicationListener之后的自定义EnvironmentPostProcessor。
编辑:我最初的答案不起作用。 我要用这个代替它。

Bootstrap-Switch开关控件使用指南,springcloud实战视频

插件下载地址:https://github.com/Bttstrp/bootstrap-switch
引入插件文件
HTML部分,只需要一个input多选框即可,checked设置初始是状态。
JS渲染开关控件,其中onSwitchChange添加开关控件状态改变。
//name值和input标签的name值一样
$("[name=‘switch’]").bootstrapSwitch({
onText : “启用”, // 设置ON文本
offText : “禁用”, // 设置OFF文本
onColor : “success”,// 设置ON文本颜色(info/success/warning/danger/primary)
offColor : “warning”, // 设置OFF文本颜色 (info/success/warning/danger/primary)
size : “normal”, // 设置控件大小,从小到大 (mini/small/normal/large)
// 当开关状态改变时触发
onSwitchChange : function(event, state) {
if(state==true){
console.log(“true”);
}else{
console.log("fals
《一线大厂Java面试题解析+后端开发学习笔记+最新架构讲解视频+实战项目源码讲义》
【docs.qq.com/doc/DSmxTbFJ1cmN1R2dB】 完整内容开源分享
@H_301_58@e");
}
}
});
BootStrapTable数据表格中使用Bootstrap-Switch开关控件
如果对BootStrapTable数据表格有不理解的地方,可以访问Bootstrap Table数据表格的使用指南。
先在表格列中添加开关状态列。代码如下。
{
field: ‘isUsed’,
title: ‘状态’,
valign: ‘middle’,
halign: ‘center’,
align: ‘center’,
formatter: ‘typeSwitch’ //表格中增加按钮
}
开关样式代码。添加开关标签的value值为当前行的id,用于修改状态用。
//表格中开关控件
function typeSwitch(value, row, index){
if (value) {
return “”;
} else {
return “”;
}
}
渲染后效果如下
在渲染表格的JS中添加如下代码,来渲染开关控件和监听开关控件的改变。
onLoadSuccess: function () { //在成功加载远程数据时触发
$("[name=‘switch’]").bootstrapSwitch({
onText : “启用”, // 设置ON文本
offText : “禁用”, // 设置OFF文本
onColor : “success”,// 设置ON文本颜色(info/success/warning/danger/primary)
offColor : “warning”, // 设置OFF文本颜色 (info/success/warning/danger/primary)
size : “small”, // 设置控件大小,从小到大 (mini/small/normal/large)


总结
以上是小编为你收集整理的Bootstrap-Switch开关控件使用指南,springcloud实战视频全部内容。
如果觉得小编网站内容还不错,欢迎将小编网站推荐给好友。
原文地址:https://blog.csdn.net/m0_63174811/article/details/121971080

J2EE企业开发架构源码SpringCloud SpinrgBoot2 Spring Cloud Spring Boot2 分布式 微服务 快速开放架构 脚手架 后台管理平台
1. 鸿鹄Cloud架构清单
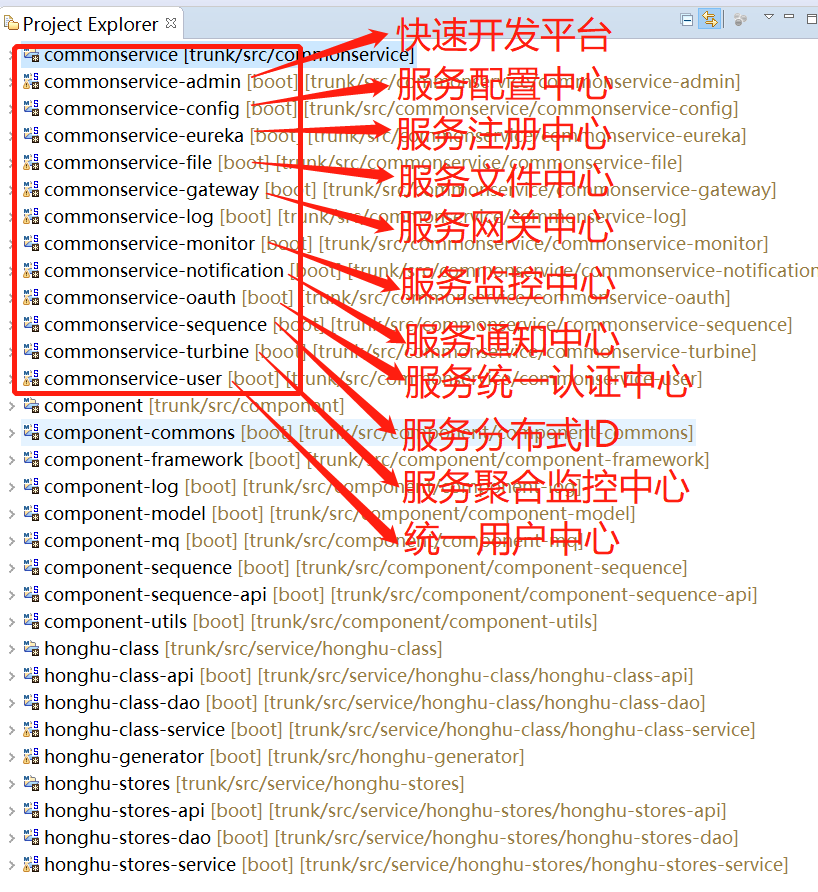
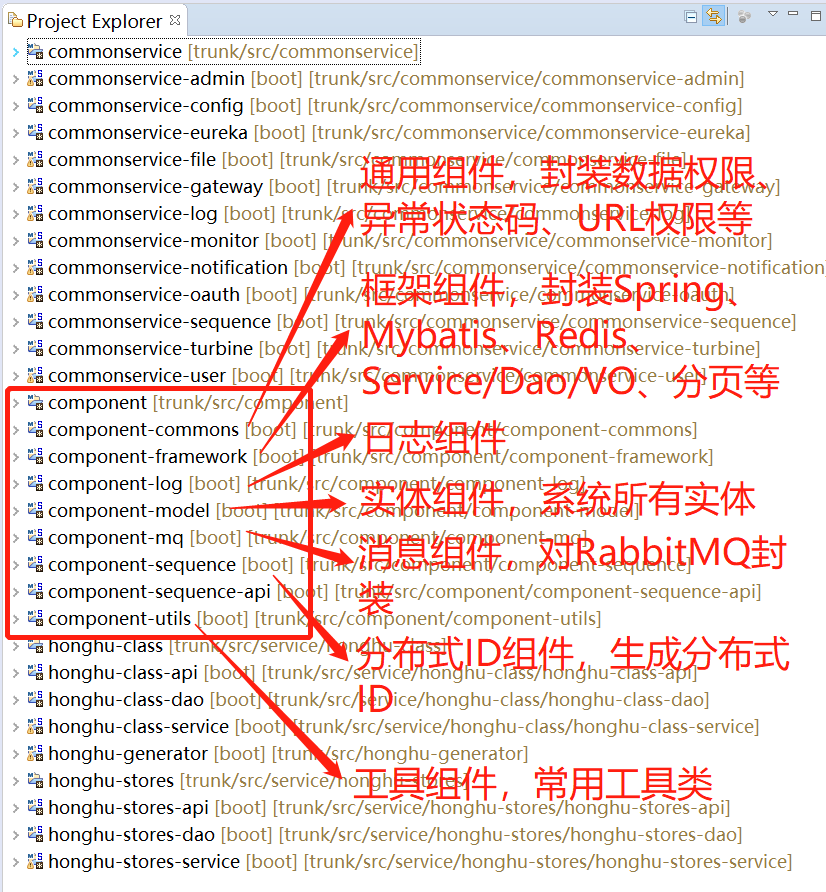
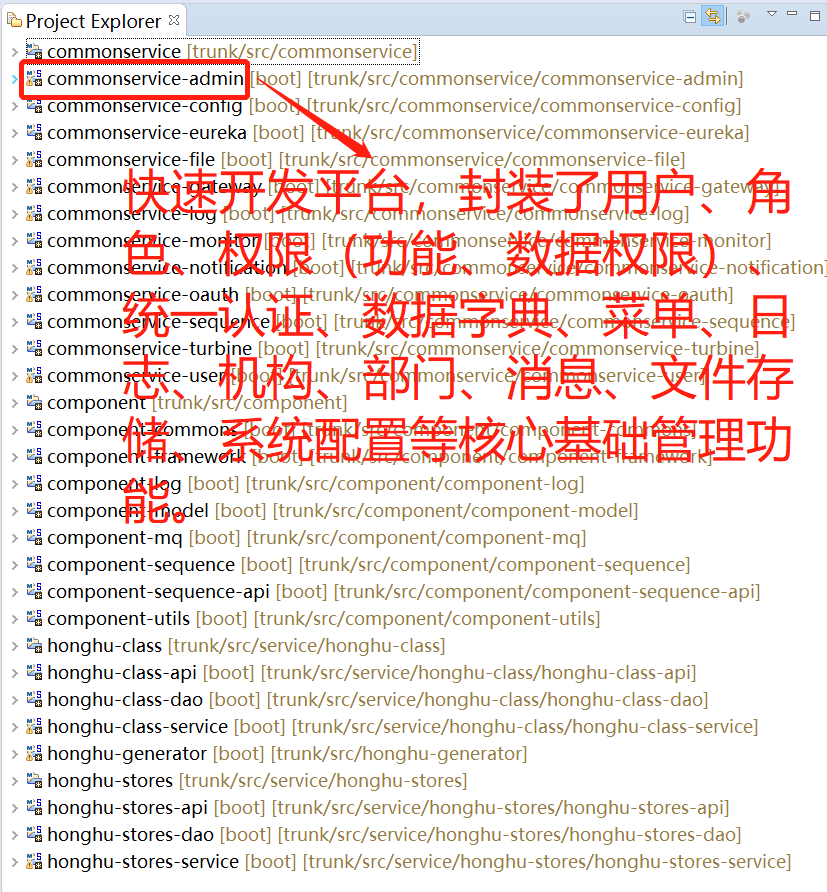
2. Commonservice(通用服务)
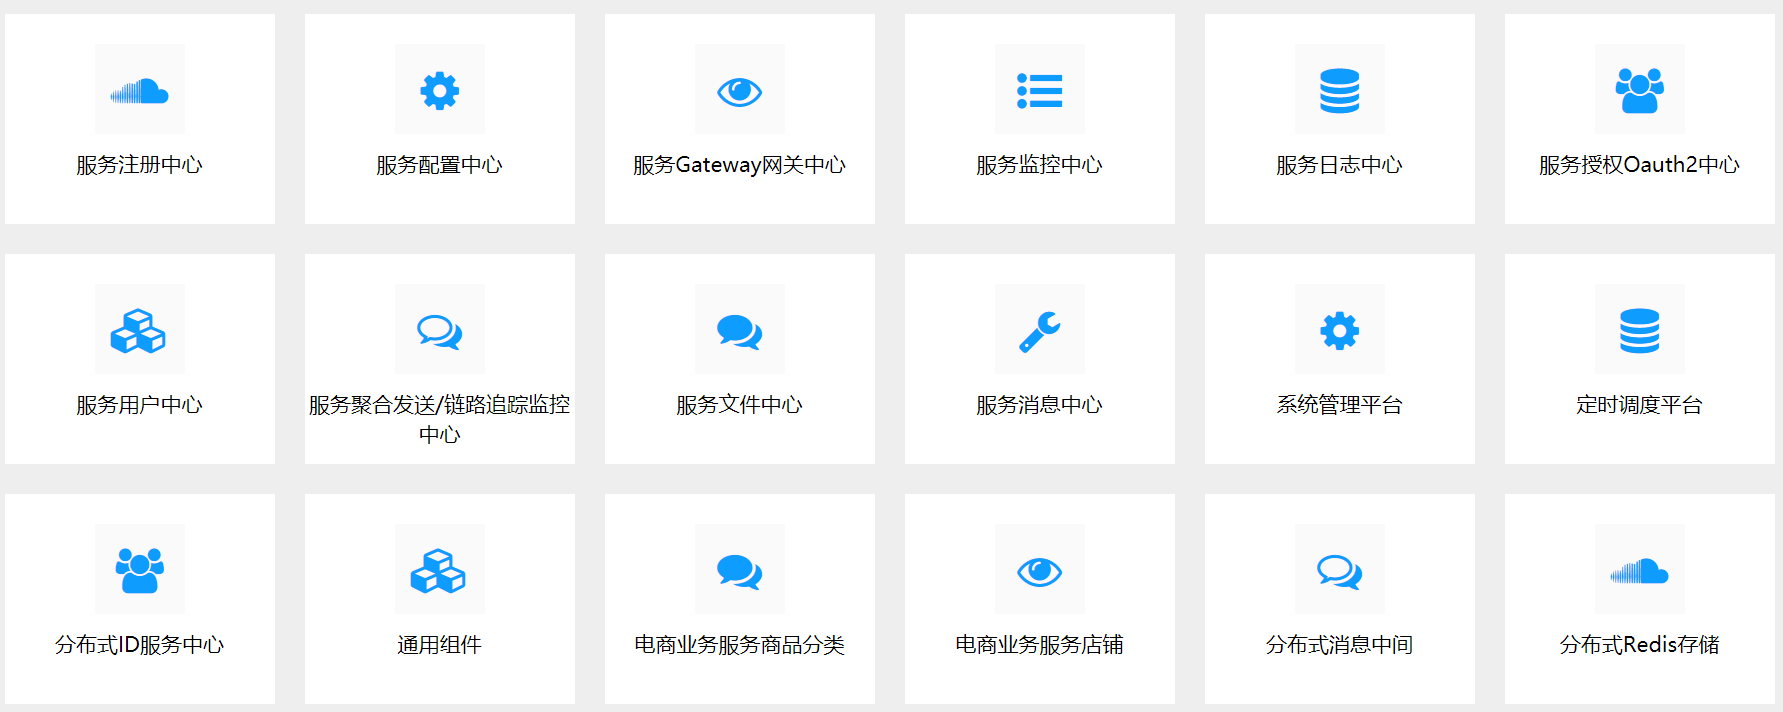
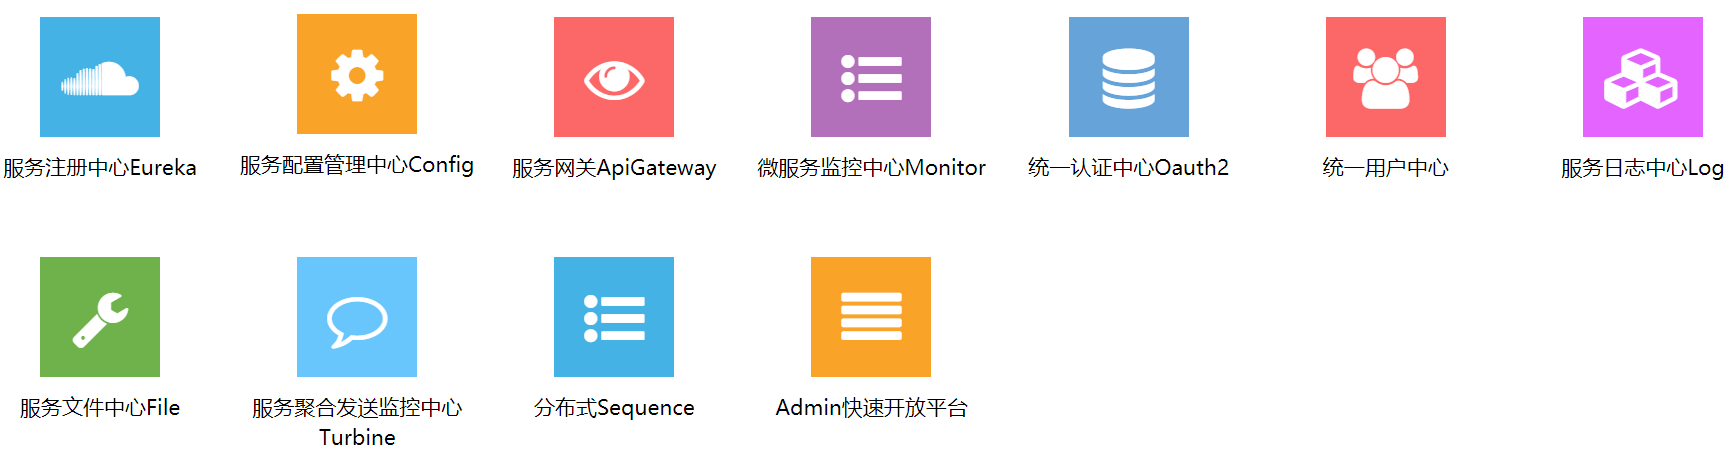
通用服务:对spring Cloud组件的使用&封装,是一套完整的针对于分布式微服务云架构的解决方案。如:注册中心、配置中心、网关中心、监控中心、认证中心、用户中心、日志中心、文件中心、消息中心、分布式ID、链路追踪、聚合发送等。
清单列表
代码结构
3. Component(通用组件)
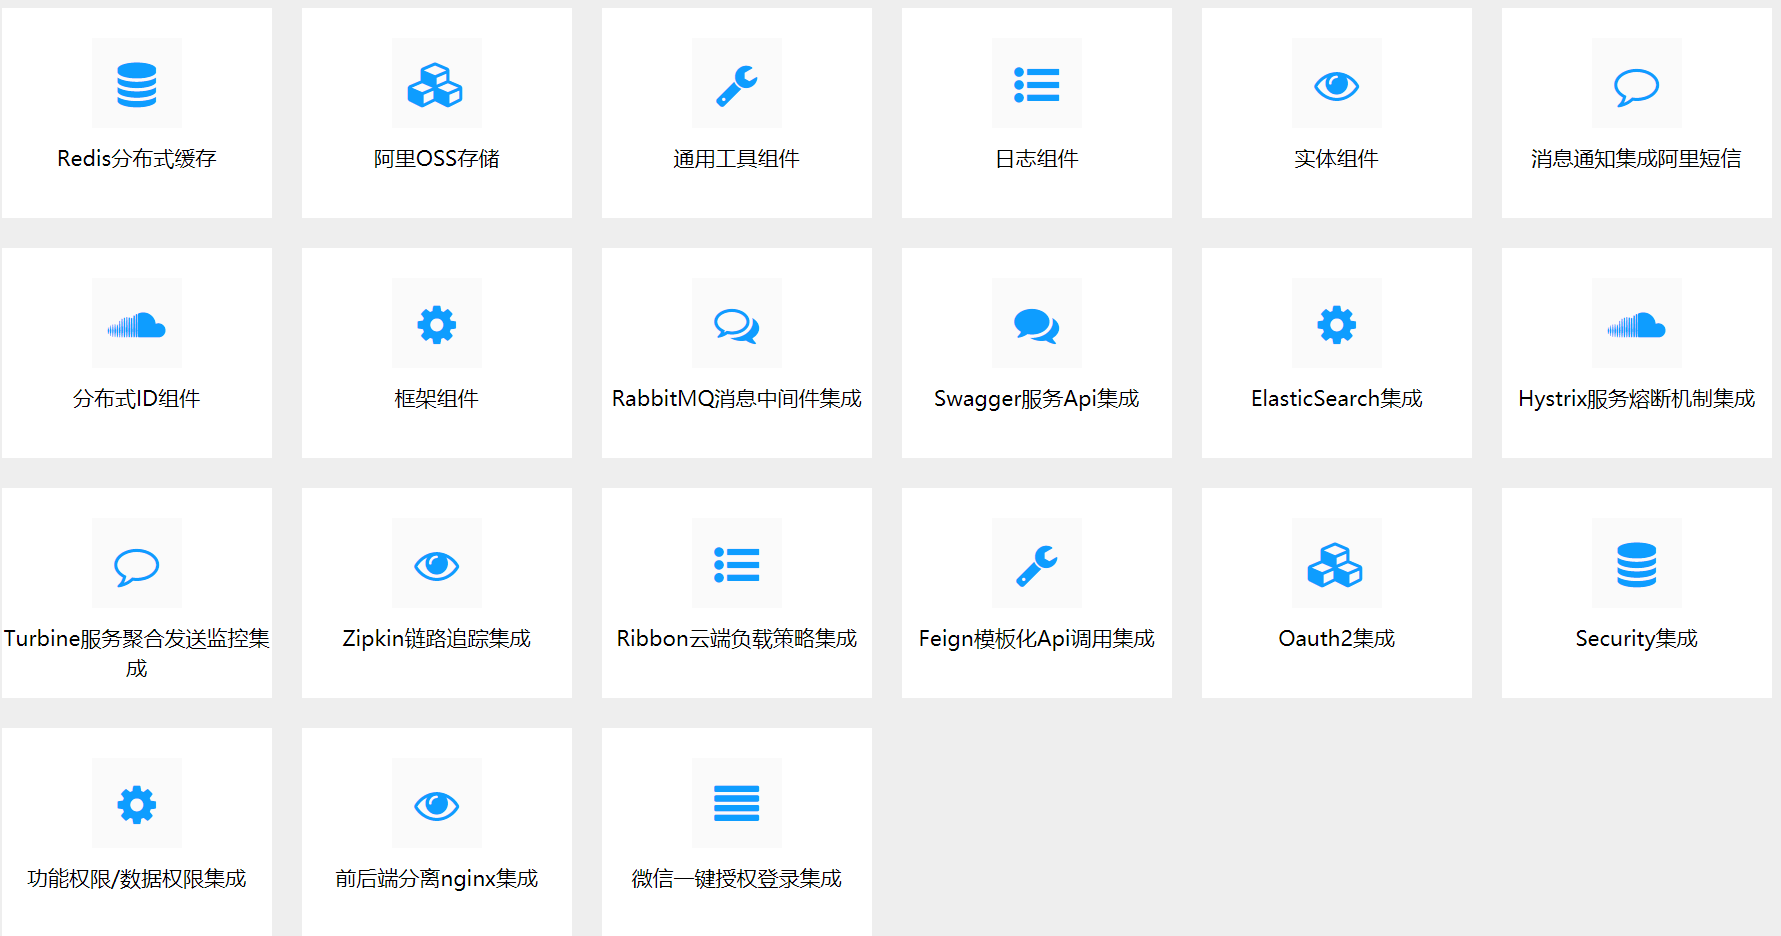
通用组件:对系统常用组件的封装,如:常用异常状态码、URL权限、Service/Dao/VO封装、Mybatis/Spring封装、分页、对象存储包、Redis缓存、日志、常用工具类、RabbitMQ、分布式Sequence等。
清单列表
代码结构
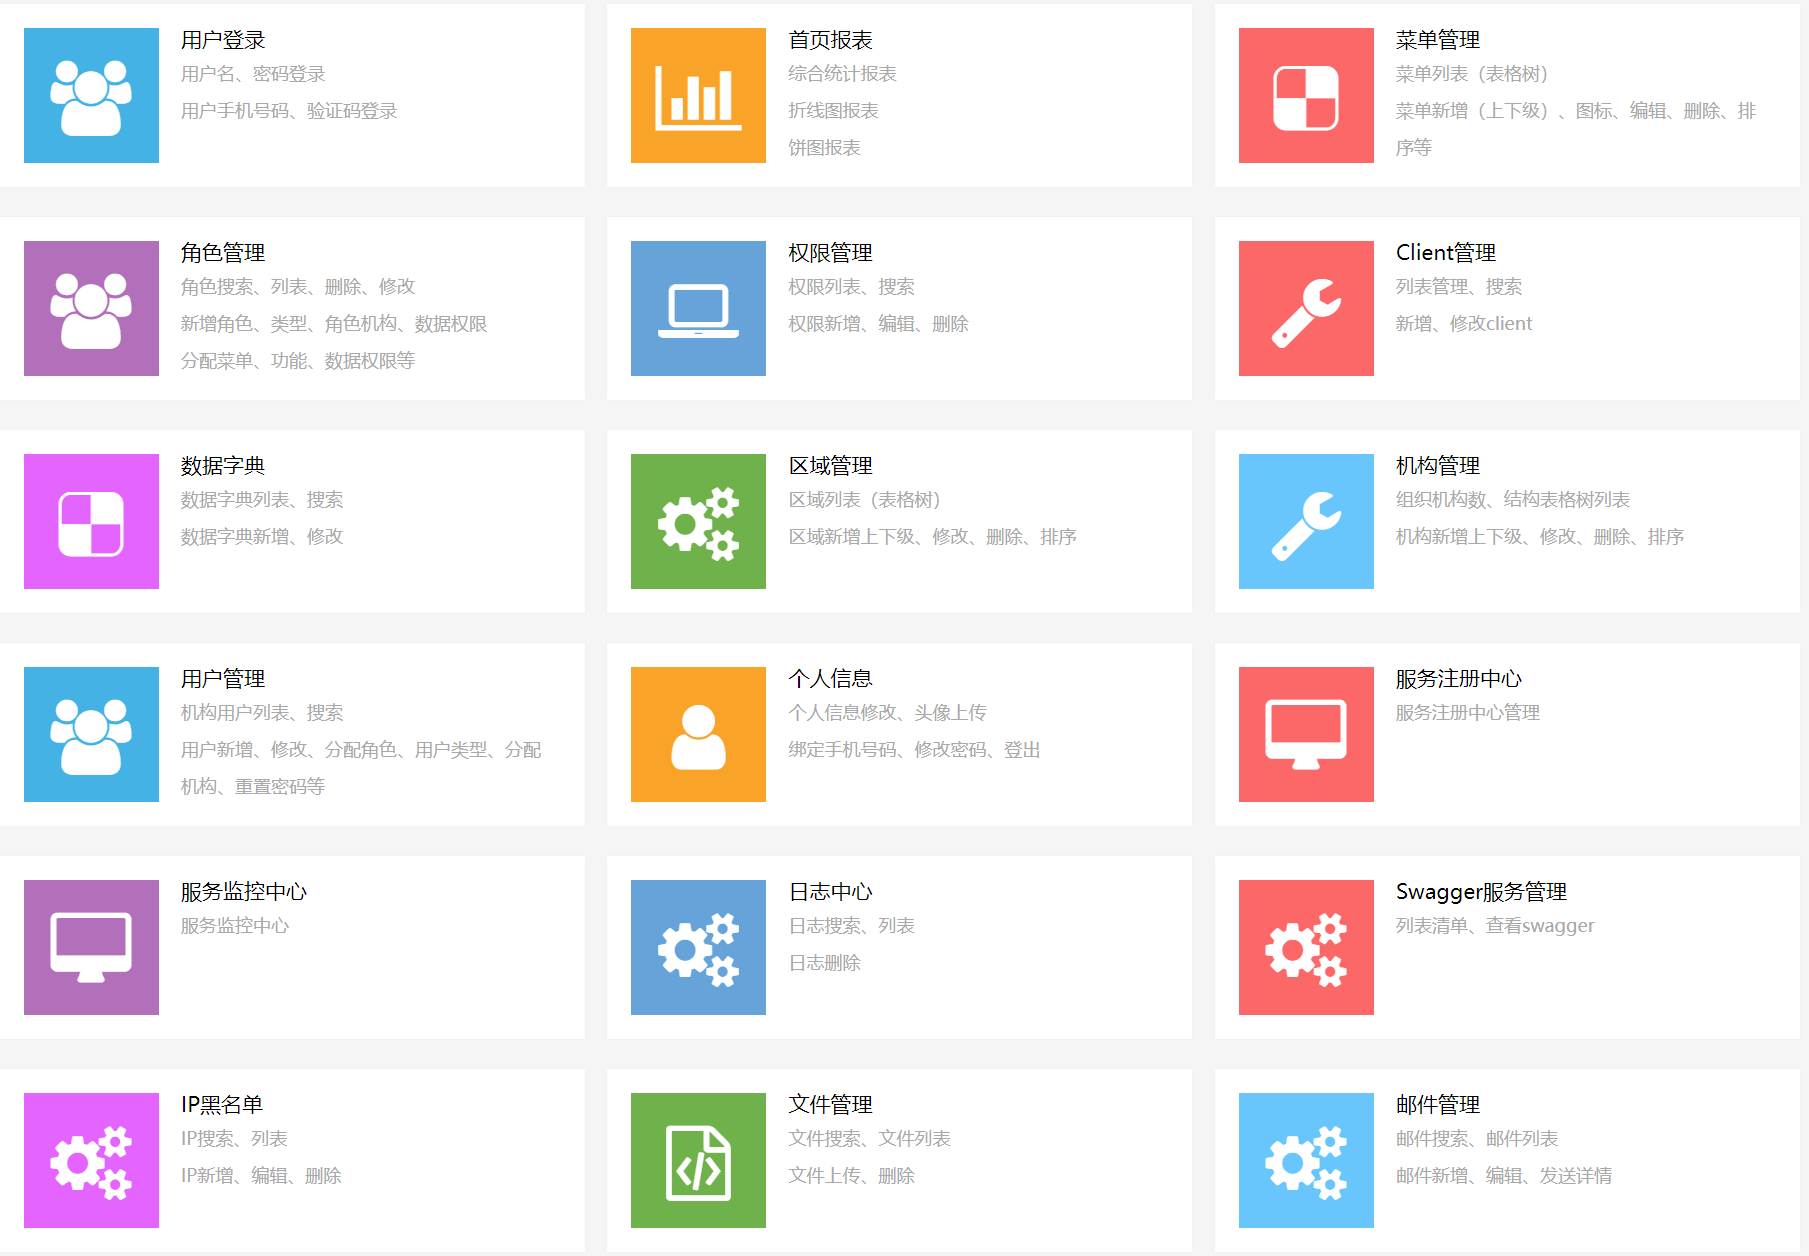
4. 快速开发管理平台
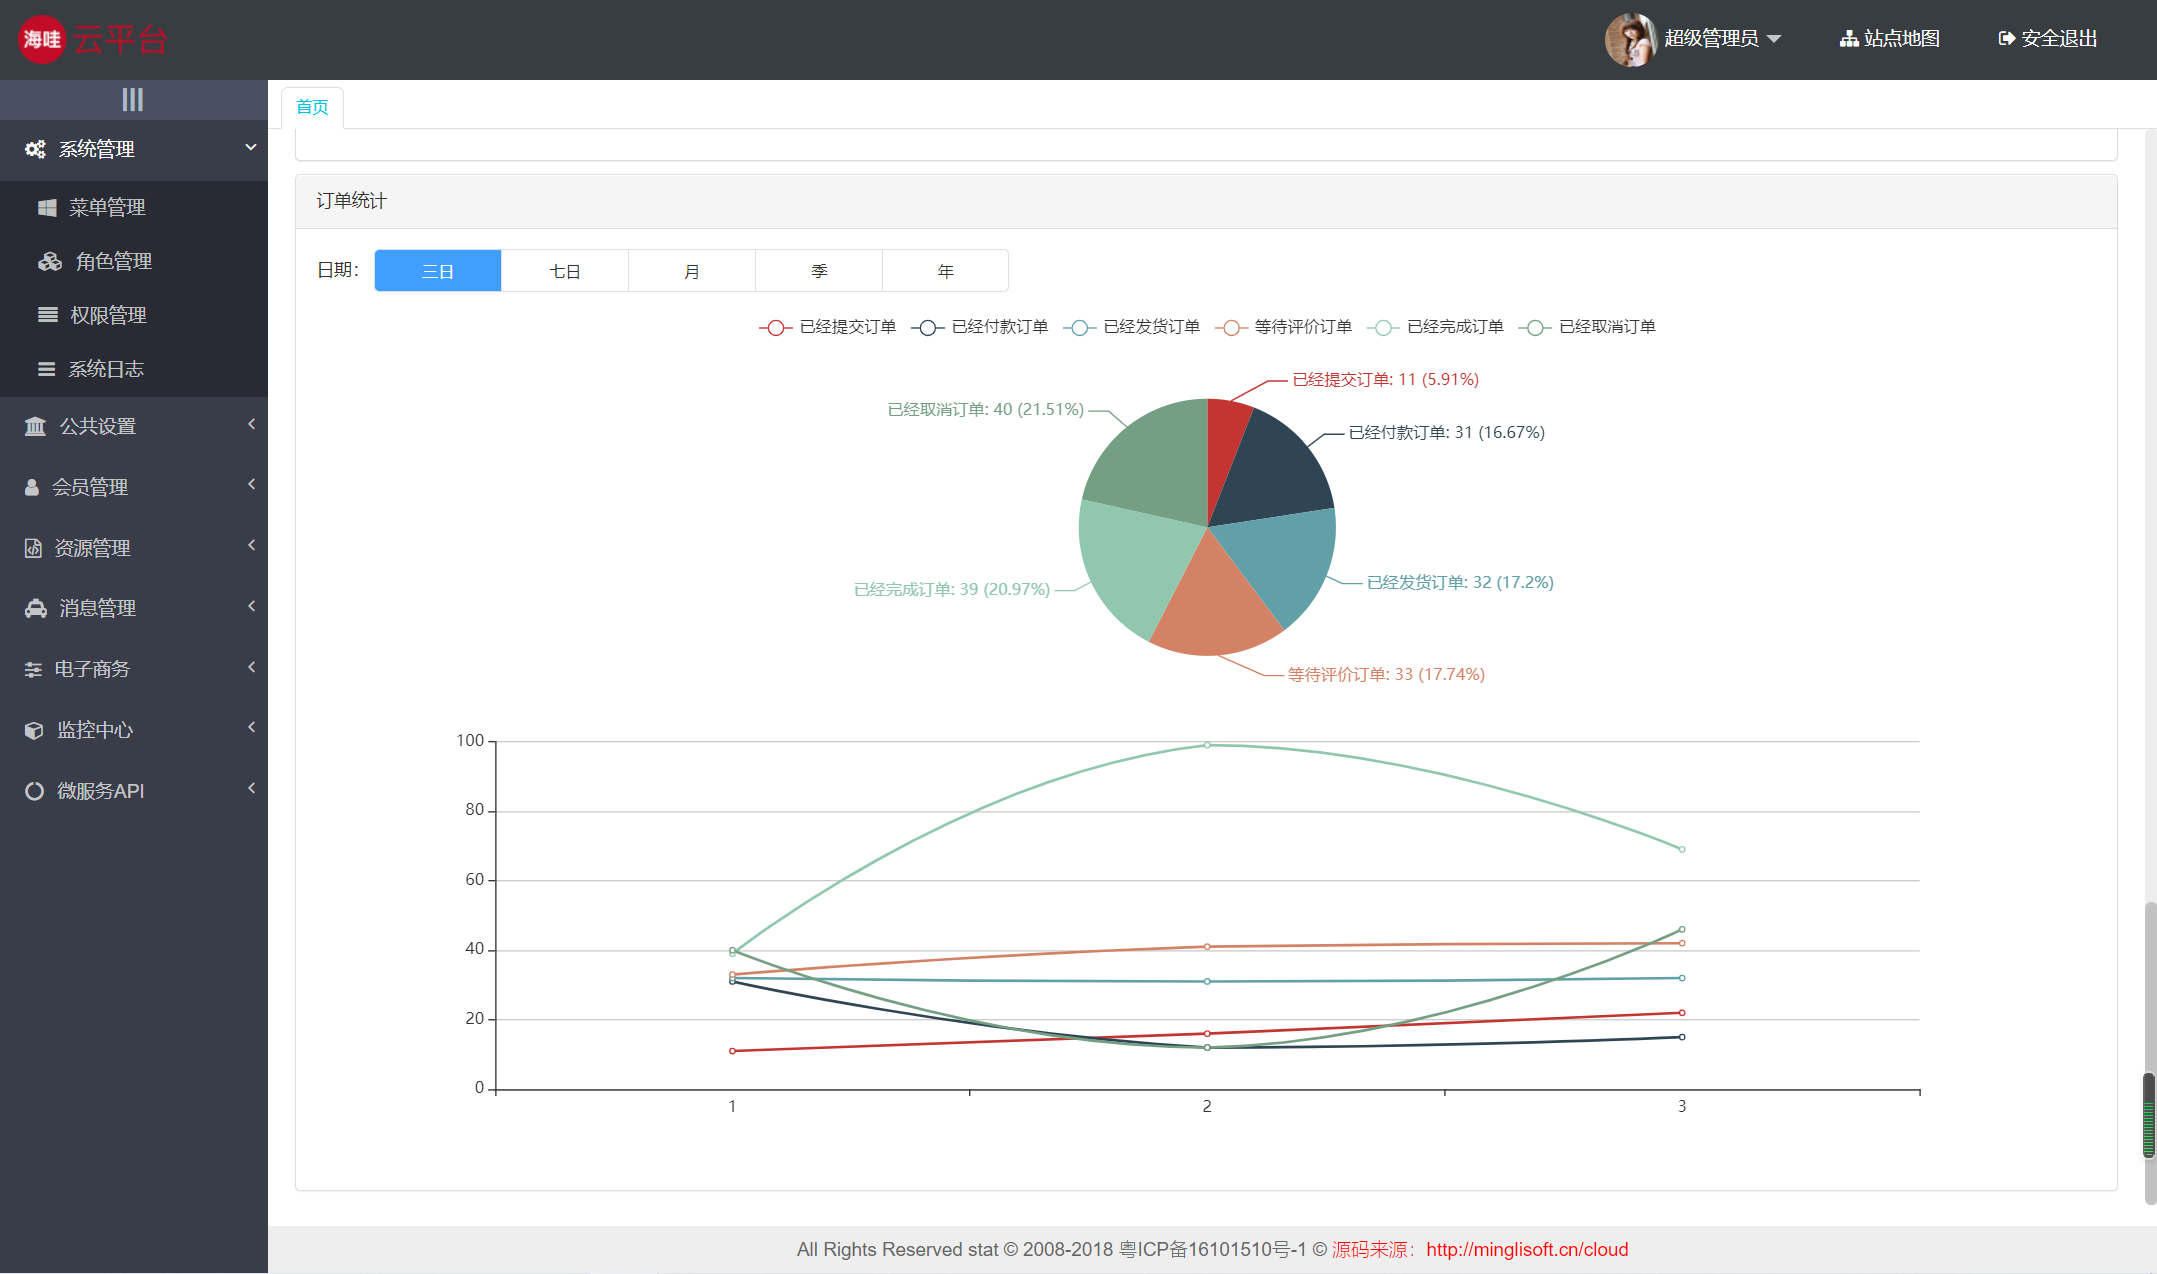
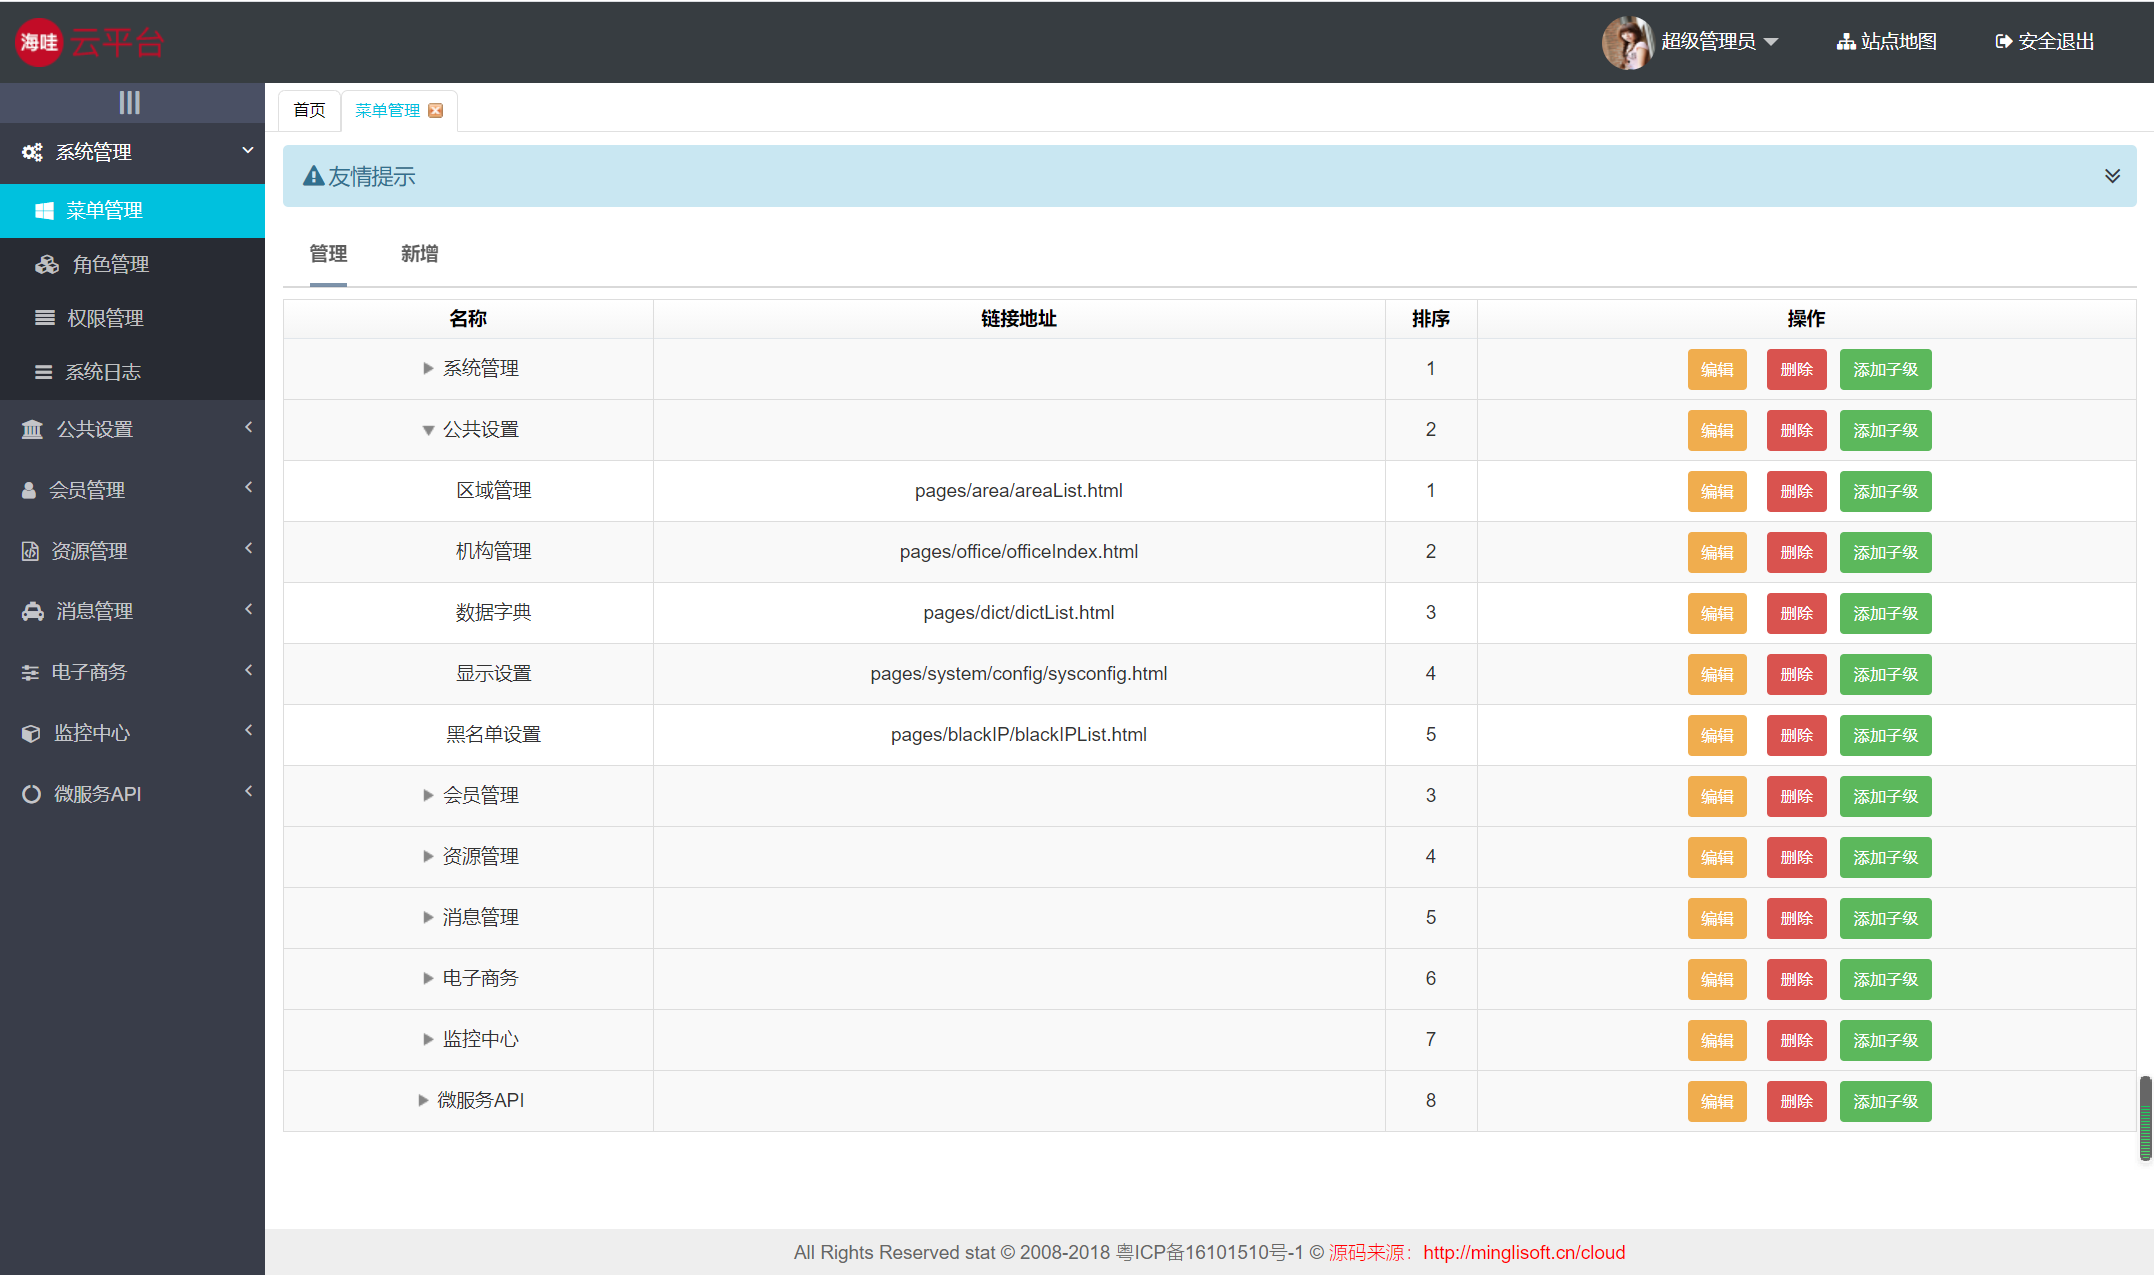
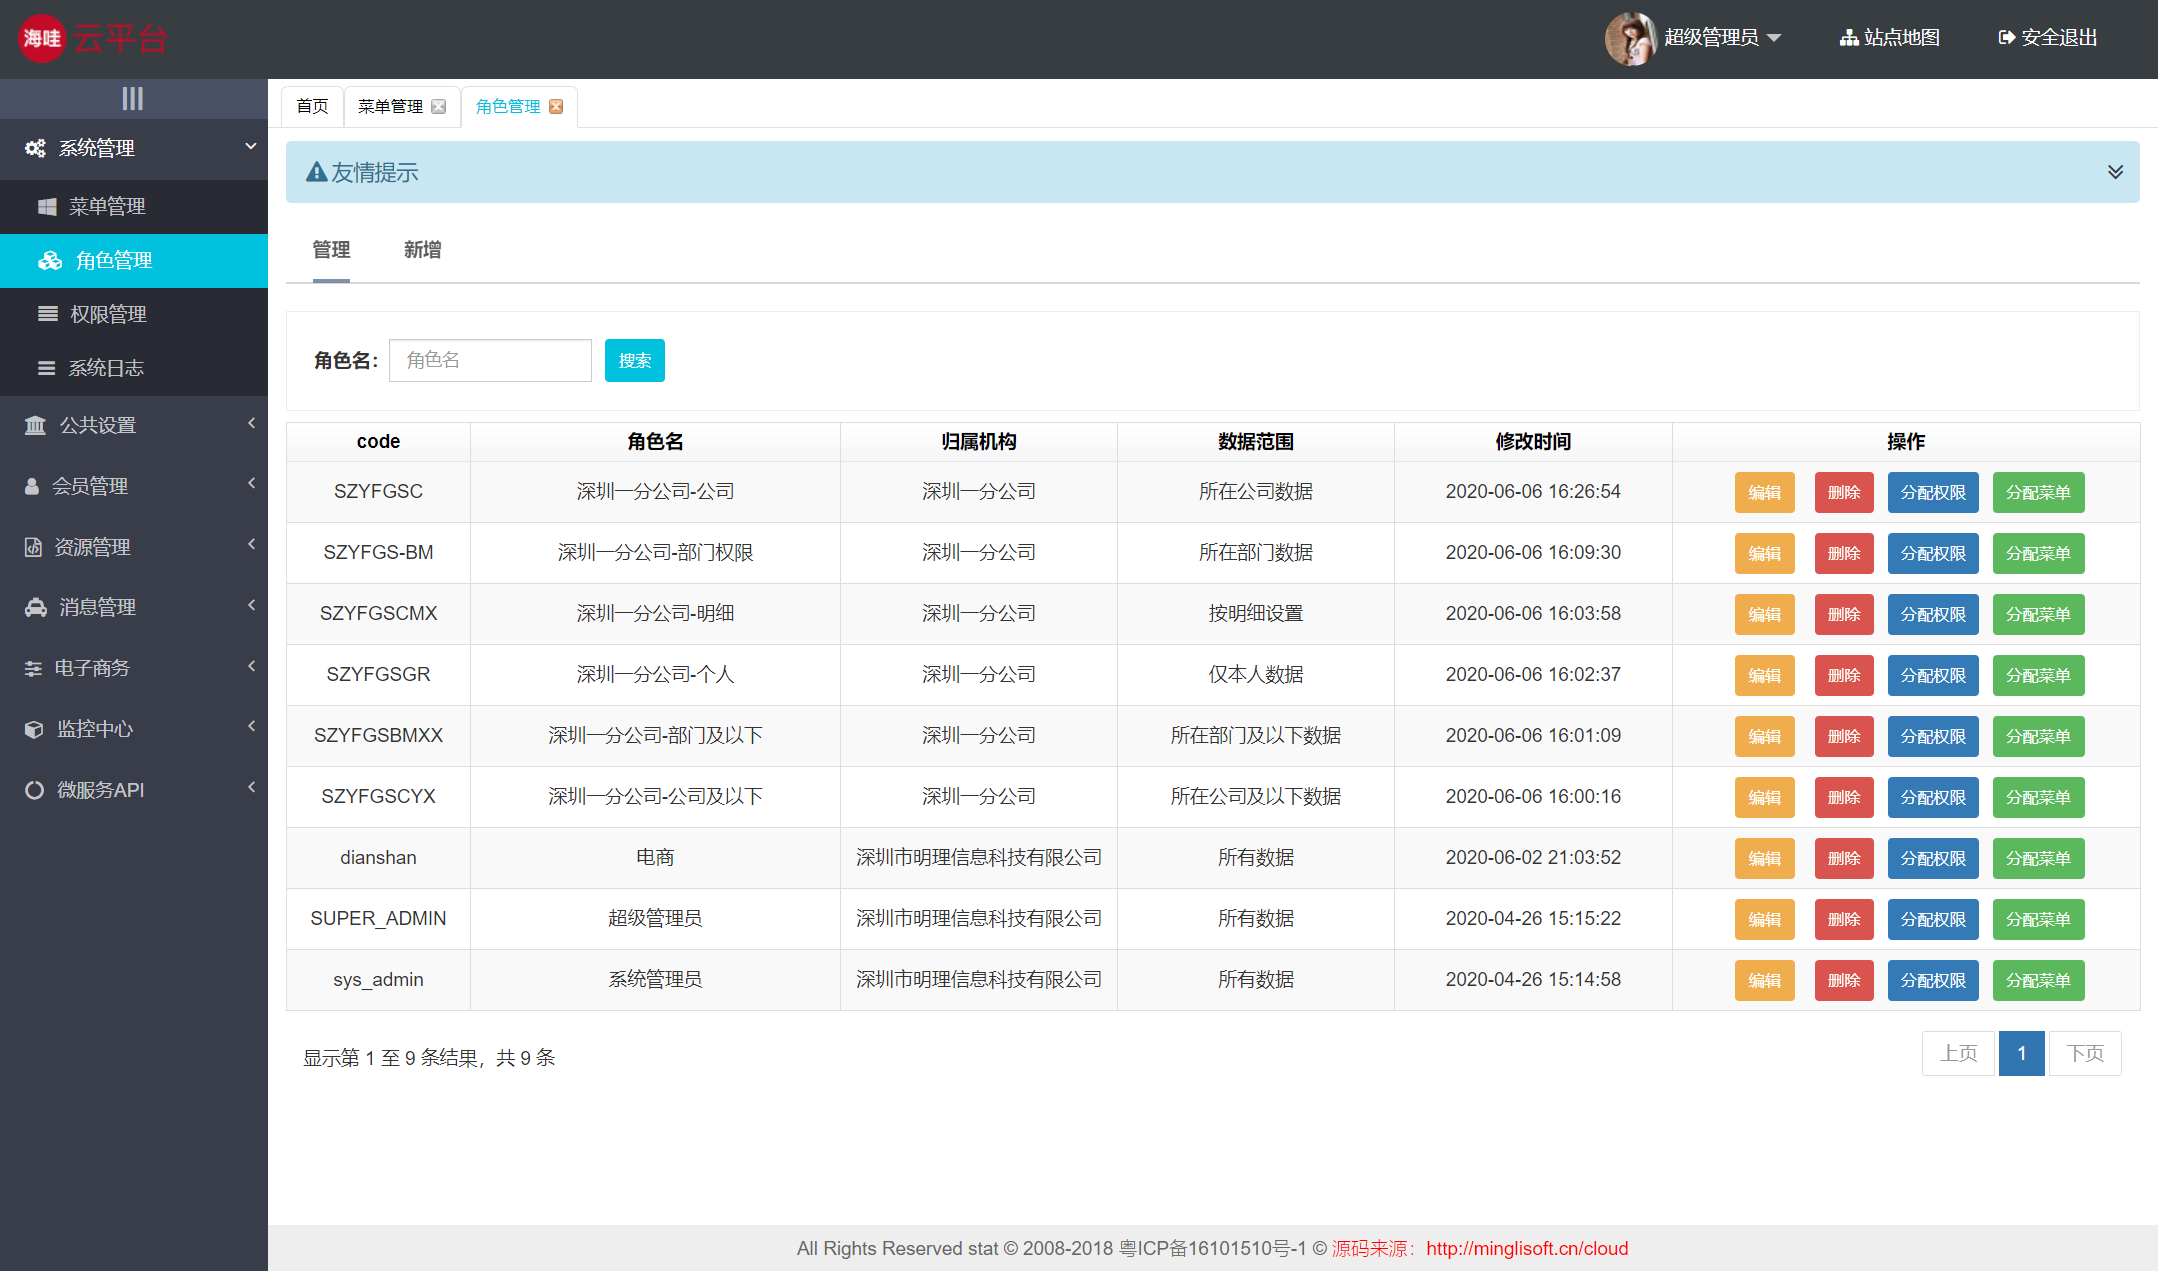
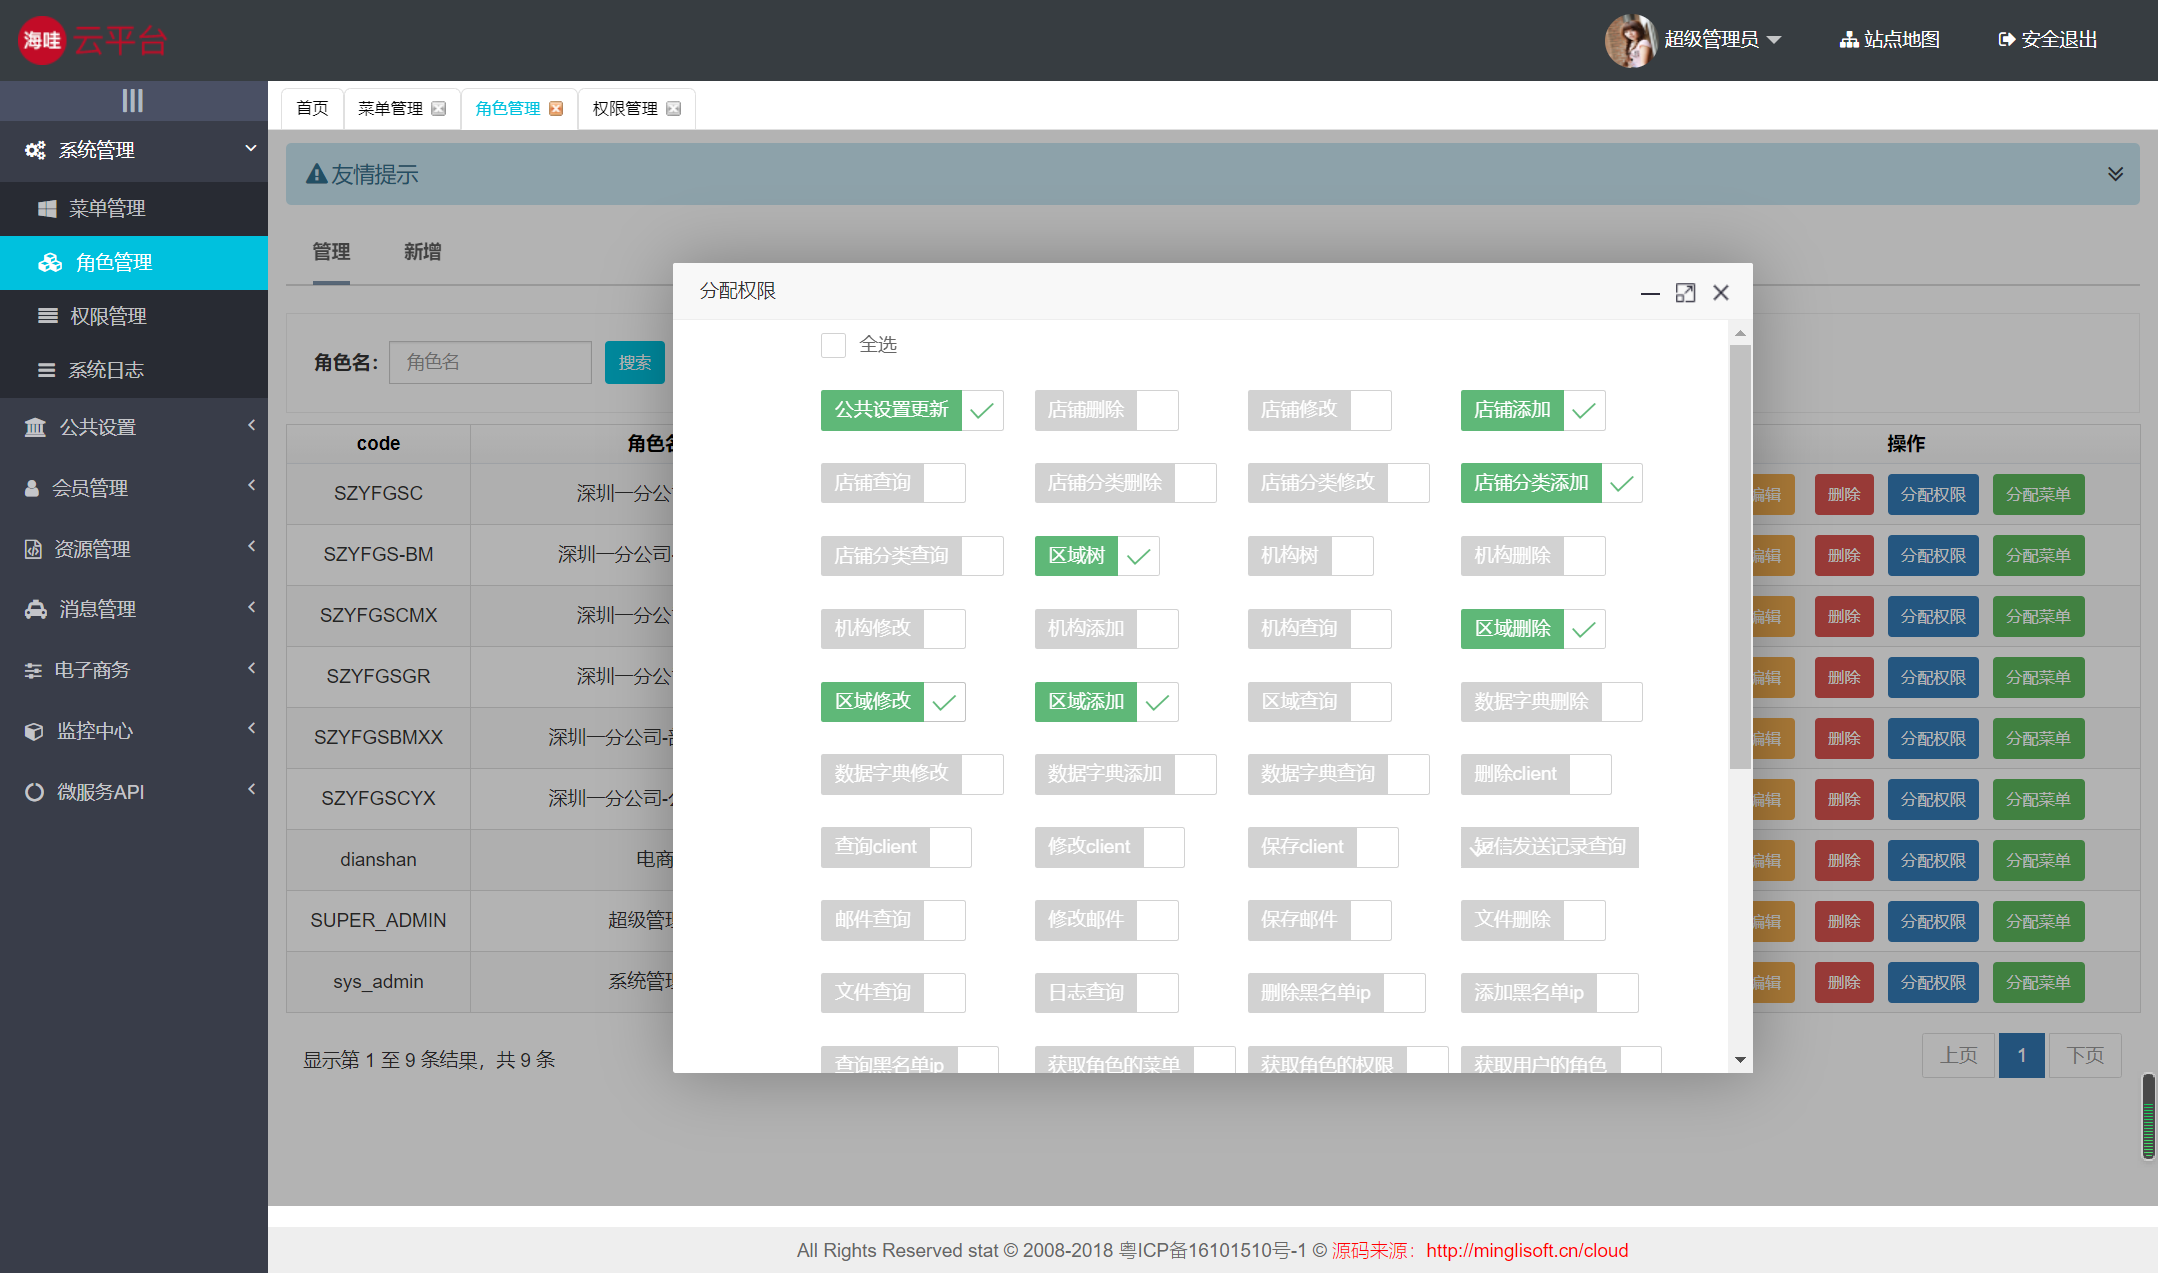
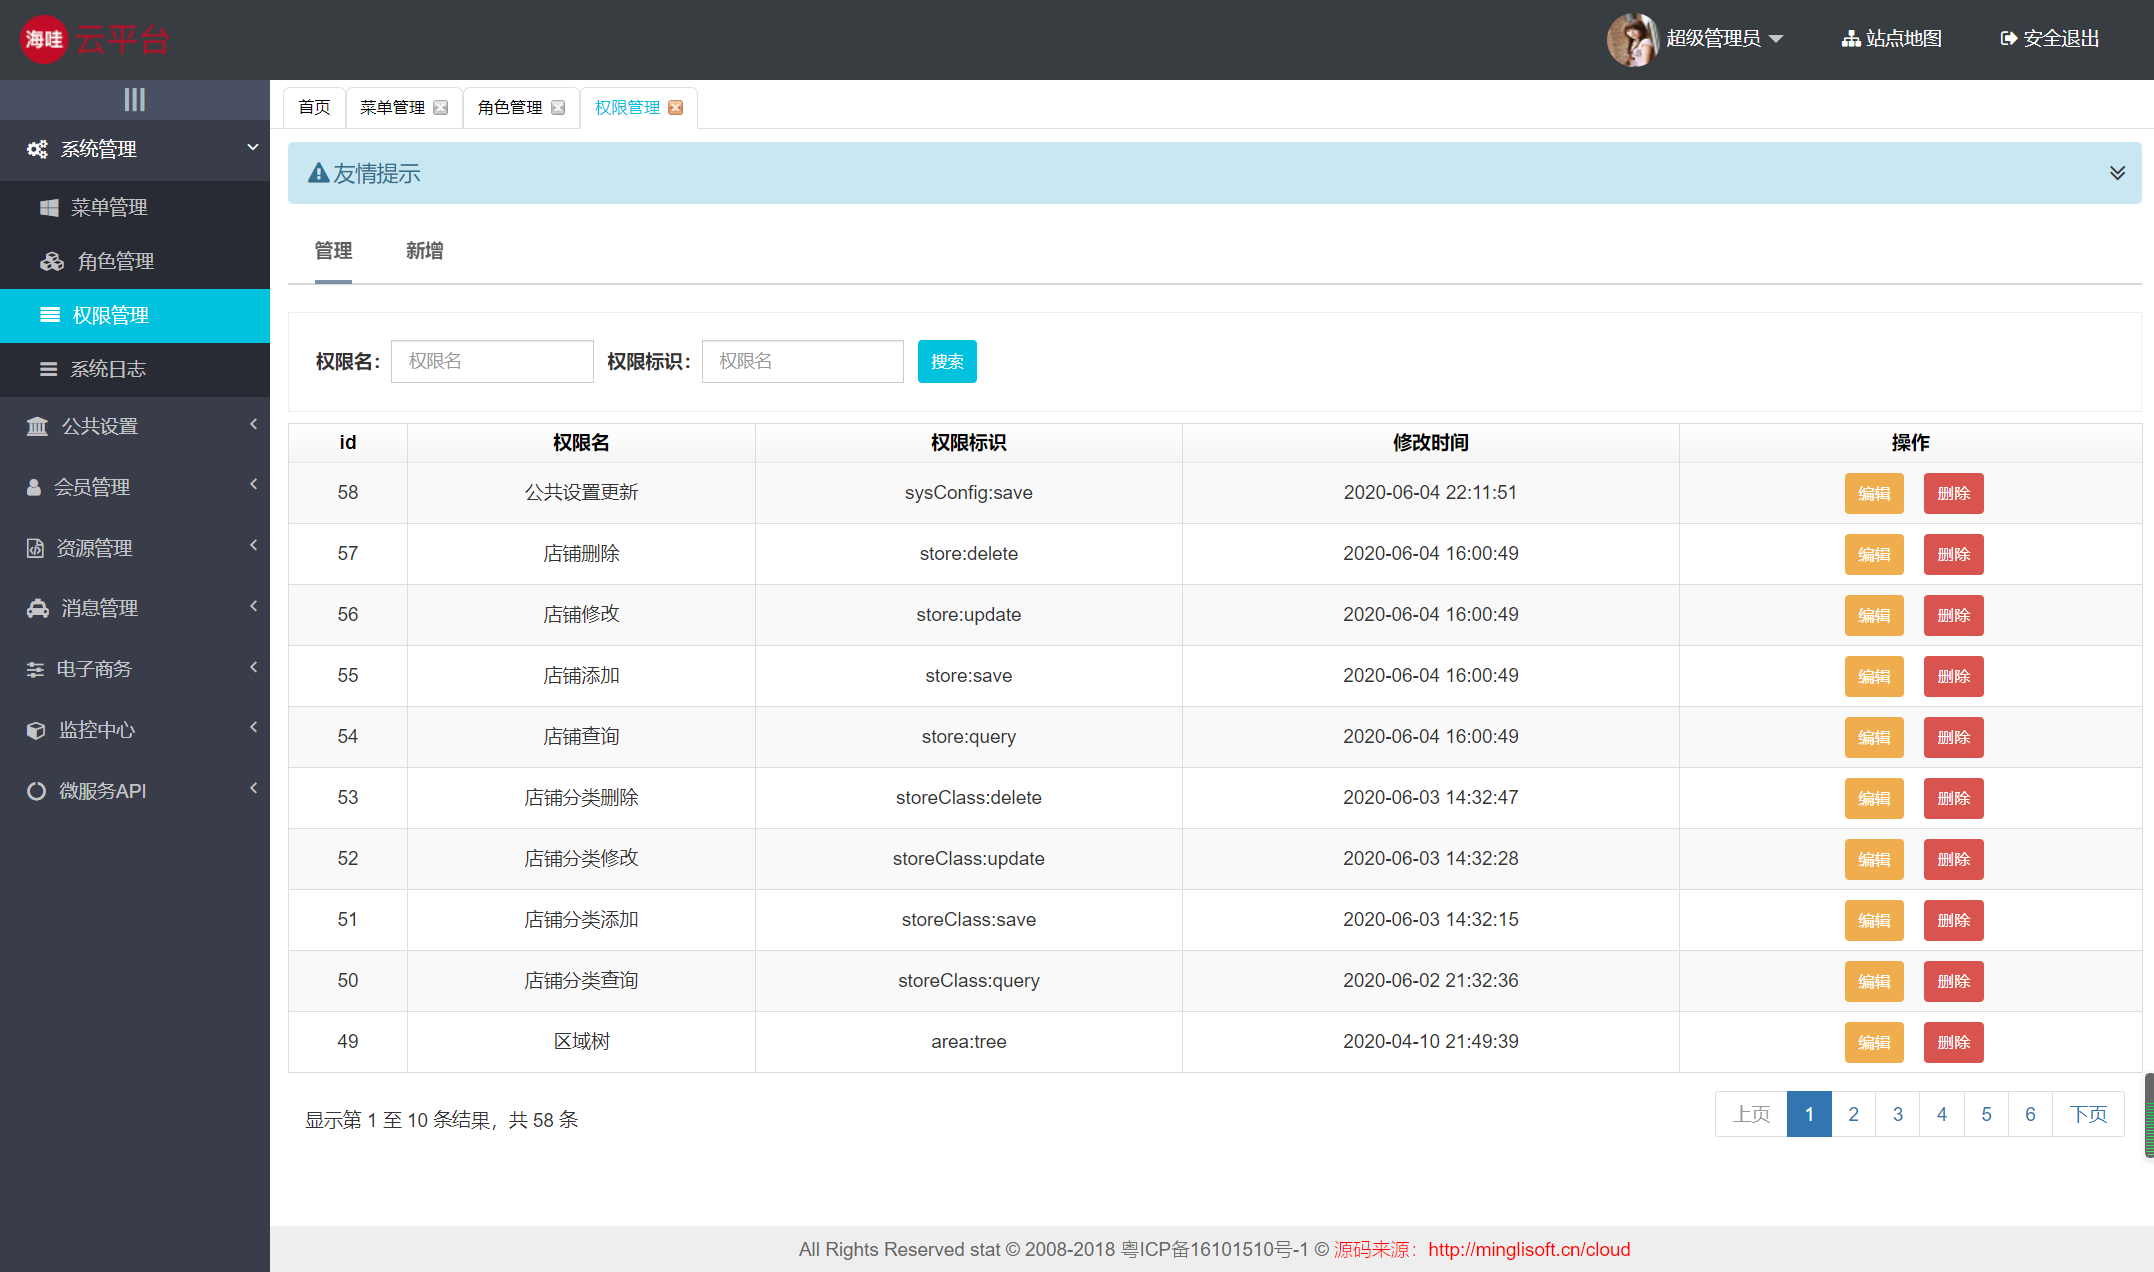
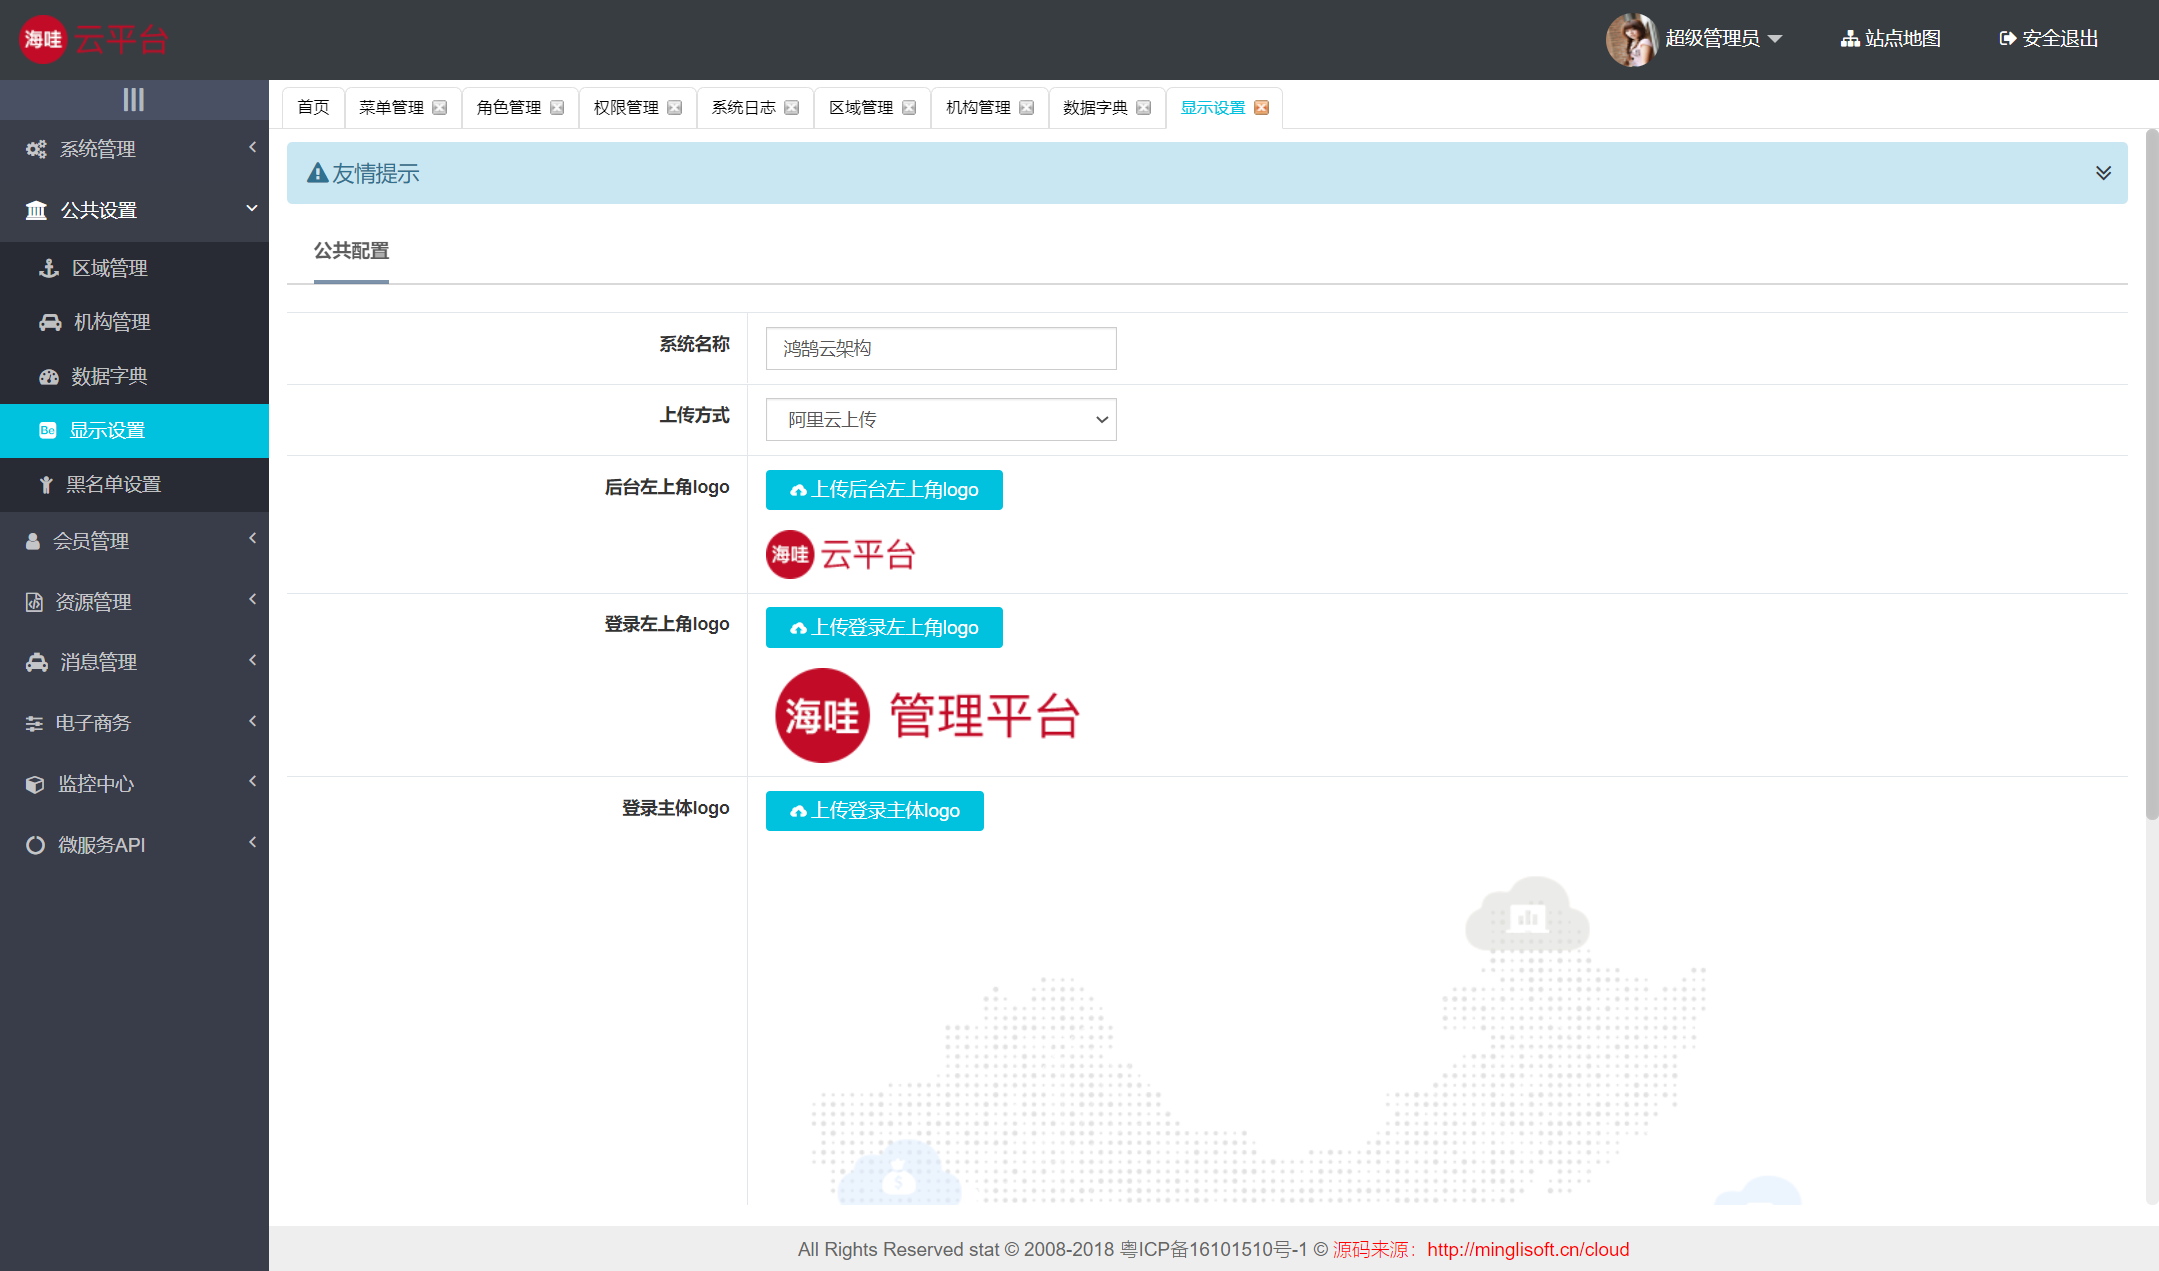
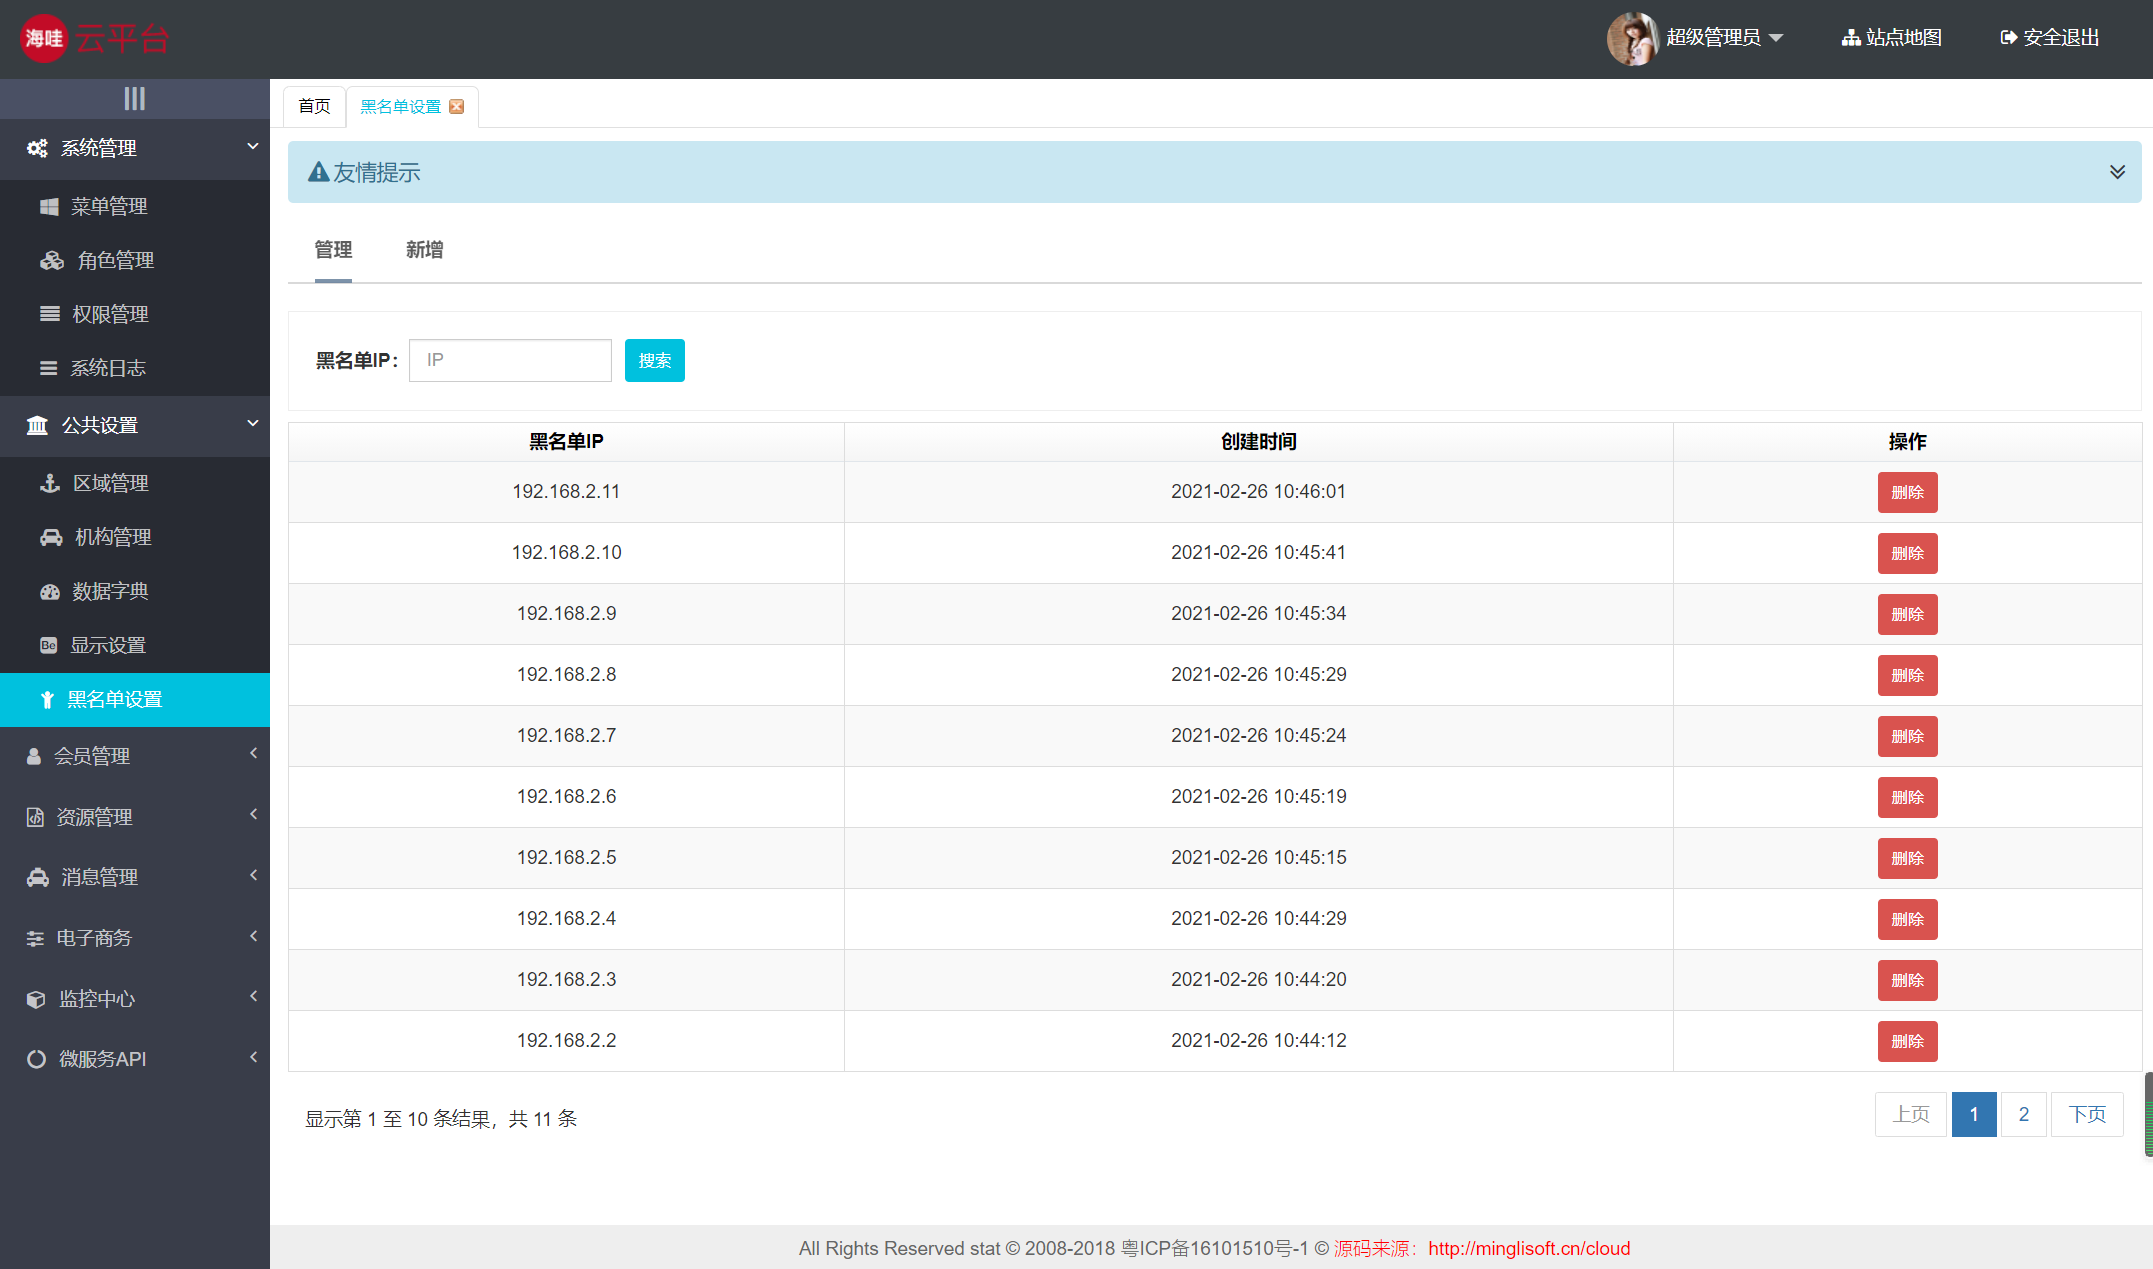
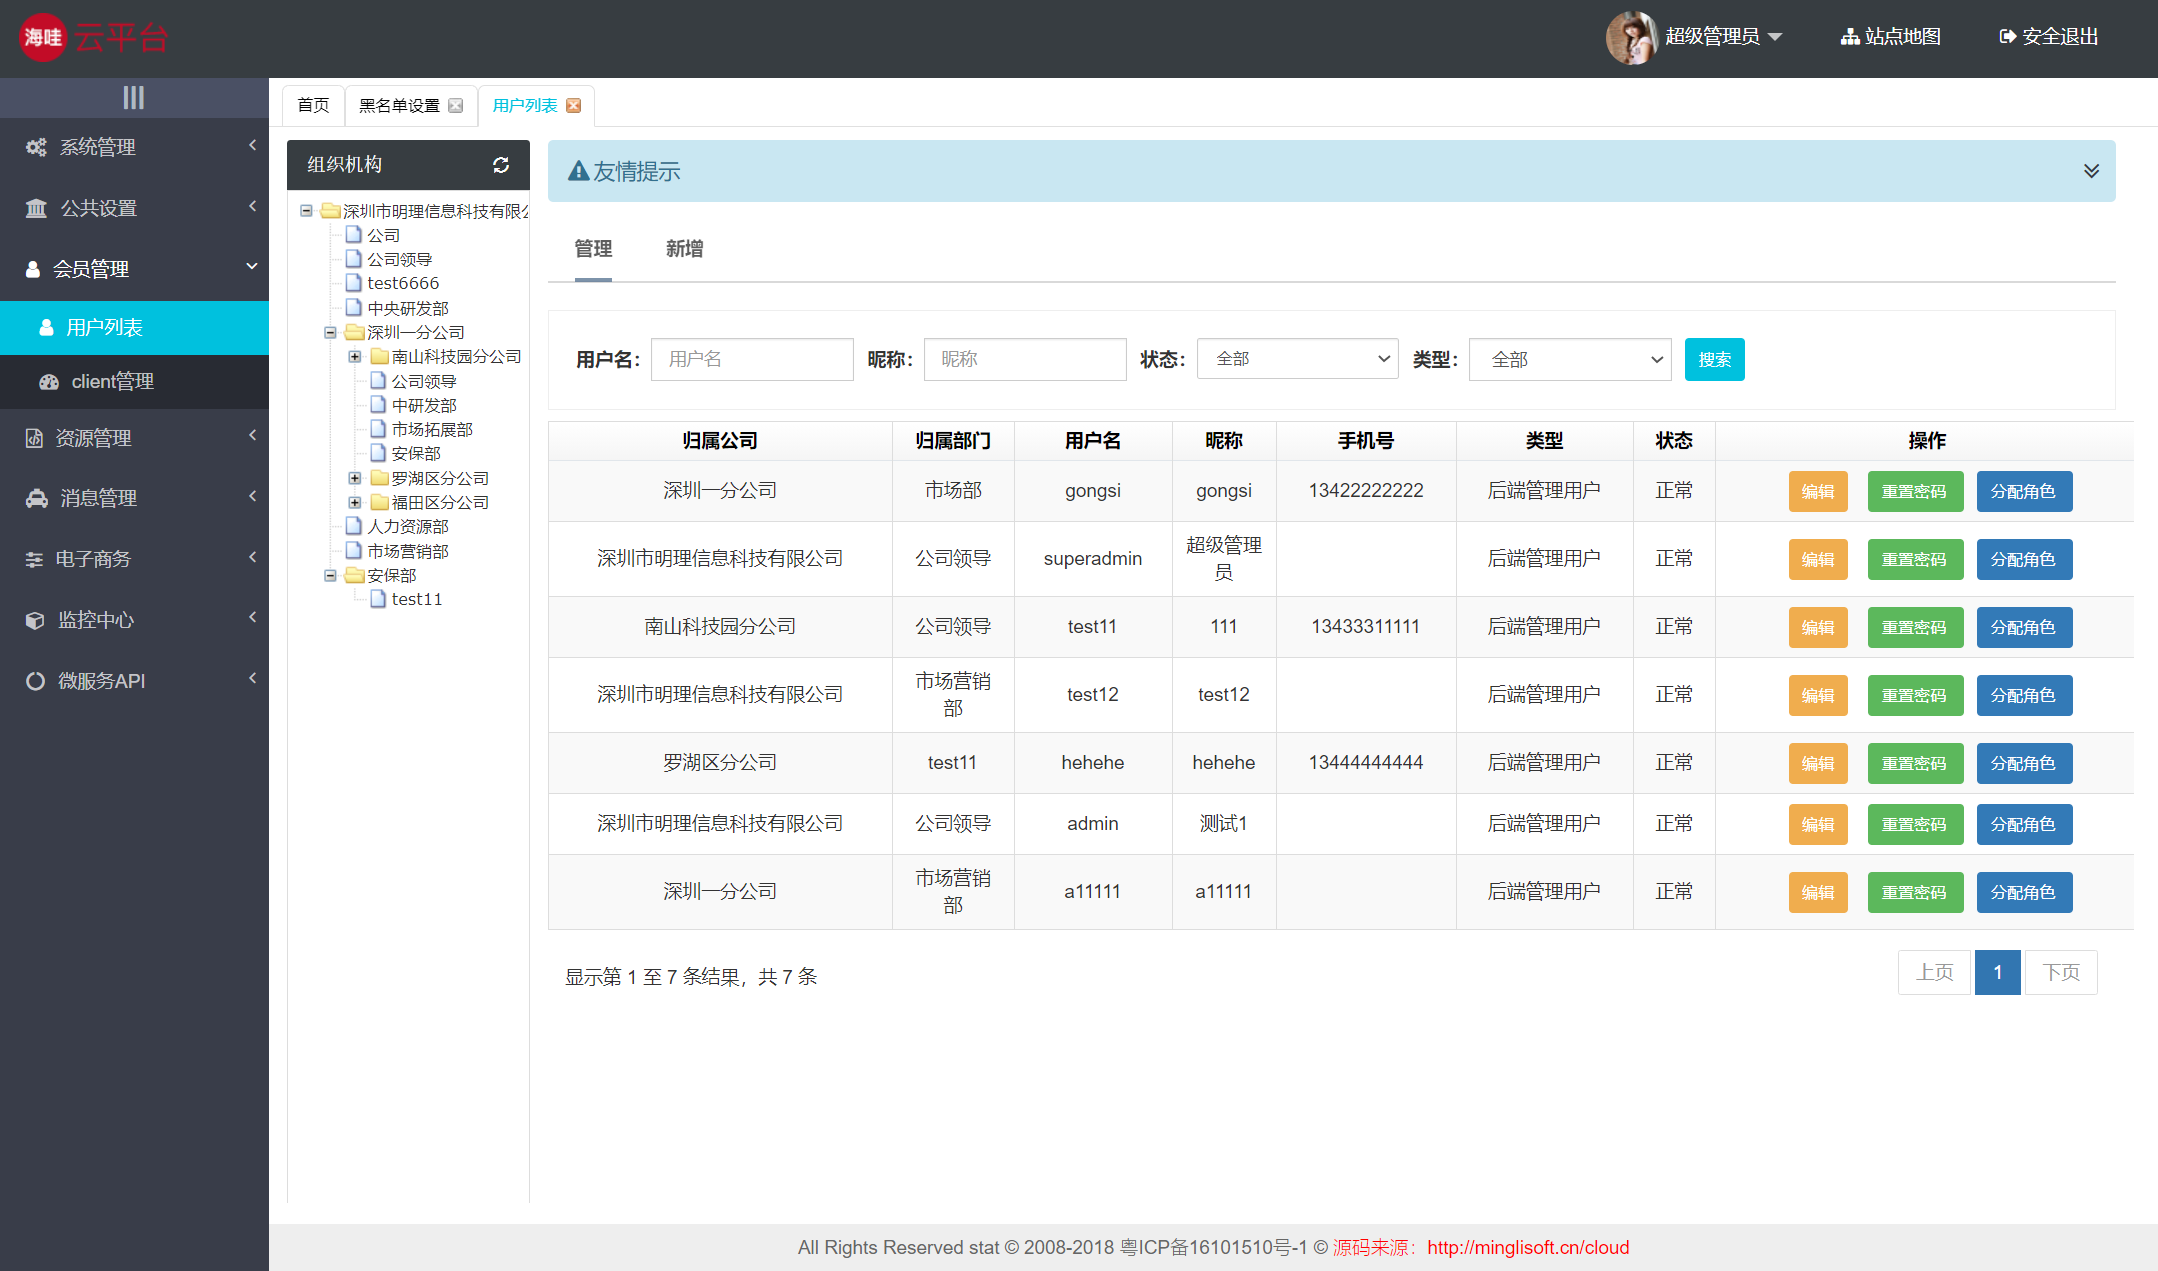
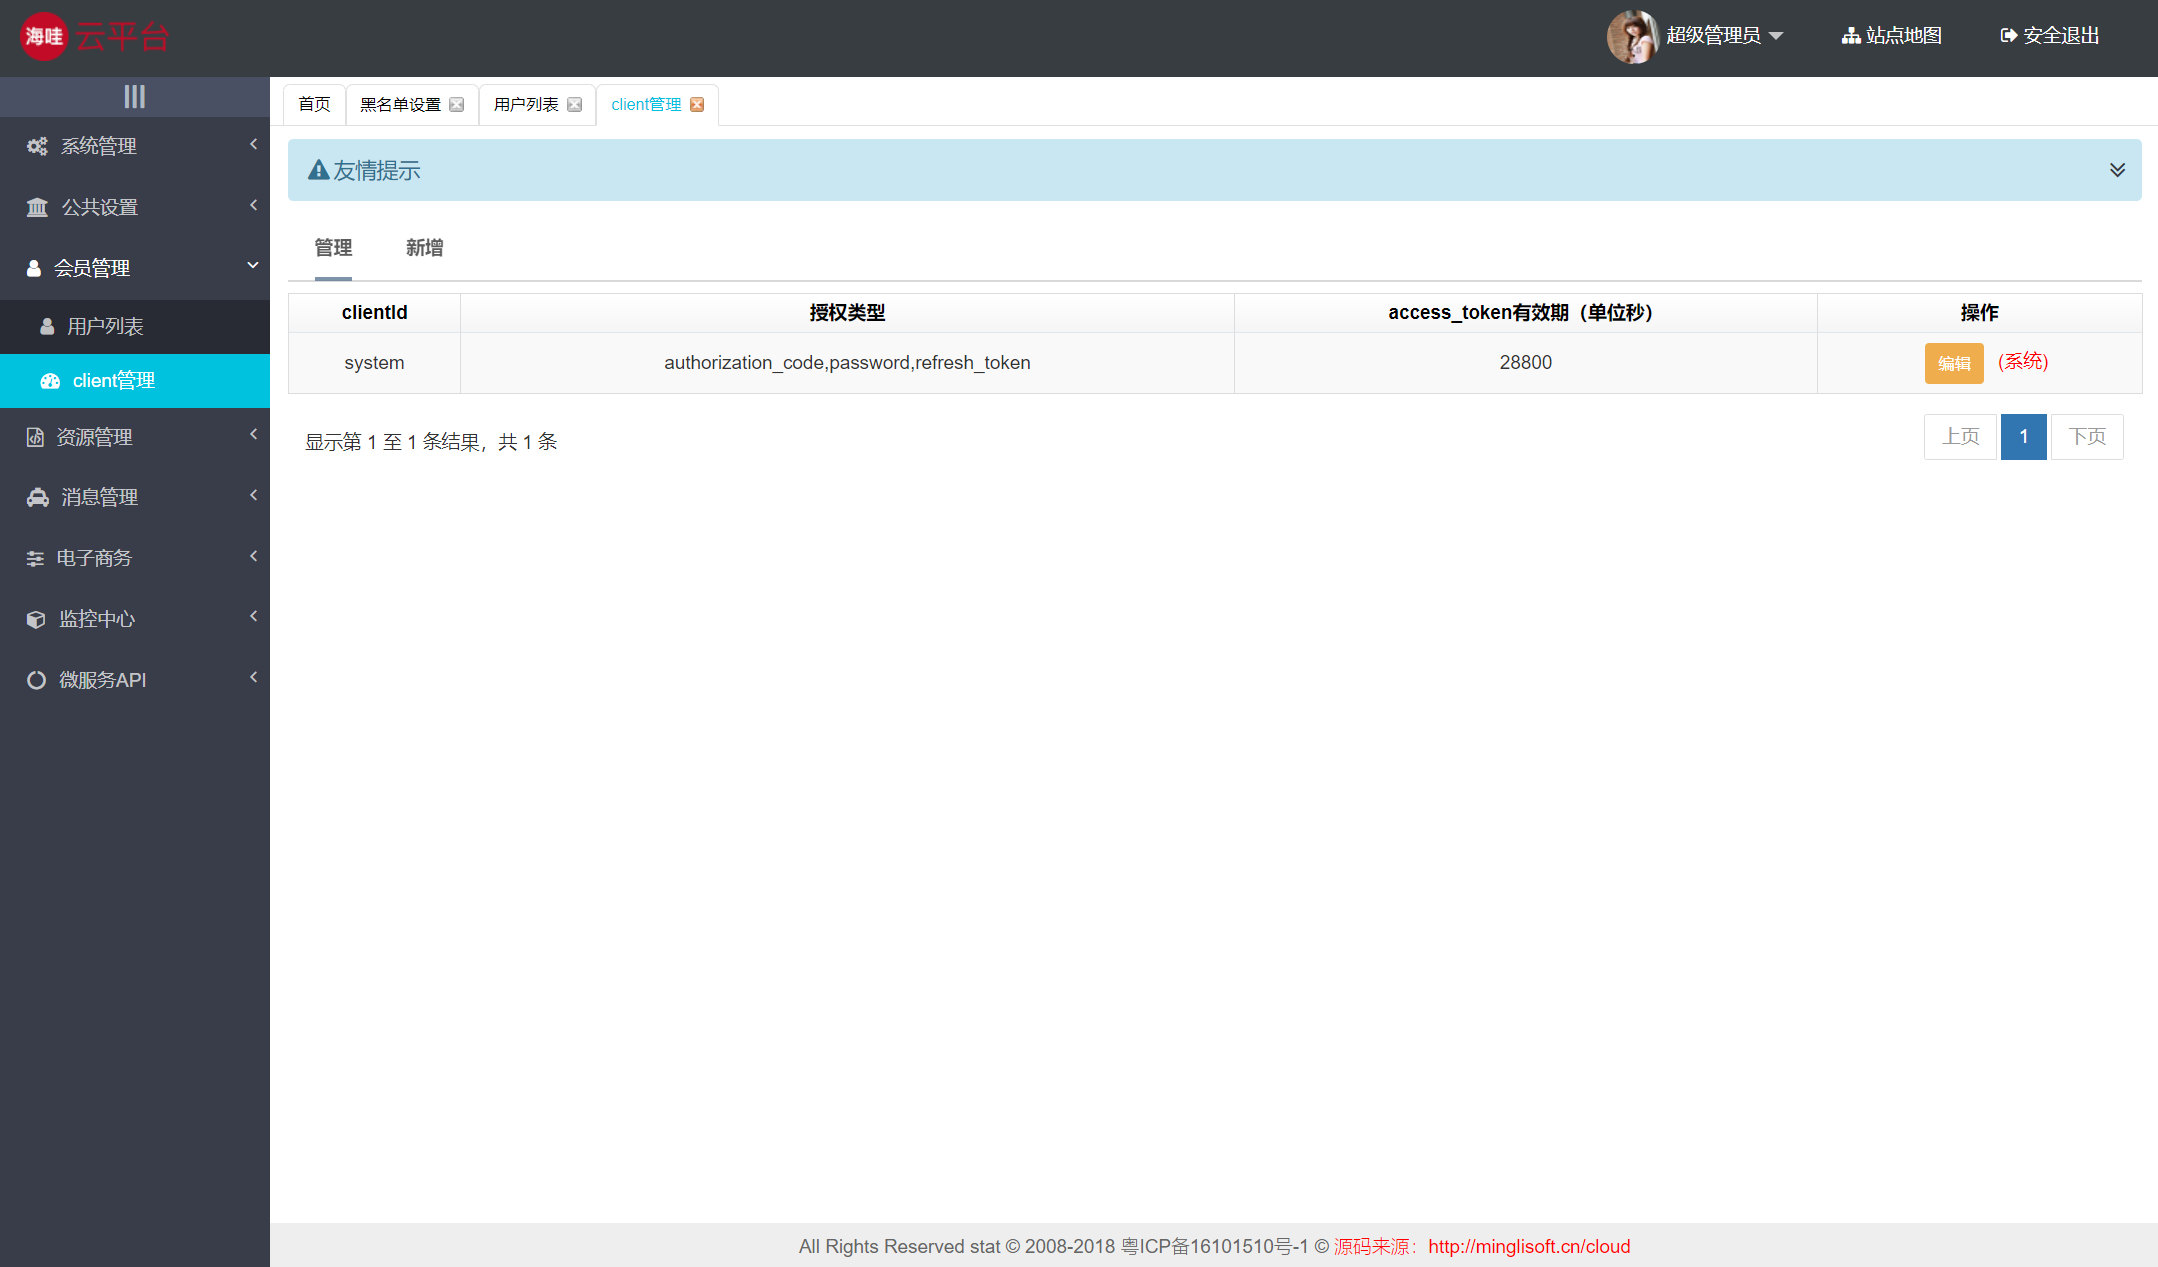
鸿鹄云架构【系统管理平台】是一个大型企业、分布式、微服务、云架构的JavaEE体系快速研发平台,基于模块化、微服务化、原子化、热部署的设计思想,使用成熟领先的无商业限制的主流开源技术(Spring Cloud+Spring Boot+Mybatis+Oauth2+微服务设计思想)构建。 采用服务化的组件开发模式,可实现复杂的业务功能。使用Maven进行项目的构建管理,采用Jenkins进行持续集成,主要定位于大型分布式企业系统或大型分布式互联网产品的架构。使用当前最流行最先进的开源技术实现服务组件化及管理,真正为企业打造分布式、微服务、云架构平台。
【平台安全性】平台严格遵循Web安全规范,使用前后端双重验证,统一用户认证及密码安全策略,标准功能权限、数据权限过滤。使用防SQL脚本注入、跨站点脚本编制(XSS)、伪造请求(CSRF)攻击等常见的攻击手段。
业务服务与业务服务提供对外标准Restful接口规范,对内Feign的调用模式,实现分布式集群部署,业务与业务之间完全解耦,使用Zipkin做服务与服务之间的链路追踪,ES做日志数据收集,真正为企业打造分布式、微服务、云架构平台。
清单列表
代码结构
5. 业务服务
业务服务:通过服务与服务之间的内部(Feign)、外部通讯(Restful),满足不同业务需求。外部服务通过标准化协议,对外提供安全稳定的Restful服务,对内通过Spring Cloud Feign方式进行通讯,数据库完整CRUD操作。
代码结构

6. 分布式架构图

7. 运行环境支持
开发工具:Idea、Eclipse
WEB容器:Tomcat、Jboss、Weblogic、webSphere
JDK版本:1.8+
系统支持:Docker、Window、Linux
数据库/数据源:MySQL、Alibaba Druid
服务框架:Spring Cloud、Spring Boot2、Mybatis、OAuth2、Security
分布式中间件:RabbitMQ、Redis、ElasticSearch、OSS
前端架构:VUE、Uniapp、Layui、Bootstrap、H5、CSS3
构建方式:Maven、Jenkins
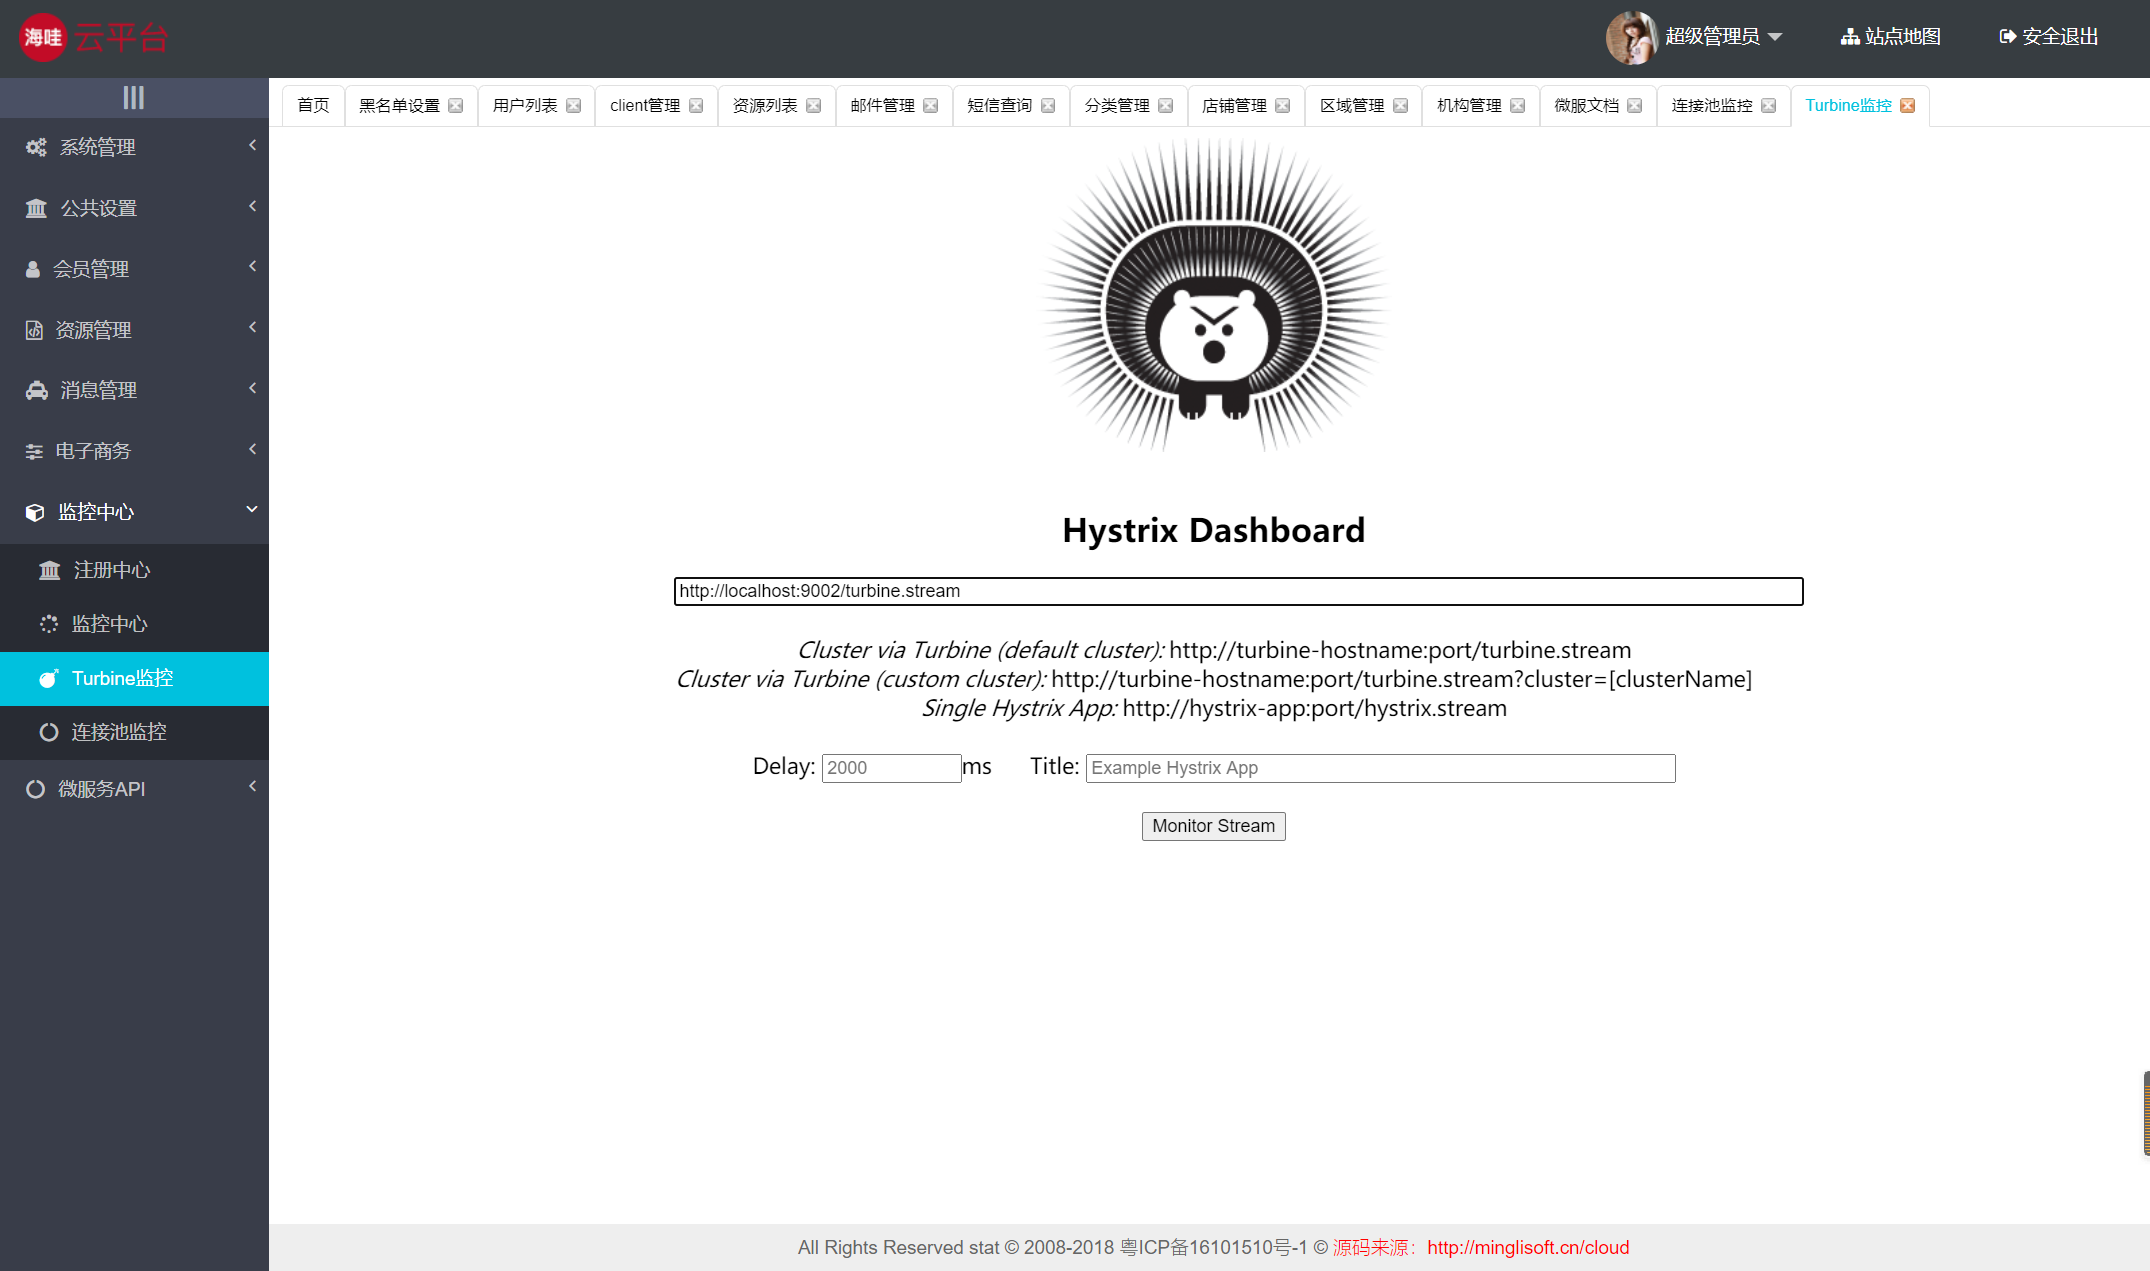
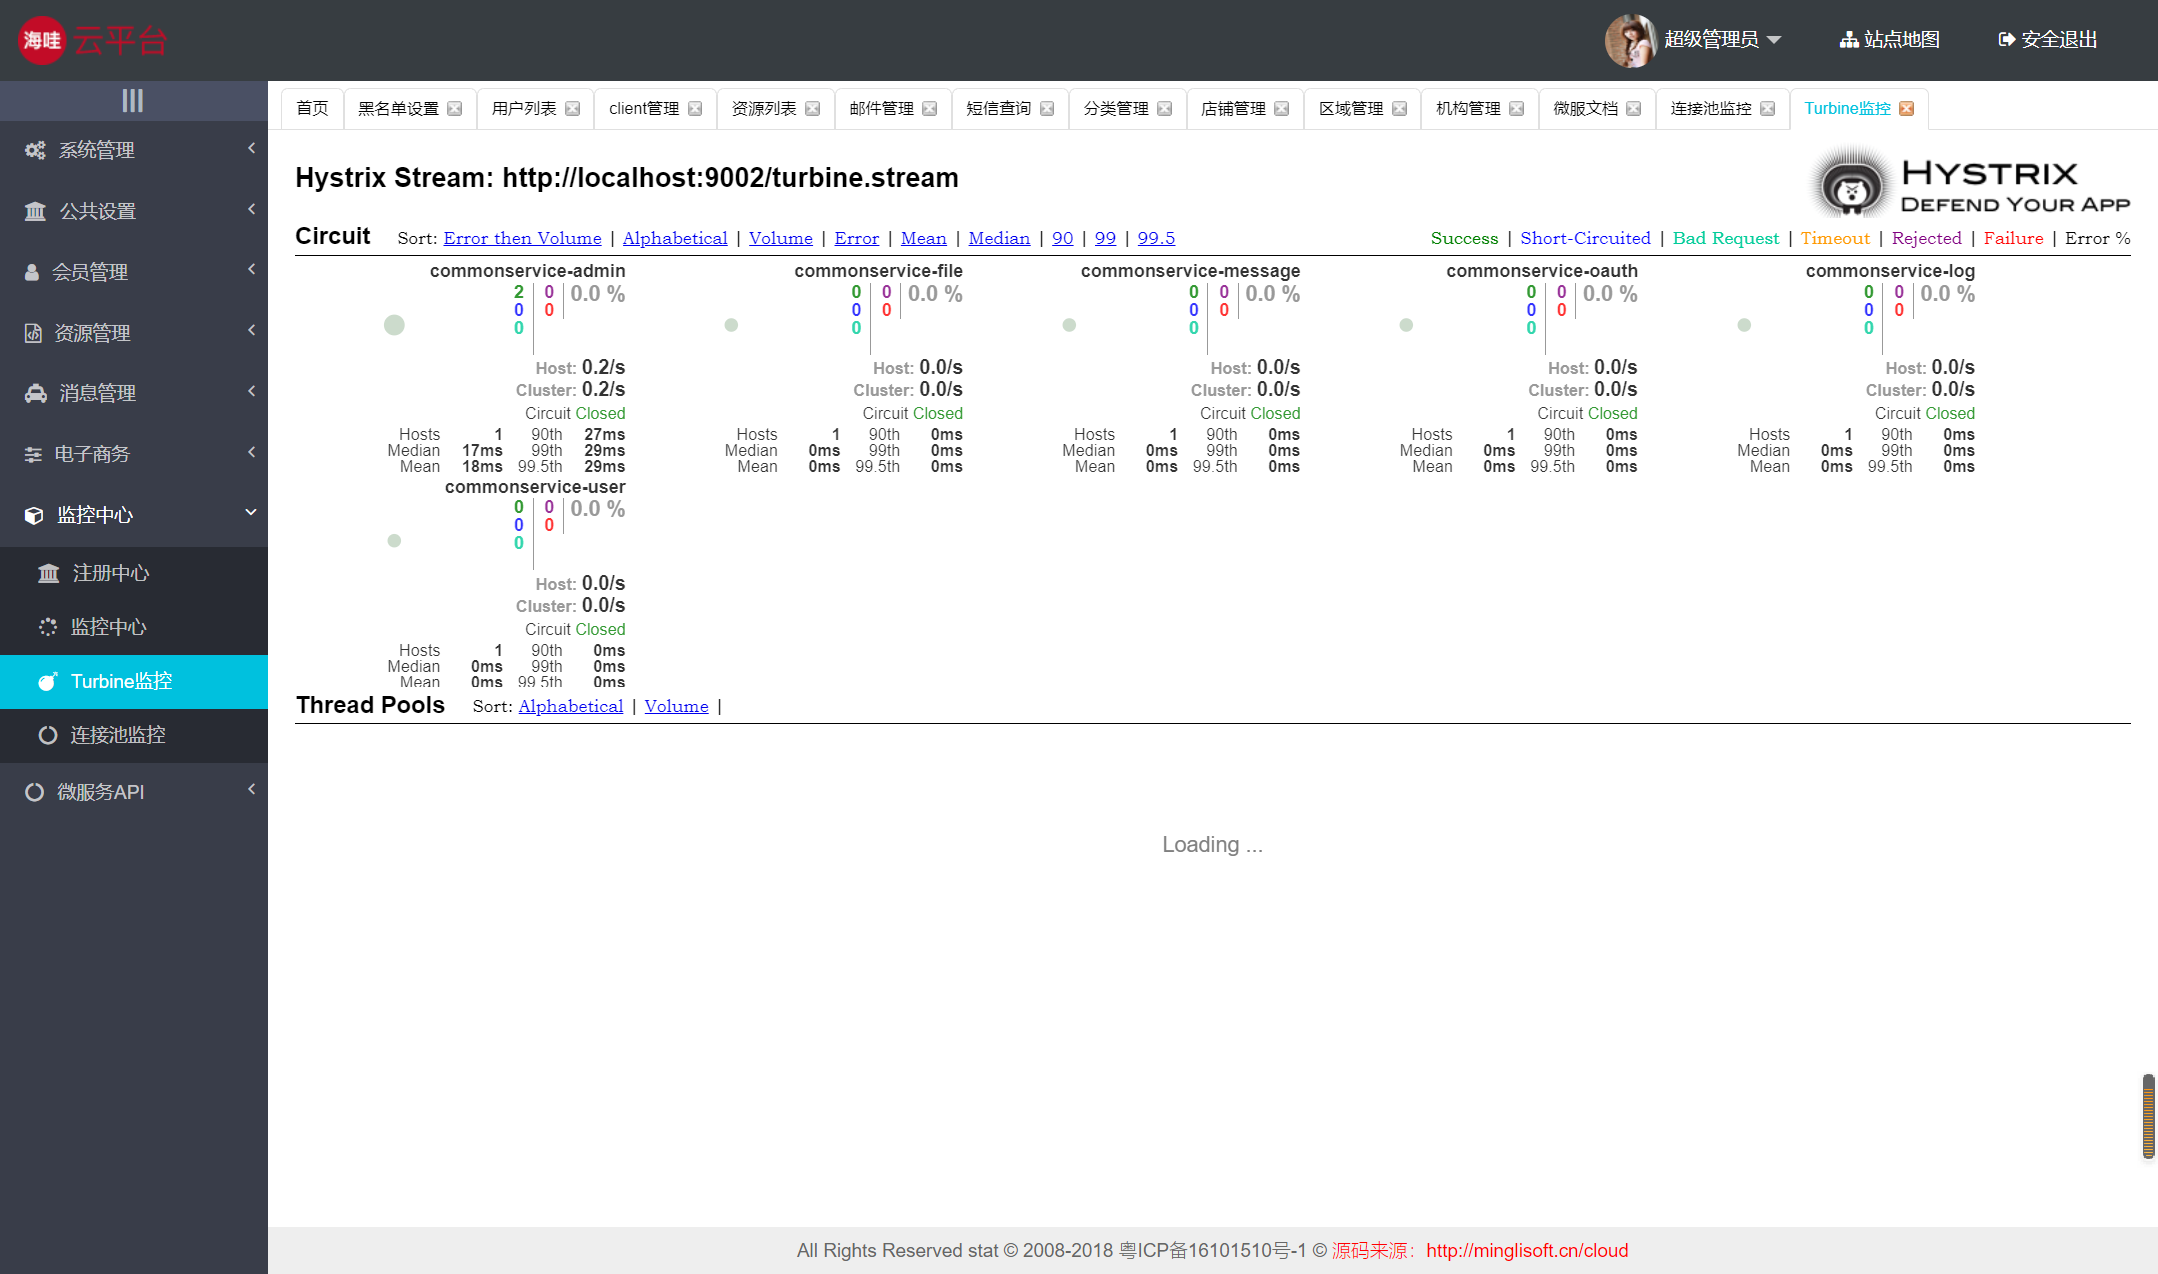
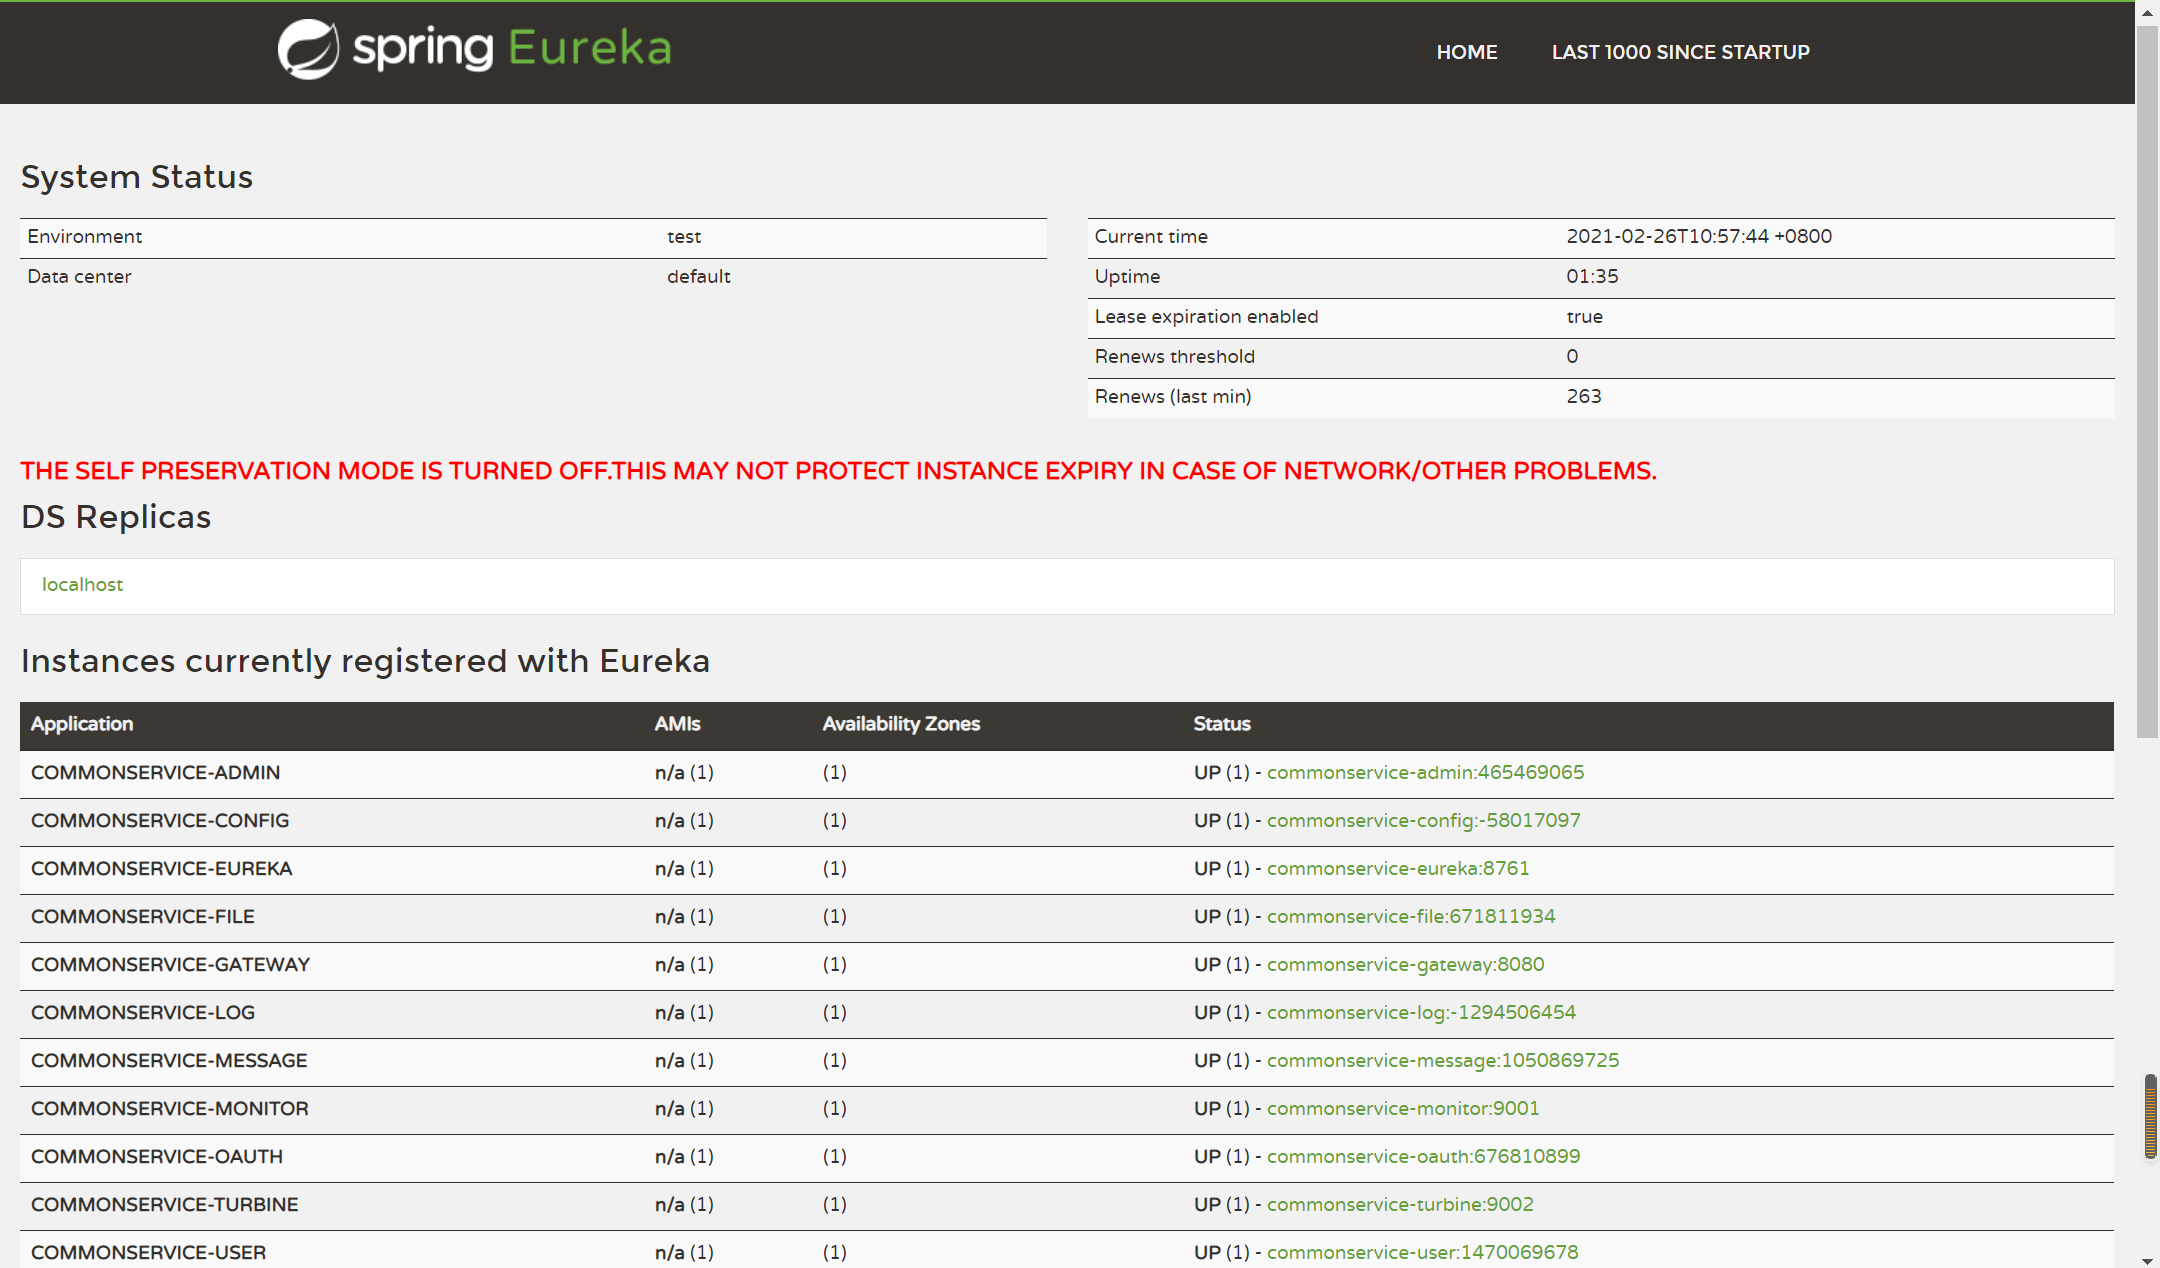
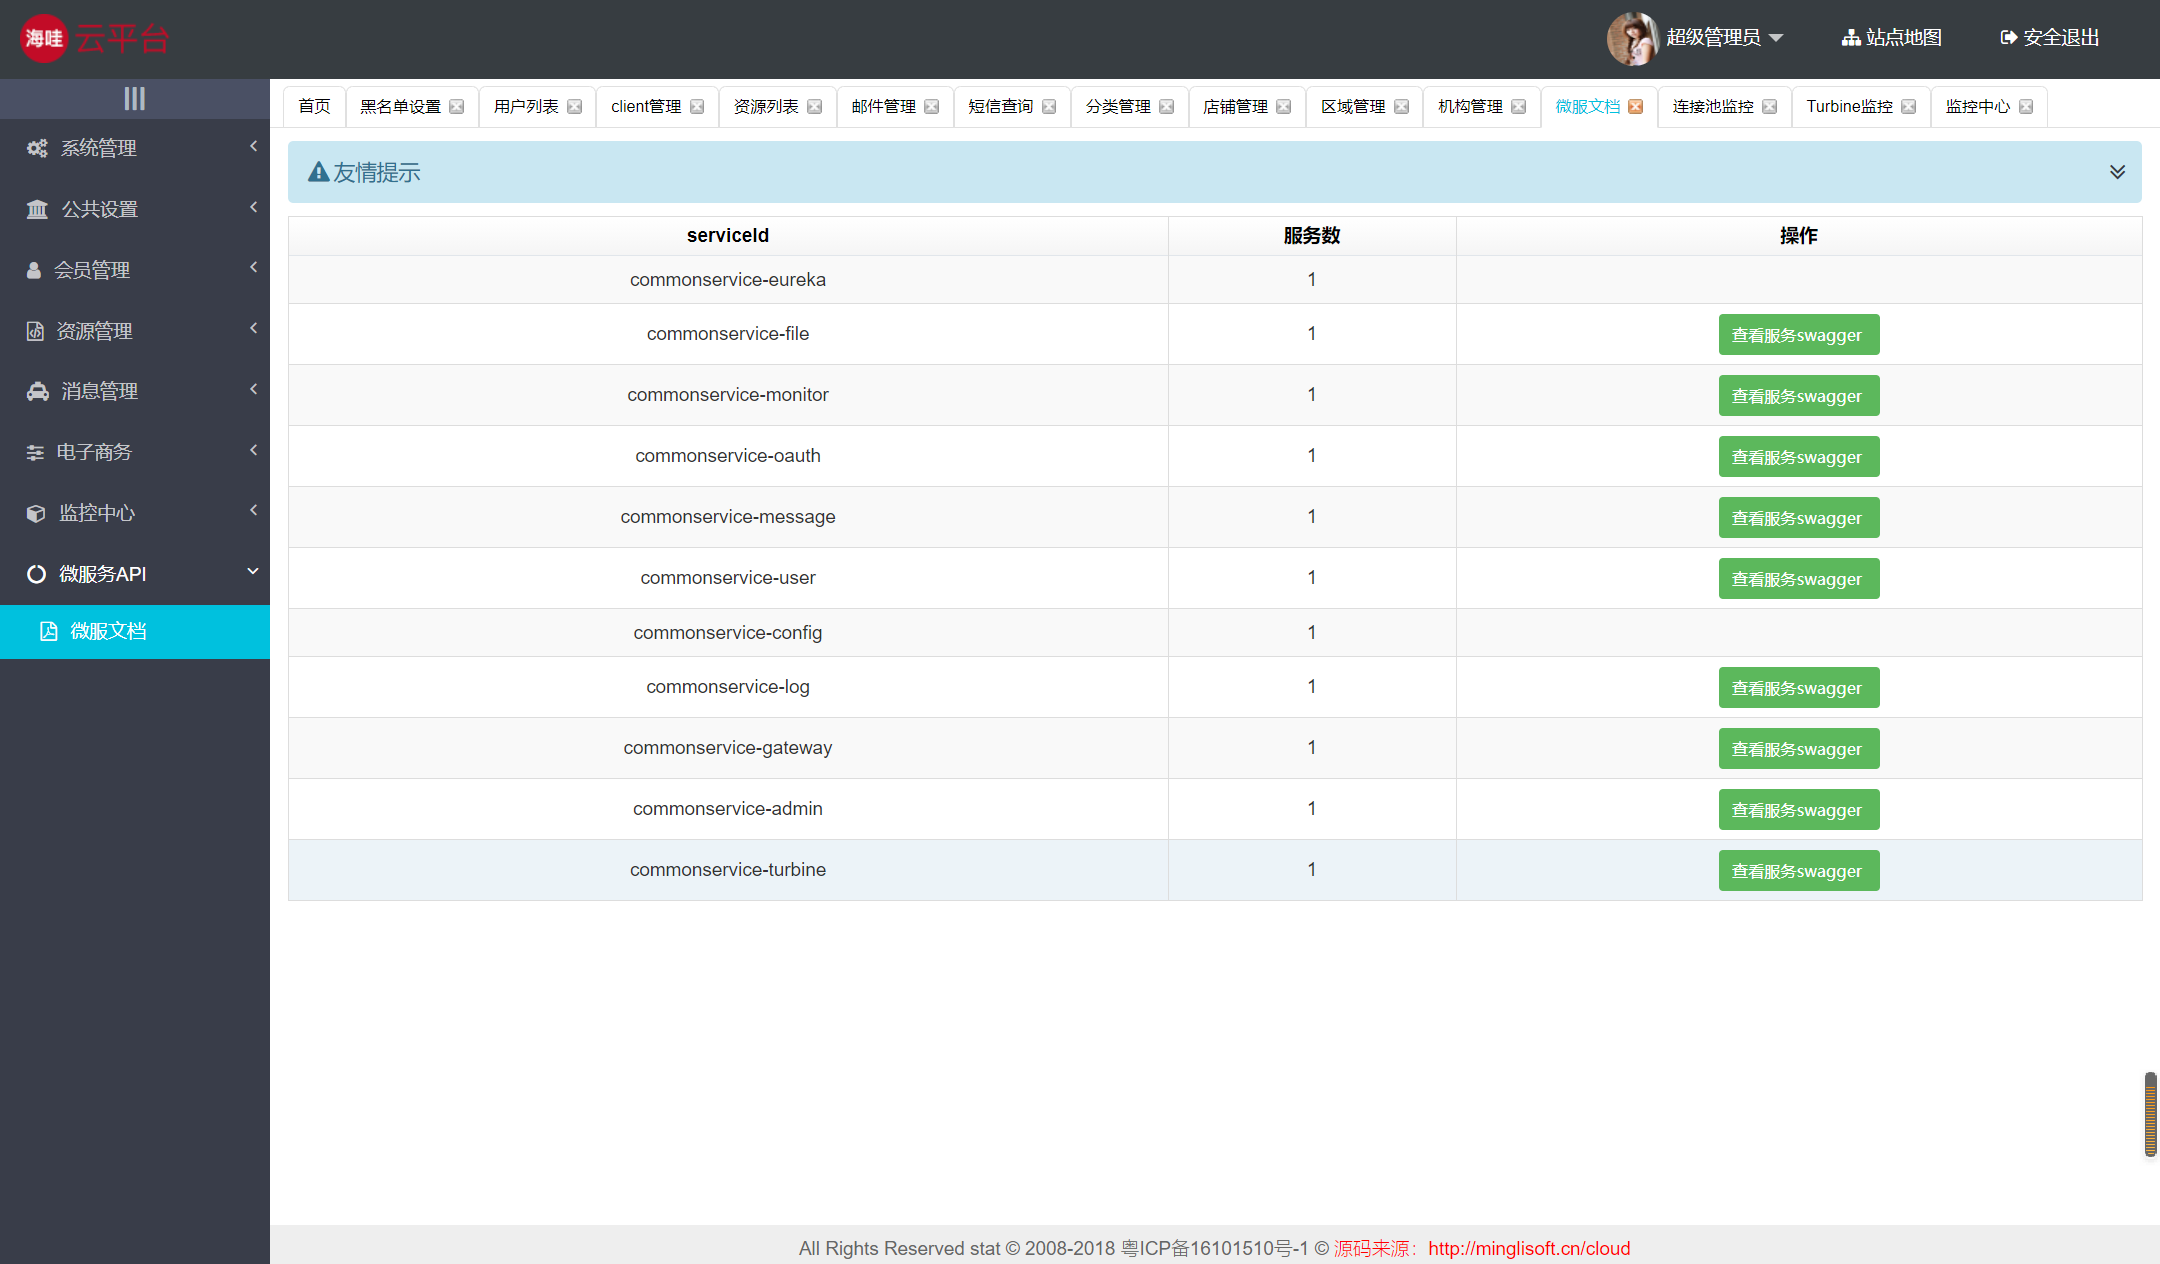
涉及技术:Eureka、Config、Zuul、OAuth2、Security、OSS、Turbine、Zipkin、Feign、Monitor、Stream、ElasticSearch
8. 运行&截图


源码下载

java 版 spring cloud springcloud spring boot springboot b2b2c o2o 微服务 分布式 电子商务 电子商城 saas 小程序商城系统相关资料
java 版 spring cloud springcloud spring boot springboot b2b2c o2o 微服务 分布式 电子商务 电子商城 saas 小程序商城系统相关资料
【鸿鹄云商 - 资料包】
链接:https://pan.baidu.com/s/1JWmKZ34mS9QMl4Tpps004A
提取码:l57t
")
JAVA入门教学之快速搭建基本的springboot(从spring boot到spring cloud)
本文主要入门者介绍怎么搭建一个基础的springboot环境,本文通过图文并茂的形式给大家介绍从spring boot到spring cloud的完美搭建过程,适用java入门教学,需要的朋友可以参考下
安装JDK
https://www.oracle.com/java/technologies/javase/javase-jdk8-downloads.html

使用的是jdk8,这里使用的是windows10 64位的操作系统,所以下载对应的jdk版本

点击链接会要你登录,登录以后才可以下载。

下载安装以后找到jdk的安装目录,我这里是C:Program FilesJavajdk1.8.0_211

配置JAVA_HOME,值就是你安装jdk的地址C:Program FilesJavajdk1.8.0_211 千万不要加bin
这个时候还没有完成配置,还需要打开path环境变量在最后加

加到bin目录


如果输入javac显示帮助信息证明配置成功了。
下面来下载springboot的IDE,建议新手不要去搞那些插件,直接装一个完整版本的,可以在下面的连接下载完整版。
https://spring.io/tools#main

这种下下来的jar包可以直接用解压软件解开,里面有直接可以执行的exe执行文件,直接用就可以了。


这里就勾选springweb 也就是springmvc
完成以后会发现下载包的速度会很慢
这时候就要自己修改maven了
http://maven.apache.org/download.cgi

修改 confsettings.xml 设置成阿里的库,把下载源从国外转到国内
alimavenaliyun maven http://maven.aliyun.com/nexus/content/groups/public/central

修改maven配置地址。重启IDE就可以了。

package com.example.demo; import org.springframework.boot.SpringApplication; import org.springframework.boot.autoconfigure.SpringBootApplication; import org.springframework.context.annotation.ComponentScan; @ComponentScan(basePackages={"com.example.demo"})//spring服务扫描目录。可以用*替换com.example.* @SpringBootApplication public class CeshiApplication { public static void main(String[] args) { SpringApplication.run(CeshiApplication.class, args); } }
package com.example.demo; import java.io.FileWriter; import java.io.IOException; import java.util.Date; import java.util.HashMap; import java.util.Map; import java.util.UUID; import javax.servlet.http.HttpServletRequest; import javax.servlet.http.HttpSession; import org.springframework.beans.factory.annotation.Autowired; import org.springframework.stereotype.Controller; import org.springframework.util.ResourceUtils; import org.springframework.web.bind.annotation.GetMapping; import org.springframework.web.bind.annotation.PathVariable; import org.springframework.web.bind.annotation.RequestBody; import org.springframework.web.bind.annotation.RequestMapping; import org.springframework.web.bind.annotation.ResponseBody; import org.springframework.web.bind.annotation.RestController; @RestController @RequestMapping("/user") public class HtuserController { @RequestMapping("/hi") @ResponseBody public Returnben getsession(HttpServletRequest request, HttpSession session) { Returnben returnben = new Returnben(); returnben.setMsg("成功"); returnben.setSuccess("1"); return returnben; } }
package com.example.demo; public class Returnben { private String success = "0"; public String getSuccess() { return success; } public void setSuccess(String success) { this.success = success; } public String getMsg() { return msg; } public void setMsg(String msg) { this.msg = msg; } public Object getobj() { return obj; } public Object getData() { return data; } public void setData(Object data) { this.data = data; } public void setobj(Object obj) { this.obj = obj; } private String msg = ""; private Object obj = null; private Object data = null; private Long count; private int code; public int getCode() { return code; } public void setCode(int code) { this.code = code; } public Long getCount() { return count; } public void setCount(Long count) { this.count = count; } }

没配置端口的话就是8080端口

基本的springboot就完成了,后续再说集成各个框架和cloud其他组件
到此这篇关于JAVA入门教学之快速搭建基本的springboot(从spring boot到spring cloud)的文章就介绍到这了,更多相关springboot入门搭建内容请搜索小编以前的文章或继续浏览下面的相关文章希望大家以后多多支持小编!
我们今天的关于如何管理共享库中的spring-cloud bootstrap属性?和springbootsession共享原理的分享就到这里,谢谢您的阅读,如果想了解更多关于Bootstrap-Switch开关控件使用指南,springcloud实战视频、J2EE企业开发架构源码SpringCloud SpinrgBoot2 Spring Cloud Spring Boot2 分布式 微服务 快速开放架构 脚手架 后台管理平台、java 版 spring cloud springcloud spring boot springboot b2b2c o2o 微服务 分布式 电子商务 电子商城 saas 小程序商城系统相关资料、JAVA入门教学之快速搭建基本的springboot(从spring boot到spring cloud)的相关信息,可以在本站进行搜索。
本文标签:


