如果您对使用C/C++和LibSerial在Ubuntu中的串行端口上读写和ubuntu串口编程感兴趣,那么这篇文章一定是您不可错过的。我们将详细讲解使用C/C++和LibSerial在Ubuntu中
如果您对使用C / C ++和LibSerial在Ubuntu中的串行端口上读写和ubuntu串口编程感兴趣,那么这篇文章一定是您不可错过的。我们将详细讲解使用C / C ++和LibSerial在Ubuntu中的串行端口上读写的各种细节,并对ubuntu串口编程进行深入的分析,此外还有关于14.04 – 如何在Ubuntu中安装PHP`mbstring`扩展?、bash – 在Ubuntu中的`yes`、Hanlp在ubuntu中的使用方法介绍、linux – Ubuntu中使用/阻止的端口的实用技巧。
本文目录一览:- 使用C / C ++和LibSerial在Ubuntu中的串行端口上读写(ubuntu串口编程)
- 14.04 – 如何在Ubuntu中安装PHP`mbstring`扩展?
- bash – 在Ubuntu中的`yes`
- Hanlp在ubuntu中的使用方法介绍
- linux – Ubuntu中使用/阻止的端口
")
使用C / C ++和LibSerial在Ubuntu中的串行端口上读写(ubuntu串口编程)
我在Ubuntu上使用LibSerial在串行端口上读写数据。
目前,我可以通过串行端口写入和接收字符串,但是我的代码不能很好地工作:特别是,
我想控制读取功能,以便仅在有需要读取的内容时才能读取当没有信息可读取时退出,以发送另一个命令 而不会阻塞流程。
我想要做:
- 编写命令
- 等待答案
- 然后写另一个命令
- 等待答案
现在,我可以在while循环中使用读取功能发送第一个命令并读取答案,但是我无能为力。
我无法发送第二条命令,因为while循环永不退出,因此程序继续读取。
你能帮我吗?
这是我正在使用的代码:(读和写功能在代码的结尾)
#include <SerialStream.h>#include <iostream>#include <unistd.h>#include <cstdlib>#include <string>intmain( int argc, char** argv ){ // // Open the serial port. // using namespace std; using namespace LibSerial ; SerialStream serial_port ; char c; serial_port.Open( "/dev/ttyACM0" ) ; if ( ! serial_port.good() ) { std::cerr << "[" << __FILE__ << ":" << __LINE__ << "] " << "Error: Could not open serial port." << std::endl ; exit(1) ; } // // Set the baud rate of the serial port. // serial_port.SetBaudRate( SerialStreamBuf::BAUD_9600 ) ; if ( ! serial_port.good() ) { std::cerr << "Error: Could not set the baud rate." << std::endl ; exit(1) ; } // // Set the number of data bits. // serial_port.SetCharSize( SerialStreamBuf::CHAR_SIZE_8 ) ; if ( ! serial_port.good() ) { std::cerr << "Error: Could not set the character size." << std::endl ; exit(1) ; } // // Disable parity. // serial_port.SetParity( SerialStreamBuf::PARITY_NONE ) ; if ( ! serial_port.good() ) { std::cerr << "Error: Could not disable the parity." << std::endl ; exit(1) ; } // // Set the number of stop bits. // serial_port.SetNumOfStopBits( 1 ) ; if ( ! serial_port.good() ) { std::cerr << "Error: Could not set the number of stop bits." << std::endl ; exit(1) ; } // // Turn off hardware flow control. // serial_port.SetFlowControl( SerialStreamBuf::FLOW_CONTROL_NONE ) ; if ( ! serial_port.good() ) { std::cerr << "Error: Could not use hardware flow control." << std::endl ; exit(1) ; } // // Do not skip whitespace characters while reading from the // serial port. // // serial_port.unsetf( std::ios_base::skipws ) ; // // Wait for some data to be available at the serial port. // // // Keep reading data from serial port and print it to the screen. // // Wait for some data to be available at the serial port. // while( serial_port.rdbuf()->in_avail() == 0 ) { usleep(100) ; } char out_buf[] = "check"; serial_port.write(out_buf, 5); <-- FIRST COMMAND while( 1 ) { char next_byte; serial_port.get(next_byte); HERE I RECEIVE THE FIRST ANSWER std::cerr << next_byte; } std::cerr << std::endl ; return EXIT_SUCCESS ;}答案1
小编典典我认为您只需要使用while( serial_port.rdbuf()->in_avail() > 0)上一个while循环的条件即可。然后它将读出所有可用数据(“答案”),然后您可以发送第二条命令。

14.04 – 如何在Ubuntu中安装PHP`mbstring`扩展?
什么是PHP mbstring扩展,以及在Ubuntu 14.04上安装它的最佳方法是什么?
解决方法:
编辑:Dylan Pierce已经确认您已经可以像安装PHP 5一样安装一些PHP 7扩展.特别是对于mbstring,您可以执行:
sudo apt-get install PHP7.0-mbstring
为了补充sparkmood的答案,如果你已经为它导入了ondrej的PPA,现在这适用于PHP 7.
sudo apt-get install libapache2-mod-PHP7.0
不要忘记,PHP 7可以通过ubuntu的官方存储库获得,或者您需要一个外部PPA.

bash – 在Ubuntu中的`yes`
在FreeBSD中,我可以这样做:
$yes "-tcp" | head -n 2
-tcp
-tcp
但是在Ubuntu中,我收到一个错误:
$yes "-tcp" | head -n 2
yes: invalid option -- 't'
Try `yes --help' for more information.
解决方法
$yes -- "-tcp" | head -n 2
双破折号告诉yes停止解析选项.

Hanlp在ubuntu中的使用方法介绍
HanLP的一个很大的好处是离线开源工具包,换而言之,它不仅提供免费的代码免费下载,而且将辛苦收集的词典也对外公开啦,此诚乃一大无私之举.我在安装的时候,主要参照这份博客:
blog.csdn.net/article/details?id=50938796
不过该博客主要介绍的是windows如何使用hanlp,而ubuntu是linux的,所以会有所区别.下面我主要介绍的是在unbuntu的安装使用.
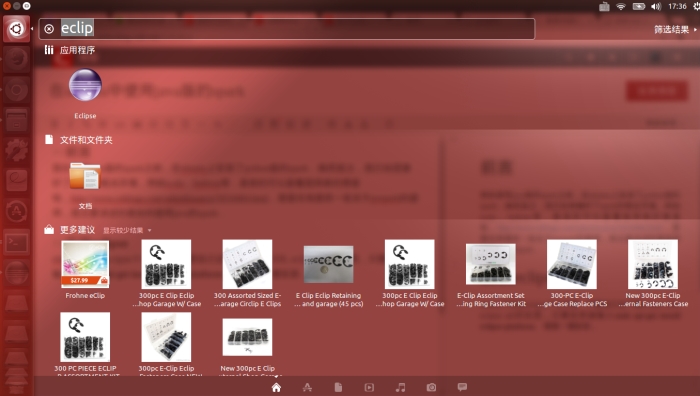
安装eclipse
在终端输入 sudo get-apt install eclipse-platform实现一键安装,然后在应用程序找到eclipse
下载hanlp
访问hanlp的官方网址:(http://方位是自行加上)hanlp.linrunsoft.com/services.html
分别下载hanlp.jar(程序包), data.zip(词典库),hanlp.properties(配置文件),而后面是说明文档,可以不下载
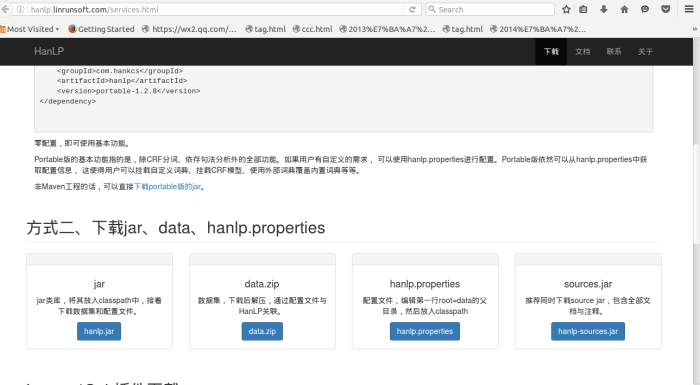
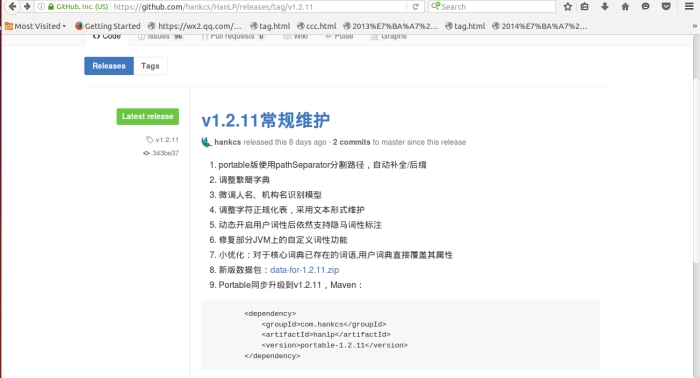
在下载的data.zip的时候,下载链接有点隐晦,点击蓝色的data-for-1.2.11.zip,就会出现百度云链接啦
导入jar包
导入hanlp到eclipse之中,具体的流程可以参照网址:
jingyan.baidu.com/article/ca41422fc76c4a1eae99ed9f.html
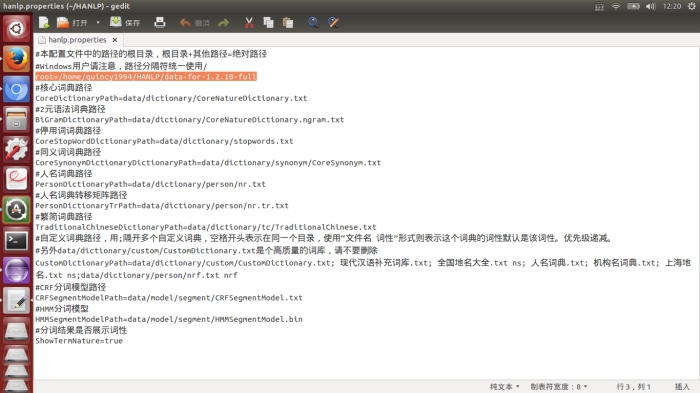
导入配置文件
将hanlp.propertie复制至项目的bin目录中,修改词典的路径
将root的路径修改至data保存的路径(记得data要解压)
编程代码示范
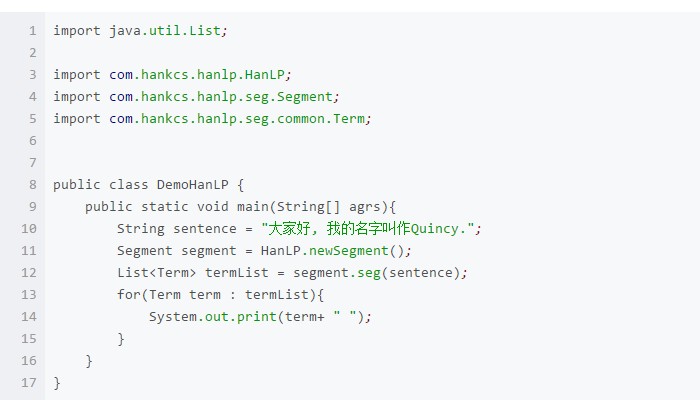
运行结果:


linux – Ubuntu中使用/阻止的端口
root@ubuntu:~/glassfishv3/glassfish/bin# netstat -tlunp
Active Internet connections (only servers)
Proto Recv-Q Send-Q Local Address           Foreign Address         State       PID/Program name
tcp        0      0 0.0.0.0:22              0.0.0.0:*               LISTEN      2149/sshd
tcp        0      0 127.0.0.1:631           0.0.0.0:*               LISTEN      2441/cupsd
tcp        0      0 0.0.0.0:5432            0.0.0.0:*               LISTEN      2075/postgres
tcp6       0      0 :::22                   :::*                    LISTEN      2149/sshd
tcp6       0      0 :::5432                 :::*                    LISTEN      2075/postgres
udp        0      0 0.0.0.0:68              0.0.0.0:*                           2082/dhclient3
udp        0      0 0.0.0.0:39256           0.0.0.0:*                           2413/avahi-daemon:
udp        0      0 0.0.0.0:5353            0.0.0.0:*                           2413/avahi-daemon:
Ubuntu 9.04 Linux ubuntu 2.6.28-11-generic#42-Ubuntu SMP Fri Apr 17 01:58:03 UTC 2009 x86_64 GNU / Linux(它是一个虚拟服务器hough).
不太确定如何解决这个问题.
解决方法
java.net.UnkNownHostException: ubuntu: ubuntu
    at java.net.InetAddress.getLocalHost(InetAddress.java:1353)
    at com.sun.enterprise.util.net.NetUtils.getCanonicalHostName
原因很简单,有时候不应该寻找复杂的问题!
今天关于使用C / C ++和LibSerial在Ubuntu中的串行端口上读写和ubuntu串口编程的讲解已经结束,谢谢您的阅读,如果想了解更多关于14.04 – 如何在Ubuntu中安装PHP`mbstring`扩展?、bash – 在Ubuntu中的`yes`、Hanlp在ubuntu中的使用方法介绍、linux – Ubuntu中使用/阻止的端口的相关知识,请在本站搜索。
本文标签:


![[转帖]Ubuntu 安装 Wine方法(ubuntu如何安装wine)](https://www.gvkun.com/zb_users/cache/thumbs/4c83df0e2303284d68480d1b1378581d-180-120-1.jpg)

