关于VirtualBox+CentOS使用NAT+Host-Only方式联网和virtualboxnat网络设置的问题就给大家分享到这里,感谢你花时间阅读本站内容,更多关于(OK)(OK)usinga
关于VirtualBox + CentOS 使用 NAT + Host-Only 方式联网和virtualboxnat网络设置的问题就给大家分享到这里,感谢你花时间阅读本站内容,更多关于(OK)(OK) using adb with a NAT''ed VM - VirtualBox - NAT Port Forwarding、:only-child和:only-of-type选择器的比较、centos 6.5 双网卡 上网 virtualbox nat hostonly、CentOS in VirtualBox (NAT 模式) 实现 SSH等相关知识的信息别忘了在本站进行查找喔。
本文目录一览:- VirtualBox + CentOS 使用 NAT + Host-Only 方式联网(virtualboxnat网络设置)
- (OK)(OK) using adb with a NAT''ed VM - VirtualBox - NAT Port Forwarding
- :only-child和:only-of-type选择器的比较
- centos 6.5 双网卡 上网 virtualbox nat hostonly
- CentOS in VirtualBox (NAT 模式) 实现 SSH
")
VirtualBox + CentOS 使用 NAT + Host-Only 方式联网(virtualboxnat网络设置)
转自:http://www.cnblogs.com/dee0912/p/5470700.html(OK) using adb with a NAT''ed VM - VirtualBox - NAT Port Forwarding")
(OK)(OK) using adb with a NAT''ed VM - VirtualBox - NAT Port Forwarding
http://www.android-x86.org/documents/debug-howto
The steps above work nicely if you have a VM which is set up to use Bridged or Host-Only adapters However, if you have a NAT''ed VM you cannot connect to the VM IP from the host You will need to set up port forwarding for a host port to be forwarded to the VM port 5555 (which is adb)
VBoxManage modifyvm <VMName> --natpf1 adb,tcp,*,<localport>,*,5555
Example from one machine:
VBoxManage modifyvm froyo --natpf1 adb,tcp,*,5555,*,5555 Once this is done, you should see the local port (i.e. 5555 in this case) bound on the host via netstat -a You can now connect to the VM by adb localhost:5555

:only-child和:only-of-type选择器的比较
:only-child
当元素是唯一的子元素,被选择。
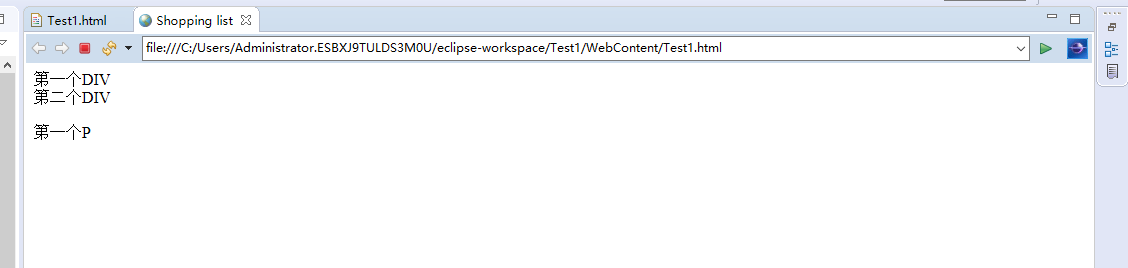
HTML代码:
<body>
<div class="x">
<div>第一个DIV</div>
<div>第一个DIV</div>
<p>第一个P</p>
</div>
</body>
效果图:
CSS代码:
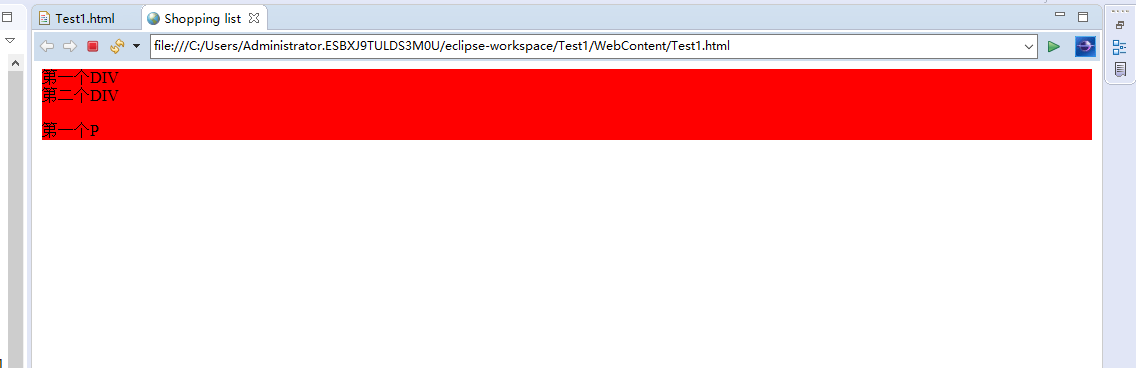
<style>
div:only-child{
    background-color:red;
}
</style>
因为div是body元素的唯一子元素,所以整个DIV都会变红。
演示图:
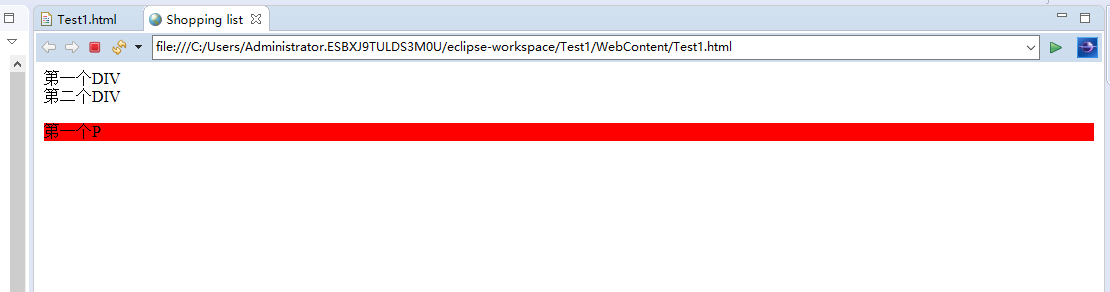
CSS代码:
<style>
p:only-child{
    background-color:red;
}
</style>
因为P元素不是div元素的唯一元素,所以P的背景颜色不会变红。
演示图:

:only-of-type
选择特定的,唯一类型的子元素。
HTML代码:
<body>
<div id="main" class="x">
<div id="a">第一个DIV</div>
<div id="b">第一个DIV</div>
<p>第一个P</p>
</div>
</body>
CSS代码:
<style>
div:only-of-type{
    background-color:red;
}
</style>
此时选择的div,是id为main的div,它是元素body的唯一类型(div)的元素,所以整个div会变红。
演示图:

而当把CSS代码修改成下面的代码,结果就会不同。
CSS代码:
<style>
.x div:only-of-type{
    background-color:red;
}
</style>
此时选择的div,是id为a和b的div,因为不是唯一,所以背景颜色不会变红。
演示图:

如果把CSS代码中的div,改成p后,p的背景颜色会变红,因为p是div里唯一类型的元素。
CSS代码:
<style>
p:only-of-type{
    background-color:red;
}
</style>
演示图:

centos 6.5 双网卡 上网 virtualbox nat hostonly
虚拟机两张网卡:分别调成 NAT (eth0) 和 host only (eht1) 模式.
nat 的网卡不用设置,host only 网卡调为 (vi /etc/sysconfig/network-scripts/ifcfg-eth1):
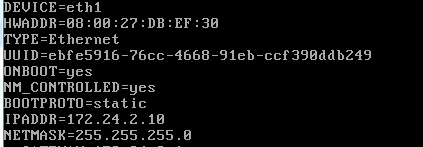
注意:一定不要设置 gateway, 不然会无法上网!!!
原因:
linux 在加载网卡配置文件的时候是先加载 eth0, 再加载 eht1 的.
这样,如果 eth1 设置了 gateway 项,则会覆盖掉 eth0 中的 gateway 设置,因此解决方法就是删除 eth1 的 gateway 设置.
为了使更改生效:service network restart
此外,还需要设置路由:
ip route add default via 10.0.2.1
最后,路由设置应该类似如下:
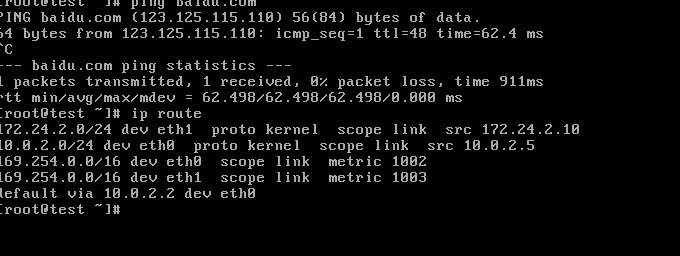
参考:
https://www.cnblogs.com/panblack/p/Centos7_Static_Routes.html
https://my.oschina.net/on0926/blog/646570
https://blog.csdn.net/u012592062/article/details/51188401
 实现 SSH")
CentOS in VirtualBox (NAT 模式) 实现 SSH
Host OS : Windows 7
Guest OS : CentOS 5.7
Virtual Machine : VirtualBox 4.1.2
Connection Type: Nat
--------------------------------------------------------------------
只是简单实现,其他的细化的东西碰到再扩展, 支持开源软件,实现如下:
进入 GuestOS :
#/sbin/ifconfig
查看 inet addr : 10.0.2.15
然后到 HostOS 去, 看控制面板, 看网络和共享中心的 VirtualBox Host-Only Network 的
ipv4 属性的 ip 地址:192.168.56.1
准备够了, 下面果断配置:
提示一下 : ssh 的默认端口是 22
打开 virtualbox 的设置窗口 -〉网络-〉 Adapter1 启用 网络连接-〉连接方式:Nat -> 接入网线 ->
Port Forwarding , 设置如下:

把 TCP 协议的 192.168.56.1:2222 映射到 10.0.2.15:22 .
OK , 重启, 打开 putty。
session-> host name(or ip address) 192.168.56.1; port: 2222 -> open

-> 登陆成功。
今天关于VirtualBox + CentOS 使用 NAT + Host-Only 方式联网和virtualboxnat网络设置的介绍到此结束,谢谢您的阅读,有关(OK)(OK) using adb with a NAT''ed VM - VirtualBox - NAT Port Forwarding、:only-child和:only-of-type选择器的比较、centos 6.5 双网卡 上网 virtualbox nat hostonly、CentOS in VirtualBox (NAT 模式) 实现 SSH等更多相关知识的信息可以在本站进行查询。
本文标签:


