在这篇文章中,我们将为您详细介绍Python-控制Tor的内容,并且讨论关于python做控制的相关问题。此外,我们还会涉及一些关于CentOS7安装Python3.x,Python2和Python3
在这篇文章中,我们将为您详细介绍Python-控制Tor的内容,并且讨论关于python做控制的相关问题。此外,我们还会涉及一些关于CentOS7 安装 Python3.x,Python2 和 Python3 共存、centos默认python2.6升级到python2.7,并用pip方式安装python工具包、Connector/Python Python连接mysql及中文显示问题、How to install Python 2.7 and Python 3.3 on CentOS的知识,以帮助您更全面地了解这个主题。
本文目录一览:- Python-控制Tor(python做控制)
- CentOS7 安装 Python3.x,Python2 和 Python3 共存
- centos默认python2.6升级到python2.7,并用pip方式安装python工具包
- Connector/Python Python连接mysql及中文显示问题
- How to install Python 2.7 and Python 3.3 on CentOS
")
Python-控制Tor(python做控制)
我试图用Python控制Tor。我已经在stackoverflow上阅读了有关此主题的其他几个问题,但没有一个回答这个问题。
我正在寻找一种方法,可以在运行命令时为您提供“新身份”,新IP地址。我四处搜寻,发现TorCtl模块是一种控制Tor的方法,但找不到找到新身份的方法。到目前为止,这是我至少要连接到tor的内容,但无法进一步进行。
from TorCtl import TorCtlconn = TorCtl.connect(controlAddr="127.0.0.1", controlPort=9051, passphrase="123")对此有任何帮助,如果还有其他更好的模块,那么TorCtl也将是很棒的!谢谢!
答案1
小编典典好吧,幸运的是,我设法找到了一个完全可以实现我想要的功能的PHP脚本,并在此帮助下将其转换为可以在TorCtl中使用的脚本。这就是将来其他需要它的人的样子!
from TorCtl import TorCtlconn = TorCtl.connect(controlAddr="127.0.0.1", controlPort=9051, passphrase="123")TorCtl.Connection.send_signal(conn, "NEWNYM")
CentOS7 安装 Python3.x,Python2 和 Python3 共存

原文链接 CentOS7 安装 Python 这么简单?
keywords: 云服务器,CentOS7, Python3,Python3,Linux
description: CentOS7 安装 Python 这么简单?centos7 安装 Python3 一看就会!
CentOS7 默认是安装了 Python2.7.x 的,所以在此之上安装 Python3.x 是可以和 Python2 共存的,下面我们就说说 CentOS7 怎么安装 Python3.x
首先登录到你的虚拟机或者云服务器,进入到如下的图形界面
我这里使用的是远程连接工具 xshell,可以使用别的远程连接工具,比如 CRT。接下来就可以输入 python -v 查看当前系统中的 Python 版本,
不出意外你会看到你的系统上默认安装了 Python2.7.x,现在我们需要在这个系统上安装 Python3.x
我们先安装 python 可能用到的依赖:
yum install openssl-devel bzip2-devel expat-devel gdbm-devel readline-devel sqlite-devel
我们最后其实是通过 wget 命令是下载 Python 资源包进行安装,所以我们要先检查 wget 命令是否有安装
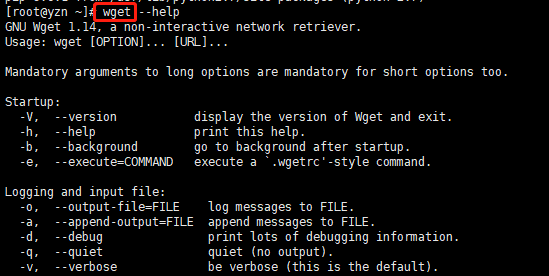
如果没有 wget 命令,我们可以输入下面的命令来安装 wget
yum -y install wget
wget 命令安装完成之后就可以用下面的代码下载 Python 资源包了,下面以 Python3.6.5 为例
wget https://www.python.org/ftp/python/3.6.5/Python-3.6.5.tgz
命令执行完后,你就会发现在当前目录下会有一个 Python-3.6.5.tgz 的文件,接下来需要解压这个文件
tar -zxvf Python-3.6.5.tgz
解压之后进入到解压后的目录 cd Python-3.6.5 进行编译
./configure --prefix=/usr/local/python3
make && make install
如果编译时报错:configure: error: no acceptable C compiler found in $PATH 说明没有安装 gcc,安装一下 gcc 即可:yum install gcc
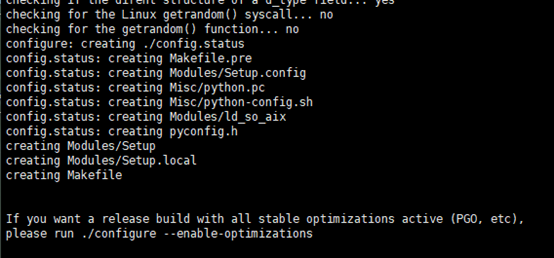
如果看到下面的日志输出,则表示编译完成
到这里我们虽然编译成功了,但是还不能直接使用,我们还需要下面的设置才行
ln -s /usr/local/python3/bin/python3 /usr/bin/python3  //链接Python3
ln -s /usr/local/python3/bin/pip3 /usr/bin/pip3   //链接pip3
这时候就可以测试一下可用不可用
python -v pip -v python3 -v pip3 -v
最后刚才下载的 Python3 的压缩包和解压缩目录也是可以删除的
执行 rm -rf Python-3.6.5.tgz Python-3.6.5 即可
可能遇到的问题
can''t decompress data: zlib not available解决办法yum -y install zlib*
下面是云服务器,可以自行选择
阿里云服务器
阿里云企业级服务器限时特惠
阿里云建站 速成美站
阿里云 SaaS 商标注册服务
CDN 爆款产品
腾讯云服务器
腾讯云境外服务器
腾讯云数据库

centos默认python2.6升级到python2.7,并用pip方式安装python工具包
- 说明 centos安装默认python2.6升级为python2.7不能用yum安装python工具包,建议用pip。
- 更新指令 yum -y update yum groupinstall -y 'development tools'
- 安装 python 工具需要的额外软件包 SSL,bz2,zlib yum install -y zlib-devel bzip2-devel openssl-devel xz-libs wget yum install openssl -y
- 编译安装Python 2.7.x (1)下载Python 2.7.2的两种方法: 方法一: 链接: https://pan.baidu.com/s/1o843tKe 密码: jrx2 方法二: 官网下载:https://www.python.org/download/releases/2.7.2/ (2)编译安装python2.7.2 tar xvf Python-2.7.2.tar cd Python-2.7.2 ./configure --prefix=/usr/local --build=x86_64 make --jobs=
grep processor /proc/cpuinfo | wc -lmake install 将python头文件拷贝到标准目录 cd /usr/local/include/python2.7 cp -a ./* /usr/local/include/ 备份旧版本的python,并符号链接新版本的python cd /usr/bin mv python python2.6 ln -s /usr/local/bin/python . 修改yum脚本,使其指向旧版本的python,已避免其无法运行 vim /usr/bin/yum #!/usr/bin/python 更改为 #!/usr/bin/python2.6 查看python版本 [root@tiaoshiji bin]# python -V Python 2.7.2 -
pip编译安装 说明:pip 是一个安装和管理 Python 包的工具,用于取代easy_install。 升级为2.7后安装python模块不能使用yum,因为yum会把模块默认安装到python2.6中。 所以采用pip方式安装python模块。由此在需要在新的2.7中安装pip。 (1)下载pip 方法一: wget --no-check-certificate https://github.com/pypa/pip/archive/1.5.5.tar.gz 方法二: 链接: https://pan.baidu.com/s/1eSlgN0u 密码: uvg6 (2)安装pip tar zvxf 1.5.5.tar.gz #解压文件
cd pip-1.5.5/
python setup.py install (3) 删除原来的pip,建立2.7的pip rm -rf /usr/bin/pip
ln /usr/local/python-2.7.2/bin/pip /usr/bin/pip (4)查看pip版本 pip --version pip 1.5.5 from /usr/local/lib/python2.7/site-packages/pip-1.5.5-py2.7.egg (python 2.7)
- pip安装测试 安装redis pip install redis

Connector/Python Python连接mysql及中文显示问题
http://dev.mysql.com/downloads/connector/python/
Select Platform:选择Platform Independent (Architecture Independent), Compressed TAR ,下载源码mysql-connector-python-2.1.3.tar.gz
tar xzvf mysql-connector-python-2.1.3.tar.gz
cd mysql-connector-python-2.1.3/
sudo python3 setup.py install --with-mysql-capi=/opt/mysql(change to you mysqlserver path)
或
sudo python setup.py install --with-mysql-capi=/opt/mysql(change to you mysqlserver path)
一般说数据库服务如果不是安装在系统默认路径下的情况,需要下载源码自己编译驱动时指定对应的路径,本人unixodbc是通过apt-get install来安装的,因此安装odbc的python驱动只需简单的sudo pip3 install pyodbc即可。
测试代码:
import mysql.connector
conn = mysql.connector.connect(host=''127.0.0.1'', port=3306, user=''your-user'', passwd=''your-passwd'',
db=''you-db'')
cur = conn.cursor()
cur.execute("SET NAMES utf8")
cur.execute("SELECT * FROM you-table")
for r in cur.fetchall():
           print(r)
conn.close()使用python3中文显示正常、python2则显示中文对应的utf-8代码,这是因为python3和python2默认编码格式不一样。
$ python
Python 2.7.6 (default, Jun 22 2015, 17:58:13)
[GCC 4.8.2] on linux2
Type "help", "copyright", "credits" or "license" for more information.
>>> import sys
>>> sys.getdefaultencoding()
''ascii''
>>> quit()
$ python3
Python 3.4.3 (default, Oct 14 2015, 20:28:29)
[GCC 4.8.4] on linux
Type "help", "copyright", "credits" or "license" for more information.
>>> import sys
>>> sys.getdefaultencoding()
''utf-8''
对字符串类型可以正常输出、而对聚合类型(列表、元组 、字典等)不行、如改为以下代码则python2可以正常显示中文了
aa=cur.execute("select * from you-table")
info = cur.fetchmany(aa)
for ii in info:
    print ii[0]+'' ''+ii[1]+'' ''+ii[2]+'' ''+ii[3]+......
conn.close()
或者
#获得表中有多少条数据
cur.execute("SET NAMES utf8")
aa=cur.execute("select * from you-table")
print aa

#打印表中的多少数据
info = cur.fetchmany(aa)
for tup in info:
    for ii in tup:
        print ii
cur.close()
conn.commit()
conn.close()
fetchmany得到的是字符串的元组,总之要转化成字符串以后再print中文就没问题了
下面的例子对python2中文问题作了很好的说明:
$ python
Python 2.7.6 (default, Jun 22 2015, 17:58:13)
[GCC 4.8.2] on linux2
Type "help", "copyright", "credits" or "license" for more information.
>>> a = [''你好'',''哈哈'',''呵呵'']
>>> print a
[''\xe4\xbd\xa0\xe5\xa5\xbd'', ''\xe5\x93\x88\xe5\x93\x88'', ''\xe5\x91\xb5\xe5\x91\xb5'']
>>> for m in a:
...     print m
...
你好
哈哈
呵呵
更通用的写法
import mysql.connector
import sys

try:
    conn = mysql.connector.connect(host=''127.0.0.1'', port=3306, user=''your-user'', passwd=''your-passwd'',
    db=''you-db'')
    cur = conn.cursor()
    cur.execute("SELECT * FROM you-table")
    data = cur.fetchall()
    for row in data:
        for col in row:
           print col,  #python3改为print (col, end='' '')
        print            #python3改为print()
except mysql.connector.Error AS e:
    print ("Error %d: %s" % (e.args[0],e.args[1]))
    sys.exit(1)
finally:
    if conn:
        conn.close()
动态sql例子
建表的sql语句
CREATE TABLE `COURSE` (
  `CNO` char(6) NOT NULL,
  `CNAME` char(12) NOT NULL,
  `TEACHER` char(8) NOT NULL,
  `TIME` smallint(6) NOT NULL
) ENGINE=InnoDB DEFAULT CHARSET=utf8;

CREATE TABLE `STUDENT` (
  `SNO` char(7) NOT NULL,
  `SNAME` char(8) NOT NULL,
  `SEX` char(2) NOT NULL,
  `BDATE` date DEFAULT NULL,
  `DIR` char(16) DEFAULT NULL
) ENGINE=InnoDB DEFAULT CHARSET=utf8;

CREATE TABLE `SC` (
  `SNO` char(7) NOT NULL,
  `CNO` char(6) NOT NULL,
  `GRADE` decimal(6,2) DEFAULT NULL
) ENGINE=InnoDB DEFAULT CHARSET=utf8;

ALTER TABLE `COURSE`
  ADD PRIMARY KEY (`CNO`);
ALTER TABLE `STUDENT`
  ADD PRIMARY KEY (`SNO`);
ALTER TABLE `SC`
  ADD PRIMARY KEY (`SNO`,`CNO`),
  ADD KEY `CNO` (`CNO`);

ALTER TABLE `SC`
  ADD CONSTRAINT `SC_ibfk_1` FOREIGN KEY (`SNO`) REFERENCES `STUDENT` (`SNO`) ON DELETE CASCADE ON UPDATE NO ACTION,
  ADD CONSTRAINT `SC_ibfk_2` FOREIGN KEY (`CNO`) REFERENCES `COURSE` (`CNO`) ON UPDATE NO ACTION;
#coding=utf-8
import mysql.connector
conn = mysql.connector.connect(host=''127.0.0.1'', port=3306, user=''your-user'', passwd=''your-passwd'',
db=''you-db'')
cur = conn.cursor()
#查询成绩大于88对应的学生和课程
sql = "SELECT SNAME,CNAME,GRADE FROM STUDENT \
Inner JOIN SC ON STUDENT.SNO = SC.SNO \
Inner JOIN COURSE ON COURSE.CNO = SC.CNO \
WHERE GRADE > ''%d''"
cur.execute(sql % (88))
data = cur.fetchall()
#打印表中的多少数据
for row in data:
for col in row:
print col,
print
conn.close()
How to install Python 2.7 and Python 3.3 on CentOS
In this guide I will show you how to install Python 2.7 and 3.3 on CentOS 6. The examples below are for Python 2.7.6 and Python 3.3.5, but the procedure is the same for any modern version of Python including the upcoming Python 3.4.0.
I make regular updates to this guide to track new versions. Please see the end of the document for a changelog.
CentOS 6 ships with Python 2.6.6 and several critical system utilities, for example yum, will break if the default Python interpreter is upgraded. The trick is to install new versions of Python in /usr/local (or some other non-standard location) so that they can live side-by-side with the system version.
This guide should work for all versions of CentOS 6, but I have only verified it on CentOS 6.5 64 bit. It will probably work for some versions of CentOS 5 also.
Execute all the commands below as root either by logging in as root or by using sudo.
Preparations – install prerequisites
In order to compile Python you must first install the development tools and a few extra libs. The extra libs are not strictly needed to compile Python but without them your new Python interpreter will be quite useless.
yum groupinstall "Development tools" yum install zlib-devel bzip2-devel openssl-devel ncurses-devel sqlite-devel readline-devel tk-devel gdbm-devel db4-devel libpcap-devel xz-devel
| 1 2 |
yum groupinstall "Development tools" yum install zlib-devel bzip2-devel openssl-devel ncurses-devel sqlite-devel readline-devel tk-devel gdbm-devel db4-devel libpcap-devel xz-devel gcc python-devel |
Things to consider
Before you compile and install Python there are a few things you should know and/or consider:
Unicode
Python has a long and complicated history when it comes to Unicode support. Unless you have very specific reasons you should configure Python 3.2 and earlier to enable UTF-32 support. This increases memory usage but improves compatibility. In Python 3.3 the Unicode support has been completely rewritten and strings are automatically stored using the most efficient encoding possible.
You enable UTF-32 in Python 2.7 by adding --enable-unicode=ucs4 to the configure command. In Python 3.2 the flag is called --with-wide-unicode.
Shared library
You should probably compile Python as a shared library. All modern Linux distros ship with Python compiled as a shared library, and there are third-party tools such as mod_wsgi and Blender that won’t work without it. If you compile Python as a shared library you must also tell it how to find the library. You have two options:
-
Compile the path into the executable by adding this to the end of the configure command:
LDFLAGS="-Wl,-rpath /usr/local/lib" -
Open the file
/etc/ld.so.confin a text editor and add the path/usr/local/libto the end of it. After you have added the line you must run/sbin/ldconfigto make the dynamic linker aware of the change. This is how the file will look after adding the line on a clean install of CentOS 6.5:/etc/ld.so.conf
include ld.so.conf.d/*.conf /usr/local/lib
1
2
include ld.so.conf.d/*.conf
/usr/local/lib
Use “make altinstall” to prevent problems
It is critical that you use make altinstall when you install your custom version of Python. If you use the normal make install you will end up with two different versions of Python in the filesystem both named python. This can lead to problems that are very hard to diagnose.
Download, compile and install Python
Here are the commands to download, compile and install Python. If you modify /etc/ld.so.conf as discussed above you can remove the LDFLAGS parameter below.
# Python 2.7.6: wget http://python.org/ftp/python/2.7.6/Python-2.7.6.tar.xz tar xf Python-2.7.6.tar.xz cd Python-2.7.6 ./configure --prefix=/usr/local --enable-unicode=ucs4 --enable-shared LDFLAGS="-Wl,-rpath /usr/local/lib" make && make altinstall # Python 3.3.5: wget http://python.org/ftp/python/3.3.5/Python-3.3.5.tar.xz tar xf Python-3.3.5.tar.xz cd Python-3.3.5 ./configure --prefix=/usr/local --enable-shared LDFLAGS="-Wl,-rpath /usr/local/lib" make && make altinstall
| 1 2 3 4 5 6 7 8 9 10 11 12 13 |
# Python 2.7.6: wget http://python.org/ftp/python/2.7.6/Python-2.7.6.tar.xz tar xf Python-2.7.6.tar.xz cd Python-2.7.6 ./configure --prefix=/usr/local --enable-unicode=ucs4 --enable-shared LDFLAGS="-Wl,-rpath /usr/local/lib" make && make altinstall
# Python 3.3.5: wget http://python.org/ftp/python/3.3.5/Python-3.3.5.tar.xz tar xf Python-3.3.5.tar.xz cd Python-3.3.5 ./configure --prefix=/usr/local --enable-shared LDFLAGS="-Wl,-rpath /usr/local/lib" make && make altinstall |
After running the commands above your newly installed Python interpreter will be available as /usr/local/bin/python2.7 or /usr/local/bin/python3.3. The system version of Python 2.6.6 will continue to be available as /usr/bin/python, /usr/bin/python2 and /usr/bin/python2.6.
Download and install Setuptools + pip
Setuptools has replaced Distribute as the official package manager used for installing packages from the Python Package Index. Each Python interpreter on your system needs its own install of Setuptools. I also suggest you install pip. It builds on top of Setuptools and provides a few extra functions that are useful when you manage your packages.
The instructions below will install the latest version of Setuptools and pip for you.
# First get the setup script for Setuptools: wget https://bitbucket.org/pypa/setuptools/raw/bootstrap/ez_setup.py # Then install it for Python 2.7 and/or Python 3.3: python2.7 ez_setup.py python3.3 ez_setup.py # Now install pip using the newly installed setuptools: easy_install-2.7 pip easy_install-3.3 pip # With pip installed you can now do things like this: pip2.7 install [packagename] pip2.7 install --upgrade [packagename] pip2.7 uninstall [packagename]
| 1 2 3 4 5 6 7 8 9 10 11 12 13 14 15 |
# First get the setup script for Setuptools: wget https://bitbucket.org/pypa/setuptools/raw/bootstrap/ez_setup.py
# Then install it for Python 2.7 and/or Python 3.3: python2.7 ez_setup.py python3.3 ez_setup.py
# Now install pip using the newly installed setuptools: easy_install-2.7 pip easy_install-3.3 pip
# With pip installed you can now do things like this: pip2.7 install [packagename] pip2.7 install --upgrade [packagename] pip2.7 uninstall [packagename] |
The packages will end up in /usr/local/lib/pythonX.Y/site-packages/ (where X.Y is the Python version).
What’s next?
If you are using Python 2.7 I strongly recommend that you install virtualenv and learn how to use it. Virtualenv makes it possible to create isolated Python environments. If you are using Python 3.3 then you don’t need virtualenv because that functionality is already built in.
Each isolated Python environment (also called sandbox) can have its own Python version and packages. This is very useful when you work on multiple projects or on different versions of the same project.
Create your first isolated Python environment
# Install virtualenv for Python 2.7 and create a sandbox called my27project: pip2.7 install virtualenv virtualenv-2.7 my27project # Use the built-in pyvenv program in Python 3.3 to create a sandbox called my33project: pyvenv-3.3 my33project # Check the system Python interpreter version: python --version # This will show Python 2.6.6 # Activate the my27project sandbox and check the version of the default Python interpreter in it: source my27project/bin/activate python --version # This will show Python 2.7.6 deactivate # Activate the my33project sandbox and check the version of the default Python interpreter in it: source my33project/bin/activate python --version # This will show Python 3.3.5 deactivate
| 1 2 3 4 5 6 7 8 9 10 11 12 13 14 15 16 17 18 19 20 21 22 |
# Install virtualenv for Python 2.7 and create a sandbox called my27project: pip2.7 install virtualenv virtualenv-2.7 my27project
# Use the built-in pyvenv program in Python 3.3 to create a sandbox called my33project: pyvenv-3.3 my33project
# Check the system Python interpreter version: python --version # This will show Python 2.6.6
# Activate the my27project sandbox and check the version of the default Python interpreter in it: source my27project/bin/activate python --version # This will show Python 2.7.6 deactivate
# Activate the my33project sandbox and check the version of the default Python interpreter in it: source my33project/bin/activate python --version # This will show Python 3.3.5 deactivate |
When you use virtualenv to create a sandbox it will automatically install setuptools and pip for you inside the sandbox. If you use pyvenv then you must do it yourself. You can reuse the ez_setup.py file you downloaded earlier and just run it after you activate your new sandbox.
-----------------
error while loading shared libraries: xxx.so.0:cannot open shared object file: No such file or directory
那就表示系統不知道 xxx.so 放在哪個目錄下。
這個時候就要在 /etc/ld.so.conf 中加入 xxx.so 所在的目錄。
一般而言,有很多 so 檔會在 /usr/local/lib 這個目錄下,所以在 /etc/ld.so.conf 中加入 /usr/local/lib 這一行,可以解決此問題。
將 /etc/ld.so.conf 存檔後,還要執行「/sbin/ldconfig –v」來更新一下才會生效
/etc/ld.so.conf:
这个文件记录了编译时使用的动态链接库的路径。
默认情况下,编译器只会使用 /lib 和 /usr/lib 这两个目录下的库文件
如果你安装了某些库,没有指定 --prefix=/usr 这样 lib 库就装到了 /usr/local 下,而又没有在 /etc/ld.so.conf 中添加 /usr/local/lib,就会报错了
ldconfig 是个什么东东吧 :
它是一个程序,通常它位于 /sbin 下,是 root 用户使用的东东。具体作用及用法可以 man ldconfig 查到
简单的说,它的作用就是将 /etc/ld.so.conf 列出的路径下的库文件 缓存到 /etc/ld.so.cache 以供使用
因此当安装完一些库文件,(例如刚安装好 glib),或者修改 ld.so.conf 增加新的库路径后,需要运行一下 /sbin/ldconfig
使所有的库文件都被缓存到 ld.so.cache 中,如果没做,即使库文件明明就在 /usr/lib 下的,也是不会被使用的,结果
编译过程中抱错,缺少 xxx 库。
今天关于Python-控制Tor和python做控制的介绍到此结束,谢谢您的阅读,有关CentOS7 安装 Python3.x,Python2 和 Python3 共存、centos默认python2.6升级到python2.7,并用pip方式安装python工具包、Connector/Python Python连接mysql及中文显示问题、How to install Python 2.7 and Python 3.3 on CentOS等更多相关知识的信息可以在本站进行查询。
本文标签:


