本文将带您了解关于docker4种网络最佳实战--摘自https://www.cnblogs.com/iiiiher/p/8047114.html的新内容,同时我们还将为您解释docker的四种网络方
本文将带您了解关于docker4种网络最佳实战 --摘自https://www.cnblogs.com/iiiiher/p/8047114.html的新内容,同时我们还将为您解释docker的四种网络方式的相关知识,另外,我们还将为您提供关于ant常用的内置 task转自https://www.cnblogs.com/baicj/archive/2015/12/21/5063608.html、c# networkcomms 3.0 实现模拟登陆总结 转载 https://www.cnblogs.com/zuochanzi/p/7039636.html、C# 导出 Excel 的各种方法总结 转自https://www.cnblogs.com/Brambling/p/6854731.html、Centos7创建CA和申请证书 转自https://www.cnblogs.com/mingzhang/p/8949541.html的实用信息。
本文目录一览:- docker4种网络最佳实战 --摘自https://www.cnblogs.com/iiiiher/p/8047114.html(docker的四种网络方式)
- ant常用的内置 task转自https://www.cnblogs.com/baicj/archive/2015/12/21/5063608.html
- c# networkcomms 3.0 实现模拟登陆总结 转载 https://www.cnblogs.com/zuochanzi/p/7039636.html
- C# 导出 Excel 的各种方法总结 转自https://www.cnblogs.com/Brambling/p/6854731.html
- Centos7创建CA和申请证书 转自https://www.cnblogs.com/mingzhang/p/8949541.html
")
docker4种网络最佳实战 --摘自https://www.cnblogs.com/iiiiher/p/8047114.html(docker的四种网络方式)
考: http://hicu.be/docker-container-network-types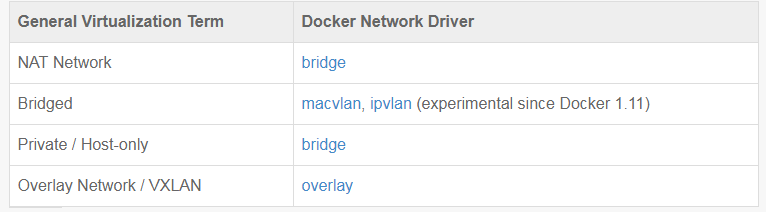
docker默认3中网络类型
参考: https://docs.docker.com/engine/userguide/networking/
$ docker network ls
NETWORK ID          NAME                DRIVER
7fca4eb8c647        bridge              bridge
9f904ee27bf5        none                null
cf03ee007fb4 host host- bridge 桥接到docker0网卡
- host 和宿主机共享网卡
- none 无网卡
手动创建net
手动创建net的类型是 bridge模式
docker network create neta
$ docker network list
NETWORK ID          NAME                DRIVER              SCOPE 19856a1ad2b4 neta bridge local
最佳实践
- 分别启动b1 b2(neta)
docker run -itd --name=b1 busybox
docker run -itd --name=b2 --net=neta busybox

- 查看他们ip
docker exec -it b1 ip ad
docker exec -it b2 ip ad

- b2 ping b1 不通
docker exec -it b2 ping 172.17.0.2 - 将b1连到neta,再次ping通了 docker network connect neta b1 docker exec -it b2 ping 172.18.0.3 - 查看b1,发现b1多了一块网卡 $ docker exec -it b1 ip ad 1: lo: <LOOPBACK,UP,LOWER_UP> mtu 65536 qdisc noqueue qlen 1 link/loopback 00:00:00:00:00:00 brd 00:00:00:00:00:00 inet 127.0.0.1/8 scope host lo valid_lft forever preferred_lft forever 10: eth0@if11: <BROADCAST,MULTICAST,UP,LOWER_UP,M-DOWN> mtu 1500 qdisc noqueue link/ether 02:42:ac:11:00:02 brd ff:ff:ff:ff:ff:ff inet 172.17.0.2/16 scope global eth0 valid_lft forever preferred_lft forever 14: eth1@if15: <BROADCAST,MULTICAST,UP,LOWER_UP,M-DOWN> mtu 1500 qdisc noqueue link/ether 02:42:ac:12:00:03 brd ff:ff:ff:ff:ff:ff inet 172.18.0.3/16 scope global eth1 valid_lft forever preferred_lft forever - 自定义的网卡自带dns $ docker exec -it b1 hostname 655e40ab3eed $ docker exec -it b2 hostname 3c821d2e8b05 $ docker exec -it b2 ping 655e40ab3eed PING 655e40ab3eed (172.18.0.3): 56 data bytes 64 bytes from 172.18.0.3: seq=0 ttl=64 time=0.085 ms 64 bytes from 172.18.0.3: seq=1 ttl=64 time=0.129 ms - 默认dns是 docker exec -it b2 cat /etc/resolv.conf nameserver 127.0.0.11
共享另一个容器的网卡
- 启动b1
$ docker run -itd --name b1 busybox

- 启动b2,使之使用b1的网卡
$ docker run -itd --net=container:b1 --name b2 busybox


- 查看b1和b2的网卡 发现ip和mac一致
$ docker exec b1 ip ad
4: eth0@if5: <BROADCAST,MULTICAST,UP,LOWER_UP,M-DOWN> mtu 1500 qdisc noqueue link/ether 02:42:ac:11:00:02 brd ff:ff:ff:ff:ff:ff inet 172.17.0.2/16 scope global eth0 valid_lft forever preferred_lft forever $ docker exec b2 ip ad 4: eth0@if5: <BROADCAST,MULTICAST,UP,LOWER_UP,M-DOWN> mtu 1500 qdisc noqueue link/ether 02:42:ac:11:00:02 brd ff:ff:ff:ff:ff:ff inet 172.17.0.2/16 scope global eth0 valid_lft forever preferred_lft forever- dokcer cnm网络模式


- 网络插件
docker 原生的 driver 包括 none、bridge、overlay 和 macvlan
第三方 driver 包括 flannel、weave、calico 等。

-
加参数配置

-
docker和k8s的对比

docker网卡桥接

ant常用的内置 task转自https://www.cnblogs.com/baicj/archive/2015/12/21/5063608.html
-
ant
例如:
<target name="callProjectB">
  <echo message="In projectA calling projectB"/>
    <ant antfile="subfile/projectB.xml" />
</target>
说明:项目A通过ant命令执行项目B
属性:
(1) antfile : 指定要执行的构建文件名称,可以包含路径信息。
(2) dir : 指定构建文件所在的目录,相当于指定了要执行的构建文件的basedir属性,如果dir属性没有设置,会以当前构建文件的根目录作为ant任务的根目录。
(3) Target:指定要执行的构建文件要执行的target。例如
 View Code
(4) output :指定ant工具执行时的信息输出,可定位到控制台或者文件中,当定位到文件中相当于在命令行指定了-logfile filename。
<ant antfile="subfile/projectB.xml" output="out.log"/>(5) inheritAll:如果设定为true,那么被调用的构建文件的project元素中可使用当前project中的reference任务。Reference任务的作用是吧当前属性复制到被调用的ant project中使用,reference任务包含两个属性:
refid :代表当前project中的属性id。
Torefid :用于指定在被调用的project中的引用id。
例如:
<reference refid="path1" torefid="path2"/> <!-- // 把当前project中的path1属性传递给被调用的project中使用, 在被调用project中通过path2引用这个属性。 -- >-
antcall : 执行过程中调用并执行其他target
例如:

<target name="targetA">

         <echo message="In targetA calling targetB"/>

         <antcall target="targetB" >

         </antcall>

         <echo message="After call targetB" />

</target>
属性:
(1) target:在AntCall任务中target属性的作用是指定要被调用执行的target,通过名称指定这个target属性是必需的。值得注意的是,当通过AntCall任务调用的target存在依赖的target(depends中指定了target),则depends属性中被指定的target也会被执行。
(2) inheritAll :用于指定是否继承当前的属性。默认时为true,代表被调用的target可使用这些属性。
(3) inheritRefs :用于指定是否覆盖reference属性或者是否建立一个对当前reference属性的引用。在默认的情况下,AntCall任务不会覆盖reference属性,除非把inheritRefs属性设为true。默认时inheritRefs属性为false。
例如:利用AntCall Task实现target间调用时传递参数的实例 当需要从一个target传递参数到被调用的target时,可以使用<param> 类型进行传递。当然也可以在target中定义property来实现,与Java中的方法调用时传递参数相似
 View Code
通过property指定和通过AntCall中的param指定的属性都传递到targetB中,对于param类型只有两个属性:name和value。由于AntCall任务中的inheritAll属性默认时为true,所以property能被targetB引用。如果targetB中也定义了相同的property,那么 可以通过设置inheritRefs属性和reference类型进行覆盖。
-
Apply/ExecOn : ant工具直接执行系统命令
Apply/ExecOn 任务的作用是,通过Ant工具直接执行系统使命。通过这个task执行的命令依赖于操作系统,而且只能在Ant支持的操作系统下执行。Ant支持Windows、Linux、UNIX、OS/2 Warp、Novell Netware 6和MacOS X。
属性:
(1) executable :用于指定要执行的命令,不带命令行参数,这个属性是必需的。
(2) dest :用于指定命令执行时目标文件的存放位置。
(3) spawn :用于指定是否在执行命令时产生输出信息。默认为false代表输出日志信息。如果指定了spawn属性为true,Ant将不会产生这个命令的日志输出。
(4) dir :用于指定执行命令所在的目录,在此目录下执行这个命令。
(5) relative:用于指定命令是否支持相对路径。默认为false,不支持相对路径,相对于当前根目录或dest属性设定的目录。
(6) forwardslash:用于设定文件路径是否支持斜线分隔符,尽管有些操作系统支持其他的分隔符。默认时为false,如果操作系统的分隔符为斜线,那么这个属性将被忽略。
(7) os:列出允许执行这个命令的操作系统。
(8) output:指定把命令行执行的输出重定向到一个输出文件。如果错误信息没有重定向到特定文件,错误信息则将输出到这个文件中。
(9) error :指定一个文件用于接收错误的输出信息。从Ant 1.6后提供了这个 属性。
(10) logError:这个属性用于指定把错误的日志输出到Ant工具的日志信息中,也可以通过error属性指定错误的输出文件。
(11) append:指定是否可以输出到一个存在的文件或者覆盖存在的文件,默认为false。
(12) outputproperty:指定输出定向到的属性的名字,在属性中可定义一个文件,这样就可以把输出信息输出到文件中。
(13) errorproperty:用于指定把错误信息输出到的属性的名字。
(14) input:指定一个文件,从这个文件中读取属性,在执行命令时可以引用得到这些属性。
(15) inputstring:用于把inputstring属性指定的字符串传递给执行的命令。
(16) resultproperty:这个属性用于存放命令执行后所返回的结果。
(17) timeout:设定一个时间,如果这段时间内命令没执行完毕,则这个命令会被中断。
(18) failonerror:这个属性用于指定是否出错时命令终止。如果属性取值为true,那么在执行的命令退出的同时返回一个不为0的代码,则构建进程将会中止。
(19) failifexecutionfails :用于指定当不能执行程序时是否中止构建命令的执行,默认为true。
(20) skipemptyfilesets:当指定的目录中没有文件,则构建命令将不会被执行。
(21) parallel:如果属性为true,则构建命令只执行一次,并把附加的文件作为命令参数。如果为false则每一个附加的文件都会执行一次这个命令。默认为false。
(22) type :指定传给要执行的命令的参数类型,可为file(文件)、dir(目录)、path(路径)。默认为file。
(23) newenvironment:如果当前的环境变量被声明,将不传递旧的环境变量,默认为false。
(24) vmlauncher :默认为true,通过Java虚拟机的特性来执行构件文件。如果为false,则通过操作系统本身的脚本功能去执行。
(25) resolveExecutable:默认为false,如果设为true,那么命令会在project的根目录下执行。如果在UNIX或Linux下只允许用户在自己的路径下执行这个命令,那么要把这个属性设为false。
(26) maxparallel :设定一个最大的平行值,用于指定一次执行的源文件的最大数目。如果设为<0代表没有限制。默认为没有限制。
(27) addsourcefile:是否自动添加源文件名到执行的命令中,默认为true。
(28) verbose :是否输出命令执行时的概要信息,默认为false不输出。
(29) ignoremissing :是否忽略不存在的文件,默认为true。
(30) force :是否通过timestamp来对target文件进行对比。默认为false。
Apply/ExecOn Task可使用的参数
执行Apply/ExecOn 任务时可以通过Ant提供的一些内置类型来简化操作,类似于参数传递的作用。可使用的Ant类型有:
● FileSet:可以通过<fileset>元素来设定文件集合,在任务中引用这个FileSet。
● FileList:可以通过一个或多个FileList来指定文件列表,然后在Apply/ExecOn Task中进行引用。
● Dirset:通过Dirset定义目录集合,然后在Apply/ExecOn Task中进行引用。
● Arg:可通过<arg>类型指定命令行参数,然后在Apply/ExecOn Task中使用。
● Mapper:通过Mapper类型可以指定dest属性的文件的映射关系。
● Srcfile:通过参数指定源文件,在<arg>的后面使用,<arg>参数的值为Srcfile指定的源文件。
● Targetfile:与Srcfile作用相似,用于指定目录文件的参数。
● Env:指定一个环境变量,并在命令行中传递,以<env>类型的形式使用。
通过Apply/ExecOn Task执行Linux下ls命令 (显示文件信息)的实例。 在Linux系统中,可以通过ls的shell命令显示文件的详细信息。用Ant工具也可以执行ls这个功能。具体的例子如下:

<apply executable="ls">

  <arg value="-l"/>

  <fileset dir="/tmp">

    <patternset>

        <exclude name="**/*.txt"/>

    </patternset>

  </fileset>

  <fileset refid="other.files"/>

</apply>
这个例子的作用是:调用ls–l的shell命令,列出/tmp目录下的所有非.txt文件和所有id为other.files的FileSet类型所指定的文件的详细信息。
使用Mapper、Srcfile类型的实例 下面是一个通过Apply/ExecOn任务使用Mapper和Srcfile类型的例子,具体内容如下:

<apply executable="cc" dest="src/C" parallel="false">

    <arg value="-c"/>

    <arg value="-o"/>

    <targetfile/>

    <srcfile/>

           <fileset dir="src/C" includes="*.c"/>

    <mapper type="glob" from="*.c" to="*.o"/>

</apply>
这个例子的作用是:通过Mapper指定为每个比.o文件新的.c文件执行cc –c –o targetfile sourcefile命令。在这个命令中用.o文件的名称替换targetfile(目标文件),用.c文件的名称替换sourcefile
-
Chmod Task : 改变Linux/Unix系统的文件权限
在UNIX和Linux系统下要改变文件的权限,可以使用chmod的shell命令。例如:chmod 777 abc.txt。设置abc.txt文件的权限为“所有人有对文件操作的所有权限”。在Ant工具中可以通过Chmod任务方便地实现这些功能。在Chmod任务中可以引用FileSet和DirSet类型指定的文件集合和目录集合。
Chmod Task属性及功能 Chmod任务包括如下属性:
(1)file:用于指定即将被改变权限的文件名称。
(2)dir:用于指定这个目录下的所有文件的权限将要被改变。在Chmod任务中dir属性和file属性两者必须选择其中一个。
(3)perm:用于指定文件的新权限。
(4)includes:用于指定一个或多个文件的匹配模式,只有符合这些模式的文件的权限才会被改变。可用逗号符或空格符进行分隔。
(5)excludes:与includes属性的作用正好相反,用于指定一个或多个文件匹配模式,只有不符合这些模式的文件的权限才会被改变。可用逗号符或空格符进行分隔。
(6)defaultexcludes:用于指定是否不包括Ant工具默认不包含的文件匹配模式。可取值为yes或no。忽略此属性时代表不包含默认的不包含的文件模式。 Ant工具默认不包含的文件模式有:**/*~,**/#*#,**/.#*,**/%*%,**/._*, **/CVS,**/CVS/**,**/.cvsignore,**/SCCS,**/SCCS/**,**/vssver.scc,**/.svn,**/.svn/**,**/.DS_Store。 (7)parallel:用于指定是否为每个包含的文件独立执行Chmod命令,默认为true。
(8)type:可取值为file、dir或both。取值file表示只改变文件的权限;若取值dir表示只改变目录的权限;若取值both则代表改变文件和目录两者的权限。
(9)maxparallel:用于指定一次执行Chmod命令的最大值。设为<=0代表不限制,默认为不限制。
(10)verbose:用于指定在执行命令后是否输出这个命令的执行信息。默认为false不输出。
通过Ant改变Linux/UNIX文件和目录权限的例子
在Linux和UNIX下通常通过Chmod命令来改变文件或目录的权限,Ant工具的Chmod任务也能实现同样的功能。例如,改变start.sh文件的权限让所有人对此文件具有读和执行的权限。 <chmod file="${dist}/start.sh" perm="ugo+rx"/> 所有用户对${dist}/start.sh文件都具有读和执行的权限。如果只有文件的所有者才具有读、写和执行权限,那么可以编写以下程序:
<chmod file="${dist}/start.sh" perm="o+rx"/>
当然也可以用数据来表示权限,上面的程序可改为: <chmod file="${dist}/start.sh" perm="700"/> <!-- //与上面程序作用相同, 文件的所有者才具有读、写和执行的权限 --> 当然也可以通过FileSet和DirSet类型实现更复杂的功能,例如:

<chmod perm="go-rwx" type="file">

    <fileset dir="/web">

        <include name="**/*.cgi"/>

        <include name="**/*.old"/>

    </fileset>

    <dirset dir="/web">

        <include name="**/private_*"/>

    </dirset>

</chmod>
这个例子的作用是让不是文件的所有者可以访问cgi脚本。文件的权限将会改变的文件有:所有/web目录下的.cgi和.old文件,所有以private_*开头的文件或目录名以private_*开头的目录下的文件。
-
Copy Task : 把一个或者多个文件复制到指定的目录下
但要注意的是,如果目标目录下具有同名的文件,那么只有当源文件相对于目标文件更新时,Ant工具才会复制这个文件。在Copy任务中可以使用FileSet类型来定义文件集合。
Copy Task的属性及功能 Copy 任务具有以下属性:
(1)file:用于指定要复制的源文件。
(2)preservelastmodified:作用是使得复制后的文件与源文件的最后修改时间相同。默认为false。
(3)tofile:用于指定要复制到的文件。
(4)todir:用于指定要复制到的目标目录。todir和tofile只能使用其中一个属性。
(5)overwrite:用于指定是否需要覆盖目录和文件,不管文件是否比源文件新,都会覆盖。默认为false。
(6)filtering:用于指定在复制时是否使用构件文件的全局过滤器对文件进行过滤。默认为false。
(7)flatten:用于指定是否需要复制目录,如果为true代表把所有的文件复制到todir属性设定的目录下。默认为false,复制目录。
(8)includeEmptyDirs:用于指定是否复制空目录。默认为true。
(9)failonerror:用于指定当遇到错误时是否停止执行。默认为true。
(10)verbose:用于指定当复制文件时是否记录日志信息。
(11)encoding:用于设定复制文件时的编码或文件过滤器使用的编码方式。默认时使用Java虚拟机的编码方式。
(12)outputencoding:指定写文件时的编码方式。默认时使用Java虚拟机的编码方式。 (13)enablemultiplemappings:用于设定是否允许多个映射。默认为false。
(14)granularity:用于指定一个文件修改时间的毫秒数据的允许误差。因为不是所有的文件系统的修改时间都是精确到毫秒数。默认时为0,如果为DOS系统则为2。
通过Copy Task实现文件和目录复制功能实例
不管是对程序进行打包还是一般的文件操作,基本上都离不开复制功能。通过Ant工具的Copy任务可以让程序在Windows和Linux/UNIX下对文件和目录进行复制操作。
例如:
(1)对单个文件进行复制:
<copy file="myfile.txt" tofile="mycopy.txt"/>这个例子的作用是在当前目录复制myfile.txt,并把复制的文件命名为mycopy.txt。当需要把文件复制到别外的目录时可以这样编写:
-
-
<copy file="myfile.txt" todir="../some/other/dir"/>这个例子的作用是把文件复制到与当前目录同级的some目录的/other/dir子目录下。这里“..”代表相对路径(当前目录的上一级目录)。
(2)对文件目录进行复制:
<copy todir="../new/dir">
    <fileset dir="src_dir"/>
</copy>
这个例子的作用是把src_dir目录复制到../new/dir目录下。有时对文件进行复制时需要对文件进行备份。
下面举一个复制文件时对文件进行备份的例子。
 View Code
这个例子的作用是把src_dir目录及其子目录下所有非Java文件复制到../backup/dir目录下,并重命名为bak文件,以作备份。
在执行Copy Task时使用文件过滤的实例
下面是一个复制文件的同时替换文件中的特殊符号的例子:
 View Code
这个例子的作用是把src_dir目录下的所有文件复制到../backup/dir目录,并在所有文件中查找并替换@TITLE@为Foo Bar。当要进行新产品发布时通过需要替换文件中的版本信息和时间信息。 说明:在Ant工具中还提供了copydir和copyfile这两个特定的任务,分别用于对目录和文件进行复制。但自从有了Copy任务后,这两个任务已过期,不建议再使用,应该统一使用Copy任务。
-
-
Echo Task : 输出系统信息
Echo任务的作用是根据logger(日志)或listener(监听器)的级别输出相应的信息。相当于Java中的System.out来输出信息。
Echo任务包含以下属性:
(1)message:用于定义要输出的信息。这个属性是必需的。
(2)file:用于定义一个文件。这个文件用于接收message定义的输出信息,当设定为把信息输出到接收文件时才起作用。
(3)append:用于指定信息是否输出到指定的文件。默认为false。
(4)level:用于指定这个信息的级别。可取值为error,warning,info,verbose或debug。 Echo任务的使用比较简单。例如定义一个信息的输出,代码如下:
<echo message=" This is a simple message,out print by echo task! " />当需要把信息输出到具体的文件中时,可以这样编写Echo Task:
<echo message=" This is a simple message,out print by echo task! " file="/logs/messge.log" append="true"/>这个例子的作用是,把信息输出到/logs/message.log文件中,而不是直接输出到命令行。
-
Mkdir Task : 创建目录。
可用于Windows或Linux下建立目录。一个有趣的地方是,这个命令在Linux和Windows下相同,建立一个目录都可以通过Mkdir+目录名称来实现。Mkdir 任务只有一个属性dir,dir属性用于指定要创建的目录名称。可为相对路径也可以为绝对路径。 Mkdir的用法比较简单,例如在当前目录下创建一个名为dist的子目录(用于项目发布):
<property name="dist" value="dist" /> <mkdir dir="${dist}"/>虽然Mkdir任务相对简单,但Mkdir很有用,特别在创建文件前对目录进行验证。
-
Move Task : 移动文件或目录。
Move 任务用于移动文件和目录,默认时Move任务会覆盖目标文件或目录(如果目标文件或目录存在)。当关闭overwrite时,Move任务只会移动源文件比目标文件新的文件,或者目标文件不存在时才移动。在Move任务中可以引用FileSet类型。
Move Task的属性及功能 Move 任务具有以下属性:
(1)file:用于指定要移动的文件或目录。
(2)preservelastmodified:用于指定移动后的文件的最后修改时间与源文件相同。
(3)tofile:作用是指定移动后的文件新名称和位置。
(4)todir:作用是指定文件目录的目标位置。
(5)overwrite:用于设定当源文件的最后修改时间大于目标文件的最后修改时间时,是否用源文件覆盖目标文件。默认为true。
(6)filtering:用于定义在移动时是否允许符号过滤。
(7)flatten:作用是忽略目录结构。把各层目录下的文件移动到同一个目录下。默认为false。
(8)includeEmptyDirs:用于指定在移动时是否忽略空目录。默认为false。
(9)failonerror:用于定义当出现错误时是忽略并继续执行,还是当遇到错误时就停止执行命令。
(10)verbose:用于指定当文件移动时是否输出日志信息。
(11)encoding:用于定义在移动文件时使用的过滤器的编码方式。
(12)outputencoding:用于定义在写文件时使用的编码方式。
(13)enablemultiplemapping:用于指定是否可以使用多个映射。默认时只使用一个 映射。
(14)granularity:用于指定一个文件修改时间的毫秒数据的允许误差。因为不是所有的文件系统的修改时间都精确到毫秒数。默认时为0,如果是DOS系统则为2。
使用Move Task实现移动文件和目录功能的实例
移动单个文件的实例:
<move file="file.orig" tofile="file.moved"/>这个例子的作用是重命名file.org文件为file.moved。把文件移动到目录的例子如下:
<move file="file.orig" todir="dir/to/move/to"/>
这个例子的作用是把文件file.org移动到dir/to/move/to目录下。
移动目录的实例:
<move todir="new/dir/to/move/to">
    <fileset dir="src/dir"/>
</move>
这个例子的作用是把src/dir目录移动到new/dir/to/move/to目录。在Ant 1.6.3版本后,可以使用以下file属性来指定目录从而实现上面目录移动的功能: <move file="src/dir" tofile="new/dir/to/move/to"/>
通过Mapper功能对文件进行备份的例子:

<move todir="my/src/dir" includeemptydirs="false">
    <fileset dir="my/src/dir">
        <exclude name="**/*.bak"/>
    </fileset>
    <mapper type="glob" from="*" to="*.bak"/>
</move>
这个实例的作用是把my/src/dir目录下的所有文件重命名为.bak的备份文件(.bak文件除外)。
-
Zip Task : 创建ZIP文件。
在Zip任务里可以直接嵌套使用FileSet类型、include类型、exclude类型等,在这些文件类型中还可以对文件进行过滤。
Zip任务具有以下属性,用于描述将要打包为zip的文件和目录等:
(1)destfile:用于指定将要打包的zip文件。
(2)zipfile:也用于指定要打包的zip文件,但已不建议使用,应该使用destfile属性来代替。zipfile属性和destfile属性两者必须选择其一。
(3)basedir:用于指定打包zip文件的目录。
(4)compress:用于指定是否使用压缩的形式来保存数据。默认为true(对数据进行压缩)。
(5)keepcompression:用于指定已压缩的zip文件保持原先的压缩格式。默认为false。 (6)encoding:用于指定Zip任务里的文件名称的编码方式。默认时采用操作系统的编码方式。
(7)filesonly:用于指定是否在Zip任务中只存储文件。默认为false。
(8)includes:用于指定一个或多个在Zip任务中要包含的文件。可以使用逗号或空格符进行分隔。当这个属性被忽略时代表zip将包含所有文件。
(9)includesfile:用于指定zip文件中要包含的文件的名称。
(10)excludes:用于指定一个或多个在Zip任务中不被包含的文件。可以使用逗号或空格符进行分隔。当这个属性被忽略时代表Zip任务将包含所有文件。
(11)excludesfile:用于指定在Zip任务中不被包含的文件的名称。
(12)defaultexcludes:用于定义是否在Zip中不包含Ant默认要排除的文件模式。可取值为yes或no。忽略时代表使用默认的排除文件模式,将不包含符合这些模式的文件。 (13)update:用于定义是否更新或覆盖目标文件,当目标文件已存在时。默认为false。 (14)whenempty:用于指定当没有满足打包条件的文件时的处理方式。可取值为fail、skip和create。fail代表创建zip失败,skip代表忽略不处理,create代表依然创建zip文件。默认为skip。
(15)duplicate:定义当出现重复文件时的处理方式。可取值add、preserve和fail。add代表依然添加(覆盖)文件,preserve代表不打包重复文件,fail代表将打包失败。默认为add。
(16)roundup:用于指定打包zip文件时文件的修改时间是否采用下一个连续的秒数。默认为true。
(17)comment:作用是在zip文件中加上注释。
使用Zip Task打包zip文件的实例 在Zip任务中可以使用ZipFileSet类型定义一个或多个zip格式的文件集合,然后在Zip任务中引用。
(1) 打包zip文件的实例,如下:
<zip destfile="${dist}/manual.zip" basedir="htdocs/manual" includes="api/**/*.html" excludes="**/todo.html" />这个实例的作用是打包htdocs/manual目录下的文件,并且命名为manual.zip。在这个zip文件中只包含htdocs/manual/api目录或其子目录下的所有.html文件,但不包含其中文件名为todo.html的文件。
以下是一个使用ant构建项目的完整的例子:
<!-- 项目名称Cesium,默认targetcombine -->
<project name="Cesium" default="combine">
<!-- target名称build -->
<target name="build" description="A developer build that prepares the source tree for use as standard AMD modules.">
<!-- 新建文件夹任务${buildDirectory}" = ./build -->
<mkdir dir="${buildDirectory}" />
<!--自定义任务,把glsl转换为js -->
<glslToJavascript minify="${build.minification}" minifystatefile="${buildDirectory}/minifyShaders.state">
<!--glsl文件目录,${shadersDirectory}目录下的所有glsl文件 -->
<glslfiles dir="${shadersDirectory}" includes="**/*.glsl" />
<!--${shadersDirectory}目录下存在的js文件,不包括.profile.js -->
<existingjsfiles dir="${shadersDirectory}" includes="**/*.js" excludes="*.profile.js" />
</glslToJavascript>
<!--自定义任务,创建CesiumJs,输出到${sourceDirectory}/Cesium.js -->
<createCesiumJs output="${sourceDirectory}/Cesium.js">
<!--源文件是以cesiumJsFiles为id的定义的fileset -->
<sourcefiles refid="cesiumJsFiles" />
</createCesiumJs>
<!--自定义任务,创建SpecList,输出到${specsDirectory}/SpecList.js -->
<createSpecList output="${specsDirectory}/SpecList.js">
<!--${specsDirectory}目录下所有js文件-->
<specs dir="${specsDirectory}" includes="**/*.js" excludes="*.js" />
</createSpecList>
<!--条件判断,如果${build.debugUnminified}的值为true,那么给exclude.development.gallery属性赋值为**/development/*.html-->
<condition property="exclude.development.gallery" value="**/development/*.html">
<istrue value="${build.debugUnminified}" />
</condition>
<!--自定义任务,创建GalleryList,输出到${galleryDirectory}/gallery-index.js -->
<createGalleryList output="${galleryDirectory}/gallery-index.js">
<!--根据上面的condition的条件,过滤掉值为${exclude.development.gallery}的文件 -->
<demos dir="${galleryDirectory}" includes="**/*.html" excludes="${exclude.development.gallery}" />
</createGalleryList>
<!--自定义任务,创建SandcastleJsHintOptions,输出到${sandcastleDirectory}/jsHintOptions.js -->
<createSandcastleJsHintOptions output="${sandcastleDirectory}/jsHintOptions.js" jshintoptionspath="${jsHintOptionsPath}" />
</target>
<!-- target名称combine,依赖于build、combineJavaScript,先顺序执行这两个target在执行combine target -->
<target name="combine" depends="build,combineJavaScript" description="Combines all source files into a single stand-alone script." />
<!--target名称minify -->
<target name="minify" description="Combines all source files into a single stand-alone, minified script.">
<!--调用combine target,并将参数build.minification和值true传进去 -->
<antcall target="combine">
<param name="build.minification" value="true" />
</antcall>
<!--调用minifyCSS target -->
<antcall target="minifyCSS" />
</target>
<!--target名称combineRelease -->
<target name="combineRelease" description="Combines all source files into a single stand-alone script with debugging code removed.">
<!--调用combine target,并将参数pragmas.debug和值false传进去 -->
<antcall target="combine">
<param name="pragmas.debug" value="false" />
</antcall>
</target>
<!--target名称minifyRelease -->
<target name="minifyRelease" description="Combines all source files into a single stand-alone, minified script with debugging code removed.">
<!--调用minify target,并将参数传进去 -->
<antcall target="minify">
<param name="pragmas.debug" value="false" />
</antcall>
</target>
<!--target名称release -->
<target name="release" description="A full release build that creates a shippable product, including building apps and generating documentation.">
<!--调用minifyRelease target -->
<antcall target="minifyRelease" />
<!--调用combine target,并传参 -->
<antcall target="combine">
<param name="build.debugUnminified" value="true" />
</antcall>
<!--调用generateDocumentation target -->
<antcall target="generateDocumentation" />
<!--调用buildApps target -->
<antcall target="buildApps" />
</target>
<!--target名称instrumentForCoverage,依赖于build target -->
<target name="instrumentForCoverage" depends="build" description="A debug build instrumented for JSCoverage (currently Windows only).">
<!--执行命令${jscoveragePath},参数为 ${sourceDirectory} ${instrumentedDirectory} -no-instrument=./ThirdParty-->
<exec executable="${jscoveragePath}">
<arg value="${sourceDirectory}" />
<arg value="${instrumentedDirectory}" />
<arg value="--no-instrument=./ThirdParty" />
</exec>
</target>
<!--target名称makeZipFile,依赖于release target -->
<target name="makeZipFile" depends="release" description="Builds zip files containing all release files.">
<!--执行内置系统任务zip,输出到Cesium-${version}.zip,以${basedir}为基准路径 -->
<zip destfile="Cesium-${version}.zip" basedir="${basedir}">
<!--定义了所有要打包的文件目录及文件和排除的文件 -->
<zipfileset dir="${buildDirectory}" prefix="Build">
<include name="Apps/**" />
<exclude name="Apps/TimelineDemo/**" />
<include name="Cesium/**" />
<include name="CesiumUnminified/**" />
<include name="Documentation/**" />
</zipfileset>
<include name="Apps/**" />
<exclude name="Apps/Sandcastle/gallery/development/**" />
<include name="Source/**" />
<include name="Specs/**" />
<include name="ThirdParty/**" />
<include name="logo.png" />
<include name="favicon.ico" />
<include name="server.js" />
<include name="package.json" />
<include name="LICENSE.md" />
<include name="CHANGES.md" />
<include name="README.md" />
<include name="web.config" />
<zipfileset file="index.release.html" fullpath="index.html" />
</zip>
</target>
<!--target名称clean -->
<target name="clean" description="Removes all generated build artifacts.">
<!--删除文件任务,包含空目录,遇到错误不停止任务,并定义了要删除的文件集合fileset -->
<delete includeEmptyDirs="true" failonerror="false">
<fileset dir="${sourceDirectory}" includes="Cesium.js" />
<fileset dir="${buildDirectory}" defaultexcludes="false" />
<fileset dir="${instrumentedDirectory}" defaultexcludes="false" />
<fileset dir="${shadersDirectory}" includes="**/*.js" excludes="*.profile.js" />
<fileset dir="${specsDirectory}" includes="SpecList.js" />
<fileset dir="${sandcastleDirectory}" includes="jsHintOptions.js" />
<fileset dir="${galleryDirectory}" includes="gallery-index.js" />
<fileset dir="." includes="Cesium-*.zip" />
</delete>
</target>
<!-- 定义全局属性,引用方式如:${build.minification},即false -->
<property name="build.minification" value="false" />
<property name="pragmas.debug" value="true" />
<property name="runServer.public" value="false" />
<property name="runServer.port" value="8080" />
<property name="version" value="1.13" />
<property name="sourceDirectory" location="Source" />
<property name="shadersDirectory" location="${sourceDirectory}/Shaders" />
<property name="examplesDirectory" location="Examples" />
<property name="sandcastleDirectory" location="Apps/Sandcastle" />
<property name="galleryDirectory" location="${sandcastleDirectory}/gallery" />
<property name="specsDirectory" location="Specs" />
<property name="toolsDirectory" location="Tools" />
<property name="tasksDirectory" location="${toolsDirectory}/buildTasks" />
<property name="thirdPartyDirectory" location="ThirdParty" />
<property name="requirejsPath" location="${thirdPartyDirectory}/requirejs-2.1.9" />
<property name="rjsPath" location="${requirejsPath}/r.js" />
<property name="rjsOptions" location="${toolsDirectory}/build.js" />
<property name="almondPath" location="${thirdPartyDirectory}/almond-0.2.6/almond.js" />
<property name="jscoveragePath" location="${toolsDirectory}/jscoverage-0.5.1/jscoverage.exe" />
<property name="rhinoJarPath" location="${toolsDirectory}/rhino-1.7R4/js.jar" />
<property name="documentationImagesDirectory" location="Documentation/Images" />
<property name="jsdoc3Directory" location="${toolsDirectory}/jsdoc3" />
<property name="webProxyDirectory" location="${toolsDirectory}/proxy" />
<property name="jsHintPath" location="${thirdPartyDirectory}/jshint-2.1.10/jshint.js" />
<property name="clocPath" location="${toolsDirectory}/cloc-1.60/cloc-1.60.pl" />
<property name="clocDefinitionsPath" location="${toolsDirectory}/cloc-1.60/cloc_definitions" />
<property name="jsHintOptionsPath" location=".jshintrc" />
<property name="nodePath" value="node" />
<property name="npmPath" value="npm" />
<!-- Outputs -->
<property name="buildDirectory" location="Build" />
<property name="buildOutputDirectory" location="${buildDirectory}/Cesium" />
<property name="unminifiedOutputDirectory" location="${buildDirectory}/CesiumUnminified" />
<property name="buildDocumentationDirectory" location="${buildDirectory}/Documentation" />
<property name="buildDocumentationImagesDirectory" location="${buildDocumentationDirectory}/images" />
<property name="instrumentedDirectory" location="Instrumented" />
<property name="buildStubsDirectory" location="${buildDirectory}/Stubs" />
<!-- 声明一组路径,并以相应的系统分隔符来分割,并命名id为javascriptClassPath,在后面用refid引用该路径-->
<path id="javascriptClassPath">
<pathelement path="${rhinoJarPath}" />
<pathelement path="${toolsDirectory}/bsf-2.4.0/bsf.jar" />
<pathelement path="${toolsDirectory}/commons-logging-1.1.1/commons-logging-1.1.1.jar" />
</path>
<!-- 定义一组文件-->
<union id="cesiumJsFiles">
<fileset dir="${sourceDirectory}">
<include name="**/*.js" />
<exclude name="*.js" />
<exclude name="Workers/**" />
<exclude name="ThirdParty/Workers/**" />
<exclude name="**/*.profile.js" />
</fileset>
<fileset dir="${sourceDirectory}">
<include name="Workers/createTaskProcessorWorker.js" />
</fileset>
</union>
<!-- 定义一组文件-->
<fileset dir="${sourceDirectory}" id="cesiumWorkersJsFileSet">
<include name="**/*.js" />
<exclude name="*.js" />
<exclude name="**/*.profile.js" />
</fileset>
<!-- 声明自定义任务glslToJavascript,语言为javascript,处理该任务的源文件是${tasksDirectory}/glslToJavaScript.js,使用manager作为引擎,引用之前定义的类路径javascriptClassPath作为classpath -->
<!-- 该任务的使用见target build-->
<scriptdef name="glslToJavascript" language="javascript" src="${tasksDirectory}/glslToJavaScript.js" manager="bsf" classpathref="javascriptClassPath" loaderref="javascript.loader">
<attribute name="minify" />
<attribute name="minifystatefile" />
<element name="glslfiles" type="fileset" />
<element name="existingjsfiles" type="fileset" />
</scriptdef>
<scriptdef name="createCesiumJs" language="javascript" src="${tasksDirectory}/createCesiumJs.js" manager="bsf" classpathref="javascriptClassPath" loaderref="javascript.loader">
<attribute name="output" />
<element name="sourcefiles" type="resources" />
</scriptdef>
<scriptdef name="createSpecList" language="javascript" src="${tasksDirectory}/createSpecList.js" manager="bsf" classpathref="javascriptClassPath" loaderref="javascript.loader">
<attribute name="output" />
<element name="specs" type="fileset" />
</scriptdef>
<scriptdef name="createGalleryList" language="javascript" src="${tasksDirectory}/createGalleryList.js" manager="bsf" classpathref="javascriptClassPath" loaderref="javascript.loader">
<attribute name="output" />
<element name="demos" type="fileset" />
</scriptdef>
<scriptdef name="createSandcastleJsHintOptions" language="javascript" src="${tasksDirectory}/createSandcastleJsHintOptions.js" manager="bsf" classpathref="javascriptClassPath" loaderref="javascript.loader">
<attribute name="output" />
<attribute name="jshintoptionspath" />
</scriptdef>
<scriptdef name="runJsHint" language="javascript" src="${tasksDirectory}/runJsHint.js" manager="bsf" classpathref="javascriptClassPath" loaderref="javascript.loader">
<attribute name="jshintpath" />
<attribute name="jshintoptionspath" />
<attribute name="sandcastlejshintoptionspath" />
<attribute name="failureproperty" />
<element name="sourcefiles" type="fileset" />
</scriptdef>
<scriptdef name="generateStubs" language="javascript" src="${tasksDirectory}/generateStubs.js" manager="bsf" classpathref="javascriptClassPath" loaderref="javascript.loader">
<attribute name="stuboutput" />
<attribute name="pathsoutput" />
<element name="sourcefiles" type="resources" />
</scriptdef>
<scriptdef name="sortRequires" language="javascript" src="${tasksDirectory}/sortRequires.js" manager="bsf" classpathref="javascriptClassPath" loaderref="javascript.loader">
<element name="sourcefiles" type="fileset" />
</scriptdef>
<!-- target名称jsHint(js语法检查),依赖于buildtarget-->
<target name="jsHint" depends="build" description="Runs JSHint on the entire source tree.">
<!-- 运行自定义任务runJsHint,由前面的scriptdef声明的,并给参数传值(指定jsHint路径、options路径、sandcastlejshintoptions路径)、源文件等-->
<runJsHint jshintpath="${jsHintPath}" jshintoptionspath="${jsHintOptionsPath}" sandcastlejshintoptionspath="${sandcastleDirectory}/jsHintOptions.js" failureproperty="jsHint.failure">
<sourcefiles dir="${basedir}">
<include name="Source/**/*.js" />
<exclude name="Source/Shaders/**" />
<exclude name="Source/ThirdParty/**" />
<exclude name="Source/Workers/cesiumWorkerBootstrapper.js" />
<include name="Apps/**/*.js" />
<include name="Apps/Sandcastle/gallery/*.html" />
<exclude name="Apps/Sandcastle/ThirdParty/**" />
<include name="Specs/**/*.js" />
<include name="Tools/buildTasks/**/*.js" />
</sourcefiles>
</runJsHint>
<fail if="jsHint.failure" message="JSHint failed!" />
</target>
<!-- target名称sortRequires-->
<target name="sortRequires" description="Sorts the list of requires in all source files">
<!-- 执行自定义任务sortRequires,并给元素sourecesfiles传值(指定源文件)-->
<sortRequires>
<sourcefiles dir="${basedir}">
<include name="Source/**/*.js" />
<exclude name="Source/Shaders/**" />
<exclude name="Source/ThirdParty/**" />
<exclude name="Source/Workers/cesiumWorkerBootstrapper.js" />
<exclude name="Source/copyrightHeader.js" />
<exclude name="Source/Workers/transferTypedArrayTest.js" />
<include name="Apps/**/*.js" />
<exclude name="Apps/Sandcastle/ThirdParty/**" />
<include name="Specs/**/*.js" />
<exclude name="Specs/SpecRunner.js" />
<exclude name="Specs/SpecList.js" />
<exclude name="Apps/Sandcastle/Sandcastle-client.js" />
<exclude name="Apps/Sandcastle/Sandcastle-header.js" />
<exclude name="Apps/Sandcastle/Sandcastle-warn.js" />
<exclude name="Apps/Sandcastle/gallery/gallery-index.js" />
<exclude name="Apps/Sandcastle/jsHintOptions.js" />
<exclude name="**/*.profile.js" />
</sourcefiles>
</sortRequires>
</target>
<target name="cloc" depends="build" description="Runs cloc to count lines of code for Source and Specs directories.">
<echo message="Source:" />
<apply executable="perl" parallel="true">
<arg value="${clocPath}" />
<arg value="--quiet" />
<arg value="--progress-rate=0" />
<arg value="--read-lang-def=${clocDefinitionsPath}" />
<arg value="Source/Core/" />
<arg value="Source/DataSources/" />
<arg value="Source/Renderer/" />
<arg value="Source/Scene/" />
<arg value="Source/Widgets/" />
<arg value="Source/Workers/" />
<fileset id="clocFileSet" dir="Source/">
<include name="Shaders/*.glsl" />
<include name="Shaders/**/*.glsl" />
<include name="main.js" />
</fileset>
</apply>
<echo message="${line.separator}Specs:" />
<exec executable="perl">
<arg value="${clocPath}" />
<arg value="--quiet" />
<arg value="--progress-rate=0" />
<arg value="--read-lang-def=${clocDefinitionsPath}" />
<arg value="Specs/" />
</exec>
</target>
<!-- target名称checkForNode,nodejs环境检查-->
<target name="checkForNode">
<!-- 执行node任务 node -version -->
<exec executable="${nodePath}" failonerror="false" failifexecutionfails="false" resultproperty="node.exec.result">
<arg value="--version" />
</exec>
<fail message="Node.js is required to run this part of the build. Install from http://nodejs.org/">
<condition>
<not>
<equals arg1="${node.exec.result}" arg2="0" />
</not>
</condition>
</fail>
</target>
<!-- 任务名称combineJavaScript.create,合并所有js源文件 -->
<target name="combineJavaScript.create">
<!-- 设置相对路径属性,因为r.js不能处理windows的绝对路径 -->
<property name="relativeAlmondPath" location="${almondPath}" relative="true" basedir="${sourceDirectory}" />
<property name="combineOutputDirectory" location="${buildDirectory}/combineOutput" />
<!-- 创建合并的js存放目录 -->
<mkdir dir="${combineOutputDirectory}" />
<property name="relativeCombineOutputDirectory" location="${combineOutputDirectory}" relative="true" basedir="${sourceDirectory}" />
<!-- 调用combineJavaScript.combineCesium target,创建合并的js源文件 -->
<antcall target="combineJavaScript.combineCesium" />
<!--调用自定义任务generateStubs,生成stubs,指定生成路径,和所需源文件等参数 -->
<mkdir dir="${buildStubsDirectory}" />
<generateStubs stuboutput="${buildStubsDirectory}/Cesium.js" pathsoutput="${buildStubsDirectory}/paths.js">
<sourcefiles refid="cesiumJsFiles" />
</generateStubs>
<!-- 调用combineJavaScript.combineCesiumWorkers target,合并所有web workers,因为web worker 源文件需要单独处理,不能和其他js文件合并在一起 -->
<antcall target="combineJavaScript.combineCesiumWorkers" />
<!-- 将合并的文件复制到相应目录下,并在文件头添加copyrightHeader.js文件的内容 -->
<copy todir="${outputDirectory}">
<fileset dir="${combineOutputDirectory}" />
<filterchain>
<concatfilter prepend="${sourceDirectory}/copyrightHeader.js" />
</filterchain>
</copy>
<!-- 删除中间文件夹${combineOutputDirectory} -->
<delete dir="${combineOutputDirectory}" />
<!-- 复制其他资源(css、texture等)到${outputDirectory},不包括空文件夹和glsl。json等文件 -->
<copy todir="${outputDirectory}" includeEmptyDirs="false">
<fileset dir="${sourceDirectory}">
<exclude name="**/*.js" />
<exclude name="**/*.glsl" />
<exclude name="**/.gitignore" />
<exclude name="**/package.json" />
</fileset>
</copy>
</target>
<!-- 合并js源文件target -->
<target name="combineJavaScript.combineCesium" depends="combineJavaScript.combineCesium.check" unless="no.combineCesium.create">
<!-- 执行node r.js -o optiongs.......(模块包裹wrap=true,css优化方式:标准压缩,js文件优化方式:不压缩代码,skipModuleInsertion避免不是用define来定义模块但是又用r.js来压缩代码产生的bug,压缩main.js的模块及其依赖项,输出到out指定目录) -->
<exec executable="${nodePath}" dir="${sourceDirectory}">
<arg value="${rjsPath}" />
<arg value="-o" />
<arg value="${rjsOptions}" />
<arg value="pragmas.debug=${pragmas.debug}" />
<arg value="optimize=${optimize}" />
<arg value="baseUrl=." />
<arg value="skipModuleInsertion=true" />
<arg value="name=${relativeAlmondPath}" />
<arg value="include=main" />
<arg value="out=${relativeCombineOutputDirectory}/Cesium.js" />
</exec>
</target>
<!-- 合并webwork源文件target -->
<target name="combineJavaScript.combineCesiumWorkers" depends="combineJavaScript.combineCesiumWorkers.check" unless="no.combineCesiumWorkers.create">
<!-- 创建独立的web worker文件node r.js -o............ -->
<apply executable="${nodePath}" dir="${sourceDirectory}" relative="true" force="true">
<arg value="${rjsPath}" />
<arg value="-o" />
<arg value="${rjsOptions}" />
<arg value="pragmas.debug=${pragmas.debug}" />
<arg value="optimize=${optimize}" />
<arg value="baseUrl=." />
<arg value="skipModuleInsertion=true" />
<arg value="wrap=false" />
<srcfile prefix="include=" />
<targetfile prefix="out=" />
<globmapper from="*" to="${relativeCombineOutputDirectory}/*.js" />
<mappedresources>
<fileset dir="${sourceDirectory}">
<include name="Workers/cesiumWorkerBootstrapper.js" />
<include name="Workers/transferTypedArrayTest.js" />
<include name="ThirdParty/Workers/*.js" />
</fileset>
<chainedmapper>
<globmapper from="*.js" to="*" />
</chainedmapper>
</mappedresources>
</apply>
<!-- 创建合并的worker文件 -->
<apply executable="${nodePath}" dir="${sourceDirectory}" relative="true" force="true">
<arg value="${rjsPath}" />
<arg value="-o" />
<arg value="${rjsOptions}" />
<arg value="optimize=${optimize}" />
<arg value="pragmas.debug=${pragmas.debug}" />
<arg value="baseUrl=." />
<srcfile prefix="name=Workers/" />
<targetfile prefix="out=" />
<globmapper from="*" to="${relativeCombineOutputDirectory}/Workers/*.js" />
<mappedresources>
<fileset dir="${sourceDirectory}/Workers">
<include name="*.js" />
<exclude name="*.profile.js" />
<exclude name="cesiumWorkerBootstrapper.js" />
<exclude name="transferTypedArrayTest.js" />
<exclude name="createTaskProcessorWorker.js" />
</fileset>
<chainedmapper>
<flattenmapper />
<globmapper from="*.js" to="*" />
</chainedmapper>
</mappedresources>
</apply>
</target>
<!-- 合并js文件前的检查,如果指定的目标文件${outputDirectory}/Cesium.js与源文件cesiumJsFiles的引用文件集相比有更新的时间错,则设置属性no.combineCesium.create-->
<target name="combineJavaScript.combineCesium.check">
<uptodate property="no.combineCesium.create" targetfile="${outputDirectory}/Cesium.js">
<srcresources refid="cesiumJsFiles" />
</uptodate>
</target>
<target name="combineJavaScript.combineCesiumWorkers.check">
<uptodate property="no.combineCesiumWorkers.create" targetfile="${outputDirectory}/Cesium.js">
<srcfiles refid="cesiumWorkersJsFileSet" />
</uptodate>
</target>
<!-- 合并js源文件,并且不压缩代码target-->
<target name="combineJavaScript.createUnminified">
<antcall target="combineJavaScript.create">
<param name="optimize" value="none" />
<param name="outputDirectory" value="${unminifiedOutputDirectory}" />
</antcall>
</target>
<!-- copy的条件:${build.minification}为true并且设置了build.debugUnminified,就设置属性combineJavascript.noCopy-->
<target name="combineJavascript.checkCopy">
<condition property="combineJavascript.noCopy">
<or>
<istrue value="${build.minification}" />
<isset property="build.debugUnminified" />
</or>
</condition>
</target>
<!-- 复制合并的js文件,依赖于copy检查target-->
<target name="combineJavaScript.copyUnminified" depends="combineJavascript.checkCopy" unless="${combineJavascript.noCopy}">
<copy todir="${buildOutputDirectory}">
<fileset dir="${unminifiedOutputDirectory}" />
</copy>
</target>
<!-- 合并js文件并且压缩代码,条件是${build.minification}为ture-->
<target name="combineJavaScript.createMinified" if="${build.minification}">
<!-- 调用combineJavaScript.create,传入参数uglify2(使用uglify2压缩代码),输出目录${buildOutputDirectory}-->
<antcall target="combineJavaScript.create">
<param name="optimize" value="uglify2" />
<param name="outputDirectory" value="${buildOutputDirectory}" />
</antcall>
</target>
<!-- 合并js文件,依赖于node环境检查、创建没有压缩的js代码,复制合并代码等target-->
<target name="combineJavaScript" depends="checkForNode,combineJavaScript.createUnminified,combineJavaScript.copyUnminified,combineJavaScript.createMinified" />
<!-- 压缩CSS。依赖于nodejs环境检查-->
<target name="minifyCSS" depends="checkForNode">
<!-- copy任务:复制${sourceDirectory}目录下的css到${buildOutputDirectory}目录下,不包括空文件夹,如果存在则覆盖-->
<copy todir="${buildOutputDirectory}" includeEmptyDirs="false" overwrite="true">
<fileset dir="${sourceDirectory}">
<include name="**/*.css" />
</fileset>
</copy>
<!-- 压缩任务:node r.js -o....-->
<apply executable="${nodePath}" dir="${buildOutputDirectory}" relative="true">
<arg value="${rjsPath}" />
<arg value="-o" />
<arg value="${rjsOptions}" />
<srcfile prefix="cssIn=" />
<targetfile prefix="out=" />
<identitymapper />
<fileset dir="${buildOutputDirectory}">
<include name="**/*.css" />
</fileset>
</apply>
</target>
<!-- 操作系统检查:如果系统是windows,则设置属性os.windows-->
<condition property="os.windows">
<os family="windows" />
</condition>
<!-- 如果系统不是windows,执行的npmInstall任务-->
<target name="npmInstall.nonWindows" unless="os.windows">
<!-- npm install(依赖于package.json)-->
<exec executable="${npmPath}" dir="${basedir}" failonerror="true">
<arg value="install" />
</exec>
</target>
<!-- 如果系统是windows,执行的npmInstall-->
<target name="npmInstall.windows" if="os.windows">
<!-- /c npm install-->
<exec executable="cmd" dir="${basedir}" failonerror="true">
<arg value="/c" />
<arg value="${npmPath}" />
<arg value="install" />
</exec>
</target>
<!-- npmInstall 依赖于系统检查-->
<target name="npmInstall" depends="npmInstall.windows,npmInstall.nonWindows" />
<!-- 生成文档,依赖于npminstall-->
<target name="generateDocumentation" depends="checkForNode,npmInstall" description="Generates HTML documentation.">
<!-- 执行命令:node node_modules/jsdoc/jsdoc.js conf....-->
<exec executable="${nodePath}" dir="${basedir}" failonerror="true">
<env key="CESIUM_VERSION" value="${version}" />
<arg value="node_modules/jsdoc/jsdoc.js" />
<arg line="--configure Tools/jsdoc/conf.json" />
</exec>
<!-- copy任务:把${documentationImagesDirectory}目录复制到${buildDocumentationImagesDirectory}目录-->
<copy todir="${buildDocumentationImagesDirectory}">
<fileset dir="${documentationImagesDirectory}" />
</copy>
</target>
<!-- 运行server,依赖于nodejs环境检查,npminstall等target-->
<target name="runServer" depends="checkForNode,npmInstall" description="Runs a local web server.">
<echo>The local web server can also be launched directly by running: node server.js</echo>
<!-- 条件判断:${runServer.public}为true,泽设置属性runServer.arg.public值为public -->
<condition property="runServer.arg.public" value="--public" else="">
<istrue value="${runServer.public}" />
</condition>
<!-- 执行命令启动server:node server.js ${runServer.arg.public} port ${runServer.port} -->
<exec executable="${nodePath}" dir="${basedir}" failonerror="true">
<arg value="server.js" />
<arg line="${runServer.arg.public}" />
<arg line="--port ${runServer.port}" />
</exec>
</target>
<!-- 启动server,public为true -->
<target name="runPublicServer" description="Runs a public web server.">
<antcall target="runServer">
<param name="runServer.public" value="true" />
</antcall>
</target>
<!-- 创建APPs,调用buildCesiumViewer target -->
<target name="buildApps" description="Create built versions of all example applications.">
<antcall target="buildCesiumViewer" />
</target>
<!-- 创建cesiemviewer 依赖于nodejs环境检查 -->
<target name="buildCesiumViewer" depends="checkForNode">
<!-- 设置路径属性 -->
<property name="cesiumViewerDirectory" location="Apps/CesiumViewer" />
<property name="cesiumViewerOutputDirectory" location="${buildDirectory}/Apps/CesiumViewer" />
<mkdir dir="${cesiumViewerOutputDirectory}" />
<property name="relativeCesiumViewerOutputDirectory" location="${cesiumViewerOutputDirectory}" relative="true" basedir="${cesiumViewerDirectory}" />
<!-- 压缩js代码,生成${relativeCesiumViewerOutputDirectory}/CesiumViewerStartup.js -->
<exec executable="${nodePath}" dir="${cesiumViewerDirectory}">
<arg value="${rjsPath}" />
<arg value="-o" />
<arg value="${rjsOptions}" />
<arg value="optimize=uglify2" />
<arg value="pragmas.debug=false" />
<arg value="mainConfigFile=../Apps/CesiumViewer/CesiumViewerStartup.js" />
<arg value="name=CesiumViewerStartup" />
<arg value="out=${relativeCesiumViewerOutputDirectory}/CesiumViewerStartup.js" />
</exec>
<!-- 将copyright头添加到CesiumViewerStartup.js -->
<copy file="${cesiumViewerOutputDirectory}/CesiumViewerStartup.js" tofile="${cesiumViewerOutputDirectory}/CesiumViewerStartup.js.tmp">
<filterchain>
<concatfilter prepend="${sourceDirectory}/copyrightHeader.js" />
</filterchain>
</copy>
<!-- 重命名 -->
<move file="${cesiumViewerOutputDirectory}/CesiumViewerStartup.js.tmp" tofile="${cesiumViewerOutputDirectory}/CesiumViewerStartup.js" />
<!-- 压缩CSS -->
<exec executable="${nodePath}" dir="${cesiumViewerDirectory}">
<arg value="${rjsPath}" />
<arg value="-o" />
<arg value="${rjsOptions}" />
<arg value="cssIn=CesiumViewer.css" />
<arg value="out=${relativeCesiumViewerOutputDirectory}/CesiumViewer.css" />
</exec>
<!-- 复制${cesiumViewerDirectory}目录下的其他资源,图片、html等 到${cesiumViewerOutputDirectory}目录下-->
<copy todir="${cesiumViewerOutputDirectory}">
<fileset dir="${cesiumViewerDirectory}">
<exclude name="*.js" />
<exclude name="*.css" />
</fileset>
</copy>
<!-- 复制requirejs -->
<copy file="${requirejsPath}/require.min.js" tofile="${cesiumViewerOutputDirectory}/require.js" />
<!-- 复制assets、webworker文件、css等到 ${cesiumViewerOutputDirectory}-->
<copy todir="${cesiumViewerOutputDirectory}" includeemptydirs="false">
<fileset dir="${buildOutputDirectory}">
<include name="Assets/**" />
<include name="Workers/**" />
<include name="ThirdParty/Workers/**" />
<include name="Widgets/**" />
<exclude name="Widgets/**/*.css" />
</fileset>
<fileset dir="${buildOutputDirectory}">
<include name="Widgets/InfoBox/InfoBoxDescription.css" />
</fileset>
</copy>
<!-- 复制webconfig -->
<copy file="${basedir}/web.config" tofile="${cesiumViewerOutputDirectory}/web.config" />
<!-- 字符替换:把${cesiumViewerOutputDirectory}下的CesiumViewerStartup.js所有../../Source和../../ThirdParty/requirejs-2.1.9替换为. -->
<replace dir="${cesiumViewerOutputDirectory}" summary="true">
<replacefilter token="../../Source" value="." />
<replacefilter token="../../ThirdParty/requirejs-2.1.9" value="." />
<include name="CesiumViewerStartup.js" />
</replace>
<!-- 字符替换(html引用的路径): ${cesiumViewerOutputDirectory}下的index.html的../../ThirdParty/requirejs-2.1.9替换为.-->
<replace dir="${cesiumViewerOutputDirectory}" summary="true">
<replacefilter token="../../ThirdParty/requirejs-2.1.9" value="." />
<include name="index.html" />
</replace>
<!-- 字符替换(css路径): ${cesiumViewerOutputDirectory}下的所有css文件的../../Source/替换为空-->
<replace dir="${cesiumViewerOutputDirectory}" summary="true">
<replacefilter token="../../Source/" value="" />
<include name="*.css" />
</replace>
</target>
</project>

c# networkcomms 3.0 实现模拟登陆总结 转载 https://www.cnblogs.com/zuochanzi/p/7039636.html
最近项目需要做一个客户查询状态系统,当前上位机缺少服务功能,于是找到了 networkcomms 开源框架,作为项目使用.
最新版 networkcomms 下载地址:https://github.com/MarcFletcher/NetworkComms.Net
下载直接 vs 打开
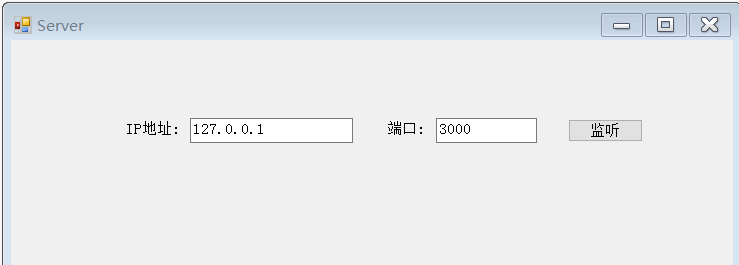
新建服务器端

using MessageContract;
using NetworkCommsDotNet;
using NetworkCommsDotNet.Connections;
using NetworkCommsDotNet.Connections.TCP;
using NetworkCommsDotNet.DPSBase;
using System;
using System.Collections.Generic;
using System.ComponentModel;
using System.Data;
using System.Drawing;
using System.Linq;
using System.Net;
using System.Text;
using System.Windows.Forms;

namespace AppServer
{
    public partial class MaiForm : Form
    {
        public MaiForm()
        {
            InitializeComponent();
        }
        SendReceiveOptions aboveOptions = new SendReceiveOptions(DPSManager.GetDataSerializer<ProtobufSerializer>(), null, null);
        private void button1_Click(object sender, EventArgs e)
        {
            //服务器开始监听客户端的请求
            Connection.StartListening(ConnectionType.TCP, new IPEndPoint(IPAddress.Parse(txtIP.Text), int.Parse(txtPort.Text)));
            //服务器开始监听客户端的请求
            //IPEndPoint thePoint = new IPEndPoint(IPAddress.Parse(txtIP.Text), int.Parse(txtPort.Text));
            //TCPConnection.StartListening(thePoint, false);
            button1.Text = "监听中";
            button1.Enabled = false;
            //button1.Text = "监听中";
            //button1.Enabled = false;

            //此方法中包含服务器具体的处理方法。
            StartListening();
        }

        private void StartListening()
        {
            //开启日志记录
            //配置日志记录器
            //ILogger logger = new LiteLogger(LiteLogger.LogMode.ConsoleAndLogFile, "ServerLogFile_" + NetworkComms.NetworkIdentifier + ".txt");
            //NetworkComms.EnableLogging(logger);

            //禁用日志记录  服务器端正式使用时,赢禁用日志记录
            NetworkComms.DisableLogging();


            //服务器端处理收到的消息
            //为简单起见,此示例中我们只处理字符类型的信息,也返回字符类型的信息。
            //处理的信息可以使自定义类,具体见下一个Demo
            NetworkComms.AppendGlobalIncomingPacketHandler<LoginContract>("ReqLogin", IncomingLoginRequest);

        }
        //处理某个具体的请求
        private void IncomingLoginRequest(PacketHeader header, Connection connection, LoginContract loginContract)
        {
            try
            {
                string resMsg = "";

                //为了简单,这里不调用数据库,而是模拟一下登录
                if (loginContract.UserID == "1000" && loginContract.PassWord == "123")

                    resMsg = "登录成功";

                else

                    resMsg = "用户名密码错误";
                //把返回结果写入到契约类中,后面返回给客户端
                //ResMsgContract contract = new ResMsgContract();
                //contract.Message = resMsg;

                //connection.SendObject<ResMsgContract>("ResLogin", contract);
                ResMsgContract contract = new ResMsgContract();
                contract.Message = resMsg;

                connection.SendObject("ResLogin", contract);
            }
            catch (Exception ex)
            {
                // LogTools.LogException(ex, "IncomingMsgHandle");
            }
        }
    }
}
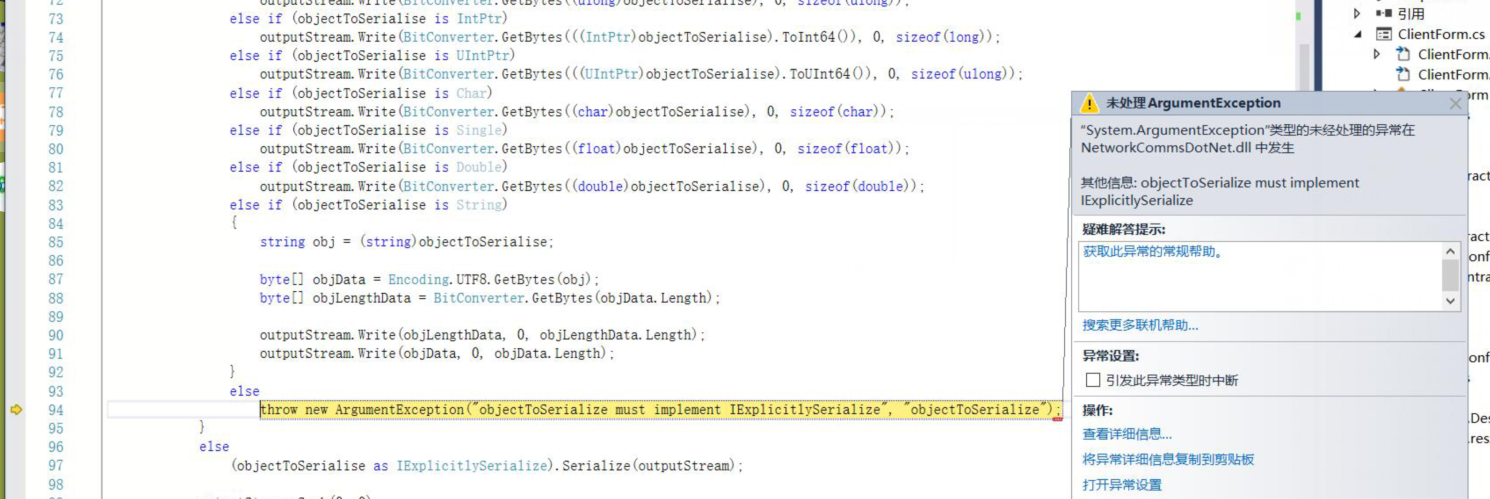
在别的帮助中往往少了这行:导致出现客户端发送时,类型打包出现问题。这行代码是客户端服务器两端都要加上的,是指定传输方式
SendReceiveOptions aboveOptions = new SendReceiveOptions(DPSManager.GetDataSerializer<ProtobufSerializer>(), null, null);就是这个报错了
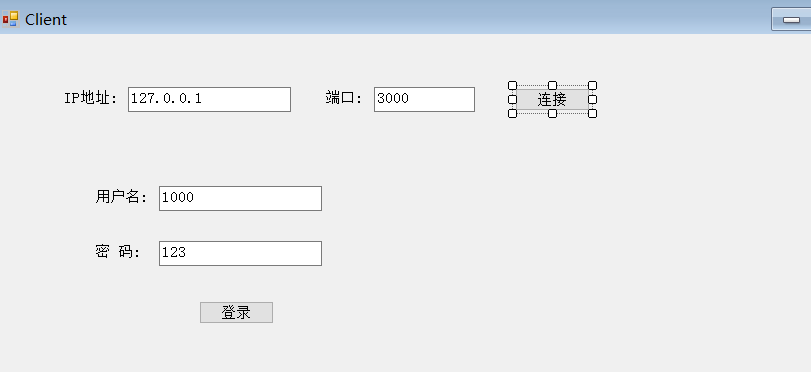
一下是客户端

using MessageContract;
using NetworkCommsDotNet;
using NetworkCommsDotNet.Connections;
using NetworkCommsDotNet.Connections.TCP;
using NetworkCommsDotNet.DPSBase;
using System;
using System.Collections.Generic;
using System.ComponentModel;
using System.Data;
using System.Drawing;
using System.Linq;
using System.Text;
using System.Windows.Forms;

namespace AppClient
{
    public partial class MainForm : Form
    {
        public MainForm()
        {
            InitializeComponent();
        }
        //连接信息对象
        public ConnectionInfo connInfo = null;
        //连接对象
        Connection newTcpConnection;
        SendReceiveOptions aboveOptions = new SendReceiveOptions(DPSManager.GetDataSerializer<ProtobufSerializer>(), null, null);
        private void button1_Click(object sender, EventArgs e)
        {
            //给连接信息对象赋值
            connInfo = new ConnectionInfo(txtIP.Text, int.Parse(txtPort.Text));

            //如果不成功,会弹出异常信息
            newTcpConnection = TCPConnection.GetConnection(connInfo);

            button1.Enabled = false;
            button1.Text = "连接成功";
        }

        private void btnlogin_Click(object sender, EventArgs e)
        {
            //给契约类赋值
            LoginContract contract = new LoginContract(txtUserName.Text, txtPassword.Text);
            //contract.UserID = txtUserName.Text;
            //contract.PassWord = txtPassword.Text;
            //向服务器发送登录信息并获取登录结果
              ResMsgContract resMsg = newTcpConnection.SendReceiveObject<LoginContract, ResMsgContract>("ReqLogin", "ResLogin", 5000, contract);
            //向服务器发送登录信息并获取登录结果
           // ResMsgContract resMsg = newTcpConnection.SendReceiveObject<ResMsgContract>("ReqLogin", "ResLogin", 5000, contract);

            if (resMsg.Message == "登录成功")
            {
                MessageBox.Show("登录成功");

            }
            else
            {
                MessageBox.Show("用户名密码错误");
            }
        }
    }
}
契约类

using System;
using System.Collections.Generic;
using System.Linq;
using System.Text;

namespace MessageContract
{
    [ProtoContract]
    public class LoginContract
    {
        [ProtoMember(1)]
        public string UserID { get; set; }

        [ProtoMember(2)]
        public string PassWord { get; set; }

        public LoginContract() { }

        public LoginContract(string userID, string passWord)
        {
            this.UserID = userID;
            this.PassWord = passWord;
        }
    }
}

using ProtoBuf;
using System;
using System.Collections.Generic;
using System.Linq;
using System.Text;

namespace MessageContract
{
    [ProtoContract]
    public  class ResMsgContract
    {
        [ProtoMember(1)]
        public string Message;
        public ResMsgContract() { }
        public ResMsgContract(string message)
        {
            this.Message = message;
        }
    }
}
注意:
使用这个框架要配合谷歌的 protobuf 要选好版本。本人没重复测试最高版本,因为在调试登录过程中出现别的问题过程中,也顺改了 protobuf 的版本,至今未测试最高版本是否存在兼容问题。本人成功的使用的是 2.0.0.668
protobuf简介protobuf是google提供的一个开源序列化框架,类似于XML,JSON这样的数据表示语言,其最大的特点是基于二进制,因此比传统的XML表示高效短小vs nuget 添加方式
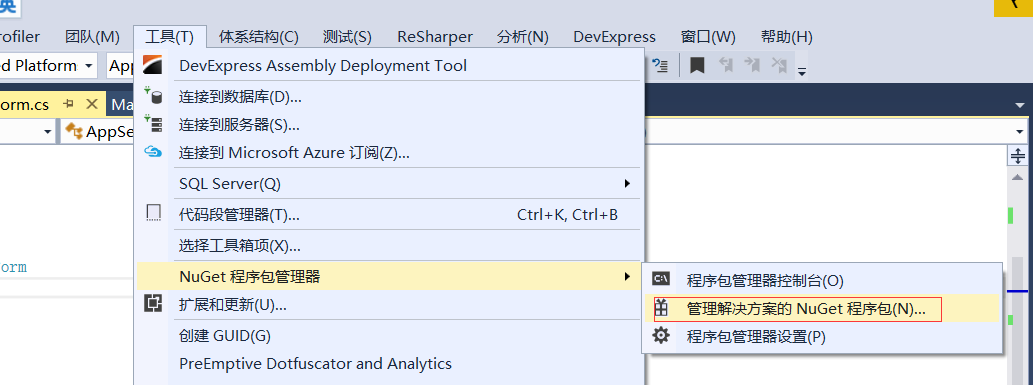
输入
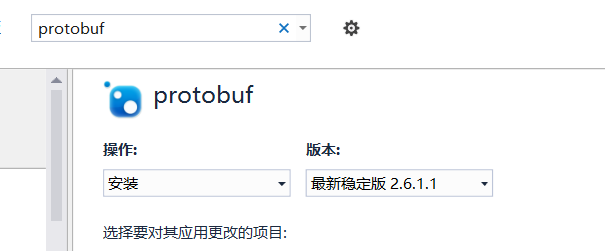
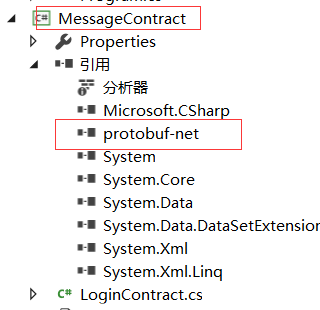
版本选择自己指定一下,加大项目的契约类里边。这是自己定义传输对象的方式.
结果:


C# 导出 Excel 的各种方法总结 转自https://www.cnblogs.com/Brambling/p/6854731.html
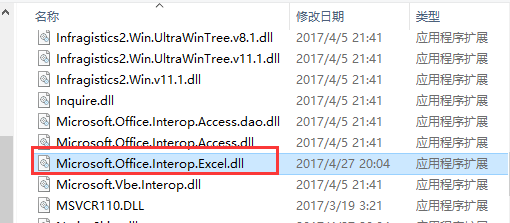
第一种:使用 Microsoft.Office.Interop.Excel.dll
首先需要安装 office 的 excel,然后再找到 Microsoft.Office.Interop.Excel.dll 组件,添加到引用。


public void ExportExcel(DataTable dt)
        {
            if (dt != null)
            {
                Microsoft.Office.Interop.Excel.Application excel = new Microsoft.Office.Interop.Excel.Application();

                if (excel == null)
                {
                    return;
                }

                //设置为不可见,操作在后台执行,为 true 的话会打开 Excel
                excel.Visible = false;

                //打开时设置为全屏显式
                //excel.DisplayFullScreen = true;

                //初始化工作簿
                Microsoft.Office.Interop.Excel.Workbooks workbooks = excel.Workbooks;

                //新增加一个工作簿,Add()方法也可以直接传入参数 true
                Microsoft.Office.Interop.Excel.Workbook workbook = workbooks.Add(Microsoft.Office.Interop.Excel.XlWBATemplate.xlWBATWorksheet);
                //同样是新增一个工作簿,但是会弹出保存对话框
                //Microsoft.Office.Interop.Excel.Workbook workbook = excel.Application.Workbooks.Add(true);

                //新增加一个 Excel 表(sheet)
                Microsoft.Office.Interop.Excel.Worksheet worksheet = (Microsoft.Office.Interop.Excel.Worksheet)workbook.Worksheets[1];

                //设置表的名称
                worksheet.Name = dt.TableName;
                try
                {
                    //创建一个单元格
                    Microsoft.Office.Interop.Excel.Range range;

                    int rowIndex = 1;       //行的起始下标为 1
                    int colIndex = 1;       //列的起始下标为 1

                    //设置列名
                    for (int i = 0; i < dt.Columns.Count; i++)
                    {
                        //设置第一行,即列名
                        worksheet.Cells[rowIndex, colIndex + i] = dt.Columns[i].ColumnName;

                        //获取第一行的每个单元格
                        range = worksheet.Cells[rowIndex, colIndex + i];

                        //设置单元格的内部颜色
                        range.Interior.ColorIndex = 33;

                        //字体加粗
                        range.Font.Bold = true;

                        //设置为黑色
                        range.Font.Color = 0;

                        //设置为宋体
                        range.Font.Name = "Arial";

                        //设置字体大小
                        range.Font.Size = 12;

                        //水平居中
                        range.HorizontalAlignment = Microsoft.Office.Interop.Excel.XlHAlign.xlHAlignCenter;

                        //垂直居中
                        range.VerticalAlignment = Microsoft.Office.Interop.Excel.XlVAlign.xlVAlignCenter;
                    }

                    //跳过第一行,第一行写入了列名
                    rowIndex++;

                    //写入数据
                    for (int i = 0; i < dt.Rows.Count; i++)
                    {
                        for (int j = 0; j < dt.Columns.Count; j++)
                        {
                            worksheet.Cells[rowIndex + i, colIndex + j] = dt.Rows[i][j].ToString();
                        }
                    }

                    //设置所有列宽为自动列宽
                    //worksheet.Columns.AutoFit();

                    //设置所有单元格列宽为自动列宽
                    worksheet.Cells.Columns.AutoFit();
                    //worksheet.Cells.EntireColumn.AutoFit();

                    //是否提示,如果想删除某个sheet页,首先要将此项设为fasle。
                    excel.DisplayAlerts = false;

                    //保存写入的数据,这里还没有保存到磁盘
                    workbook.Saved = true;

                    //设置导出文件路径
                    string path = HttpContext.Current.Server.MapPath("Export/");

                    //设置新建文件路径及名称
                    string savePath = path + DateTime.Now.ToString("yyyy-MM-dd-HH-mm-ss") + ".xlsx";

                    //创建文件
                    FileStream file = new FileStream(savePath, FileMode.CreateNew);

                    //关闭释放流,不然没办法写入数据
                    file.Close();
                    file.Dispose();

                    //保存到指定的路径
                    workbook.SaveCopyAs(savePath);

                    //还可以加入以下方法输出到浏览器下载
                    FileInfo fileInfo = new FileInfo(savePath);
                    OutputClient(fileInfo);
                }
                catch(Exception ex)
                {

                }
                finally
                {
                    workbook.Close(false, Type.Missing, Type.Missing);
                    workbooks.Close();

                    //关闭退出
                    excel.Quit();

                    //释放 COM 对象
                    Marshal.ReleaseComObject(worksheet);
                    Marshal.ReleaseComObject(workbook);
                    Marshal.ReleaseComObject(workbooks);
                    Marshal.ReleaseComObject(excel);

                    worksheet = null;
                    workbook = null;
                    workbooks = null;
                    excel = null;

                    GC.Collect();
                }
            }
        }
public void OutputClient(FileInfo file)
        {
            HttpContext.Current.Response.Buffer = true;

            HttpContext.Current.Response.Clear();
            HttpContext.Current.Response.ClearHeaders();
            HttpContext.Current.Response.ClearContent();

            HttpContext.Current.Response.ContentType = "application/vnd.ms-excel";

            //导出到 .xlsx 格式不能用时,可以试试这个
            //HttpContext.Current.Response.ContentType = "application/vnd.openxmlformats-officedocument.spreadsheetml.sheet";

            HttpContext.Current.Response.AddHeader("Content-Disposition", string.Format("attachment; filename={0}.xlsx", DateTime.Now.ToString("yyyy-MM-dd-HH-mm")));

            HttpContext.Current.Response.Charset = "GB2312";
            HttpContext.Current.Response.ContentEncoding = Encoding.GetEncoding("GB2312");

            HttpContext.Current.Response.AddHeader("Content-Length", file.Length.ToString());

            HttpContext.Current.Response.WriteFile(file.FullName);
            HttpContext.Current.Response.Flush();

            HttpContext.Current.Response.Close();
}第一种方法性能实在是不敢恭维,而且局限性太多。首先必须要安装 office(如果计算机上面没有的话),而且导出时需要指定文件保存的路径。也可以输出到浏览器下载,当然前提是已经保存写入数据。
第二种:使用 Aspose.Cells.dll
这个 Aspose.Cells 是 Aspose 公司推出的导出 Excel 的控件,不依赖 Office,商业软件,收费的。
可以参考:http://www.cnblogs.com/xiaofengfeng/archive/2012/09/27/2706211.html#top


public void ExportExcel(DataTable dt)
        {
            try
            {
                //获取指定虚拟路径的物理路径
                string path = HttpContext.Current.Server.MapPath("DLL/") + "License.lic";

                //读取 License 文件
                Stream stream = (Stream)File.OpenRead(path);

                //注册 License
                Aspose.Cells.License li = new Aspose.Cells.License();
                li.SetLicense(stream);

                //创建一个工作簿
                Aspose.Cells.Workbook workbook = new Aspose.Cells.Workbook();

                //创建一个 sheet 表
                Aspose.Cells.Worksheet worksheet = workbook.Worksheets[0];

                //设置 sheet 表名称
                worksheet.Name = dt.TableName;

                Aspose.Cells.Cell cell;

                int rowIndex = 0;   //行的起始下标为 0
                int colIndex = 0;   //列的起始下标为 0

                //设置列名
                for (int i = 0; i < dt.Columns.Count; i++)
                {
                    //获取第一行的每个单元格
                    cell = worksheet.Cells[rowIndex, colIndex + i];

                    //设置列名
                    cell.PutValue(dt.Columns[i].ColumnName);

                    //设置字体
                    cell.Style.Font.Name = "Arial";

                    //设置字体加粗
                    cell.Style.Font.IsBold = true;

                    //设置字体大小
                    cell.Style.Font.Size = 12;

                    //设置字体颜色
                    cell.Style.Font.Color = System.Drawing.Color.Black;

                    //设置背景色
                    cell.Style.BackgroundColor = System.Drawing.Color.LightGreen;
                }

                //跳过第一行,第一行写入了列名
                rowIndex++;

                //写入数据
                for (int i = 0; i < dt.Rows.Count; i++)
                {
                    for (int j = 0; j < dt.Columns.Count; j++)
                    {
                        cell = worksheet.Cells[rowIndex + i, colIndex + j];

                        cell.PutValue(dt.Rows[i][j]);
                    }
                }

                //自动列宽
                worksheet.AutoFitColumns();

                //设置导出文件路径
                path = HttpContext.Current.Server.MapPath("Export/");

                //设置新建文件路径及名称
                string savePath = path + DateTime.Now.ToString("yyyy-MM-dd-HH-mm-ss") + ".xlsx";

                //创建文件
                FileStream file = new FileStream(savePath, FileMode.CreateNew);

                //关闭释放流,不然没办法写入数据
                file.Close();
                file.Dispose();

                //保存至指定路径
                workbook.Save(savePath);


                //或者使用下面的方法,输出到浏览器下载。
                //byte[] bytes = workbook.SaveToStream().ToArray();
                //OutputClient(bytes);

                worksheet = null;
                workbook = null;
            }
            catch(Exception ex)
            {

            }
        }
public void OutputClient(byte[] bytes)
        {
            HttpContext.Current.Response.Buffer = true;

            HttpContext.Current.Response.Clear();
            HttpContext.Current.Response.ClearHeaders();
            HttpContext.Current.Response.ClearContent();

            HttpContext.Current.Response.ContentType = "application/vnd.ms-excel";
            HttpContext.Current.Response.AddHeader("Content-Disposition", string.Format("attachment; filename={0}.xls", DateTime.Now.ToString("yyyy-MM-dd-HH-mm")));

            HttpContext.Current.Response.Charset = "GB2312";
            HttpContext.Current.Response.ContentEncoding = Encoding.GetEncoding("GB2312");

            HttpContext.Current.Response.BinaryWrite(bytes);
            HttpContext.Current.Response.Flush();

            HttpContext.Current.Response.Close();
}设置单元格格式为文本方法:
cell = worksheet.Cells[rowIndex, colIndex + i];
cell.PutValue(colNames[i]);
style = cell.GetStyle();
style.Number = 49;      // 49(text|@) 表示为文本
cell.SetStyle(style);
第二种方法性能还不错,而且操作也不复杂,可以设置导出时文件保存的路径,还可以保存为流输出到浏览器下载。
第三种:Microsoft.Jet.OLEDB
这种方法操作 Excel 类似于操作数据库。下面先介绍一下连接字符串:
// Excel 2003 版本连接字符串
string strConn = "Provider=Microsoft.Jet.OLEDB.4.0;Data Source=C:/xxx.xls;Extended Properties=''Excel 8.0;HDR=Yes;IMEX=2;''";

// Excel 2007 以上版本连接字符串
string strConn = "Provider=Microsoft.ACE.OLEDB.12.0;Data Source=C:/xxx.xlsx;Extended Properties=''Excel 12.0;HDR=Yes;IMEX=2;''";
Provider:驱动程序名称
Data Source:指定 Excel 文件的路径
Extended Properties:Excel 8.0 针对 Excel 2000 及以上版本;Excel 12.0 针对 Excel 2007 及以上版本。
HDR:Yes 表示第一行包含列名,在计算行数时就不包含第一行。NO 则完全相反。
IMEX:0 写入模式;1 读取模式;2 读写模式。如果报错为“不能修改表 sheet1 的设计。它在只读数据库中”,那就去掉这个,问题解决。


public void ExportExcel(DataTable dt)
        {
            OleDbConnection conn = null;
            OleDbCommand cmd = null;

            Microsoft.Office.Interop.Excel.Application excel = new Microsoft.Office.Interop.Excel.Application();

            Microsoft.Office.Interop.Excel.Workbooks workbooks = excel.Workbooks;

            Microsoft.Office.Interop.Excel.Workbook workbook = workbooks.Add(true);

            try
            {
                //设置区域为当前线程的区域
                dt.Locale = System.Threading.Thread.CurrentThread.CurrentCulture;

                //设置导出文件路径
                string path = HttpContext.Current.Server.MapPath("Export/");

                //设置新建文件路径及名称
                string savePath = path + DateTime.Now.ToString("yyyy-MM-dd-HH-mm-ss") + ".xlsx";

                //创建文件
                FileStream file = new FileStream(savePath, FileMode.CreateNew);

                //关闭释放流,不然没办法写入数据
                file.Close();
                file.Dispose();

                //由于使用流创建的 excel 文件不能被正常识别,所以只能使用这种方式另存为一下。
                workbook.SaveCopyAs(savePath);


                // Excel 2003 版本连接字符串
                //string strConn = "Provider=Microsoft.Jet.OLEDB.4.0;Data Source=''" + savePath + "'';Extended Properties=''Excel 8.0;HDR=Yes;''";

                // Excel 2007 以上版本连接字符串
                string strConn = "Provider=Microsoft.ACE.OLEDB.12.0;Data Source=''"+ savePath + "'';Extended Properties=''Excel 12.0;HDR=Yes;''";

                //创建连接对象
                conn = new OleDbConnection(strConn);
                //打开连接
                conn.Open();

                //创建命令对象
                cmd = conn.CreateCommand();

                //获取 excel 所有的数据表。
                //new object[] { null, null, null, "Table" }指定返回的架构信息:参数介绍
                //第一个参数指定目录
                //第二个参数指定所有者
                //第三个参数指定表名
                //第四个参数指定表类型
                DataTable dtSheetName = conn.GetOleDbSchemaTable(OleDbSchemaGuid.Tables, new object[] { null, null, null, "Table" });

                //因为后面创建的表都会在最后面,所以本想删除掉前面的表,结果发现做不到,只能清空数据。
                for (int i = 0; i < dtSheetName.Rows.Count; i++)
                {
                    cmd.CommandText = "drop table [" + dtSheetName.Rows[i]["TABLE_NAME"].ToString() + "]";
                    cmd.ExecuteNonQuery();
                }

                //添加一个表,即 Excel 中 sheet 表
                cmd.CommandText = "create table " + dt.TableName + " ([S_Id] INT,[S_StuNo] VarChar,[S_Name] VarChar,[S_Sex] VarChar,[S_Height] VarChar,[S_BirthDate] VarChar,[C_S_Id] INT)";
                cmd.ExecuteNonQuery();

                for (int i = 0; i < dt.Rows.Count; i++)
                {
                    string values = "";

                    for (int j = 0; j < dt.Columns.Count; j++)
                    {
                        values += "''" + dt.Rows[i][j].ToString() + "'',";
                    }

                    //判断最后一个字符是否为逗号,如果是就截取掉
                    if (values.LastIndexOf('','') == values.Length - 1)
                    {
                        values = values.Substring(0, values.Length - 1);
                    }

                    //写入数据
                    cmd.CommandText = "insert into " + dt.TableName + " (S_Id,S_StuNo,S_Name,S_Sex,S_Height,S_BirthDate,C_S_Id) values (" + values + ")";
                    cmd.ExecuteNonQuery();
                }

                conn.Close();
                conn.Dispose();
                cmd.Dispose();

                //加入下面的方法,把保存的 Excel 文件输出到浏览器下载。需要先关闭连接。
                FileInfo fileInfo = new FileInfo(savePath);
                OutputClient(fileInfo);
            }
            catch (Exception ex)
            {

            }
            finally
            {
                workbook.Close(false, Type.Missing, Type.Missing);
                workbooks.Close();
                excel.Quit();

                Marshal.ReleaseComObject(workbook);
                Marshal.ReleaseComObject(workbooks);
                Marshal.ReleaseComObject(excel);

                workbook = null;
                workbooks = null;
                excel = null;

                GC.Collect();
            }
        }

public void OutputClient(FileInfo file)
        {
            HttpResponse response = HttpContext.Current.Response;

            response.Buffer = true;

            response.Clear();
            response.ClearHeaders();
            response.ClearContent();

            response.ContentType = "application/vnd.ms-excel";

            //导出到 .xlsx 格式不能用时,可以试试这个
            //HttpContext.Current.Response.ContentType = "application/vnd.openxmlformats-officedocument.spreadsheetml.sheet";

            response.AddHeader("Content-Disposition", string.Format("attachment; filename={0}.xlsx", DateTime.Now.ToString("yyyy-MM-dd-HH-mm")));

            response.Charset = "GB2312";
            response.ContentEncoding = Encoding.GetEncoding("GB2312");

            response.AddHeader("Content-Length", file.Length.ToString());

            response.WriteFile(file.FullName);
            response.Flush();

            response.Close();
}这种方法需要指定一个已经存在的 Excel 文件作为写入数据的模板,不然的话就得使用流创建一个新的 Excel 文件,但是这样是没法识别的,那就需要用到 Microsoft.Office.Interop.Excel.dll 里面的 Microsoft.Office.Interop.Excel.Workbook.SaveCopyAs() 方法另存为一下,这样性能也就更差了。
使用操作命令创建的表都是在最后面的,前面的也没法删除(我是没有找到方法),当然也可以不再创建,直接写入数据也可以。
第四种:NPOI
NPOI 是 POI 项目的.NET版本,它不使用 Office COM 组件,不需要安装 Microsoft Office,目前支持 Office 2003 和 2007 版本。
NPOI 是免费开源的,操作也比较方便,下载地址:http://npoi.codeplex.com/

public void ExportExcel(DataTable dt)
        {
            try
            {
                //创建一个工作簿
                IWorkbook workbook = new HSSFWorkbook();

                //创建一个 sheet 表
                ISheet sheet = workbook.CreateSheet(dt.TableName);

                //创建一行
                IRow rowH = sheet.CreateRow(0);

                //创建一个单元格
                ICell cell = null;

                //创建单元格样式
                ICellStyle cellStyle = workbook.CreateCellStyle();

                //创建格式
                IDataFormat dataFormat = workbook.CreateDataFormat();

                //设置为文本格式,也可以为 text,即 dataFormat.GetFormat("text");
                cellStyle.DataFormat = dataFormat.GetFormat("@");

                //设置列名
                foreach (DataColumn col in dt.Columns)
                {
                    //创建单元格并设置单元格内容
                    rowH.CreateCell(col.Ordinal).SetCellValue(col.Caption);

                    //设置单元格格式
                    rowH.Cells[col.Ordinal].CellStyle = cellStyle;
                }

                //写入数据
                for (int i = 0; i < dt.Rows.Count; i++)
                {
                    //跳过第一行,第一行为列名
                    IRow row = sheet.CreateRow(i + 1);

                    for (int j = 0; j < dt.Columns.Count; j++)
                    {
                        cell = row.CreateCell(j);
                        cell.SetCellValue(dt.Rows[i][j].ToString());
                        cell.CellStyle = cellStyle;
                    }
                }

                //设置导出文件路径
                string path = HttpContext.Current.Server.MapPath("Export/");

                //设置新建文件路径及名称
                string savePath = path + DateTime.Now.ToString("yyyy-MM-dd-HH-mm-ss") + ".xls";

                //创建文件
                FileStream file = new FileStream(savePath, FileMode.CreateNew,FileAccess.Write);

                //创建一个 IO 流
                MemoryStream ms = new MemoryStream();

                //写入到流
                workbook.Write(ms);

                //转换为字节数组
                byte[] bytes = ms.ToArray();

                file.Write(bytes, 0, bytes.Length);
                file.Flush();

                //还可以调用下面的方法,把流输出到浏览器下载
                OutputClient(bytes);

                //释放资源
                bytes = null;

                ms.Close();
                ms.Dispose();

                file.Close();
                file.Dispose();

                workbook.Close();
                sheet = null;
                workbook = null;
            }
            catch(Exception ex)
            {

            }
        }

public void OutputClient(byte[] bytes)
        {
            HttpResponse response = HttpContext.Current.Response;

            response.Buffer = true;

            response.Clear();
            response.ClearHeaders();
            response.ClearContent();

            response.ContentType = "application/vnd.ms-excel";
            response.AddHeader("Content-Disposition", string.Format("attachment; filename={0}.xls", DateTime.Now.ToString("yyyy-MM-dd-HH-mm-ss")));

            response.Charset = "GB2312";
            response.ContentEncoding = Encoding.GetEncoding("GB2312");

            response.BinaryWrite(bytes);
            response.Flush();

            response.Close();
}// 2007 版本创建一个工作簿
IWorkbook workbook = new XSSFWorkbook();
// 2003 版本创建一个工作簿
IWorkbook workbook = new HSSFWorkbook();PS:操作 2003 版本需要添加 NPOI.dll 的引用,操作 2007 版本需要添加 NPOI.OOXML.dll 的引用。
第五种:GridView
直接使用 GridView 把 DataTable 的数据转换为字符串流,然后输出到浏览器下载。

public void ExportExcel(DataTable dt)
        {
            HttpResponse response = HttpContext.Current.Response;

            response.Buffer = true;

            response.Clear();
            response.ClearHeaders();
            response.ClearContent();

            response.ContentType = "application/vnd.ms-excel";
            response.AddHeader("content-disposition", string.Format("attachment; filename={0}.xls", DateTime.Now.ToString("yyyy-MM-dd-HH-mm-ss")));

            response.Charset = "GB2312";
            response.ContentEncoding = Encoding.GetEncoding("GB2312");

            //实例化一个流
            StringWriter stringWrite = new StringWriter();

            //指定文本输出到流
            HtmlTextWriter htmlWrite = new HtmlTextWriter(stringWrite);

            GridView gv = new GridView();
            gv.DataSource = dt;
            gv.DataBind();

            for (int i = 0; i < dt.Rows.Count; i++)
            {
                for (int j = 0; j < dt.Columns.Count; j++)
                {
                    //设置每个单元格的格式
                    gv.Rows[i].Cells[j].Attributes.Add("style", "vnd.ms-excel.numberformat:@");
                }
            }

            //把 GridView 的内容输出到 HtmlTextWriter
            gv.RenderControl(htmlWrite);

            response.Write(stringWrite.ToString());
            response.Flush();

            response.Close();
}这种方式导出 .xlsx 格式的 Excel 文件时,没办法打开。导出 .xls 格式的,会提示文件格式和扩展名不匹配,但是可以打开的。
第六种:DataGrid
其实这一种方法和上面的那一种方法几乎是一样的。


public void ExportExcel(DataTable dt)
        {
            HttpResponse response = HttpContext.Current.Response;

            response.Buffer = true;

            response.Clear();
            response.ClearHeaders();
            response.ClearContent();

            response.ContentType = "application/vnd.ms-excel";
            response.AddHeader("content-disposition", string.Format("attachment; filename={0}.xls", DateTime.Now.ToString("yyyy-MM-dd-HH-mm-ss")));

            response.Charset = "GB2312";
            response.ContentEncoding = Encoding.GetEncoding("GB2312");

            //实例化一个流
            StringWriter stringWrite = new StringWriter();

            //指定文本输出到流
            HtmlTextWriter htmlWrite = new HtmlTextWriter(stringWrite);

            DataGrid dg = new DataGrid();
            dg.DataSource = dt;
            dg.DataBind();

            dg.Attributes.Add("style", "vnd.ms-excel.numberformat:@");

            //把 DataGrid 的内容输出到 HtmlTextWriter
            dg.RenderControl(htmlWrite);

            response.Write(stringWrite.ToString());
            response.Flush();

            response.Close();
        }
第七种:直接使用 IO 流
第一种方式,使用文件流在磁盘创建一个 Excel 文件,然后使用流写入数据。


public void ExportExcel(DataTable dt)
        {
            //设置导出文件路径
            string path = HttpContext.Current.Server.MapPath("Export/");

            //设置新建文件路径及名称
            string savePath = path + DateTime.Now.ToString("yyyy-MM-dd-HH-mm-ss") + ".xls";

            //创建文件
            FileStream file = new FileStream(savePath, FileMode.CreateNew, FileAccess.Write);

            //以指定的字符编码向指定的流写入字符
            StreamWriter sw = new StreamWriter(file, Encoding.GetEncoding("GB2312"));

            StringBuilder strbu = new StringBuilder();

            //写入标题
            for (int i = 0; i < dt.Columns.Count; i++)
            {
                strbu.Append(dt.Columns[i].ColumnName.ToString() + "\t");
            }
            //加入换行字符串
            strbu.Append(Environment.NewLine);

            //写入内容
            for (int i = 0; i < dt.Rows.Count; i++)
            {
                for (int j = 0; j < dt.Columns.Count; j++)
                {
                    strbu.Append(dt.Rows[i][j].ToString() + "\t");
                }
                strbu.Append(Environment.NewLine);
            }

            sw.Write(strbu.ToString());
            sw.Flush();
            file.Flush();

            sw.Close();
            sw.Dispose();

            file.Close();
            file.Dispose();
}第二种方式,这种方式就不需要在本地磁盘创建文件了,首先创建一个内存流写入数据,然后输出到浏览器下载。


public void ExportExcel(DataTable dt)
        {
            //创建一个内存流
            MemoryStream ms = new MemoryStream();

            //以指定的字符编码向指定的流写入字符
            StreamWriter sw = new StreamWriter(ms, Encoding.GetEncoding("GB2312"));

            StringBuilder strbu = new StringBuilder();

            //写入标题
            for (int i = 0; i < dt.Columns.Count; i++)
            {
                strbu.Append(dt.Columns[i].ColumnName.ToString() + "\t");
            }
            //加入换行字符串
            strbu.Append(Environment.NewLine);

            //写入内容
            for (int i = 0; i < dt.Rows.Count; i++)
            {
                for (int j = 0; j < dt.Columns.Count; j++)
                {
                    strbu.Append(dt.Rows[i][j].ToString() + "\t");
                }
                strbu.Append(Environment.NewLine);
            }

            sw.Write(strbu.ToString());
            sw.Flush();

            sw.Close();
            sw.Dispose();

            //转换为字节数组
            byte[] bytes = ms.ToArray();

            ms.Close();
            ms.Dispose();

            OutputClient(bytes);
        }

public void OutputClient(byte[] bytes)
        {
            HttpResponse response = HttpContext.Current.Response;

            response.Buffer = true;

            response.Clear();
            response.ClearHeaders();
            response.ClearContent();

            response.ContentType = "application/vnd.ms-excel";
            response.AddHeader("Content-Disposition", string.Format("attachment; filename={0}.xls", DateTime.Now.ToString("yyyy-MM-dd-HH-mm-ss")));

            response.Charset = "GB2312";
            response.ContentEncoding = Encoding.GetEncoding("GB2312");

            response.BinaryWrite(bytes);
            response.Flush();

            response.Close();
}这种方法有一个弊端,就是不能设置单元格的格式(至少我是没有找到,是在下输了)。
第八种:EPPlus
EPPlus 是一个使用 Open Office Xml 格式(xlsx)读取和写入 Excel 2007/2010 文件的 .net 库,并且免费开源。
下载地址:http://epplus.codeplex.com/
第一种方式,先使用文件流在磁盘创建一个 Excel 文件,然后打开这个文件写入数据并保存。

public void ExportExcel(DataTable dt)
        {
            //新建一个 Excel 文件
            string path = HttpContext.Current.Server.MapPath("Export/");
            string filePath = path + DateTime.Now.ToString("yyyy-MM-dd-HH-mm-ss") + ".xlsx";
            FileStream fileStream = new FileStream(filePath, FileMode.Create);

            //加载这个 Excel 文件
            ExcelPackage package = new ExcelPackage(fileStream);

            // 添加一个 sheet 表
            ExcelWorksheet worksheet = package.Workbook.Worksheets.Add(dt.TableName);

            int rowIndex = 1;   // 起始行为 1
            int colIndex = 1;   // 起始列为 1

            //设置列名
            for (int i = 0; i < dt.Columns.Count; i++)
            {
                worksheet.Cells[rowIndex, colIndex + i].Value = dt.Columns[i].ColumnName;

                //自动调整列宽,也可以指定最小宽度和最大宽度
                worksheet.Column(colIndex + i).AutoFit();
            }

            // 跳过第一列列名
            rowIndex++;

            //写入数据
            for (int i = 0; i < dt.Rows.Count; i++)
            {
                for (int j = 0; j < dt.Columns.Count; j++)
                {
                    worksheet.Cells[rowIndex + i, colIndex + j].Value = dt.Rows[i][j].ToString();
                }

                //自动调整行高
                worksheet.Row(rowIndex + i).CustomHeight = true;
            }

            //设置字体,也可以是中文,比如:宋体
            worksheet.Cells.Style.Font.Name = "Arial";

            //字体加粗
            worksheet.Cells.Style.Font.Bold = true;

            //字体大小
            worksheet.Cells.Style.Font.Size = 12;

            //字体颜色
            worksheet.Cells.Style.Font.Color.SetColor(System.Drawing.Color.Black);

            //单元格背景样式,要设置背景颜色必须先设置背景样式
            worksheet.Cells.Style.Fill.PatternType = ExcelFillStyle.Solid;
            //单元格背景颜色
            worksheet.Cells.Style.Fill.BackgroundColor.SetColor(System.Drawing.Color.DimGray);

            //设置单元格所有边框样式和颜色
            worksheet.Cells.Style.Border.BorderAround(ExcelBorderStyle.Thin, System.Drawing.ColorTranslator.FromHtml("#0097DD"));

            //单独设置单元格四边框 Top、Bottom、Left、Right 的样式和颜色
            //worksheet.Cells.Style.Border.Top.Style = ExcelBorderStyle.Thin;
            //worksheet.Cells.Style.Border.Top.Color.SetColor(System.Drawing.Color.Black);

            //垂直居中
            worksheet.Cells.Style.VerticalAlignment = ExcelVerticalAlignment.Center;

            //水平居中
            worksheet.Cells.Style.HorizontalAlignment = ExcelHorizontalAlignment.Center;

            //单元格是否自动换行
            worksheet.Cells.Style.WrapText = false;

            //设置单元格格式为文本
            worksheet.Cells.Style.Numberformat.Format = "@";

            //单元格自动适应大小
            worksheet.Cells.Style.ShrinkToFit = true;

            package.Save();

            fileStream.Close();
            fileStream.Dispose();

            worksheet.Dispose();
            package.Dispose();
}第二种方式,不指定文件,先创建一个 Excel 工作簿写入数据之后,可以选择保存至指定文件(新建文件)、保存为流、获取字节数组输出到浏览器下载。


public void ExportExcel(DataTable dt)
        {
            //新建一个 Excel 工作簿
            ExcelPackage package = new ExcelPackage();

            // 添加一个 sheet 表
            ExcelWorksheet worksheet = package.Workbook.Worksheets.Add(dt.TableName);

            int rowIndex = 1;   // 起始行为 1
            int colIndex = 1;   // 起始列为 1

            //设置列名
            for (int i = 0; i < dt.Columns.Count; i++)
            {
                worksheet.Cells[rowIndex, colIndex + i].Value = dt.Columns[i].ColumnName;

                //自动调整列宽,也可以指定最小宽度和最大宽度
                worksheet.Column(colIndex + i).AutoFit();
            }

            // 跳过第一列列名
            rowIndex++;

            //写入数据
            for (int i = 0; i < dt.Rows.Count; i++)
            {
                for (int j = 0; j < dt.Columns.Count; j++)
                {
                    worksheet.Cells[rowIndex + i, colIndex + j].Value = dt.Rows[i][j].ToString();
                }

                //自动调整行高
                worksheet.Row(rowIndex + i).CustomHeight = true;
            }

            //设置字体,也可以是中文,比如:宋体
            worksheet.Cells.Style.Font.Name = "Arial";

            //字体加粗
            worksheet.Cells.Style.Font.Bold = true;

            //字体大小
            worksheet.Cells.Style.Font.Size = 12;

            //字体颜色
            worksheet.Cells.Style.Font.Color.SetColor(System.Drawing.Color.Black);

            //单元格背景样式,要设置背景颜色必须先设置背景样式
            worksheet.Cells.Style.Fill.PatternType = ExcelFillStyle.Solid;
            //单元格背景颜色
            worksheet.Cells.Style.Fill.BackgroundColor.SetColor(System.Drawing.Color.DimGray);

            //设置单元格所有边框样式和颜色
            worksheet.Cells.Style.Border.BorderAround(ExcelBorderStyle.Thin, System.Drawing.ColorTranslator.FromHtml("#0097DD"));

            //单独设置单元格四边框 Top、Bottom、Left、Right 的样式和颜色
            //worksheet.Cells.Style.Border.Top.Style = ExcelBorderStyle.Thin;
            //worksheet.Cells.Style.Border.Top.Color.SetColor(System.Drawing.Color.Black);

            //垂直居中
            worksheet.Cells.Style.VerticalAlignment = ExcelVerticalAlignment.Center;

            //水平居中
            worksheet.Cells.Style.HorizontalAlignment = ExcelHorizontalAlignment.Center;

            //单元格是否自动换行
            worksheet.Cells.Style.WrapText = false;

            //设置单元格格式为文本
            worksheet.Cells.Style.Numberformat.Format = "@";

            //单元格自动适应大小
            worksheet.Cells.Style.ShrinkToFit = true;


            ////第一种保存方式
            //string path1 = HttpContext.Current.Server.MapPath("Export/");
            //string filePath1 = path1 + DateTime.Now.ToString("yyyy-MM-dd-HH-mm-ss") + ".xlsx";
            //FileStream fileStream1 = new FileStream(filePath1, FileMode.Create);
            ////保存至指定文件
            //FileInfo fileInfo = new FileInfo(filePath1);
            //package.SaveAs(fileInfo);

            ////第二种保存方式
            //string path2 = HttpContext.Current.Server.MapPath("Export/");
            //string filePath2 = path2 + DateTime.Now.ToString("yyyy-MM-dd-HH-mm-ss") + ".xlsx";
            //FileStream fileStream2 = new FileStream(filePath2, FileMode.Create);
            ////写入文件流
            //package.SaveAs(fileStream2);


            //创建一个内存流,然后转换为字节数组,输出到浏览器下载
            //MemoryStream ms = new MemoryStream();
            //package.SaveAs(ms);
            //byte[] bytes = ms.ToArray();

            //也可以直接获取流
            //Stream stream = package.Stream;

            //也可以直接获取字节数组
            byte[] bytes = package.GetAsByteArray();

            //调用下面的方法输出到浏览器下载
            OutputClient(bytes);

            worksheet.Dispose();
            package.Dispose();
        }

public void OutputClient(byte[] bytes)
        {
            HttpResponse response = HttpContext.Current.Response;

            response.Buffer = true;

            response.Clear();
            response.ClearHeaders();
            response.ClearContent();

            //response.ContentType = "application/ms-excel";
            response.ContentType = "application/vnd.openxmlformats - officedocument.spreadsheetml.sheet";
            response.AppendHeader("Content-Type", "text/html; charset=GB2312");
            response.AddHeader("Content-Disposition", string.Format("attachment; filename={0}.xlsx", DateTime.Now.ToString("yyyy-MM-dd-HH-mm-ss")));

            response.Charset = "GB2312";
            response.ContentEncoding = Encoding.GetEncoding("GB2312");

            response.BinaryWrite(bytes);
            response.Flush();

            response.End();
}这种方法创建文件和输出到浏览器下载都是可以支持 Excel .xlsx 格式的。更多相关属性设置,请参考:
http://www.cnblogs.com/rumeng/p/3785775.html

Centos7创建CA和申请证书 转自https://www.cnblogs.com/mingzhang/p/8949541.html
Centos7.3创建CA和申请证书
openssl 的配置文件:/etc/pki/tls/openssl.cnf
重要参数配置路径
dir = /etc/pki/CA # Where everything is kept
certs = /etc/pki/CA/certs # Where the issued certs are kept
database = /etc/pki/CA/index.txt # database index file.
new_certs_dir = /etc/pki/CA/newcerts # default place for new certs.
certificate = /etc/pki/CA/cacert.pem # The CA certificate
serial = /etc/pki/CA/serial # The current serial number
private_key = /etc/pki/CA/private/cakey.pem # The private key
三种策略:匹配、支持和可选
匹配指要求申请填写的信息跟CA设置信息必须一致;支持指必须填写这项申请信息;可选指可有可无
1、创建所需要的文件
touch /etc/pki/CA/index.txt 生成证书索引数据库文件
echo 01 > /etc/pki/CA/serial 指定第一个颁发证书的序列号,必须是两位十六进制数,99之后是9A
2、CA自签证书
生成私钥
cd /etc/pki/CA/
(umask 066;openssl genrsa -out /etc/pki/CA/private/cakey.pem 2048)
生成自签名证书
openssl req -new -x509 –key /etc/pki/CA/private/cakey.pem -days 7300 -out /etc/pki/CA/cacert.pem
-new: 生成新证书签署请求
-x509: 专用于 CA 生成自签证书
-key: 生成请求时用到的私钥文件
-days n:证书的有效期限
-out: 证书的保存路径
提示输入国家,省,市,公司名称,部门名称,CA主机名(颁发者名称)
linux下查看生成的自签名证书
openssl x509 -in /etc/pki/CA/cacert.pem -noout -text
Windows下查看生成的自签名证书
需要更改上述文件名后缀为.cer即可查看
3、颁发证书
(1)在需要使用证书的主机生成证书请求
给web服务器生成私钥
(umask 066; openssl genrsa -out /app/service.key 2048)
生成证书申请文件
openssl req -new -key /app/service.key -out /app/service.csr
同样提示输入国家,省,市等信息。注意:国家,省,公司名称三项必须和CA一致。主机名称必须和网站域名相同,如www.centos73.com。或者使用泛域名,即*.centos73.com,匹配所有。
(2)将证书请求文件传输给CA
scp /app/service.csr 192.168.10.15:/etc/pki/CA/csr/
(3)CA签署证书,并将证书颁发给请求者
openssl ca -in /etc/pki/CA/csr/service.csr –out /etc/pki/CA/certs/service.crt -days 365
生成certs/service.crt和newcerts/xx.pem文件,两个文件相同。
(4)查看证书中的信息:
openssl x509 -in certs/service.crt -noout -text|issuer|subject|serial|dates
cat serial
cat index.txt //V表示当前证书的状态正常
openssl ca -status SERIAL 查看指定编号的证书状态
cat index.txt.attr //yes表示subjects信息必须是唯一的,不能重复申请
4、吊销证书
(1)在客户端获取要吊销的证书的serial
openssl x509 -in /etc/pki/CA/cacert.pem -noout -serial -subject
(2)在CA上,根据客户提交的serial与subject信息,对比检验是否与index.txt文件中的信息一致,吊销证书:
openssl ca -revoke /etc/pki/CA/newcerts/xx.pem
cat index.txt //R表示证书已经失效
(3)指定第一个吊销证书的编号
注意:第一次更新证书吊销列表前,才需要执行
echo 01 > /etc/pki/CA/crlnumber
(4)更新证书吊销列表:
openssl ca -gencrl -out /etc/pki/CA/crl.pem
linux下查看crl文件:
openssl crl -in /etc/pki/CA/crl.pem -noout -text
Windows下查看吊销列表文件,需更改文件后缀为.crl
关于docker4种网络最佳实战 --摘自https://www.cnblogs.com/iiiiher/p/8047114.html和docker的四种网络方式的介绍现已完结,谢谢您的耐心阅读,如果想了解更多关于ant常用的内置 task转自https://www.cnblogs.com/baicj/archive/2015/12/21/5063608.html、c# networkcomms 3.0 实现模拟登陆总结 转载 https://www.cnblogs.com/zuochanzi/p/7039636.html、C# 导出 Excel 的各种方法总结 转自https://www.cnblogs.com/Brambling/p/6854731.html、Centos7创建CA和申请证书 转自https://www.cnblogs.com/mingzhang/p/8949541.html的相关知识,请在本站寻找。
本文标签:


