对于Sigmoid和tanh激活函数中有多少计算操作?感兴趣的读者,本文将会是一篇不错的选择,我们将详细介绍tanh激活函数和sigmoid关系,并为您提供关于AI神经网络激活函数sigmoid及ma
对于Sigmoid 和 tanh 激活函数中有多少计算操作?感兴趣的读者,本文将会是一篇不错的选择,我们将详细介绍tanh激活函数和sigmoid关系,并为您提供关于AI神经网络激活函数sigmoid及matlab的sigmf、ANN 神经网络 ——Sigmoid 激活函数编程练习 (Python 实现)、LSTM输入门中tanh激活函数的使用、python实现并绘制 sigmoid函数,tanh函数,ReLU函数,PReLU函数的有用信息。
本文目录一览:- Sigmoid 和 tanh 激活函数中有多少计算操作?(tanh激活函数和sigmoid关系)
- AI神经网络激活函数sigmoid及matlab的sigmf
- ANN 神经网络 ——Sigmoid 激活函数编程练习 (Python 实现)
- LSTM输入门中tanh激活函数的使用
- python实现并绘制 sigmoid函数,tanh函数,ReLU函数,PReLU函数
")
Sigmoid 和 tanh 激活函数中有多少计算操作?(tanh激活函数和sigmoid关系)
如何解决Sigmoid 和 tanh 激活函数中有多少计算操作??
我正在为 LSTM 模块创建一个计算图。
例如,在大小为 A=nxl 和 B=lxm 的两个矩形矩阵相乘的情况下,我们可以得到操作总数为 Operations(AxB) = n*l*m + n*(l-1)*m 其中 n*l*m 是乘法次数,n*(l-1)*m 是加法次数。
如何根据输入大小计算 Sigmoid 和 tanh 激活函数中的运算次数(加/减、乘/除等)?
解决方法
暂无找到可以解决该程序问题的有效方法,小编努力寻找整理中!
如果你已经找到好的解决方法,欢迎将解决方案带上本链接一起发送给小编。
小编邮箱:dio#foxmail.com (将#修改为@)

AI神经网络激活函数sigmoid及matlab的sigmf
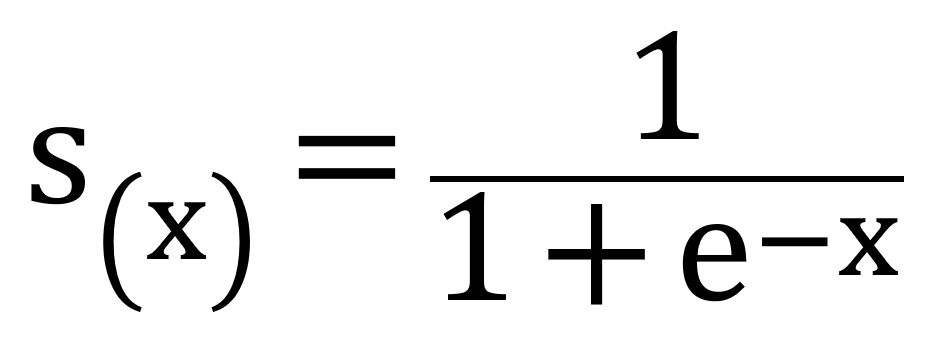
神经网络中引入激活函数sigmoid作用是逻辑回归(logistic regression),引入非线性化。数学中的标准sigmoid输出范围是(0,1)。sigmoid的数学定义:
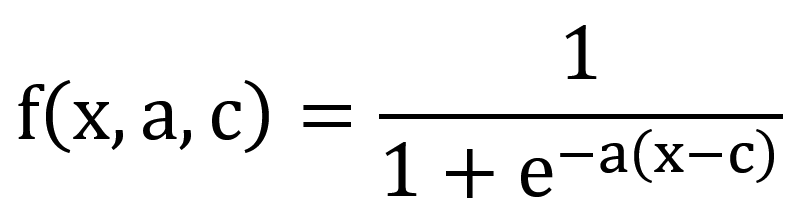
在matlab中,对于sigmoid的定义实现是sigmf,但是sigmf包含多个参数:
用MATLAB跑出不同的sigmoid函数曲线:
x1=-10:0.1:10;

y1=sigmf(x1,[1 2]);
plot(x1,y1,''g'');
hold on;

y2=sigmf(x1,[1 0])+0.2;
plot(x1,y2,''b'');
hold on;

y3 =1./(1+exp(-x1));
plot(x1,y3,''r'');
hold on;

legend(''sigmf(x1,[1 2])'',''sigmf(x1,[1 0])+0.2'',''标准sigmoid函数'');

grid on;
曲线如图所示:
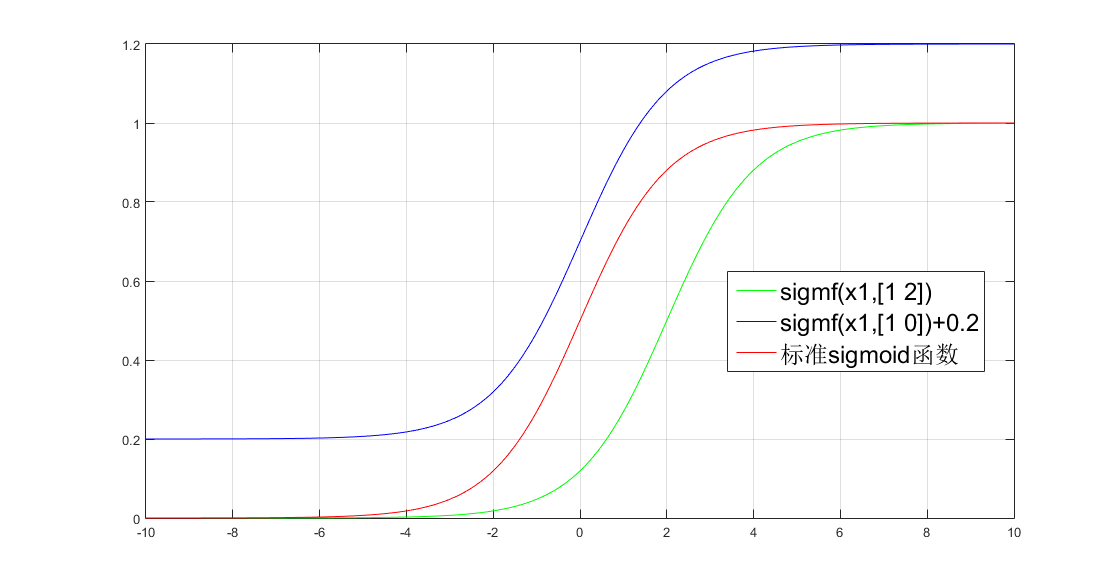
红色的y3曲线,是逻辑回归sigmoid函数的数学标准定义。把matlab中的sigmf参数a=1,c=0,那么sigmf就变成标准sigmoid数学定义实现。蓝色的y2曲线是标准sigmoid函数的y值再加0.2,其中a=1 ,c=0。
")
ANN 神经网络 ——Sigmoid 激活函数编程练习 (Python 实现)

# ----------
#
# There are two functions  to finish:
# First, in activate(), write the sigmoid activation function.
# Second, in update(), write the gradient descent update rule. Updates should be
#   performed online, revising the weights after each data point.
#
# ----------

import numpy as np


class Sigmoid:
    """
    This class models an artificial neuron with sigmoid activation function.
    """

    def __init__(self, weights = np.array([1])):
        """
        Initialize weights based on input arguments. Note that no type-checking
        is being performed here for simplicity of code.
        """
        self.weights = weights

        # NOTE: You do not need to worry about these two attribues for this
        # programming quiz, but these will be useful for if you want to create
        # a network out of these sigmoid units!
        self.last_input = 0 # strength of last input
        self.delta      = 0 # error signal

    def activate(self, values):
        """
        Takes in @param values, a list of numbers equal to length of weights.
        @return the output of a sigmoid unit with given inputs based on unit
        weights.
        """

        # YOUR CODE HERE


        # First calculate the strength of the input signal.
        strength = np.dot(values, self.weights)
        self.last_input = strength

        # TODO: Modify strength using the sigmoid activation function and
        # return as output signal.
        # HINT: You may want to create a helper function to compute the
        #   logistic function since you will need it for the update function.


        result = self.logistic(strength)
        return result


    def logistic(self,strength):
        return 1/(1+np.exp(-strength))


    def update(self, values, train, eta=.1):
        """
        Takes in a 2D array @param values consisting of a LIST of inputs and a
        1D array @param train, consisting of a corresponding list of expected
        outputs. Updates internal weights according to gradient descent using
        these values and an optional learning rate, @param eta.
        """

        # TODO: for each data point...
        for X, y_true in zip(values, train):
            # obtain the output signal for that point
            y_pred = self.activate(X)

            # YOUR CODE HERE

            # TODO: compute derivative of logistic function at input strength
            # Recall: d/dx logistic(x) = logistic(x)*(1-logistic(x))
            dx = self.logistic(self.last_input)*(1 - self.logistic(self.last_input) )
            print ("dx{}:".format(dx))
            print (''\n'')
            # TODO: update self.weights based on learning rate, signal accuracy,
            # function slope (derivative) and input value
            delta_w = eta * (y_true - y_pred) * dx * X
            print ("delta_w:{} weight before {}".format(delta_w, self.weights))

            self.weights += delta_w
            print ("delta_w:{} weight after {}".format(delta_w, self.weights))
            print (''\n'')

def test():
    """
    A few tests to make sure that the perceptron class performs as expected.
    Nothing should show up in the output if all the assertions pass.
    """
    def sum_almost_equal(array1, array2, tol = 1e-5):
        return sum(abs(array1 - array2)) < tol

    u1 = Sigmoid(weights=[3,-2,1])
    assert abs(u1.activate(np.array([1,2,3])) - 0.880797) < 1e-5

    u1.update(np.array([[1,2,3]]),np.array([0]))
    assert sum_almost_equal(u1.weights, np.array([2.990752, -2.018496, 0.972257]))

    u2 = Sigmoid(weights=[0,3,-1])
    u2.update(np.array([[-3,-1,2],[2,1,2]]),np.array([1,0]))
    assert sum_almost_equal(u2.weights, np.array([-0.030739, 2.984961, -1.027437]))

if __name__ == "__main__":
    test()
OUTPUT
Running test()...
dx0.104993585404:


delta_w:[-0.0092478  -0.01849561 -0.02774341] weight before [3, -2, 1]
delta_w:[-0.0092478  -0.01849561 -0.02774341] weight after [ 2.9907522  -2.01849561  0.97225659]


dx0.00664805667079:


delta_w:[-0.00198107 -0.00066036  0.00132071] weight before [0, 3, -1]
delta_w:[-0.00198107 -0.00066036  0.00132071] weight after [ -1.98106867e-03   2.99933964e+00  -9.98679288e-01]


dx0.196791859198:


delta_w:[-0.02875794 -0.01437897 -0.02875794] weight before [ -1.98106867e-03   2.99933964e+00  -9.98679288e-01]
delta_w:[-0.02875794 -0.01437897 -0.02875794] weight after [-0.03073901  2.98496067 -1.02743723]


All done!

LSTM输入门中tanh激活函数的使用
如何解决LSTM输入门中tanh激活函数的使用?
在学习 LSTM 时,我了解了在输入门中使用 2 个不同的激活函数 - sigmoid 和 tanh。我使用了 sigmoid 但没有使用 tanh。在这篇 stackoverflow 文章中,about use of tanh 说我们希望它的二阶导数在变为零之前保持很长时间,我不明白他为什么要谈论二阶导数。此外,他有点说 tanh 消除了消失梯度(在第二段中),但在我阅读的所有文章中,他们都说 Leaky ReLU 有助于消除它。因此我想了解 LSTM 中的 tanh。这不是重复的问题,我只是想了解之前回答的问题。谢谢!?
解决方法
暂无找到可以解决该程序问题的有效方法,小编努力寻找整理中!
如果你已经找到好的解决方法,欢迎将解决方案带上本链接一起发送给小编。
小编邮箱:dio#foxmail.com (将#修改为@)

python实现并绘制 sigmoid函数,tanh函数,ReLU函数,PReLU函数
<a href="http://www.jqhtml.com/18054.html" target="_blank">Python绘制正余弦函数图像</a>
# -*- coding:utf-8 -*-
from matplotlib import pyplot as plt
import numpy as np
import mpl_toolkits.axisartist as axisartist


def sigmoid(x):
    return 1. / (1 + np.exp(-x))


def tanh(x):
    return (np.exp(x) - np.exp(-x)) / (np.exp(x) + np.exp(-x))


def relu(x):
    return np.where(x<0,0,x)


def prelu(x):
    return np.where(x<0,0.5*x,x)

def plot_sigmoid():
    x = np.arange(-10, 10, 0.1)
    y = sigmoid(x)
    fig = plt.figure()
    # ax = fig.add_subplot(111)
    ax = axisartist.Subplot(fig,111)
    ax.spines[''top''].set_color(''none'')
    ax.spines[''right''].set_color(''none'')
    # ax.spines[''bottom''].set_color(''none'')
    # ax.spines[''left''].set_color(''none'')
    ax.axis[''bottom''].set_axisline_style("-|>",size=1.5)
    ax.spines[''left''].set_position((''data'', 0))
    ax.plot(x, y)
    plt.xlim([-10.05, 10.05])
    plt.ylim([-0.02, 1.02])
    plt.tight_layout()
    plt.savefig("sigmoid.png")
    plt.show()


def plot_tanh():
    x = np.arange(-10, 10, 0.1)
    y = tanh(x)
    fig = plt.figure()
    ax = fig.add_subplot(111)
    ax.spines[''top''].set_color(''none'')
    ax.spines[''right''].set_color(''none'')
    # ax.spines[''bottom''].set_color(''none'')
    # ax.spines[''left''].set_color(''none'')
    ax.spines[''left''].set_position((''data'', 0))
    ax.spines[''bottom''].set_position((''data'', 0))
    ax.plot(x, y)
    plt.xlim([-10.05, 10.05])
    plt.ylim([-1.02, 1.02])
    ax.set_yticks([-1.0, -0.5, 0.5, 1.0])
    ax.set_xticks([-10, -5, 5, 10])
    plt.tight_layout()
    plt.savefig("tanh.png")
    plt.show()


def plot_relu():
    x = np.arange(-10, 10, 0.1)
    y = relu(x)
    fig = plt.figure()
    ax = fig.add_subplot(111)
    ax.spines[''top''].set_color(''none'')
    ax.spines[''right''].set_color(''none'')
    # ax.spines[''bottom''].set_color(''none'')
    # ax.spines[''left''].set_color(''none'')
    ax.spines[''left''].set_position((''data'', 0))
    ax.plot(x, y)
    plt.xlim([-10.05, 10.05])
    plt.ylim([0, 10.02])
    ax.set_yticks([2, 4, 6, 8, 10])
    plt.tight_layout()
    plt.savefig("relu.png")
    plt.show()


def plot_prelu():
    x = np.arange(-10, 10, 0.1)
    y = prelu(x)
    fig = plt.figure()
    ax = fig.add_subplot(111)
    ax.spines[''top''].set_color(''none'')
    ax.spines[''right''].set_color(''none'')
    # ax.spines[''bottom''].set_color(''none'')
    # ax.spines[''left''].set_color(''none'')
    ax.spines[''left''].set_position((''data'', 0))
    ax.spines[''bottom''].set_position((''data'', 0))
    ax.plot(x, y)
    plt.xticks([])
    plt.yticks([])
    plt.tight_layout()
    plt.savefig("prelu.png")
    plt.show()


if __name__ == "__main__":
    plot_sigmoid()
    plot_tanh()
    plot_relu()
    plot_prelu()
今天关于Sigmoid 和 tanh 激活函数中有多少计算操作?和tanh激活函数和sigmoid关系的介绍到此结束,谢谢您的阅读,有关AI神经网络激活函数sigmoid及matlab的sigmf、ANN 神经网络 ——Sigmoid 激活函数编程练习 (Python 实现)、LSTM输入门中tanh激活函数的使用、python实现并绘制 sigmoid函数,tanh函数,ReLU函数,PReLU函数等更多相关知识的信息可以在本站进行查询。
本文标签:


