在这篇文章中,我们将带领您了解vue2.0学习笔记的全貌,包括vue2.0教程的相关情况。同时,我们还将为您介绍有关asp.netcore2.0学习笔记、Vue2.0学习笔记之Vue中的compute
在这篇文章中,我们将带领您了解vue2.0学习笔记的全貌,包括vue2.0教程的相关情况。同时,我们还将为您介绍有关asp.net core2.0学习笔记、Vue 2.0学习笔记之Vue中的computed属性、Vue 2.0学习笔记之使用$refs访问Vue中的DOM、vue(1)--指令,回流与重绘---2019.5.20学习笔记的知识,以帮助您更好地理解这个主题。
本文目录一览:- vue2.0学习笔记(vue2.0教程)
- asp.net core2.0学习笔记
- Vue 2.0学习笔记之Vue中的computed属性
- Vue 2.0学习笔记之使用$refs访问Vue中的DOM
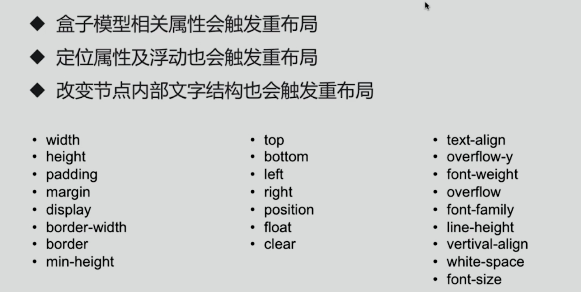
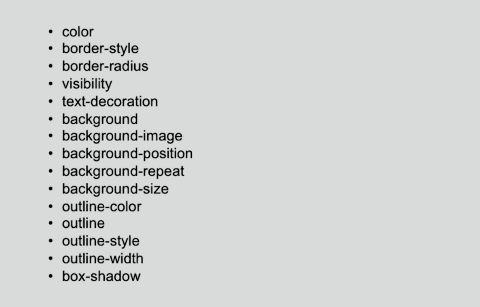
- vue(1)--指令,回流与重绘---2019.5.20学习笔记
")
vue2.0学习笔记(vue2.0教程)
- 易用(html,es5,css)
- 灵活(核心库很小,压缩只有20k左右,渐进式技术栈[从易到难])
- 性能(虚拟dom)
- 相似:只关注视图层,只帮助我们渲染(数据变化,重新渲染dom),使用 Virtual DOM,组件化,
- vue的不同:不用像react把所有的虚拟dom都写在render函数里,它采用传统的dom模板,所以比react多一个指令
- vue的优势:
- vue的劣势:react拥有更丰富的生态圈
- new Vue({})里面传一个配置对象,再是一个data属性,data里面是数据。
- el:挂载点,告诉当前应用的模板的位置(当前应用这个实例的模板的位置,让dom模板和实例相关联),将这个根实例挂载到app这个dom节点上,将dom当做根实例模板。(我们在new一个vue实例的时候,会去读这个el里面的所有的dom节点,把这些dom节点都当成模板)。
- 指令的作用:(数据的变化映射到dom的行为,就是做dom操作的地方,凡是带V-的是vue提供的特殊属性)
- v-bind: 如果属性值是一个变量,在属性名前面加上v-bind
- 条件: v-if:是否显示当前的dom节点(0,false不显示,其他的显示)
- 遍历: v-for=''t in todos'' t遍历的每一个对象,in关键字,todos遍历的数组
- 处理用户操作: v-on:绑定事件 v-on:click=''字符串'' 字符串是一个函数的引用,在一个methods配置项中进行配置,methods是用来配置模板中处理函数的地方
- 双向绑定: v-model=''value''
- 定义组件: 定义:Vue.component(''todo-item'', {
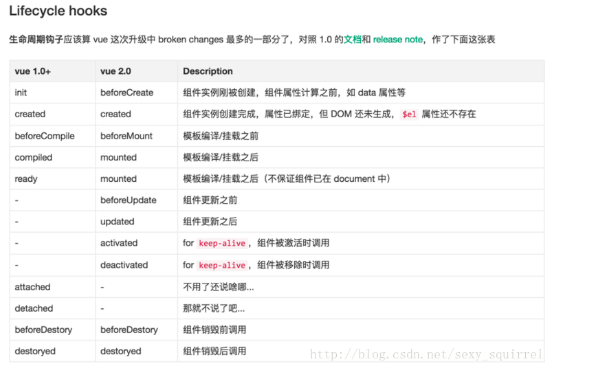
- beforeCreate: vue实例化之前
- created: vue实例化之后
- beforeMount:插入真实的dom之前
- mounted: 渲染之后
- beforeUpdate:当数据发生改变之前,虚拟dom重新渲染之前
- updated:当数据发生改变之后
- beforeDestroy:销毁实例之前
- destroyed:销毁实例之后
- v-html:输出真正的 HTML。站点上动态渲染的任意 HTML 可能会非常危险,因为它很容易导致 XSS 攻击。请只对可信内容使用 HTML 插值,绝不要对用户提供的内容插值。
- v-once:通过使用 v-once 指令,能执行一次性地插值,当数据改变时,插值处的内容不会更新。但请留心这会影响到该节点上所有的数据绑定
- 双花括号中仅仅用来显示数据,加减乘除,三目运算符
- 过滤器:当我们想要格式化显示文本的时候,比如后台返回来的数据是0和1,我们需要将他转成男和女。
- 第一种,class后直接跟一个变量,这个变量必须为一个对象
- 对象语法 <div :> active是class名,bool为变量值bool意思是如果bool值为true的话,就把key当做类名作用到当前的节点上,可以接受多个
- 数组语法:把类放到数组中,数组中存在的就把类作用到当前的dom上,可以使用三目
- v-if和v-else 中间不能有第三者。
- template:当我们想要显示和隐藏多个dom节点的时候使用,把一个 <template> 元素当做包装元素,并在上面使用 v-if。最终的渲染结果不会包含 <template> 元素
- v-else-if 可以支持多选一
- key:
- v-show
- 根据一组数组的选项列表进行渲染,items是源数据数组,item是数组中的每个对象他的别名。index是索引,从0开始。
- 可以遍历对象,value是每个对象的属性值,key为每个对象的属性名也就是key值。index为每个对象的索引。
- 整数迭代
- v-for 和 v-if
- key
- 数组更新检测的变化
- 显示过滤和排序
- 监听事件:
- 方法事件处理器
- 事件修饰符
- 键值修饰符
- 修饰键
- 滑鼠按键修饰符
- 为什么要在html中监听事件
- 文本
- 多行文本
- 复选框
- 单选框
- 单选列表
- 修饰符
- 什么是组件
- 全局注册
- 局部注册
- dom模板问题
- data 必须为函数
- 组件传递数据
- 单向数据流
- prop验证
- 非props属性(有问题)
- 自定义事件
- sync修饰符
- 使用自定义事件的表单输入组件
- slot:分发
- 动态组件
- keep-alive
- 子组件索引
- 异步组件
- 组件的关系:props down,events up
- 概念:元素从无到有,从有到无得一个过渡效果,所谓的过渡效果无非就是添加和删除类
- 触发的条件:条件渲染(v-if),条件展示(v-show),动态组件,根渲染, Vue 提供了 transition 的封装组件,给条件变化组件添加enter, leave过渡,分为enter,enter-active,enter-to
- 如何做动画效果
- 什么时候使用css过渡(transition),什么时候使用css动画(animation)
- css动画
- 自定义过渡类名
- 自定义钩子
- 初始化渲染
- 钩子函数
- 在配置对象中定义computed:{计算属性名:function(){ return 计算好的数据}}
- 1.会监听在这个计算属性中所依赖的任何数据,
- 2.计算属性会被缓存(当依赖的数据没有变化,多次使用的时候不会执行计算属性函数),
- 3.当依赖的数据发生变化的时候,计算属性的值会被重新计算并赋值。
- 4.get和set还可以监听计算属性自身的变化
- getter一般是获取计算属性的值
- setter当计算属性发生变化的时候,同时也会执行set,来修改原本依赖的数据

asp.net core2.0学习笔记
一、Core
1,防止过度发布
2,Main
3,Startup
4,添加过滤器
5,依赖注入
6,中间件
7,静态文件
8,路由
9,环境
10,配置和选项
11,日志
12,使用Sesstion
13,使用po文件配置本地化
14,在 ASP.NET 管道中运行 OWIN 中间件
15,WebSockets
16,使用内存缓存
二、EF
1,Include和ThenInclude
2,通过依赖关系注入注册上下文
3,种子数据
4,级联删除
5,组合PK
6,使用原始sql
三、Razor页面
四、MVC
1,模型绑定
2,视图
3,标记帮助程序
4,内置标记帮助程序
5,分部视图
6,视图组件
7,上传文件
8,筛选器
9,绑定与压缩
五、Model
六、配置
一、Core
1,防止过度发布
①TryUpdateModelAsync


public async Task<IActionResult> OnPostAsync()
        {
            if (!ModelState.IsValid)
            {
                return Page();
            }
            var emptyStudent = new Student();
            if (await TryUpdateModelAsync<Student>(emptyStudent, "student", s => s.FirstMidName, s => s.LastName, s => s.EnrollmentDate))
            {
                _context.Students.Add(emptyStudent);
                await _context.SaveChangesAsync();
                return RedirectToPage("./Index");

            }
            return null;
        }

        [BindProperty]
        public Student Student { get; set; }
        public async Task<IActionResult> OnPostAsync(int? id)
        {
            if (!ModelState.IsValid)
            {
                return Page();
            }

            var studentToUpdate =await _context.Students.FindAsync(id);
            if (await TryUpdateModelAsync<Student>(studentToUpdate, "student", s => s.LastName, s => s.EnrollmentDate))
            {
                await _context.SaveChangesAsync();
                return RedirectToPage("./Index");
            }
            return Page();
}仅更新TryUpdateModelAsync列出的值
在上述示例中:
- 第二个自变量 (
"student", // Prefix) 是用于查找值的前缀。 该自变量不区分大小写。 - 已发布的表单值通过模型绑定转换为
Student模型中的类型。
②通过属性名称匹配


using System;

namespace ContosoUniversity.Models
{
    public class StudentVM
    {
        public int ID { get; set; }
        public string LastName { get; set; }
        public string FirstMidName { get; set; }
        public DateTime EnrollmentDate { get; set; }
    }
}

[BindProperty]
public StudentVM StudentVM { get; set; }

public async Task<IActionResult> OnPostAsync()
{
    if (!ModelState.IsValid)
    {
        return Page();
    }

    var entry = _context.Add(new Student());
    entry.CurrentValues.SetValues(StudentVM);
    await _context.SaveChangesAsync();
    return RedirectToPage("./Index");
}
2,Main


using Microsoft.AspNetCore;
using Microsoft.AspNetCore.Hosting;

namespace aspnetcoreapp
{
    public class Program
    {
        public static void Main(string[] args)
        {
            BuildWebHost(args).Run();
        }

        public static IWebHost BuildWebHost(string[] args) =>
            WebHost.CreateDefaultBuilder(args)
                .UseStartup<Startup>()
                .Build();
    }
}UseHttpSys:用于在 HTTP.sys 中托管应用
UseContentRoot:用于指定根内容目录
Build 和 Run 方法生成 IWebHost 对象,该对象托管应用并开始侦听 HTTP 请求
UseStartup:指定Startup 类
3,Startup
ConfigureServices 定义应用所使用的服务(如 ASP.NET Core MVC、Entity Framework Core 和Identity)(可选择)
Configure 定义请求管道的中间件(必须)
ConfigureServices在 Configure之前执行
UseMvc 扩展方法将路由中间件添加到请求管道,并将 MVC 配置为默认设置。
4,添加过滤器
①定义Middleware


using System;
using System.Net;
using System.Threading.Tasks;
using Microsoft.AspNetCore.Http;
using Microsoft.Extensions.Options;
using WebApplication1.Models;

namespace WebApplication1
{
    public class RequestSetOptionsMiddleware
    {
        private readonly RequestDelegate _next;
        private IOptions<AppOptions> _injectedOptions;

        public RequestSetOptionsMiddleware(
            RequestDelegate next, IOptions<AppOptions> injectedOptions)
        {
            _next = next;
            _injectedOptions = injectedOptions;
        }

        public async Task Invoke(HttpContext httpContext)
        {
            Console.WriteLine("RequestSetOptionsMiddleware.Invoke");

            var option = httpContext.Request.Query["option"];

            if (!string.IsNullOrWhiteSpace(option))
            {
                _injectedOptions.Value.Option = WebUtility.HtmlEncode(option);
            }

            await _next(httpContext);
        }
    }
}②实现IStartupFilter


using Microsoft.AspNetCore.Hosting;
using System;
using System.Collections.Generic;
using System.Linq;
using System.Threading.Tasks;
using Microsoft.AspNetCore.Builder;

namespace WebApplication1
{
    public class RequestSetOptionsStartupFilter : IStartupFilter
    {
        public Action<IApplicationBuilder> Configure(Action<IApplicationBuilder> next)
        {
            return builder =>
            {
                builder.UseMiddleware<RequestSetOptionsMiddleware>();
                next(builder);
            };
        }
    }
}③在 ConfigureServices 的服务容器中注册 IStartupFilter


// This method gets called by the runtime. Use this method to add services to the container.
        public void ConfigureServices(IServiceCollection services)
        {
            services.AddTransient<IStartupFilter, RequestSetOptionsStartupFilter>();
            services.AddMvc();
        }
5,依赖注入
①注册案例


public void ConfigureServices(IServiceCollection services)
{
    services.AddDbContext<ApplicationDbContext>(options =>
        options.UseInMemoryDatabase()
    );

    // Add framework services.
    services.AddMvc();

    // Register application services.
    services.AddScoped<ICharacterRepository, CharacterRepository>();
    services.AddTransient<IOperationTransient, Operation>();
    services.AddScoped<IOperationScoped, Operation>();
    services.AddSingleton<IOperationSingleton, Operation>();
    services.AddSingleton<IOperationSingletonInstance>(new Operation(Guid.Empty));
    services.AddTransient<OperationService, OperationService>();
}
6,中间件
①中间件排序
②Use、Run 和 Map
Run:不会调用next方法。后面的管道将不会执行


public void Configure(IApplicationBuilder app, IHostingEnvironment env)
        {

            app.Run(async (context)=>{
                 await context.Response.WriteAsync("Map Test 1");
            });

            if (env.IsDevelopment())
            {
                app.UseDeveloperExceptionPage();
            }
            else
            {
                app.UseExceptionHandler("/Home/Error");
            }

            //使用wwwroot
            app.UseStaticFiles();

            app.UseMvc(routes =>
            {
                routes.MapRoute(
                    name: "default",
                    template: "{controller=Home}/{action=Index}/{id?}");
            });


}Use:如果中间件不调用next方法,会使管道短路。
Map:如果请求路径以给定路径开头,则执行分支。


public class Startup
{
    private static void HandleMapTest1(IApplicationBuilder app)
    {
        app.Run(async context =>
        {
            await context.Response.WriteAsync("Map Test 1");
        });
    }

    private static void HandleMapTest2(IApplicationBuilder app)
    {
        app.Run(async context =>
        {
            await context.Response.WriteAsync("Map Test 2");
        });
    }

    public void Configure(IApplicationBuilder app)
    {
        app.Map("/map1", HandleMapTest1);

        app.Map("/map2", HandleMapTest2);

        app.Run(async context =>
        {
            await context.Response.WriteAsync("Hello from non-Map delegate. <p>");
        });
    }
}


public class Startup
{
    private static void HandleBranch(IApplicationBuilder app)
    {
        app.Run(async context =>
        {
            var branchVer = context.Request.Query["branch"];
            await context.Response.WriteAsync($"Branch used = {branchVer}");
        });
    }

    public void Configure(IApplicationBuilder app)
    {
        app.MapWhen(context => context.Request.Query.ContainsKey("branch"),
                               HandleBranch);

        app.Run(async context =>
        {
            await context.Response.WriteAsync("Hello from non-Map delegate. <p>");
        });
    }
}


app.Map("/level1", level1App => {
       level1App.Map("/level2a", level2AApp => {
           // "/level1/level2a"
           //...
       });
       level1App.Map("/level2b", level2BApp => {
           // "/level1/level2b"
           //...
       });
   });

app.Map("/level1/level2", HandleMultiSeg);③自定义Middleware


using Microsoft.AspNetCore.Builder;
using Microsoft.AspNetCore.Http;
using System.Globalization;
using System.Threading.Tasks;

namespace IocDemo
{
    public class CustomMiddleware
    {
        private readonly RequestDelegate _next;

        public CustomMiddleware(RequestDelegate next)
        {
            _next=next;
        }
        public Task InvokeAsync(HttpContext context)
        {
            this._next.Invoke(context);
            context.Response.WriteAsync("CustomMiddleware");
            return Task.CompletedTask;
        }
    }
    public static class CustomMiddlewareExtensions
    {
        public static IApplicationBuilder UseCustomer(this IApplicationBuilder budiler)
        {
            return budiler.UseMiddleware<CustomMiddleware>();
        }

    }


}

using System;
using System.Collections.Generic;
using System.Linq;
using System.Threading.Tasks;
using Microsoft.AspNetCore.Builder;
using Microsoft.AspNetCore.Hosting;
using Microsoft.AspNetCore.Http;
using Microsoft.Extensions.Configuration;
using Microsoft.Extensions.DependencyInjection;

namespace IocDemo
{
    public class Startup
    {
        public Startup(IConfiguration configuration)
        {
            Configuration = configuration;
        }

        public IConfiguration Configuration { get; }

        // This method gets called by the runtime. Use this method to add services to the container.
        public void ConfigureServices(IServiceCollection services)
        {
            services.AddMvc();
        }

        // This method gets called by the runtime. Use this method to configure the HTTP request pipeline.
        public void Configure(IApplicationBuilder app, IHostingEnvironment env)
        {

            if (env.IsDevelopment())
            {
                app.UseDeveloperExceptionPage();
            }
            else
            {
                app.UseExceptionHandler("/Home/Error");
            }

            //使用自定义middleware
            app.UseCustomer();

            //使用wwwroot
            app.UseStaticFiles();

            app.UseMvc(routes =>
            {
                routes.MapRoute(
                    name: "default",
                    template: "{controller=Home}/{action=Index}/{id?}");
            });


        }
    }
}
7,静态文件
①提供 Web 根目录外的文件
请求 http://<server_address>/StaticFiles/images/banner1.svg 提供 banner1.svg 文件


public void Configure(IApplicationBuilder app)
{
    app.UseStaticFiles(); // For the wwwroot folder

    app.UseStaticFiles(new StaticFileOptions
    {
        FileProvider = new PhysicalFileProvider(
            Path.Combine(Directory.GetCurrentDirectory(), "MyStaticFiles")),
        RequestPath = "/StaticFiles"
    });
}②设置 HTTP 响应标头


public void Configure(IApplicationBuilder app)
{
    app.UseStaticFiles(new StaticFileOptions
    {
        OnPrepareResponse = ctx =>
        {
            // Requires the following import:
            // using Microsoft.AspNetCore.Http;
            ctx.Context.Response.Headers.Append("Cache-Control", "public,max-age=600");
        }
    });
}③静态文件授权方法
新建个静态文件根文件夹


[Authorize]
public IActionResult BannerImage()
{
    var file = Path.Combine(Directory.GetCurrentDirectory(),
                            "MyStaticFiles", "images", "banner1.svg");

    return PhysicalFile(file, "image/svg+xml");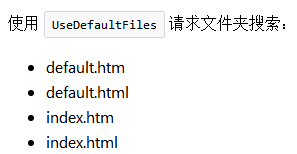
}④默认提供文档


public void Configure(IApplicationBuilder app)
{
    app.UseDefaultFiles();
    app.UseStaticFiles();
}要提供默认文件,必须在 UseStaticFiles 前调用 UseDefaultFiles。 UseDefaultFiles 实际上用于重写 URL,不提供文件。 通过 UseStaticFiles 启用静态文件中间件来提供文件。


public void Configure(IApplicationBuilder app)
{
    // Serve my app-specific default file, if present.
    DefaultFilesOptions options = new DefaultFilesOptions();
    options.DefaultFileNames.Clear();
    options.DefaultFileNames.Add("mydefault.html");
    app.UseDefaultFiles(options);
    app.UseStaticFiles();
}
8,路由


routes.MapRoute(
    name: "default",
    template: "{controller=Home}/{action=Index}/{id?}");

routes.MapRoute(
    name: "default",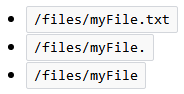
template: "{controller=Home}/{action=Index}/{id:int}");①尾随句点 . 是可选: files/{filename}.{ext?}
②*全方位参数: blog/{*slug}
将匹配以 /blog 开头且其后带有任何值(将分配给 slug 路由值)的 URI
9,环境
ASP.NET Core 在应用程序启动时读取环境变量 ASPNETCORE_ENVIRONMENT(如果未设置 ASPNETCORE_ENVIRONMENT,将默认为 Production)
ASPNETCORE_ENVIRONMENT值:
- Development(开发)
- Production(生产)
- Staging(暂存)
10,配置和选项
nuget Microsoft.Extensions.Configuration
①读取json文件
nuget Microsoft.Extensions.Configuration.Json


using System;
using System.IO;
// Requires NuGet package
// Microsoft.Extensions.Configuration.Json
using Microsoft.Extensions.Configuration;

public class Program
{
    public static IConfiguration Configuration { get; set; }

    public static void Main(string[] args = null)
    {
        var builder = new ConfigurationBuilder()
            .SetBasePath(Directory.GetCurrentDirectory())
            .AddJsonFile("appsettings.json");

        Configuration = builder.Build();

        Console.WriteLine($"option1 = {Configuration["Option1"]}");
        Console.WriteLine($"option2 = {Configuration["option2"]}");
        Console.WriteLine(
            $"suboption1 = {Configuration["subsection:suboption1"]}");
        Console.WriteLine();

        Console.WriteLine("Wizards:");
        Console.Write($"{Configuration["wizards:0:Name"]}, ");
        Console.WriteLine($"age {Configuration["wizards:0:Age"]}");
        Console.Write($"{Configuration["wizards:1:Name"]}, ");
        Console.WriteLine($"age {Configuration["wizards:1:Age"]}");
        Console.WriteLine();

        Console.WriteLine("Press a key...");
        Console.ReadKey();
    }
}

{
  "option1": "value1_from_json",
  "option2": 2,

  "subsection": {
    "suboption1": "subvalue1_from_json"
  },
  "wizards": [
    {
      "Name": "Gandalf",
      "Age": "1000"
    },
    {
      "Name": "Harry",
      "Age": "17"
    }
  ]
}节点由冒号 : 分隔: Configuration["subsection:suboption1"]
获取数组值: Configuration["wizards:0:Name"]
②读取xml文件
nuget Microsoft.Extensions.Configuration.Xml


using System;
using Microsoft.Extensions.Configuration;
using System.IO;

namespace ConsoleDemo
{
    class Program
    {
        static void Main(string[] args)
        {
            var builder= new ConfigurationBuilder()
                        .SetBasePath(Directory.GetCurrentDirectory())
                        .AddXmlFile("test.xml");
            var configuration=builder.Build();
            Console.WriteLine(configuration["wizard:Harry:age"]);
        }
    }
}

<wizards>
  <wizard name="Gandalf">
    <age>1000</age>
  </wizard>
  <wizard name="Harry">
    <age>17</age>
  </wizard>
</wizards>③json绑定到对象里面
nuget Microsoft.Extensions.Configuration.Binder


using System;
using Microsoft.Extensions.Configuration;
using System.IO;
using System.Collections.Generic;

namespace ConsoleDemo
{
    class Program
    {
        static void Main(string[] args)
        {
            var dic=new Dictionary<string,string>();
            dic.Add("Person:Name","hunter");
            dic.Add("Person:Age","10");


            var builder=new ConfigurationBuilder()
                        .AddInMemoryCollection(dic);
            IConfiguration configuration=builder.Build();

            var person=new Person();
            configuration.GetSection("Person").Bind(person);
            Console.WriteLine(person.Name);
            Console.WriteLine(person.Age);

        }
    }

    public class Person{
        public string Name{get;set;}
        public int Age{get;set;}
    }
}④在razor视图获取mvc视图中使用configuration


@page
@model IndexModel
@using Microsoft.Extensions.Configuration
@inject IConfiguration Configuration
<!DOCTYPE html>
<html lang="en">
<head>
<title>Index Page</title>
</head>
<body>
<h1>Access configuration in a Razor Pages page</h1>
<p>Configuration["key"]: @Configuration["key"]</p>
</body>
</html>

@using Microsoft.Extensions.Configuration
@inject IConfiguration Configuration
<!DOCTYPE html>
<html lang="en">
<head>
<title>Index View</title>
</head>
<body>
<h1>Access configuration in an MVC view</h1>
<p>Configuration["key"]: @Configuration["key"]</p>
</body>
</html>④注入option配置


{
  "Logging": {
    "IncludeScopes": false,
    "LogLevel": {
      "Default": "Warning"
    }
  },
  "Option":{
    "option1":"value1_from_json",
    "option2":-1
  }

}

  public class MyOption{
        public string option1{get;set;}
        public int option2{get;set;}
    }

services.Configure<MyOption>(Configuration.GetSection("Option"));

private  IOptions<MyOption> _option;
        public BlogController(IOptions<MyOption> option)
        {
            _option=option;
           _option.Value.option1+_option.Value.option2
        }
11,日志
①创建日志
nuget Microsoft.Extensions.Logging


public class TodoController : Controller
{
    private readonly ITodoRepository _todoRepository;
    private readonly ILogger _logger;

    public TodoController(ITodoRepository todoRepository,
        ILogger<TodoController> logger)
    {
        _todoRepository = todoRepository;
        _logger = logger;
    }

public IActionResult GetById(string id)
{
    _logger.LogInformation(LoggingEvents.GetItem, "Getting item {ID}", id);
    var item = _todoRepository.Find(id);
    if (item == null)
    {
        _logger.LogWarning(LoggingEvents.GetItemNotFound, "GetById({ID}) NOT FOUND", id);
        return NotFound();
    }
    return new ObjectResult(item);
}②事件ID
LoggingEvents自己定义例如:


public class LoggingEvents
{
    public const int GenerateItems = 1000;
    public const int ListItems = 1001;
    public const int GetItem = 1002;
    public const int InsertItem = 1003;
    public const int UpdateItem = 1004;
    public const int DeleteItem = 1005;

    public const int GetItemNotFound = 4000;
    public const int UpdateItemNotFound = 4001;
}

public IActionResult GetById(string id)
{
    _logger.LogInformation(LoggingEvents.GetItem, "Getting item {ID}", id);
    var item = _todoRepository.Find(id);
    if (item == null)
    {
        _logger.LogWarning(LoggingEvents.GetItemNotFound, "GetById({ID}) NOT FOUND", id);
        return NotFound();
    }
    return new ObjectResult(item);
}
12,使用Sesstion
using Microsoft.AspNetCore.Http


using System;
using System.Collections.Generic;
using System.Linq;
using System.Threading.Tasks;
using Microsoft.AspNetCore.Builder;
using Microsoft.AspNetCore.Hosting;
using Microsoft.Extensions.Configuration;
using Microsoft.Extensions.DependencyInjection;
using Microsoft.Extensions.FileProviders;

namespace MvcDemo
{
    public class Startup
    {
        public Startup(IConfiguration configuration, IHostingEnvironment env)
        {
            Configuration = configuration;
            HostingEnvironment=env;
        }

        public IConfiguration Configuration { get; }
        public IHostingEnvironment HostingEnvironment{get;}

        // This method gets called by the runtime. Use this method to add services to the container.
        public void ConfigureServices(IServiceCollection services)
        {
            var physicalProvider= HostingEnvironment.ContentRootFileProvider;
            services.AddSingleton<IFileProvider>(physicalProvider);

            services.AddSession(option=>{
                option.IdleTimeout=TimeSpan.FromSeconds(10);
                option.Cookie.HttpOnly=true;//指示客户端脚本是否可以访问cookie。
            });

            services.AddMvc();
        }

        // This method gets called by the runtime. Use this method to configure the HTTP request pipeline.
        public void Configure(IApplicationBuilder app, IHostingEnvironment env)
        {
            if (env.IsDevelopment())
            {
                app.UseDeveloperExceptionPage();
            }
            else
            {
                app.UseExceptionHandler("/Home/Error");
            }

            app.UseSession();//要在UseMvc之前调用

            app.UseStaticFiles();

            app.UseMvc(routes =>
            {
                routes.MapRoute(
                    name: "default",
                    template: "{controller=Home}/{action=Index}/{id?}");
            });
        }
    }
}

using System;
using System.Collections.Generic;
using System.Diagnostics;
using System.Linq;
using System.Threading.Tasks;
using Microsoft.AspNetCore.Mvc;
using MvcDemo.Models;
using Microsoft.Extensions.FileProviders;
using Microsoft.AspNetCore.Http;

namespace MvcDemo.Controllers
{
    public class SesstionController : Controller
    {

        public string Index(string str)
        {
            HttpContext.Session.SetString("str",str);

            return "sesstion已经设置";
        }

        public string GetSession()
        {
           var val= HttpContext.Session.GetString("str");
           return val;
        }


    }
}
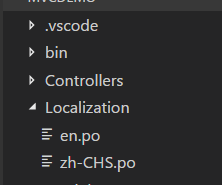
13,使用po文件配置本地化
nuget OrchardCore.Localization.Core
①配置Startup


using System;
using System.Collections.Generic;
using System.Globalization;
using System.Linq;
using System.Threading.Tasks;
using Microsoft.AspNetCore.Builder;
using Microsoft.AspNetCore.Hosting;
using Microsoft.AspNetCore.Localization;
using Microsoft.Extensions.Configuration;
using Microsoft.Extensions.DependencyInjection;
using Microsoft.Extensions.FileProviders;

namespace MvcDemo
{
    public class Startup
    {
        public Startup(IConfiguration configuration, IHostingEnvironment env)
        {
            Configuration = configuration;
            HostingEnvironment=env;
        }

        public IConfiguration Configuration { get; }
        public IHostingEnvironment HostingEnvironment{get;}

        // This method gets called by the runtime. Use this method to add services to the container.
        public void ConfigureServices(IServiceCollection services)
        {
            var physicalProvider= HostingEnvironment.ContentRootFileProvider;
            services.AddSingleton<IFileProvider>(physicalProvider);

            services.AddSession(option=>{
                option.IdleTimeout=TimeSpan.FromSeconds(10);
                option.Cookie.HttpOnly=true;//指示客户端脚本是否可以访问cookie。
            });

            services.AddLocalization(option=>{

            });
            services.AddMvc()
                    .AddViewLocalization();
            services.AddPortableObjectLocalization(options=>{
                options.ResourcesPath="Localization";
            });
            services.Configure<RequestLocalizationOptions>(options =>
            {
                var supportedCultures = new List<CultureInfo>
                {
                    new CultureInfo("en-US"),
                    new CultureInfo("en"),
                    new CultureInfo("fr-FR"),
                    new CultureInfo("fr"),
                    new CultureInfo("zh-CHS")
                };

                options.DefaultRequestCulture = new RequestCulture("zh-CHS");
                options.SupportedCultures = supportedCultures;
                options.SupportedUICultures = supportedCultures;
            });

        }

        // This method gets called by the runtime. Use this method to configure the HTTP request pipeline.
        public void Configure(IApplicationBuilder app, IHostingEnvironment env)
        {
            if (env.IsDevelopment())
            {
                app.UseDeveloperExceptionPage();
            }
            else
            {
                app.UseExceptionHandler("/Home/Error");
            }

            app.UseSession();//要在UseMvc之前调用

            app.UseStaticFiles();

            app.UseRequestLocalization();

            app.UseMvc(routes =>
            {
                routes.MapRoute(
                    name: "default",
                    template: "{controller=Home}/{action=Index}/{id?}");
            });
        }
    }
}②使应用内容可本地化


using System;
using System.Collections.Generic;
using System.Diagnostics;
using System.Linq;
using System.Threading;
using System.Threading.Tasks;
using Microsoft.AspNetCore.Mvc;
using MvcDemo.Models;
using Microsoft.Extensions.Localization;
using Microsoft.Extensions.DependencyInjection;
using Microsoft.AspNetCore.Builder;
using System.Globalization;
using Microsoft.AspNetCore.Localization;

namespace MvcDemo.Controllers
{
    public class LocalizationController : Controller
    {

        private readonly IStringLocalizer<LocalizationController> _localization;

        public LocalizationController(IStringLocalizer<LocalizationController> localization)
        {
            _localization=localization;
        }

        public string Index()
        {
            return _localization["Localization"];
        }

        public string Get()
        {
            return _localization["Test{0}",1];
        }

    }
}③视图本地化


@using Microsoft.AspNetCore.Mvc.Localization
@inject IViewLocalizer Localizer
@{
    ViewData["Title"] = "Home Page";
}
<p>@Localizer["Localization"]</p>
<p>@Localizer["Test{0}",1]</p>④DataAnnotations本地化
⑤po文件


msgid "Localization"
msgstr "Localization"

msgid "Home"
msgstr "Home"

msgid "Test{0}"
msgstr "Test{0}"

msgid "Localization"
msgstr "本地化"

msgid "Home"
msgstr "主页"

msgid "Test{0}"
msgstr "测试{0}"msgid:键
msgstr:值
14,在 ASP.NET 管道中运行 OWIN 中间件


using System;
using System.Collections.Generic;
using System.Linq;
using System.Threading.Tasks;
using Microsoft.AspNetCore.Builder;
using Microsoft.AspNetCore.Hosting;
using Microsoft.Extensions.Configuration;
using Microsoft.Extensions.DependencyInjection;
using Microsoft.AspNetCore.Owin;
using System.Text;
using System.IO;
using System.Globalization;

namespace AspNetCoreOwin
{
    public class Startup
    {
        public Startup(IConfiguration configuration)
        {
            Configuration = configuration;
        }

        public IConfiguration Configuration { get; }

        // This method gets called by the runtime. Use this method to add services to the container.
        public void ConfigureServices(IServiceCollection services)
        {
            services.AddMvc();
        }

        // This method gets called by the runtime. Use this method to configure the HTTP request pipeline.
        public void Configure(IApplicationBuilder app, IHostingEnvironment env)
        {
            if (env.IsDevelopment())
            {
                app.UseDeveloperExceptionPage();
            }
            else
            {
                app.UseExceptionHandler("/Home/Error");
            }

            app.UseOwin(pipeline=>{
                pipeline(next=>OwinHello);
            });

            app.UseStaticFiles();

            app.UseMvc(routes =>
            {
                routes.MapRoute(
                    name: "default",
                    template: "{controller=Home}/{action=Index}/{id?}");
            });
        }

        public Task OwinHello(IDictionary<string,object> environment)
        {
            string responseText="hello owin";
            byte[] responseBytes=Encoding.UTF8.GetBytes(responseText);
            var responseStream=(Stream)environment["owin.ResponseBody"];
            var responseHeaders=(IDictionary<string,string[]>)environment["owin.ResponseHeaders"];
            responseHeaders["Content-Length"]=new string[]{responseBytes.Length.ToString(CultureInfo.InvariantCulture)};
            responseHeaders["Content-Type"]=new string[] {"text/plain"};
            return responseStream.WriteAsync(responseBytes,0,responseBytes.Length);
        }
    }
}案例下载:https://pan.baidu.com/s/1FLfBuqsMuKnv7wSF3BSW4w
15,WebSockets


using System;
using System.Collections.Generic;
using System.Linq;
using System.Threading.Tasks;
using Microsoft.AspNetCore.Builder;
using Microsoft.AspNetCore.Hosting;
using Microsoft.Extensions.Configuration;
using Microsoft.Extensions.DependencyInjection;
using Microsoft.AspNetCore.WebSockets;
using System.Net.WebSockets;
using Microsoft.AspNetCore.Http;
using System.Threading;
using System.Collections.Concurrent;

namespace WebSocketsDemo
{
    public class Startup
    {
        public Startup(IConfiguration configuration)
        {
            Configuration = configuration;
        }

        public IConfiguration Configuration { get; }

        // This method gets called by the runtime. Use this method to add services to the container.
        public void ConfigureServices(IServiceCollection services)
        {
            services.AddMvc();
        }

        // This method gets called by the runtime. Use this method to configure the HTTP request pipeline.
        public void Configure(IApplicationBuilder app, IHostingEnvironment env)
        {
            if (env.IsDevelopment())
            {
                app.UseDeveloperExceptionPage();
            }
            else
            {
                app.UseExceptionHandler("/Home/Error");
            }

            app.UseDefaultFiles();
            app.UseStaticFiles();

            var webSocketOption=new WebSocketOptions()
            {
                KeepAliveInterval=TimeSpan.FromSeconds(120),//向客户端发送“ping”帧的频率,以确保代理保持连接处于打开状态
                ReceiveBufferSize=4*1024//用于接收数据的缓冲区的大小
            };
            app.UseWebSockets(webSocketOption);

            app.UseMvc(routes =>
            {
                routes.MapRoute(
                    name: "default",
                    template: "{controller=Home}/{action=Index}/{id?}");
            });

            app.Use(async (context,next)=>{
                if(context.Request.Path=="/ws")
                {
                    if(context.WebSockets.IsWebSocketRequest)//判断是否是websocket请求
                    {
                        //将TCP连接升级到WebSocket连接,并提供websocket对象
                        WebSocket webSocket=await context.WebSockets.AcceptWebSocketAsync();
                        WebSockets.TryAdd(webSocket,"1");
                        await Echo(context,webSocket);
                    }
                    else
                    {
                        context.Response.StatusCode=400;
                    }
                }
                else
                {
                    await next();
                }
            });
        }

        private async Task Echo(HttpContext context,WebSocket websocket)
        {
            var buffer=new byte[4*1024];
            WebSocketReceiveResult result=await websocket.ReceiveAsync(new ArraySegment<byte>(buffer),CancellationToken.None);
            while(!result.CloseStatus.HasValue)
            {
                //广播
                foreach(var ws in WebSockets)
                {
                    if(!ws.Key.CloseStatus.HasValue)
                    {
                       await ws.Key.SendAsync(new ArraySegment<byte>(buffer,0,buffer.Length),result.MessageType,result.EndOfMessage,CancellationToken.None);
                    }
                    else
                    {
                        string value;
                        WebSockets.TryRemove(ws.Key,out value);
                    }
                    //await ws.SendAsync(new ArraySegment<byte>(buffer,0,buffer.Length),result.MessageType,result.EndOfMessage,CancellationToken.None);
                }

                result=await websocket.ReceiveAsync(new ArraySegment<byte>(buffer),CancellationToken.None);
            }
            await websocket.CloseAsync(result.CloseStatus.Value,result.CloseStatusDescription,CancellationToken.None);
        }
        //可以开一个线程去检测WebSocket是否掉线,掉线则从字典中删除
        private static ConcurrentDictionary<WebSocket,string> WebSockets=new ConcurrentDictionary<WebSocket,string>();
    }
}

<!doctype html>
<html lang="en">
  <head>
    <title>Title</title>
    <!-- Required meta tags -->
    <meta charset="utf-8">
    <meta name="viewport" content="width=device-width, initial-scale=1, shrink-to-fit=no">

    <!-- Bootstrap CSS -->
    <link rel="stylesheet" href="https://maxcdn.bootstrapcdn.com/bootstrap/4.0.0/css/bootstrap.min.css" integrity="sha384-Gn5384xqQ1aoWXA+058RXPxPg6fy4IWvTNh0E263XmFcJlSAwiGgFAW/dAiS6JXm" crossorigin="anonymous">
    <script src="lib/jquery/dist/jquery.min.js"></script>
    </head>
  <body>

    <input type="text" id="message"/><input type="button" id="send" value="发送"/>

    <div id="context"></div>

    <!-- Optional JavaScript -->
    <!-- jQuery first, then Popper.js, then Bootstrap JS -->
    <script src="https://code.jquery.com/jquery-3.2.1.slim.min.js" integrity="sha384-KJ3o2DKtIkvYIK3UENzmM7KCkRr/rE9/Qpg6aAZGJwFDMVNA/GpGFF93hXpG5KkN" crossorigin="anonymous"></script>
    <script src="https://cdnjs.cloudflare.com/ajax/libs/popper.js/1.12.9/umd/popper.min.js" integrity="sha384-ApNbgh9B+Y1QKtv3Rn7W3mgPxhU9K/ScQsAP7hUibX39j7fakFPskvXusvfa0b4Q" crossorigin="anonymous"></script>
    <script src="https://maxcdn.bootstrapcdn.com/bootstrap/4.0.0/js/bootstrap.min.js" integrity="sha384-JZR6Spejh4U02d8jOt6vLEHfe/JQGiRRSQQxSfFWpi1MquVdAyjUar5+76PVCmYl" crossorigin="anonymous"></script>
  </body>

  <script>

      var ws;
      if("WebSocket" in window)
      {
         ws=new WebSocket("ws://localhost:5000/ws");
         ws.onopen=function(){
          alert("开始")
         }
         ws.onmessage=function(res){
           $("#context").append(res.data+"<br/>")
         }
         ws.onclose=function(){
           alert("退出")
         }
      }
      else
      {
          alert("不支持websocket");
      }

   $(function(){

          $("#send").click(function(){
            ws.send($("#message").val())
          })
   })

  </script>
</html>案例下载:https://pan.baidu.com/s/1C5CLrtD6Mr66oiM7sfEHaw
16,使用内存缓存
nuget Microsoft.Extensions.Caching.Memory


using System;
using System.Collections.Generic;
using System.Linq;
using System.Threading.Tasks;
using Microsoft.AspNetCore.Builder;
using Microsoft.AspNetCore.Hosting;
using Microsoft.AspNetCore.Http;
using Microsoft.AspNetCore.HttpsPolicy;
using Microsoft.AspNetCore.Mvc;
using Microsoft.Extensions.Configuration;
using Microsoft.Extensions.DependencyInjection;
using Microsoft.Extensions.Caching;

namespace CacheDemo
{
    public class Startup
    {
        public Startup(IConfiguration configuration)
        {
            Configuration = configuration;
        }

        public IConfiguration Configuration { get; }

        // This method gets called by the runtime. Use this method to add services to the container.
        public void ConfigureServices(IServiceCollection services)
        {
            services.Configure<CookiePolicyOptions>(options =>
            {
                // This lambda determines whether user consent for non-essential cookies is needed for a given request.
                options.CheckConsentNeeded = context => true;
                options.MinimumSameSitePolicy = SameSiteMode.None;
            });

            services.AddMemoryCache();
            services.AddMvc().SetCompatibilityVersion(CompatibilityVersion.Version_2_1);
        }

        // This method gets called by the runtime. Use this method to configure the HTTP request pipeline.
        public void Configure(IApplicationBuilder app, IHostingEnvironment env)
        {
            if (env.IsDevelopment())
            {
                app.UseDeveloperExceptionPage();
            }
            else
            {
                app.UseExceptionHandler("/Home/Error");
                app.UseHsts();
            }

            app.UseHttpsRedirection();
            app.UseStaticFiles();
            app.UseCookiePolicy();

            app.UseMvc(routes =>
            {
                routes.MapRoute(
                    name: "default",
                    template: "{controller=Home}/{action=Index}/{id?}");
            });
        }
    }
}

using System;
using System.Collections.Generic;
using System.Diagnostics;
using System.Linq;
using System.Threading.Tasks;
using Microsoft.AspNetCore.Mvc;
using CacheDemo.Models;
using Microsoft.Extensions.Caching.Memory;

namespace CacheDemo.Controllers
{
    public class HomeController : Controller
    {

        private IMemoryCache _cache;

        public HomeController(IMemoryCache cache)
        {
            _cache=cache;
        }

        public IActionResult Index()
        {
            DateTime date;
            if(_cache.TryGetValue("date",out date))
            {
                ViewData["date"]=date;
            }
            else
            {
                ViewData["date"]="未设置缓存";
            }
            return View();
        }


        public IActionResult Set()
        {
            _cache.Set<DateTime>("date",DateTime.Now);
            return RedirectToAction("Index");
        }


    }
}案例下载:https://pan.baidu.com/s/1DEpF-_HLlEQFWswPyb-WkA
二、EF
1,Include和ThenInclude
使上下文加载 Student.Enrollments 导航属性,并在每个注册中加载 Enrollment.Course 导航属性


public class Student
    {
        public int ID { get; set; }
        public string LastName { get; set; }
        public string FirstMidName { get; set; }
        public DateTime EnrollmentDate { get; set; }

        public ICollection<Enrollment> Enrollments { get; set; }
    }

    public class Enrollment
    {
        public int EnrollmentID { get; set; }
        public int CourseID { get; set; }
        public int StudentID { get; set; }
        public Grade? Grade { get; set; }

        public Course Course { get; set; }
        public Student Student { get; set; }
    }
    public class Course
    {
        //主键
        [DatabaseGenerated(DatabaseGeneratedOption.None)]
        public int CourseID { get; set; }
        public string Title { get; set; }
        public int Credits { get; set; }

        public ICollection<Enrollment> Enrollments { get; set; }
}2,通过依赖关系注入注册上下文
public void ConfigureServices(IServiceCollection services)
{
    services.AddDbContext<SchoolContext>(options =>
      options.UseSqlServer(Configuration.GetConnectionString("DefaultConnection")));

    services.AddMvc();
}
配置连接字符串


{
  "ConnectionStrings": {
    "DefaultConnection": "Server=(localdb)\\mssqllocaldb;Database=ContosoUniversity1;ConnectRetryCount=0;Trusted_Connection=True;MultipleActiveResultSets=true"
  },
  "Logging": {
    "IncludeScopes": false,
    "LogLevel": {
      "Default": "Warning"
    }
  }
}ConnectRetryCount=0 来防止 SQLClient 挂起
3,种子数据


using ContosoUniversity.Models;
using System;
using System.Linq;

namespace ContosoUniversity.Data
{
    public static class DbInitializer
    {
        public static void Initialize(SchoolContext context)
        {
            context.Database.EnsureCreated();

            // Look for any students.
            if (context.Students.Any())
            {
                return;   // DB has been seeded
            }

            var students = new Student[]
            {
            new Student{FirstMidName="Carson",LastName="Alexander",EnrollmentDate=DateTime.Parse("2005-09-01")},
            new Student{FirstMidName="Meredith",LastName="Alonso",EnrollmentDate=DateTime.Parse("2002-09-01")},
            new Student{FirstMidName="Arturo",LastName="Anand",EnrollmentDate=DateTime.Parse("2003-09-01")},
            new Student{FirstMidName="Gytis",LastName="Barzdukas",EnrollmentDate=DateTime.Parse("2002-09-01")},
            new Student{FirstMidName="Yan",LastName="Li",EnrollmentDate=DateTime.Parse("2002-09-01")},
            new Student{FirstMidName="Peggy",LastName="Justice",EnrollmentDate=DateTime.Parse("2001-09-01")},
            new Student{FirstMidName="Laura",LastName="Norman",EnrollmentDate=DateTime.Parse("2003-09-01")},
            new Student{FirstMidName="Nino",LastName="Olivetto",EnrollmentDate=DateTime.Parse("2005-09-01")}
            };
            foreach (Student s in students)
            {
                context.Students.Add(s);
            }
            context.SaveChanges();

            var courses = new Course[]
            {
            new Course{CourseID=1050,Title="Chemistry",Credits=3},
            new Course{CourseID=4022,Title="Microeconomics",Credits=3},
            new Course{CourseID=4041,Title="Macroeconomics",Credits=3},
            new Course{CourseID=1045,Title="Calculus",Credits=4},
            new Course{CourseID=3141,Title="Trigonometry",Credits=4},
            new Course{CourseID=2021,Title="Composition",Credits=3},
            new Course{CourseID=2042,Title="Literature",Credits=4}
            };
            foreach (Course c in courses)
            {
                context.Courses.Add(c);
            }
            context.SaveChanges();

            var enrollments = new Enrollment[]
            {
            new Enrollment{StudentID=1,CourseID=1050,Grade=Grade.A},
            new Enrollment{StudentID=1,CourseID=4022,Grade=Grade.C},
            new Enrollment{StudentID=1,CourseID=4041,Grade=Grade.B},
            new Enrollment{StudentID=2,CourseID=1045,Grade=Grade.B},
            new Enrollment{StudentID=2,CourseID=3141,Grade=Grade.F},
            new Enrollment{StudentID=2,CourseID=2021,Grade=Grade.F},
            new Enrollment{StudentID=3,CourseID=1050},
            new Enrollment{StudentID=4,CourseID=1050},
            new Enrollment{StudentID=4,CourseID=4022,Grade=Grade.F},
            new Enrollment{StudentID=5,CourseID=4041,Grade=Grade.C},
            new Enrollment{StudentID=6,CourseID=1045},
            new Enrollment{StudentID=7,CourseID=3141,Grade=Grade.A},
            };
            foreach (Enrollment e in enrollments)
            {
                context.Enrollments.Add(e);
            }
            context.SaveChanges();
        }
    }
}

// Unused usings removed
using System;
using Microsoft.AspNetCore;
using Microsoft.AspNetCore.Hosting;
using Microsoft.Extensions.Logging;
using Microsoft.Extensions.DependencyInjection;
using ContosoUniversity.Data;

namespace ContosoUniversity
{
    public class Program
    {
        public static void Main(string[] args)
        {
            var host = BuildWebHost(args);

            using (var scope = host.Services.CreateScope())
            {
                var services = scope.ServiceProvider;
                try
                {
                    var context = services.GetRequiredService<SchoolContext>();
                    DbInitializer.Initialize(context);
                }
                catch (Exception ex)
                {
                    var logger = services.GetRequiredService<ILogger<Program>>();
                    logger.LogError(ex, "An error occurred while seeding the database.");
                }
            }

            host.Run();
        }

        public static IWebHost BuildWebHost(string[] args) =>
            WebHost.CreateDefaultBuilder(args)
                .UseStartup<Startup>()
                .Build();
    }
}第一次运行该应用时,会使用测试数据创建并填充数据库。 更新数据模型时:
- 删除数据库。
- 更新 seed 方法。
- 运行该应用,并创建新的种子数据库。
4,级联删除


modelBuilder.Entity<Department>()
   .HasOne(d => d.Administrator)
   .WithMany()
   .OnDelete(DeleteBehavior.Restrict)
5,组合PK


public class CourseAssignment
    {
        public int InstructorID { get; set; }
        public int CourseID { get; set; }
        public Instructor Instructor { get; set; }
        public Course Course { get; set; }
    }

protected override void OnModelCreating(ModelBuilder modelBuilder)
        {
modelBuilder.Entity<CourseAssignment>()
                .HasKey(c => new { c.CourseID, c.InstructorID });
 }
6,使用原始sql
①调用返回实体的查询


public async Task<IActionResult> Details(int? id)
{
    if (id == null)
    {
        return NotFound();
    }

    string query = "SELECT * FROM Department WHERE DepartmentID = {0}";
    var department = await _context.Departments
        .FromSql(query, id)
        .Include(d => d.Administrator)
        .AsNoTracking()
        .SingleOrDefaultAsync();

    if (department == null)
    {
        return NotFound();
    }

    return View(department);
}②调用返回其他类型的查询


public async Task<ActionResult> About()
{
    List<EnrollmentDateGroup> groups = new List<EnrollmentDateGroup>();
    var conn = _context.Database.GetDbConnection();
    try
    {
        await conn.OpenAsync();
        using (var command = conn.CreateCommand())
        {
            string query = "SELECT EnrollmentDate, COUNT(*) AS StudentCount "
                + "FROM Person "
                + "WHERE Discriminator = ''Student'' "
                + "GROUP BY EnrollmentDate";
            command.CommandText = query;
            DbDataReader reader = await command.ExecuteReaderAsync();

            if (reader.HasRows)
            {
                while (await reader.ReadAsync())
                {
                    var row = new EnrollmentDateGroup { EnrollmentDate = reader.GetDateTime(0), StudentCount = reader.GetInt32(1) };
                    groups.Add(row);
                }
            }
            reader.Dispose();
        }
    }
    finally
    {
        conn.Close();
    }
    return View(groups);
}③调用更新查询


[HttpPost]
public async Task<IActionResult> UpdateCourseCredits(int? multiplier)
{
    if (multiplier != null)
    {
        ViewData["RowsAffected"] =
            await _context.Database.ExecuteSqlCommandAsync(
                "UPDATE Course SET Credits = Credits * {0}",
                parameters: multiplier);
    }
    return View();
}
三、Razor页面
1,路由
<a asp-action="Edit" asp-route-studentID="@item.ID">Edit</a>
<a href="/Students/Edit?studentID=6">Edit</a>
2,命令搭建基架
参考文档:https://docs.microsoft.com/zh-cn/aspnet/core/data/ef-rp/intro#add-scaffold-tooling
3,SelectList


using ContosoUniversity.Data;
using Microsoft.AspNetCore.Mvc.RazorPages;
using Microsoft.AspNetCore.Mvc.Rendering;
using Microsoft.EntityFrameworkCore;
using System.Linq;

namespace ContosoUniversity.Pages.Courses
{
    public class DepartmentNamePageModel : PageModel
    {
        public SelectList DepartmentNameSL { get; set; }

        public void PopulateDepartmentsDropDownList(SchoolContext _context,
            object selectedDepartment = null)
        {
            var departmentsQuery = from d in _context.Departments
                                   orderby d.Name // Sort by name.
                                   select d;

            DepartmentNameSL = new SelectList(departmentsQuery.AsNoTracking(),
                        "DepartmentID", "Name", selectedDepartment);
        }
    }
}


  <div class="form-group">
                <label asp-for="Course.Department" class="control-label"></label>
                <select asp-for="Course.DepartmentID" class="form-control"
                        asp-items="@Model.DepartmentNameSL">
                    <option value="">-- Select Department --</option>
                </select>
                <span asp-validation-for="Course.DepartmentID" class="text-danger" />
            </div>
四、MVC
1,模型绑定
①常用的验证属性
-
[CreditCard]:验证属性是否具有信用卡格式。 -
[Compare]:验证某个模型中的两个属性是否匹配。 -
[EmailAddress]:验证属性是否具有电子邮件格式。 -
[Phone]:验证属性是否具有电话格式。 -
[Range]:验证属性值是否落在给定范围内。 -
[RegularExpression]:验证数据是否与指定的正则表达式匹配。 -
[Required]:将属性设置为必需属性。 -
[StringLength]:验证字符串属性是否最多具有给定的最大长度。 -
[Url]:验证属性是否具有 URL 格式。
2,视图
①Razor语法


<p>Last week this time: @(DateTime.Now - TimeSpan.FromDays(7))</p>

@{
    var joe = new Person("Joe", 33);
}

<p>Age@(joe.Age)</p>

@Html.Raw("<span>Hello World</span>")

@for (var i = 0; i < people.Length; i++)
{
    var person = people[i];
    <text>Name: @person.Name</text>
}

@for (var i = 0; i < people.Length; i++)
{
    var person = people[i];
    @:Name: @person.Name
}

@if (value % 2 == 0)
{
    <p>The value was even.</p>
}
else if (value >= 1337)
{
    <p>The value is large.</p>
}
else
{
    <p>The value is odd and small.</p>
}

@switch (value)
{
    case 1:
        <p>The value is 1!</p>
        break;
    case 1337:
        <p>Your number is 1337!</p>
        break;
    default:
        <p>Your number wasn''t 1 or 1337.</p>
        break;
}

@for (var i = 0; i < people.Length; i++)
{
    var person = people[i];
    <p>Name: @person.Name</p>
    <p>Age: @person.Age</p>
}

@foreach (var person in people)
{
    <p>Name: @person.Name</p>
    <p>Age: @person.Age</p>
}

@{ var i = 0; }
@while (i < people.Length)
{
    var person = people[i];
    <p>Name: @person.Name</p>
    <p>Age: @person.Age</p>

    i++;
}

@{ var i = 0; }
@do
{
    var person = people[i];
    <p>Name: @person.Name</p>
    <p>Age: @person.Age</p>

    i++;
} while (i < people.Length);

@using (Html.BeginForm())
{
    <div>
        email:
        <input type="email" id="Email" value="">
        <button>Register</button>
    </div>
}

@try
{
    throw new InvalidOperationException("You did something invalid.");
}
catch (Exception ex)
{
    <p>The exception message: @ex.Message</p>
}
finally
{
    <p>The finally statement.</p>
}②@inherits 指令对视图继承的类提供完全控制


using Microsoft.AspNetCore.Mvc.Razor;

public abstract class CustomRazorPage<TModel> : RazorPage<TModel>
{
    public string CustomText { get; } = "Gardyloo! - A Scottish warning yelled from a window before dumping a slop bucket on the street below.";
}

@inherits CustomRazorPage<TModel>

<div>Custom text: @CustomText</div>

<div>Custom text: Gardyloo! - A Scottish warning yelled from a window before dumping a slop bucket on the street below.</div>③@functions 指令允许 Razor 页面将 C# 代码块添加到视图中


@functions {
    public string GetHello()
    {
        return "Hello";
    }
}

<div>From method: @GetHello()</div>

using System.Threading.Tasks;
using Microsoft.AspNetCore.Mvc.Razor;

public class _Views_Home_Test_cshtml : RazorPage<dynamic>
{
    // Functions placed between here
    public string GetHello()
    {
        return "Hello";
    }
    // And here.
#pragma warning disable 1998
    public override async Task ExecuteAsync()
    {
        WriteLiteral("\r\n<div>From method: ");
        Write(GetHello());
        WriteLiteral("</div>\r\n");
    }
#pragma warning restore 1998④_ViewImports.cshtml导入共享指令
支持的指令:
-
@addTagHelper -
@removeTagHelper -
@tagHelperPrefix -
@using -
@model -
@inherits -
@inject
针对 ASP.NET Core MVC 应用的 _ViewImports.cshtml 文件通常放置在 Views 文件夹中
3,标记帮助程序
①@addTagHelper
@addTagHelper *, Microsoft.AspNetCore.Mvc.TagHelpers
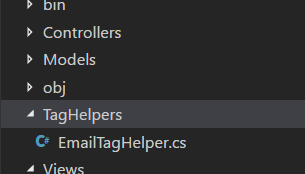
@addTagHelper MvcDemo2.TagHelpers.EmailTagHelper,MvcDemo2@addTagHelper之后第一个参数:需要加载的标记帮助类(*表示所有)
第二个参数:标记帮助类所在的程序集②简单的将 <email>hunter</email> 变成 <a>hunter</a>


using Microsoft.AspNetCore.Razor.TagHelpers;
using System.Threading.Tasks;
namespace MvcDemo2.TagHelpers
{
    //EmailTagHelper 的根名称是 email,因此 <email> 标记将作为目标名称
    public class EmailTagHelper:TagHelper
    {
        public override void Process(TagHelperContext context, TagHelperOutput output)
        {
            output.TagName="a";//用<a>标签替换<email>
        }

    }
}


@using MvcDemo2
@using MvcDemo2.Models
@addTagHelper *, Microsoft.AspNetCore.Mvc.TagHelpers
@addTagHelper MvcDemo2.TagHelpers.EmailTagHelper,MvcDemo2这时,在页面上的 <email>hunter</email> 会变成<a>hunter</a>
③设置自结束标签 <email/>


[HtmlTargetElement("email",TagStructure=TagStructure.WithoutEndTag)]
public class EmailTagHelper:TagHelper如果存在不是自结束标签,就会报错
④将 <email mail-to="hunter"></email> 变成 <a href="hunter@qq.com">hunter@qq.com</a>


using Microsoft.AspNetCore.Razor.TagHelpers;
using System.Threading.Tasks;
namespace MvcDemo2.TagHelpers
{
    //EmailTagHelper 的根名称是 email,因此 <email> 标记将作为目标名称
    public class EmailTagHelper:TagHelper
    {
        public const string EmailDomain="qq.com";
        //可以通过<email mail-to =“...”/>传递
        //标记帮助程序采用 Pascal 大小写格式的类和属性名将转换为各自相应的小写短横线格式
        public string MailTo{get;set;}
        public override void Process(TagHelperContext context, TagHelperOutput output)
        {
            output.TagName="a";//用<a>标签替换<email>
            var address=MailTo+"@"+EmailDomain;

            //给标签添加属性
            output.Attributes.SetAttribute("href",address);
            //设置<email></email>里面的内容
            output.Content.SetContent(address);
        }

    }
}⑤将 <email>hunter</email> 变成<a href="hunter@qq.com">hunter@qq.com</a>


using Microsoft.AspNetCore.Razor.TagHelpers;
using System.Threading.Tasks;
namespace MvcDemo2.TagHelpers
{
    //EmailTagHelper 的根名称是 email,因此 <email> 标记将作为目标名称
    public class EmailTagHelper:TagHelper
    {
        public const string EmailDomain="qq.com";
        //可以通过<email mail-to =“...”/>传递

        public override async Task ProcessAsync(TagHelperContext context, TagHelperOutput output)
        {
            output.TagName="a";//用<a>标签替换<email>

            var content=await output.GetChildContentAsync();//获取标签里的内容
            var tagter=content.GetContent()+"@"+EmailDomain;

            //给标签添加属性
            output.Attributes.SetAttribute("href",tagter);
            //设置<email></email>里面的内容
            output.Content.SetContent(tagter);
        }

    }
}⑥将页面中的 <bold>bbbb</bold> 替换为 <strong>bbbb</strong>


using Microsoft.AspNetCore.Razor.TagHelpers;
namespace MvcDemo2.TagHelpers
{
    public class BoldTagHelper:TagHelper
    {
        public override void Process(TagHelperContext context, TagHelperOutput output)
        {
            output.Attributes.RemoveAll("bold");
            output.PreContent.SetHtmlContent("<strong>");
            output.PostContent.SetHtmlContent("</strong>");
        }

    }
}③将model传入标记帮助程序


using System;
namespace MvcDemo2.Models
{
    public class WebsiteContext
    {
        public Version Version{get;set;}
        public int CopyrightYear{get;set;}
        public bool Approved{get;set;}
        public int TagsToShow{get;set;}
    }
}

using Microsoft.AspNetCore.Razor.TagHelpers;
using MvcDemo2.Models;
namespace MvcDemo2.TagHelpers
{

    //使用<website-information />
    public class WebsiteInformationTagHelper:TagHelper
    {
        public WebsiteContext Info{get;set;}

        public override void Process(TagHelperContext context, TagHelperOutput output)
        {
            output.TagName="section";
            output.Content.SetHtmlContent(
                $@"<ul><li><strong>版本:</strong> {Info.Version}</li>
                <li><strong>版权 年:</strong> {Info.CopyrightYear}</li>
                <li><strong>是否批准:</strong> {Info.Approved}</li>
                <li><strong>显示的标签:</strong> {Info.TagsToShow}</li></ul>"
            );
        }

    }
}

<website-information info="new WebsiteContext(){
    Version=new Version(1,3),
    CopyrightYear=10,
    Approved=true,
    TagsToShow=131
}"></website-information>⑥.NET 类型和生成的 HTML 类型
⑦数据注解和生成的 HTML 类型
⑧验证标记帮助程序
<span asp-validation-for="Email"></span>
针对具有 asp-validation-summary 属性的 <div> 元素
| asp-validation-summary | 显示的验证消息 |
|---|---|
| ValidationSummary.All | 属性和模型级别 |
| ValidationSummary.ModelOnly | 模型 |
| ValidationSummary.None | 无 |
实例:


@model RegisterViewModel
@{
    ViewData["Title"] = "Home Page";
}

<a bold>aaa</a>
<bold>bbbb</bold>
<!--Razor 知道 info 属性是一个类,而不是字符串,并且你想要编写 C# 代码。 编写任何非字符串标记帮助程序属性时,都不应使用 @@ 字符。-->


<website-information info="new WebsiteContext(){
    Version=new Version(1,3),
    CopyrightYear=10,
    Approved=true,
    TagsToShow=131
}"></website-information>


<form asp-action="Register" method="POST" role="form">
    <legend>注册</legend>

    <div asp-validation-summary="ModelOnly"></div>

    <div class="form-group">
        <input asp-for="Email" class="form-control" placeholder="Input field">
        <span asp-validation-for="Email"></span>
    </div>

     <div class="form-group">
        <input asp-for="Password" class="form-control" placeholder="Input field">
        <span asp-validation-for="Password"></span>
    </div>

    <button type="submit" class="btn btn-primary">Submit</button>
</form>

        [HttpPost]
        public IActionResult Register(RegisterViewModel model)
        {
            return View("Index");
}⑨选择标记帮助程序


using System.Collections.Generic;
using Microsoft.AspNetCore.Mvc.Rendering;

namespace MvcDemo2.Models
{
    public class CountryViewModel
    {
        public string Country{get;set;}
        public List<SelectListItem> Countries {get;}=new List<SelectListItem>(){
            new SelectListItem(){Value="MX",Text="墨西哥"},
            new SelectListItem(){Value="CA",Text="加拿大"},
            new SelectListItem(){Value="US",Text="美国"}
        };
    }
}

using System;
using System.Collections.Generic;
using System.Diagnostics;
using System.Linq;
using System.Threading.Tasks;
using Microsoft.AspNetCore.Mvc;
using MvcDemo2.Models;

namespace MvcDemo2.Controllers
{
    public class HomeController : Controller
    {
        public IActionResult Index()
        {
            var country=new CountryViewModel();
            country.Country="US";
            return View(country);
        }

        [HttpPost]
        public IActionResult Index(CountryViewModel model)
        {
            return View(model);
        }

    }
}

@model CountryViewModel


<form method="POST" asp-action="Index">

    <select asp-for="Country" asp-items="Model.Countries"></select>

    <input type="submit" value="提交" />
</form>⑩枚举绑定


public enum CountryEnum
        {
            [Display(Name = "墨西哥合众国")]
            Mexico,
            [Display(Name = "美国")]
            USA,
            Canada,
            France,
            Germany,
            Spain
}<select asp-for="Country" asp-items="Html.GetEnumSelectList<CountryEnum>()"></select>
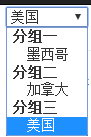
⑩选项分组


using System.Collections.Generic;
using System.ComponentModel.DataAnnotations;
using Microsoft.AspNetCore.Mvc.Rendering;

namespace MvcDemo2.Models
{
    public class CountryViewModel
    {
        public string Country{get;set;}

        public List<SelectListItem> Countries {get;}=new List<SelectListItem>(){
            new SelectListItem(){Value="MX",Text="墨西哥",Group=new SelectListGroup(){Name="分组一"}},
            new SelectListItem(){Value="CA",Text="加拿大",Group=new SelectListGroup(){Name="分组二"}},
            new SelectListItem(){Value="US",Text="美国",Group=new SelectListGroup(){Name="分组三"}}
        };


    }

}

using System;
using System.Collections.Generic;
using System.Diagnostics;
using System.Linq;
using System.Threading.Tasks;
using Microsoft.AspNetCore.Mvc;
using MvcDemo2.Models;

namespace MvcDemo2.Controllers
{
    public class HomeController : Controller
    {
        public IActionResult Index()
        {
            var country=new CountryViewModel();
            country.Country="US";
            return View(country);
        }

        [HttpPost]
        public IActionResult Index(CountryViewModel model)
        {
            return View(model);
        }

    }
}<select asp-for="Country" asp-items="Model.Countries"></select>
⑩多重选择


using System.Collections.Generic;
using System.ComponentModel.DataAnnotations;
using Microsoft.AspNetCore.Mvc.Rendering;

namespace MvcDemo2.Models
{
    public class CountryViewModel
    {
        public IEnumerable<string> Countrys{get;set;}

        public List<SelectListItem> Countries {get;}=new List<SelectListItem>(){
            new SelectListItem(){Value="MX",Text="墨西哥"},
            new SelectListItem(){Value="CA",Text="加拿大"},
            new SelectListItem(){Value="US",Text="美国"}
        };


    }

}

using System;
using System.Collections.Generic;
using System.Diagnostics;
using System.Linq;
using System.Threading.Tasks;
using Microsoft.AspNetCore.Mvc;
using MvcDemo2.Models;

namespace MvcDemo2.Controllers
{
    public class HomeController : Controller
    {
        public IActionResult Index()
        {
            var country=new CountryViewModel();
            country.Countrys=new []{"US","MX"};
            return View(country);
        }

        [HttpPost]
        public IActionResult Index(CountryViewModel model)
        {
            return View(model);
        }

    }
}

@model CountryViewModel


<form method="POST" asp-action="Index">

    <select asp-for="Countrys" asp-items="Model.Countries"></select>

    <input type="submit" value="提交" />
</form>⑩无选定内容


using System.Collections.Generic;
using System.ComponentModel.DataAnnotations;
using Microsoft.AspNetCore.Mvc.Rendering;

namespace MvcDemo2.Models
{
    public class CountryViewModel
    {
        public string Country{get;set;}

        public List<SelectListItem> Countries {get;}=new List<SelectListItem>(){
            new SelectListItem(){Value="MX",Text="墨西哥"},
            new SelectListItem(){Value="CA",Text="加拿大"},
            new SelectListItem(){Value="US",Text="美国"}
        };


    }

}

using System;
using System.Collections.Generic;
using System.Diagnostics;
using System.Linq;
using System.Threading.Tasks;
using Microsoft.AspNetCore.Mvc;
using MvcDemo2.Models;

namespace MvcDemo2.Controllers
{
    public class HomeController : Controller
    {
        public IActionResult Index()
        {
            var country=new CountryViewModel();
            return View(country);
        }

        [HttpPost]
        public IActionResult Index(CountryViewModel model)
        {
            return View(model);
        }

    }
}

@model CountryViewModel


<form method="POST" asp-action="Index">

    <select asp-for="Country" asp-items="Model.Countries">
        <option value="">--none--</option>
    </select>

    <input type="submit" value="提交" />
</form>
4,内置标记帮助程序
①asp-all-route-data


@{
var parms = new Dictionary<string, string>
            {
                { "speakerId", "11" },
                { "currentYear", "true" }
            };
}

<a asp-route="speakerevalscurrent"
   asp-all-route-data="parms">Speaker Evaluations</a>

<a href="/Speaker/EvaluationsCurrent?speakerId=11¤tYear=true">Speaker Evaluations</a>

[Route("/Speaker/EvaluationsCurrent",
       Name = "speakerevalscurrent")]
public IActionResult Evaluations(
    int speakerId,
bool currentYear) => View();②asp-fragment
可定义要追加到 URL 的 URL 片段


<a asp-controller="Speaker"
   asp-action="Evaluations"
   asp-fragment="SpeakerEvaluations">Speaker Evaluations</a>

<a href="/Speaker/Evaluations#SpeakerEvaluations">Speaker Evaluations</a>③asp-area
设置相应路由的区域名称


<a asp-area="Blogs"
   asp-controller="Home"
   asp-action="AboutBlog">About Blog</a>

<a href="/Blogs/Home/AboutBlog">About Blog</a>④asp-protocol
在URL 中指定协议(比如 https)


<a asp-protocol="https"
   asp-controller="Home"
   asp-action="About">About</a>

<a href="https://localhost/Home/About">About</a>⑤asp-host
在 URL 中指定主机名


<a asp-protocol="https"
   asp-host="microsoft.com"
   asp-controller="Home"
   asp-action="About">About</a>

<a href="https://microsoft.com/Home/About">About</a>⑥缓存标记帮助程序
<cache enabled="true">@DateTime.Now</cache>
属性expires-after:设置过期时间


<cache expires-after="@TimeSpan.FromSeconds(120)">
    Current Time Inside Cache Tag Helper: @DateTime.Now
</cache>属性expires-sliding:设置多久未被访问过期设置


<cache expires-sliding="@TimeSpan.FromSeconds(60)">
    Current Time Inside Cache Tag Helper: @DateTime.Now
</cache>⑦环境标记帮助程序


<environment include="Development">Development</environment>
<environment include="Staging">Staging</environment>
<environment include="Production">Production</environment>⑧图像标记帮助程序


<img src="~/images/1.jpg" asp-append-version="true"/>asp-append-version:追加版本号
5,分部视图
@await Html.PartialAsync("ViewName")
@await Html.PartialAsync("ViewName.cshtml")
@await Html.PartialAsync("~/Views/Folder/ViewName.cshtml")
@await Html.PartialAsync("/Views/Folder/ViewName.cshtml")
@await Html.PartialAsync("../Account/LoginPartial.cshtml")

@model string
姓名:@Model

@await Html.PartialAsync("Person","Hunter")
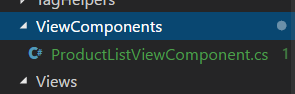
6,视图组件
①添加 ViewComponent 类
在根目录新建一个ViewComponents文件夹,建ViewComponent类放在此文件夹中


using MvcDemo2.Models;
using Microsoft.AspNetCore.Mvc;
using System.Threading.Tasks;
using System.Collections.Generic;
using System.Linq;

namespace MvcDemo2.ViewComponents
{
    public class ProductListViewComponent:ViewComponent
    {
        public async Task<IViewComponentResult> InvokeAsync(bool ischecked,string name)
        {
            var list=new List<Product>(){
                new Product(){IsChecked=true,Name="iphone x",Price=10000},
                new Product(){IsChecked=false,Name="iphone 8p",Price=6600},
            };
             var data= list.Where(m=>m.IsChecked==ischecked&&m.Name.Contains(name));
             return View(data);
        }

    }
}
②创建视图组件 Razor 视图
创建 Views/Shared/Components 文件夹。 此文件夹 必须 命名为 Components
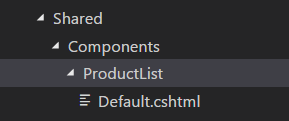


@model IEnumerable<Product>

@foreach(var item in Model)
{
    <p>@item.Name</p>
}

@await Component.InvokeAsync("ProductList",new {ischecked=true,name="iphone"})
7,上传文件
①使用模型绑定上传小文件


using System.Collections.Generic;
using Microsoft.AspNetCore.Http;

namespace MvcDemo2.Models
{
    public class FileUpViewModel
    {
        public IEnumerable<IFormFile> files {get;set;}
        public string name{get;set;}
    }
}

public IActionResult FileUp(FileUpViewModel model)
        {
            return View();
        }


<form asp-action="FileUp" enctype="multipart/form-data" method="POST" role="form">
    <legend>提交</legend>

        <input type="file" name="files" class="form-control" multiple/>
        <input type="text" name="name" class="form-control"/>


    <button type="submit" class="btn btn-primary">Submit</button>
</form>
8,筛选器
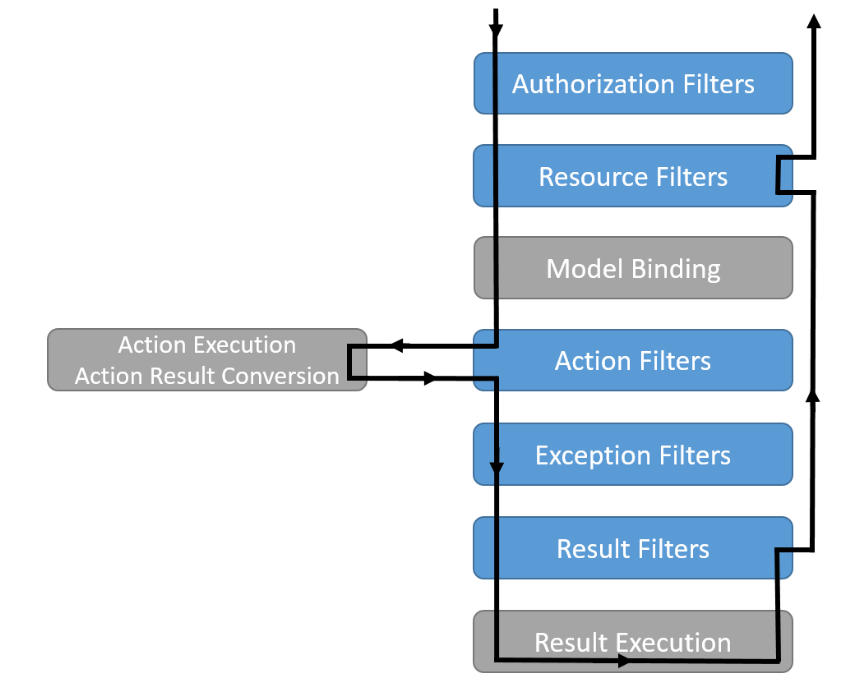
每种筛选器类型都在筛选器管道中的不同阶段执行。
-
授权筛选器最先运行,用于确定是否已针对当前请求为当前用户授权。 如果请求未获授权,它们可以让管道短路。
-
资源筛选器是授权后最先处理请求的筛选器。 它们可以在筛选器管道的其余阶段运行之前以及管道的其余阶段完成之后运行代码。 出于性能方面的考虑,可以使用它们来实现缓存或以其他方式让筛选器管道短路。它们在模型绑定之前运行,所以可以影响模型绑定。
-
操作筛选器可以在调用单个操作方法之前和之后立即运行代码。 它们可用于处理传入某个操作的参数以及从该操作返回的结果。
-
异常筛选器用于在向响应正文写入任何内容之前,对未经处理的异常应用全局策略。
-
结果筛选器可以在执行单个操作结果之前和之后立即运行代码。 仅当操作方法成功执行时,它们才会运行。对于必须围绕视图或格式化程序的执行的逻辑,它们很有用。
下图展示了这些筛选器类型在筛选器管道中的交互方式:
①筛选器通过不同的接口定义支持同步和异步实现


using FiltersSample.Helper;
using Microsoft.AspNetCore.Mvc.Filters;

namespace FiltersSample.Filters
{
    public class SampleActionFilter : IActionFilter
    {
        public void OnActionExecuting(ActionExecutingContext context)
        {
            // do something before the action executes
        }

        public void OnActionExecuted(ActionExecutedContext context)
        {
            // do something after the action executes
        }
    }
}

using System.Threading.Tasks;
using Microsoft.AspNetCore.Mvc.Filters;

namespace FiltersSample.Filters
{
    public class SampleAsyncActionFilter : IAsyncActionFilter
    {
        public async Task OnActionExecutionAsync(
            ActionExecutingContext context,
            ActionExecutionDelegate next)
        {
            // 在行动执行之前做一些事情
            var resultContext = await next();
            // 在执行操作后执行某些操作; resultContext.Result将被设置
        }
    }
}②添加为全局筛选器


public void ConfigureServices(IServiceCollection services)
{
    services.AddMvc(options =>
    {
        options.Filters.Add(new AddHeaderAttribute("GlobalAddHeader",
            "Result filter added to MvcOptions.Filters")); // an instance
        options.Filters.Add(typeof(SampleActionFilter)); // by type
        options.Filters.Add(new SampleGlobalActionFilter()); // an instance
    });

    services.AddScoped<AddHeaderFilterWithDi>();
}③取消和设置短路
通过设置提供给筛选器方法的 context 参数上的 Result 属性,可以在筛选器管道的任意位置设置短路。 例如,以下资源筛选器将阻止执行管道的其余阶段


using System;
using Microsoft.AspNetCore.Mvc;
using Microsoft.AspNetCore.Mvc.Filters;

namespace FiltersSample.Filters
{
    public class ShortCircuitingResourceFilterAttribute : Attribute,
            IResourceFilter
    {
        public void OnResourceExecuting(ResourceExecutingContext context)
        {
            context.Result = new ContentResult()
            {
                Content = "Resource unavailable - header should not be set"
            };
        }

        public void OnResourceExecuted(ResourceExecutedContext context)
        {
        }
    }
}
9,绑定与压缩


[
  {
    "outputFileName": "wwwroot/css/site.min.css",
    "inputFiles": [
      "wwwroot/css/site.css"
    ]
  },
  {
    "outputFileName": "wwwroot/js/site.min.js",
    "inputFiles": [
      "wwwroot/js/site.js"
    ],
    "minify": {
      "enabled": true,
      "renameLocals": true
    },
    "sourceMap": false
  }
]①需要引用: <DotNetCliToolReference Include="BundlerMinifier.Core" Version="2.6.362" />
②执行命令: dotnet bundle 会合并并压缩inputFiles里的文件到outputFileName
五、Model
1,数据注解
①DisplayFormat
[DisplayFormat(DataFormatString = "{0:yyyy-MM-dd}", ApplyFormatInEditMode = true)]②Column
[Column("FirstName")]
 public string FirstMidName { get; set; }
实体属性表字段映射
2,DatabaseGenerated标记主键
 实体
实体
六、配置

Vue 2.0学习笔记之Vue中的computed属性
Vue中的 computed 属性称为 计算属性 。在这一节中,我们学习Vue中的计算属性如何使用?记得在学习Vue的模板相关的知识的时候,知道在模板内可以使用表达式,而且模板内的表达式是非常的便利,但这种遍历是有一定的限制的,它们实际上是用于一些简单的运算。也就是说,如果在模板中放入太多的逻辑会让模板过重而且难以维护。咱们先来看一个示例:
在这个示例中,模板不再简单和清晰。你必须看一段时间才能意识到,这里是想要显示变量 message 的翻转字符串。当你想要在模板中多次引用此处的翻转字符串时,就会更加难以处理。
这就是对于任何复杂逻辑,你都应当使用 计算属性 的原因。接下来咱们一起来学习Vue中的计算属性。
计算属性可用于快速计算视图( View )中显示的属性。这些计算将被缓存,并且只在需要时更新。
在Vue中有多种方法为视图设置值:
- 使用指令直接将数据值绑定到视图
- 使用简单的表达式对内容进行简单的转换
- 使用过滤器对内容进行简单的转换
除此之外,我们还可以使用计算属性根据数据模型中的值或一组值来计算显示值。
计算属性
计算属性允许我们对指定的视图,复杂的值计算。这些值将绑定到依赖项值,只在需要时更新。
例如,我们可以在数据模型中有一个 results 数组:

--指令,回流与重绘---2019.5.20学习笔记")