在本文中,我们将带你了解ElasticSearch-定义自定义字母顺序进行排序在这篇文章中,我们将为您详细介绍ElasticSearch-定义自定义字母顺序进行排序的方方面面,并解答elasticse
在本文中,我们将带你了解ElasticSearch-定义自定义字母顺序进行排序在这篇文章中,我们将为您详细介绍ElasticSearch-定义自定义字母顺序进行排序的方方面面,并解答elasticsearch 自定义排序常见的疑惑,同时我们还将给您一些技巧,以帮助您实现更有效的Elasticsearch CentOS6.5下安装ElasticSearch6.2.4+elasticsearch-head+Kibana、Elasticsearch 中如何进行排序 (中文 + 父子文档 + 嵌套文档)、Elasticsearch 在所有存储桶上对数据进行排序、elasticsearch 自定义 analyzer。
本文目录一览:- ElasticSearch-定义自定义字母顺序进行排序(elasticsearch 自定义排序)
- Elasticsearch CentOS6.5下安装ElasticSearch6.2.4+elasticsearch-head+Kibana
- Elasticsearch 中如何进行排序 (中文 + 父子文档 + 嵌套文档)
- Elasticsearch 在所有存储桶上对数据进行排序
- elasticsearch 自定义 analyzer
")
ElasticSearch-定义自定义字母顺序进行排序(elasticsearch 自定义排序)
我正在使用ElasticSearch 2.4.2(通过Java的HibernateSearch 5.7.1.Final)。
我对字符串排序有问题。我的应用程序的语言带有变音符号,它们具有特定的字母顺序。例如Ł,直接在after之后L,Ó在after之后O,等等。因此,您应该对字符串进行如下排序:
Dla Dła Doa Dóa Dza EzaElasticSearch首先按典型字母排序,然后将所有奇怪的字母移到最后:
Dla Doa Dza Dła Dóa Eza我可以为ElasticSearch添加自定义字母顺序吗?也许有一些插件吗?我需要编写自己的插件吗?我该如何开始?
我发现了一个插件,为ElasticSearch波兰语,但据我所知它是分析和分析是不是在我的情况的解决方案,因为它会忽略变音符号和离开的话用L和Ł混合:
Dla Dłb Dlc有时这是可以接受的,但在我的特定用例中是不可接受的。
对此,我将不胜感激。
答案1
小编典典我从未使用过它,但是有一个可以满足您需求的插件:ICU整理插件。
您将必须使用icu_collation令牌过滤器,该过滤器会将令牌转换为排序键。因此,您需要在Hibernate
Search中使用单独的@Field(例如myField_sort)。
您可以使用来为您的字段分配特定的分析器@Field(name = "myField_sort", analyzer =@Analyzer(definition = "myCollationAnalyzer")),并使用其中一个实体上的类似内容来定义此分析器(类型,参数):
@Entity@Indexed@AnalyzerDef( name = "myCollationAnalyzer", filters = { @TokenFilterDef( name = "polish_collation", factory = ElasticsearchTokenFilterFactory.class, params = { @Parameter(name = "type", value = "''icu_collation''"), @Parameter(name = "language", value = "''pl''") } ) })public class MyEntity {请参阅文档以获取更多信息:https :
//docs.jboss.org/hibernate/stable/search/reference/zh-
CN/html_single/#_custom_analyzers
现在肯定有点笨拙,但是在具有规范化器和分析器定义提供程序的下一个Hibernate Search版本中,分析器配置将变得更加整洁。
注意:与往常一样,您的字段需要声明为可排序(@SortableField(forField = "myField_sort"))。

Elasticsearch CentOS6.5下安装ElasticSearch6.2.4+elasticsearch-head+Kibana
CentOS6.5下安装ElasticSearch6.2.4
(1)配置JDK环境
配置环境变量
export JAVA_HOME="/opt/jdk1.8.0_144"
export PATH="$JAVA_HOME/bin:$PATH"
export CLASSPATH=".:$JAVA_HOME/lib"
(2)安装ElasticSearch6.2.4
下载地址:https://www.elastic.co/cn/downloads/past-releases/elasticsearch-6-2-4
启动报错: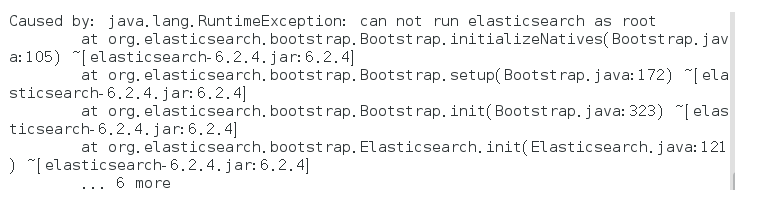
解决方式:
bin/elasticsearch -Des.insecure.allow.root=true
或者修改bin/elasticsearch,加上ES_JAVA_OPTS属性:
ES_JAVA_OPTS="-Des.insecure.allow.root=true"
再次启动: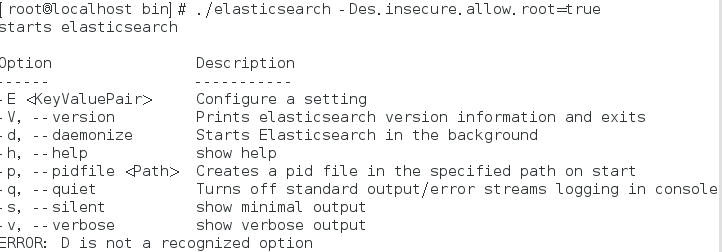
这是出于系统安全考虑设置的条件。由于ElasticSearch可以接收用户输入的脚本并且执行,为了系统安全考 虑,建议创建一个单独的用户用来运行ElasticSearch。
如果没有普通用户就要创建一个普通用户组和普通用户,下面介绍一下怎么创建用户组和普通用户
创建用户组和用户:
groupadd esgroup
useradd esuser -g esgroup -p espassword
更改elasticsearch文件夹及内部文件的所属用户及组:
cd /opt
chown -R esuser:esgroup elasticsearch-6.2.4
切换用户并运行:
su esuser
./bin/elasticsearch
再次启动显示已杀死: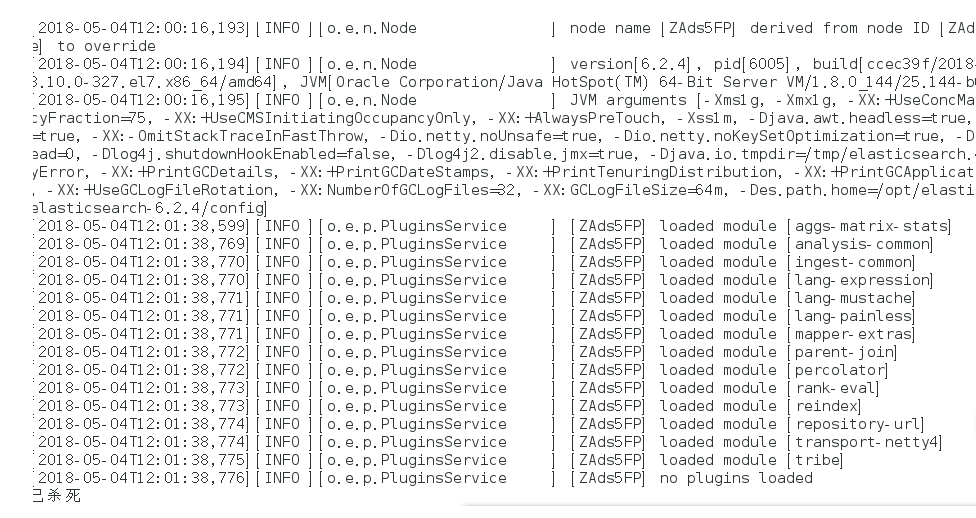
需要调整JVM的内存大小:
vi bin/elasticsearch
ES_JAVA_OPTS="-Xms512m -Xmx512m"
再次启动:启动成功
如果显示如下类似信息:
[INFO ][o.e.c.r.a.DiskThresholdMonitor] [ZAds5FP] low disk watermark [85%] exceeded on [ZAds5FPeTY-ZUKjXd7HJKA][ZAds5FP][/opt/elasticsearch-6.2.4/data/nodes/0] free: 1.2gb[14.2%], replicas will not be assigned to this node
需要清理磁盘空间。
后台运行:./bin/elasticsearch -d
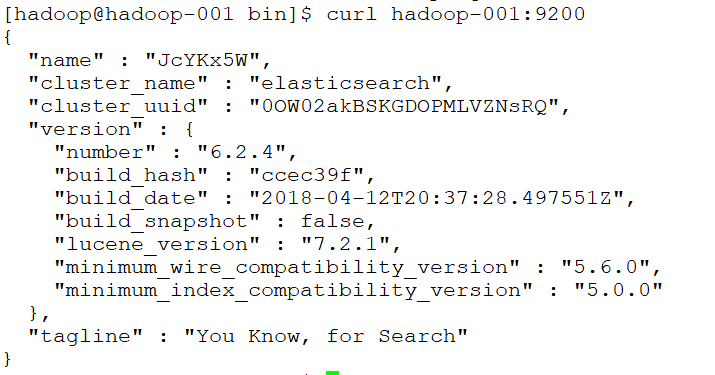
测试连接:curl 127.0.0.1:9200
会看到一下JSON数据:
[root@localhost ~]# curl 127.0.0.1:9200
{
"name" : "rBrMTNx",
"cluster_name" : "elasticsearch",
"cluster_uuid" : "-noR5DxFRsyvAFvAzxl07g",
"version" : {
"number" : "5.1.1",
"build_hash" : "5395e21",
"build_date" : "2016-12-06T12:36:15.409Z",
"build_snapshot" : false,
"lucene_version" : "6.3.0"
},
"tagline" : "You Know, for Search"
}
实现远程访问:
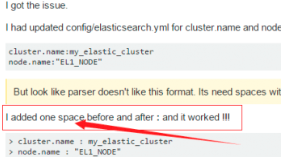
需要对config/elasticsearch.yml进行 配置:
network.host: hadoop-001
再次启动报错:Failed to load settings from [elasticsearch.yml]
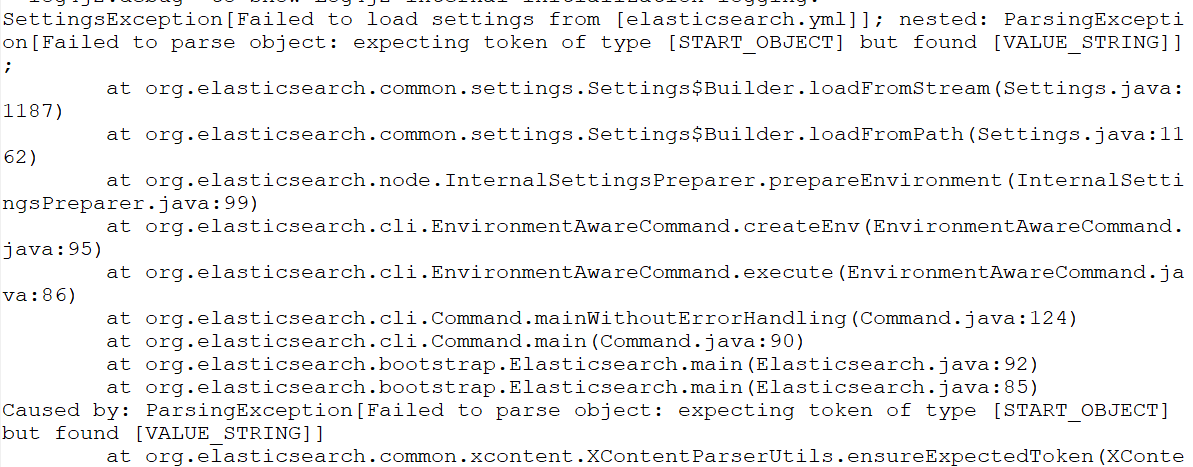
这个错就是参数的冒号前后没有加空格,加了之后就好,我找了好久这个问题;
后来在一个外国网站找到了这句话.
Exception in thread "main" SettingsException[Failed to load settings from [elasticsearch.yml]]; nested: ElasticsearchParseException[malformed, expected end of settings but encountered additional content starting at line number: [3], column number: [1]]; nested: ParserException[expected ''<document start>'', but found BlockMappingStart
in ''reader'', line 3, column 1:
node.rack : r1
^
];
Likely root cause: expected ''<document start>'', but found BlockMappingStart
in ''reader'', line 3, column 1:
node.rack : r1
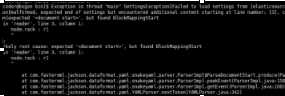
这个是行的开头没有加空格,fuck!
Exception in thread "main" SettingsException[Failed to load settings from [elasticsearch.yml]]; nested: ScannerException[while scanning a simple key
in ''reader'', line 11, column 2:
discovery.zen.ping.unicast.hosts ...
^

参数冒号后加空格,或者是数组中间加空格
例如:
# discovery.zen.minimum_master_nodes: 3
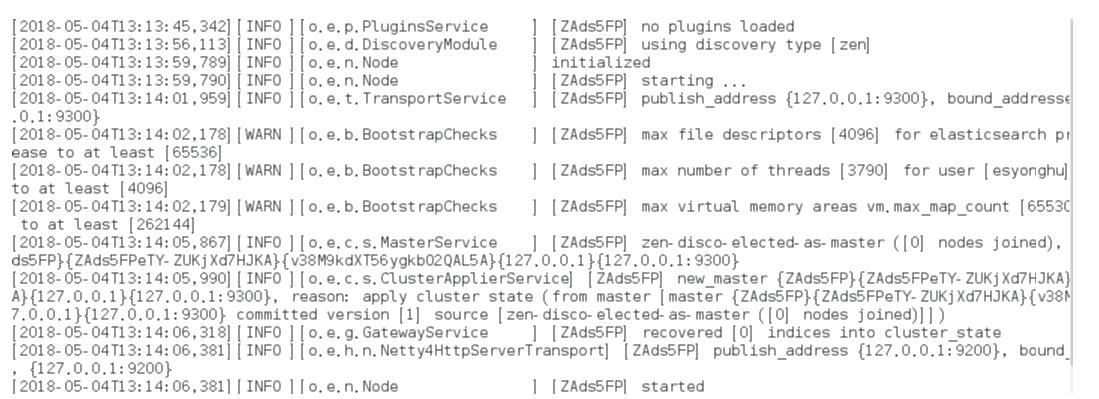
再次启动
还是报错
max file descriptors [4096] for elasticsearch process is too low
处理第一个错误:
vim /etc/security/limits.conf //文件最后加入
esuser soft nofile 65536
esuser hard nofile 65536
esuser soft nproc 4096
esuser hard nproc 4096
处理第二个错误:
进入limits.d目录下修改配置文件。
vim /etc/security/limits.d/20-nproc.conf
修改为 esuser soft nproc 4096
注意重新登录生效!!!!!!!!
处理第三个错误:
vim /etc/sysctl.conf
vm.max_map_count=655360
执行以下命令生效:
sysctl -p
关闭防火墙:systemctl stop firewalld.service
启动又又又报错
system call filters failed to install; check the logs and fix your configuration or disable sys

直接在
config/elasticsearch.yml 末尾加上一句
bootstrap.system_call_filter: false再次启动成功!
安装Head插件
Head是elasticsearch的集群管理工具,可以用于数据的浏览和查询
(1)elasticsearch-head是一款开源软件,被托管在github上面,所以如果我们要使用它,必须先安装git,通过git获取elasticsearch-head
(2)运行elasticsearch-head会用到grunt,而grunt需要npm包管理器,所以nodejs是必须要安装的
nodejs和npm安装:
http://blog.java1234.com/blog/articles/354.html
git安装
yum install -y git

(3)elasticsearch5.0之后,elasticsearch-head不做为插件放在其plugins目录下了。
使用git拷贝elasticsearch-head到本地
cd ~
git clone git://github.com/mobz/elasticsearch-head.git
(4)安装elasticsearch-head依赖包
[root@localhost local]# npm install -g grunt-cli
[root@localhost _site]# cd /usr/local/elasticsearch-head/
[root@localhost elasticsearch-head]# cnpm install
(5)修改Gruntfile.js
[root@localhost _site]# cd /usr/local/elasticsearch-head/
[root@localhost elasticsearch-head]# vi Gruntfile.js
在connect-->server-->options下面添加:hostname:’*’,允许所有IP可以访问
(6)修改elasticsearch-head默认连接地址
[root@localhost elasticsearch-head]# cd /usr/local/elasticsearch-head/_site/
[root@localhost _site]# vi app.js
将this.base_uri = this.config.base_uri || this.prefs.get("app-base_uri") || "http://localhost:9200";中的localhost修改成你es的服务器地址
(7)配置elasticsearch允许跨域访问
打开elasticsearch的配置文件elasticsearch.yml,在文件末尾追加下面两行代码即可:
http.cors.enabled: true
http.cors.allow-origin: "*"
(8)打开9100端口
[root@localhost elasticsearch-head]# firewall-cmd --zone=public --add-port=9100/tcp --permanent
重启防火墙
[root@localhost elasticsearch-head]# firewall-cmd --reload
(9)启动elasticsearch
(10)启动elasticsearch-head
[root@localhost _site]# cd ~/elasticsearch-head/
[root@localhost elasticsearch-head]# node_modules/grunt/bin/grunt server 或者 npm run start
(11)访问elasticsearch-head
关闭防火墙:systemctl stop firewalld.service
浏览器输入网址:hadoop-001:9100/

安装Kibana
Kibana是一个针对Elasticsearch的开源分析及可视化平台,使用Kibana可以查询、查看并与存储在ES索引的数据进行交互操作,使用Kibana能执行高级的数据分析,并能以图表、表格和地图的形式查看数据
(1)下载Kibana
https://www.elastic.co/downloads/kibana
(2)把下载好的压缩包拷贝到/soft目录下
(3)解压缩,并把解压后的目录移动到/user/local/kibana
(4)编辑kibana配置文件
[root@localhost /]# vi /usr/local/kibana/config/kibana.yml
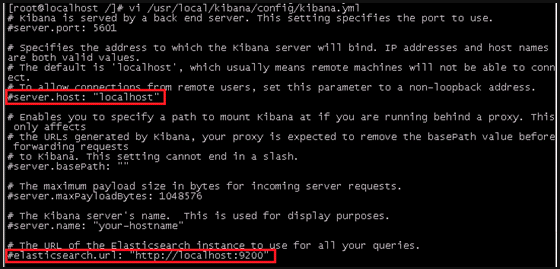
将server.host,elasticsearch.url修改成所在服务器的ip地址
server.port: 5601 //监听端口
server.host: "hadoo-001" //监听IP地址,建议内网ip
elasticsearch.url: "http:/hadoo-001" //elasticsearch连接kibana的URL,也可以填写192.168.137.188,因为它们是一个集群
(5)开启5601端口
Kibana的默认端口是5601
开启防火墙:systemctl start firewalld.service
开启5601端口:firewall-cmd --permanent --zone=public --add-port=5601/tcp
重启防火墙:firewall-cmd –reload
(6)启动Kibana
[root@localhost /]# /usr/local/kibana/bin/kibana
浏览器访问:http://192.168.137.188:5601

安装中文分词器
一.离线安装
(1)下载中文分词器
https://github.com/medcl/elasticsearch-analysis-ik
下载elasticsearch-analysis-ik-master.zip
(2)解压elasticsearch-analysis-ik-master.zip
unzip elasticsearch-analysis-ik-master.zip
(3)进入elasticsearch-analysis-ik-master,编译源码
mvn clean install -Dmaven.test.skip=true
(4)在es的plugins文件夹下创建目录ik
(5)将编译后生成的elasticsearch-analysis-ik-版本.zip移动到ik下,并解压
(6)解压后的内容移动到ik目录下
二.在线安装
./elasticsearch-plugin install https://github.com/medcl/elasticsearch-analysis-ik/releases/download/v6.2.4/elasticsearch-analysis-ik-6.2.4.zip
")
Elasticsearch 中如何进行排序 (中文 + 父子文档 + 嵌套文档)
Elasticsearch 中如何进行排序
背景
最近去兄弟部门的新自定义查询项目组搬砖,项目使用 Elasticsearch 进行数据的检索和查询。每一个查询页面都需要根据选择的字段进行排序,以为是一个比较简单的需求,其实实现起来还是比较复杂的。这里进行一个总结,加深一下记忆。
前置知识
-
Elasticsearch 是什么? Elasticsearch 简称 ES,是一个全文搜索引擎,可以实现类似百度搜索的功能。但她不仅仅能进行全文检索,还可以实现 PB 级数据的近实时分析和精确查找,还可以作 GIS 数据库,进行 AI 机器学习,功能非常强大。
-
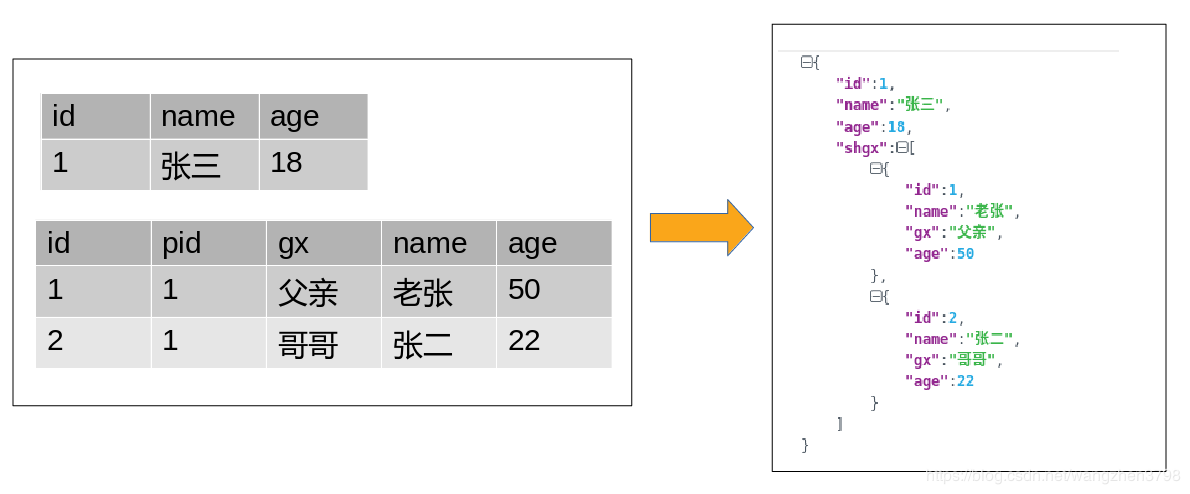
ES 的数据模型 ES 中常用嵌套文档和父子文档两种方法进行数据建模,多层父子文档还可以形成祖孙文档。但是父子文档是一种不推荐的建模方式,这种方式有很多的局限性。如果传统关系型数据库的建模方法是通过 “三范式” 进行规范化,那么 ES 的建模方法就是反范式,进行反规范化。关系型数据库的数据是表格模型,ES 是 JSON 树状模型。
ES 中排序的分类
根据建模方法的不同,ES 中排序分为以下几种,每种都有不同的排序写法和一些限制:
- 嵌套文档 - 根据主文档字段排序
- 嵌套文档 - 根据内嵌文档字段排序
- 父子文档 - 查父文档然后根据子文档排序
- 父子文档 - 查子文档然后根据父文档排序
- 更复杂的情况,父子文档里又嵌套了文档,然后根据嵌套文档字段进行排序。
下面分别对其中某几种情况和中文字段的排序,进行测试说明(ES 5.5.x)。
测试数据准备
首先,设置索引类型字段映射
PUT /test_sort
{
  "mappings": {
    "zf":{
      "properties": {
        "id":{"type": "keyword"},
        "name":{"type": "keyword"},
        "age":{"type": "integer"},
        "shgx":{"type": "nested"}
      }
    }
  }
}
然后新建测试数据
PUT /test_sort/zf/1
{
  "id":1,
  "name":"张三",
  "age":18,
  "shgx":[{
    "id":1,
    "name":"老张",
    "age":50,
    "gx":"父亲"
  },{
    "id":2,
    "name":"张二",
    "age":22,
    "gx":"哥哥"
  }]
}

PUT /test_sort/zf/2
{
  "id":2,
  "name":"李四",
  "age":25,
  "shgx":[{
    "id":3,
    "name":"李五",
    "age":23,
    "gx":"弟弟"
  }]
}
- 嵌套文档 - 根据主文档字段排序 根据 zf 主文档 age 字段倒叙排列,直接加 sort 子语句就可以
POST /test_sort/zf/_search
{
  "query": {
    "match_all": {
    }
  },
  "sort": [
    {
      "age": {
        "order": "desc"
      }
    }
  ],
  "_source": {"include": ["id","name","age"]}
}
结果:
"hits": [
      {
        "_index": "test_sort",
        "_type": "zf",
        "_id": "2",
        "_score": null,
        "_source": {
          "name": "李四",
          "id": 2,
          "age": 25
        },
        "sort": [
          25
        ]
      },
      {
        "_index": "test_sort",
        "_type": "zf",
        "_id": "1",
        "_score": null,
        "_source": {
          "name": "张三",
          "id": 1,
          "age": 18
        },
        "sort": [
          18
        ]
      }
    ]
- 嵌套文档 - 根据内嵌文档字段排序 根据 age 小于 50 岁的亲属排序,理论上李四应该排第一位,因为 50 岁以下的亲属,李五最大。 凭直觉先这样写:
POST /test_sort/zf/_search
{
  "query": {
    "nested": {
      "path": "shgx",
      "query": {
        "range": {
          "shgx.age": {
            "lt": 50
          }
        }
      }
    }
  },
  "sort": [
    {
      "shgx.age": {
        "nested_path": "shgx",
        "order": "desc"
      }
    }
  ]
}
看结果:
"hits": [
      {
        "_index": "test_sort",
        "_type": "zf",
        "_id": "1",
        "_score": null,
        "_source": {
          "id": 1,
          "name": "张三",
          "age": 18,
          "shgx": [
            {
              "id": 1,
              "name": "老张",
              "age": 50,
              "gx": "父亲"
            },
            {
              "id": 2,
              "name": "张二",
              "age": 22,
              "gx": "哥哥"
            }
          ]
        },
        "sort": [
          50
        ]
      },
      {
        "_index": "test_sort",
        "_type": "zf",
        "_id": "2",
        "_score": null,
        "_source": {
          "id": 2,
          "name": "李四",
          "age": 25,
          "shgx": [
            {
              "id": 3,
              "name": "李五",
              "age": 23,
              "gx": "弟弟"
            }
          ]
        },
        "sort": [
          23
        ]
      }
    ]
非常重要!结果是错误的。这是因为嵌套文档是作为主文档的一部分返回的,在主查询中的嵌套文档的过滤条件并不能把不符合条件的内部嵌套文档过滤掉,返回的还是整个文档(主文档 + 完整的嵌套文档)。以至于按嵌套文档字段排序时,还是按照全部的嵌套文档进行排序的。要正确的实现排序,就要把主查询中有关嵌套文档的查询条件,在排序中再写一遍。
正确的写法:
POST /test_sort/zf/_search
{
  "query": {
    "nested": {
      "path": "shgx",
      "query": {
        "range": {
          "shgx.age": {
            "lt": 50
          }
        }
      }
    }
  },
  "sort": [
    {
      "shgx.age": {
        "nested_path": "shgx",
        "order": "desc",
        "nested_filter": {
          "range": {
          "shgx.age": {
            "lt": 50
          }
        }
        }
      }
    }
  ]
}
- 父子文档 - 查父文档 - 根据子文档排序 构造测试数据,首先设置父子文档的映射关系
PUT /test_sort_2
{
  "mappings": {
    "zf_parent":{
      "properties": {
        "id":{"type": "keyword"},
        "name":{"type": "keyword"},
        "age":{"type": "integer"}
      }
    },
    "shgx":{
      "_parent": {
        "type": "zf_partent"
      }
    }
  }
}
然后,添加数据。
PUT /test_sort_2/zf_parent/1
{
  "id":1,
  "name":"张三",
  "age":18
}
PUT /test_sort_2/zf_parent/2
{
  "id":2,
  "name":"李四",
  "age":25
}

PUT /test_sort_2/shgx/1?parent=1
{
  "id":1,
  "name":"老张",
  "age":50,
  "gx":"父亲"
}

PUT /test_sort_2/shgx/2?parent=1
{
  "id":2,
  "name":"张二",
  "age":22,
  "gx":"哥哥"
}

PUT /test_sort_2/shgx/3?parent=2
{
  "id":3,
  "name":"李五",
  "age":23,
  "gx":"弟弟"
}
然后,根据 age 小于 50 岁的亲属排序,升序的话张三应该是第一位。
POST /test_sort_3/zf_parent/_search
{
  "query": {
    "has_child": {
      "type": "shgx",
      "query": {
        "range": {
          "age": {
            "lt": 50
          }
        }
      },
      "inner_hits": {
        "name": "ZfShgx",
        "sort": [
          {
            "age": {
              "order": "asc"
            }
          }
        ]
      }
    }
  }
}
查看排序结果:
{
        "_index": "test_sort_3",
        "_type": "zf_parent",
        "_id": "2",
        "_score": 1,
        "_source": {
          "id": 2,
          "name": "李四",
          "age": 25
        },
        "inner_hits": {
          "ZfShgx": {
            "hits": {
              "total": 1,
              "max_score": null,
              "hits": [
                {
                  "_type": "shgx",
                  "_id": "3",
                  "_score": null,
                  "_routing": "2",
                  "_parent": "2",
                  "_source": {
                    "id": 3,
                    "name": "李五",
                    "age": 23,
                    "gx": "弟弟"
                  },
                  "sort": [
                    23
                  ]
                }
              ]
            }
          }
        }
      },
      {
        "_index": "test_sort_3",
        "_type": "zf_parent",
        "_id": "1",
        "_score": 1,
        "_source": {
          "id": 1,
          "name": "张三",
          "age": 18
        },
        "inner_hits": {
          "ZfShgx": {
            "hits": {
              "total": 1,
              "max_score": null,
              "hits": [
                {
                  "_type": "shgx",
                  "_id": "2",
                  "_score": null,
                  "_routing": "1",
                  "_parent": "1",
                  "_source": {
                    "id": 2,
                    "name": "张二",
                    "age": 22,
                    "gx": "哥哥"
                  },
                  "sort": [
                    22
                  ]
                }
              ]
            }
          }
        }
      }
结果是错误的,李四在前,查看官方文档的父子文档时不能直接用子文档排序父文档,或者用父文档排序子文档。那有没有解决办法呢?有一个曲线救国的方案,使用 function_score 通过子文档的评分来影响父文档的顺序,但是评分算法很难做到精准控制顺序。
中文字符排序
在项目中发现,中文字符在 ES 中的顺序和在关系型数据库中的顺序不一致。经查是因为 ES 是用的 unicode 的字节码做排序的。即先对字符(包括汉字)转换成 byte [] 数组,然后对字节数组进行排序。这种排序规则对 ASIC 码(英文)是有效的,但对于中文等亚洲国家的字符不适用,怎么办呢?有两种解决办法:
- 第一种,做拼音冗余。即在向 ES 同步数据时候,同步程序将汉字字段同时转换成拼音,在 ES 里专门用于汉字排序。如:
#插入信息
POST /test/star/1
{
  "xm": "刘德华",
  "xm_pinyin": "liudehua"
}

POST /test/star/2
{
  "xm": "张惠妹",
  "xm_pinyin": "zhanghuimei"
}

# 查询排序
POST /test/star/_search
{
  "query": {
    "match_all": {}
  },
  "sort": [
    {
      "xm_pinyin": {
        "order": "desc"
      }
    }
  ]
}
- 第二种,使用 ICU 分词插件。使用插件提供的 icu_collation_keyword 映射类型实现中文排序。
PUT test2
{
  "mappings": {
    "star": {
      "properties": {
        "xm": {
          "type": "text",
          "fields": {
            "sort": {
              "type": "icu_collation_keyword",
              "index": false,
              "language": "zh",
              "country": "CN"
            }
          }
        }
      }
    }
  }
}

POST  /test2/star/_search
{
  "query": {
    "match_all": { }
  },
  "sort": "xm.sort"
}
结论
- 嵌套文档 - 根据主文档字段排序时,可以使用 sort 语句直接排序,无限制。
- 嵌套文档 - 根据嵌套文档字段排序时,必须在 sort 子句里把所有嵌套相关的查询条件,在 sort 里重新写一边,排序才正确。
- 父子文档 - 查父文档根据子文档排序时,不能根据子文档排序父文档,反之亦然。
- 数据模型的复杂程度决定了排序的复杂程度,排序的复杂程度随着模型的复杂程度成指数级增加。
- 中文字符可以通过做拼音冗余和使用 ICU 插件来实现排序。

Elasticsearch 在所有存储桶上对数据进行排序
如何解决Elasticsearch 在所有存储桶上对数据进行排序?
我正在尝试进行 es 排序,但我很挣扎。
我的数据的基本故事是我有例如可以由各种产品组成的产品定义。 (我们称之为抽象和具体)。
假设我有一个抽象的产品 A,它可以由产品 B、C、D(称为具体)组成。
例如,我还有产品 E,它可以将 F 作为具体物等等。
我想按产品摘要汇总产品(只显示每个具体的 1 个),然后根据某些标准对所有具体项目进行排序。
我写的以下内容没有按预期工作。
 "aggs": {
"category:58": {
  "aggs": {
    "products": {
      "aggs": {
        "abstract": {
          "top_hits": {
            "size": 1,"sort": [
              {
                "criteria1": {
                  "order": "desc"
                }
              },{
                "_score": {
                  "order": "desc"
                }
              },{
                "criteria3": {
                  "missing": "_last","order": "asc","unmapped_type": "integer"
                }
              }
            ]
          }
        }
      },"terms": {
        "field": "abstract_id","size": 10
      }
    }
  },"filter": {
    "term": {
      "categories.id": {
        "value": "58"
      }
    }
  }
}
},
如果我猜对了,这将创建 10 个存储桶,每个存储桶将有一个产品,然后我的排序对单个产品进行排序,我应该在这里对整个结果进行排序。问题是我应该把当前在 aggs->abstract 中的排序放在哪里。 如果我通过 abstract_id 删除分组并将其更改为唯一的内容,那么排序确实有效,但是对于一个抽象产品,我可以显示所有我不希望出现的具体情况。
我发现我无法按条件排序,所以我现在有点无能为力。
解决方法
我最终使用了多个聚合,然后进行了桶排序。 我最终得到的查询看起来像这样
          "aggs": {
        "abstract": {
          "top_hits": {
            "size": 1
          }
        },"criteria3": {
          "sum": {
            "field": "custom_filed_foo_bar"
          }
        },"criteria1": {
          "sum": {
            "field": "boosted_value"
          }
        },"criteria2": {
          "max": {
            "script":{
              "source": "_score"
            }
          }
        },"sorting": {
          "bucket_sort": {
            "sort": [
              {
                "criteria1": {
                  "order": "desc"
                }
              },{
                "criteria2": {
                  "order": "desc"
                }
              },{
                "criteria3": {
                  "order": "desc"
                }
              }
            ]
          }
        }
我不知道这是否是正确的方法,但似乎有效

elasticsearch 自定义 analyzer

示例:
# mapping 中自定义 analyzer

## char_filter
# html_strip
POST _analyze
{
  "tokenizer": "keyword",
  "char_filter": ["html_strip"],
  "text": "<b>hello world</b>"
}

# mapping
POST _analyze
{
  "tokenizer": "standard",
  "char_filter": [
    {
      "type": "mapping",
      "mappings": ["-=>_"]
    }
  ],
  "text": "123-456, i-test"
}

# 正则表达式
POST _analyze
{
  "tokenizer": "standard",
  "char_filter": [
    {
      "type": "pattern_replace",
      "pattern": "http://(.*)",
      "replacement": "$1"
    }
  ],
  "text": "http://www.elastic.co"
}

## tokenizer
# path_hierarchy
POST _analyze
{
  "tokenizer": "path_hierarchy",
  "text": "/usr/abc/efg"
}

## filter
# whitespace and stop
POST _analyze
{
  "tokenizer": "whitespace",
  "filter": ["stop"],
  "text": "The rain in Spain falls mainly on the plain."
}

POST _analyze
{
  "tokenizer": "whitespace",
  "filter": ["lowercase", "stop"],
  "text": "The rain in Spain falls mainly on the plain."
}
今天关于ElasticSearch-定义自定义字母顺序进行排序和elasticsearch 自定义排序的分享就到这里,希望大家有所收获,若想了解更多关于Elasticsearch CentOS6.5下安装ElasticSearch6.2.4+elasticsearch-head+Kibana、Elasticsearch 中如何进行排序 (中文 + 父子文档 + 嵌套文档)、Elasticsearch 在所有存储桶上对数据进行排序、elasticsearch 自定义 analyzer等相关知识,可以在本站进行查询。
本文标签:


