本文将为您提供关于centos6升级OpenSSH7.6,OpenSSL1.0.1n的详细介绍,我们还将为您解释centos6升级7grub的相关知识,同时,我们还将为您提供关于Centons7.6升
本文将为您提供关于centos6 升级OpenSSH 7.6,OpenSSL 1.0.1n的详细介绍,我们还将为您解释centos6 升级 7 grub的相关知识,同时,我们还将为您提供关于Centons7.6升级openssl和openssh、CentOS 5.8升级OpenSSH,OpenSSL到最新版、CentOS 6.5上升级openssh7.4、centos 6.5升级openssl的实用信息。
本文目录一览:- centos6 升级OpenSSH 7.6,OpenSSL 1.0.1n(centos6 升级 7 grub)
- Centons7.6升级openssl和openssh
- CentOS 5.8升级OpenSSH,OpenSSL到最新版
- CentOS 6.5上升级openssh7.4
- centos 6.5升级openssl
")
centos6 升级OpenSSH 7.6,OpenSSL 1.0.1n(centos6 升级 7 grub)
公司做安全扫描,扫出OpenSSH、OpenSSL漏洞,需要做升级。直接yum update无果,只好手动编译升级了。
升级前
ssh -V
OpenSSH_5.3p1,OpenSSL 1.0.1e-fips 11 Feb 2013
升级后
ssh -V
OpenSSH_7.6p1,OpenSSL 1.0.2n  7 Dec 2017
准备工作
-
准备OpenSSH、OpenSSL安装包
openssh-7.6p1.tar.gz
openssl-1.0.2n.tar.gz - 安装依赖包
OpenSSL依赖
To install OpenSSL,you will need:
- make
- Perl 5
- an ANSI C compiler
- a development environment in form of development libraries and C
header files- a supported Unix operating system
OpenSSH依赖
You will need working installations of Zlib and libcrypto (LibreSSL / OpenSSL)
Zlib 1.1.4 or 1.2.1.2 or greater (earlier 1.2.x versions have problems):
http://www.gzip.org/zlib/
libcrypto (LibreSSL or OpenSSL >= 0.9.8f < 1.1.0)
LibreSSL http://www.libressl.org/ ; or
OpenSSL http://www.openssl.org/
yum install gcc make perl pam-devel zlib-devel -y
-
开启telnet
预防升级失败,无法连接服务器yum install xinetd telnet-server -y sed -i ‘/disable/ s/yes/no/‘ /etc/xinetd.d/telnet /etc/init.d/xinetd start
- 添加普通用户
升级后默认不支持root直接登录,需要使用普通用户去登录,再su 切换到rootuseradd xx -G wheel passwd xx
OpenSSL升级
tar zxvf openssl-1.0.2n.tar.gz
cd openssl-1.0.2n
./config --prefix=/usr/local/openssl shared zlib && make && make install
mv /usr/bin/openssl /usr/bin/openssl.bak
mv /usr/include/openssl /usr/include/openssl.bak
ln -s /usr/local/openssl/bin/openssl /usr/bin/openssl
ln -s /usr/local/openssl/include/openssl /usr/include/openssl
echo "/usr/local/openssl/lib" >>/etc/ld.so.conf
ldconfig -v
查看版本
openssl version -a
OpenSSL 1.0.2n  7 Dec 2017
built on: reproducible build,date unspecified
platform: linux-x86_64
options:  bn(64,64) rc4(16x,int) des(idx,cisc,16,int) idea(int) blowfish(idx)
compiler: gcc -I. -I.. -I../include  -fPIC -DOPENSSL_PIC -DZLIB -DOPENSSL_THREADS -D_REENTRANT -DDSO_DLFCN -DHAVE_DLFCN_H -Wa,--noexecstack -m64 -DL_ENDIAN -O3 -Wall -DOPENSSL_IA32_SSE2 -DOPENSSL_BN_ASM_MONT -DOPENSSL_BN_ASM_MONT5 -DOPENSSL_BN_ASM_GF2m -DRC4_ASM -DSHA1_ASM -DSHA256_ASM -DSHA512_ASM -DMD5_ASM -DAES_ASM -DVPAES_ASM -DBSAES_ASM -DWHIRLPOOL_ASM -DGHASH_ASM -DECP_NISTZ256_ASM
OPENSSLDIR: "/usr/local/openssl/ssl"
OpenSSH升级
tar zxvf openssh-7.6p1.tar.gz
cd openssh-7.6p1
./configure --prefix=/usr  --sysconfdir=/etc/ssh --with-md5-passwords --with-pam --with-ssl-dir=/usr/local/openssl/ && make
rpm -e `rpm -qa|grep openssh` --nodeps
make install &&
install -v -m755    contrib/ssh-copy-id /usr/bin     &&

install -v -m644    contrib/ssh-copy-id.1                     /usr/share/man/man1              &&
install -v -m755 -d /usr/share/doc/openssh-7.6p1     &&
install -v -m644    INSTALL LICENCE OVERVIEW README*                     /usr/share/doc/openssh-7.6p1

echo "PermitRootLogin no" >> /etc/ssh/sshd_config
echo "ChallengeResponseAuthentication no" >> /etc/ssh/sshd_config
cp contrib/redhat/sshd.pam /etc/pam.d/
sed ‘[email protected]/[email protected]/[email protected]‘ /etc/pam.d/login > /etc/pam.d/sshd && chmod 644 /etc/pam.d/sshd && echo "UsePAM yes" >> /etc/ssh/sshd_config

cp contrib/redhat/sshd.init /etc/init.d/sshd
chmod +x /etc/init.d/sshd
chkconfig --add sshd
chkconfig sshd on
/etc/init.d/sshd start
查看版本
ssh -V
OpenSSH_7.6p1,OpenSSL 1.0.2n  7 Dec 2017

Centons7.6升级openssl和openssh
安装需注意
在安装时需要卸载OpenSSH,卸载后除当前打开窗口外,不在接受新的SSH连接。
可以安装Telnet,通过Telnet代替SSH连接,直到升级完毕再关闭Telnet
查看操作系统版本
lsb_release -a
输入后会显示下面这些信息,我的版本号是7.6.1810
lsb_release -aLSB Version: :core-4.1-amd64:core-4.1-noarch
distributor ID: CentOS
Description: CentOS Linux release 7.6.1810 (Core)
Release: 7.6.1810
Codename: Core
查询当前版本
ssh -V
openssl version
下载安装包
wget https://www.openssl.org/source/openssl-1.1.1l.tar.gz
wget
https://openbsd.hk/pub/OpenBSD/OpenSSH/portable/openssh-8.6p1.tar.gz
卸载openssh和openssl
yum remove openssl openssl-devel openssh -y
安装顺序,先安装openssl,后安装openssh
openssl安装
安装依赖
yum install gcc perl zlib zlib-devel -y
编译安装
tar -zxvf openssl-1.1.1l.tar.gz
cd openssl-1.1.1l
./config shared zlib --prefix=/usr/local/openssl
–openssldir=/usr/local/openssl/sslmake
make install
配置
echo “/usr/local/openssl/lib” >> /etc/ld.so.conf
ldconfig -v
mv /usr/bin/openssl /usr/bin/openssl.old
ln -s /usr/local/openssl/bin/openssl /usr/bin/openssl
查看版本
openssl version
接下来安装openssh
安装依赖
yum -y install pam-devel
编译安装
tar -zxvf openssh-8.6p1.tar.gz
cd openssh-8.6p1
./configure --prefix=/usr --sysconfdir=/etc/ssh
–with-openssl-includes=/usr/local/openssl/include/ --with-ssl-dir=/usr/local/openssl --with-zlib --with-md5-passwords–with-pammake
make install
配置
echo “PermitRootLogin yes” >> /etc/ssh/sshd_config
echo “UsednS no” >> /etc/ssh/sshd_config
cp -a contrib/redhat/sshd.init /etc/init.d/sshd
chmod +x /etc/init.d/sshd
chkconfig --add sshd
systemctl enable sshd
chkconfig sshd on
chmod 600 /etc/ssh/ssh_host_rsa_key
chmod 600 /etc/ssh/ssh_host_ecdsa_key
/etc/init.d/sshd restart
查看版本
ssh -V
OpenSSH_8.6p1, OpenSSL 1.1.1l 24 Aug 2021
升级完成

CentOS 5.8升级OpenSSH,OpenSSL到最新版
因业务系统安全要求需要升级OpenSSH版本到最新版。原有CentOS 5.8系统自带版本如下。
[root@localhost ~]# lsb_release -a
LSB Version:	:core-4.0-amd64:core-4.0-ia32:core-4.0-noarch:graphics-4.0-amd64:graphics-4.0-ia32:graphics-4.0-noarch:printing-4.0-amd64:printing-4.0-ia32:pri
nting-4.0-noarchdistributor ID:	CentOS
Description:	CentOS release 5.8 (Final)
Release:	5.8
Codename:	Final
[root@localhost ~]# ssh -V
OpenSSH_4.3p2,OpenSSL 0.9.8e-fips-rhel5 01 Jul 2008
升级版本:
经过多次验证最终确定使用ssh最新版本openssh-7.3p1和openssl 0.9.8的最终版本openssl-0.9.8zg(CentOS 5.8安装openssl的1.x版本有很多问题,不建议使用)。而且openssh-7.3p1最低要求openssl 0.9.8f。
openssl-0.9.8zg并不涉及OpenSSLCVE-2014-0160漏洞 (心脏出血漏洞)。目前有漏洞的版本有:1.0.1-1.0.1f(包含1.0.1f)以及1.0.2-beta。参考:https://segmentfault.com/a/1190000000461002
安装编译环境
yum -y install gcc openssl-devel pam-devel rpm-build
步骤1:开启telnet服务已确保ssh升级失败可以控制主机
安装并开启telnet服务。
[root@localhost ~]# yum install -y xinetd telnet-server
[root@localhost ~]# vim /etc/xinetd.d/krb5-telnet
# default: off
# description: The kerberized telnet server accepts normal telnet sessions,\
#              but can also use Kerberos 5 authentication.
service telnet
{
        flags           = REUSE
        socket_type     = stream
        wait            = no
        user            = root
        server          = /usr/kerberos/sbin/telnetd
        log_on_failure  += USERID
        disable         = no #修改disable为no,默认为yes,即禁用telnet服务。修改为no,即表示启用telnet服务
}
[root@localhost ~]# service xinetd restart
[root@localhost ~]# netstat -tnlp | grep :23
tcp        0      0 0.0.0.0:23                  0.0.0.0:*                   LISTEN      -
Telnet是不能以root直接登陆的,需要提前建立一个普通用户并设置密码。以普通用户登录后再su切换root,SSH升级成功后,记得关闭telnet服务。
[root@localhost ~]# useradd meng
[root@localhost ~]# passwd meng
通过其他服务器测试telnet登录保证可以使用。确保防火墙允许telnet服务,即打开23端口。
[root@localhost ~]# telnet 192.168.1.10
Trying 192.168.1.10...
Connected to 192.168.1.10 (192.168.1.10).
Escape character is '^]'.
    localhost.localdomain (Linux release 2.6.18-308.el5 #1 SMP Tue Feb 21 20:06:06 EST 2012) (2)
login: meng
Password:
一切就绪,准备开始。
步骤2:安装新版openssl
生成openssl-0.9.8zg RPM包
[root@localhost x86_64]# cd /opt
[root@localhost x86_64]# wget https://www.openssl.org/source/openssl-0.9.8zg.tar.gz
[root@localhost x86_64]# cp openssl-0.9.8zg.tar.gz /usr/src/redhat/SOURCES/
[root@localhost x86_64]# tar xvf openssl-0.9.8zg.tar.gz
[root@localhost x86_64]# cp openssl-0.9.8zg/openssl.spec /usr/src/redhat/Specs/
[root@localhost x86_64]# rpmbuild /usr/src/redhat/Specs/openssl.spec
[root@localhost x86_64]# cd /usr/src/redhat/RPMS/x86_64/
[root@localhost x86_64]# ls openssl* -l
-rw-r--r-- 1 root root 1279018 Nov  6 01:01 openssl-0.9.8zg-1.x86_64.rpm
-rw-r--r-- 1 root root  113834 Nov  6 01:01 openssl-debuginfo-0.9.8zg-1.x86_64.rpm
-rw-r--r-- 1 root root 2237915 Nov  6 01:01 openssl-devel-0.9.8zg-1.x86_64.rpm
-rw-r--r-- 1 root root  607823 Nov  6 01:01 openssl-doc-0.9.8zg-1.x86_64.rpm
安装openssl,安装时需要使用--nodeps选项,否则会报很多软件包的依赖错误“libcrypto.so.6 is needed by (installed) openldap-2.3.43-3.el5.i386”等等。
rpm --nodeps -Uvh openssl-0.9.8zg-1.i386.rpm openssl-devel-0.9.8zg-1.i386.rpm
安装后会导致yum等无法使用,提示“libcrypto.so.0.9.8 is not a symbolic link”或“libssl.so.6 is not a symbolic link”。需要执行以下命令增加链接库的软链接。
ln -s /usr/lib/libcrypto.so.0.9.8 /usr/lib/libcrypto.so.6
ln -s /usr/lib/libssl.so.0.9.8 /usr/lib/libssl.so.6
ln -s /usr/lib/libcrypto.so.0.9.8 /usr/lib64/libcrypto.so.6
ln -s /usr/lib/libssl.so.0.9.8 /usr/lib64/libssl.so.6
此时执行ssh -V会提示“ssh: symbol lookup error: ssh: undefined symbol: FIPS_mode”错误。继续安装ssh新版本即可。
步骤3:安装新版openssh
下载并编译opensshRPM包。下载地址:http://openbsd.hk/pub/OpenBSD/OpenSSH/portable/,选择最新版下载。
[root@localhost ~]# cd /opt
[root@localhost ~]# yum -y install libX11-devel libXt-devel gtk2-devel
[root@localhost ~]# wget http://openbsd.hk/pub/OpenBSD/OpenSSH/portable/openssh-7.3p1.tar.gz
[root@localhost ~]# tar zxvf openssh-7.3p1.tar.gz
[root@localhost ~]# cp openssh-7.3p1/contrib/redhat/openssh.spec /usr/src/redhat/Specs/
[root@localhost ~]# cp openssh-7.3p1.tar.gz /usr/src/redhat/SOURCES/
[root@localhost ~]# cd /usr/src/redhat/Specs
[root@localhost ~]# perl -i.bak -pe 's/^(%define no_(gnome|x11)_askpass)\s+0$/$1 1/' openssh.spec
[root@localhost ~]# rpmbuild -bb openssh.spec
[root@localhost ~]# cd /usr/src/redhat/RPMS/x86_64
[root@localhost x86_64]# ls openssh-* -l
-rw-r--r-- 1 root root 737241 Nov  6 01:41 openssh-7.3p1-1.x86_64.rpm
-rw-r--r-- 1 root root  43458 Nov  6 01:41 openssh-askpass-7.3p1-1.x86_64.rpm
-rw-r--r-- 1 root root  22868 Nov  6 01:41 openssh-askpass-gnome-7.3p1-1.x86_64.rpm
-rw-r--r-- 1 root root 933212 Nov  6 01:41 openssh-clients-7.3p1-1.x86_64.rpm
-rw-r--r-- 1 root root  16799 Nov  6 01:41 openssh-debuginfo-7.3p1-1.x86_64.rpm
-rw-r--r-- 1 root root 456630 Nov  6 01:41 openssh-server-7.3p1-1.x86_64.rpm
[root@localhost x86_64]# rpm -Uvh openssh-7.3p1-1.x86_64.rpm openssh-askpass-7.3p1-1.x86_64.rpm openssh-server-7.3p1-1.x86_64.rpm openssh-clients-7.3p1-1.x86_6
4.rpm
安装后查看版本。
[root@localhost x86_64]# ssh -V
OpenSSH_7.3p1,OpenSSL 0.9.8zg 11 Jun 2015
新版本安装后默认禁止root远程登录需要修改sshd配置文件。修改后重启ssh服务。
[root@localhost x86_64]# vim /etc/ssh/sshd_config
#LoginGraceTime 2m
PermitRootLogin yes  #去掉注释
#StrictModes yes
#MaxAuthTries 6
[root@localhost x86_64]# service sshd restart
Stopping sshd:                                             [  OK  ]
Starting sshd:                                             [  OK  ]
测试远程登录,yum等。远程登录成功后关闭telnet服务。
如果还有其他服务器需要升级。直接安装RPM即可。
[root@localhost opt]# ls
openssh-askpass-gnome-7.3p1-1.x86_64.rpm  openssh-server-7.3p1-1.x86_64.rpm       openssl-devel-0.9.8zg-1.x86_64.rpm
openssh-7.3p1-1.x86_64.rpm          openssh-clients-7.3p1-1.x86_64.rpm        openssl-0.9.8zg-1.x86_64.rpm            openssl-doc-0.9.8zg-1.x86_64.rpm
openssh-askpass-7.3p1-1.x86_64.rpm  openssh-debuginfo-7.3p1-1.x86_64.rpm      openssl-debuginfo-0.9.8zg-1.x86_64.rpm
[root@localhost opt]# rpm --nodeps -Uvh openssl*
Preparing...                ########################################### [100%]
   1:openssl                ########################################### [ 25%]
   2:openssl-debuginfo      ########################################### [ 50%]
   3:openssl-devel          ########################################### [ 75%]
   4:openssl-doc            ########################################### [100%]
[root@localhost opt]# ln -s /usr/lib/libcrypto.so.0.9.8 /usr/lib/libcrypto.so.6
[root@localhost opt]# ln -s /usr/lib/libssl.so.0.9.8 /usr/lib/libssl.so.6
[root@localhost opt]# ln -s /usr/lib/libcrypto.so.0.9.8 /usr/lib64/libcrypto.so.6
[root@localhost opt]# ln -s /usr/lib/libssl.so.0.9.8 /usr/lib64/libssl.so.6
[root@localhost opt]# rpm --nodeps -Uvh openssh-*
Preparing...                ########################################### [100%]
   1:openssh                ########################################### [ 17%]
   2:openssh-askpass        ########################################### [ 33%]
   3:openssh-askpass-gnome  ########################################### [ 50%]
   4:openssh-clients        ########################################### [ 67%]
   5:openssh-debuginfo      ########################################### [ 83%]
   6:openssh-server         ########################################### [100%]
[root@localhost opt]# vim /etc/ssh/sshd_config
#PermitRootLogin prohibit-password #禁用
PermitRootLogin yes #允许root通过密码登录
[root@localhost opt]# service sshd restart
Stopping sshd:                                             [  OK  ]
Starting sshd:                                             [  OK  ]
[root@localhost opt]# ssh -V
OpenSSH_7.3p1,OpenSSL 0.9.8zg 11 Jun 2015
RPM包下载地址:链接:http://pan.baidu.com/s/1eR7438e 密码:ugii
本文参考以下blog,经过亲自测试整理。
http://blog.chinaunix.net/uid-6984-id-5120601.html
http://hxl2009.blog.51cto.com/779549/1035652

CentOS 6.5上升级openssh7.4
Linux 升级openssh7.4
环境:CentOS 6.5
提前开telnet 服务
http://zlib.net/zlib-1.2.8.tar.gz
准备安装包
第一步:
解压:zlib-1.2.8.tar.gz
[root@dbaul01 openssh]# tar -xvf zlib-1.2.8.tar.gz
[root@dbaul01 openssh]# cd zlib-1.2.8
[root@dbaul01 zlib-1.2.8]# ./configure
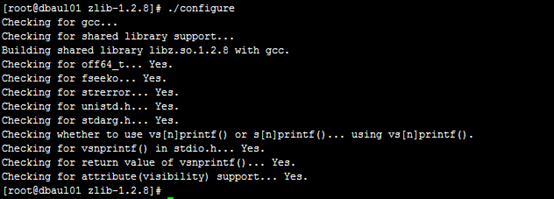
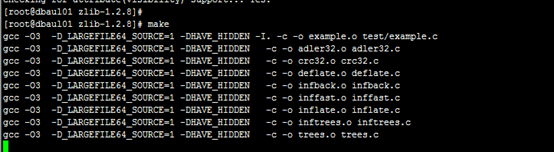
[root@dbaul01 zlib-1.2.8]# make
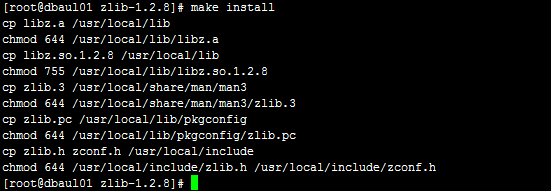
[root@dbaul01 zlib-1.2.8]# make install
查看
[root@dbaul01 zlib-1.2.8]# ll /usr/local/lib

第二步:
查看目前的openssl版本
[root@dbaul01 openssh]# openssl version
先安装一个openssl-fips
[root@bogon openssh]# tar -xvf openssl-fips-2.0.12.tar.gz
[root@bogon openssl-fips-2.0.12]# ./config
[root@bogon openssl-fips-2.0.12]# make
[root@bogon openssl-fips-2.0.12]# make install
安装openssl-fips 完毕
第三步:
安装openssl-1.0.2i
[root@bogon openssl-1.0.2i]# ./config
[root@bogon openssl-1.0.2i]# make
[root@bogon openssl-1.0.2i]# make install
[root@bogon openssl-1.0.2i]# cd /usr/local/ssl/
[root@bogon ssl]# cd bin/
[root@bogon bin]# ln -s /usr/local/ssl/bin/openssl /usr/bin/openssl
[root@bogon bin]# openssl version -a
![]()
第四步:
安装openssh-7.4p1
http://www.linuxfromscratch.org/blfs/view/svn/postlfs/openssh.html
[root@dbaul01 openssh-7.4p1]# ./configure --prefix=/usr \
--sysconfdir=/etc/ssh \
--with-md5-passwords \
--with-privsep-path=/var/lib/sshd
检查出现error
configure: error: PAM headers not found

缺失 PAM-header
安装 PAM-header
[root@dbaul01 openssh]# yum install pam-devel.x86_64 -y
再次编译
[root@dbaul01 openssh-7.4p1]# ./configure --prefix=/usr --sysconfdir=/etc/ssh --with-md5-passwords --with-pam --with-tcp-wrappers --with-ssl-dir=/usr/local/ssl --without-hardening

编译成功
[root@dbaul01 openssh-7.4p1]# make
[root@dbaul01 openssh-7.4p1]# make install
[root@localhost redhat]# pwd
/root/openssh/openssh-7.4p1/contrib/redhat
[root@localhost redhat]# mv /etc/init.d/sshd /etc/init.d/sshd20161222
[root@localhost redhat]# cp sshd.init /etc/init.d/sshd
[root@localhost redhat]# chmod u+x /etc/init.d/sshd
[root@localhost redhat]# chkconfig --add sshd
[root@localhost openssh-7.4p1]# cp ssh_config /etc/ssh/ssh_config
cp: overwrite `/etc/ssh/ssh_config''? y
[root@localhost openssh-7.4p1]# cp -p sshd_config /etc/ssh/sshd_config
cp: overwrite `/etc/ssh/sshd_config''? y
[root@localhost openssh-7.4p1]#
[root@localhost openssh-7.4p1]# ssh -V
OpenSSH_7.4p1, OpenSSL 1.0.2i 22 Sep 2016
安装完毕

centos 6.5升级openssl
开发者技术变现资源聚集地
https://www.baiydu.com
1.下载升级版本
wget https://www.openssl.org/source/openssl-1.1.0i.tar.gz
2.安装 zlib zlib-devel
yum -y install zlib zlib-devel
3.解压openssl
tar -zvxf openssl-1.1.0i.tar.gz
4.进入openssl解压文件夹
cd openssl-1.1.0e
5.链接安装文件
./config shared zlib
6.编译
make
7.安装
make install
8.将原本的openssl重命名
mv /usr/bin/openssl /usr/bin/openssl.bak
9.查询openssl所有路径
find / -name openssl
10.将/usr/bin/下增加openssl快捷方式
ln -s /usr/local/bin/openssl /usr/bin/openssl
11.增加openssl环境变量
echo "/usr/local/lib64/" >> /etc/ld.so.conf
12.生效
ldconfig
13.查看版本
openssl version -a
关于centos6 升级OpenSSH 7.6,OpenSSL 1.0.1n和centos6 升级 7 grub的问题我们已经讲解完毕,感谢您的阅读,如果还想了解更多关于Centons7.6升级openssl和openssh、CentOS 5.8升级OpenSSH,OpenSSL到最新版、CentOS 6.5上升级openssh7.4、centos 6.5升级openssl等相关内容,可以在本站寻找。
本文标签:


