在本文中,我们将带你了解SpringSecurity权限控制原理《一》在这篇文章中,我们将为您详细介绍SpringSecurity权限控制原理《一》的方方面面,并解答springsecurity权限控
在本文中,我们将带你了解Spring Security 权限控制原理《一》在这篇文章中,我们将为您详细介绍Spring Security 权限控制原理《一》的方方面面,并解答springsecurity权限控制的原理常见的疑惑,同时我们还将给您一些技巧,以帮助您实现更有效的10. Spring Boot中Spring Security权限控制、Angular.Js + Spring Security 的权限控制使用、Spring Boot + Spring Security 权限控制、Spring Boot 2.X(十八):集成 Spring Security-登录认证和权限控制。
本文目录一览:- Spring Security 权限控制原理《一》(springsecurity权限控制的原理)
- 10. Spring Boot中Spring Security权限控制
- Angular.Js + Spring Security 的权限控制使用
- Spring Boot + Spring Security 权限控制
- Spring Boot 2.X(十八):集成 Spring Security-登录认证和权限控制
")
Spring Security 权限控制原理《一》(springsecurity权限控制的原理)
姗姗来迟,今天终于是写完了。。。@Jeanie 不写了,
Spring Security is a powerful and highly customizable authentication and access-control framework. It is the de-facto standard for securing Spring-based applications.(Spring安全是一个功能强大且高度可定制的身份验证和访问控制框架。这是事实上的标准,以确保Spring为基础的应用程序)看着有点糊涂。。。
Spring Security是一个能够为基于Spring的企业应用系统提供声明式的安全访问控制解决方案的安全框架。它提供了一组可以在Spring应用上下文中配置的Bean,充分利用了Spring IoC,DI(控制反转Inversion of Control ,DI:Dependency Injection 依赖注入)和AOP(面向切面编程)功能,为应用系统提供声明式的安全访问控制功能,减少了为企业系统安全控制编写大量重复代码的工作。
下面我就简单的学习了解了一下,在spring的官网上最新的已经更新到 4.2.3版本,添加maven 依赖
<dependencies>
    <dependency>
        <groupId>org.springframework.security</groupId>
        <artifactId>spring-security-web</artifactId>
        <version>4.2.3.BUILD-SNAPSHOT</version>
    </dependency>
</dependencies><repositories>
    <repository>
        <id>spring-snapshots</id>
        <name>Spring Snapshots</name>
        <url>https://repo.spring.io/libs-snapshot</url>
        <snapshots>
            <enabled>true</enabled>
        </snapshots>
    </repository>
</repositories>
** 自动导入了spring-security-web-4.2.3,和 spring-secrity-core-4.2.3这两个 jar包文件(发现运行出现不知所措的异常,所以决定版本导入为:3.1.4的jar包,具体原因可能是jarb包冲突导致的) **
web.xml配置文件
<?xml version="1.0" encoding="UTF-8"?>
<web-app xmlns:xsi="http://www.w3.org/2001/XMLSchema-instance" xmlns="http://java.sun.com/xml/ns/javaee" xmlns:web="http://java.sun.com/xml/ns/javaee/web-app_2_5.xsd" xsi:schemaLocation="http://java.sun.com/xml/ns/javaee http://java.sun.com/xml/ns/javaee/web-app_2_5.xsd" id="WebApp_ID" version="2.5">
  <display-name>Archetype Created Web Application</display-name>
<!-- 加载具体的配置文件。。 -->
	<context-param>
		<param-name>contextConfigLocation</param-name>
		<param-value>classpath*:classpath*:dispacher-servlet.xml,
		classpath*:spring-security.xml</param-value>

	</context-param>
	<context-param>
    <param-name>log4jConfigLocation</param-name>
    <param-value>/WEB-INF/classes/log4j.properties</param-value>
  </context-param>
  <!-- 添加spring监听器,必须的 -->
	<listener>
		<listener-class>org.springframework.web.context.ContextLoaderListener</listener-class>
	</listener>
	<!-- 编码格式UTF-8 -->
	<filter>
		<filter-name>CharacterEncodingFilter</filter-name>
		<filter-class>org.springframework.web.filter.CharacterEncodingFilter</filter-class>
		<init-param>
			<param-name>encoding</param-name>
			<param-value>UTF-8</param-value>
		</init-param>
		<init-param>
			<param-name>forceEncoding</param-name>
			<param-value>true</param-value>
		</init-param>
	</filter>
	<filter-mapping>
		<filter-name>CharacterEncodingFilter</filter-name>
		<url-pattern>/*</url-pattern>
	</filter-mapping>

	<!-- 添加 spring secrity 过滤器-->
    <filter>
       <filter-name>springSecurityFilterChain</filter-name>
      <filter-class>org.springframework.web.filter.DelegatingFilterProxy</filter-class>
    </filter>
    <filter-mapping>
       <filter-name>springSecurityFilterChain</filter-name>
       <url-pattern>/*</url-pattern>
    </filter-mapping>
	<!-- Spring view分发器 -->
	<servlet>
		<servlet-name>dispatcher</servlet-name>
		<servlet-class>org.springframework.web.servlet.DispatcherServlet</servlet-class>
		<init-param>
			<param-name>contextConfigLocation</param-name>
			<param-value>classpath:dispacher-servlet.xml</param-value>
		</init-param>
		<load-on-startup>1</load-on-startup>
	</servlet>
	<servlet-mapping>
		<servlet-name>dispatcher</servlet-name>
		<url-pattern>/</url-pattern>
	</servlet-mapping>
  <welcome-file-list>
  	<welcome-file>index.jsp</welcome-file>
  </welcome-file-list>
</web-app>
spring-security.xml 配置文件
<beans xmlns="http://www.springframework.org/schema/beans"
  xmlns:security="http://www.springframework.org/schema/security"
  xmlns:xsi="http://www.w3.org/2001/XMLSchema-instance"
  xsi:schemaLocation="http://www.springframework.org/schema/beans
          http://www.springframework.org/schema/beans/spring-beans-3.1.xsd
          http://www.springframework.org/schema/security
          http://www.springframework.org/schema/security/spring-security-3.1.xsd">

	 index.jsp登录页面 和登录失败页面  配置不要 角色权限就可以访问,否则 登录失败 就不会进入到 登录失败页面。
	<security:http security="none" pattern="/index.jsp"></security:http>
 	<security:http security="none" pattern="/loginFailure.jsp"></security:http>
<!--  	<security:http security="none" pattern="/loginSuccess.jsp"></security:http>  -->
	   <security:http auto-config="true" use-expressions="true">
	   		<!-- 登录 页面,以及登录成功页面 -->
	   		<!-- login-processing-url 这个配置 ,加上和去掉都没有什么影响。。 -->
	   		<security:form-login login-page="/index.jsp"
	   			default-target-url="/loginSuccess.jsp"
	   			password-parameter="user_pwd"
	   			username-parameter="user_name"
	   			always-use-default-target="true"

	   			authentication-failure-url="/loginFailure.jsp"
	   			login-processing-url="/login/loginAction"/>
	   			<!-- 退出登录 以及推出成功自动跳转到 登录页面  推出失败注销 session会话-->
	   		<security:logout invalidate-session="true"
	   				logout-success-url="/index.jsp"
	   				logout-url="/login/loginOut"/>
	   		<!-- 这个地方表示所有的用户请求,必要要有 ROLE_USER 角色 -->
	      	<security:intercept-url pattern="/**" access="hasRole(''ROLE_USER'')"/>
	   </security:http>

		<!--  authentication-manager  固定用户名和密码配置如下 没有什么实际作用-->
<!-- 	   <security:authentication-manager> -->
<!-- 	      <security:authentication-provider> -->
<!-- 	         <security:user-service> -->
<!-- 	            <security:user name="user" password="user" authorities="ROLE_USER"/> -->
<!-- 	            <security:user name="admin" password="admin" authorities="ROLE_USER, ROLE_ADMIN"/> -->
<!-- 	         </security:user-service> -->
<!-- 	      </security:authentication-provider> -->
<!-- 	   </security:authentication-manager> -->
		<!-- 自定义  authentication-manager -->
		<!-- 数据库 验证用户名  配置,我们待会主要实现这个功能 -->
		<security:authentication-manager>
                    这个配置为会set给DaoAuthenticationProvider 类中的userDetailsService,后面后说到
			<security:authentication-provider user-service-ref="userServiceImpl">
				<!-- MD5加密 密码-->
				<security:password-encoder ref="passwordEncoder"></security:password-encoder>
			</security:authentication-provider>
		</security:authentication-manager>
		<bean  id="passwordEncoder"/>
</beans>
spring-context.xml 配置文件 
编写UserServiceImpl 这个类,实现UserDetailsService 接口,并重写loadUserByUsername这个方法,由于没有连接数据库区根据用户名获取用户信息,所以我就暂时写了一个userdb.getUser(String uname)来根据用户名去获取list集合中的一个用户信息。
@Service("userServiceImpl")
public class UserServiceImpl implements UserDetailsService{
	private Log log = LogFactory.getLog(UserServiceImpl.class);
	@Autowired
	private HttpServletRequest request;
	@Override
	public UserDetails loadUserByUsername(String username)
			throws UsernameNotFoundException {
		// TODO Auto-generated method stub
		userDB userdb = new userDB();
		UserDetails userDetails = null;
		try {
			user userInfo = userdb.getUser(username);
			userDetails = new User(userInfo.getUserName(), userInfo.getUserPassword(), getAuthority(userInfo.getAccess()));
		} catch (Exception e) {
			request.getSession().setAttribute("loginInfo",e.getMessage());
			log.error(e.getMessage());

			e.printStackTrace();
		}
		return userDetails;
	}

	权限给予
	private List<GrantedAuthority> getAuthority(Integer access){
		List<GrantedAuthority> authorityList = new ArrayList<GrantedAuthority>();
		if(access.intValue() == 0){
			authorityList.add(new GrantedAuthorityImpl("ROLE_USER"));
			authorityList.add(new GrantedAuthorityImpl("ROLE_ADMIN"));
		}else{
			authorityList.add(new GrantedAuthorityImpl("ROLE_USER"));
		}
		return authorityList;
	}

}
userDB类
public class userDB {
	private static  List<user> userDB = new ArrayList<user>();
	static{
		user u1 = new user("admin","21232f297a57a5a743894a0e4a801fc3",0);
		user u2 = new user("user","ee11cbb19052e40b07aac0ca060c23ee",1);
		userDB.add(u1);
		userDB.add(u2);
	}
	/*** @throws Exception **/
	public user getUser(String name) throws UsernameNotFoundException{
		if(name == null || "".equals(name)){
			throw new UsernameNotFoundException("username could not null");
		}
		for (user u : userDB) {
			System.out.println(u.getUserName().equals(name));
			if(u.getUserName().equals(name)){
				return u;
			}
		}
		throw new UsernameNotFoundException("user dose not exist");
	}
}
在web.xml中添加了对请求拦截的过滤器类DelegatingFilterProxy.java.通过断点doFilter方法查看可以知道一个请求执行了一下过滤器链类 其中有一个UsernamePasswordAuthenticationFilter 这个是我们验证用户名和密码的类
    public Authentication attemptAuthentication(HttpServletRequest request, HttpServletResponse response) throws AuthenticationException {
        if (postOnly && !request.getMethod().equals("POST")) {
            throw new AuthenticationServiceException("Authentication method not supported: " + request.getMethod());
        }
        获取用户名
        String username = obtainUsername(request);
        获取密码,还没有加密的密码
        String password = obtainPassword(request);

        if (username == null) {
            username = "";
        }

        if (password == null) {
            password = "";
        }

        username = username.trim();

        UsernamePasswordAuthenticationToken authRequest = new UsernamePasswordAuthenticationToken(username, password);

        // Allow subclasses to set the "details" property
        setDetails(request, authRequest);
        return this.getAuthenticationManager().authenticate(authRequest);
    }
看到有一个 this.getAuthenticationManager() 这个方法来自父类AbstractAuthenticationProcessingFilter方法 获取到的是AuthenticationManager. 在进入authenticate(authRequest)方法查看
    public Authentication authenticate(Authentication authentication) throws AuthenticationException {
        Class<? extends Authentication> toTest = authentication.getClass();
        AuthenticationException lastException = null;
        Authentication result = null;
        boolean debug = logger.isDebugEnabled();

        for (AuthenticationProvider provider : getProviders()) {
            if (!provider.supports(toTest)) {
                continue;
            }

            if (debug) {
                logger.debug("Authentication attempt using " + provider.getClass().getName());
            }

            try {
                result = provider.authenticate(authentication);

                if (result != null) {
                    copyDetails(authentication, result);
                    break;
                }
            } catch (AccountStatusException e) {
                prepareException(e, authentication);
                // SEC-546: Avoid polling additional providers if auth failure is due to invalid account status
                throw e;
            } catch (AuthenticationException e) {
                lastException = e;
            }
        }

        if (result == null && parent != null) {
            // Allow the parent to try.
            try {
                result = parent.authenticate(authentication);
            } catch (ProviderNotFoundException e) {
                // ignore as we will throw below if no other exception occurred prior to calling parent and the parent
                // may throw ProviderNotFound even though a provider in the child already handled the request
            } catch (AuthenticationException e) {
                lastException = e;
            }
        }

        if (result != null) {
            if (eraseCredentialsAfterAuthentication && (result instanceof CredentialsContainer)) {
                // Authentication is complete. Remove credentials and other secret data from authentication
                ((CredentialsContainer)result).eraseCredentials();
            }

            eventPublisher.publishAuthenticationSuccess(result);
            return result;
        }

        // Parent was null, or didn''t authenticate (or throw an exception).

        if (lastException == null) {
            lastException = new ProviderNotFoundException(messages.getMessage("ProviderManager.providerNotFound",
                        new Object[] {toTest.getName()}, "No AuthenticationProvider found for {0}"));
        }

        prepareException(lastException, authentication);

        throw lastException;
    }
在这其中 getProviders 获取到的是 一个 List<AuthenticationProvider> 集合,循环的去调用一个authenticate()方法,在集合中有一个 AbstractUserDetailsAuthenticationProvider 抽象类,当对这个类的方发被执行时
    public Authentication authenticate(Authentication authentication) throws AuthenticationException {
        Assert.isInstanceOf(UsernamePasswordAuthenticationToken.class, authentication,
            messages.getMessage("AbstractUserDetailsAuthenticationProvider.onlySupports",
                "Only UsernamePasswordAuthenticationToken is supported"));

        // Determine username
        String username = (authentication.getPrincipal() == null) ? "NONE_PROVIDED" : authentication.getName();

        boolean cacheWasUsed = true;
        UserDetails user = this.userCache.getUserFromCache(username);

        if (user == null) {
            cacheWasUsed = false;

            try {
                user = retrieveUser(username, (UsernamePasswordAuthenticationToken) authentication);
            } catch (UsernameNotFoundException notFound) {
                logger.debug("User ''" + username + "'' not found");

                if (hideUserNotFoundExceptions) {
                    throw new BadCredentialsException(messages.getMessage(
                            "AbstractUserDetailsAuthenticationProvider.badCredentials", "Bad credentials"));
                } else {
                    throw notFound;
                }
            }

            Assert.notNull(user, "retrieveUser returned null - a violation of the interface contract");
        }

        try {
            preAuthenticationChecks.check(user);
            additionalAuthenticationChecks(user, (UsernamePasswordAuthenticationToken) authentication);
        } catch (AuthenticationException exception) {
            if (cacheWasUsed) {
                // There was a problem, so try again after checking
                // we''re using latest data (i.e. not from the cache)
                cacheWasUsed = false;
                user = retrieveUser(username, (UsernamePasswordAuthenticationToken) authentication);
                preAuthenticationChecks.check(user);
                additionalAuthenticationChecks(user, (UsernamePasswordAuthenticationToken) authentication);
            } else {
                throw exception;
            }
        }

        postAuthenticationChecks.check(user);

        if (!cacheWasUsed) {
            this.userCache.putUserInCache(user);
        }

        Object principalToReturn = user;

        if (forcePrincipalAsString) {
            principalToReturn = user.getUsername();
        }

        return createSuccessAuthentication(principalToReturn, authentication, user);
    }
有一个retrieveUser()和 additionalAuthenticationChecks()被执行,而这个抽象类被DaoAuthenticationProvider所继承实现,所以调用这个retrieveUser执行的是其子类所实现的具体方法。在其实现类中我们可以看到是如何对用户名和密码进行验证的
    @SuppressWarnings("deprecation")
    protected void additionalAuthenticationChecks(UserDetails userDetails,
            UsernamePasswordAuthenticationToken authentication) throws AuthenticationException {
        Object salt = null;

        if (this.saltSource != null) {
            salt = this.saltSource.getSalt(userDetails);
        }

        if (authentication.getCredentials() == null) {
            logger.debug("Authentication failed: no credentials provided");

            throw new BadCredentialsException(messages.getMessage(
                    "AbstractUserDetailsAuthenticationProvider.badCredentials", "Bad credentials"), userDetails);
        }

        String presentedPassword = authentication.getCredentials().toString();

        if (!passwordEncoder.isPasswordValid(userDetails.getPassword(), presentedPassword, salt)) {
            logger.debug("Authentication failed: password does not match stored value");

            throw new BadCredentialsException(messages.getMessage(
                    "AbstractUserDetailsAuthenticationProvider.badCredentials", "Bad credentials"), userDetails);
        }
    }

    protected void doAfterPropertiesSet() throws Exception {
        Assert.notNull(this.userDetailsService, "A UserDetailsService must be set");
    }

    protected final UserDetails retrieveUser(String username, UsernamePasswordAuthenticationToken authentication)
            throws AuthenticationException {
        UserDetails loadedUser;

        try {
            loadedUser = this.getUserDetailsService().loadUserByUsername(username);
        } catch (UsernameNotFoundException notFound) {
            if(authentication.getCredentials() != null) {
                String presentedPassword = authentication.getCredentials().toString();
                passwordEncoder.isPasswordValid(userNotFoundEncodedPassword, presentedPassword, null);
            }
            throw notFound;
        } catch (Exception repositoryProblem) {
            throw new AuthenticationServiceException(repositoryProblem.getMessage(), repositoryProblem);
        }

        if (loadedUser == null) {
            throw new AuthenticationServiceException(
                    "UserDetailsService returned null, which is an interface contract violation");
        }
        return loadedUser;
    }
其中additionalAuthenticationChecks 方法是对密码的验证。retrieveUser是根据用户输入的用户名去获取一个具体的用户信息实体类,其中就包含我们的用户名和密码。在根据用户名去获取用户信息实体类时:this.getUserDetailsService() 这个方法其实就是获取到我们自己之前定义的UserServiceImpl 实现了UserDetailsService接口的类,并把这个类在spring-secret.xml中set到我们的DaoAuthenticationProvider类中的userDetailsService,这样就完成了对用户权限的验证。。。
界面效果: 


10. Spring Boot中Spring Security权限控制
Spring Security权限控制可以配合授权注解使用。接着上一节,要开启这些注解,只需要在Spring Security配置文件中添加注解:
@Configuration
@EnableGlobalMethodSecurity(prePostEnabled = true)
public class BrowserSecurityConfig extends WebSecurityConfigurerAdapter {
   ...
}在UserDetailService中,我们给当前登录用户授予了”admin”的权限,我们将这块代码改造一下:当登录用户为admin的时候,其拥有”admin”权限,其他用户则只有”test”权限:
@Configuration
public class UserDetailService implements UserDetailsService {

    @Autowired
    private PasswordEncoder passwordEncoder;

    @Override
    public UserDetails loadUserByUsername(String username) throws UsernameNotFoundException {
        // 模拟一个用户,替代数据库获取逻辑
        MyUser user = new MyUser();
        user.setUserName(username);
        user.setPassword(this.passwordEncoder.encode("123456"));
        // 输出加密后的密码
        System.out.println("加密以后的密码" + user.getPassword());

        //封装权限
        List<GrantedAuthority> authorities = new ArrayList<>();
        if (StringUtils.equalsIgnoreCase("admin", username)) {
            //admin用户
            authorities = AuthorityUtils.commaSeparatedStringToAuthorityList("admin");
        } else {
            //普通用户
            authorities = AuthorityUtils.commaSeparatedStringToAuthorityList("test");
        }


        return new User(username, user.getPassword(), user.isEnabled(),
                user.isAccountNonExpired(), user.isCredentialsNonExpired(),
                user.isAccountNonLocked(), authorities);
    }
}
添加一个方法,并且使用权限注解标明只有拥有“admin”权限的人才能访问:
@GetMapping("/auth/admin")
@PreAuthorize("hasAuthority(''admin'')")
public String authenticationTest() {
    return "您拥有admin权限,可以查看";
}
启动系统,使用admin账号登录:
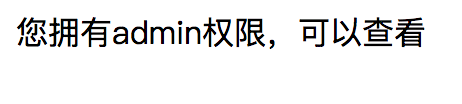
可看到,admin可以访问该资源。
使用123456账号登录:
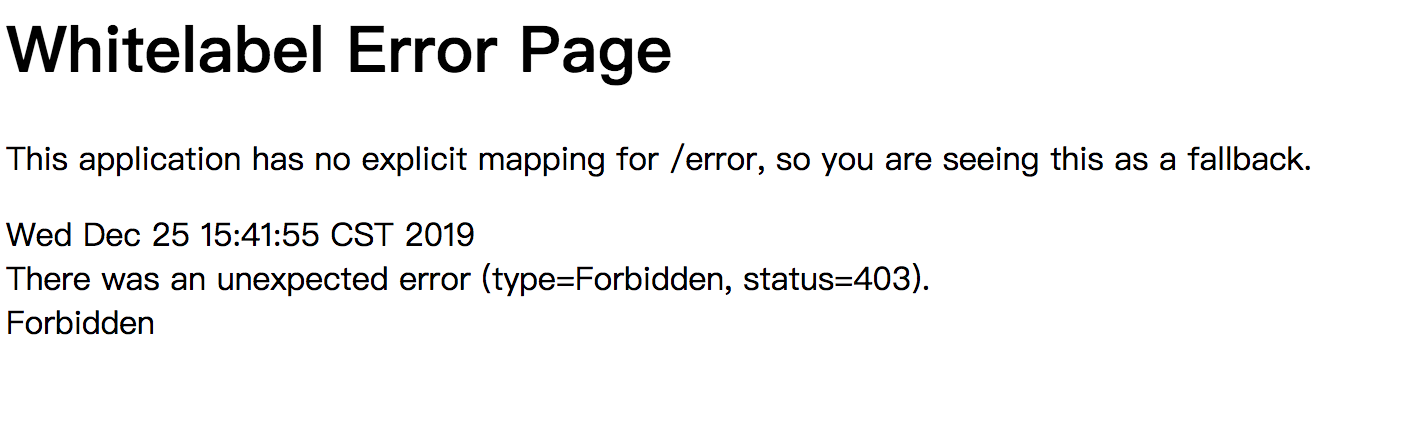
可以看到,123456没有权限访问,返回403错误码。
我们可以自定义权限不足处理器来处理权限不足时候的操作。
新增一个处理器MyAuthenticationAccessDeniedHandler,实现AccessDeniedHandler接口:
@Component
public class MyAuthenticationAccessDeniedHandler implements AccessDeniedHandler {
@Override
public void handle(HttpServletRequest request, HttpServletResponse response, AccessDeniedException accessDeniedException) throws IOException {
response.setStatus(HttpStatus.INTERNAL_SERVER_ERROR.value());
response.setContentType("application/json;charset=utf-8");
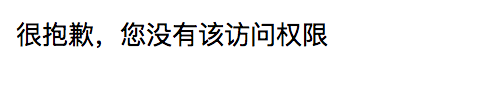
response.getWriter().write("很抱歉,您没有该访问权限");
}
}然后将这个处理器添加到Spring Security配置链中:
@Autowired
private MyAuthenticationAccessDeniedHandler authenticationAccessDeniedHandler;

@Override
protected void configure(HttpSecurity http) throws Exception {
    http.exceptionHandling()
            .accessDeniedHandler(authenticationAccessDeniedHandler)
        .and()
    ......
}重启系统,再次使用123456账号访问/auth/admin:
源码:https://gitee.com/hekang_admin/security-demo5.git

Angular.Js + Spring Security 的权限控制使用
一. 引言
在系统中,常常因为用户的角色不同,拥有不同的功能,那么涉及到一个问题,就是UI界面如何根据用户角色的不太显示不同的UI界面,后台如何避免没有权限的用户进行api 接口的访问。
二. Angular.JS 权限的指令
Angular.Js中指令分为属性型指令和结构型指令。
1.指令得基本使用方法
angular 创建指令的命令:
ng generate directive [directive-name]
属性型指令:主要用于操作元素的属性和样式。angular中提供的内置结构型指令有ngStyle、ngClass等。
eg:
<div [ngClass]="{''red-background'': isRed}">这是V层的使用</div>在angular的c层中,根据isRed 属性的值true 还是 false 来决定V层是否添加该样式。
结构型指令:主要用于改变DOM的结构和布局。angular中提供的内置结构型指令有ngIf、ngFor、ngSwitch等。 在V层使用的时候,需要在指令名前加前缀 , 这是angular的语法糖,编译器会将起转换为[] 包裹的属性型形式。
eg:
<div *ngIf="condition">V层使用结构型指令ngIf</div>编译器看见前缀* 后,将起转换为:
<ng-template [ngIf]="condition">
  <div>这是编译器转换后的形式</div>
</ng-template>
在angular的c层中,根据condition属性的值true 还是 false 来决定V层是否改变DOM的结构和布局。
若您还需了解更多指令selector的设置,可移步到Angular 指令注解的属性解释
2.用angular结构型指令实现前台权限的控制。
需求:不同用户登录系统,展示不同的菜单,或添加,编辑,删除等操作按钮。
思路:
1 创建权限指令
2 在指令中获取当前登录用户
3 在指令中做逻辑判断,用户拥有权限 创建嵌入视图, 用户没有权限 什么都不做或清除嵌入的视图
4 在v层中元素中,使用该指令
具体实现:
V成使用:
<div *appBePermit="[''admin'']">holle</div>指令:
@Directive({
  selector: ''[appBePermit]''
})
export class BePermitDirective implements OnInit{
  // 模拟一个当前登录用户
  user = {name: ''张三'', password: ''123456'', authorities: [''admin'', ''user'']} as User;

  // 接收属性值
  @Input(''appBePermit'') authorities: string[] | undefined | string;

  constructor(private viewContainer: ViewContainerRef,
              private readonly templateRef: TemplateRef<any>,) {
  }

  ngOnInit() {
    console.log(this.authorities)
    // 获取当前用户
    const currentUser = this.user;

    // 逻辑判断
    const hasView = this.viewContainer.length;
    if (hasView === 0 && currentUser.authorities.some(item => this.authorities?.includes(item))) {
      // 有权限 创建陷入视图
      this.viewContainer.createEmbeddedView(this.templateRef);
    } else {
      // 清除容器的视图
      this.viewContainer.clear();
    }
  }
}
interface User {
  name: string,
  password: string,
  authorities: string[]
}
其中:TemplateRef用于表示内嵌的<ng-template>模板元素。
二. 基于Spring Security 的授权使用
spring Security 是一个框架,提供 认证(authentication)、授权(authorization) 和 保护,以抵御常见的攻击。
在 Spring Security 中,与认证、授权相关的校验其实都是利用一系列的过滤器来完成的,这些过滤器共同组成了一个过滤器链。

1 项目启用spring security
添加依赖
 <dependency>
            <groupId>org.springframework.boot</groupId>
            <artifactId>spring-boot-starter-security</artifactId>
        </dependency>
在配置类中,添加注解使其生效
@EnableWebSecurity (启用Spring Security的Web安全配置)
@EnableGlobalMethodSecurity(prePostEnabled = true) (启用Spring Security的@PreAuthorize、@PostAuthorize、@PreFilter和@PostFilter注解)
继承WebSecurityConfigurerAdapter适配器类,自定义安全策略
eg:
@Configuration
@EnableWebSecurity
@EnableGlobalMethodSecurity(prePostEnabled = true)
public class SecurityConfig extends WebSecurityConfigurerAdapter {

        protected void configure(HttpSecurity http) throws Exception {
        http
            .authorizeRequests()
            .antMatchers("/login").permitAll()
            .anyRequest().authenticated()
            .and()
            .httpBasic()
            .and().cors()
            .and().csrf().disable();
    }

}
执行以上的操作后,Sping Security 就可以在系统中使用了。
在每个方法前面,注解使用@PreAuthorize("hasAnyAuthority(''access'', ''ROLE_ADMIN'')")可控制拥有access, ROLE_ADMIN中任意一个权限即可访问该方法。

用户角色的存储

总结
Spring Security 未使用过,仅仅处于看到过的阶段,需要写Demo 进行学习一下,当前学习的都很浅,还需要深入学习一下,画图理解一下其原理。

Spring Boot + Spring Security 权限控制
本文在 Spring Boot + Spring Security 添加记住我功能 的基础上进行修改
- 在登录的时候,在 UserDetailService 中认证并授权,修改 UserDetailService
@Configuration
public class UserDetailService implements UserDetailsService {

    @Autowired
    private PasswordEncoder passwordEncoder;

    @Override
    public UserDetails loadUserByUsername(String username) throws UsernameNotFoundException {
        // 模拟一个用户,替代数据库获取逻辑
        MyUser user = new MyUser();
        user.setUserName(username);
        user.setPassword(this.passwordEncoder.encode("123456"));
        // 输出加密后的密码
        System.out.println(user.getPassword());

        //授权  真正的应用中会根据数据中的查询得知
        List<GrantedAuthority> authorities = new ArrayList<>();
        if (StringUtils.equalsIgnoreCase("admin", username)) {
            authorities = AuthorityUtils.commaSeparatedStringToAuthorityList("admin");
        } else {
            authorities = AuthorityUtils.commaSeparatedStringToAuthorityList("test");
        }
        return new User(username, user.getPassword(), user.isEnabled(),
                user.isAccountNonExpired(), user.isCredentialsNonExpired(),
                user.isAccountNonLocked(), authorities);
    }
}
- 新建自定义权限辅助类:
@Component
public class MyAuthenticationAccessDeniedHandler implements AccessDeniedHandler {

    @Override
    public void handle(HttpServletRequest request, HttpServletResponse response, AccessDeniedException accessDeniedException) throws IOException {
        response.setStatus(HttpStatus.INTERNAL_SERVER_ERROR.value());
        response.setContentType("application/json;charset=utf-8");
        response.getWriter().write("很抱歉,您没有该访问权限");
    }
}
- 开启权限注解并配置权限辅助类:
@Component
@EnableGlobalMethodSecurity(prePostEnabled = true) // 开启权限注解
public class MySecurityConfig extends WebSecurityConfigurerAdapter {
    @Autowired
    private MyAuthenticationFailureHandler authenticationFailureHandler;

    @Autowired
    private MyAuthenticationSuccessHandler authenticationSuccessHandler;
    @Autowired
    private ValidateCodeFilter validateCodeFilter;
    @Autowired
    private UserDetailService userDetailService;
    @Autowired
    private DataSource dataSource;
    @Autowired
    private MyAuthenticationAccessDeniedHandler myAuthenticationAccessDeniedHandler;

    public PersistentTokenRepository persistentTokenRepository() {
        JdbcTokenRepositoryImpl jdbcTokenRepository = new JdbcTokenRepositoryImpl();
        jdbcTokenRepository.setDataSource(dataSource);
        jdbcTokenRepository.setCreateTableOnStartup(false);
        return jdbcTokenRepository;
    }
    @Bean
    public BCryptPasswordEncoder bCryptPasswordEncoder(){
        return new BCryptPasswordEncoder();
    }
    @Override
    protected void configure(HttpSecurity http) throws Exception {
         http.addFilterBefore(validateCodeFilter, UsernamePasswordAuthenticationFilter.class) // 添加验证码校验过滤器
                 .exceptionHandling()
                 .accessDeniedHandler(myAuthenticationAccessDeniedHandler) // 配置辅助类
                 .and()
                 .formLogin() // 表单登录
                // http.httpBasic() // HTTP Basic
                .loginPage("/authentication/require") // 登录跳转 URL
                .loginProcessingUrl("/login") // 处理表单登录 URL
                .failureHandler(authenticationFailureHandler) // 处理登录失败
                .successHandler(authenticationSuccessHandler)
                 .and()
                 .rememberMe() // 启用rememberMe
                 .tokenRepository(persistentTokenRepository()) // 配置 token 持久化仓库
                 .tokenValiditySeconds(3600) // remember 过期时间,单为秒
                 .userDetailsService(userDetailService) // 处理自动登录逻辑
                .and()
                .authorizeRequests() // 授权配置
                .antMatchers("/authentication/require",
                        "/login.html",
                        "/code/image").permitAll() // 无需认证的请求路径
                .anyRequest()  // 所有请求
                .authenticated() // 都需要认证
                .and().csrf().disable();
    }
}
- 修改 IndexController:
@RestController
public class IndexController {
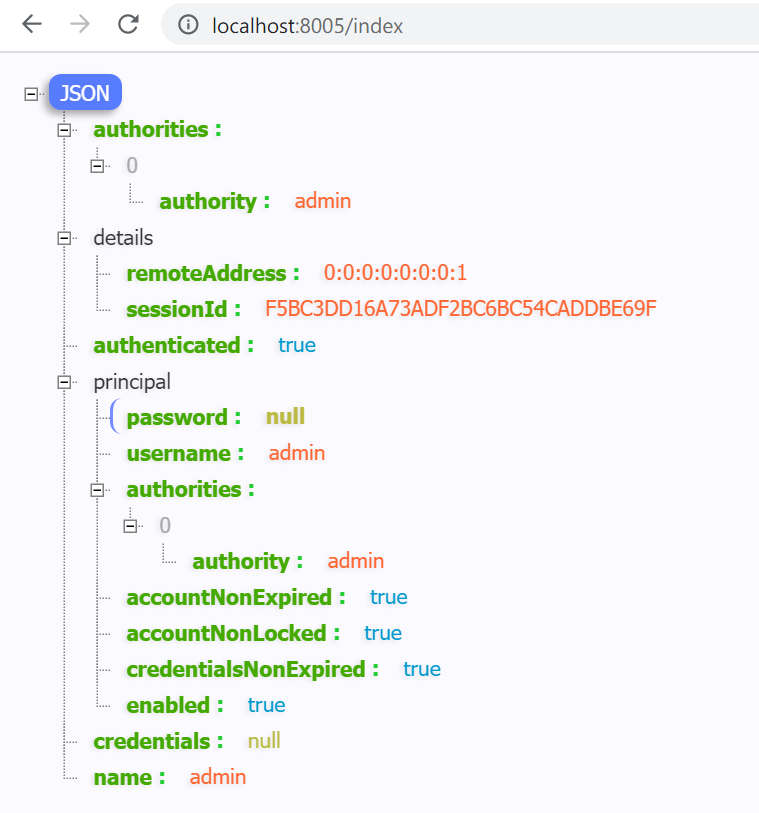
@GetMapping("index")
public Object index(){
return SecurityContextHolder.getContext().getAuthentication();
}
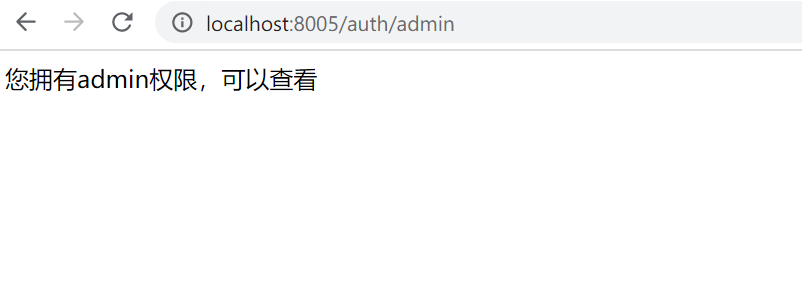
@GetMapping("/auth/admin")
@PreAuthorize("hasAuthority(''admin'')") // 权限控制注解①
public String authenticationTest() {
return "您拥有admin权限,可以查看";
}
}
- 测试:
启动项目:访问 http://localhost:8005/login.html , 填写用户名 user 密码 123456, 提示如下
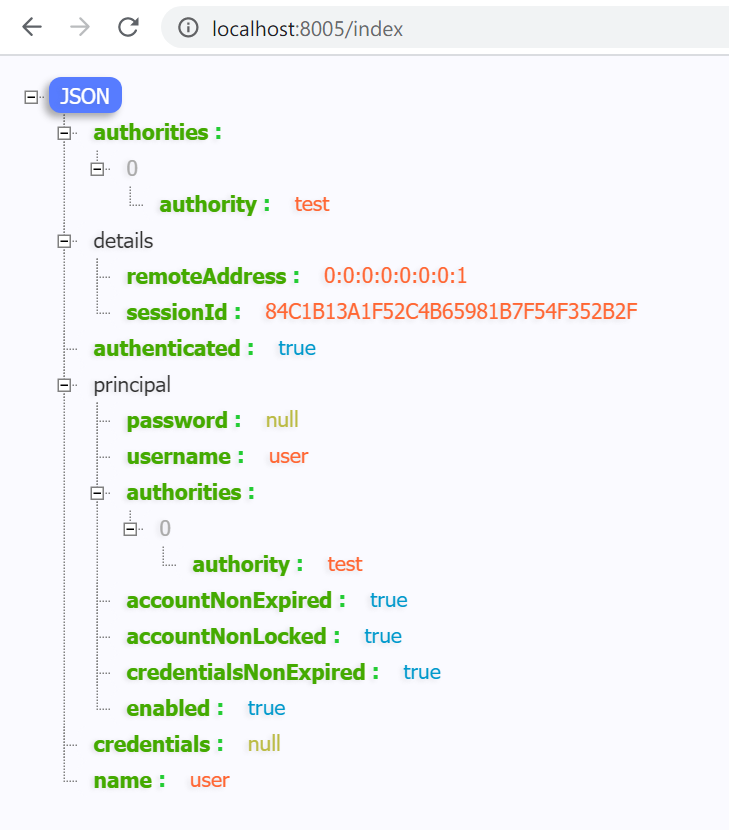
访问 http://localhost:8005/auth/admin 提示如下:
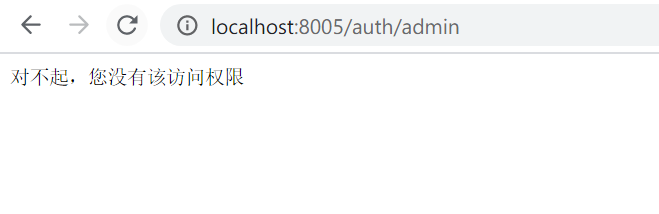
使用 admin 密码 123456 登录 提示如下:
访问 http://localhost:8005/auth/admin 提示如下:
注:
①权限控制注解有:
1.Spring Security 自带的 @Secured 注解;
开启注解:@EnableGlobalMethodSecurity (securedEnabled = true)
@Secured("ROLE_ADMIN")  // 或者({"ROLE_ADMIN","ROLE_USER"})
public void test(){
    ...
}
2.JSR-250 的 @RolesAllowed 注解;
@EnableGlobalMethodSecurity(jsr250Enabled = true)
@RolesAllowed("ROLE_ADMIN")
public void test(){
    ...
}
3. 表达式驱动的注解,包括 @PreAuthorize、@PostAuthorize、@PreFilter 和 @PostFilter
开启注解: @EnableGlobalMethodSecurity (prePostEnabled = true)
//该注解用于方法前验证权限,下方是:限制非VIP用户提交blog的note字段字数不得超过1000字
//#form部分直接引用了方法中的同名参数。这使得Spring Security能够检查传入方法的参数,并将这些参数用于认证决策的制定
@PreAuthorize("hasRole(''ROLE_ADMIN'') and #form.note.length() <= 1000 or hasRole(''ROLE_VIP'')")
public void writeBlog(Form form){
    ...
}
或者:
//方法后调用权限验证,校验方法返回值 用户名是否正确
//Spring Security在SpEL中提供了名为returnObject 的变量。在这里方法返回一个User对象,所以这个表达式可以直接访问user对象中的userName属性。
@PreAuthorize("hasRole(ROLE_USER)")
@PostAuthorize("returnObject.user.userName == principal.username")
public User getUserById(long id){
    ...
本文代码运行正常
本文源代码:https://github.com/ttdys/springboot/tree/master/springboot_security/05_role_permission
:集成 Spring Security-登录认证和权限控制")
Spring Boot 2.X(十八):集成 Spring Security-登录认证和权限控制
前言
在企业项目开发中,对系统的安全和权限控制往往是必需的,常见的安全框架有 Spring Security、Apache Shiro 等。本文主要简单介绍一下 Spring Security,再通过 Spring Boot 集成开一个简单的示例。
Spring Security
什么是 Spring Security?
Spring Security 是一种基于 Spring AOP 和 Servlet 过滤器 Filter 的安全框架,它提供了全面的安全解决方案,提供在 Web 请求和方法调用级别的用户鉴权和权限控制。
Web 应用的安全性通常包括两方面:用户认证(Authentication)和用户授权(Authorization)。
用户认证指的是验证某个用户是否为系统合法用户,也就是说用户能否访问该系统。用户认证一般要求用户提供用户名和密码,系统通过校验用户名和密码来完成认证。
用户授权指的是验证某个用户是否有权限执行某个操作。
2.原理
Spring Security 功能的实现主要是靠一系列的过滤器链相互配合来完成的。以下是项目启动时打印的默认安全过滤器链(集成5.2.0):
[
    org.springframework.security.web.context.request.async.WebAsyncManagerIntegrationFilter@5054e546,
    org.springframework.security.web.context.SecurityContextPersistenceFilter@7b0c69a6,
    org.springframework.security.web.header.HeaderWriterFilter@4fefa770,
    org.springframework.security.web.csrf.CsrfFilter@6346aba8,
    org.springframework.security.web.authentication.logout.LogoutFilter@677ac054,
    org.springframework.security.web.authentication.UsernamePasswordAuthenticationFilter@51430781,
    org.springframework.security.web.savedrequest.RequestCacheAwareFilter@4203d678,
    org.springframework.security.web.servletapi.SecurityContextHolderAwareRequestFilter@625e20e6,
    org.springframework.security.web.authentication.AnonymousAuthenticationFilter@19628fc2,
    org.springframework.security.web.session.SessionManagementFilter@471f8a70,
    org.springframework.security.web.access.ExceptionTranslationFilter@3e1eb569,
    org.springframework.security.web.access.intercept.FilterSecurityInterceptor@3089ab62
]
- WebAsyncManagerIntegrationFilter
- SecurityContextPersistenceFilter
- HeaderWriterFilter
- CsrfFilter
- LogoutFilter
- UsernamePasswordAuthenticationFilter
- RequestCacheAwareFilter
- SecurityContextHolderAwareRequestFilter
- AnonymousAuthenticationFilter
- SessionManagementFilter
- ExceptionTranslationFilter
- FilterSecurityInterceptor
详细解读可以参考:https://blog.csdn.net/dushiwodecuo/article/details/78913113
3.核心组件
SecurityContextHolder
用于存储应用程序安全上下文(Spring Context)的详细信息,如当前操作的用户对象信息、认证状态、角色权限信息等。默认情况下,SecurityContextHolder 会使用 ThreadLocal 来存储这些信息,意味着安全上下文始终可用于同一执行线程中的方法。
获取有关当前用户的信息
因为身份信息与线程是绑定的,所以可以在程序的任何地方使用静态方法获取用户信息。例如获取当前经过身份验证的用户的名称,代码如下:
Object principal = SecurityContextHolder.getContext().getAuthentication().getPrincipal();
if (principal instanceof UserDetails) {
    String username = ((UserDetails)principal).getUsername();
} else {
    String username = principal.toString();
}
其中,getAuthentication() 返回认证信息,getPrincipal() 返回身份信息,UserDetails 是对用户信息的封装类。
Authentication
认证信息接口,集成了 Principal 类。该接口中方法如下:
| 接口方法 | 功能说明 |
|---|---|
| getAuthorities() | 获取权限信息列表,默认是 GrantedAuthority 接口的一些实现类,通常是代表权限信息的一系列字符串 |
| getCredentials() | 获取用户提交的密码凭证,用户输入的密码字符窜,在认证过后通常会被移除,用于保障安全 |
| getDetails() | 获取用户详细信息,用于记录 ip、sessionid、证书序列号等值 |
| getPrincipal() | 获取用户身份信息,大部分情况下返回的是 UserDetails 接口的实现类,是框架中最常用的接口之一 |
AuthenticationManager
认证管理器,负责验证。认证成功后,AuthenticationManager 返回一个填充了用户认证信息(包括权限信息、身份信息、详细信息等,但密码通常会被移除)的 Authentication 实例。然后再将 Authentication 设置到 SecurityContextHolder 容器中。
AuthenticationManager 接口是认证相关的核心接口,也是发起认证的入口。但它一般不直接认证,其常用实现类 ProviderManager 内部会维护一个 List<AuthenticationProvider> 列表,存放里多种认证方式,默认情况下,只需要通过一个 AuthenticationProvider 的认证,就可被认为是登录成功。
UserDetailsService
负责从特定的地方加载用户信息,通常是通过JdbcDaoImpl从数据库加载实现,也可以通过内存映射InMemoryDaoImpl实现。
UserDetails
该接口代表了最详细的用户信息。该接口中方法如下:
| 接口方法 | 功能说明 |
|---|---|
| getAuthorities() | 获取授予用户的权限 |
| getPassword() | 获取用户正确的密码,这个密码在验证时会和 Authentication 中的 getCredentials() 做比对 |
| getUsername() | 获取用于验证的用户名 |
| isAccountNonExpired() | 指示用户的帐户是否已过期,无法验证过期的用户 |
| isAccountNonLocked() | 指示用户的账号是否被锁定,无法验证被锁定的用户 |
| isCredentialsNonExpired() | 指示用户的凭据(密码)是否已过期,无法验证凭证过期的用户 |
| isEnabled() | 指示用户是否被启用,无法验证被禁用的用户 |
Spring Security 实战
1.系统设计
本文主要使用 Spring Security 来实现系统页面的权限控制和安全认证,本示例不做详细的数据增删改查,sql 可以在完整代码里下载,主要是基于数据库对页面 和 ajax 请求做权限控制。
1.1 技术栈
- 编程语言:Java
- 编程框架:Spring、Spring MVC、Spring Boot
- ORM 框架:MyBatis
- 视图模板引擎:Thymeleaf
- 安全框架:Spring Security(5.2.0)
- 数据库:MySQL
- 前端:Layui、JQuery
1.2 功能设计
- 实现登录、退出
- 实现菜单 url 跳转的权限控制
- 实现按钮 ajax 请求的权限控制
- 防止跨站请求伪造(CSRF)攻击
1.3 数据库层设计
t_user 用户表
| 字段 | 类型 | 长度 | 是否为空 | 说明 |
|---|---|---|---|---|
| id | int | 8 | 否 | 主键,自增长 |
| username | varchar | 20 | 否 | 用户名 |
| password | varchar | 255 | 否 | 密码 |
t_role 角色表
| 字段 | 类型 | 长度 | 是否为空 | 说明 |
|---|---|---|---|---|
| id | int | 8 | 否 | 主键,自增长 |
| role_name | varchar | 20 | 否 | 角色名称 |
t_menu 菜单表
| 字段 | 类型 | 长度 | 是否为空 | 说明 |
|---|---|---|---|---|
| id | int | 8 | 否 | 主键,自增长 |
| menu_name | varchar | 20 | 否 | 菜单名称 |
| menu_url | varchar | 50 | 是 | 菜单url(Controller 请求路径) |
t_user_roles 用户权限表
| 字段 | 类型 | 长度 | 是否为空 | 说明 |
|---|---|---|---|---|
| id | int | 8 | 否 | 主键,自增长 |
| user_id | int | 8 | 否 | 用户表id |
| role_id | int | 8 | 否 | 角色表id |
t_role_menus 权限菜单表
| 字段 | 类型 | 长度 | 是否为空 | 说明 |
|---|---|---|---|---|
| id | int | 8 | 否 | 主键,自增长 |
| role_id | int | 8 | 否 | 角色表id |
| menu_id | int | 8 | 否 | 菜单表id |
实体类这里不详细列了。
2.代码实现
2.0 相关依赖
<dependencies>
		<dependency>
			<groupId>org.springframework.boot</groupId>
			<artifactId>spring-boot-starter-web</artifactId>
		</dependency>

		<dependency>
			<groupId>org.springframework.boot</groupId>
			<artifactId>spring-boot-starter-test</artifactId>
			<scope>test</scope>
			<exclusions>
				<exclusion>
					<groupId>org.junit.vintage</groupId>
					<artifactId>junit-vintage-engine</artifactId>
				</exclusion>
			</exclusions>
		</dependency>

		<dependency>
			<groupId>org.springframework.boot</groupId>
			<artifactId>spring-boot-starter-jdbc</artifactId>
		</dependency>

		<!-- 热部署模块 -->
		<dependency>
			<groupId>org.springframework.boot</groupId>
			<artifactId>spring-boot-devtools</artifactId>
			<optional>true</optional> <!-- 这个需要为 true 热部署才有效 -->
		</dependency>

			<!-- mysql 数据库驱动. -->
		<dependency>
			<groupId>mysql</groupId>
			<artifactId>mysql-connector-java</artifactId>
			<scope>runtime</scope>
		</dependency>

		<!-- mybaits -->
		<dependency>
			<groupId>org.mybatis.spring.boot</groupId>
			<artifactId>mybatis-spring-boot-starter</artifactId>
			<version>2.1.0</version>
		</dependency>

		<!-- thymeleaf -->
		<dependency>
			<groupId>org.springframework.boot</groupId>
			<artifactId>spring-boot-starter-thymeleaf</artifactId>
		</dependency>

		<!-- alibaba fastjson -->
		<dependency>
			<groupId>com.alibaba</groupId>
			<artifactId>fastjson</artifactId>
			<version>1.2.47</version>
		</dependency>
		<!-- spring security -->
		<dependency>
            <groupId>org.springframework.boot</groupId>
            <artifactId>spring-boot-starter-security</artifactId>
        </dependency>
	</dependencies>
2.1 继承 WebSecurityConfigurerAdapter 自定义 Spring Security 配置
/**
prePostEnabled :决定Spring Security的前注解是否可用 [@PreAuthorize,@PostAuthorize,..]
secureEnabled : 决定是否Spring Security的保障注解 [@Secured] 是否可用
jsr250Enabled :决定 JSR-250 annotations 注解[@RolesAllowed..] 是否可用.
 */
@Configurable
@EnableWebSecurity
//开启 Spring Security 方法级安全注解 @EnableGlobalMethodSecurity
@EnableGlobalMethodSecurity(prePostEnabled = true,securedEnabled = true,jsr250Enabled = true)
public class WebSecurityConfig extends WebSecurityConfigurerAdapter{

	@Autowired
	private CustomAccessDeniedHandler customAccessDeniedHandler;
	@Autowired
	private UserDetailsService userDetailsService;

	/**
	 * 静态资源设置
	 */
	@Override
	public void configure(WebSecurity webSecurity) {
		//不拦截静态资源,所有用户均可访问的资源
		webSecurity.ignoring().antMatchers(
				"/",
				"/css/**",
				"/js/**",
				"/images/**",
				"/layui/**"
				);
	}
	/**
	 * http请求设置
	 */
	@Override
	public void configure(HttpSecurity http) throws Exception {
		//http.csrf().disable(); //注释就是使用 csrf 功能
		http.headers().frameOptions().disable();//解决 in a frame because it set ''X-Frame-Options'' to ''DENY'' 问题
		//http.anonymous().disable();
		http.authorizeRequests()
			.antMatchers("/login/**","/initUserData")//不拦截登录相关方法
			.permitAll()
			//.antMatchers("/user").hasRole("ADMIN")  // user接口只有ADMIN角色的可以访问
//			.anyRequest()
//			.authenticated()// 任何尚未匹配的URL只需要验证用户即可访问
			.anyRequest()
			.access("@rbacPermission.hasPermission(request, authentication)")//根据账号权限访问
			.and()
			.formLogin()
			.loginPage("/")
			.loginPage("/login")   //登录请求页
			.loginProcessingUrl("/login")  //登录POST请求路径
			.usernameParameter("username") //登录用户名参数
			.passwordParameter("password") //登录密码参数
			.defaultSuccessUrl("/main")   //默认登录成功页面
			.and()
			.exceptionHandling()
			.accessDeniedHandler(customAccessDeniedHandler) //无权限处理器
			.and()
			.logout()
			.logoutSuccessUrl("/login?logout");  //退出登录成功URL

	}
	/**
	 * 自定义获取用户信息接口
	 */
	@Override
	public void configure(AuthenticationManagerBuilder auth) throws Exception {
		auth.userDetailsService(userDetailsService).passwordEncoder(passwordEncoder());
	}

	/**
     * 密码加密算法
     * @return
     */
    @Bean
    public BCryptPasswordEncoder passwordEncoder() {
        return new BCryptPasswordEncoder();

    }
}
2.2 自定义实现 UserDetails 接口,扩展属性
public class UserEntity implements UserDetails {

	/**
	 *
	 */
	private static final long serialVersionUID = -9005214545793249372L;

	private Long id;// 用户id
	private String username;// 用户名
	private String password;// 密码
	private List<Role> userRoles;// 用户权限集合
	private List<Menu> roleMenus;// 角色菜单集合

	private Collection<? extends GrantedAuthority> authorities;
	public UserEntity() {

	}

	public UserEntity(String username, String password, Collection<? extends GrantedAuthority> authorities,
			List<Menu> roleMenus) {
		this.username = username;
		this.password = password;
		this.authorities = authorities;
		this.roleMenus = roleMenus;
	}

	public Long getId() {
		return id;
	}

	public void setId(Long id) {
		this.id = id;
	}

	public String getUsername() {
		return username;
	}

	public void setUsername(String username) {
		this.username = username;
	}

	public String getPassword() {
		return password;
	}

	public void setPassword(String password) {
		this.password = password;
	}

	public List<Role> getUserRoles() {
		return userRoles;
	}

	public void setUserRoles(List<Role> userRoles) {
		this.userRoles = userRoles;
	}

	public List<Menu> getRoleMenus() {
		return roleMenus;
	}

	public void setRoleMenus(List<Menu> roleMenus) {
		this.roleMenus = roleMenus;
	}

	@Override
	public Collection<? extends GrantedAuthority> getAuthorities() {
		return this.authorities;
	}

	@Override
	public boolean isAccountNonExpired() {
		return true;
	}

	@Override
	public boolean isAccountNonLocked() {
		return true;
	}

	@Override
	public boolean isCredentialsNonExpired() {
		return true;
	}

	@Override
	public boolean isEnabled() {
		return true;
	}

}
2.3 自定义实现 UserDetailsService 接口
/**
 * 获取用户相关信息
 * @author charlie
 *
 */
@Service
public class UserDetailServiceImpl implements UserDetailsService {
	private Logger log = LoggerFactory.getLogger(UserDetailServiceImpl.class);

	@Autowired
	private UserDao userDao;

	@Autowired
	private RoleDao roleDao;
	@Autowired
	private MenuDao menuDao;

	@Override
	public UserEntity loadUserByUsername(String username) throws UsernameNotFoundException {
		// 根据用户名查找用户
		UserEntity user = userDao.getUserByUsername(username);
		System.out.println(user);
		if (user != null) {
			System.out.println("UserDetailsService");
			//根据用户id获取用户角色
			List<Role> roles = roleDao.getUserRoleByUserId(user.getId());
			// 填充权限
			Collection<SimpleGrantedAuthority> authorities = new HashSet<SimpleGrantedAuthority>();
			for (Role role : roles) {
				authorities.add(new SimpleGrantedAuthority(role.getRoleName()));
			}
			//填充权限菜单
			List<Menu> menus=menuDao.getRoleMenuByRoles(roles);
			return new UserEntity(username,user.getPassword(),authorities,menus);
		} else {
			System.out.println(username +" not found");
			throw new UsernameNotFoundException(username +" not found");
		}
	}

}
2.4 自定义实现 URL 权限控制
/**
 * RBAC数据模型控制权限
 * @author charlie
 *
 */
@Component("rbacPermission")
public class RbacPermission{

	private AntPathMatcher antPathMatcher = new AntPathMatcher();

	public boolean hasPermission(HttpServletRequest request, Authentication authentication) {
		Object principal = authentication.getPrincipal();
		boolean hasPermission = false;
		if (principal instanceof UserEntity) {
			// 读取用户所拥有的权限菜单
			List<Menu> menus = ((UserEntity) principal).getRoleMenus();
			System.out.println(menus.size());
			for (Menu menu : menus) {
				if (antPathMatcher.match(menu.getMenuUrl(), request.getRequestURI())) {
					hasPermission = true;
					break;
				}
			}
		}
		return hasPermission;
	}
}
2.5 实现 AccessDeniedHandler
自定义处理无权请求
/**
 * 处理无权请求
 * @author charlie
 *
 */
@Component
public class CustomAccessDeniedHandler implements AccessDeniedHandler {

	private Logger log = LoggerFactory.getLogger(CustomAccessDeniedHandler.class);

	@Override
	public void handle(HttpServletRequest request, HttpServletResponse response,
			AccessDeniedException accessDeniedException) throws IOException, ServletException {
		boolean isAjax = ControllerTools.isAjaxRequest(request);
		System.out.println("CustomAccessDeniedHandler handle");
		if (!response.isCommitted()) {
			if (isAjax) {
				String msg = accessDeniedException.getMessage();
				log.info("accessDeniedException.message:" + msg);
				String accessDenyMsg = "{\"code\":\"403\",\"msg\":\"没有权限\"}";
				ControllerTools.print(response, accessDenyMsg);
			} else {
				request.setAttribute(WebAttributes.ACCESS_DENIED_403, accessDeniedException);
				response.setStatus(HttpStatus.FORBIDDEN.value());
				RequestDispatcher dispatcher = request.getRequestDispatcher("/403");
				dispatcher.forward(request, response);
			}
		}

	}

	public static class ControllerTools {
		public static boolean isAjaxRequest(HttpServletRequest request) {
			return "XMLHttpRequest".equals(request.getHeader("X-Requested-With"));
		}

		public static void print(HttpServletResponse response, String msg) throws IOException {
			response.setCharacterEncoding("UTF-8");
			response.setContentType("application/json; charset=utf-8");
			PrintWriter writer = response.getWriter();
			writer.write(msg);
			writer.flush();
			writer.close();
		}
	}

}
2.6 相关 Controller
登录/退出跳转
/**
 * 登录/退出跳转
 * @author charlie
 *
 */
@Controller
public class LoginController {
	@GetMapping("/login")
	public ModelAndView login(@RequestParam(value = "error", required = false) String error,
			@RequestParam(value = "logout", required = false) String logout) {
		ModelAndView mav = new ModelAndView();
		if (error != null) {
			mav.addObject("error", "用户名或者密码不正确");
		}
		if (logout != null) {
			mav.addObject("msg", "退出成功");
		}
		mav.setViewName("login");
		return mav;
	}
}
登录成功跳转
@Controller
public class MainController {

	@GetMapping("/main")
	public ModelAndView toMainPage() {
		//获取登录的用户名
		Object principal= SecurityContextHolder.getContext().getAuthentication().getPrincipal();
		String username=null;
		if(principal instanceof UserDetails) {
			username=((UserDetails)principal).getUsername();
		}else {
			username=principal.toString();
		}
		ModelAndView mav = new ModelAndView();
		mav.setViewName("main");
		mav.addObject("username", username);
		return mav;
	}

}
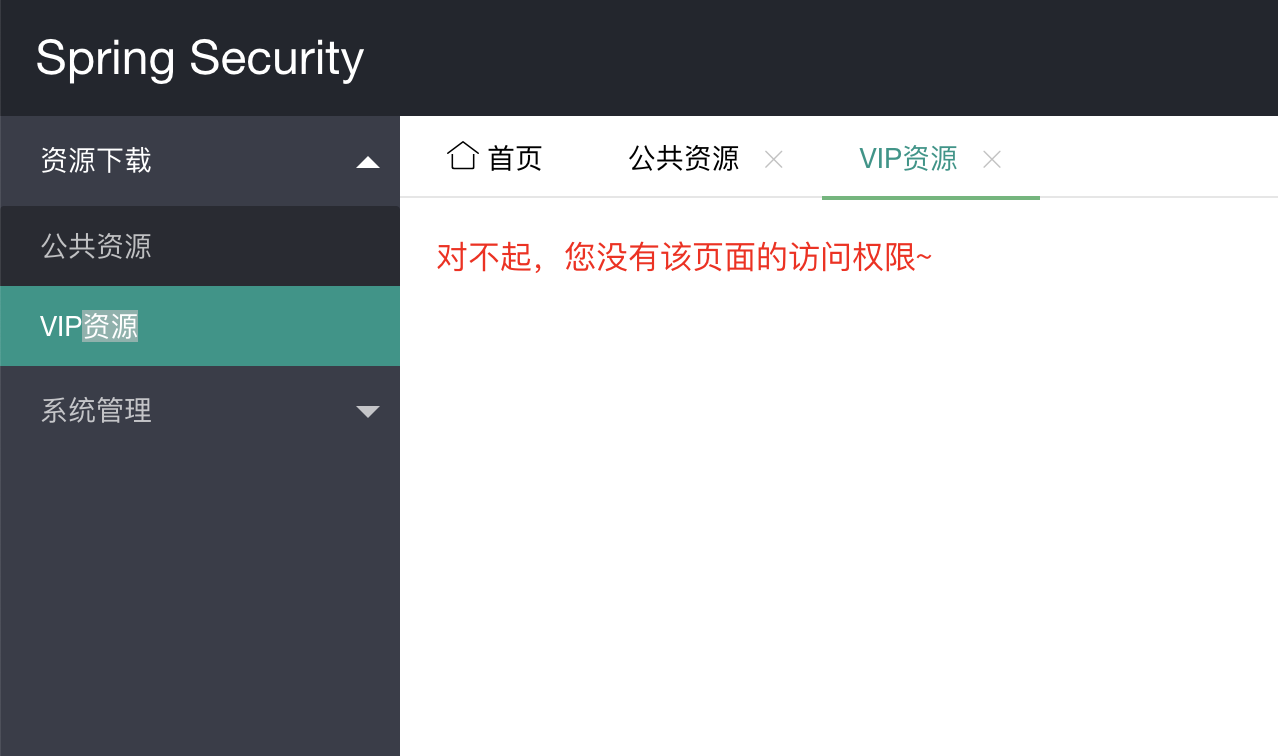
用于不同权限页面访问测试
/**
 * 用于不同权限页面访问测试
 * @author charlie
 *
 */
@Controller
public class ResourceController {

	@GetMapping("/publicResource")
	public String toPublicResource() {
		return "resource/public";
	}

	@GetMapping("/vipResource")
	public String toVipResource() {
		return "resource/vip";
	}
}
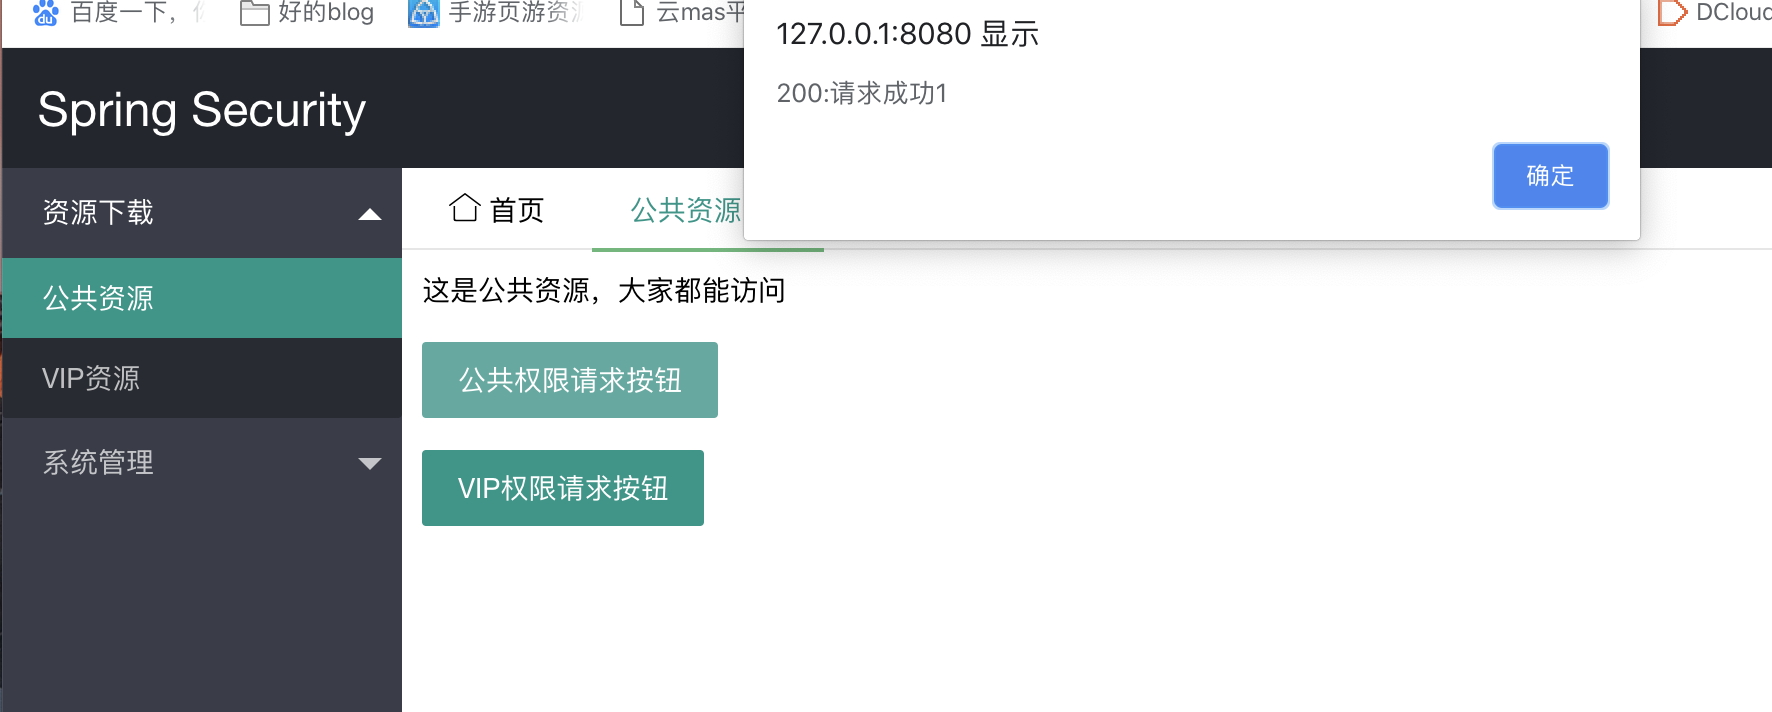
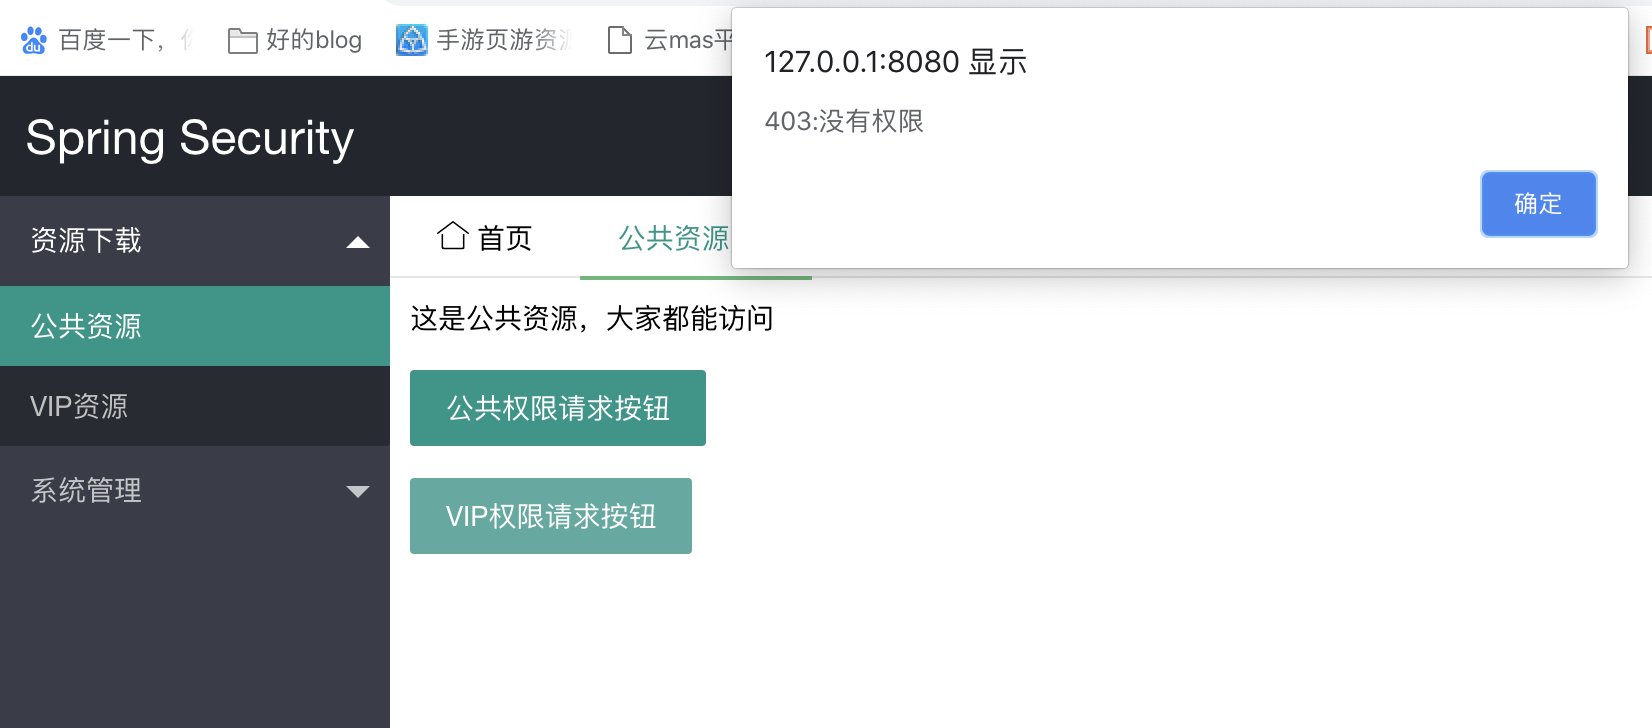
用于不同权限ajax请求测试
/**
 * 用于不同权限ajax请求测试
 * @author charlie
 *
 */
@RestController
@RequestMapping("/test")
public class HttptestController {

	@PostMapping("/public")
	public JSONObject doPublicHandler(Long id) {
		JSONObject json = new JSONObject();
		json.put("code", 200);
		json.put("msg", "请求成功" + id);
		return json;
	}

	@PostMapping("/vip")
	public JSONObject doVipHandler(Long id) {
		JSONObject json = new JSONObject();
		json.put("code", 200);
		json.put("msg", "请求成功" + id);
		return json;
	}
}
2.7 相关 html 页面
登录页面
<formaction="/login" method="post">
			<div>
				<input type="hidden" th:name="${_csrf.parameterName}" th:value="${_csrf.token}"/>
				<input type="text" name="username" required
					placeholder="用户名" autocomplete="off">
			</div>
			<div>
				<input type="password" name="password" required  placeholder="密码" autocomplete="off">
			</div>
			<div>
				<button id="btnLogin" lay-submit lay-filter="*">登录</button>
			</div>
			<div>
				<label th:text="${error}"></label>
				<label th:text="${msg}"></label>
			</div>
		</form>
<input type="hidden" th:name="${_csrf.parameterName}" th:value="${_csrf.token}"/> 防止跨站请求伪造(CSRF)攻击
退出系统
<form id="logoutForm" action="/logout" method="post">
								<input type="hidden" th:name="${_csrf.parameterName}"
									th:value="${_csrf.token}">
							</form>
							<a
								href="javascript:document.getElementById(''logoutForm'').submit();">退出系统</a>
ajax 请求页面
<input type="hidden" th:name="${_csrf.parameterName}" th:value="${_csrf.token}" id="hidCSRF">
<buttonid="btnPublic">公共权限请求按钮</button>
<br>
<br>
<buttonid="btnVip">VIP权限请求按钮</button>
<script type="text/javascript" th:src="@{/js/jquery-1.8.3.min.js}"></script>
<script type="text/javascript" th:src="@{/layui/layui.js}"></script>
<script type="text/javascript">
		layui.use(''form'', function() {
			var form = layui.form;
			$("#btnPublic").click(function(){
				$.ajax({
					url:"/test/public",
					type:"POST",
					data:{id:1},
					beforeSend:function(xhr){
						xhr.setRequestHeader(''X-CSRF-TOKEN'',$("#hidCSRF").val());
					},
					success:function(res){
						alert(res.code+":"+res.msg);

					}
				});
			});
			$("#btnVip").click(function(){
				$.ajax({
					url:"/test/vip",
					type:"POST",
					data:{id:2},
					beforeSend:function(xhr){
						xhr.setRequestHeader(''X-CSRF-TOKEN'',$("#hidCSRF").val());
					},
					success:function(res){
						alert(res.code+":"+res.msg);

					}
				});
			});
		});
	</script>
2.8 测试
测试提供两个账号:user 和 admin (密码与账号一样)
由于 admin 作为管理员权限,设置了全部的访问权限,这里只展示 user 的测试结果。 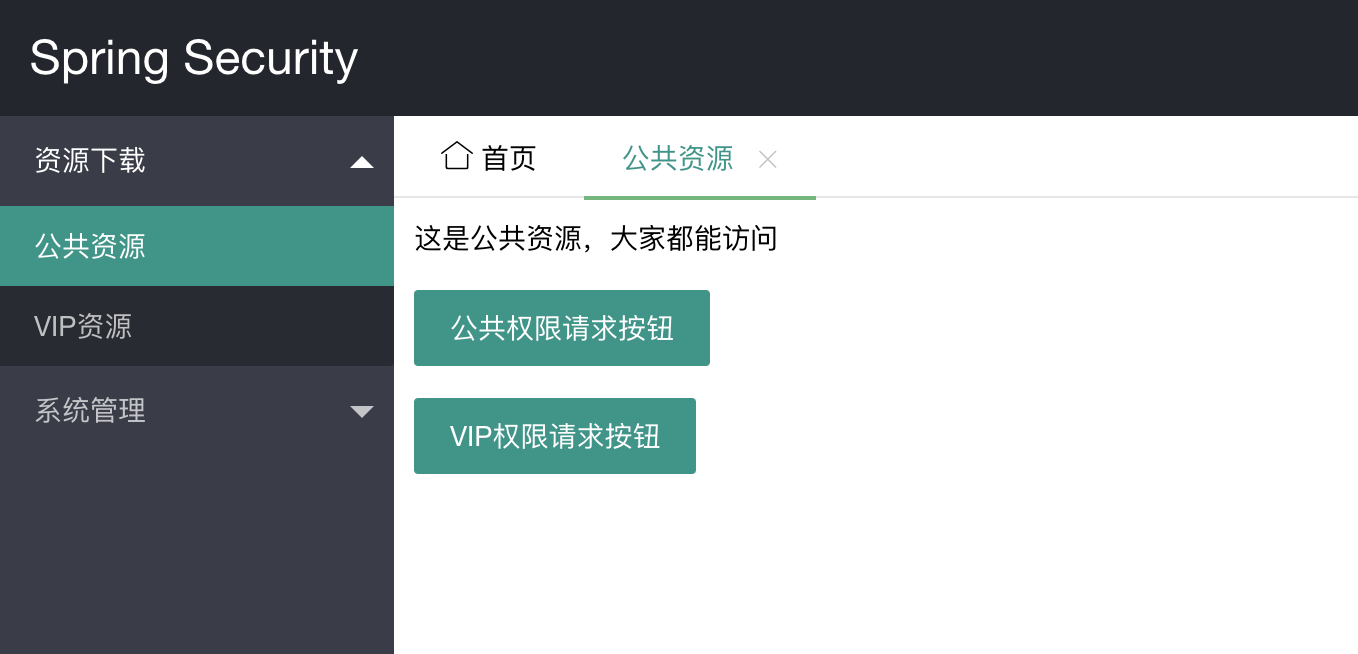
完整代码
github
码云
非特殊说明,本文版权归 朝雾轻寒 所有,转载请注明出处.
原文标题:Spring Boot 2.X(十八):集成 Spring Security-登录认证和权限控制
原文地址: https://www.zwqh.top/article/info/27
如果文章有不足的地方,欢迎提点,后续会完善。
如果文章对您有帮助,请给我点个赞,请扫码关注下我的公众号,文章持续更新中...

原文出处:https://www.cnblogs.com/zwqh/p/11934880.html
关于Spring Security 权限控制原理《一》和springsecurity权限控制的原理的介绍现已完结,谢谢您的耐心阅读,如果想了解更多关于10. Spring Boot中Spring Security权限控制、Angular.Js + Spring Security 的权限控制使用、Spring Boot + Spring Security 权限控制、Spring Boot 2.X(十八):集成 Spring Security-登录认证和权限控制的相关知识,请在本站寻找。
本文标签:


