在本文中,我们将为您详细介绍dart–Flutter:AutomaticKeepAliveClientMixin不能与BottomNavigationBar一起使用的相关知识,并且为您解答关于flut
在本文中,我们将为您详细介绍dart – Flutter:AutomaticKeepAliveClientMixin不能与BottomNavigationBar一起使用的相关知识,并且为您解答关于flutter与dart关系的疑问,此外,我们还会提供一些关于(17)Flutter BottomNavigationBar、16-Flutter移动电商实战-切换后页面状态的保持AutomaticKeepAliveClientMixin、5、Flutter 实现 ViewPager、bottomNavigationBar 界面切换、BottomNavigationBar + BottomNavigationBarItem 导航的另外一种用法的有用信息。
本文目录一览:- dart – Flutter:AutomaticKeepAliveClientMixin不能与BottomNavigationBar一起使用(flutter与dart关系)
- (17)Flutter BottomNavigationBar
- 16-Flutter移动电商实战-切换后页面状态的保持AutomaticKeepAliveClientMixin
- 5、Flutter 实现 ViewPager、bottomNavigationBar 界面切换
- BottomNavigationBar + BottomNavigationBarItem 导航的另外一种用法
")
dart – Flutter:AutomaticKeepAliveClientMixin不能与BottomNavigationBar一起使用(flutter与dart关系)
默认情况下,AddPatientInfo打开,其中包含一堆TextFields(用于输入患者信息),在AddPatientimages页面中,用户可以添加Images.
问题是如果我在AddPatientInfo上填充TextFields然后转到AddPatientimages然后返回,所有TextFields都是空的.这是正确的,因为整个小部件树得到重建,我放弃了所有填充的数据.
所以我正在实现AutomaticKeepAliveClientMixin,因此即使更改选项卡也会保持状态.但它似乎不起作用:
Working Gif via GIPHY
这是我的代码:
AddPatientView(父)
class AddPatientView extends StatefulWidget {
  @override
  State<StatefulWidget> createState() {
    return _AddPatientViewState();
  }
}

class _AddPatientViewState extends State<AddPatientView> {
  int _currentIndex = 0;
  List<Widget> _children;
  List<File> _imageFileList = new List<File>();

  @override
  void initState() {
    super.initState();
    _children = [
      AddPatientInfo(savePatient),AddPatientimages(_imageFileList)
    ];
  }


  @override
  Widget build(BuildContext context) {
    return Scaffold(
      appBar: AppBar(
        title: Text("New Patient Record"),),body: _children[_currentIndex],bottomNavigationBar: BottomNavigationBar(
        currentIndex: _currentIndex,items: [
          BottomNavigationBarItem(icon: new Icon(Icons.create),title: new Text('Info')),BottomNavigationBarItem(icon: new Icon(Icons.camera_alt),title: new Text('Images')),],onTap: (int index) {
          setState(() {
            _currentIndex = index;
          });
        },);
  }
}
AddPatientInfo
class AddPatientInfo extends StatefulWidget {
  final Function savePatient;

  AddPatientInfo(this.savePatient){
  }

  @override
  State<StatefulWidget> createState() {
    return _AddPatientInfoState();
  }
}

class _AddPatientInfoState extends State<AddPatientInfo> with AutomaticKeepAliveClientMixin<AddPatientInfo> {

  Function _savePatient;
  String _firstName,_lastName,_gender,_phone,_email,_diabetesMeds,_hypertensionMeds,_others;
  int _age,_diabetesYears,_hypertensionYears,_smokesPerDay,_smokerYears;
  bool _diabetes = false,_hypertension = false,_smoker = false,_chestPain = false,_cva = false,_ckd = false,_breathlessness = false,_syncope = false,_sweating = false,_sweatingFeet = false;

  List<String> _genderList = new List<String>();
  List<String> _yesNoList = new List<String>();
  List<File> _imageFileList = new List<File>();

  @override
  void initState() {
    super.initState();
    _savePatient = widget.savePatient;
    _genderList.addAll(['Male','Female','Other']);
    _yesNoList.addAll(['Yes','No']);
    _gender = _genderList.elementAt(0);
  }

  @override
  Widget build(BuildContext context) {
    return Scaffold(
      resizetoAvoidBottomPadding: false,body: Container(
        margin: EdgeInsets.all(10.0),child: Form(
          child: new ListView(
            children: <Widget>[
              TextField(
                decoration: Inputdecoration(
                    labelText: 'Patient First Name',labelStyle: TextStyle(
                        color: Colors.black
                    ),hintText: 'Enter patients first name'
                ),onChanged: (String value) {
                  setState(() {
                    _firstName = value;
                  });
                },TextField(
                decoration: Inputdecoration(
                    labelText: 'Patient Last Name',hintText: 'Enter patients last name'
                ),onChanged: (String value) {
                  setState(() {
                    _lastName = value;
                  });
                },//other textfield widgets below
            ],)
      ),);
  }

  @override
  bool get wantKeepAlive => true;
}
我在这里错过了什么?是否有更优雅的方式来维护表单中的数据?
解决方法
/// A mixin with convenience methods for clients of [AutomaticKeepAlive]. Used
/// with [State] subclasses.
///
/// Subclasses must implement [wantKeepAlive],and their [build] methods must
/// call `super.build` (the return value will always return null,and should be
/// ignored).
所以在你的例子中,在你返回Scaffold之前只需要调用super.build:
Widget build(BuildContext context) {
    super.build(context);
    return Scaffold(...);
  }
Flutter BottomNavigationBar")
(17)Flutter BottomNavigationBar
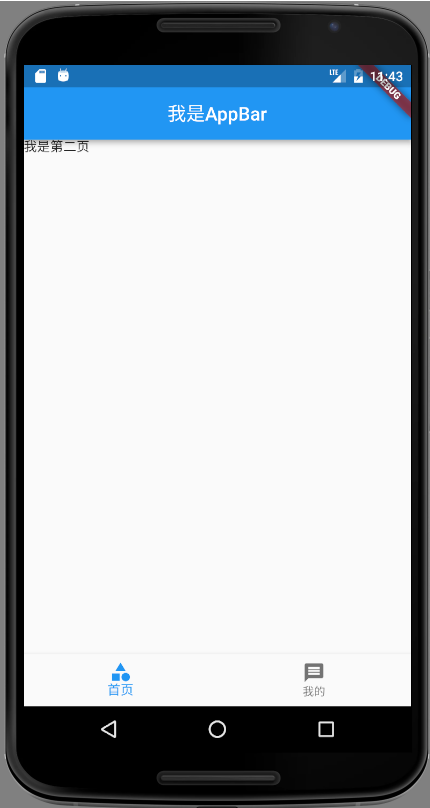
效果展示

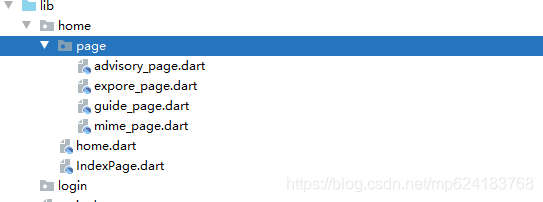
项目结构:
main.dart
内容很简单
import ''package:flutter/material.dart'';

import ''home/home.dart'';

void main() {
  runApp(MyApp());
}

class MyApp extends StatelessWidget {
  // This widget is the root of your application.
  @override
  Widget build(BuildContext context) {
    return MaterialApp(
      title: ''Flutter Demo'',
      theme: ThemeData(
        // This is the theme of your application.
        //
        // Try running your application with "flutter run". You''ll see the
        // application has a blue toolbar. Then, without quitting the app, try
        // changing the primarySwatch below to Colors.green and then invoke
        // "hot reload" (press "r" in the console where you ran "flutter run",
        // or simply save your changes to "hot reload" in a Flutter IDE).
        // Notice that the counter didn''t reset back to zero; the application
        // is not restarted.
        primarySwatch: Colors.blue,
      ),
      initialRoute: "/",
      routes: {
        "/": (context) => Home(),
      },
    );
  }
}
Home里面也没有做什么处理 如果项目定型的话 ndexPage就可以改为home使用。
因为home 只做了一层转发
home.dart
import ''package:flutter/material.dart'';

import ''IndexPage.dart'';

class Home extends StatelessWidget {
  @override
  Widget build(BuildContext context) {
    return IndexPage();
  }
}
核心代码来了IndexPage.dart
因为要点击修改页面状态 所以使用了 StatefulWidget
不然没有setStatus方法
import ''package:flutter/material.dart'';
import ''package:flutter_xiaochao/home/page/advisory_page.dart'';
import ''package:flutter_xiaochao/home/page/expore_page.dart'';
import ''package:flutter_xiaochao/home/page/guide_page.dart'';
import ''package:flutter_xiaochao/home/page/mime_page.dart'';

class IndexPage extends StatefulWidget {
  @override
  _IndexPageState createState() => _IndexPageState();
}

class _IndexPageState extends State<IndexPage> {
  final List<BottomNavigationBarItem> bottomNavItems = [
    BottomNavigationBarItem(
      backgroundColor: Colors.blue,
      icon: Icon(Icons.home),
      label: "探索",
    ),
    BottomNavigationBarItem(
      backgroundColor: Colors.green,
      icon: Icon(Icons.message),
      label: "指南",
    ),
    BottomNavigationBarItem(
      backgroundColor: Colors.amber,
      icon: Icon(Icons.shopping_cart),
      label: "资讯",
    ),
    BottomNavigationBarItem(
      backgroundColor: Colors.red,
      icon: Icon(Icons.person),
      label: "我的",
    ),
  ];
  final pages = [ExplorePage(), GuidePage(), AdvisoryPage(), MinePage()];

  int currentIndex;

  @override
  void initState() {
    currentIndex = 0;
  }

  void _changeIndexPage(index) {
    /*如果点击的导航项不是当前项  切换 */
    if (index != currentIndex) {
      setState(() {
        currentIndex = index;
      });
    }
  }

  @override
  Widget build(BuildContext context) {
    return Scaffold(
      bottomNavigationBar: BottomNavigationBar(
        items: bottomNavItems,
        currentIndex: currentIndex,
        type: BottomNavigationBarType.shifting,
        showSelectedLabels: true,
        showUnselectedLabels: true,
        onTap: _changeIndexPage,
      ),
      body: pages[currentIndex],
    );
  }
}
余下四个就很简单
advisory_page.dart
import ''package:flutter/material.dart'';

class AdvisoryPage extends StatelessWidget {
  @override
  Widget build(BuildContext context) {
    return Container(
      alignment: Alignment.center,
      child: Text("发现"),
    );
  }
}
expore_page.dart
import ''package:flutter/material.dart'';

class ExplorePage extends StatelessWidget {
  @override
  Widget build(BuildContext context) {
    return Container(
      alignment: Alignment.center,
      child: Text("探索"),
    );
  }
}
guide_page.dart
import ''package:flutter/material.dart'';

class GuidePage extends StatelessWidget {
  @override
  Widget build(BuildContext context) {
    return Container(
      alignment: Alignment.center,
      child: Text("向导"),
    );
  }
}
mime_page.dart
import ''package:flutter/material.dart'';

class MinePage extends StatelessWidget {
  @override
  Widget build(BuildContext context) {
    return Container(
      alignment: Alignment.center,
      child: Text("我的"),
    );
  }
}

16-Flutter移动电商实战-切换后页面状态的保持AutomaticKeepAliveClientMixin
底栏切换每次都重新请求是一件非常恶心的事,flutter 中提供了AutomaticKeepAliveClientMixin 帮我们完成页面状态保存效果。
1、AutomaticKeepAliveClientMixin
AutomaticKeepAliveClientMixin 这个 Mixin 是 Flutter 为了保持页面设置的。哪个页面需要保持页面状态,就在这个页面进行混入。
不过使用使用这个 Mixin 是有几个先决条件的:
- 使用的页面必须是 StatefulWidget,如果是 StatelessWidget 是没办法办法使用的。
- 其实只有两个前置组件才能保持页面状态:PageView 和 IndexedStack。
- 重写 wantKeepAlive 方法,如果不重写也是实现不了的。
2、修改index_page.dart
明白基本知识之后,就可以修改 index_page.dart,思路就是增加一个 IndexedStack 包裹在 tabBodies 外边。
整体代码如下:
import ''package:flutter/cupertino.dart'';
import ''package:flutter/material.dart'';
import ''home_page.dart'';
import ''category_page.dart'';
import ''cart_page.dart'';
import ''member_page.dart'';


class IndexPage extends StatefulWidget {
  _IndexPageState createState() => _IndexPageState();
}

class _IndexPageState extends State<IndexPage>{

  PageController _pageController;

  final List<BottomNavigationBarItem> bottomTabs = [
    BottomNavigationBarItem(
      icon:Icon(CupertinoIcons.home),
      title:Text(''首页'')
    ),
    BottomNavigationBarItem(
      icon:Icon(CupertinoIcons.search),
      title:Text(''分类'')
    ),
    BottomNavigationBarItem(
      icon:Icon(CupertinoIcons.shopping_cart),
      title:Text(''购物车'')
    ),
     BottomNavigationBarItem(
      icon:Icon(CupertinoIcons.profile_circled),
      title:Text(''会员中心'')
    ),
  ];

  final List<Widget> tabBodies = [
    HomePage(),
    CategoryPage(),
    CartPage(),
    MemberPage()
  ];

  int currentIndex= 0;
  var currentPage ;

  @override
  void initState() {
   currentPage=tabBodies[currentIndex];
   _pageController=new PageController()
      ..addListener(() {
        if (currentPage != _pageController.page.round()) {
          setState(() {
            currentPage = _pageController.page.round();
          });
        }
  });
  super.initState();
  }

  @override
  Widget build(BuildContext context) {
    return Scaffold(
      backgroundColor: Color.fromRGBO(244, 245, 245, 1.0),
      bottomNavigationBar: BottomNavigationBar(
        type:BottomNavigationBarType.fixed,
        currentIndex: currentIndex,
        items:bottomTabs,
        onTap: (index){
          setState(() {
           currentIndex=index;
            currentPage =tabBodies[currentIndex];
          });

        },
      ),
      body: IndexedStack(
        index: currentIndex,
        children: tabBodies
      )
    );
  }
}
3、加入Mixin保持页面状态
在 home_page.dart 里加入 AutomaticKeepAliveClientMixin 混入,加入后需要重写 wantKeepAlive 方法。
主要代码如下:
class _HomePageState extends State<HomePage> with AutomaticKeepAliveClientMixin {

  @override
  bool get wantKeepAlive =>true;
}
为了检验结果,我们在 HomePageState 里增加一个 initState,在里边 print 一些内容,如果内容输出了,证明我们的页面重新加载了,如果没输出,证明我们的页面保持了状态。
@override
void initState() {
    super.initState();
    print(''我打印了哈哈哈哈哈'');
}

5、Flutter 实现 ViewPager、bottomNavigationBar 界面切换
1、前言
首先我们想一下,如果在 Android 中实现 布局切换,通常的思路是:
- 做一个 viewpager
- 一组 Fragment
- 每个 Fragment 绑定一个 xml
- 最后填充至 viewpager
2、Flutter 实现
上边提到的用安卓原生做,思路是很明确,但是代码量还是有的,那么来看一下, Flutter 如何使用 Viewpager 实现的。
2.1、创建有状态 Widget
首先创建有状态 StatefulWidget,然后构建 state:_ApplicationPageState
class ApplicationPage extends StatefulWidget {
  //@override
  //_ApplicationPageState createState() => new _ApplicationPageState();
   等同于上边注释掉的 createState();
    @override
    State<StatefulWidget> createState() {
      // TODO: implement createState
      return _ApplicationPageState();
    }

}
2.2、state
Scaffold 实现了基本的纸墨设计布局结构。所以我们 new Scaffold 然后 return 即可。
class _ApplicationPageState extends State<ApplicationPage> {

  int _currentPageIndex = 0;
  var _pageController = new PageController(initialPage: 0);

  @override
  Widget build(BuildContext context) {
    return new Scaffold(
      appBar:
       new AppBar(
         title: new Text("我是AppBar"),
         centerTitle: true,
       ),
      body: new PageView.builder(
          onPageChanged:_pageChange,
          controller: _pageController,
          itemBuilder: (BuildContext context,int index){
            return index==1?new Text("我是第一页"):new Text("我是第二页");
          },
          itemCount: 2,
      ),
      bottomNavigationBar: new BottomNavigationBar(items: [
              BottomNavigationBarItem(
                  icon: new Icon(Icons.category), title: new Text("首页")),
              BottomNavigationBarItem(
                  icon: new Icon(Icons.message), title: new Text("我的")),
          ],
          currentIndex: _currentPageIndex,
          onTap: onTap,
      ),
    );
  }

  // bottomnaviagtionbar 和 pageview 的联动
  void onTap(int index) {
    // 过pageview的pagecontroller的animateToPage方法可以跳转
    _pageController.animateToPage(index,
        duration: const Duration(milliseconds: 300), curve: Curves.ease);
  }

  void _pageChange(int index) {
    setState(() {
      if (_currentPageIndex != index) {
        _currentPageIndex = index;
      }
    });
  }

}
关于上边有几个方法:
-
appBar:显示在界面顶部的一个 AppBar,也就是 Android 中的 ActionBar 、Toolbar
-
body:当前界面所显示的主要内容 Widget
-
bottomNavigationBar: 显示在页面底部的导航栏
2.3、navBar和pageview如何联动?
通过上边的代码也可以发现,pageView有个 onPageChanged 属性,并且类中定义了一个 _pageChange 方法,
通过 pageview 的 pagecontroller 的 animateToPage 方法实现的界面跳转;

BottomNavigationBar + BottomNavigationBarItem 导航的另外一种用法
import ''package:flutter/material.dart'';
import ''News.dart'';
import ''Video.dart'';
import ''Chat.dart'';
import ''MyId.dart'';

class AppTwo extends StatelessWidget {
  @override
  Widget build(BuildContext context) => MaterialApp(home: Home());
}

class Home extends StatefulWidget {
  @override
  State<StatefulWidget> createState() => _HomeState();
}

class _HomeState extends State<Home> {
  int _currentIndex = 0;
  final List<Widget> _children = [
    NewsPage(),
    VideoPage(),
    ChatPage(),
    MyIdPage()
  ];

  @override
  Widget build(BuildContext context) {
    return new Scaffold(
//      appBar: AppBar(
//        title: Text("第二种方式"),
//        centerTitle: true,
//      ),
      body: _children[_currentIndex],
//      CupertinoTabBar 是IOS分格
      bottomNavigationBar: BottomNavigationBar(
        currentIndex: _currentIndex,
        onTap: onTabTapped,
        items: [
          BottomNavigationBarItem(
              title: new Text("Home"), icon: new Icon(Icons.home)),
          BottomNavigationBarItem(
              title: new Text("List"), icon: new Icon(Icons.list)),
          BottomNavigationBarItem(
              title: new Text("Message"), icon: new Icon(Icons.message)),
        ],
      ),
    );

  }

  void onTabTapped(int index) {
    setState(() {
      _currentIndex = index;
    });
  }
}
import ''package:flutter/material.dart'';
import ''Guide.dart'';
void main() => runApp(new AppTwo());
今天关于dart – Flutter:AutomaticKeepAliveClientMixin不能与BottomNavigationBar一起使用和flutter与dart关系的分享就到这里,希望大家有所收获,若想了解更多关于(17)Flutter BottomNavigationBar、16-Flutter移动电商实战-切换后页面状态的保持AutomaticKeepAliveClientMixin、5、Flutter 实现 ViewPager、bottomNavigationBar 界面切换、BottomNavigationBar + BottomNavigationBarItem 导航的另外一种用法等相关知识,可以在本站进行查询。
本文标签:


