本文将为您提供关于Nacos服务注册原理解析的详细介绍,我们还将为您解释nacos的服务注册流程的相关知识,同时,我们还将为您提供关于2021升级版微服务教程4—Nacos服务注册和发现、3.(服务注
本文将为您提供关于Nacos服务注册原理解析的详细介绍,我们还将为您解释nacos的服务注册流程的相关知识,同时,我们还将为您提供关于2021升级版微服务教程4—Nacos 服务注册和发现、3.(服务注册)快速把服务注册到Consul中、Alibaba Nacos 学习(三):Spring Cloud Nacos Discovery - FeignClient,Nacos 服务注册与发现、Nacos 之 服务注册中心的实用信息。
本文目录一览:- Nacos服务注册原理解析(nacos的服务注册流程)
- 2021升级版微服务教程4—Nacos 服务注册和发现
- 3.(服务注册)快速把服务注册到Consul中
- Alibaba Nacos 学习(三):Spring Cloud Nacos Discovery - FeignClient,Nacos 服务注册与发现
- Nacos 之 服务注册中心
")
Nacos服务注册原理解析(nacos的服务注册流程)
参考:Nacos服务注册源码分析
Spring Boot版本:2.2.9.RELEASESpring Cloud版本:Hoxton.SR6Spring Cloud Alibaba版本:2.2.1.RELEASENacos版本:1.3.1
1 @EnableDiscoveryClient
如果需要启用服务注册功能,需要在启动类上面添加@EnableDiscoveryClient注解。
查看@EnableDiscoveryClient的源码:
@Target(ElementType.TYPE)
@Retention(RetentionPolicy.RUNTIME)
@Documented
@Inherited
@Import(EnableDiscoveryClientImportSelector.class)
public @interface EnableDiscoveryClient {

	/**
	 * 默认返回值为true。
	 * 如果返回值为true,ServiceRegistry将会自动将本服务注册到服务注册中心。
	 */
	boolean autoRegister() default true;
}
@EnableDiscoveryClient注解的源码中有一个方法autoRegister(),默认返回true,表示希望自动注册服务。
@EnableDiscoveryClient还通过@Import注解引入了EnableDiscoveryClientImportSelector类,查看源码:
@Order(Ordered.LOWEST_PRECEDENCE - 100)
public class EnableDiscoveryClientImportSelector
		extends SpringFactoryImportSelector<EnableDiscoveryClient> {

	@Override
	public String[] selectImports(AnnotationMetadata metadata) {
		String[] imports = super.selectImports(metadata);

		AnnotationAttributes attributes = AnnotationAttributes.fromMap(
				metadata.getAnnotationAttributes(getAnnotationClass().getName(), true));
        // 获取@EnableDiscoveryClient注解的属性autoRegister的值
		boolean autoRegister = attributes.getBoolean("autoRegister");
        // 如果autoRegister == true,加载AutoServiceRegistrationConfiguration配置类
		if (autoRegister) {
			List<String> importsList = new ArrayList<>(Arrays.asList(imports));
			importsList.add(
					"org.springframework.cloud.client.serviceregistry.AutoServiceRegistrationConfiguration");
			imports = importsList.toArray(new String[0]);
		}
        // 如果autoRegister == false,设置spring.cloud.service-registry.auto-registration.enabled=false,关闭服务自动注册功能
		else {
			Environment env = getEnvironment();
			if (ConfigurableEnvironment.class.isInstance(env)) {
				ConfigurableEnvironment configEnv = (ConfigurableEnvironment) env;
				LinkedHashMap<String, Object> map = new LinkedHashMap<>();
				map.put("spring.cloud.service-registry.auto-registration.enabled", false);
				MapPropertySource propertySource = new MapPropertySource(
						"springCloudDiscoveryClient", map);
				configEnv.getPropertySources().addLast(propertySource);
			}

		}

		return imports;
	}

	@Override
	protected boolean isEnabled() {
		return getEnvironment().getProperty("spring.cloud.discovery.enabled",
				Boolean.class, Boolean.TRUE);
	}

	@Override
	protected boolean hasDefaultFactory() {
		return true;
	}

}
主要关注selectImports(...)这个方法。首先获取@EnableDiscoveryClient注解的属性autoRegister的值。
-
如果
autoRegister == true,加载org.springframework.cloud.client.serviceregistry.AutoServiceRegistrationConfiguration配置类的配置。 -
如果
autoRegister == false,设置spring.cloud.service-registry.auto-registration.enabled=false,关闭自动服务注册功能。因为服务自动注册相关的类在注册到Spring容器的时候都有一个条件@ConditionalOnProperty(value = "spring.cloud.service-registry.auto-registration.enabled", matchIfMissing = true)。
查看AutoServiceRegistrationConfiguration配置类源码:
@Configuration(proxyBeanMethods = false)
@EnableConfigurationProperties(AutoServiceRegistrationProperties.class)
@ConditionalOnProperty(value = "spring.cloud.service-registry.auto-registration.enabled",
      matchIfMissing = true)
public class AutoServiceRegistrationConfiguration {

}
可以看到,这个类加载了AutoServiceRegistrationProperties这个属性类,这个类里面维护了所有spring.cloud.service-registry.auto-registration开头的属性的配置值。
@ConfigurationProperties("spring.cloud.service-registry.auto-registration")
public class AutoServiceRegistrationProperties {

	/** Whether service auto-registration is enabled. Defaults to true. */
	private boolean enabled = true;

	/** Whether to register the management as a service. Defaults to true. */
	private boolean registerManagement = true;

	/**
	 * Whether startup fails if there is no AutoServiceRegistration. Defaults to false.
	 */
	private boolean failFast = false;

    ...
}
可以看到,spring.cloud.service-registry.auto-registration.enabled默认值就是true。也就是说,如果没有使用@EnableDiscoveryClient注解,服务也会被自动注册,因为@ConditionalOnProperty(value = "spring.cloud.service-registry.auto-registration.enabled", matchIfMissing = true)这个条件默认情况下就是满足的。
但是如果不想自动注册服务,可以通过使用@EnableDiscoveryClient(autoRegister = false),或者直接在配置文件中设置spring.cloud.service-registry.auto-registration.enabled=false。
2 Spring Cloud定义的服务发现的统一规范
拥有服务注册的中间件有很多,比如Euerka、Consul、ZooKeeper、Nacos等,想要接入Spring Cloud就必须遵守一套统一的规范,Spring Cloud将这套规范定义在了Spring Cloud Common中:
spring-cloud-commons
  -- org.springframework.cloud
    -- client
      -- discovery
      -- loadbalancer
      -- serviceregistry
discovery包下面定义了服务发现的规范,loadbalancer包下面定义了负载均衡的规范,serviceregistry包下面定义了服务注册的规范。
org.springframework.cloud.client.serviceregistry包下面有三个接口,这是服务注册的核心接口:
AutoServiceRegistration接口Registration接口ServiceRegistry接口
2.1 AutoServiceRegistration接口
AutoServiceRegistration用于服务自动注册。自动注册的意思就是,服务启动后自动把服务信息注册到注册中心。
public interface AutoServiceRegistration {

}
这个接口没有定义方法,它的存在就是要规范实现必须要有自动注册。
Spring Cloud中有一个抽象类AbstractAutoServiceRegistration实现了这个接口。
2.2 Registration接口
Registration存储服务信息,用于规范将什么信息注册到注册中心。
public interface Registration extends ServiceInstance {

}
Registration继承ServiceInstance接口,ServiceInstance接口定义了一个服务实例应该具有哪些服务信息,源码如下:
public interface ServiceInstance {

	// 返回服务实例唯一ID
	default String getInstanceId() {
		return null;
	}

	// 返回服务ID,服务名称
	String getServiceId();

	// 返回服务实例所在的主机的host值
	String getHost();

	// 返回服务实例的port
	int getPort();

	// 返回服务的实例port是否启用了https协议
	boolean isSecure();

	// 返回服务的URI地址
	URI getUri();

	// 返回服务实力的元数据
	Map<String, String> getMetadata();

	// 返回服务实例的scheme
	default String getScheme() {
		return null;
	}
}
2.3 ServiceRegistry接口
ServiceRegistry是服务注册接口,用来向注册中心注册服务。
public interface ServiceRegistry<R extends Registration> {

	// 注册服务,registration保存了服务的信息
	void register(R registration);

	// 反注册,也就是从注册中心移除注册的服务信息
	void deregister(R registration);

    // 关闭ServiceRegistry,这是一个生命周期函数
	void close();

    /**
     * 设置服务的状态,status的值取决于具体的实现。
     * 查看org.springframework.cloud.client.serviceregistry.endpoint.ServiceRegistryEndpoint
     */
	void setStatus(R registration, String status);

	/**
	 * 获取服务状态值。
	 * 查看org.springframework.cloud.client.serviceregistry.endpoint.ServiceRegistryEndpoint
	 */
	<T> T getStatus(R registration);
}
3 Nacos服务注册的实现
Nacos服务注册模块按照Spring Cloud的规范,实现了AutoServiceRegistration、Registration、ServiceRegistry三个接口,具体的实现了分别是:

NacosAutoServiceRegistration类
NacosRegistration类
NacosServiceRegistry类
这三个类位于spring-cloud-starter-alibaba-nacos-discovery包中的com.alibaba.cloud.nacos.registry包路径下。

3.1 NacosRegistration
首先看看NacosRegistration,这个类管理了Nacos服务的基本信息,如服务名、服务地址和端口等信息。

它实现了Spring Cloud定义的规范接口Registration,同时也实现了ServiceInstance接口。

不过实际上Nacos服务的基本信息都是由NacosDiscoveryProperties这个类来保存的,NacosRegistration只是对NacosDiscoveryProperties进行了封装而已。
public class NacosRegistration implements Registration, ServiceInstance {
/**
* management port
*/
public static final String MANAGEMENT_PORT = "management.port";
/**
* management context-path.
*/
public static final String MANAGEMENT_CONTEXT_PATH = "management.context-path";
/**
* management address.
*/
public static final String MANAGEMENT_ADDRESS = "management.address";
/**
* management endpoints web base path.
*/
public static final String MANAGEMENT_ENDPOINT_BASE_PATH = "management.endpoints.web.base-path";
// 配置文件中spring.cloud.nacos.discovery开头的配置的映射类
private NacosDiscoveryProperties nacosDiscoveryProperties;
// 应用上下文
private ApplicationContext context;
// 构造函数注入
public NacosRegistration(NacosDiscoveryProperties nacosDiscoveryProperties,
ApplicationContext context) {
this.nacosDiscoveryProperties = nacosDiscoveryProperties;
this.context = context;
}
// 当构造函数执行之后执行的初始化
@PostConstruct
public void init() {
Map<String, String> metadata = nacosDiscoveryProperties.getMetadata();
Environment env = context.getEnvironment();
String endpointBasePath = env.getProperty(MANAGEMENT_ENDPOINT_BASE_PATH);
if (!StringUtils.isEmpty(endpointBasePath)) {
metadata.put(MANAGEMENT_ENDPOINT_BASE_PATH, endpointBasePath);
}
Integer managementPort = ManagementServerPortUtils.getPort(context);
if (null != managementPort) {
metadata.put(MANAGEMENT_PORT, managementPort.toString());
String contextPath = env
.getProperty("management.server.servlet.context-path");
String address = env.getProperty("management.server.address");
if (!StringUtils.isEmpty(contextPath)) {
metadata.put(MANAGEMENT_CONTEXT_PATH, contextPath);
}
if (!StringUtils.isEmpty(address)) {
metadata.put(MANAGEMENT_ADDRESS, address);
}
}
if (null != nacosDiscoveryProperties.getHeartBeatInterval()) {
metadata.put(PreservedMetadataKeys.HEART_BEAT_INTERVAL,
nacosDiscoveryProperties.getHeartBeatInterval().toString());
}
if (null != nacosDiscoveryProperties.getHeartBeatTimeout()) {
metadata.put(PreservedMetadataKeys.HEART_BEAT_TIMEOUT,
nacosDiscoveryProperties.getHeartBeatTimeout().toString());
}
if (null != nacosDiscoveryProperties.getIpDeleteTimeout()) {
metadata.put(PreservedMetadataKeys.IP_DELETE_TIMEOUT,
nacosDiscoveryProperties.getIpDeleteTimeout().toString());
}
}
// getter、setter
...
}
3.2 NacosServiceRegistry
NacosServiceRegistry实现了Spring Cloud定义的ServiceRegistry接口,负责将服务实例注册到Nacos服务注册中心上面。
public class NacosServiceRegistry implements ServiceRegistry<Registration> {

	private static final Logger log = LoggerFactory.getLogger(NacosServiceRegistry.class);

	private final NacosDiscoveryProperties nacosDiscoveryProperties;

	private final NamingService namingService;

	public NacosServiceRegistry(NacosDiscoveryProperties nacosDiscoveryProperties) {
		this.nacosDiscoveryProperties = nacosDiscoveryProperties;
		this.namingService = nacosDiscoveryProperties.namingServiceInstance();
	}

	@Override
	public void register(Registration registration) {
        // 如果获取不到服务名,则打印日志并返回
		if (StringUtils.isEmpty(registration.getServiceId())) {
			log.warn("No service to register for nacos client...");
			return;
		}
        // 服务名
		String serviceId = registration.getServiceId();
        // 分组
		String group = nacosDiscoveryProperties.getGroup();
        // 创建服务实例对象
		Instance instance = getNacosInstanceFromRegistration(registration);

		try {
            // 通过namingService将服务实例注册到注册中心
			namingService.registerInstance(serviceId, group, instance);
			log.info("nacos registry, {} {} {}:{} register finished", group, serviceId,
					instance.getIp(), instance.getPort());
		}
		catch (Exception e) {
			log.error("nacos registry, {} register failed...{},", serviceId,
					registration.toString(), e);
			// rethrow a RuntimeException if the registration is failed.
			// issue : https://github.com/alibaba/spring-cloud-alibaba/issues/1132
			rethrowRuntimeException(e);
		}
	}

	@Override
	public void deregister(Registration registration) {

		log.info("De-registering from Nacos Server now...");

		if (StringUtils.isEmpty(registration.getServiceId())) {
			log.warn("No dom to de-register for nacos client...");
			return;
		}
        // 获取namingService
		NamingService namingService = nacosDiscoveryProperties.namingServiceInstance();
		// 服务名
        String serviceId = registration.getServiceId();
        // 分组
		String group = nacosDiscoveryProperties.getGroup();

		try {
            // 通过namingService反注册当前服务实例
			namingService.deregisterInstance(serviceId, group, registration.getHost(),
					registration.getPort(), nacosDiscoveryProperties.getClusterName());
		}
		catch (Exception e) {
			log.error("ERR_NACOS_DEREGISTER, de-register failed...{},",
					registration.toString(), e);
		}

		log.info("De-registration finished.");
	}

	......

	private Instance getNacosInstanceFromRegistration(Registration registration) {
		Instance instance = new Instance();
		instance.setIp(registration.getHost());
		instance.setPort(registration.getPort());
		instance.setWeight(nacosDiscoveryProperties.getWeight());
		instance.setClusterName(nacosDiscoveryProperties.getClusterName());
		instance.setMetadata(registration.getMetadata());

		return instance;
	}
}
主要是关注register(...)和deregister(...)方法,分别负责服务的注册和反注册。
最终都是通过Nacos中定义的NamingService来完成这两个功能的,NamingService在启动的时候封装了Nacos注册中心的信息,并且封装了服务注册和反注册相关的http请求。
3.3 NacosAutoServiceRegistration
NacosAutoServiceRegistration这个类实现了服务自动注册到Nacos注册中心的功能。这个类继承了AbstractAutoServiceRegistration类,大部分操作都是在抽象类中完成的。
查看抽象类源码:
public abstract class AbstractAutoServiceRegistration<R extends Registration>
		implements AutoServiceRegistration, ApplicationContextAware,
		ApplicationListener<WebServerInitializedEvent> {

            ...
        }
可以看到,实现了ApplicationListener<WebServerInitializedEvent>,说明会被事件回调。当容器启动之后,应用上下文被刷新并且WebServer准备就绪之后,会触发WebServerInitializedEvent事件,那么抽象类中的onApplicationEvent(WebServerInitializedEvent event)方法就会被调用。查看源码:
    @Override
	@SuppressWarnings("deprecation")
	public void onApplicationEvent(WebServerInitializedEvent event) {
        // 调用bind方法
		bind(event);
	}
实际调用了bind(event)方法:
    @Deprecated
	public void bind(WebServerInitializedEvent event) {
		ApplicationContext context = event.getApplicationContext();
		if (context instanceof ConfigurableWebServerApplicationContext) {
			if ("management".equals(((ConfigurableWebServerApplicationContext) context)
					.getServerNamespace())) {
				return;
			}
		}
		this.port.compareAndSet(0, event.getWebServer().getPort());
        // 调用start方法
		this.start();
	}
实际调用start()方法:
    public void start() {
		if (!isEnabled()) {
			if (logger.isDebugEnabled()) {
				logger.debug("Discovery Lifecycle disabled. Not starting");
			}
			return;
		}

		// only initialize if nonSecurePort is greater than 0 and it isn''t already running
		// because of containerPortInitializer below
		if (!this.running.get()) {
			this.context.publishEvent(
					new InstancePreRegisteredEvent(this, getRegistration()));
            // 调用register()方法
			register();
			if (shouldRegisterManagement()) {
				registerManagement();
			}
			this.context.publishEvent(
					new InstanceRegisteredEvent<>(this, getConfiguration()));
			this.running.compareAndSet(false, true);
		}

	}
实际又调用的是register()方法:
    protected void register() {
		this.serviceRegistry.register(getRegistration());
	}
实际调用的是serviceRegistry的register方法,而serviceRegistry是在构造NacosAutoServiceRegistration的时候传入的NacosServiceRegistry。所以实际上是调用的NacosServiceRegistry的register方法。
查看NacosServiceRegistry源码:
    @Override
	public void register(Registration registration) {

		if (StringUtils.isEmpty(registration.getServiceId())) {
			log.warn("No service to register for nacos client...");
			return;
		}

		String serviceId = registration.getServiceId();
		String group = nacosDiscoveryProperties.getGroup();

		Instance instance = getNacosInstanceFromRegistration(registration);

		try {
            // 最后由namingService实现服务注册
			namingService.registerInstance(serviceId, group, instance);
			log.info("nacos registry, {} {} {}:{} register finished", group, serviceId,
					instance.getIp(), instance.getPort());
		}
		catch (Exception e) {
			log.error("nacos registry, {} register failed...{},", serviceId,
					registration.toString(), e);
			// rethrow a RuntimeException if the registration is failed.
			// issue : https://github.com/alibaba/spring-cloud-alibaba/issues/1132
			rethrowRuntimeException(e);
		}
	}
最后由namingService实现了服务注册。
总结:服务的自动注册其实是利用了
Spring的WebServerInitializedEvent事件,最终由namingService完成服务注册工作。
3.4 其他辅助类
上面三个类是Nacos按照规范实现了Spring Cloud定义的统一接口。但是只有这三个类是没法完成服务“自动”注册的,还需要一些辅助类来协助完成这项任务。
3.4.1 NacosDiscoveryProperties
前面说到NacosRegistration只是对NacosDiscoveryProperties进行了封装而已,服务的基本信息真正的是保存在NacosDiscoveryProperties里面的。查看源码:
@ConfigurationProperties("spring.cloud.nacos.discovery")
public class NacosDiscoveryProperties {

	private static final Logger log = LoggerFactory
			.getLogger(NacosDiscoveryProperties.class);

	/**
	 * Prefix of {@link NacosDiscoveryProperties}.
	 */
	public static final String PREFIX = "spring.cloud.nacos.discovery";

	private static final Pattern PATTERN = Pattern.compile("-(\\w)");

	/**
	 * nacos discovery server address.
	 */
	private String serverAddr;

    // 各种配置字段
	......

	@Autowired
	private InetUtils inetUtils;

	@Autowired
	private Environment environment;

	private static NamingService namingService;

	private static NamingMaintainService namingMaintainService;

	@PostConstruct
	public void init() throws SocketException {

		metadata.put(PreservedMetadataKeys.REGISTER_SOURCE, "SPRING_CLOUD");
		if (secure) {
			metadata.put("secure", "true");
		}

		serverAddr = Objects.toString(serverAddr, "");
		if (serverAddr.endsWith("/")) {
			serverAddr = serverAddr.substring(0, serverAddr.length() - 1);
		}
		endpoint = Objects.toString(endpoint, "");
		namespace = Objects.toString(namespace, "");
		logName = Objects.toString(logName, "");

		if (StringUtils.isEmpty(ip)) {
			// traversing network interfaces if didn''t specify a interface
			if (StringUtils.isEmpty(networkInterface)) {
				ip = inetUtils.findFirstNonLoopbackHostInfo().getIpAddress();
			}
			else {
				NetworkInterface netInterface = NetworkInterface
						.getByName(networkInterface);
				if (null == netInterface) {
					throw new IllegalArgumentException(
							"no such interface " + networkInterface);
				}

				Enumeration<InetAddress> inetAddress = netInterface.getInetAddresses();
				while (inetAddress.hasMoreElements()) {
					InetAddress currentAddress = inetAddress.nextElement();
					if (currentAddress instanceof Inet4Address
							&& !currentAddress.isLoopbackAddress()) {
						ip = currentAddress.getHostAddress();
						break;
					}
				}

				if (StringUtils.isEmpty(ip)) {
					throw new RuntimeException("cannot find available ip from"
							+ " network interface " + networkInterface);
				}

			}
		}

		this.overrideFromEnv(environment);
	}

	// getter、setter
    ......

	public void overrideFromEnv(Environment env) {

		if (StringUtils.isEmpty(this.getServerAddr())) {
			String serverAddr = env
					.resolvePlaceholders("${spring.cloud.nacos.discovery.server-addr:}");
			if (StringUtils.isEmpty(serverAddr)) {
				serverAddr = env.resolvePlaceholders(
						"${spring.cloud.nacos.server-addr:localhost:8848}");
			}
			this.setServerAddr(serverAddr);
		}
		if (StringUtils.isEmpty(this.getNamespace())) {
			this.setNamespace(env
					.resolvePlaceholders("${spring.cloud.nacos.discovery.namespace:}"));
		}
		if (StringUtils.isEmpty(this.getAccessKey())) {
			this.setAccessKey(env
					.resolvePlaceholders("${spring.cloud.nacos.discovery.access-key:}"));
		}
		if (StringUtils.isEmpty(this.getSecretKey())) {
			this.setSecretKey(env
					.resolvePlaceholders("${spring.cloud.nacos.discovery.secret-key:}"));
		}
		if (StringUtils.isEmpty(this.getLogName())) {
			this.setLogName(
					env.resolvePlaceholders("${spring.cloud.nacos.discovery.log-name:}"));
		}
		if (StringUtils.isEmpty(this.getClusterName())) {
			this.setClusterName(env.resolvePlaceholders(
					"${spring.cloud.nacos.discovery.cluster-name:}"));
		}
		if (StringUtils.isEmpty(this.getEndpoint())) {
			this.setEndpoint(
					env.resolvePlaceholders("${spring.cloud.nacos.discovery.endpoint:}"));
		}
		if (StringUtils.isEmpty(this.getGroup())) {
			this.setGroup(
					env.resolvePlaceholders("${spring.cloud.nacos.discovery.group:}"));
		}
		if (StringUtils.isEmpty(this.getUsername())) {
			this.setUsername(env.resolvePlaceholders("${spring.cloud.nacos.username:}"));
		}
		if (StringUtils.isEmpty(this.getPassword())) {
			this.setPassword(env.resolvePlaceholders("${spring.cloud.nacos.password:}"));
		}
	}

	public NamingService namingServiceInstance() {

		if (null != namingService) {
			return namingService;
		}

		try {
			namingService = NacosFactory.createNamingService(getNacosProperties());
		}
		catch (Exception e) {
			log.error("create naming service error!properties={},e=,", this, e);
			return null;
		}
		return namingService;
	}

	@Deprecated
	public NamingMaintainService namingMaintainServiceInstance() {

		if (null != namingMaintainService) {
			return namingMaintainService;
		}

		try {
			namingMaintainService = NamingMaintainFactory
					.createMaintainService(getNacosProperties());
		}
		catch (Exception e) {
			log.error("create naming service error!properties={},e=,", this, e);
			return null;
		}
		return namingMaintainService;
	}

	private Properties getNacosProperties() {
		Properties properties = new Properties();
		properties.put(SERVER_ADDR, serverAddr);
		properties.put(USERNAME, Objects.toString(username, ""));
		properties.put(PASSWORD, Objects.toString(password, ""));
		properties.put(NAMESPACE, namespace);
		properties.put(UtilAndComs.NACOS_NAMING_LOG_NAME, logName);

		if (endpoint.contains(":")) {
			int index = endpoint.indexOf(":");
			properties.put(ENDPOINT, endpoint.substring(0, index));
			properties.put(ENDPOINT_PORT, endpoint.substring(index + 1));
		}
		else {
			properties.put(ENDPOINT, endpoint);
		}

		properties.put(ACCESS_KEY, accessKey);
		properties.put(SECRET_KEY, secretKey);
		properties.put(CLUSTER_NAME, clusterName);
		properties.put(NAMING_LOAD_CACHE_AT_START, namingLoadCacheAtStart);

		enrichNacosDiscoveryProperties(properties);
		return properties;
	}

	private void enrichNacosDiscoveryProperties(Properties nacosDiscoveryProperties) {
		Map<String, Object> properties = PropertySourcesUtils
				.getSubProperties((ConfigurableEnvironment) environment, PREFIX);
		properties.forEach((k, v) -> nacosDiscoveryProperties.putIfAbsent(resolveKey(k),
				String.valueOf(v)));
	}

	private String resolveKey(String key) {
		Matcher matcher = PATTERN.matcher(key);
		StringBuffer sb = new StringBuffer();
		while (matcher.find()) {
			matcher.appendReplacement(sb, matcher.group(1).toUpperCase());
		}
		matcher.appendTail(sb);
		return sb.toString();
	}

}
可以看到,这个类实际上是配置文件中以spring.cloud.nacos.discovery开头的配置的映射类。
除此之外,还有一个init(...)方法,被@PostConstruct注释。当构造函数被调用之后,执行init初始化。初始化主要工作是对一些配置项的值进行数据转换处理等等。
3.4.2 NacosServiceRegistryAutoConfiguration
显然,这个NacosServiceRegistryAutoConfiguration类是为了使用Spring Boot自动装配功能的一个自动配置类。源码如下:
@Configuration(proxyBeanMethods = false)
@EnableConfigurationProperties
@ConditionalOnNacosDiscoveryEnabled
@ConditionalOnProperty(value = "spring.cloud.service-registry.auto-registration.enabled",
		matchIfMissing = true)
@AutoConfigureAfter({ AutoServiceRegistrationConfiguration.class,
		AutoServiceRegistrationAutoConfiguration.class,
		NacosDiscoveryAutoConfiguration.class })
public class NacosServiceRegistryAutoConfiguration {

	@Bean
	public NacosServiceRegistry nacosServiceRegistry(
			NacosDiscoveryProperties nacosDiscoveryProperties) {
		return new NacosServiceRegistry(nacosDiscoveryProperties);
	}

	@Bean
	@ConditionalOnBean(AutoServiceRegistrationProperties.class)
	public NacosRegistration nacosRegistration(
			NacosDiscoveryProperties nacosDiscoveryProperties,
			ApplicationContext context) {
		return new NacosRegistration(nacosDiscoveryProperties, context);
	}

	@Bean
	@ConditionalOnBean(AutoServiceRegistrationProperties.class)
	public NacosAutoServiceRegistration nacosAutoServiceRegistration(
			NacosServiceRegistry registry,
			AutoServiceRegistrationProperties autoServiceRegistrationProperties,
			NacosRegistration registration) {
		return new NacosAutoServiceRegistration(registry,
				autoServiceRegistrationProperties, registration);
	}

}
-
这个自动装配类首先使用了
@EnableConfigurationProperties注解,这个注解能够使使用了@ConfigurationProperties注解但是没有使用@Component等注解实例化为bean的类生效。因为NacosDiscoveryProperties类使用了@ConfigurationProperties("spring.cloud.nacos.discovery")注解,但是没有@Component注解,Spring容器不会实例化这个类,所以需要通过@EnableConfigurationProperties注解让NacosDiscoveryProperties被实例化并注入到容器中。这样就能获取到配置文件中配置的Nacos相关的配置值。 -
然后使用了
@ConditionalOnNacosDiscoveryEnabled注解。这个注解的意思是spring.cloud.nacos.discovery.enabled=true的时候(默认是true),NacosServiceRegistryAutoConfiguration这个配置类才会生效。 -
然后使用了
@ConditionalOnProperty(value = "spring.cloud.service-registry.auto-registration.enabled", matchIfMissing = true)注解。这个注解的意思是当spring.cloud.service-registry.auto-registration.enabled=true的时候,NacosServiceRegistryAutoConfiguration这个配置类才会生效。默认情况下就是true。 -
然后使用了如下注解:
@AutoConfigureAfter({ AutoServiceRegistrationConfiguration.class,
		AutoServiceRegistrationAutoConfiguration.class,
		NacosDiscoveryAutoConfiguration.class })
这个注解的意思是要在AutoServiceRegistrationConfiguration、AutoServiceRegistrationAutoConfiguration、NacosDiscoveryAutoConfiguration配置类生效后再使NacosServiceRegistryAutoConfiguration这个配置类生效。
- 查看
NacosServiceRegistryAutoConfiguration配置类的内容,可以看出,这个配置类实例化了NacosServiceRegistry、NacosRegistration、NacosAutoServiceRegistration这三个bean。其中,NacosServiceRegistry负责服务注册和反注册,NacosRegistration负责维护服务实例的基本信息,NacosAutoServiceRegistration主要是实现服务的自动注册。
3.4.3 NamingService的实例化
从上面的源码分析可以看出,服务注册和反注册工作,最终都是交由NamingService来处理的。
NamingService是nacos-api包里面定义的接口,其实现类NacosNamingService也是nacos-api包中定义的类。
NamingService是对Nacos注册中心的封装,除了有Nacos注册中心的基本信息之外,还对服务注册相关的http请求进行了封装。
那么,NamingService的实例bean又是何时被创建的呢?
查看NacosServiceRegistry源码,其构造函数如下:
    public NacosServiceRegistry(NacosDiscoveryProperties nacosDiscoveryProperties) {
		this.nacosDiscoveryProperties = nacosDiscoveryProperties;
        // 实例化namingService
		this.namingService = nacosDiscoveryProperties.namingServiceInstance();
	}
也就是在实例化NacosServiceRegistry的时候,通过调用nacosDiscoveryProperties.namingServiceInstance()方法实例化了namingService。
继续跟踪源码:
    public NamingService namingServiceInstance() {

		if (null != namingService) {
			return namingService;
		}

		try {
            // 创建namingService
			namingService = NacosFactory.createNamingService(getNacosProperties());
		}
		catch (Exception e) {
			log.error("create naming service error!properties={},e=,", this, e);
			return null;
		}
		return namingService;
	}
如果namingService为null,则通过NacosFactory.createNamingService(getNacosProperties())创建它。其中,getNacosProperties()方法获取Nacos注册中心的基本配置信息。
继续跟踪源码:
    public static NamingService createNamingService(Properties properties) throws NacosException {
            return NamingFactory.createNamingService(properties);
    }
调用NamingFactory.createNamingService(properties)创建namingService。
继续跟踪源码:
    public static NamingService createNamingService(Properties properties) throws NacosException {
        try {
            Class<?> driverImplClass = Class.forName("com.alibaba.nacos.client.naming.NacosNamingService");
            Constructor constructor = driverImplClass.getConstructor(Properties.class);
            // 通过反射机制创建NamingService的对象
            NamingService vendorImpl = (NamingService)constructor.newInstance(properties);
            return vendorImpl;
        } catch (Throwable e) {
            throw new NacosException(NacosException.CLIENT_INVALID_PARAM, e);
        }
    }
可以看出,最终是通过反射机制,创建了NamingService的实例对象,也就是NacosNamingService的对象。

继续跟踪源码,看看创建NacosNamingService对象的时候都干了什么?
public NacosNamingService(Properties properties) {
init(properties);
}
调用的是init方法:
    private void init(Properties properties) {
        // 初始化命名空间
        namespace = InitUtils.initNamespaceForNaming(properties);
        // 初始化Nacos注册中心服务地址
        initServerAddr(properties);
        // 初始化应用上下文
        InitUtils.initWebRootContext();
        // 初始化缓存目录
        initCacheDir();
        // 初始化日志文件名字
        initLogName(properties);

        // 初始化事件分发器
        eventDispatcher = new EventDispatcher();
        // 初始化服务代理
        serverProxy = new NamingProxy(namespace, endpoint, serverList, properties);
        // 初始化客户端心跳机制,会定时向服务端发送心跳信息
        beatReactor = new BeatReactor(serverProxy, initClientBeatThreadCount(properties));
        // 初始化服务信息更新机制,会定时拉去客户端关心的服务信息
        hostReactor = new HostReactor(eventDispatcher, serverProxy, cacheDir, isLoadCacheAtStart(properties),
            initPollingThreadCount(properties));
    }
3.4.5 NamingService#registerInstance方法
com.alibaba.nacos.client.naming.NacosNamingService#registerInstance(java.lang.String, java.lang.String, com.alibaba.nacos.api.naming.pojo.Instance)
从上面的源码分析可以看出,服务注册最终调用的是NamingService#registerInstance的方法,那具体的实现就是NacosNamingService#registerInstance。
跟踪源码:
    @Override
    public void registerInstance(String serviceName, String groupName, Instance instance) throws NacosException {

        if (instance.isEphemeral()) {
            BeatInfo beatInfo = new BeatInfo();
            beatInfo.setServiceName(NamingUtils.getGroupedName(serviceName, groupName));
            beatInfo.setIp(instance.getIp());
            beatInfo.setPort(instance.getPort());
            beatInfo.setCluster(instance.getClusterName());
            beatInfo.setWeight(instance.getWeight());
            beatInfo.setMetadata(instance.getMetadata());
            beatInfo.setScheduled(false);
            beatInfo.setPeriod(instance.getInstanceHeartBeatInterval());

            beatReactor.addBeatInfo(NamingUtils.getGroupedName(serviceName, groupName), beatInfo);
        }

        serverProxy.registerService(NamingUtils.getGroupedName(serviceName, groupName), groupName, instance);
    }
最终通过serverProxy.registerService(...)注册服务信息:
    public void registerService(String serviceName, String groupName, Instance instance) throws NacosException {

        NAMING_LOGGER.info("[REGISTER-SERVICE] {} registering service {} with instance: {}",
            namespaceId, serviceName, instance);

        final Map<String, String> params = new HashMap<String, String>(9);
        params.put(CommonParams.NAMESPACE_ID, namespaceId);
        params.put(CommonParams.SERVICE_NAME, serviceName);
        params.put(CommonParams.GROUP_NAME, groupName);
        params.put(CommonParams.CLUSTER_NAME, instance.getClusterName());
        params.put("ip", instance.getIp());
        params.put("port", String.valueOf(instance.getPort()));
        params.put("weight", String.valueOf(instance.getWeight()));
        params.put("enable", String.valueOf(instance.isEnabled()));
        params.put("healthy", String.valueOf(instance.isHealthy()));
        params.put("ephemeral", String.valueOf(instance.isEphemeral()));
        params.put("metadata", JSON.toJSONString(instance.getMetadata()));

        reqAPI(UtilAndComs.NACOS_URL_INSTANCE, params, HttpMethod.POST);

    }
其中:
public static String WEB_CONTEXT = "/nacos";
public static String NACOS_URL_BASE = WEB_CONTEXT + "/v1/ns";
public static String NACOS_URL_INSTANCE = NACOS_URL_BASE + "/instance";
所以,会向/nacos/v1/ns/instance发送一个POST请求,将服务信息通过这个请求注册到Nacos上面。

2021升级版微服务教程4—Nacos 服务注册和发现
2021升级版SpringCloud教程从入门到实战精通「H版&alibaba&链路追踪&日志&事务&锁」

教程全目录「含视频」:https://gitee.com/bingqilinpe...

Nacos 服务注册和发现
SpringCloud Alibaba
https://github.com/alibaba/sp...
Spring Cloud Alibaba 致力于提供微服务开发的一站式解决方案。此项目包含开发分布式应用微服务的必需组件,方便开发者通过 Spring Cloud 编程模型轻松使用这些组件来开发分布式应用服务。
依托 Spring Cloud Alibaba,您只需要添加一些注解和少量配置,就可以将 Spring Cloud 应用接入阿里微服务解决方案,通过阿里中间件来迅速搭建分布式应用系统。
Nacos基本使用
简介和安装
一个更易于构建云原生应用的动态服务发现、配置管理和服务管理平台。Nacos=注册中心+配置中心
官方文档:https://nacos.io/zh-cn/docs/q...
安装
下载 https://github.com/alibaba/Nacos
下载地址:https://github.com/alibaba/na...
- 解压
- 通过命令启动
- 访问 http://localhost:8848/nacos/#/login 账号密码为:nacos

基本使用
订单服务改造为Nacos客户端
导入依赖
    <!--        nacos服务注册/发现-->
    <dependency>
        <groupId>com.alibaba.cloud</groupId>
        <artifactId>spring-cloud-starter-alibaba-nacos-discovery</artifactId>
    </dependency>
配置
server.port=8803 spring.application.name=nacos-order #注册中心地址 spring.cloud.nacos.discovery.server-addr=localhost:8848- 启动类上注解 @EnableDiscoveryClient
- 启动项目 可以看到 注册中心中

Nacos和Eureka的区别

注意:关于配置管理以及集群部署,见后续文章
如果你觉得这篇内容对你挺有有帮助的话:
- 点赞支持下吧,让更多的人也能看到这篇内容(收藏不点赞,都是耍流氓 -_-)
- 欢迎在留言区与我分享你的想法,也欢迎你在留言区记录你的思考过程。
- 觉得不错的话,也可以关注 编程鹿 的个人公众号看更多文章和讲解视频(感谢大家的鼓励与支持)

快速把服务注册到Consul中")
3.(服务注册)快速把服务注册到Consul中
安装go-plugins
go get -v github.com/micro/go-plugins,原来go-micro consul的支持已经迁移到了go-plugins里面
package main

import (
    "github.com/gin-gonic/gin"
    "github.com/micro/go-micro/registry"
    "github.com/micro/go-micro/web"
    "github.com/micro/go-plugins/registry/consul"
)

func main() {
    consulReg := consul.NewRegistry( //新建一个consul注册的地址,也就是我们consul服务启动的机器ip+端口
        registry.Addrs("localhost:8500"),
    )
    ginRouter := gin.Default()
    ginRouter.Handle("GET", "/user", func(context *gin.Context) {
        context.String(200, "user api")
    })
    ginRouter.Handle("GET", "/news", func(context *gin.Context) {
        context.String(200, "news api")
    })
    server := web.NewService( //go-micro很灵性的实现了注册和反注册,我们启动后直接ctrl+c退出这个server,它会自动帮我们实现反注册
        web.Name("prodservice"), //注册进consul服务中的service名字
        web.Address(":8001"), //注册进consul服务中的端口
        web.Handler(ginRouter), //web.Handler()返回一个Option,我们直接把ginRouter穿进去,就可以和gin完美的结合
        web.Registry(consulReg),//注册到哪个服务器伤的consul中
    )
    server.Run()
}
:Spring Cloud Nacos Discovery - FeignClient,Nacos 服务注册与发现")
Alibaba Nacos 学习(三):Spring Cloud Nacos Discovery - FeignClient,Nacos 服务注册与发现
Alibaba Nacos 学习(一):Nacos 介绍与安装
Alibaba Nacos 学习(二):Spring Cloud Nacos Config
Alibaba Nacos 学习(三):Spring Cloud Nacos Discovery - FeignClient,Nacos 服务注册与发现
Alibaba Nacos 学习(四):Nacos Docker
Alibaba Nacos 学习(五):K8S Nacos 搭建,使用 nfs
接上一篇
https://www.cnblogs.com/woxpp/p/11908262.html
服务端新增引入依赖
<dependency>
            <groupId>org.springframework.cloud</groupId>
            <artifactId>spring-cloud-starter-alibaba-nacos-discovery</artifactId>
            <version>0.2.1.RELEASE</version>
        </dependency>
启动类开启服务注册支持
@EnableSwagger2
@SpringBootApplication
@EnableDiscoveryClient
public class Application {

    public static void main(String[] args) {
        SpringApplication.run(Application.class, args);
    }
}
增加服务注册地址 application.properties
spring.cloud.nacos.discovery.server-addr=192.168.50.31:8848消费端 POM.XML 如下,引入 ribbon 与 openfeign 支持
<?xml version="1.0" encoding="UTF-8"?>
<project xmlns="http://maven.apache.org/POM/4.0.0" xmlns:xsi="http://www.w3.org/2001/XMLSchema-instance"
    xsi:schemaLocation="http://maven.apache.org/POM/4.0.0 https://maven.apache.org/xsd/maven-4.0.0.xsd">
    <modelVersion>4.0.0</modelVersion>
    <parent>
        <groupId>org.springframework.boot</groupId>
        <artifactId>spring-boot-starter-parent</artifactId>
        <version>2.0.1.RELEASE</version>
        <relativePath/> <!-- lookup parent from repository -->
    </parent>
    <groupId>nacos.consumer</groupId>
    <artifactId>nacos.consumer</artifactId>
    <name>nacos.consumer</name>
    <description>Demo project for Spring Boot</description>

    <properties>
        <java.version>1.8</java.version>
        <spring-boot.version>2.0.3.RELEASE</spring-boot.version>
        <nacos-config-spring-boot.version>0.2.1</nacos-config-spring-boot.version>
    </properties>
    <dependencies>
        <dependency>
            <groupId>org.springframework.boot</groupId>
            <artifactId>spring-boot-starter-web</artifactId>
        </dependency>
        <dependency>
            <groupId>org.springframework.cloud</groupId>
            <artifactId>spring-cloud-starter-alibaba-nacos-discovery</artifactId>
            <version>0.2.1.RELEASE</version>
        </dependency>

        <dependency>
            <groupId>org.springframework.cloud</groupId>
            <artifactId>spring-cloud-starter-netflix-ribbon</artifactId>
            <version>2.0.0.RELEASE</version>
        </dependency>

        <dependency>
            <groupId>org.springframework.cloud</groupId>
            <artifactId>spring-cloud-starter-openfeign</artifactId>
            <version>2.0.0.RELEASE</version>
        </dependency>
        <dependency>
            <groupId>io.springfox</groupId>
            <artifactId>springfox-swagger2</artifactId>
            <version>2.5.0</version>
        </dependency>
        <!-- swagger-ui -->
        <dependency>
            <groupId>io.springfox</groupId>
            <artifactId>springfox-swagger-ui</artifactId>
            <version>2.5.0</version>
        </dependency>
    </dependencies>
</project>
创建服务引用对象,利用 FeignClient
package example.dockertest.example.dockertest.service;

import org.springframework.cloud.openfeign.FeignClient;
import org.springframework.web.bind.annotation.RequestMapping;
import org.springframework.web.bind.annotation.RequestMethod;
import org.springframework.web.bind.annotation.ResponseBody;

@FeignClient(value = "service-provider")
public interface ICustomerService {
    @RequestMapping(value = "/config/get", method = RequestMethod.GET)
    @ResponseBody
    String get();
}
调用服务方法
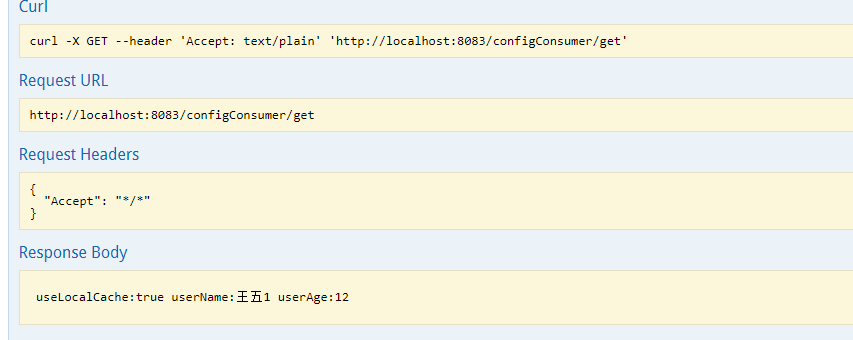
@RestController
@RequestMapping("/configConsumer")
public class ConfigController {
    @Autowired
    private ICustomerService customerService;

    @RequestMapping(value = "/get", method = RequestMethod.GET)
    @ResponseBody
    public String get() {
        return customerService.get();
    }
}
提供服务发现
@EnableSwagger2
@SpringBootApplication
@EnableDiscoveryClient
@EnableFeignClients
public class Application {
    public static void main(String[] args) {
        SpringApplication.run(Application.class, args);
    }

}
启动测试是否能够调用

Nacos 之 服务注册中心
先占坑
关于Nacos服务注册原理解析和nacos的服务注册流程的问题就给大家分享到这里,感谢你花时间阅读本站内容,更多关于2021升级版微服务教程4—Nacos 服务注册和发现、3.(服务注册)快速把服务注册到Consul中、Alibaba Nacos 学习(三):Spring Cloud Nacos Discovery - FeignClient,Nacos 服务注册与发现、Nacos 之 服务注册中心等相关知识的信息别忘了在本站进行查找喔。
本文标签:


![[转帖]Ubuntu 安装 Wine方法(ubuntu如何安装wine)](https://www.gvkun.com/zb_users/cache/thumbs/4c83df0e2303284d68480d1b1378581d-180-120-1.jpg)

