在本文中,我们将带你了解CENTOS:如何才CENTOS下安装MYSQL,而不是安装MARIADB在这篇文章中,同时我们还将给您一些技巧,以帮助您实现更有效的179.centos7安装mariadb或
在本文中,我们将带你了解CENTOS: 如何才CENTOS下安装MYSQL,而不是安装MARIADB在这篇文章中,同时我们还将给您一些技巧,以帮助您实现更有效的179. centos7 安装mariadb 或 mysql 卸载、CentOS 6.5系统卸载MySQL并安装MariaDB的方法、centos 7.0 如何安装php环境 centos7安装mariadb的正确命令、CentOS 7下安装MariaDB。
本文目录一览:- CENTOS: 如何才CENTOS下安装MYSQL,而不是安装MARIADB
- 179. centos7 安装mariadb 或 mysql 卸载
- CentOS 6.5系统卸载MySQL并安装MariaDB的方法
- centos 7.0 如何安装php环境 centos7安装mariadb的正确命令
- CentOS 7下安装MariaDB

CENTOS: 如何才CENTOS下安装MYSQL,而不是安装MARIADB
参考文章:How to Install MySQL on CentOS 7
第一步:下载和更新MysqL的下载地方。
wget http://repo.MysqL.com/MysqL-community-release-el7-5.noarch.rpm
sudo rpm -ivh MysqL-community-release-el7-5.noarch.rpm
yum update
sudo yum install MysqL-server
第三步:设置为自动启动
systemctl enable MysqLd
第四步:启动MysqL
systemctl start MysqLd
第五步:设置MysqL
sudo MysqL_secure_installation这一步有几个步骤去设置的。这里就不详细了。
如果想远程连接MysqL,可以参考我另外一篇文章:CentOS: 下mysql远程连接的失败的解决方法

179. centos7 安装mariadb 或 mysql 卸载
0.卸载mysql
https://blog.csdn.net/wuwang0823/article/details/80171579
1. centos7 中安装mariadb
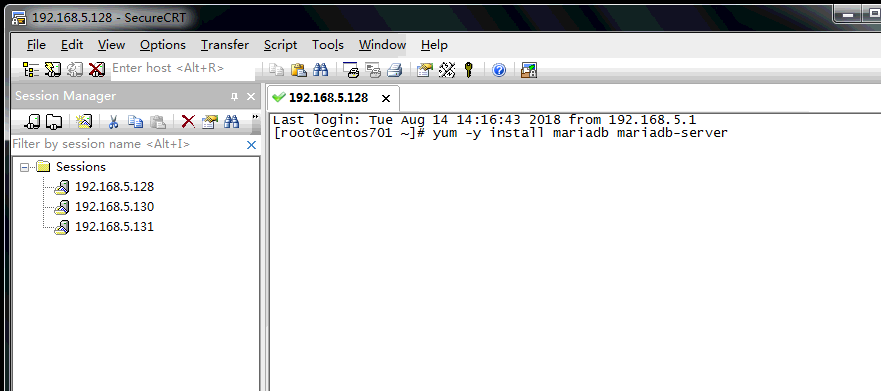
1.1 执行安装
centos7 自带了mariadb
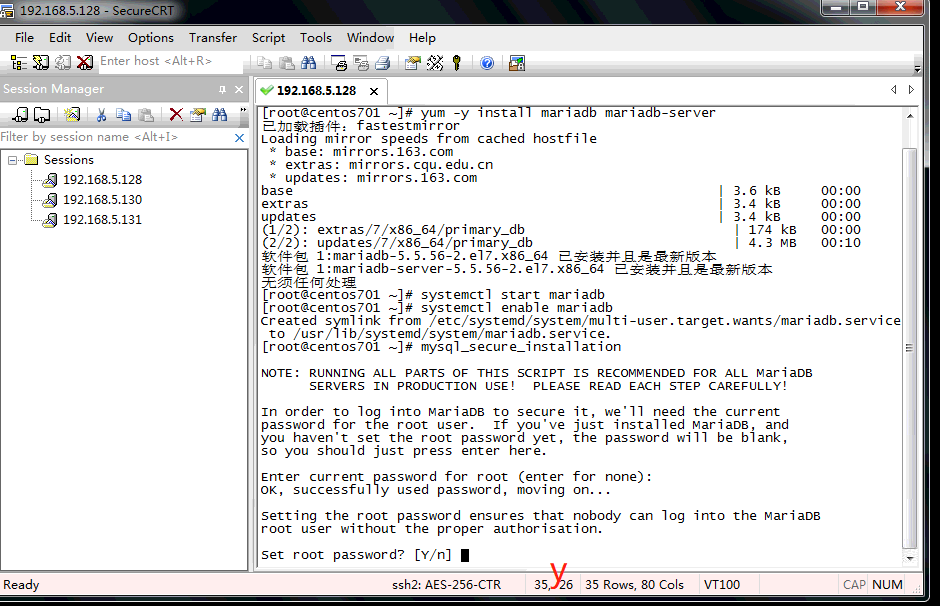
yum -y install mariadb mariadb-server
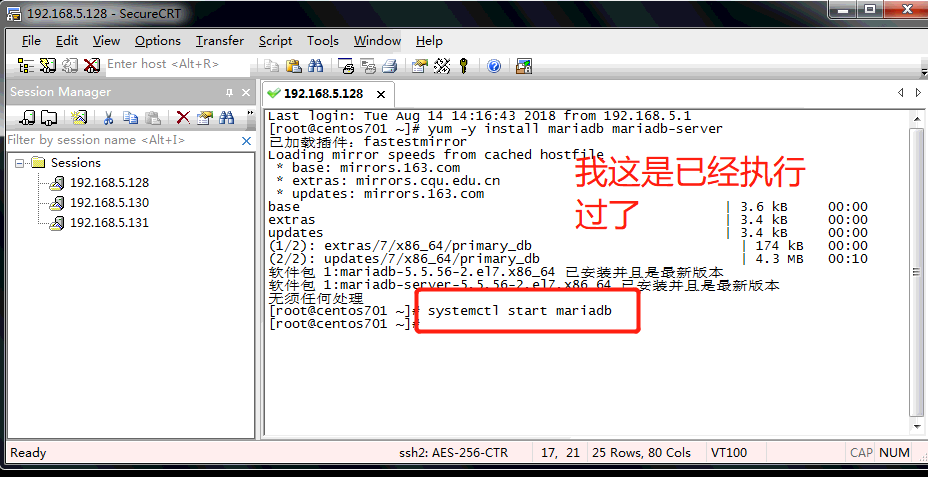
1.2 启动mariadb
systemctl start mariadb
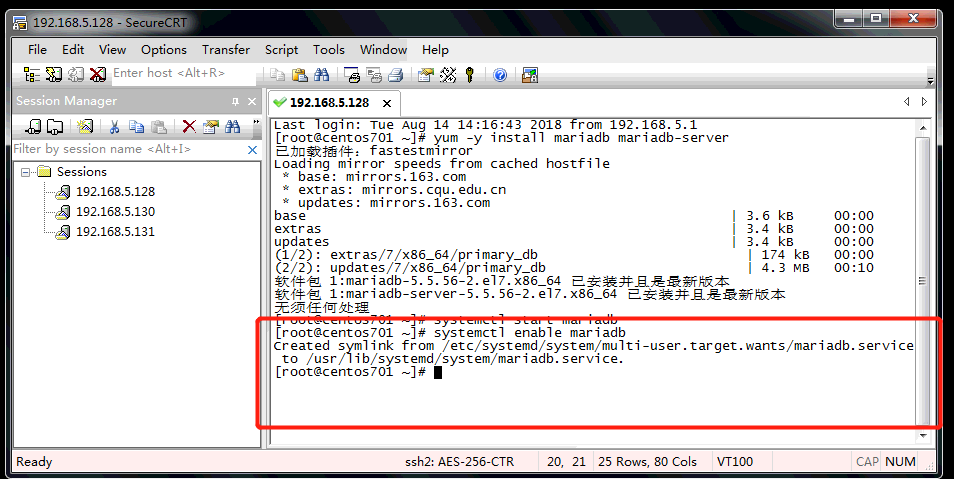
1.3 设置开机启动
systemctl enable mariadb
1.4 MariaDB的相关简单配置
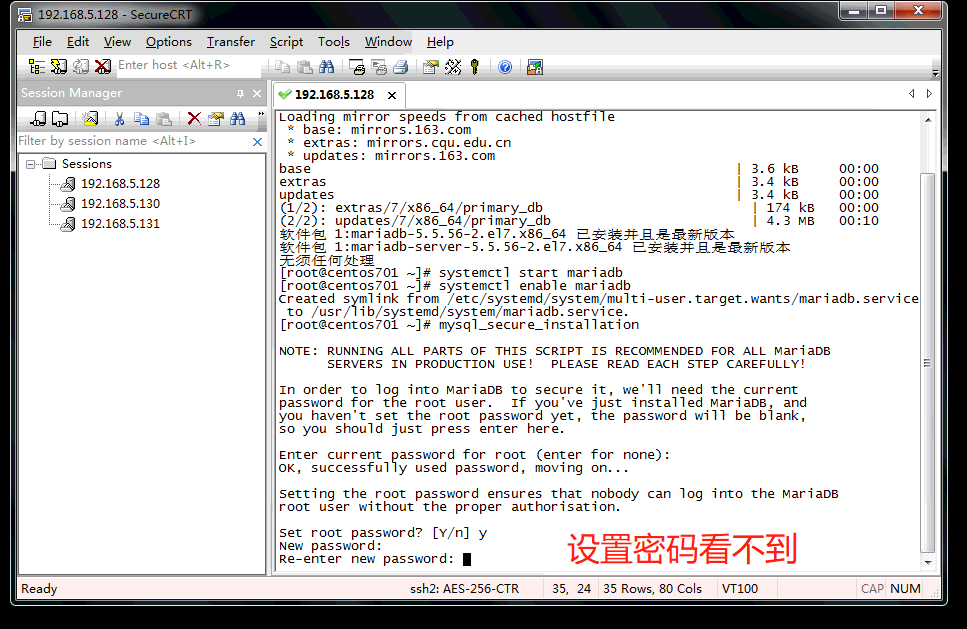
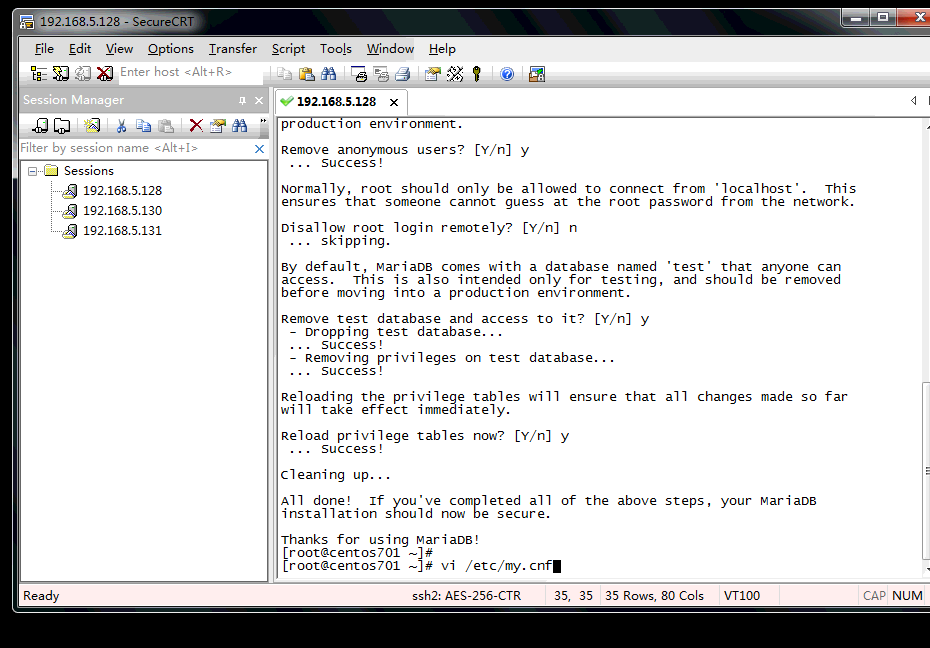
mysql_secure_installation
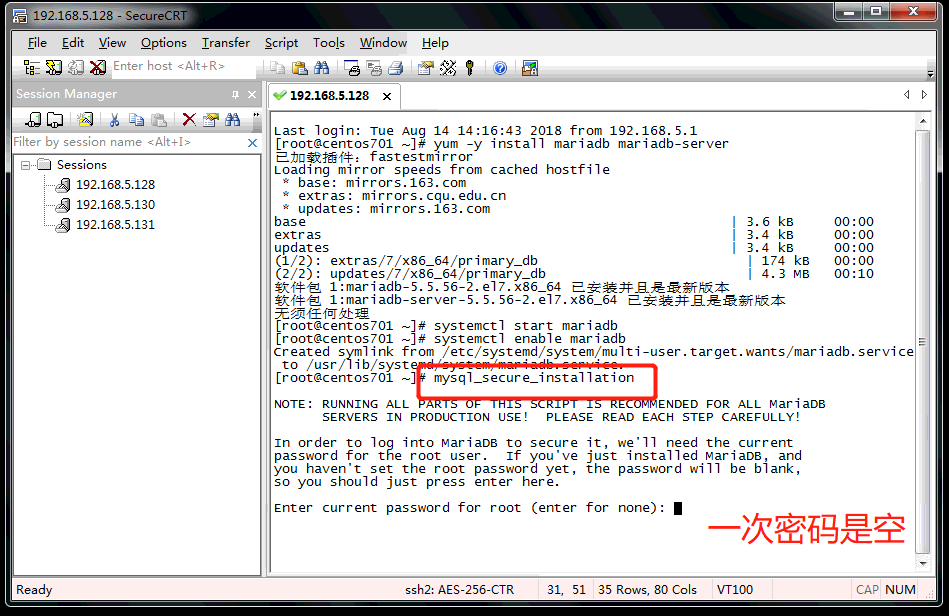
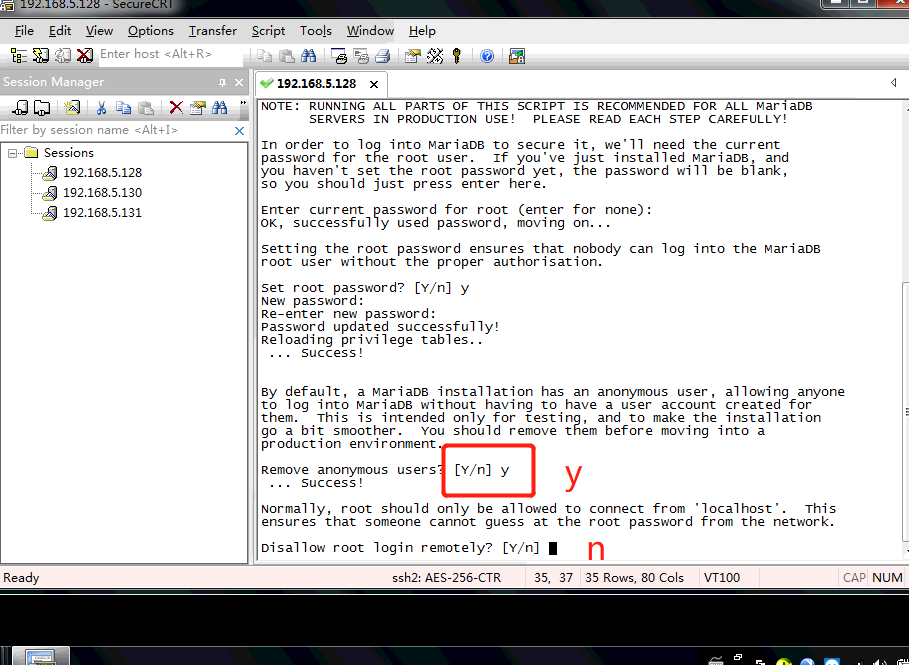
Remove anonymous users? [Y/n] <– 是否删除匿名用户,回车 按y
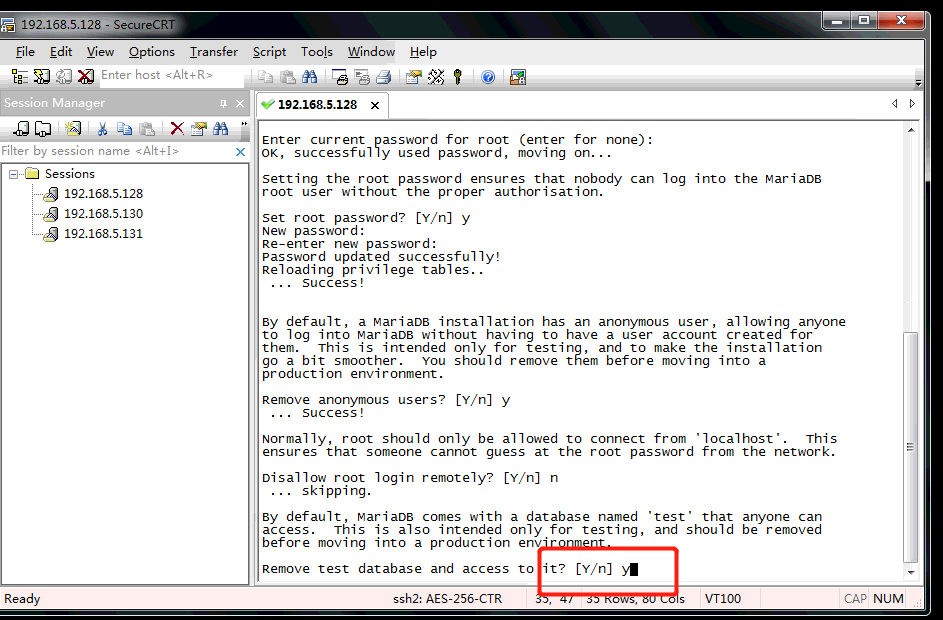
Disallow root login remotely? [Y/n] <–是否禁止root远程登录,回车, 按n
Remove test database and access to it? [Y/n] <– 是否删除test数据库,回车 按y
Reload privilege tables now? [Y/n] <– 是否重新加载权限表,回车 按 y

1.5 配置MariaDB的字符集
vi /etc/my.cnf
将下面这段内容加入
| init_connect=''SET collation_connection = utf8_unicode_ci'' init_connect=''SET NAMES utf8'' character-set-server=utf8 collation-server=utf8_unicode_ci skip-character-set-client-handshake |
在[client]中添加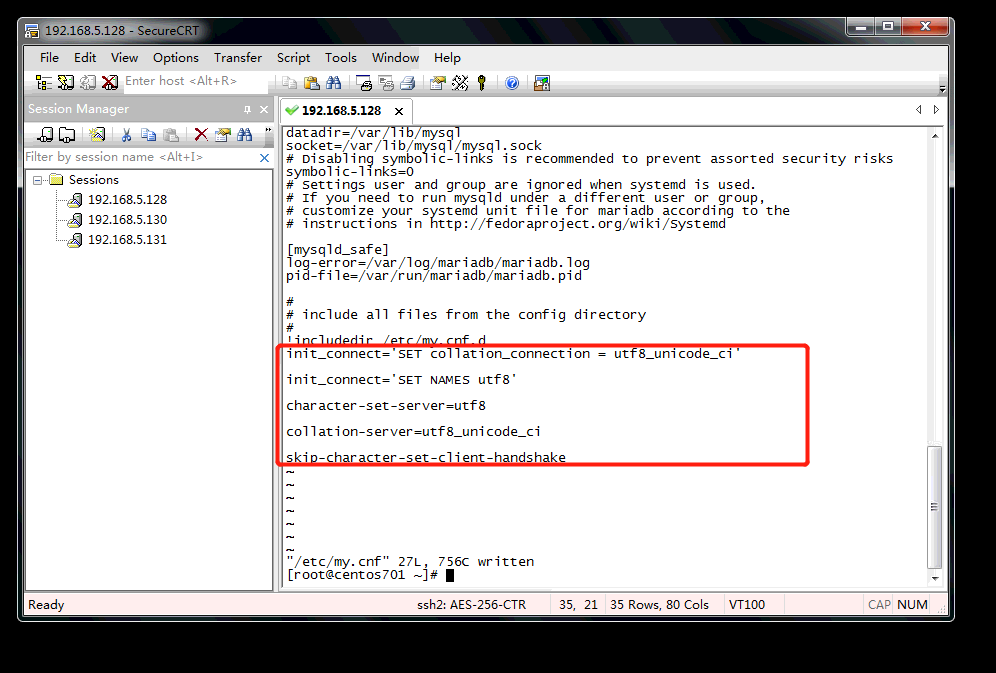
vi /etc/my.cnf.d/client.cnf
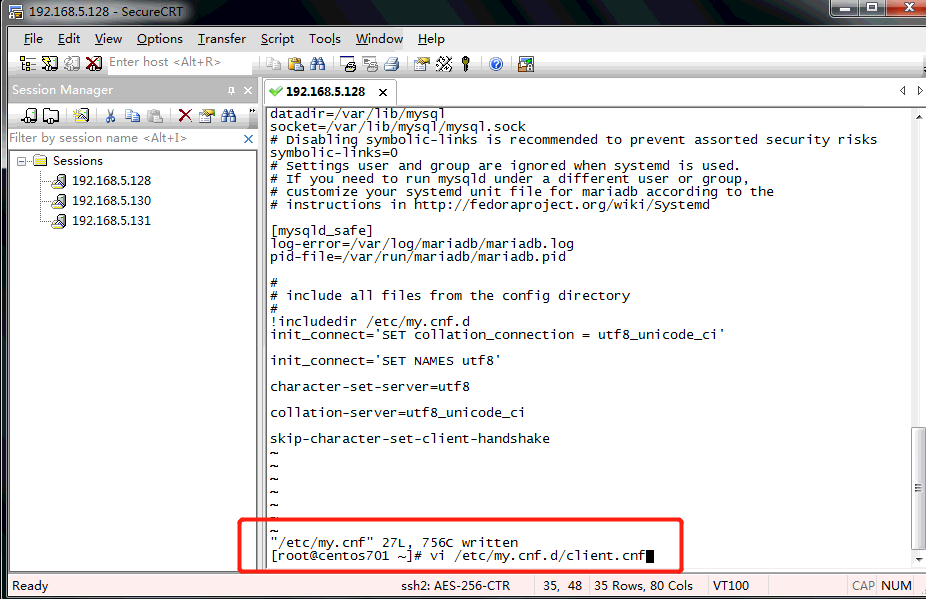
default-character-set=utf8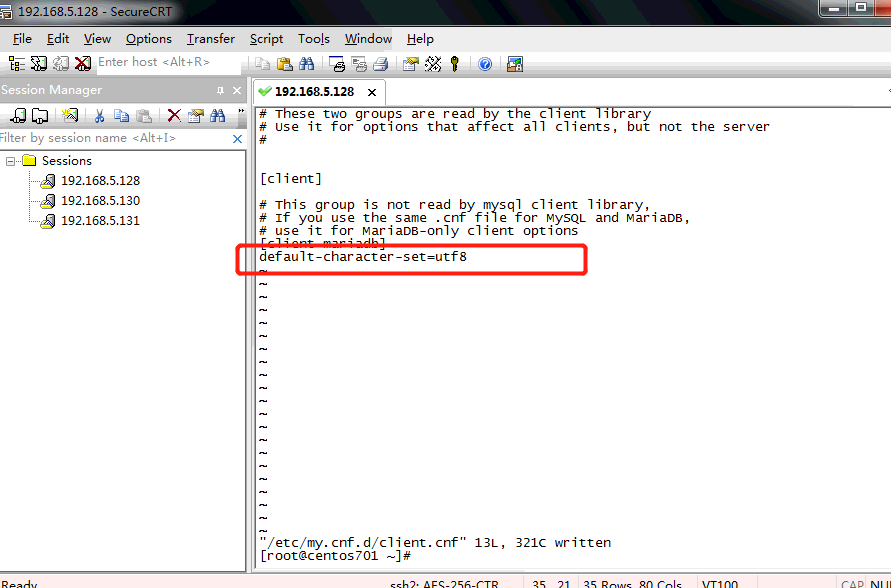
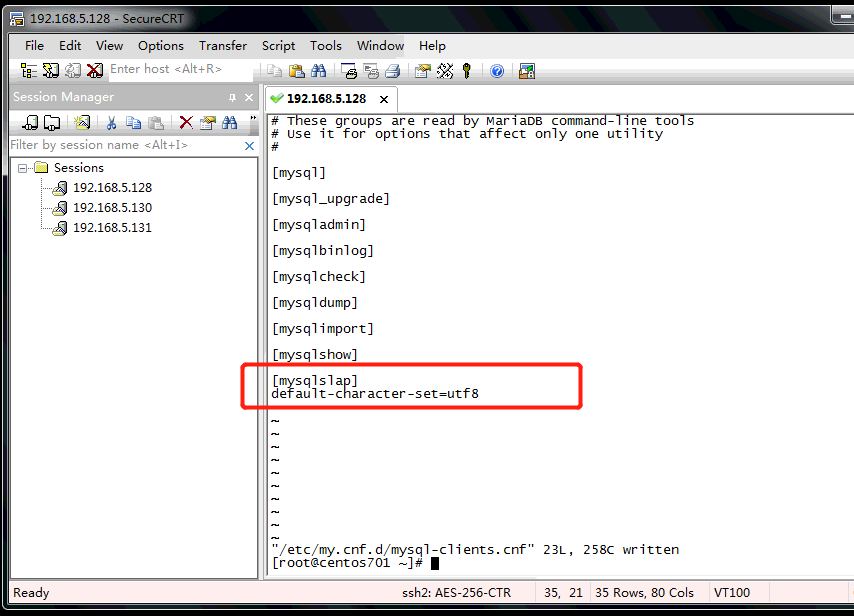
在[mysql]中添加
vi /etc/my.cnf.d/mysql-clients.cnf
default-character-set=utf8
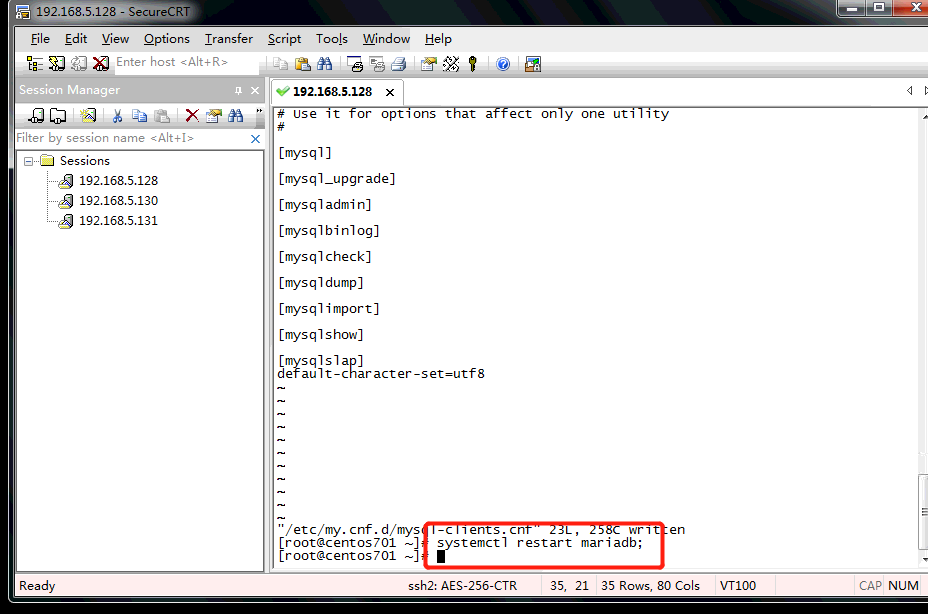
全部配置完成,重启mariadb
systemctl restart mariadb;
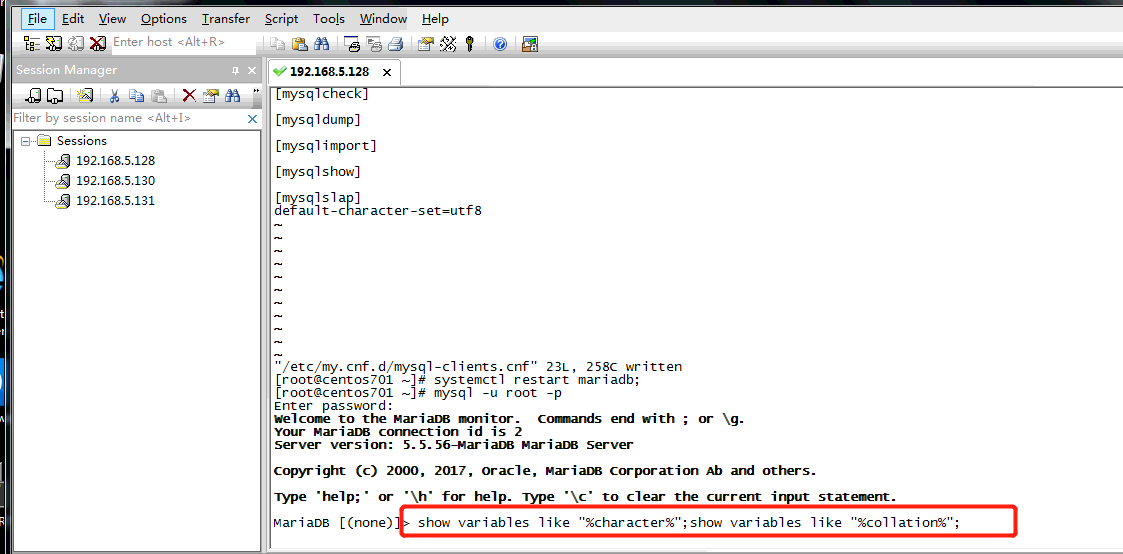
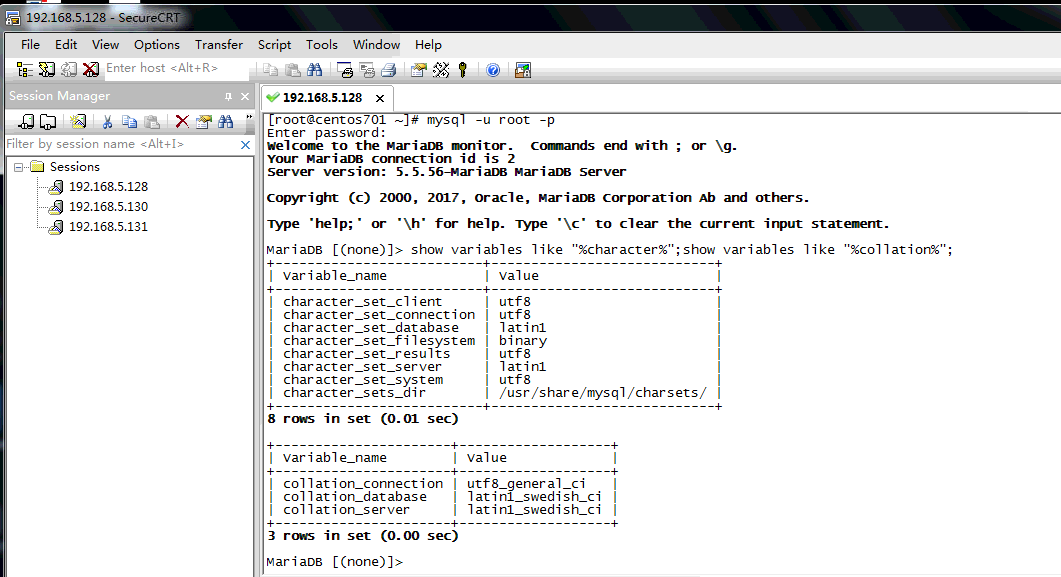
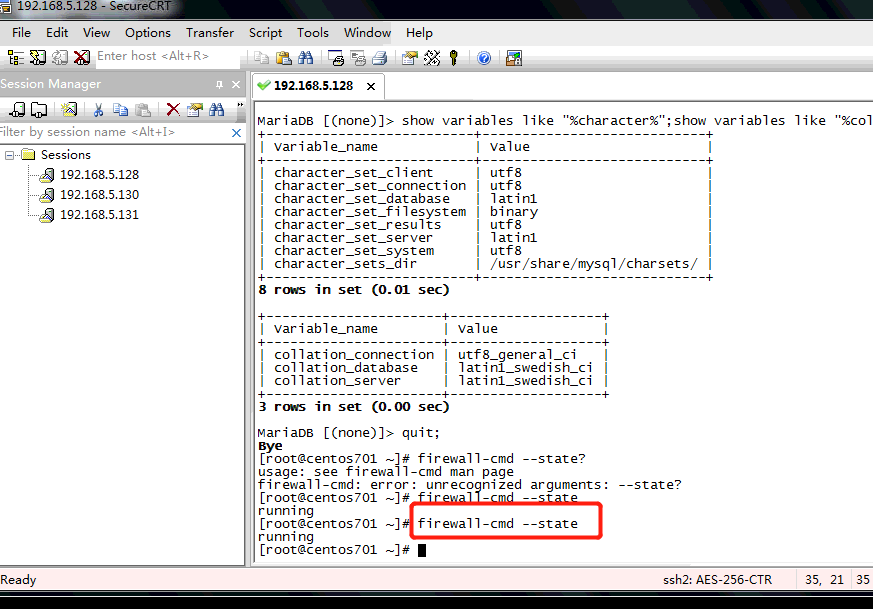
登陆之后进入MariaDB查看字符集
show variables like "%character%";show variables like "%collation%";
1.6 设置防火墙
1.6.1 查看防火墙状态
在任意位置执行下面的命令
firewall-cmd --state
1.6.2 立即开启防火墙
systemctl start firewalld.service
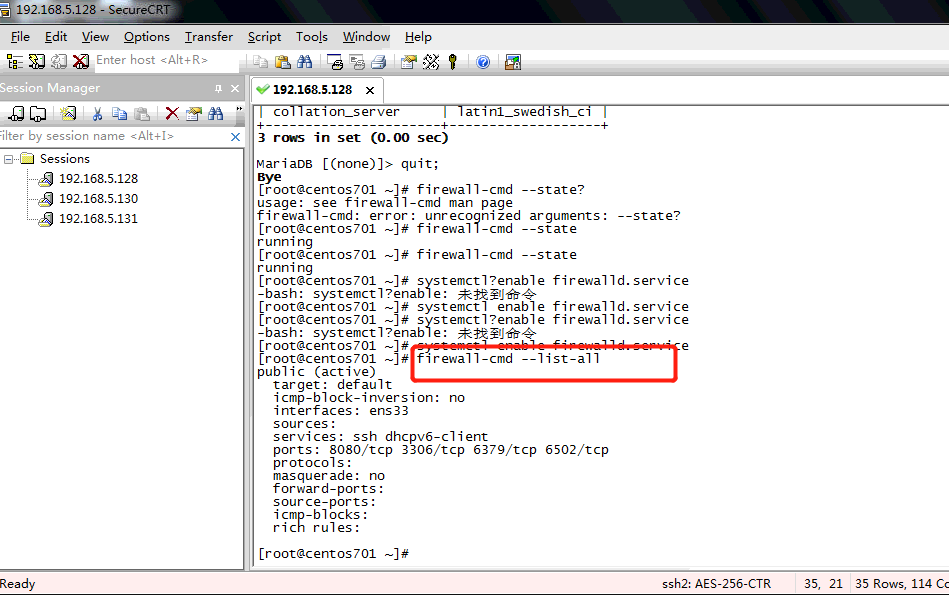
1.6.3 开启开机启动防火墙
systemctl enable firewalld.service

1.6.4 查看开启的端口
firewall-cmd --list-all
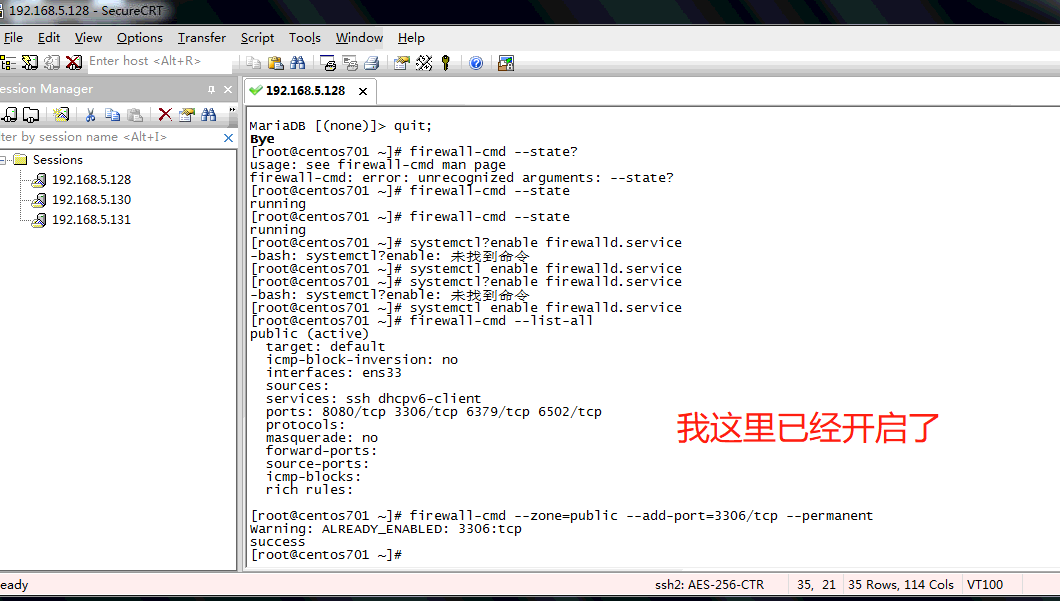
1.6.5 开启需要的端口
firewall-cmd --zone=public --add-port=3306/tcp --permanent
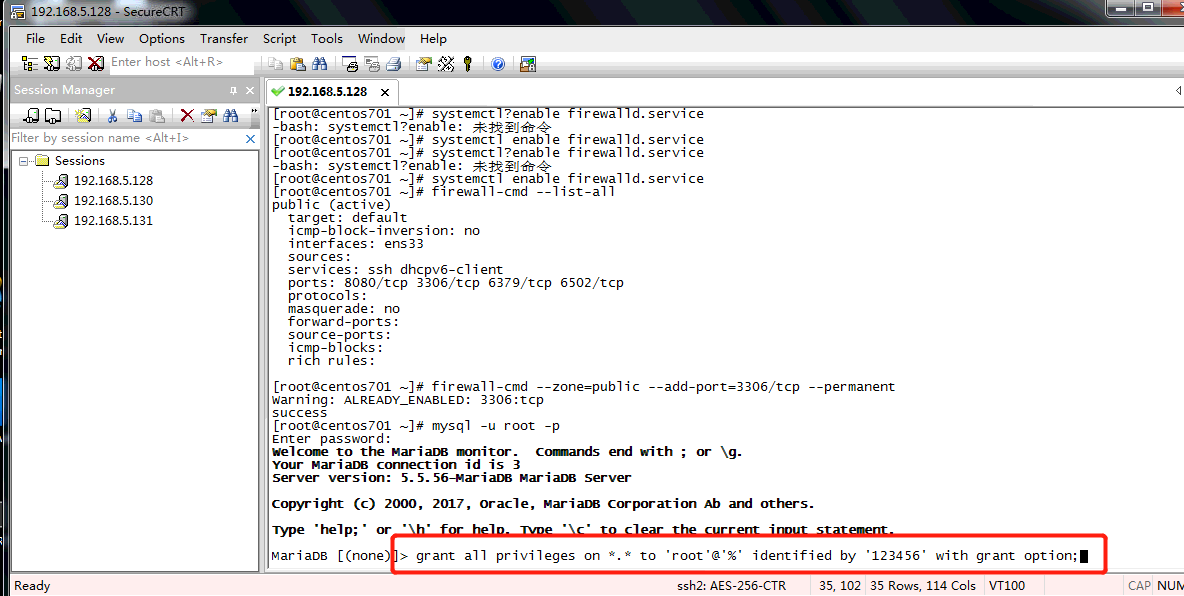
1.7 外界连接授权
登录成功后执行
grant all privileges on *.* to ''root''@''%'' identified by ''123456'' with grant option;

1.8 测试外界连接
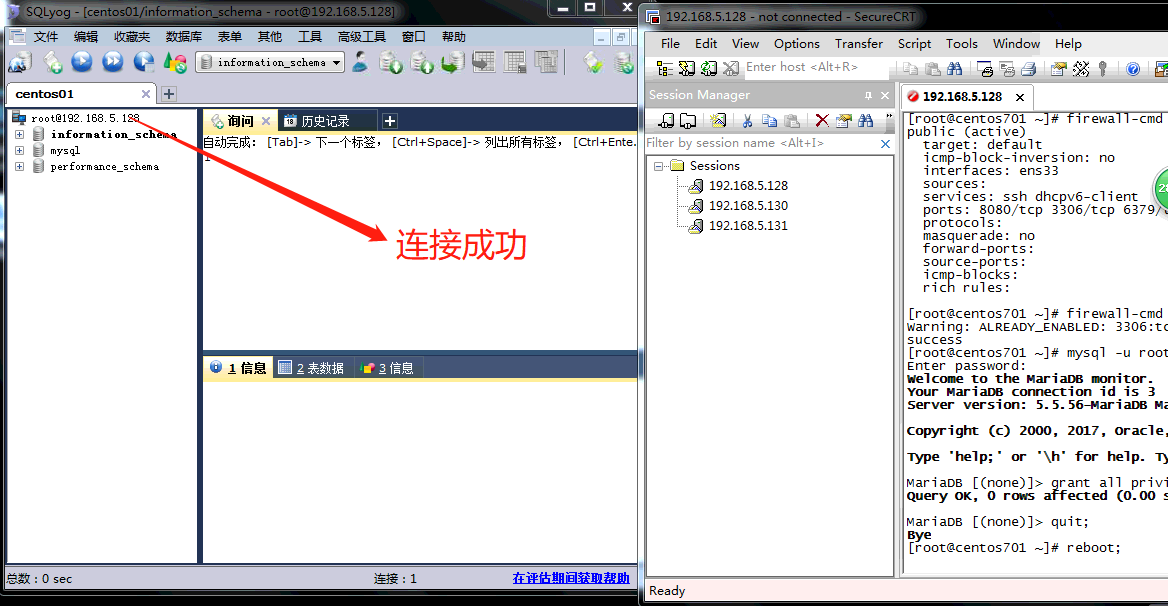
完成
2. centos 8安装 mysql
参考: https://www.cnblogs.com/luohanguo/p/9045391.html
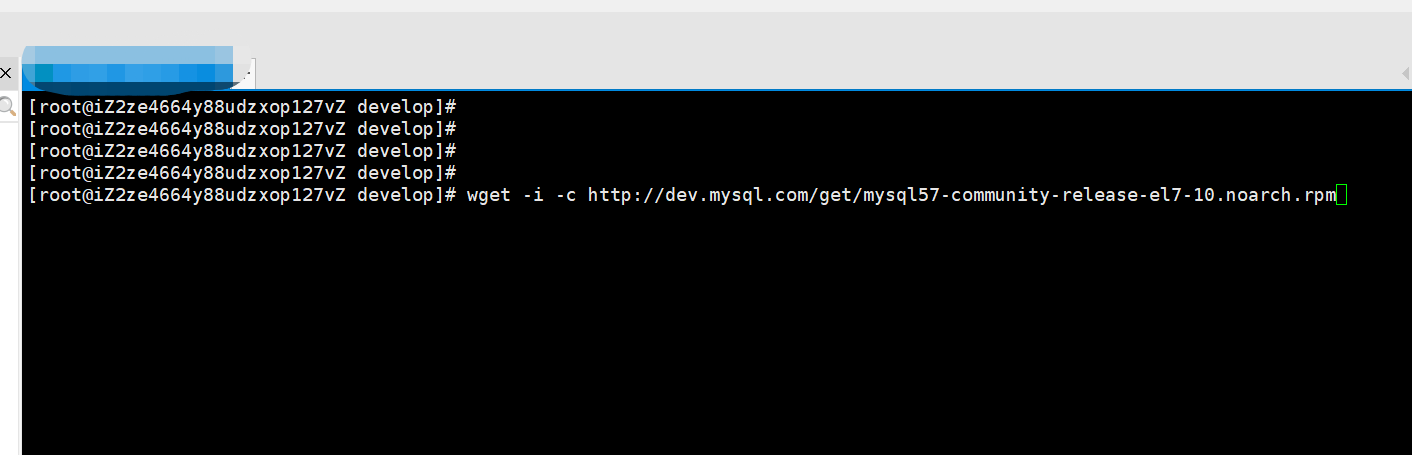
2.1 下载并安装MySQL官方的 Yum Repository
wget -i -c http://dev.mysql.com/get/mysql57-community-release-el7-10.noarch.rpm
yum -y install mysql57-community-release-el7-10.noarch.rpm

出现问题:
解决方案:https://blog.csdn.net/weixin_45616519/article/details/105765719
yum module disable mysql
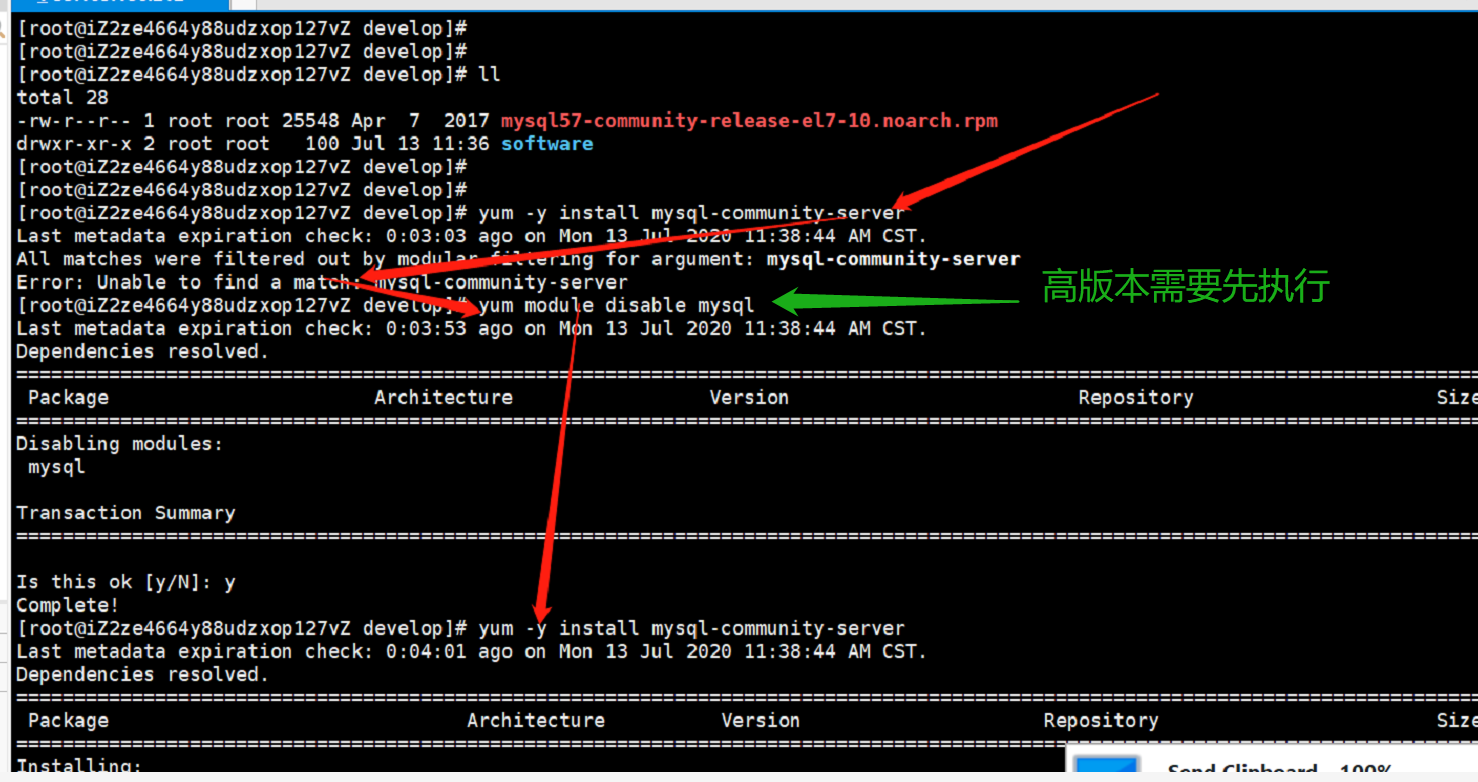
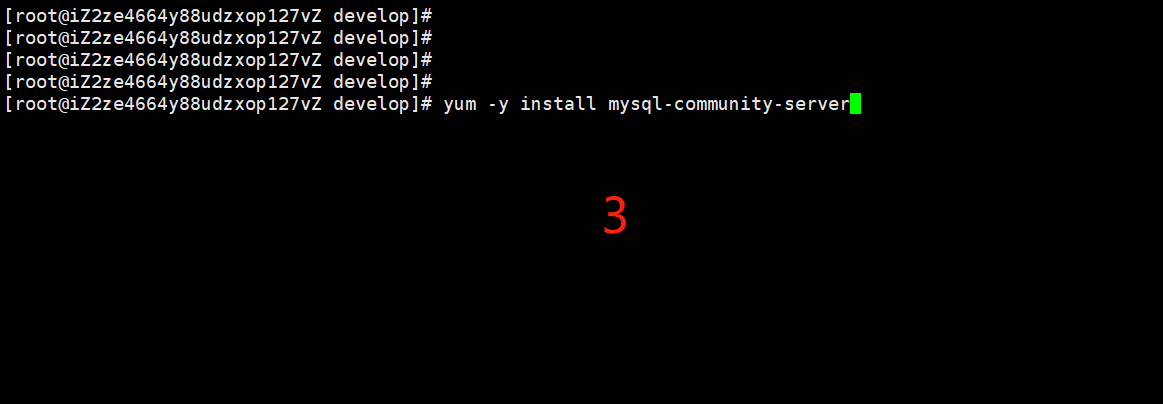
yum -y install mysql-community-server
2.2 MySQL数据库设置
首先启动MySQL
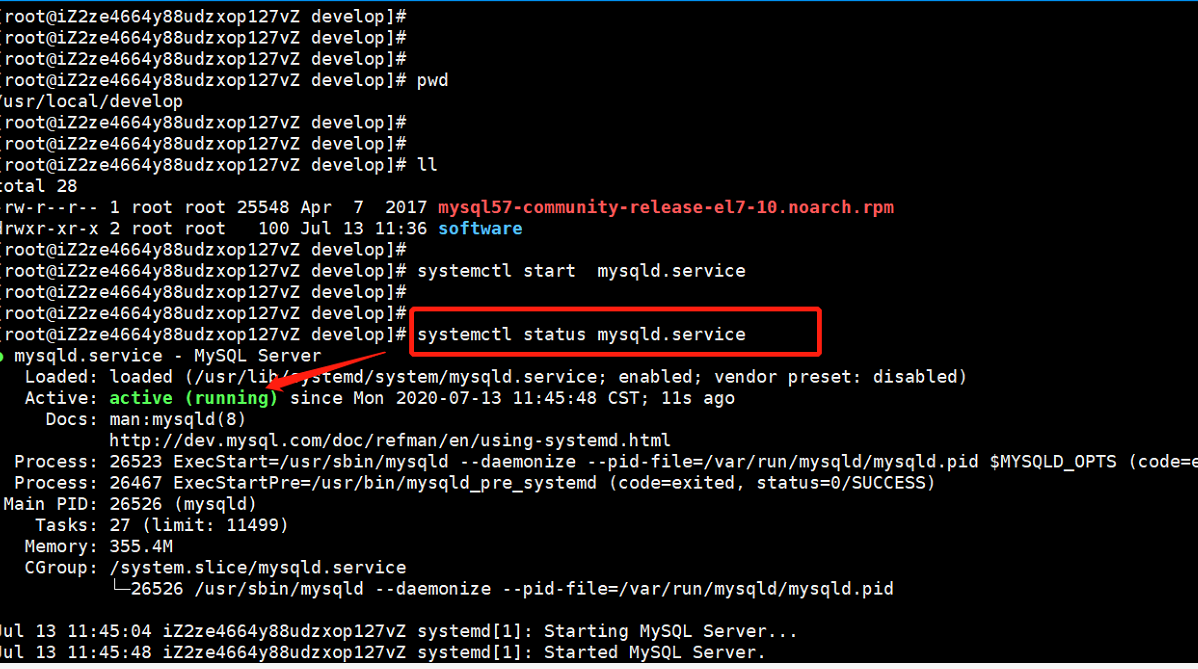
systemctl start mysqld.service
查看MySQL运行状态,运行状态如图:
systemctl status mysqld.service
如下命令进入数据库:
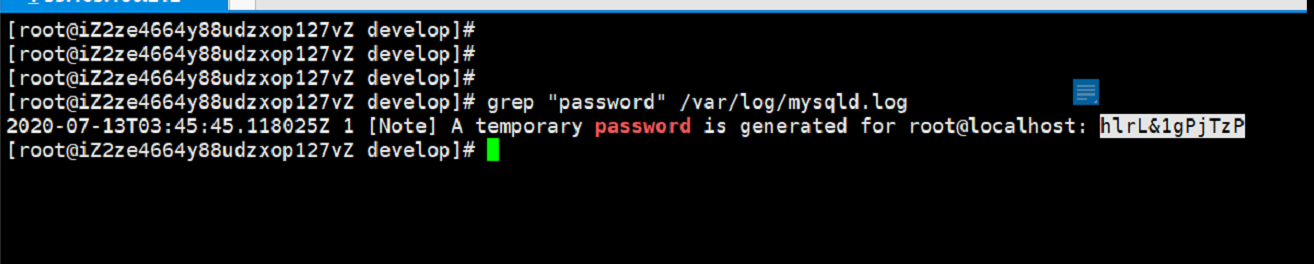
mysql -uroot -p
grep "password" /var/log/mysqld.log
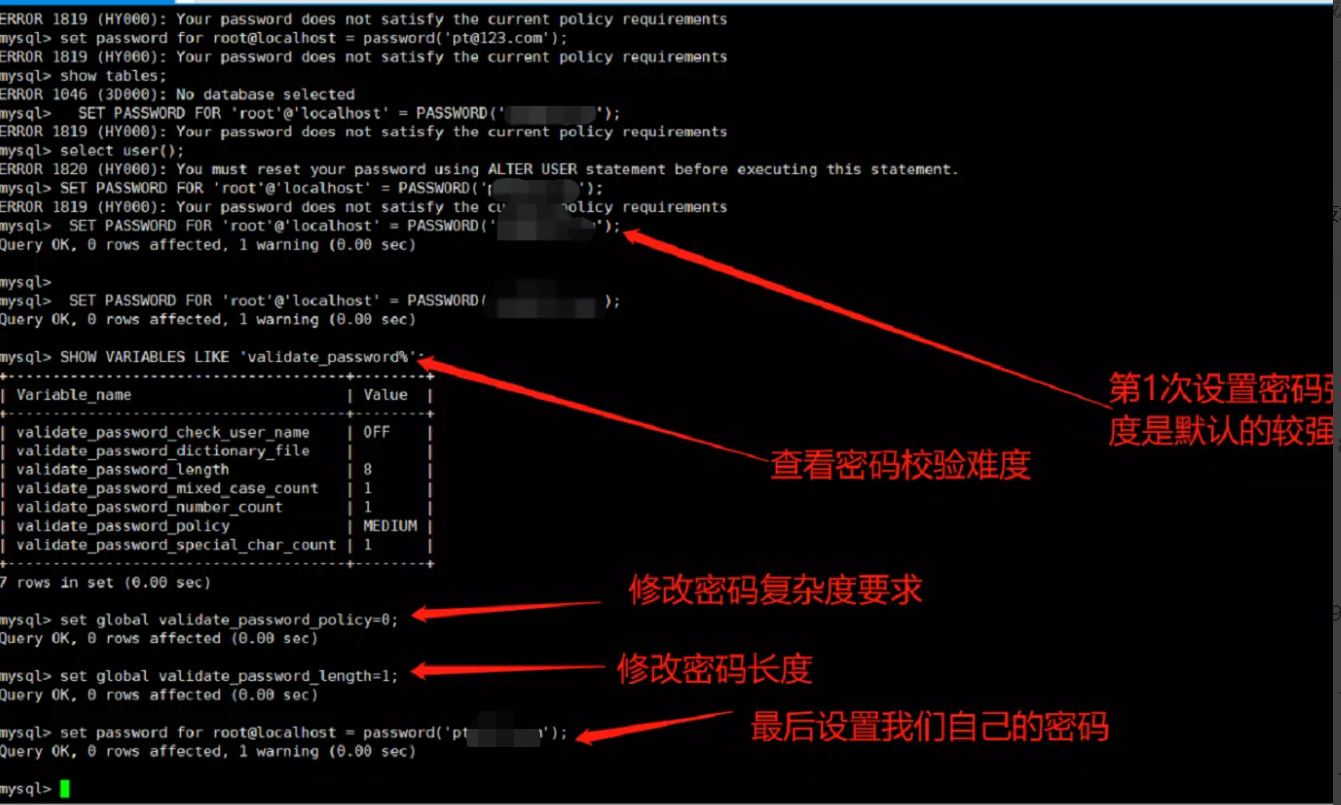
ALTER USER ''root''@''localhost'' IDENTIFIED BY ''new password'';
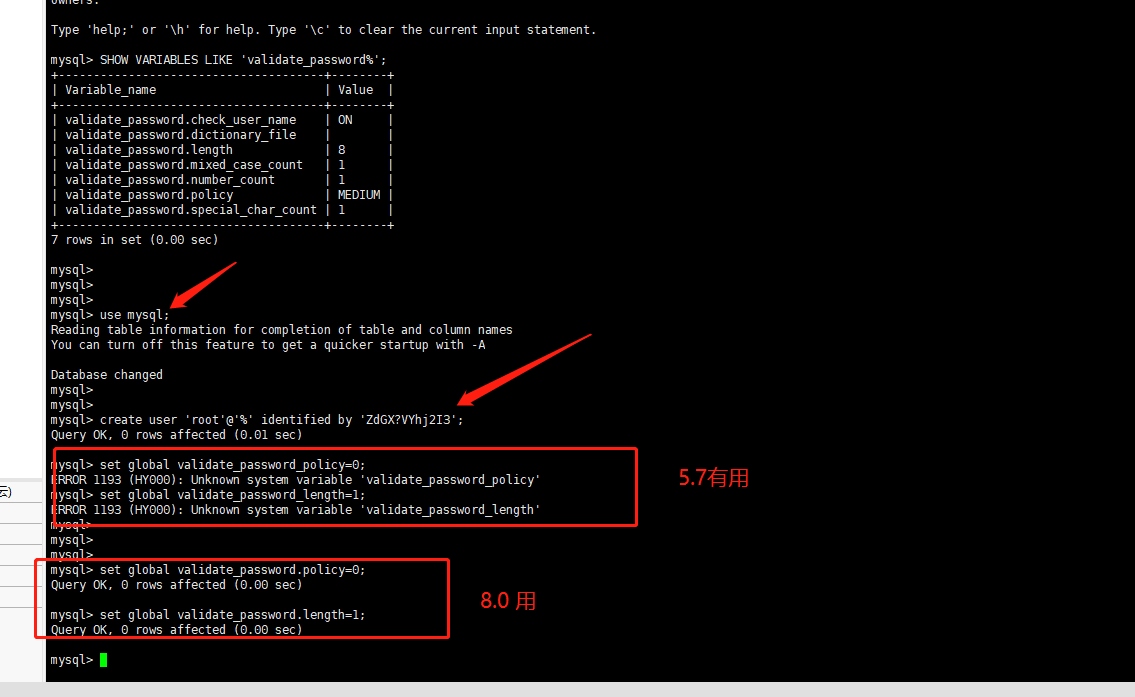
SHOW VARIABLES LIKE ''validate_password%'';
set global validate_password_policy=0;
set global validate_password_length=1;
mysql 8 请参考 :https://blog.csdn.net/weixin_44425934/article/details/109047655
2.3 授权:登录mysql
grant all privileges on *.* to ''root''@''%'' identified by ''123456'' with grant option;
刷新:
flush privileges;
mysql8.0授权
https://blog.csdn.net/qq_34416331/article/details/104198487
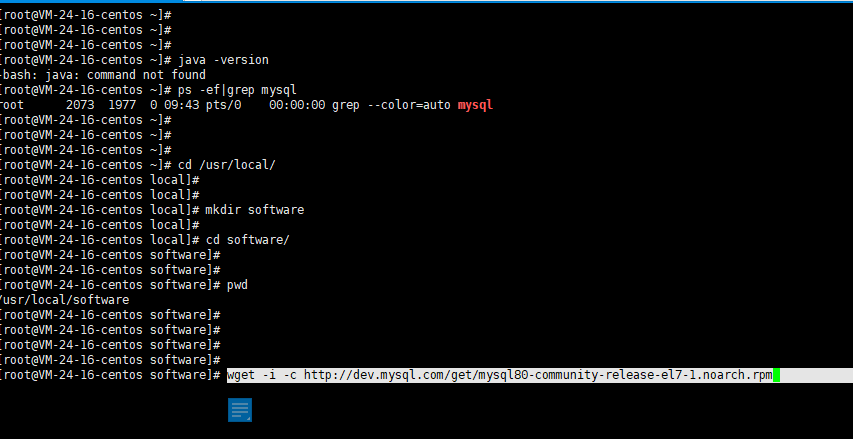
2.4 mysql 8.0 在线安装
wget -i -c http://dev.mysql.com/get/mysql80-community-release-el7-1.noarch.rpm
yum -y install mysql80-community-release-el7-1.noarch.rpm
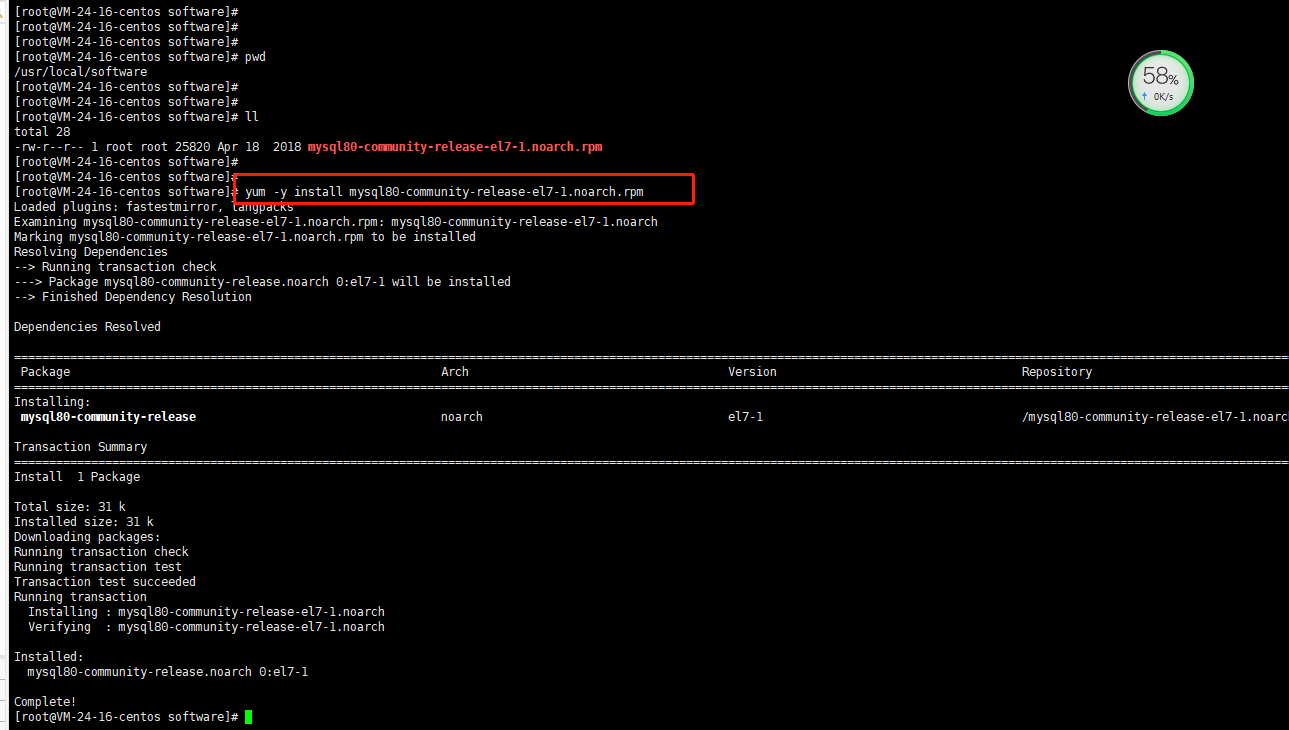
yum -y install mysql-community-server
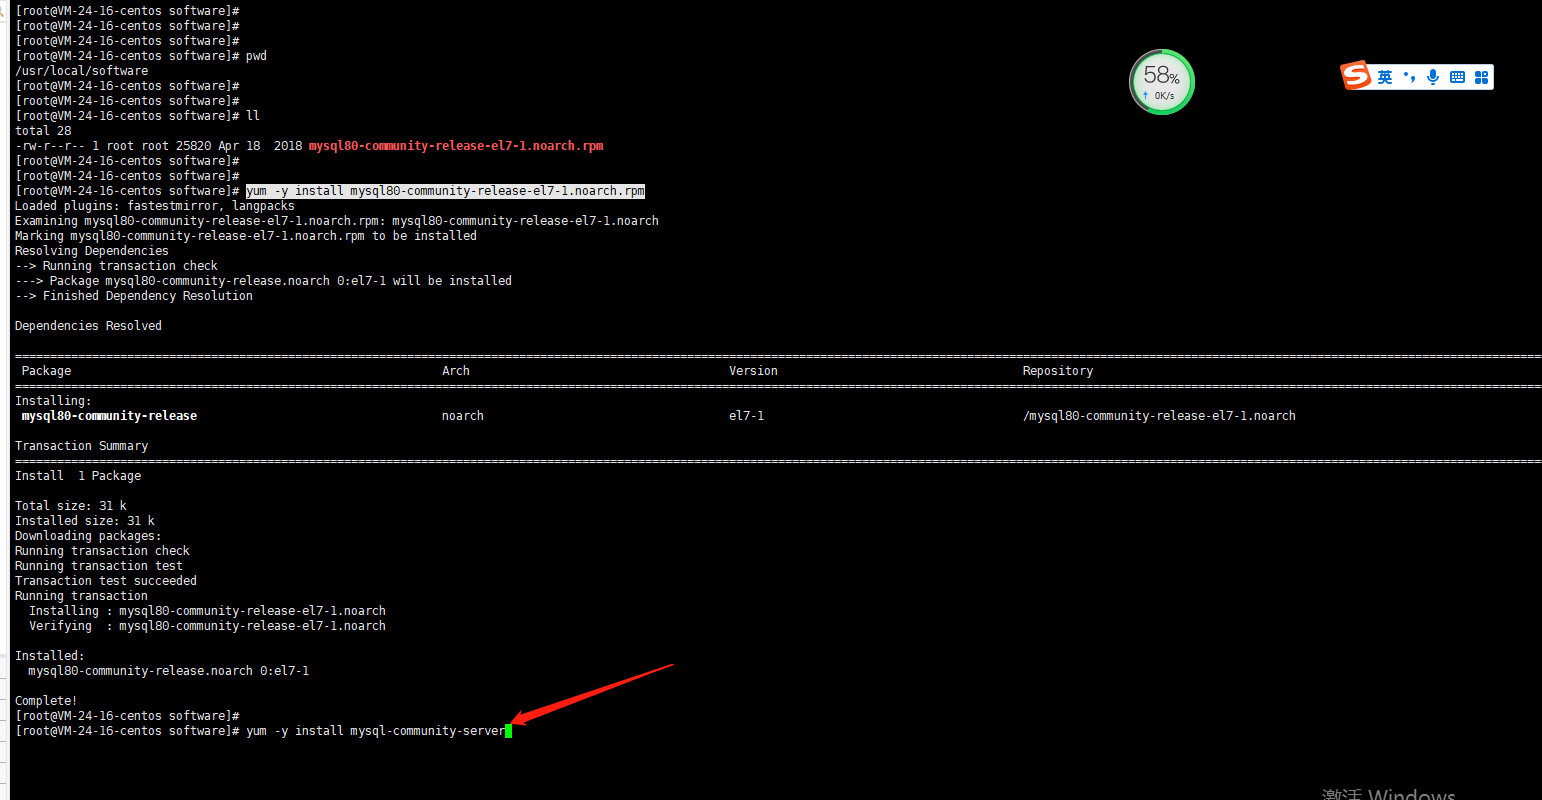
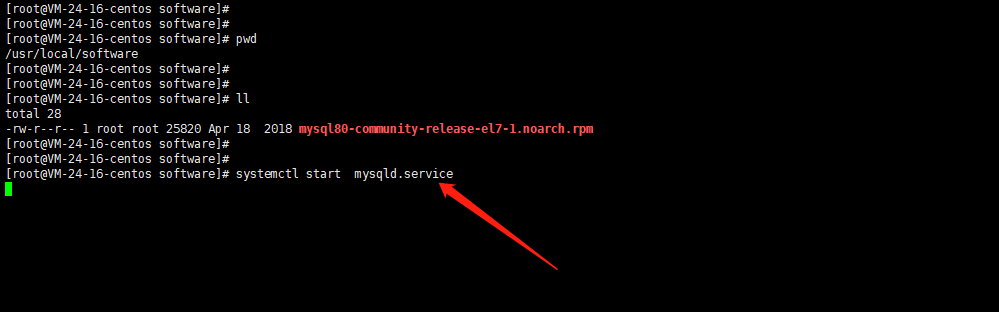
systemctl start mysqld.service
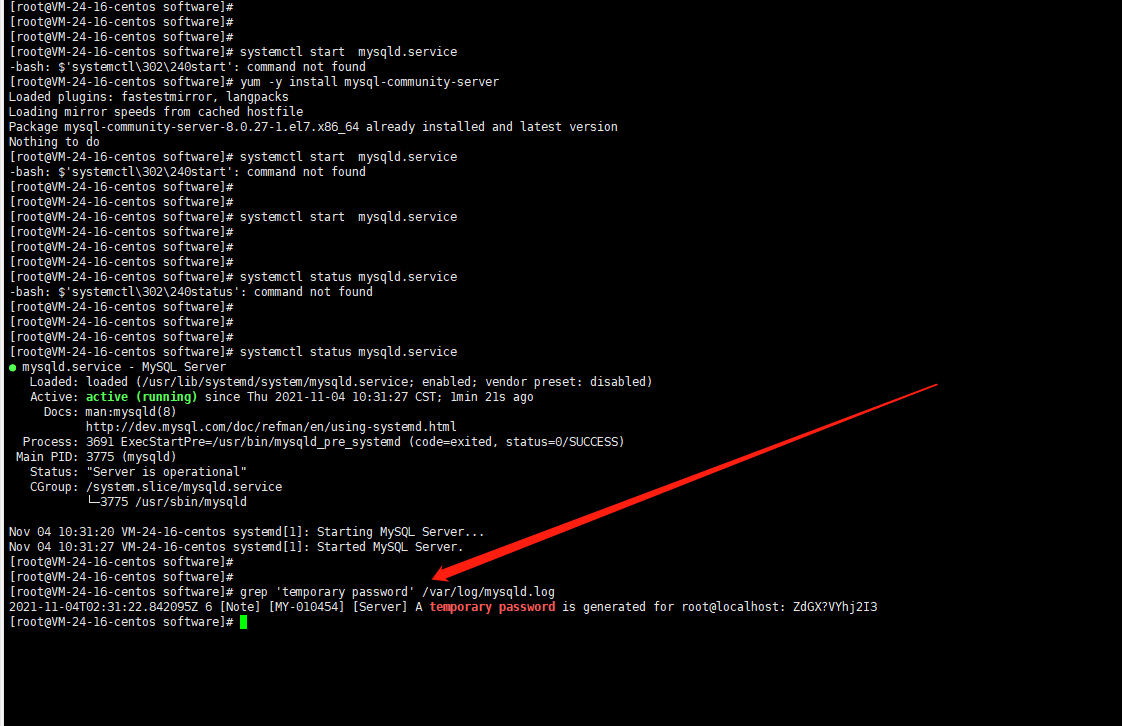
错误情景
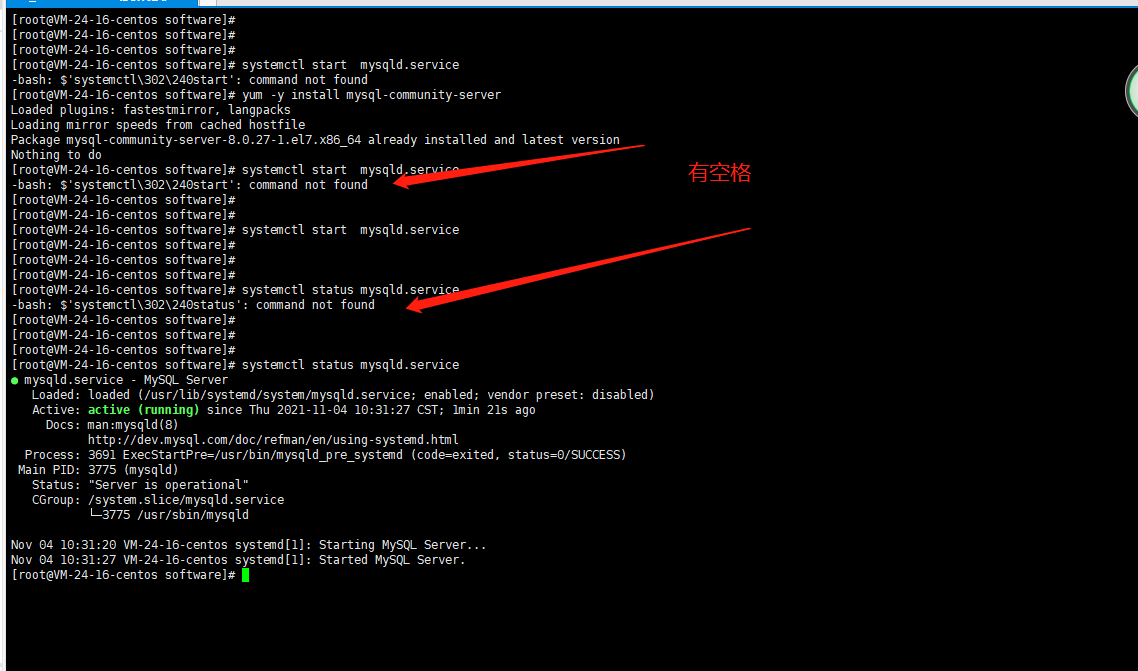
systemctl status mysqld.service

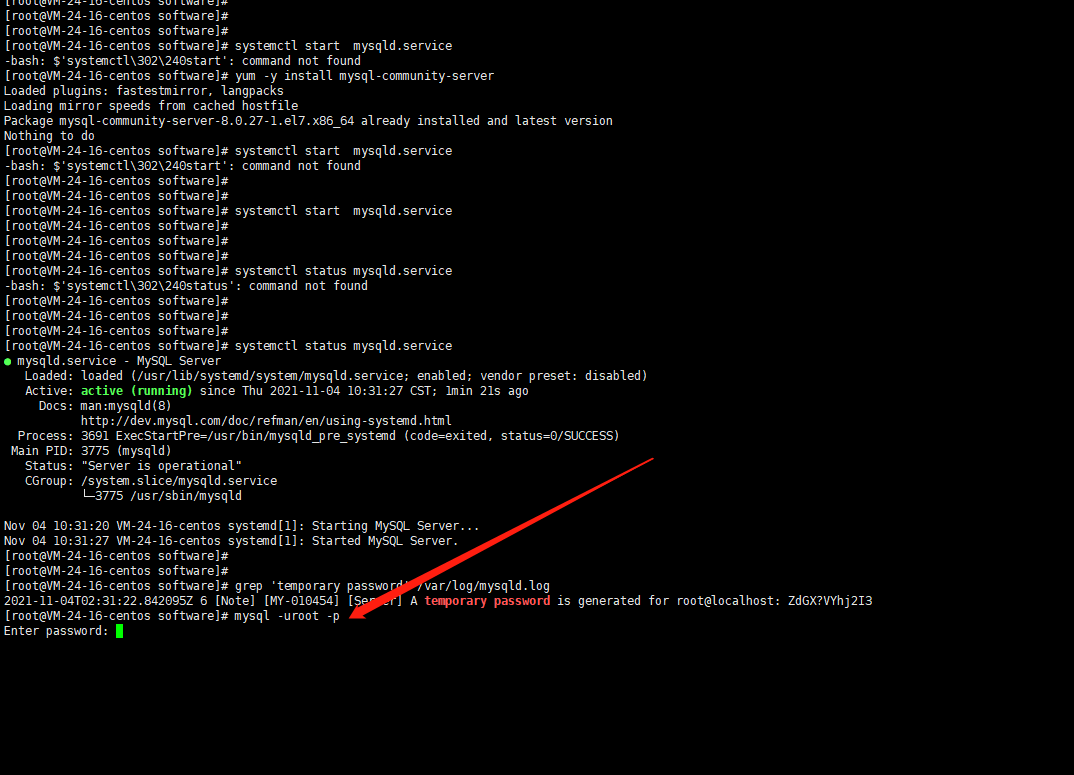
查看临时密码: grep ''temporary password'' /var/log/mysqld.log
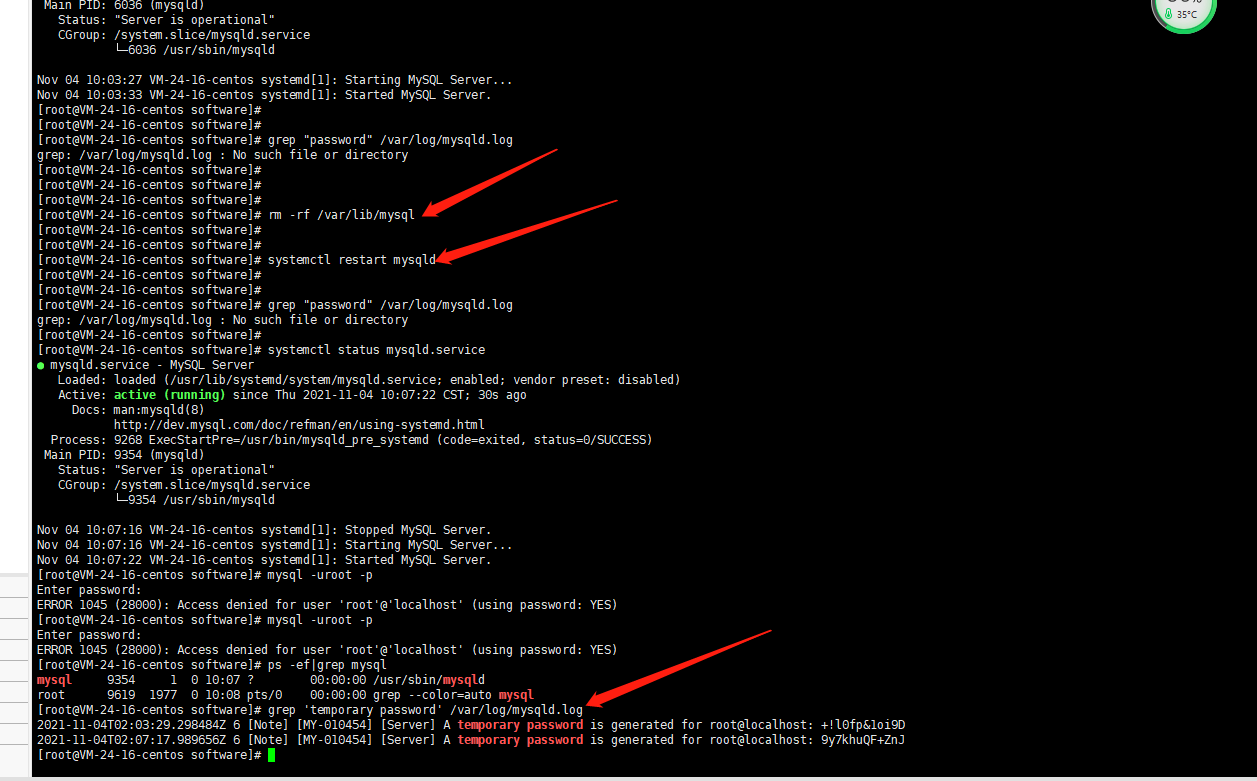
无临时密码处理方案
rm -rf /var/lib/mysql
systemctl restart mysqld
grep ''temporary password'' /var/log/mysqld.log
内部登录
修改密码:
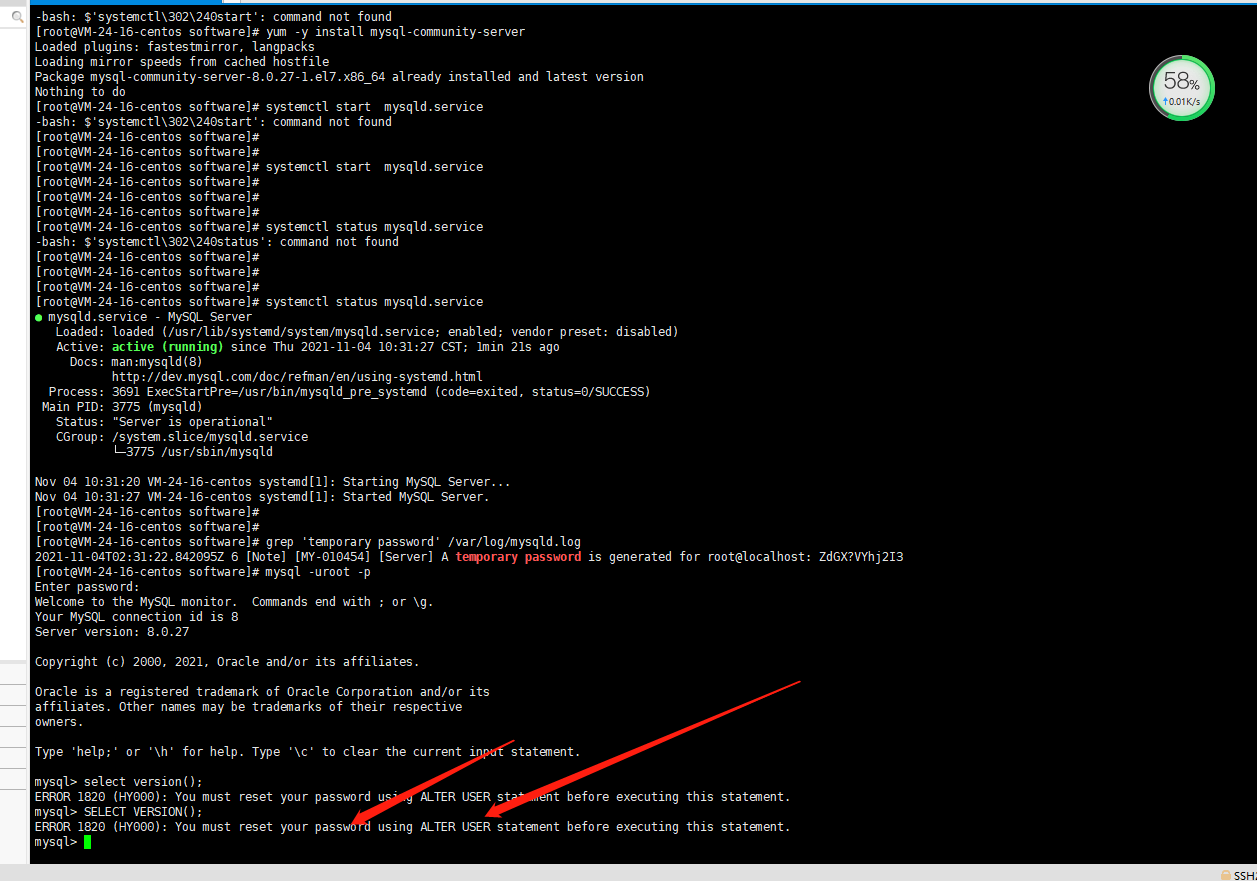
参考:https://blog.csdn.net/qq_34416331/article/details/104198487

CentOS 6.5系统卸载MySQL并安装MariaDB的方法
CentOS 6.5系统卸载MysqL并安装MariaDB的方法
关闭目前的MysqL服务 #/etc/init.d/MysqLd stop
确保已正常关闭 #ps -ef | grep MysqL
查询MysqL的安装情况: #rpm -qa | grep MysqL
将列出来的删除。 #rpm -e MysqL-server.x86_64
这里有些朋友可能会出错,形如: [root@centos-dev halc]# rpm -e MysqL-libs-5.1.69-1.el6_4.i686 error: Failed dependencies: libMysqLclient.so.16 is needed by (installed) postfix-2:2.6.6-2.2.el6_1.i686 libMysqLclient.so.16(libMysqLclient_16) is needed by (installed) postfix-2:2.6.6-2.2.el6_1.i686 MysqL-libs is needed by (installed) postfix-2:2.6.6-2.2.el6_1.i686
用这个就好了 #rpm -e --nodeps MysqL-libs-5.1.69-1.el6_4.i686
之后就能安装MariaDB了。
yum安装MariaDB的方法,去MariaDB的官网上,那里有详细说明

centos 7.0 如何安装php环境 centos7安装mariadb的正确命令
http://www.cnblogs.com/apro-abra/p/4862285.html
安装sql http://www.it165.net/os/html/201409/9234.html
install mariadb on centos 7
如何搭建lamp(CentOS7+Apache+MySQL+PHP)环境
在网上搜资料,自己在本地虚拟机上尝试搭建,弄了整整一天一夜,终于弄好了.
网上的资料,虽然很多,但大多都是重复的,拿去试了之后,又很多都不能得到正确的结果.最终找到了适合我的linux环境的搭建方式;在这里贴出来:
Install Apache,PHP And MySQL On CentOS 7 (LAMP)
度娘真不给力啊,没搜出来靠谱的方法。最后用喜乐搜找到的靠谱的教程。
这里还是要总结一下我的LAMP环境的搭建步骤。
我先在电脑里装了虚拟机,在虚拟机中测试了数次之后,再在服务器上搭建的。
说说我的环境:
虚拟机是:VMware-workstation-full-8.0.0-471780.exe;
Linux系统用的是:CentOS-7-x86_64-Minimal-1503-01.ios;(阿里云上也是用的CentOS7-64bit)
准备好这两个之后,就开始一步一步搭建我们的LAMP环境了。
一、安装虚拟机
二、安装CentOS7
注意:以下安装,我都是用的root权限。
三、安装Apache
1.安装
yum -y install httpd
2.开启apache服务
systemctl start httpd.service
3.设置apache服务开机启动
systemctl enable httpd.service
4.验证apache服务是否安装成功
在本机浏览器中输入虚拟机的ip地址,CentOS7查看ip地址的方式为:
ip addr
(阿里云不需要用这种方式查看,外网IP已经在你主机列表那里给你写出来了的;)
这里是访问不成功的
(阿里云用外网访问,能成功,不需要做以下步骤)
查了资料,说法是,CentOS7用的是Firewall-cmd,CentOS7之前用的是iptables防火墙;要想让外网能访问到apache主目录,就需要做以下的操作:
firewall-cmd --permanent --zone=public --add-service=http
firewall-cmd --permanent --zone=public --add-service=https
firewall-cmd --reload
然后再访问外网IP,如果看到apache默认的页面--有Testing 123...字样,便是成功安装了apache服务了;
四、安装PHP
1.安装
yum -y install PHP
2.重启apache服务
systemctl restart httpd或者systemctl restart httpd.service
然后,你可以写一个PHP文件在浏览器中运行一下了;
eg:
vi /var/www/html/info.PHP
i
<?PHP PHPinfo(); ?>
Esc
:wq
然后,在自己电脑浏览器输入 192.168.1.1/info.PHP
运行,会出现PHP的一些信息
五、安装MysqL
我这里根据所学的那个教程,也安装了MariaDB
1.安装
yum -y install mariadb-service mariadb
2.开启MysqL服务
systemctl start mariadb.service
3.设置开机启动MysqL服务
systemctl enable mariadb.service
4.设置root帐户的密码
MysqL_secure_installation
然后会出现一串东西,可以仔细读一下,如果你懒得读,就在提示出来的时候,按Enter就好了,让你设置密码的时候,你就输入你想要的密码就行,然后继续在让你选择y/n是,Enter就好了;当一切结束的时候,你可以输入MysqL -uroot -p的方式,验证一下;
六、将PHP和MysqL关联起来
yum search PHP,选择你需要的安装:yum -y install PHP-MysqL
七、安装常用的PHP模块
例如,GD库,curl,mbstring,...
1.安装:
yum -y install PHP-gd PHP-ldap PHP-odbc PHP-pear PHP-xml PHP-xmlrpc PHP-mbstring PHP-snmp PHP-soap curl curl-devel
2.重启apache服务
systemctl restart httpd.service
然后,再次在浏览器中运行info.PHP,你会看到安装的模块的信息;
至此,LAMP环境就搭建好了。

CentOS 7下安装MariaDB
一 通过yum方式安装MariaDB,执行命令如下:
今天关于CENTOS: 如何才CENTOS下安装MYSQL,而不是安装MARIADB的介绍到此结束,谢谢您的阅读,有关179. centos7 安装mariadb 或 mysql 卸载、CentOS 6.5系统卸载MySQL并安装MariaDB的方法、centos 7.0 如何安装php环境 centos7安装mariadb的正确命令、CentOS 7下安装MariaDB等更多相关知识的信息可以在本站进行查询。
本文标签:


