在本文中,我们将带你了解Removespurioussmallislandsofnoiseinanimage-PythonOpenCV在这篇文章中,同时我们还将给您一些技巧,以帮助您实现更有效的Asm
在本文中,我们将带你了解Remove spurious small islands of noise in an image - Python OpenCV在这篇文章中,同时我们还将给您一些技巧,以帮助您实现更有效的A small instance of visual analytics basing Spark(Python)、Amazon Personalize can now use 10X more item attributes to improve relevance of recommendations、AndroidStudio OpenCv的配置,不用安装opencv manager、bitMapToFile ERR: java.io.FileNotFoundException: /storage/emulated/0/image.jpg: open failed: EPERM (Operation not allowed) in android。
本文目录一览:- Remove spurious small islands of noise in an image - Python OpenCV
- A small instance of visual analytics basing Spark(Python)
- Amazon Personalize can now use 10X more item attributes to improve relevance of recommendations
- AndroidStudio OpenCv的配置,不用安装opencv manager
- bitMapToFile ERR: java.io.FileNotFoundException: /storage/emulated/0/image.jpg: open failed: EPERM (Operation not allowed) in android

Remove spurious small islands of noise in an image - Python OpenCV
我正试图从我的一些图像中去除背景噪音。这就是未过滤图像。
element = cv2.getStructuringElement(cv2.MORPH_RECT, (2,2)) mask = cv2.erode(mask, element, iterations = 1) mask = cv2.dilate(mask, element, iterations = 1) mask = cv2.erode(mask, element)当我从原始图像中屏蔽掉不需要的像素时
形象,我得到的是正如你所看到的,中间区域的所有小点都消失了,但是很多
那些来自人口密集地区的人也不见了。为了减少过滤,我
已尝试将“getStructuringElement()”的第二个参数更改为(1,1)
但是这样做给了我第一个图像,好像什么都没有被过滤过。
有什么方法可以在这两个之间加上一些过滤器吗
极端?
另外,有人能给我解释一下getStructuringElement()do吗?什么是“结构元素”?它有什么作用
它的大小(第二个参数)如何影响过滤级别?
答案1
小编典典你的很多问题都是因为你不知道该怎么做
形态学图像处理工作,但我们可以消除你的疑虑。你呢
可以把结构元素解释为“基本形态”来比较。1英寸
结构元素对应于要在中查看的像素
此形状和0是您要忽略的形状。有不同的形状,例如
矩形(如你用“变形矩形”算出的),椭圆,圆形,
等。
因此,cv2.getStructuringElement为您返回一个结构元素。
第一个参数指定所需的类型,第二个参数指定所需的类型
指定所需的大小。在你的例子中,你想要一个2 x 2“的矩形。。。
这真的是个正方形,但没关系。
在一个更低级的意义上,您使用结构化元素并从
从左到右,从上到下抓取像素
邻里。每个像素邻域的中心正好位于像素上
你正在看的有趣的东西。每个像素邻域的大小是
与结构元素大小相同。
侵蚀
对于侵蚀,检查像素邻域中
正在触及结构元素。如果每个非零像素都在接触
结构元素像素为1,然后是
与输入相对应的中心位置为1。如果有
至少一个不接触的非零像素
1,则输出为0。
对于矩形结构元素,您需要确保
结构元素中的每一个像素都会接触到一个非零像素
像素邻域的图像。如果不是,则输出为0,否则为1。
这有效地消除了噪声的小杂散区域,也降低了噪声
物体的面积。
矩形越大,收缩越大
执行。结构元素的大小是任何对象
比这个矩形结构元素小,你可以考虑
它们被过滤掉而不出现在输出中。基本上,选择一个
1 x 1矩形结构元素与输入图像本身相同
因为这个结构元素适合它里面的所有像素,因为像素是
图像中可能的最小信息表示。
扩张
膨胀与侵蚀相反。如果至少有一个非零像素
结构元素中的像素是1,那么在结构元素中的像素是1
1,否则输出为0。你可以认为这是一个稍微放大的物体
扩大小岛面积。
这里的大小意味着结构元素越大,
物体的面积越大,孤立的物体就越大
岛屿变成了。
你要做的是先腐蚀然后扩张。这就是
被称为打开操作。此操作的目的是移除
小岛的噪音,同时(试图)保持较大的面积
图像中的对象。侵蚀移除了这些岛屿,而膨胀
将较大的对象恢复到其原始大小。
因为某种原因,你又一次被侵蚀了,我不太明白
明白,但没关系。
我个人会做的是先执行关闭操作,这是一个
膨胀之后是腐蚀。关闭有助于对靠近的区域进行分组
一起变成一个物体。因此,你看到有一些更大的
在我们彼此接近之前
别的。因此,我会先做一个结束,然后做一个开始
之后,我们可以消除孤立的噪音区域。注意我要走了
为了使结束结构元素的大小更大,我想确定
我得到附近的像素和开口结构元素的大小小所以
我不想错误地移除任何较大的区域。
一旦你这么做了,我会用原件掩盖任何额外的信息
这样你就可以在小岛离开的时候保持较大的区域完好无损
走开。
而不是把腐蚀和膨胀联系起来
由于侵蚀,使用cv2.morphologyEx,
其中可以指定“MORPH\u OPEN”和“MORPH\u CLOSE”作为标志。
因此,我个人会这样做,假设你的形象是所谓的斑点.png:
import cv2import numpy as npimg = cv2.imread(''spots.png'')img_bw = 255*(cv2.cvtColor(img, cv2.COLOR_BGR2GRAY) > 5).astype(''uint8'')se1 = cv2.getStructuringElement(cv2.MORPH_RECT, (5,5))se2 = cv2.getStructuringElement(cv2.MORPH_RECT, (2,2))mask = cv2.morphologyEx(img_bw, cv2.MORPH_CLOSE, se1)mask = cv2.morphologyEx(mask, cv2.MORPH_OPEN, se2)mask = np.dstack([mask, mask, mask]) / 255out = img * maskcv2.imshow(''Output'', out)cv2.waitKey(0)cv2.destroyAllWindows()cv2.imwrite(''output.png'', out)上面的代码非常简单。首先,我读入图像,然后
我将图像转换为灰度和阈值,强度为5到
创建被视为对象像素的遮罩。这是一个相当干净的房间
所以任何大于5的东西似乎都起作用了。对于形态学
我需要转换图像。
接下来,我们创建两个结构元素-一个是一个5 x 5的矩形
关闭操作和另一个2 x 2的打开操作。我
运行“cv2.morphologyEx”两次以执行打开和关闭操作
分别在阈值图像上。
一旦我这样做了,我堆叠的面具,使它成为一个三维矩阵和除以
所以它变成了一个[0,1]的掩码,然后我们把这个掩码乘以
这样我们就可以抓取图像的原始像素了
以及从掩码输出中保持被认为是真实对象的内容。
剩下的只是举例说明。我在窗口中显示图像,并且
将图像保存到名为输出.png,其目的是向您展示
这张照片是什么样子的。
我明白了:
记住它并不完美,但它比你拥有它的方式要好得多
以前。你将不得不玩弄结构元素的大小来获得
你认为这是一个很好的输出,但这肯定足以
开始吧。祝你好运!
α+C版本
已经有一些请求把上面写的代码翻译成C。
使用OpenCV的版本。我终于开始写一个C++版本了
代码和它已经在opencv3.1.0上进行了测试。代码如下。
如您所见,代码与Python版本中的代码非常相似。
但是,我用cv::Mat::setTo
在原始图像的副本上设置任何不是最终图像的部分
屏蔽为0。这与执行元素乘法是一样的
在Python中。
#include <opencv2/opencv.hpp>using namespace cv;int main(int argc, char *argv[]){ // Read in the image Mat img = imread("spots.png", CV_LOAD_IMAGE_COLOR); // Convert to black and white Mat img_bw; cvtColor(img, img_bw, COLOR_BGR2GRAY); img_bw = img_bw > 5; // Define the structuring elements Mat se1 = getStructuringElement(MORPH_RECT, Size(5, 5)); Mat se2 = getStructuringElement(MORPH_RECT, Size(2, 2)); // Perform closing then opening Mat mask; morphologyEx(img_bw, mask, MORPH_CLOSE, se1); morphologyEx(mask, mask, MORPH_OPEN, se2); // Filter the output Mat out = img.clone(); out.setTo(Scalar(0), mask == 0); // Show image and save namedWindow("Output", WINDOW_NORMAL); imshow("Output", out); waitKey(0); destroyWindow("Output"); imwrite("output.png", out);}The results should be the same as what you get in the Python version.
")
A small instance of visual analytics basing Spark(Python)
A small instance of visual analytics basing Spark(Python)The total delay time of the major airlines in a certain month
1.Preparation
1.1.Data
This data set was downloaded from the U.S. Department of Transportation, Office of the Secretary of Research on November 30, 2014 and represents flight data for the domestic United States in April of 2014.
The following CSV files are lookup tables:
- airlines.csv
- airports.csv
And provided detailed information about the reference codes in the main data set. These files have header rows to identify their fields.
The flights.csv contains flight statistics for April 2014 with the following fields:
- flight date (yyyy-mm-dd)
- airline id (lookup in airlines.csv)
- flight num
- origin (lookup in airports.csv)
- destination (lookup in airports.csv)
- departure time (HHMM)
- departure delay (minutes)
- arrival time (HHMM)
- arrival delay (minutes)
- air time (minutes)
- distance (miles)
1.2.Codes—a basic template
A basic template for writing a Spark application in Python is as follows:
## Spark Application - execute with spark-submit

## Imports

from pyspark import SparkConf, SparkContext

## Module Constants

APP_NAME = "My Spark Application"

## Closure Functions

## Main functionality

def main(sc):

    pass

if __name__ == "__main__":

    # Configure Spark

    conf = SparkConf().setAppName(APP_NAME)

    conf = conf.setMaster("local[*]")

    sc   = SparkContext(conf=conf)

    # Execute Main functionality

    main(sc)
1.3. Codes—a basic template
The entire app is as follows:
## Spark Application - execute with spark-submit
## Imports
import csv
import matplotlib.pyplot as plt
from StringIO import StringIO
from datetime import datetime
from collections import namedtuple
from operator import add, itemgetter
from pyspark import SparkConf, SparkContext
## Module Constants
APP_NAME = "Flight Delay Analysis"
DATE_FMT = "%Y-%m-%d"
TIME_FMT = "%H%M"
fields   = ('date', 'airline', 'flightnum', 'origin', 'dest', 'dep',
            'dep_delay', 'arv', 'arv_delay', 'airtime', 'distance')
Flight   = namedtuple('Flight', fields)
## Closure Functions
def parse(row):
    """
    Parses a row and returns a named tuple.
    """
    row[0]  = datetime.strptime(row[0], DATE_FMT).date()
    row[5]  = datetime.strptime(row[5], TIME_FMT).time()
    row[6]  = float(row[6])
    row[7]  = datetime.strptime(row[7], TIME_FMT).time()
    row[8]  = float(row[8])
    row[9]  = float(row[9])
    row[10] = float(row[10])
    return Flight(*row[:11])
def split(line):
    """
    Operator function for splitting a line with csv module
    """
    reader = csv.reader(StringIO(line))
    return reader.next()
def plot(delays):
    """
    Show a bar chart of the total delay per airline
    """
    airlines = [d[0] for d in delays]
    minutes  = [d[1] for d in delays]
    index    = list(xrange(len(airlines)))
    fig, axe = plt.subplots()
    bars = axe.barh(index, minutes)
    # Add the total minutes to the right
    for idx, air, min in zip(index, airlines, minutes):
        if min > 0:
            bars[idx].set_color('#d9230f')
            axe.annotate(" %0.0f min" % min, xy=(min+1, idx+0.5), va='center')
        else:
            bars[idx].set_color('#469408')
            axe.annotate(" %0.0f min" % min, xy=(10, idx+0.5), va='center')
    # Set the ticks
    ticks = plt.yticks([idx+ 0.5 for idx in index], airlines)
    xt = plt.xticks()[0]
    plt.xticks(xt, [' '] * len(xt))
    # minimize chart junk
    plt.grid(axis = 'x', color ='white', linestyle='-')
    plt.title('Total Minutes Delayed per Airline')
    plt.show()
## Main functionality
def main(sc):
    # Load the airlines lookup dictionary
    airlines = dict(sc.textFile("ontime/airlines.csv").map(split).collect())
    # broadcast the lookup dictionary to the cluster
    airline_lookup = sc.broadcast(airlines)
    # Read the CSV Data into an RDD
    flights = sc.textFile("ontime/flights.csv").map(split).map(parse)
    # Map the total delay to the airline (joined using the broadcast value)
    delays  = flights.map(lambda f: (airline_lookup.value[f.airline],
                                     add(f.dep_delay, f.arv_delay)))
    # Reduce the total delay for the month to the airline
    delays  = delays.reduceByKey(add).collect()
    delays  = sorted(delays, key=itemgetter(1))
    # Provide output from the driver
    for d in delays:
        print "%0.0f minutes delayed\t%s" % (d[1], d[0])
    # Show a bar chart of the delays
    plot(delays)
if __name__ == "__main__":
    # Configure Spark
    conf = SparkConf().setMaster("local[*]")
    conf = conf.setAppName(APP_NAME)
    sc   = SparkContext(conf=conf)
    # Execute Main functionality
    main(sc)
1.4. equipments
A Ubuntu computer with spark、jdk、Scala
2.Steps
2.1.overview
data

codes

2.2. use the spark-submit command as follows:
![]()
2.3.result

2.4.Analysis
what is this code doing? Let's look particularly at the main function which does the work most directly related to Spark. First, we load up a CSV file into an RDD, then map the split function to it. The split function parses each line of text using the csvmodule and returns a tuple that represents the row. Finally we pass the collect action to the RDD, which brings the data from the RDD back to the driver as a Python list. In this case, airlines.csv is a small jump table that will allow us to join airline codes with the airline full name. We will store this jump table as a Python dictionary and then broadcast it to every node in the cluster using sc.broadcast.
Next, the main function loads the much larger flights.csv. After splitting the CSV rows, we map the parse function to the CSV row, which converts dates and times to Python dates and times, and casts floating point numbers appropriately. It also stores the row as a NamedTuple called Flight for efficient ease of use.
With an RDD of Flight objects in hand, we map an anonymous function that transforms the RDD to a series of key-value pairs where the key is the name of the airline and the value is the sum of the arrival and departure delays. Each airline has its delay summed together using the reduceByKey action and the add operator, and this RDD is collected back to the driver (again the number airlines in the data is relatively small). Finally the delays are sorted in ascending order, then the output is printed to the console as well as visualized using matplotlib.
3.Q&A3.1.ImportError: No module named matplotlib.pyplot

http://www.codeweblog.com/importerror-no-module-named-matplotlib-pyplot/
Note:
this demo came initially from the website
https://districtdatalabs.silvrback.com/getting-started-with-spark-in-python
I also find the chinese version
http://blog.jobbole.com/86232/
data come from github
https://github.com/bbengfort/hadoop-fundamentals/blob/master/data/ontime.zip

Amazon Personalize can now use 10X more item attributes to improve relevance of recommendations
https://amazonaws-china.com/blogs/machine-learning/amazon-personalize-can-now-use-10x-more-item-attributes-to-improve-relevance-of-recommendations/
Amazon Personalize is a machine learning service which enables you to personalize your website, app, ads, emails, and more, with custom machine learning models which can be created in Amazon Personalize, with no prior machine learning experience. AWS is pleased to announce that Amazon Personalize now supports ten times more item attributes for modeling in Personalize. Previously, you could use up to five item attributes while building an ML model in Amazon Personalize. This limit is now 50 attributes. You can now use more information about your items, for example, category, brand, price, duration, size, author, year of release etc., to increase the relevance of recommendations.
In this post, you learn how to add item metadata with custom attributes to Amazon Personalize and create a model using this data and user interactions. This post uses the Amazon customer reviews data for beauty products. For more information and to download this data, see Amazon Customer Reviews Dataset. We will use the history of what items the users have reviewed along with user and item metadata to generate product recommendations for them.
Pre-processing the data
To model the data in Amazon Personalize, you need to break it into the following datasets:
- Users – Contains metadata about the users
- Items – Contains metadata about the items
- Interactions – Contains interactions (for this post, reviews) and metadata about the interactions
For each respective dataset, this post uses the following attributes:
- Users –
customer_id,helpful_votes, andtotal_votes - Items –
product_id,product_category, andproduct_parent - Interactions –
product_id,customer_id,review_date, andstar_rating
This post does not use the other attributes available, which include marketplace, review_id, product_title, vine, verified_purchase, review_headline, and review_body.
Additionally, to conform with the keywords in Amazon Personalize, this post renames customer_id to USER_ID, product_id to ITEM_ID, and review_date to TIMESTAMP.
To download and process the data for input to Amazon Personalize, use the following Python example codes.
For the Users dataset, enter the following code:
#Downloading data
$aws s3 cp s3://amazon-reviews-pds/tsv/amazon_reviews_us_Beauty_v1_00.tsv.gz .
$gunzip amazon_reviews_us_Beauty_v1_00.tsv.gz
#Generating the user dataset
import pandas as pd
fields = [''customer_id'', ''helpful_votes'', ''total_votes'']
df = pd.read_csv(''amazon_reviews_us_Beauty_v1_00.tsv'', sep=''\t'', usecols=fields)
df = df.rename(columns={''customer_id'':''USER_ID''})
df.to_csv(''User_dataset.csv'', index = None, header=True)The following screenshot shows the Users dataset. This output can be generated by
df.head()
For the Items dataset, enter the following code:
#Generating the item dataset
fields = [''product_id'', ''product_category'', ''product_parent'']
df1 = pd.read_csv(''amazon_reviews_us_Beauty_v1_00.tsv'', sep=''\t'', usecols=fields)
df1= df1.rename(columns={''product_id'':''ITEM_ID''})

#Clip category names to 999 characters to confirm to Personalize limits
maxlen = 999
for index, row in df1.iterrows():
    product_category = row[''product_category''][:maxlen]
df1.to_csv(''Item_dataset.csv'', index = None, header=True)
The following screenshot shows the Items dataset. This output can be generated by
df1.head()
For the Interactions dataset, enter the following code:
#Generating the interactions dataset
from datetime import datetime
fields = [''product_id'', ''customer_id'', ''review_date'', ''star_rating'']
df2 = pd.read_csv(''amazon_reviews_us_Beauty_v1_00.tsv'', sep=''\t'', usecols=fields, low_memory=False)
df2= df2.rename(columns={''product_id'':''ITEM_ID'', ''customer_id'':''USER_ID'', ''review_date'':''TIMESTAMP''})

#Converting timstamp to UNIX timestamp and rounding milliseconds
num_errors =0
for index, row in df2.iterrows():
    time_input= row["TIMESTAMP"]
    try:
        time_input = datetime.strptime(time_input, "%Y-%m-%d")
        timestamp = round(datetime.timestamp(time_input))
        df2.set_value(index, "TIMESTAMP", timestamp)
    except:
        print("exception at index: {}".format(index))
        num_errors += 1
print("Total rows in error: {}".format(num_errors))
df2.to_csv("Interaction_dataset.csv", index = None, header=True)
The following screenshot shows the Interactions dataset. This output can be generated by
df2.head()
Ingesting the data
After you process the preceding data, you can ingest it in Amazon Personalize.
Creating a dataset group
To create a dataset group to store events (user interactions) sent by your application and the metadata for users and items, complete the following steps:
- On the Amazon Personalize console, under Dataset groups, choose Create dataset group.
- For Dataset group name, enter the name of your dataset group. This post enters the name
DemoLimitIncrease. - Choose Next.
Creating a dataset and defining schema
After you create the dataset group, create a dataset and define schema for each of them. The following steps are for your Items dataset:
- For Dataset name, enter a name.
- Under Schema details, select Create new schema.
- For New schema name, enter a name.
- For Schema definition, enter the following code:
{ "type": "record", "name": "Items", "namespace": "com.amazonaws.personalize.schema", "fields": [ { "name": "ITEM_ID", "type": "string" }, { "name": "product_parent", "type": "string", "categorical": true }, { "name": "product_category", "type": "string", "categorical": true } ], "version": "1.0"} - Choose Next.

Follow the same steps for the Users and Interactions datasets and define the schema to conform to the columns you want to import.
Importing the data
After you create the dataset, import the data from Amazon S3. Make sure you provide Amazon Personalize read access to your bucket. To import your Items data, complete the following steps:
- Under Dataset import job details, for Dataset import job name, enter a name.
- For IAM Service role, choose AmazonPersonalize-ExecutionRole.
- For Data location, enter the location of your S3 bucket.
- Choose Create dataset import job.
Follow the same steps to import your Users and Interactions datasets.
Training a model
After you ingest the data into Amazon Personalize, you are ready to train a model (solutionVersion). To do so, map the recipe (algorithm) you want to use to your use case. The following are your available options:
- For user personalization, such as recommending items to a user, use one of the following recipes:
- HRNN – Trains only on interaction data and provides a baseline
- HRNN-Metadata – Trains on interaction+user, item, and interaction metadata and is recommended when you have such data available
- HRNN-Coldstart – Use when you want to recommend cold (new) items to a user
- For recommending items similar to an input item, use SIMS.
- For reranking a list of input items for a given user, use Personalized-Ranking.
This post uses the HRNN-Metadata recipe to define a solution and then train a solutionVersion (model). Complete the following steps:
- On the Amazon Personalize console, under Dataset groups, choose DemoLimitIncrease.
- Choose Solutions.
- Choose Create solution.
- Under Solution configuration, for Solution name, enter a name
- For Recipe selection, select Manual.
- For Recipe, choose aws-hrnn-metadata.
- Choose Next.
You can also change the default hyperparameters or perform hyperparameter optimization for a solution.
Getting recommendations
To get recommendations, create a campaign using the solution and solution version you just created. Complete the following steps:
- Under Dataset groups, under DemoLimitIncrease, choose Campaigns.
- Choose Create new campaign.
- Under Campaign details, for Campaign name, enter a name
- For Solution, choose the solution name from previous step.
- For Solution version ID, choose the solution version you just created.
- For Minimum provisioned transactions per second, enter 1.
- Choose Create campaign.
- After the campaign is created you can see the details in the console and use it to get recommendations.
After you set up the campaign, you can programmatically call the campaign to get recommendations in form of item IDs. You can also use the console to get the recommendations and perform spot checks. Additionally, Amazon Personalize offers the ability to batch process recommendations. For more information, see Now available: Batch Recommendations in Amazon Personalize.
Conclusion
You can now use these recommendations to power display experiences, such as personalize the homepage of your beauty website based on what you know about the user or send a promotional email with recommendations. Performing real-time recommendations with Amazon Personalize requires you to also send user events as they occur. For more information, see Amazon Personalize is Now Generally Available. Get started with Amazon Personalize today!
About the author
 Vaibhav Sethi is the Product Manager for Amazon Personalize. He focuses on delivering products that make it easier to build machine learning solutions. In his spare time, he enjoys hiking and reading.

AndroidStudio OpenCv的配置,不用安装opencv manager
按照以下操作步骤配置并测试了,没问题。
-
下载OpenCV sdk for Android,解压(我的解压地址是F:\OpenCV-android-sdk)
-
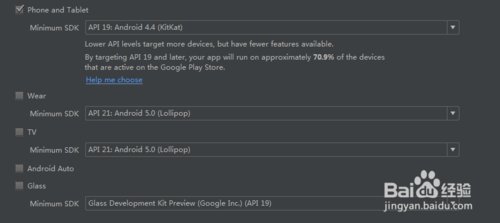
1)新建项目项目,取名为Opencvtest(名字随便取)
2)Minimum SDK 选择 API 19:Android 4.4 (KitKat)
3)选择Empty Activity


-
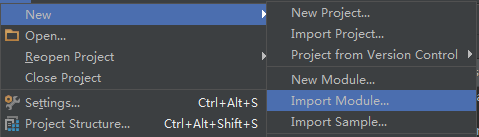
Android Studio菜单-->File-->New-->Import Module
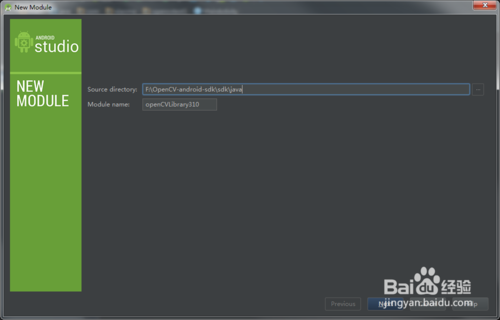
1)选择F:\OpenCV-android-sdk/sdk/java
2)Module name: Android studio会自动填充这项为openCVLibrary310 ,不用管它.
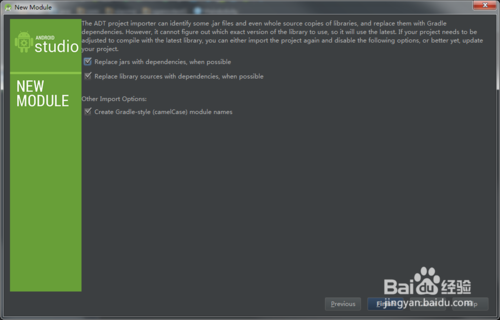
3)点击下一步,会出现三个复选框,都选上,点击Finish
-
1)File-->Project Structure
2)左边Modules栏下选择app
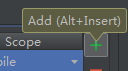
3)在右边上面一栏中选择Dependencies
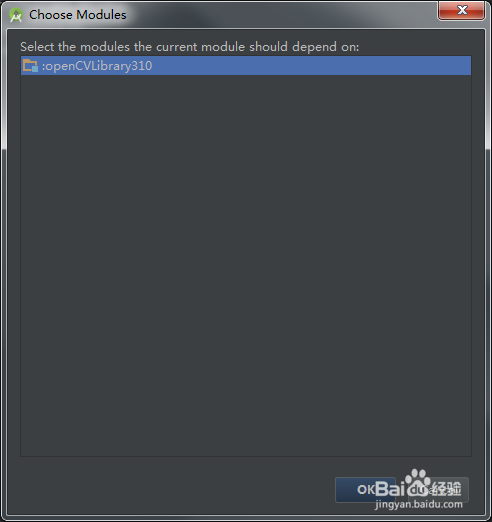
4)点击右边栏中的“+”,选择第三个Module Dependency
5)点击ok退出,然后再点击ok退出


-
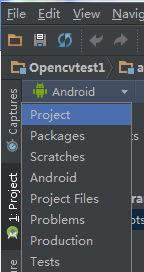
1)将视图由Android切换到Project,如图所示
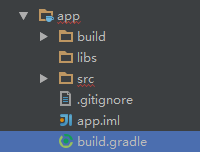
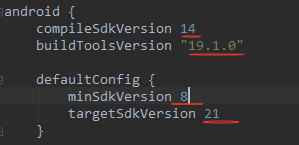
2)点击app,打开app根目录下的build.gradle文件,记下
compileSdkVersion
buildToolsVersion
minSdkVersion
targetSdkVersion
后面的数值
3)点击openCVLibrary310,打开根目录下的build.gradle文件,把文件中
compileSdkVersion
buildToolsVersion
minSdkVersion
targetSdkVersion
后的数值改成app中一样的
4)点击上方Gradle project sync一行中的Try Again


-
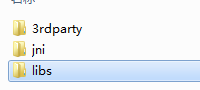
1)把OpenCV sdk for Android文件下F:\OpenCV-android-sdk\sdk\native下的libs文件夹拷贝到你的安卓项目下,即Opencvtest\app\src\main下面,并且将libs改名为jniLibs
2)此时前期准备工作就完成了,接下来可以用opencv中程序测试下
3)打开你的主活动MainActivity.java文件,记下包名,我的是
package com.xiaoma.opencvtest;,则我的包名就是com.xiaoma.opencvtest

-
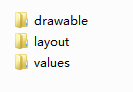
1)将OpenCV-android-sdk\samples\image-manipulations\res中的三个文件(如图所示),拷贝到你的安卓项目Opencvtest\app\src\main\res下(拷贝前先将此目录下的同名的三个文件删掉)
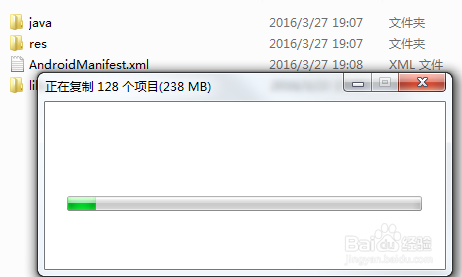
2)将OpenCV-android-sdk\samples\image-manipulations中的AndroidManifest.xml文件,拷贝到你的安卓项目Opencvtest\app\src\main下替换
3)将OpenCV-android-sdk\samples\image-manipulations\src\org\opencv\samples\imagemanipulations中的ImageManipulationsActivity.java文件,拷贝到你的安卓项目Opencvtest\app\src\main\java\com\xiaoma\opencvtest下,并且把原来的MainActivity.java文件删掉。其中\com\xiaoma\这段根据每个人的包名不同会不一样
-
1)在Android Studio中打开ImageManipulationsActivity.java,AndroidManifest.xml
2)把文件中的包名,换成第六步骤中你记下的包名
3)AndroidManifest.xml文件下的的uses-sdk android:minSdkVersion的值改成第五步骤中记下的值
4)注意这一步在改AndroidManifest.xml文件中的包名时不要把原来的“”给粘贴没了

-
有些手机运行时可能会弹出
It seems that you device does not support camera(or it is locked).Application will be closed.
这时候打开手机应用权限管理,找到该程序应用,把它的相机的权限改为允许就可以了
 in android")
bitMapToFile ERR: java.io.FileNotFoundException: /storage/emulated/0/image.jpg: open failed: EPERM (Operation not allowed) in android
如何解决bitMapToFile ERR: java.io.FileNotFoundException: /storage/emulated/0/image.jpg: open failed: EPERM (Operation not allowed) in android?
我尝试使用 BitMapToFile 代码,但它有错误!!
class ImageProcess {

    companion object {
        fun bitmapToFile(imageBitmap: Bitmap,filename: String): File? {
            val sd = Environment.getExternalStorageDirectory()
            val dest = File(sd,filename)

            try {
                val out = FileOutputStream(dest) //problem
                imageBitmap.compress(Bitmap.CompressFormat.PNG,100,out)
                out.flush()
                out.close()
            } catch (e: Exception) {
                e.printstacktrace()
            }

            return dest

        }
    }

}
这个错误!
W/System.err: java.io.FileNotFoundException: /storage/emulated/0/image.jpg: open Failed: EPERM (Operation not permitted)
        at libcore.io.IoBridge.open(IoBridge.java:492)
W/System.err:     at java.io.FileOutputStream.<init>(FileOutputStream.java:236)
但我有android:requestLegacyExternalStorage="true"
在文件 AndroidManifest.xml 中
<application
        android:allowBackup="true"
        android:icon="@mipmap/ic_launcher"
        android:label="@string/app_name"
        android:requestLegacyExternalStorage="true"
        android:roundIcon="@mipmap/ic_launcher_round"
        android:supportsRtl="true"
        android:theme="@style/Theme.TestFirst"
        android:usesCleartextTraffic="true">
解决方法
暂无找到可以解决该程序问题的有效方法,小编努力寻找整理中!
如果你已经找到好的解决方法,欢迎将解决方案带上本链接一起发送给小编。
小编邮箱:dio#foxmail.com (将#修改为@)
关于Remove spurious small islands of noise in an image - Python OpenCV的介绍现已完结,谢谢您的耐心阅读,如果想了解更多关于A small instance of visual analytics basing Spark(Python)、Amazon Personalize can now use 10X more item attributes to improve relevance of recommendations、AndroidStudio OpenCv的配置,不用安装opencv manager、bitMapToFile ERR: java.io.FileNotFoundException: /storage/emulated/0/image.jpg: open failed: EPERM (Operation not allowed) in android的相关知识,请在本站寻找。
本文标签:


 in android)