如果您对CentOS笔记和centos笔记本关闭盖子感兴趣,那么这篇文章一定是您不可错过的。我们将详细讲解CentOS笔记的各种细节,并对centos笔记本关闭盖子进行深入的分析,此外还有关于Cent
如果您对CentOS笔记和centos笔记本关闭盖子感兴趣,那么这篇文章一定是您不可错过的。我们将详细讲解CentOS笔记的各种细节,并对centos笔记本关闭盖子进行深入的分析,此外还有关于CentOS 6.8操作系统安装PostGIS笔记、CentOS 6.9 yum 和源码安装 htop,适用于 centOS 7、centos 67安装nginx 110 centos7 nginx php centos官网 centos下、CentOS 7.0 yum install 错误http://vault.centos.org/centos/7/os/Source/repodata/repomd.xml: [Errno 14]的实用技巧。
本文目录一览:- CentOS笔记(centos笔记本关闭盖子)
- CentOS 6.8操作系统安装PostGIS笔记
- CentOS 6.9 yum 和源码安装 htop,适用于 centOS 7
- centos 67安装nginx 110 centos7 nginx php centos官网 centos下
- CentOS 7.0 yum install 错误http://vault.centos.org/centos/7/os/Source/repodata/repomd.xml: [Errno 14]
")
CentOS笔记(centos笔记本关闭盖子)
1、用户管理
以root用户登录,实施用户管理
useradd:添加用户
userdel:删除用户
passwd:修改密码(若不带参数则为修改自己的密码)

CentOS 6.8操作系统安装PostGIS笔记
CentOS 6.8操作系统安装PostGIS笔记
首先顺便利一下SSH工具的选择。因为我不能操作安装CentOS系统的机器,只能远程操作。所以在工作进行之前必须选择一款好的SSH工具。以前操作Oracle Red Hat Enterprise Linux系统的时候用SSHSecureShellClient工具挺顺手的。这次远程登录到CentOS操作系统后中文全部乱码。于是选择了PuTTY工具。
首先在Windows系统上启动PuTTY,远程登录到CentOS系统,如下所示:
login as: root
root@192.168.8.155's password:
Active connection state: activated
Active connection path: /org/freedesktop/NetworkManager/ActiveConnection/2
[root@db ~]# ls
anaconda-ks.cfg install.log install.log.syslog
安装Postgresql
安装大型软件经常要拷贝文件,需要创建一个固定的文件夹用来存放专用文件。
[root@db /]# mkdir /home/postgis
[root@db /]# ls -l /home/postgis
total 0
[root@db /]#
CentOS软件列表默认没有Postgressql,所有要先从Postgresql下载rpm包。这个包主要用来在软件源中加入Postgresql,以便使用yum install命令安装。下载链接如下:
http://yum.postgresql.org/9.4/redhat/rhel6x86_64/pgdgredhat949.41.noarch.rpm
我放到了F盘的根目录。接下来要用SSH管道传递到远程服务器。与PuTTY配套的工具还有很多,这里使用配套的PSCP工具。我把pscp.exe复制到了Windows目录,这样不用设置环境不用切换目录,打开Windows控制台窗口,输入命令,如下所示:
C:\Users\xuesongshu>pscp f:\pgdg-redhat94-9.4-1.noarch.rpm root@192.168.8.155:/home/postgis
root@192.168.8.155's password:
pgdg-redhat94-9.4-1.noarc | 5 kB | 5.2 kB/s | ETA: 00:00:00 | 100%
C:\Users\xuesongshu>
然后安装:
[root@db /]# cd /home/postgis
[root@db postgis]# yum install pgdg-redhat94-9.4-1.noarch.rpm login as: root
Loaded plugins: fastestmirror,refresh-packagekit,security
Setting up Install Process
Examining pgdg-redhat94-9.4-1.noarch.rpm: pgdg-redhat94-9.4-1.noarch
Marking pgdg-redhat94-9.4-1.noarch.rpm to be installed
Loading mirror speeds from cached hostfile
如下图所示,输入Y:
至此提示则成功
Downloading Packages:
Running rpm_check_debug
Running Transaction Test
Transaction Test Succeeded
Running Transaction
Installing : pgdg-redhat94-9.4-1.noarch 1/1
Verifying : pgdg-redhat94-9.4-1.noarch 1/1
Installed:
pgdg-redhat94.noarch 0:9.4-1
Complete!
[root@db postgis]#
输入命令安装Postgresql,如下所示:
[root@db postgis]# yum install postgresql94-server postgresql94-contrib
在随后的提示中都输入Y即可,静待下载和安装,等待时间由网速决定。出现以下提示则表示安装成功。
Installed:
postgresql94-contrib.x86_64 0:9.4.8-1PGDG.rhel6
postgresql94-server.x86_64 0:9.4.8-1PGDG.rhel6
Dependency Installed:
postgresql94.x86_64 0:9.4.8-1PGDG.rhel6
postgresql94-libs.x86_64 0:9.4.8-1PGDG.rhel6
Complete!
[root@db postgis]#
配置Postgresql
Postgresql以默认方式安装完成之后不能马上投入使用,必须进行配置。首先初始化并启动服务,如下所示:
[root@db /]# service postgresql-9.4 initdb
Initializing database: [ OK ]
[root@db /]# chkconfig postgresql-9.4 on
[root@db /]#
编辑pg_hba.conf,如下所示:
[root@db /]# cd /var/lib/pgsql/9.4/data
[root@db data]# ls
base pg_ident.conf pg_replslot pg_subtrans postgresql.auto.conf
global pg_log pg_serial pg_tblspc postgresql.conf
pg_clog pg_logical pg_snapshots pg_twophase
pg_dynshmem pg_multixact pg_stat PG_VERSION
pg_hba.conf pg_notify pg_stat_tmp pg_xlog
[root@db data]# vi pg_hba.conf
按向下键快速向后找到以下文字:
# Put your actual configuration here
# ----------------------------------
#
# If you want to allow non-local connections,you need to add more
# "host" records. In that case you will also need to make Postgresql
# listen on a non-local interface via the listen_addresses
# configuration parameter,or via the -i or -h command line switches.
# TYPE DATABASE USER ADDRESS METHOD
紧接在这里的是Postgresql的服务配置:
# TYPE DATABASE USER ADDRESS METHOD
# "local" is for Unix domain socket connections only
local all all peer
# IPv4 local connections:
host all all 127.0.0.1/32 ident
# IPv6 local connections:
host all all ::1/128 ident
# Allow replication connections from localhost,by a user with the
# replication privilege.
#local replication postgres peer
#host replication postgres 127.0.0.1/32 ident
#host replication postgres ::1/128 ident
按shift+I键进入编辑状态,改成如下所示:
然后按Esc键,输入:wq!命令保存文件,如下图所示。
编辑postgresql.conf文件,如下所示:
[root@db data]# vi postgresql.conf
按向下键快速向后查看找到以下文字:
#ident_file = 'ConfigDir/pg_ident.conf' # ident configuration file
# (change requires restart)
# If external_pid_file is not explicitly set,no extra PID file is written.
#external_pid_file = '' # write an extra PID file
# (change requires restart)
#------------------------------------------------------------------------------
# CONNECTIONS AND AUTHENTICATION
#------------------------------------------------------------------------------
# - Connection Settings -
紧接下来的是服务配置文字如下:
# - Connection Settings -
#listen_addresses = 'localhost' # what IP address(es) to listen on;
# comma-separated list of addresses;
# defaults to 'localhost'; use '*' for all
# (change requires restart)
#port = 5432 # (change requires restart)
max_connections = 100 # (change requires restart)
按shift+I键进入编辑状态,改成如下所示:
按Esc键后输入:wq!保存文件。
编辑环境变量,如下所示:
[root@db data]# cd /etc/
[root@db etc]# vi profile
按向下键快速向后移到光标,找到以下文字:
HOSTNAME=`/bin/hostname 2>/dev/null`
HISTSIZE=1000
if [ "$HISTCONTROL" = "ignorespace" ] ; then
export HISTCONTROL=ignoreboth
else
export HISTCONTROL=ignoredups
fi
export PATH USER LOGNAME MAIL HOSTNAME HISTSIZE HISTCONTROL
改成:
HOSTNAME=`/bin/hostname 2>/dev/null`
HISTSIZE=1000
if [ "$HISTCONTROL" = "ignorespace" ] ; then
export HISTCONTROL=ignoreboth
else
export HISTCONTROL=ignoredups
fi
export PGHOME=/usr/pgsql-9.4
export PGDATA=/var/lib/pgsql/9.4/data
export PATH=$PGHOME/bin:$PATH
export PATH USER LOGNAME MAIL HOSTNAME HISTSIZE HISTCONTROL
按Esc键,输入:wq!,然后回车保存文件。
使环境变量立即生效,如下所示:
[root@db etc]# source /etc/profile
Active connection state: activated
Active connection path: /org/freedesktop/NetworkManager/ActiveConnection/3
[root@db etc]#
如果防火墙已经打开,那么输入以下命令关闭防火墙:
systemctl stop firewalld.service
systemctl disable firewalld.service
如果企业用户没有网关防火墙则不建议直接关闭防火墙,而是增加端口规则。
Postgresql服务不允许以root身份启动,所以要切换到postgres用户。首先可看postgres用户是否存在。
[root@db etc]# cat /etc/passwd | grep -i postgres
postgres:x:26:26:Postgresql Server:/var/lib/pgsql:/bin/bash
[root@db etc]#
如果输出为空则表示用户不存在,需要新建用户。如果已经存在,则需要修改用户密码。用户密码需要分两步修改。首先修改系统的postgres用户的密码:
[root@db etc]# passwd postgres
Changing password for user postgres.
New password:
Retype new password:
passwd: all authentication tokens updated successfully.
[root@db etc]#
切换到postgres用户:
[root@db etc]# su postgres
bash-4.1$
尝试重启或启动Postgresql服务
bash-4.1$ pg_ctl restart
pg_ctl: PID file "/var/lib/pgsql/9.4/data/postmaster.pid" does not exist
Is server running?
starting server anyway
pg_ctl: Could not read file "/var/lib/pgsql/9.4/data/postmaster.opts"
bash-4.1$ pg_ctl start
server starting
bash-4.1$ < 2016-06-28 23:46:04.688 CST >LOG: redirecting log output to logging collector process
< 2016-06-28 23:46:04.688 CST >HINT: Future log output will appear in directory "pg_log".
bash-4.1$
注意服务启动成功时命令行没有返回用户的bash,按一下回车即可。
进入psql命令行:
bash-4.1$ psql
psql (9.4.8)
Type "help" for help.
postgres=#
修改数据库的postgres用户的密码:
alter user postgres with password '最好与系统的用户密码相同';
命令中的红色文字请自行更改为您自己的密码,然后执行命令,如下所示:
postgres=# alter user postgres with password '不告诉你^_^^_^';
ALTER ROLE
postgres=#
退出测试一下:
postgres=# \q
bash-4.1$ psql -h 192.168.8.155 -p 5432 -d postgres -U postgres -W
Password for user postgres:
psql (9.4.8)
Type "help" for help.
postgres=#
至此可以用pgAdmin工具远程登录数据库系统了。
安装PostGIS
首选检查PostGIS是否存在源列表中:
postgres=# \q
bash-4.1$ exit
exit
[root@db etc]# yum list | grep -i postgis
postgis.x86_64 1.3.6-1.el6.rf rpmforge
postgis-utils.x86_64 1.3.6-1.el6.rf rpmforge
postgis2_94.x86_64 2.1.8-1.rhel6 pgdg94
postgis2_94-client.x86_64 2.1.8-1.rhel6 pgdg94
postgis2_94-debuginfo.x86_64 2.1.8-1.rhel6 pgdg94
postgis2_94-devel.x86_64 2.1.8-1.rhel6 pgdg94
postgis2_94-docs.x86_64 2.1.8-1.rhel6 pgdg94
postgis2_94-utils.x86_64 2.1.8-1.rhel6 pgdg94
[root@db etc]#
尝试安装:
[root@db etc]# yum install postgis2_94
如果出现这些提示,则表示缺少依赖项:
Error: Package: gdal-libs-1.9.2-7.rhel6.x86_64 (pgdg94)
Requires: libnetcdf.so.6()(64bit)
Error: Package: gdal-libs-1.9.2-7.rhel6.x86_64 (pgdg94)
Requires: libdap.so.11()(64bit)
Error: Package: gdal-libs-1.9.2-7.rhel6.x86_64 (pgdg94)
Requires: libspatialite.so.2()(64bit)
Error: Package: gdal-libs-1.9.2-7.rhel6.x86_64 (pgdg94)
Requires: libfreexl.so.1()(64bit)
Error: Package: gdal-libs-1.9.2-7.rhel6.x86_64 (pgdg94)
Requires: libdapserver.so.7()(64bit)
Error: Package: gdal-libs-1.9.2-7.rhel6.x86_64 (pgdg94)
Requires: libCharLS.so.1()(64bit)
Error: Package: gdal-libs-1.9.2-7.rhel6.x86_64 (pgdg94)
Requires: libarmadillo.so.4()(64bit)
You Could try using --skip-broken to work around the problem
You Could try running: rpm -Va --nofiles --nodigest
从网上下载epel-release-6-8.noarch.rpm,放到F盘根目录。下载地址是:
http://dl.fedoraproject.org/pub/epel/6/x86_64/epelrelease68
用pscp工具上传到远程服务器,如下所示:
C:\Users\xuesongshu>pscp f:\epel-release-6-8.noarch.rpm root@192.168.8.155:/home/postgis
root@192.168.8.155's password:
epel-release-6-8.noarch.r | 14 kB | 14.2 kB/s | ETA: 00:00:00 | 100%
C:\Users\xuesongshu>
安装epel-release-6-8.noarch.rpm,如下所示:
[root@db etc]# cd /home/postgis
[root@db postgis]# rpm -ivh epel-release-6-8.noarch.rpm
warning: epel-release-6-8.noarch.rpm: Header V3 RSA/SHA256 Signature,key ID 0608b895: NOKEY
Preparing... ########################################### [100%]
1:epel-release ########################################### [100%]
[root@db postgis]#
再次运行:
[root@db postgis]# yum install postgis2_94
静静等待下载安装即可,等待时间取决于网速。在所有的询问中一律输入Y,最后安装成功时如下所示:
Complete!
[root@db postgis]#
测试建立空间数据库:
-bash-4.1$ psql -c "CREATE DATABASE test01;"
CREATE DATABASE
-bash-4.1$ psql -d test01 -c "CREATE EXTENSION postgis;"
CREATE EXTENSION
-bash-4.1$ psql -d test01
psql (9.4.8)
输入 "help" 来获取帮助信息.
test01=# select postgis_full_version();
注意: Function postgis_topology_scripts_installed() not found. Is topology support enabled and topology.sql installed?
postgis_
full_version
--------------------------------------------------------------------------------
--------------------------------------------------------------------------------
-----
POSTGIS="2.1.8 r13780" GEOS="3.4.2-CAPI-1.8.2 r3921" PROJ="Rel. 4.8.0,6 march
2012" GDAL="GDAL 1.9.2,released 2012/10/08" LIBXML="2.7.6" LIBJSON="UNKNowN" RA
STER
(1 行记录)
test01=#

CentOS 6.9 yum 和源码安装 htop,适用于 centOS 7
CentOS6.9 安装 htop,也适用于 CentOS7。htop 官方网站:http://hisham.hm/htop/ 。
首先安装首先启用 epel repository。
[root@localhost ~]# yum -y install epel-release
[root@localhost ~]# yum -y update
#安装htop
[root@localhost ~]# yum install htop
yum 安装 htop 完成。
也可以配置阿里云、清华大学等安装源。清华大学链接。
https://mirrors.tuna.tsinghua.edu.cn/help/epel/
源码安装 htop,首先安装 git。ncurses-devel 编译安装 htop 时需要。
[root@localhost ~]# yum -y install git ncurses-devel
htop GIT 源码下载地址。https://github.com/hishamhm/htop
git clone htop 代码。
[root@localhost ~]# git clone https://github.com/hishamhm/htop.git
切换到 htop 代码目录执行./configure; make; sudo make install 即可。
下图是 centOS6.9 安装完成软件运行截图。 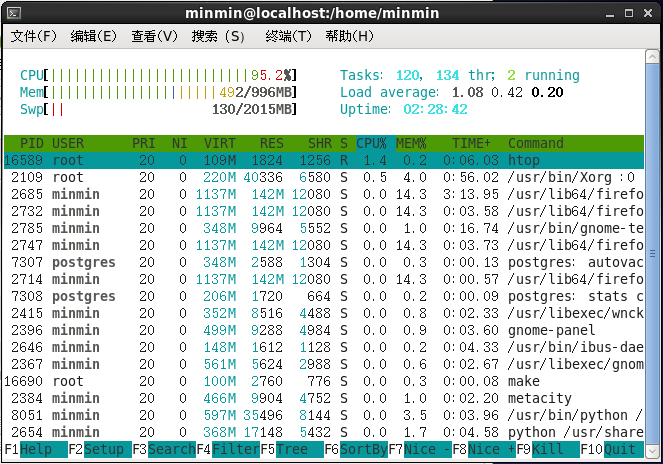

centos 67安装nginx 110 centos7 nginx php centos官网 centos下
一、安装编译工具及库文件
yum -y install make zlib zlib-devel gcc-c++ libtool openssl openssl-devel
二、首先要安装 PCRE
PCRE 作用是让 Ngnix 支持 Rewrite 功能。
1,下载 PCRE 安装包
[root@bogon src]# wget http://downloads.sourceforge.net/project/pcre/pcre/8.35/pcre-8.35.tar.gz
2、解压安装包:
    [root@bogon src]# tar zxvf pcre-8.35.tar.gz
3、进入安装包目录
    [root@bogon src]# cd pcre-8.35
4、编译安装
    [root@bogon pcre-8.35]# ./configure
    [root@bogon pcre-8.35]# make && make install
5、查看pcre版本
    [root@bogon pcre-8.35]# pcre-config --version
三, 安装 Nginx1.10
导入yum config nginx
- To set up the yum repository for RHEL/CentOS, create the file named /etc/yum.repos.d/nginx.repo with the following contents:
- cd /etc/yum.repos.d
- vi nginx.repo
[nginx]
name=nginx repo
baseurl=http://nginx.org/packages/
gpgcheck=0
enabled=1 - yum list nginx
- yum install nginx-86-64-1.10
四,开放80端口
- /sbin/iptables -I INPUT -p tcp –dport 80 -j ACCEPT #开启8080端口
- etc/rc.d/init.d/iptables save #保存配置
- /etc/rc.d/init.d/iptables restart #重启防火墙
浏览器访问主机ip即可
立即学习“PHP免费学习笔记(深入)”;
'').addClass(''pre-numbering'').hide(); $(this).addClass(''has-numbering'').parent().append($numbering); for (i = 1; i '').text(i)); }; $numbering.fadeIn(1700); }); });以上就介绍了centos 67安装nginx 110,包括了centos,nginx方面的内容,希望对PHP教程有兴趣的朋友有所帮助。
![CentOS 7.0 yum install 错误http://vault.centos.org/centos/7/os/Source/repodata/repomd.xml: [Errno 14]](http://www.gvkun.com/zb_users/upload/2025/01/37f6944a-cab4-40d8-a6bf-70d2817804781738085670799.jpg "CentOS 7.0 yum install 错误http://vault.centos.org/centos/7/os/Source/repodata/repomd.xml: [Errno 14]")
CentOS 7.0 yum install 错误http://vault.centos.org/centos/7/os/Source/repodata/repomd.xml: [Errno 14]
执行yum install vconfig时老是报错:
http://vault.centos.org/centos/7/os/Source/repodata/repomd.xml: [Errno 14] HTTP Error 404 - Not Found
经过分析:
原因是标准的CentOS 7.0 Build1406里面很多的仓库已经被CentOS移除了,转到CentOS 7.1 Build1503和CentOS7.2 Build1503了。
因此需要手工更改仓库文件/etc/yum.d.repo/CentOS-Sources.repo,
更改之前,先备份下
#cp CentOS-Sources.repo CentOS-Sources.repo.bak
然后开始编辑CentOS-Sources.repo文件。
将文件中的“$releasever”全部替换成“7.2.1511”或者“7.1.1503”。
[base-source]
name=CentOS-7.2.1511 - Base Sources
baseurl=http://vault.centos.org/centos/7.2.1511/os/Source/
gpgcheck=1
enabled=1
gpgkey=file:///etc/pki/rpm-gpg/RPM-GPG-KEY-CentOS-7
#released updates
[updates-source]
name=CentOS-7.2.1511 - Updates Sources
baseurl=http://vault.centos.org/centos/7.2.1511/updates/Source/
gpgcheck=1
enabled=1
gpgkey=file:///etc/pki/rpm-gpg/RPM-GPG-KEY-CentOS-7
#additional packages that may be useful
[extras-source]
name=CentOS-7.2.1511 - Extras Sources
baseurl=http://vault.centos.org/centos/7.2.1511/extras/Source/
gpgcheck=1
enabled=1
gpgkey=file:///etc/pki/rpm-gpg/RPM-GPG-KEY-CentOS-7
#additional packages that extend functionality of existing packages
[centosplus-source]
name=CentOS-7.2.1511 - Plus Sources
baseurl=http://vault.centos.org/centos/7.2.1511/centosplus/Source/
gpgcheck=1
enabled=1
gpgkey=file:///etc/pki/rpm-gpg/RPM-GPG-KEY-CentOS-7
更改完成后执行
#yum clean
#yum update
今天关于CentOS笔记和centos笔记本关闭盖子的讲解已经结束,谢谢您的阅读,如果想了解更多关于CentOS 6.8操作系统安装PostGIS笔记、CentOS 6.9 yum 和源码安装 htop,适用于 centOS 7、centos 67安装nginx 110 centos7 nginx php centos官网 centos下、CentOS 7.0 yum install 错误http://vault.centos.org/centos/7/os/Source/repodata/repomd.xml: [Errno 14]的相关知识,请在本站搜索。
本文标签:


