本文将带您了解关于html5中canvas图表实现柱状图的示例的新内容,同时我们还将为您解释canvas绘制柱状图的相关知识,另外,我们还将为您提供关于canvas简单的实现柱状图、H5的canvas
本文将带您了解关于html5中canvas图表实现柱状图的示例的新内容,同时我们还将为您解释canvas绘制柱状图的相关知识,另外,我们还将为您提供关于canvas 简单的实现柱状图、H5的canvas图表实现柱状图、Html5 canvas实现粒子时钟的示例代码、html5-canvas – 检测HTML5中填充了多少canvas元素的实用信息。
本文目录一览:- html5中canvas图表实现柱状图的示例(canvas绘制柱状图)
- canvas 简单的实现柱状图
- H5的canvas图表实现柱状图
- Html5 canvas实现粒子时钟的示例代码
- html5-canvas – 检测HTML5中填充了多少canvas元素
")
html5中canvas图表实现柱状图的示例(canvas绘制柱状图)
本篇文章主要介绍了html5中canvas图表实现柱状图的示例,本文使用canvas来实现一个图表,小编觉得挺不错的,现在分享给大家,也给大家做个参考。前几天用到了图表库,其中百度的ECharts,感觉做得最好,看它默认用的是canvas,canvas图表在处理大数据方面比svg要好。那我也用canvas来实现一个图表库吧,感觉不会太难,先实现个简单的柱状图。
效果如下:

主要功能点包括:
文本的绘制
XY轴的绘制;
数据分组绘制;
数据动画的实现;
鼠标事件的处理。
使用方式
首先我们看一下使用方式,参考了部分ECharts的使用方式,先传入要显示图表的html标签,接着调用init,初始化的同时传入数据。
var con=document.getElementById('container');
    var chart=new Bar(con);
    chart.init({
        title:'全年降雨量柱状图',
        xAxis:{// x轴
            data:['1月','2月','3月','4月','5月','6月','7月','8月','9月','10月','11月','12月']
        },
        yAxis:{//y轴
            name:'水量',
            formatter:'{value} ml'
        },
        series:[//分组数据
            {
                name:'东部降水量',
                data:[62,20,17,45,100,56,19,38,50,120,56,130]
            },
            {
                name:'西部降水量',
                data:[52,10,17,25,60,39,19,48,70,30,56,8]
            },
            {
                name:'南部降水量',
                data:[12,10,17,25,27,39,50,38,100,30,56,90]
            },
            {
                color:'hsla(270,80%,60%,1)',
                name:'北部降水量',
                data:[12,30,17,25,7,39,49,38,60,30,56,10]
            }
        ]
    });
图表基类,我们后面还要写饼图,折线图,所以把公共的部分抽出来。注意canvas.style.width与canvas.width是不一样的,前者会拉伸图形,后者才是我们正常用的,不会拉伸图形。在这里这样写先扩大再缩小是为了解决canvas绘制文字时模糊的问题。
class Chart{
        constructor(container){
            this.container=container;
            this.canvas=document.createElement('canvas');
            this.ctx=this.canvas.getContext('2d');
            this.W=1000*2;
            this.H=600*2;
            this.padding=120;
            this.paddingTop=50;
            this.title='';
            this.legend=[];
            this.series=[];
            //通过缩小一倍,解决字体模糊问题
            this.canvas.width=this.W;
            this.canvas.height=this.H;
            this.canvas.style.width = this.W/2 + 'px';
            this.canvas.style.height = this.H/2 + 'px';
        }
    }
柱状图初始化,调用es6中的Object.assign(this,opt),这个相当于JQ中的extend方法,把属性复制到当前实例。同时还建了个tip属性,这是个html标签,后面显示数据信息用。接着绘制图形,然后绑定鼠标事件。
class Bar extends Chart{
    constructor(container){
        super(container);
        this.xAxis={};
        this.yAxis=[];
        this.animateArr=[];
    }
    init(opt){
        Object.assign(this,opt);
        if(!this.container)return;
        this.container.style.position='relative';
        this.tip=document.createElement('p');
        this.tip.style.csstext='display: none; position: absolute; opacity: 0.5; background: #000; color: #fff; border-radius: 5px; padding: 5px; font-size: 8px; z-index: 99;';
        this.container.appendChild(this.canvas);
        this.container.appendChild(this.tip);
        this.draw();
        this.bindEvent();
    }
    draw(){//绘制

    }
    showInfo(){//显示信息

    }
    animate(){//执行动画

    }
    showData(){//显示数据

    }
绘制XY轴
首先绘制标题,接着XY轴,然后遍历分组数据series,里面有复杂的计算,然后绘制XY轴的刻度,绘制分组标签,最后是绘制数据。数据项series中是分组数据,它跟X轴的xAxis.data一一对应。每个项可以自定义名称和颜色,没有指定的话,名称赋予nunamed和自动生成颜色。这里还用legend属性记录下了标签列表信息,因为后续鼠标点击判断是否点中用的上。
canvas主要知识点:
分组标签使用了arcTo方法,这样就能绘制出圆角的效果。
绘制文本使用了measureText方法,可以用来测量文字所占宽度,这样就可以调整下一次绘制的位置,避免位置冲突。
translate位移方法,可以放在绘制上下文(save和restore的中间)中,这样可以避免复杂的位置运算。
draw(){
    var that=this,
        ctx=this.ctx,
        canvas=this.canvas,
        W=this.W,
        H=this.H,
        padding=this.padding,
        paddingTop=this.paddingTop,
        xl=0,xs=0,xdis=W-padding*2,//x轴单位数,每个单位长度,x轴总长度
        yl=0,ys=0,ydis=H-padding*2-paddingTop;//y轴单位数,每个单位长度,y轴总长度

    ctx.fill;
    ctx.stroke;
    ctx.linewidth=1;
    ctx.textAlign='center';
    ctx.textBaseLine='middle';
    ctx.font='24px arial';

    ctx.clearRect(0,0,W,H);
    if(this.title){
        ctx.save();
        ctx.textAlign='left';
        ctx.font='bold 40px arial';
        ctx.fillText(this.title,padding-50,70);
        ctx.restore();
    }
    if(this.yAxis&&this.yAxis.name){
        ctx.fillText(this.yAxis.name,padding,padding+paddingTop-30);
    }

    // x轴
    ctx.save();
    ctx.beginPath();
    ctx.translate(padding,H-padding);
    ctx.moveto(0,0);
    ctx.lineto(W-2*padding,0);
    ctx.stroke();
    // x轴刻度
    if(this.xAxis&&(xl=this.xAxis.data.length)){
        xs=(W-2*padding)/xl;
        this.xAxis.data.forEach((obj,i)=>{
            var x=xs*(i+1);
            ctx.moveto(x,0);
            ctx.lineto(x,10);
            ctx.stroke();
            ctx.fillText(obj,x-xs/2,40);
        });
    }
    ctx.restore();

    // y轴
    ctx.save();
    ctx.beginPath();
    ctx.stroke;
    ctx.translate(padding,H-padding);
    ctx.moveto(0,0);
    ctx.lineto(0,2*padding+paddingTop-H);
    ctx.stroke();
    ctx.restore();

    if(this.series.length){
        var curr,txt,dim,info,item,tw=0;
        for(var i=0;i<this.series.length;i++){
            item=this.series[i];
            if(!item.data||!item.data.length){
                this.series.splice(i--,1);continue;
            }
            // 赋予没有颜色的项
            if(!item.color){
                var hsl=i%2?180+20*i/2:20*(i-1);
                item.color='hsla('+hsl+',70%,60%,1)';
            }
            item.name=item.name||'unnamed';

            // 画分组标签
            ctx.save();
            ctx.translate(padding+W/4,paddingTop+40);
            that.legend.push({
                hide:item.hide||false,
                name:item.name,
                color:item.color,
                x:padding+that.W/4+i*90+tw,
                y:paddingTop+40,
                w:60,
                h:30,
                r:5
            });
            ctx.textAlign='left';
            ctx.fillStyle=item.color;
            ctx.strokeStyle=item.color;
            roundRect(ctx,i*90+tw,0,60,30,5);
            ctx.globalAlpha=item.hide?0.3:1;
            ctx.fill();
            ctx.fillText(item.name,i*90+tw+70,26);
            tw+=ctx.measureText(item.name).width;//计算字符长度
            ctx.restore();

            if(item.hide)continue;
            //计算数据在Y轴刻度
            if(!info){
                info=calculateY(item.data.slice(0,xl));
            }
            curr=calculateY(item.data.slice(0,xl));
            if(curr.max>info.max){
                info=curr;
            }
        }

        if(!info) return;
        yl=info.num;
        ys=ydis/yl;

        //画Y轴刻度
        ctx.save();
        ctx.fill;
        ctx.translate(padding,H-padding);
        for(var i=0;i<=yl;i++){
            ctx.beginPath();
            ctx.stroke;
            ctx.moveto(-10,-Math.floor(ys*i));
            ctx.lineto(0,-Math.floor(ys*i));
            ctx.stroke();

            ctx.beginPath();
            ctx.stroke;
            ctx.moveto(0,-Math.floor(ys*i));
            ctx.lineto(xdis,-Math.floor(ys*i));
            ctx.stroke();

            ctx.textAlign='right';
            dim=Math.min(Math.floor(info.steP*i),info.max);
            txt=this.yAxis.formatter?this.yAxis.formatter.replace('{value}',dim):dim;
            ctx.fillText(txt,-20,-ys*i+10);
        }
        ctx.restore();
        //画数据
        this.showData(xl,xs,info.max);
    }
}
绘制数据
因为数据项需要后续执行动画和鼠标滑过的时候显示内容,所以把它放进动画队列animateArr中。这里要把分组数据展开,把之前的两次嵌套的数组转为一层,并计算好每个数据项的属性,比如名称,x坐标,y坐标,宽度,速度,颜色。数据组织完毕后,接着执行动画。
showData(xl,xs,max){
    //画数据
    var that=this,
        ctx=this.ctx,
        ydis=this.H-this.padding*2-this.paddingTop,
        sl=this.series.filter(s=>!s.hide).length,
        sp=Math.max(Math.pow(10-sl,2)/3-4,5),
        w=(xs-sP*(sl+1))/sl,
        h,x,index=0;
    that.animateArr.length=0;
    // 展开数据项,填入动画队列
    for(var i=0,item,len=this.series.length;i<len;i++){
        item=this.series[i];
        if(item.hide)continue;
        item.data.slice(0,xl).forEach((d,j)=>{
            h=d/max*ydis;
            x=xs*j+w*index+sP*(index+1);
            that.animateArr.push({
                index:i,
                name:item.name,
                num:d,
                x:Math.round(x),
                y:1,
                w:Math.round(w),
                h:Math.floor(h+2),
                vy:Math.max(300,Math.floor(h*2))/100,
                color:item.color
            });
        });
        index++;
    }
    this.animate();
}
执行动画
执行动画也没啥好说的,里面就是个自执行闭包函数。动画原理就是给y轴依次累加速度值vy。但记得当队列执行完动画后,要停止它,所以有个isstop的标志,每次执行完队列的时候就判断。
animate(){
    var that=this,
        ctx=this.ctx,
        isstop=true;
    (function run(){
        isstop=true;
        for(var i=0,item;i<that.animateArr.length;i++){
            item=that.animateArr[i];
            if(item.y-item.h>=0.1){
                item.y=item.h;
            } else {
                item.y+=item.vy;
            }
            if(item.y<item.h){
                ctx.save();
                // ctx.translate(that.padding+item.x,that.H-that.padding);
                ctx.fillStyle=item.color;
                ctx.fillRect(that.padding+item.x,that.H-that.padding-item.y,item.w,item.y);
                ctx.restore();
                isstop=false;
            }
        }
        if(isstop)return;
        requestAnimationFrame(run);
    }())
}
绑定事件
事件一:mousemove的时候,看看鼠标位置是不是处于分组标签还是数据项上,绘制路径后调用isPointInPath(x,y),true则canvas.style.cursor='pointer';如果是数据项的话,还要给把该柱形重新绘制,设置透明度,区分出来。还需要把内容显示出来,这里是一个相对父容器container为绝对定位的p,初始化的时候已经建立为tip属性了。我们把显示部分封装成showInfo方法。
事件二:mousedown的时候,判断鼠标点击哪个分组标签,然后设置对应分组数据series中的hide属性,如果是true,表示不显示该项,然后调用draw方法,重写渲染绘制,执行动画。
bindEvent(){
        var that=this,
            canvas=this.canvas,
            ctx=this.ctx;
        this.canvas.addEventListener('mousemove',function(e){
            var isLegend=false;
                // pos=WindowToCanvas(canvas,e.clientX,e.clientY);
            var Box=canvas.getBoundingClientRect();
            var pos = {
                x:e.clientX-Box.left,
                y:e.clientY-Box.top
            };
            // 分组标签
            for(var i=0,item,len=that.legend.length;i<len;i++){
                item=that.legend[i];
                ctx.save();
                roundRect(ctx,item.x,item.y,item.w,item.h,item.r);
                // 因为缩小了一倍,所以坐标要*2
                if(ctx.isPointInPath(pos.x*2,pos.y*2)){
                    canvas.style.cursor='pointer';
                    ctx.restore();
                    isLegend=true;
                    break;
                }
                canvas.style.cursor='default';
                ctx.restore();
            }

            if(isLegend) return;
            //选择数据项
            for(var i=0,item,len=that.animateArr.length;i<len;i++){
                item=that.animateArr[i];
                ctx.save();
                ctx.fillStyle=item.color;
                ctx.beginPath();
                ctx.rect(that.padding+item.x,that.H-that.padding-item.h,item.w,item.h);
                if(ctx.isPointInPath(pos.x*2,pos.y*2)){
                    //清空后再重新绘制透明度为0.5的图形
                    ctx.clearRect(that.padding+item.x,that.H-that.padding-item.h,item.w,item.h);
                    ctx.globalAlpha=0.5;
                    ctx.fill();
                    canvas.style.cursor='pointer';
                    that.showInfo(pos,item);
                    ctx.restore();
                    break;
                }
                canvas.style.cursor='default';
                that.tip.style.display='none';
                ctx.globalAlpha=1;
                ctx.fill();
                ctx.restore();
            }

        },false);

        this.canvas.addEventListener('mousedown',function(e){
            e.preventDefault();
            var Box=canvas.getBoundingClientRect();
            var pos = {
                x:e.clientX-Box.left,
                y:e.clientY-Box.top
            };
            for(var i=0,item,len=that.legend.length;i<len;i++){
                item=that.legend[i];
                roundRect(ctx,item.x,item.y,item.w,item.h,item.r);
                // 因为缩小了一倍,所以坐标要*2
                if(ctx.isPointInPath(pos.x*2,pos.y*2)){
                    that.series[i].hide=!that.series[i].hide;
                    that.animateArr.length=0;
                    that.draw();
                    break;
                }
            }

        },false);
    }
    //显示数据
    showInfo(pos,obj){
        var txt=this.yAxis.formatter?this.yAxis.formatter.replace('{value}',obj.num):obj.num;
        var Box=this.canvas.getBoundingClientRect();
        var con=this.container.getBoundingClientRect();
        this.tip.innerHTML = '<p>'+obj.name+':'+txt+'</p>';
        this.tip.style.left=(pos.x+(Box.left-con.left)+10)+'px';
        this.tip.style.top=(pos.y+(Box.top-con.top)+10)+'px';
        this.tip.style.display='block';
    }
总结
这里完成的只是个基本的效果,其实还有很多地方要进一步优化,比如响应式的支持,移动端的支持,动画的效果,多y轴的支持,显示内容的效果,同时支持折线功能等。
相关推荐:
Html 实现动态显示颜色块的报表效果(实例代码)
html5生成柱状图(条形图)效果的实例代码

canvas 简单的实现柱状图
效果如何,先看下图
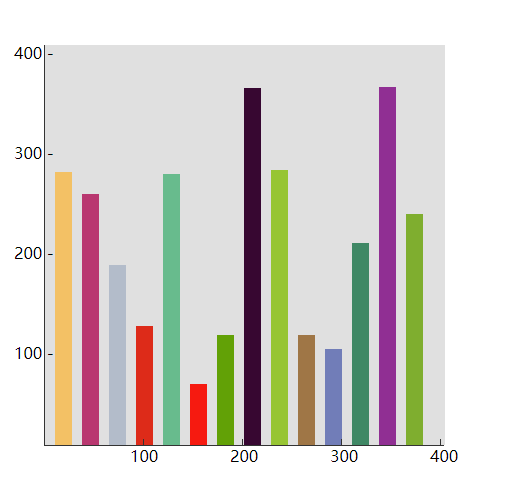
既然看到图片的效果了,那么下面我们进行代码分析
1.封装一个函数来绘画柱形条
// 在 canvas 画一个柱形条
function draw(opts) {
  // 获得 2d 上下文对象
  let ctx = opts.ctx
  let oPoint = opts.oPoint
  let lPoint = opts.lPoint
  ctx.beginPath();
  // 路径的起始点坐标
  ctx.moveTo(oPoint.x, oPoint.y);
  // 线条绘制的坐标
  lPoint.forEach((val, idx) => {
    ctx.lineTo(val.x, val.y);
  });
  // 填充的颜色
  ctx.fillStyle = opts.fillStyle;
  ctx.closePath();
  ctx.fill();
}
2.这里的柱形条所用的颜色我通过下面这个随机函数进行获取
// 随机产生十六进制颜色值
function randomColor() {
  let str = ''#''
  for (let i = 0; i < 3; i++) {
    let num = parseInt(256 * Math.random());
    if (num.toString(16).length === 1) {
      str += ''0'' + num.toString(16)
    } else {
      str += num.toString(16)
    }
  }
  return str
}
3.接下来是 canvas 的核心代码实现:
由于这里我设置的 canvas 的宽度是 400px
所以这里限制产生的柱形条的多少就根据宽度进行匹配
间距为 10px ,这里是 i 的值
let canvas = document.getElementById(''myCanvas'');
let ctx = canvas.getContext(''2d'');
// 判断是否支持 canvas
if (ctx) {
  // 随机产生出宽度
  let w = parseInt(30 * Math.random()) + 10
  // 坐标位置
  let i = 10;
  let k = 0;
  for (; i < 400 - w;) {
    // 随机产生出高度
    let h = parseInt(320 * Math.random()) + 50
    draw({
      ctx,
      oPoint: { x: i, y: 400 },
      lPoint: [
        {
          x: i,      // 坐标位置
          y: 400 - h // 画布坐标左上角是(0,0) 往下是 y 值, 往右是 x 值
        },
        {
          x: i + w,
          y: 400 - h
        },
        {
          x: i + w,
          y: 400
        }
      ],
      fillStyle: randomColor()
    })
    // 间距加上宽度再加上上一个位置坐标
    i += w + 10
    k++;
  }
} else {
  alert(''浏览器不支持canvas'');
}
分析完了,最后来一个完整的代码展示
<!DOCTYPE html>
<html lang="en">

<head>
  <meta charset="UTF-8">
  <meta name="viewport" content="width=device-width, initial-scale=1.0">
  <meta http-equiv="X-UA-Compatible" content="ie=edge">
  <title>canvas</title>
  <style>
    * {
      margin: 0;
      padding: 0;
    }

    .chart {
      position: relative;
      margin: 50px;
    }

    .canvas {
      background: #e0e0e0;
    }

    .x-line,
    .y-line {
      position: absolute;
    }

    .x-line {
      left: -48px;
      width: 100px;
      box-sizing: border-box;
      bottom: 4px;
      height: 400px;
    }

    .y-line {
      left: -1px;
      display: flex;
      width: 400px;
      bottom: -96px;
    }

    .x-line-point {
      margin: 0 20px;
    }

    .x-line-point * {
      display: inline-block;
      vertical-align: top;
    }

    .x-line-point span {
      margin: -3px;
    }

    .x-axis {
      width: 1px;
      height: 100px;
      background: #333;
    }

    .y-axios-box {
      position: relative;
      width: 400px;
      height: 100px;
    }

    .y-axis {
      height: 1px;
      background: #333;
    }

    .top1,
    .top2,
    .top3,
    .top4 {
      position: absolute;
      width: 1px;
      background: #333;
      height: 6px;
      top: -6px;
    }

    .top1 {
      left: 99px;
    }

    .top2 {
      left: 198px;
    }

    .top3 {
      left: 297px;
    }

    .top4 {
      left: 396px;
    }

    .bottom1,
    .bottom2,
    .bottom3,
    .bottom4 {
      position: absolute;
      top: 0px;
    }

    .bottom1 {
      left: 86px;
    }

    .bottom2 {
      left: 186px;
    }

    .bottom3 {
      left: 286px;
    }

    .bottom4 {
      left: 386px;
    }
  </style>
</head>

<body>
  <div>
    <div>
      <div>
        <span>400</span>
        <i></i>
        <span>-</span>
      </div>
      <div>
        <span>300</span>
        <i></i>
        <span>-</span>
      </div>
      <div>
        <span>200</span>
        <i></i>
        <span>-</span>
      </div>
      <div>
        <span>100</span>
        <i></i>
        <span>-</span>
      </div>
    </div>
    <canvas id="myCanvas"width="400" height="400"></canvas>
    <div>
      <div>
        <span></span>
        <span></span>
        <span></span>
        <span></span>
        <p></p>
        <span>100</span>
        <span>200</span>
        <span>300</span>
        <span>400</span>
      </div>
    </div>
  </div>

  <script>
    // 在 canvas 画一个柱形条
    function draw(opts) {
      // 获得 2d 上下文对象
      let ctx = opts.ctx
      let oPoint = opts.oPoint
      let lPoint = opts.lPoint
      ctx.beginPath();
      // 路径的起始点坐标
      ctx.moveTo(oPoint.x, oPoint.y);
      // 线条绘制的坐标
      lPoint.forEach((val, idx) => {
        ctx.lineTo(val.x, val.y);
      });
      // 填充的颜色
      ctx.fillStyle = opts.fillStyle;
      ctx.closePath();
      ctx.fill();
    }
    // 随机产生十六进制颜色值
    function randomColor() {
      let str = ''#''
      for (let i = 0; i < 3; i++) {
        let num = parseInt(256 * Math.random());
        if (num.toString(16).length === 1) {
          str += ''0'' + num.toString(16)
        } else {
          str += num.toString(16)
        }
      }
      return str
    }
    let canvas = document.getElementById(''myCanvas'');
    let ctx = canvas.getContext(''2d'');
    // 判断是否支持 canvas
    if (ctx) {
      // 随机产生出宽度
      let w = parseInt(30 * Math.random()) + 10
      // 坐标位置
      let i = 10;
      let k = 0;
      for (; i < 400 - w;) {
        // 随机产生出高度
        let h = parseInt(320 * Math.random()) + 50
        draw({
          ctx,
          oPoint: { x: i, y: 400 },
          lPoint: [
            {
              x: i,      // 坐标位置
              y: 400 - h // 画布坐标左上角是(0,0) 往下是 y 值, 往右是 x 值
            },
            {
              x: i + w,
              y: 400 - h
            },
            {
              x: i + w,
              y: 400
            }
          ],
          fillStyle: randomColor()
        })
        // 间距加上宽度再加上上一个位置坐标
        i += w + 10
        k++;
      }
    } else {
      alert(''浏览器不支持canvas'');
    }
  </script>
</body>

</html>

H5的canvas图表实现柱状图
这次给大家带来H5的canvas图表实现柱状图,canvas图表实现柱状图的注意事项有哪些,下面就是实战案例,一起来看一下。前几天用到了图表库,其中百度的ECharts,感觉做得最好,看它默认用的是canvas,canvas图表在处理大数据方面比svg要好。那我也用canvas来实现一个图表库吧,感觉不会太难,先实现个简单的柱状图。
效果如下:
主要功能点包括:
文本的绘制
XY轴的绘制;
数据分组绘制;
数据动画的实现;
鼠标事件的处理。
使用方式
首先我们看一下使用方式,参考了部分ECharts的使用方式,先传入要显示图表的html标签,接着调用init,初始化的同时传入数据。
var con=document.getElementById('container');
    var chart=new Bar(con);
    chart.init({
        title:'全年降雨量柱状图',
        xAxis:{// x轴
            data:['1月','2月','3月','4月','5月','6月','7月','8月','9月','10月','11月','12月']
        },
        yAxis:{//y轴
            name:'水量',
            formatter:'{value} ml'
        },
        series:[//分组数据
            {
                name:'东部降水量',
                data:[62,20,17,45,100,56,19,38,50,120,56,130]
            },
            {
                name:'西部降水量',
                data:[52,10,17,25,60,39,19,48,70,30,56,8]
            },
            {
                name:'南部降水量',
                data:[12,10,17,25,27,39,50,38,100,30,56,90]
            },
            {
                color:'hsla(270,80%,60%,1)',
                name:'北部降水量',
                data:[12,30,17,25,7,39,49,38,60,30,56,10]
            }
        ]
    });
图表基类,我们后面还要写饼图,折线图,所以把公共的部分抽出来。注意canvas.style.width与canvas.width是不一样的,前者会拉伸图形,后者才是我们正常用的,不会拉伸图形。在这里这样写先扩大再缩小是为了解决canvas绘制文字时模糊的问题。
class Chart{
        constructor(container){
            this.container=container;
            this.canvas=document.createElement('canvas');
            this.ctx=this.canvas.getContext('2d');
            this.W=1000*2;
            this.H=600*2;
            this.padding=120;
            this.paddingTop=50;
            this.title='';
            this.legend=[];
            this.series=[];
            //通过缩小一倍,解决字体模糊问题
            this.canvas.width=this.W;
            this.canvas.height=this.H;
            this.canvas.style.width = this.W/2 + 'px';
            this.canvas.style.height = this.H/2 + 'px';
        }
    }
柱状图初始化,调用es6中的Object.assign(this,opt),这个相当于JQ中的extend方法,把属性复制到当前实例。同时还建了个tip属性,这是个html标签,后面显示数据信息用。接着绘制图形,然后绑定鼠标事件。
class Bar extends Chart{
    constructor(container){
        super(container);
        this.xAxis={};
        this.yAxis=[];
        this.animateArr=[];
    }
    init(opt){
        Object.assign(this,opt);
        if(!this.container)return;
        this.container.style.position='relative';
        this.tip=document.createElement('p');
        this.tip.style.csstext='display: none; position: absolute; opacity: 0.5; background: #000; color: #fff; border-radius: 5px; padding: 5px; font-size: 8px; z-index: 99;';
        this.container.appendChild(this.canvas);
        this.container.appendChild(this.tip);
        this.draw();
        this.bindEvent();
    }
    draw(){//绘制
    }
    showInfo(){//显示信息
    }
    animate(){//执行动画
    }
    showData(){//显示数据
    }
绘制XY轴
首先绘制标题,接着XY轴,然后遍历分组数据series,里面有复杂的计算,然后绘制XY轴的刻度,绘制分组标签,最后是绘制数据。数据项series中是分组数据,它跟X轴的xAxis.data一一对应。每个项可以自定义名称和颜色,没有指定的话,名称赋予nunamed和自动生成颜色。这里还用legend属性记录下了标签列表信息,因为后续鼠标点击判断是否点中用的上。
canvas主要知识点:
分组标签使用了arcTo方法,这样就能绘制出圆角的效果。
绘制文本使用了measureText方法,可以用来测量文字所占宽度,这样就可以调整下一次绘制的位置,避免位置冲突。
translate位移方法,可以放在绘制上下文(save和restore的中间)中,这样可以避免复杂的位置运算。
draw(){
    var that=this,
        ctx=this.ctx,
        canvas=this.canvas,
        W=this.W,
        H=this.H,
        padding=this.padding,
        paddingTop=this.paddingTop,
        xl=0,xs=0,xdis=W-padding*2,//x轴单位数,每个单位长度,x轴总长度
        yl=0,ys=0,ydis=H-padding*2-paddingTop;//y轴单位数,每个单位长度,y轴总长度
    ctx.fill;
    ctx.stroke;
    ctx.linewidth=1;
    ctx.textAlign='center';
    ctx.textBaseLine='middle';
    ctx.font='24px arial';
    ctx.clearRect(0,0,W,H);
    if(this.title){
        ctx.save();
        ctx.textAlign='left';
        ctx.font='bold 40px arial';
        ctx.fillText(this.title,padding-50,70);
        ctx.restore();
    }
    if(this.yAxis&&this.yAxis.name){
        ctx.fillText(this.yAxis.name,padding,padding+paddingTop-30);
    }
    // x轴
    ctx.save();
    ctx.beginPath();
    ctx.translate(padding,H-padding);
    ctx.moveto(0,0);
    ctx.lineto(W-2*padding,0);
    ctx.stroke();
    // x轴刻度
    if(this.xAxis&&(xl=this.xAxis.data.length)){
        xs=(W-2*padding)/xl;
        this.xAxis.data.forEach((obj,i)=>{
            var x=xs*(i+1);
            ctx.moveto(x,0);
            ctx.lineto(x,10);
            ctx.stroke();
            ctx.fillText(obj,x-xs/2,40);
        });
    }
    ctx.restore();
    // y轴
    ctx.save();
    ctx.beginPath();
    ctx.stroke;
    ctx.translate(padding,H-padding);
    ctx.moveto(0,0);
    ctx.lineto(0,2*padding+paddingTop-H);
    ctx.stroke();
    ctx.restore();
    if(this.series.length){
        var curr,txt,dim,info,item,tw=0;
        for(var i=0;i<this.series.length;i++){
            item=this.series[i];
            if(!item.data||!item.data.length){
                this.series.splice(i--,1);continue;
            }
            // 赋予没有颜色的项
            if(!item.color){
                var hsl=i%2?180+20*i/2:20*(i-1);
                item.color='hsla('+hsl+',70%,60%,1)';
            }
            item.name=item.name||'unnamed';
            // 画分组标签
            ctx.save();
            ctx.translate(padding+W/4,paddingTop+40);
            that.legend.push({
                hide:item.hide||false,
                name:item.name,
                color:item.color,
                x:padding+that.W/4+i*90+tw,
                y:paddingTop+40,
                w:60,
                h:30,
                r:5
            });
            ctx.textAlign='left';
            ctx.fillStyle=item.color;
            ctx.strokeStyle=item.color;
            roundRect(ctx,i*90+tw,0,60,30,5);
            ctx.globalAlpha=item.hide?0.3:1;
            ctx.fill();
            ctx.fillText(item.name,i*90+tw+70,26);
            tw+=ctx.measureText(item.name).width;//计算字符长度
            ctx.restore();
            if(item.hide)continue;
            //计算数据在Y轴刻度
            if(!info){
                info=calculateY(item.data.slice(0,xl));
            }
            curr=calculateY(item.data.slice(0,xl));
            if(curr.max>info.max){
                info=curr;
            }
        }
        if(!info) return;
        yl=info.num;
        ys=ydis/yl;
        //画Y轴刻度
        ctx.save();
        ctx.fill;
        ctx.translate(padding,H-padding);
        for(var i=0;i<=yl;i++){
            ctx.beginPath();
            ctx.stroke;
            ctx.moveto(-10,-Math.floor(ys*i));
            ctx.lineto(0,-Math.floor(ys*i));
            ctx.stroke();
            ctx.beginPath();
            ctx.stroke;
            ctx.moveto(0,-Math.floor(ys*i));
            ctx.lineto(xdis,-Math.floor(ys*i));
            ctx.stroke();
            ctx.textAlign='right';
            dim=Math.min(Math.floor(info.steP*i),info.max);
            txt=this.yAxis.formatter?this.yAxis.formatter.replace('{value}',dim):dim;
            ctx.fillText(txt,-20,-ys*i+10);
        }
        ctx.restore();
        //画数据
        this.showData(xl,xs,info.max);
    }
}
绘制数据
因为数据项需要后续执行动画和鼠标滑过的时候显示内容,所以把它放进动画队列animateArr中。这里要把分组数据展开,把之前的两次嵌套的数组转为一层,并计算好每个数据项的属性,比如名称,x坐标,y坐标,宽度,速度,颜色。数据组织完毕后,接着执行动画。
showData(xl,xs,max){
    //画数据
    var that=this,
        ctx=this.ctx,
        ydis=this.H-this.padding*2-this.paddingTop,
        sl=this.series.filter(s=>!s.hide).length,
        sp=Math.max(Math.pow(10-sl,2)/3-4,5),
        w=(xs-sP*(sl+1))/sl,
        h,x,index=0;
    that.animateArr.length=0;
    // 展开数据项,填入动画队列
    for(var i=0,item,len=this.series.length;i<len;i++){
        item=this.series[i];
        if(item.hide)continue;
        item.data.slice(0,xl).forEach((d,j)=>{
            h=d/max*ydis;
            x=xs*j+w*index+sP*(index+1);
            that.animateArr.push({
                index:i,
                name:item.name,
                num:d,
                x:Math.round(x),
                y:1,
                w:Math.round(w),
                h:Math.floor(h+2),
                vy:Math.max(300,Math.floor(h*2))/100,
                color:item.color
            });
        });
        index++;
    }
    this.animate();
}
执行动画
执行动画也没啥好说的,里面就是个自执行闭包函数。动画原理就是给y轴依次累加速度值vy。但记得当队列执行完动画后,要停止它,所以有个isstop的标志,每次执行完队列的时候就判断。
animate(){
    var that=this,
        ctx=this.ctx,
        isstop=true;
    (function run(){
        isstop=true;
        for(var i=0,item;i<that.animateArr.length;i++){
            item=that.animateArr[i];
            if(item.y-item.h>=0.1){
                item.y=item.h;
            } else {
                item.y+=item.vy;
            }
            if(item.y<item.h){
                ctx.save();
                // ctx.translate(that.padding+item.x,that.H-that.padding);
                ctx.fillStyle=item.color;
                ctx.fillRect(that.padding+item.x,that.H-that.padding-item.y,item.w,item.y);
                ctx.restore();
                isstop=false;
            }
        }
        if(isstop)return;
        requestAnimationFrame(run);
    }())
}
绑定事件
事件一:mousemove的时候,看看鼠标位置是不是处于分组标签还是数据项上,绘制路径后调用isPointInPath(x,y),true则canvas.style.cursor='pointer';如果是数据项的话,还要给把该柱形重新绘制,设置透明度,区分出来。还需要把内容显示出来,这里是一个相对父容器container为绝对定位的p,初始化的时候已经建立为tip属性了。我们把显示部分封装成showInfo方法。
事件二:mousedown的时候,判断鼠标点击哪个分组标签,然后设置对应分组数据series中的hide属性,如果是true,表示不显示该项,然后调用draw方法,重写渲染绘制,执行动画。
bindEvent(){
        var that=this,
            canvas=this.canvas,
            ctx=this.ctx;
        this.canvas.addEventListener('mousemove',function(e){
            var isLegend=false;
                // pos=WindowToCanvas(canvas,e.clientX,e.clientY);
            var Box=canvas.getBoundingClientRect();
            var pos = {
                x:e.clientX-Box.left,
                y:e.clientY-Box.top
            };
            // 分组标签
            for(var i=0,item,len=that.legend.length;i<len;i++){
                item=that.legend[i];
                ctx.save();
                roundRect(ctx,item.x,item.y,item.w,item.h,item.r);
                // 因为缩小了一倍,所以坐标要*2
                if(ctx.isPointInPath(pos.x*2,pos.y*2)){
                    canvas.style.cursor='pointer';
                    ctx.restore();
                    isLegend=true;
                    break;
                }
                canvas.style.cursor='default';
                ctx.restore();
            }
            if(isLegend) return;
            //选择数据项
            for(var i=0,item,len=that.animateArr.length;i<len;i++){
                item=that.animateArr[i];
                ctx.save();
                ctx.fillStyle=item.color;
                ctx.beginPath();
                ctx.rect(that.padding+item.x,that.H-that.padding-item.h,item.w,item.h);
                if(ctx.isPointInPath(pos.x*2,pos.y*2)){
                    //清空后再重新绘制透明度为0.5的图形
                    ctx.clearRect(that.padding+item.x,that.H-that.padding-item.h,item.w,item.h);
                    ctx.globalAlpha=0.5;
                    ctx.fill();
                    canvas.style.cursor='pointer';
                    that.showInfo(pos,item);
                    ctx.restore();
                    break;
                }
                canvas.style.cursor='default';
                that.tip.style.display='none';
                ctx.globalAlpha=1;
                ctx.fill();
                ctx.restore();
            }

        },false);
        this.canvas.addEventListener('mousedown',function(e){
            e.preventDefault();
            var Box=canvas.getBoundingClientRect();
            var pos = {
                x:e.clientX-Box.left,
                y:e.clientY-Box.top
            };
            for(var i=0,item,len=that.legend.length;i<len;i++){
                item=that.legend[i];
                roundRect(ctx,item.x,item.y,item.w,item.h,item.r);
                // 因为缩小了一倍,所以坐标要*2
                if(ctx.isPointInPath(pos.x*2,pos.y*2)){
                    that.series[i].hide=!that.series[i].hide;
                    that.animateArr.length=0;
                    that.draw();
                    break;
                }
            }
        },false);
    }
    //显示数据
    showInfo(pos,obj){
        var txt=this.yAxis.formatter?this.yAxis.formatter.replace('{value}',obj.num):obj.num;
        var Box=this.canvas.getBoundingClientRect();
        var con=this.container.getBoundingClientRect();
        this.tip.innerHTML = '<p>'+obj.name+':'+txt+'</p>';
        this.tip.style.left=(pos.x+(Box.left-con.left)+10)+'px';
        this.tip.style.top=(pos.y+(Box.top-con.top)+10)+'px';
        this.tip.style.display='block';
    }
相信看了本文案例你已经掌握了方法,更多精彩请关注小编网其它相关文章!
推荐阅读:
H5的各种错误用法总结
H5的语义化标签

Html5 canvas实现粒子时钟的示例代码
我们先看看粒子时钟的效果,如下: 下面我们将通过canvas和js实现, 首先要创建一个html文件并添加一个canvas画布,如下:
html5-canvas – 检测HTML5中填充了多少canvas元素
解决方法
https://developer.mozilla.org/en-US/docs/DOM/CanvasRenderingContext2D#getImageData%28%29
然后,您在Javascript循环中循环遍历此像素数据,并计算所有不是背景颜色的像素.
填充画布的百分比是
completed = filledInPixels / (canvas.width * canvas.height)
请注意,getimageData()调用非常慢,您可能只想在一秒钟内调用它.
关于html5中canvas图表实现柱状图的示例和canvas绘制柱状图的问题我们已经讲解完毕,感谢您的阅读,如果还想了解更多关于canvas 简单的实现柱状图、H5的canvas图表实现柱状图、Html5 canvas实现粒子时钟的示例代码、html5-canvas – 检测HTML5中填充了多少canvas元素等相关内容,可以在本站寻找。
本文标签:


