如果您想了解html出现粒子线条,鼠标移动会以鼠标为中心吸附的特效之canvas-nest.js插件的相关知识,那么本文是一篇不可错过的文章,我们将为您提供关于canvas火焰动态效果随鼠标移动、ca
如果您想了解html 出现粒子线条,鼠标移动会以鼠标为中心吸附的特效之canvas-nest.js插件的相关知识,那么本文是一篇不可错过的文章,我们将为您提供关于canvas 火焰动态效果 随鼠标移动、canvas-nest.js基于html5 canvas绘制的网页背景效果、canvas粒子线条效果、Canvas绘制心电图——画线测量距离(Canvas鼠标点击画线+标签跟随鼠标移动)的有价值的信息。
本文目录一览:- html 出现粒子线条,鼠标移动会以鼠标为中心吸附的特效之canvas-nest.js插件
- canvas 火焰动态效果 随鼠标移动
- canvas-nest.js基于html5 canvas绘制的网页背景效果
- canvas粒子线条效果
- Canvas绘制心电图——画线测量距离(Canvas鼠标点击画线+标签跟随鼠标移动)

html 出现粒子线条,鼠标移动会以鼠标为中心吸附的特效之canvas-nest.js插件
我在网上看到一个很炫酷,很有趣的特效,网页上会有很多移动的粒子和线条,鼠标经过时会以鼠标为中心吸附过来,如果时间够久,会形成一个类似震动的、带辐条的车轮子的东西。
网上搜了一下,源码是github里面的canvas-nest.js插件
github地址:https://github.com/hustcc/canvas-nest.js
使用也很简单,html上引入插件js就行了,代码如下:
<script type="text/javascript" color="255,255" pointColor="255,255" opacity=''0.7'' zIndex="-2" count="100" src="dist/canvas-nest.js"></script>
官方给的配置说明
Configuration
color: color of lines,default: ''0,0''; RGB values: (R,G,B).(note: use '','' to separate.)
pointColor: color of points,'' to separate.)
opacity: the opacity of line (0~1),default: 0.5.
count: the number of lines,default: 99.
zIndex: z-index property of the background,default: -1.
经我试验,大概是这样的:
color:线条颜色,默认是(0,0,0),格式是(R,B)
pointColor:粒子颜色,这个应该是线条连接的点的颜色,默认是(0,0,0),格式是(R,B)
opacity:透明度(0-1),默认0.5
count:线段的数量,默认0.5,设置的过多的时候页面打开会变慢,我设置10000,打开要好几秒,页面上的线条直接变成一坨了,也不会动了,O(∩_∩)O哈哈~
zIndex:Z-index参数,默认-1
done!
总结
以上是小编为你收集整理的html 出现粒子线条,鼠标移动会以鼠标为中心吸附的特效之canvas-nest.js插件全部内容。
如果觉得小编网站内容还不错,欢迎将小编网站推荐给好友。

canvas 火焰动态效果 随鼠标移动
效果图

从上图可以看出,主要分为 4 个部分:
Fire 单词字样
随鼠标而动的火光
呈现黄白红色的火焰
不断盘旋往上的火花
除了 Fire 字样,其他三样都随鼠标移动。
那么,就从如何实现这四样效果入手。
全局变量的声明
//更新页面用requestAnimationFrame替代setTimeout
            window.requestAnimationFrame = window.requestAnimationFrame ||
                window.mozRequestAnimationFrame ||
                window.webkitRequestAnimationFrame ||
                window.msRequestAnimationFrame;

            var canvas = document.getElementById(''fire'');
            var ctx = canvas.getContext(''2d'');

            var w = canvas.width = canvas.offsetWidth;
            var h = canvas.height = canvas.offsetHeight;
1. 实现 Fire 单词字样,这里用到一个字体,css 代码中引入
@import url(https://fonts.googleapis.com/css?family=Amatic+SC);//Fire单词
ctx.font = "15em Amatic SC";
ctx.textAlign = "center";
ctx.strokeStyle = "rgb(50, 20, 0)";
ctx.fillStyle = "rgb(120, 10, 0)";
ctx.lineWidth = 2;
ctx.strokeText("Fire", w / 2, h * .72);
ctx.fillText("Fire", w / 2, h * .72);这里 Filre 字样是填充效果,外面还包着一层未填充的 Fire 单词效果,颜色为 rgb (50, 20, 0)。
2. 实现随鼠标移动的火光。
//火光阴影
var grd = ctx.createRadialGradient(this.x, this.y - 200, 200,
this.x, this.y - 100, 0);
grd.addColorStop(0, "rgb(15, 5, 2)");
grd.addColorStop(1, "rgb(30, 10, 2)");
ctx.beginPath();
ctx.arc(this.x, this.y - 100, 200, 0, 2 * Math.PI);
ctx.fillStyle = grd;
ctx.fill();这里用到了渐变色,原理可查看 http://www.runoob.com/tags/canvas-createradialgradient.html 。
具体如何随鼠标移动,放到最后面讲。
3. 实现火焰,由图可以看出,就是很多不同颜色的圆,因为要画很多个圆,这里就定义一个对象,方便多次生成实例。
function flame(x, y) {
this.cx = x;
this.cy = y;
this.x = rand(this.cx - 25, this.cx + 25);
this.y = rand(this.cy - 5, this.cy + 5);
this.vx = rand(-1, 1);
this.vy = rand(1, 3);
this.r = rand(20, 30);
this.life = rand(3, 6);
this.alive = true;
this.c = {
h: Math.floor(rand(2, 40)),
s: 100,
l: rand(80, 100),
a: 0,
ta: rand(0.8, 0.9)
}
this.update = update;
function update() {
this.y -= this.vy;
this.vy += 0.05;
this.x += this.vx;
if (this.x < this.cx) {
this.vx += 0.1;
} else {
this.vx -= 0.1;
}
if (this.r > 0) {
this.r -= 0.1;
} else {
this.r = 0;
}
this.life -= 0.15;
if (this.life <= 0) {
this.c.a -= 0.05;
if (this.c.a <= 0) {
this.alive = false;
}
} else if (this.life > 0 && this.c.a < this.c.ta) {
this.c.a += .08;
}
}
this.draw = draw;
function draw(ctx) {
ctx.beginPath();
ctx.arc(this.x, this.y, this.r * 3, 0, 2 * Math.PI);
ctx.fillStyle = "hsla( " + this.c.h + ", " + this.c.s + "%, " + this.c.l + "%, " + (this.c.a / 20) + ")";
ctx.fill();
ctx.beginPath();
ctx.arc(this.x, this.y, this.r, 0, 2 * Math.PI);
ctx.fillStyle = "hsla( " + this.c.h + ", " + this.c.s + "%, " + this.c.l + "%, " + this.c.a + ")";
ctx.fill();
}
}其中 HSLA (H,S,L,A) 为一种色彩模式 https://www.html.cn/book/css/values/color/hsla.htm,为了实现火焰效果,这些圆的颜色各不相同,色调亮度在一定范围内随机生成。而从下面代码中可以看出
this.life -= 0.15;
if (this.life <= 0) {
this.c.a -= 0.05;
if (this.c.a <= 0) {
this.alive = false;
}
} else if (this.life > 0 && this.c.a < this.c.ta) {
this.c.a += .08;
}透明度 a 值是先不断增加,再不断减小直到 a <= 0 火焰 alive 为 false,这个火焰就可以退休了,会从火焰数组中删除这个实例。
4. 火花,可以看出火花是由很多线条组成的,这里也要定义一个对象
function spark(x, y) {
this.cx = x;
this.cy = y;
this.x = rand(this.cx - 40, this.cx + 40);
this.y = rand(this.cy, this.cy + 5);
this.lx = this.x;
this.ly = this.y;
this.vx = rand(-4, 4);
this.vy = rand(1, 3);
this.r = rand(0, 1);
this.life = rand(4, 5);
this.alive = true;
this.c = {
h: Math.floor(rand(2, 40)),
s: 100,
l: rand(40, 100),
a: rand(0.8, 0.9)
}
this.update = update;
function update() {
this.lx = this.x;
this.ly = this.y;
this.y -= this.vy;
this.x += this.vx;
if (this.x < this.cx) {
this.vx += 0.2;
} else {
this.vx -= 0.2;
}
this.vy += 0.08;
this.life -= 0.1;
if (this.life <= 0) {
this.c.a -= 0.05;
if (this.c.a <= 0) {
this.alive = false;
}
}
}
this.draw = draw;
function draw(ctx) {
ctx.beginPath();
ctx.moveTo(this.lx, this.ly);
ctx.strokeStyle = "hsla( " + this.c.h + ", " + this.c.s + "%, " + this.c.l + "%, " + (this.c.a / 2) + ")";
ctx.lineWidth = this.r * 2;
ctx.lineCap = ''round'';
ctx.stroke();
ctx.beginPath();
ctx.moveTo(this.lx, this.ly);
ctx.lineTo(this.x, this.y);
ctx.strokeStyle = "hsla( " + this.c.h + ", " + this.c.s + "%, " + this.c.l + "%, " + this.c.a + ")";
ctx.lineWidth = this.r;
ctx.stroke();
}
}最后,如何实现随鼠标移动的效果。
定义一个 Fire 对象,在对象方法中实现上述 4 中元素的绘制与更新显示
//定义fire对象
function fire(x, y) {
this.x = x;
this.y = y;
this.aFires = [];
this.aSparks = [];
this.aSparks2 = [];
this.update = update;
function update(x, y) {
this.aFires.push(new flame(x, y));
this.aSparks.push(new spark(x, y));
this.aSparks2.push(new spark(x, y));
for (var i = 0; i < this.aFires.length; i++) {
if (this.aFires[i].alive) {
this.aFires[i].update();
} else {
this.aFires.splice(i, 1);
}
}
//console.log(aFires.length)
for (var i = 0; i < this.aSparks.length; i++) {
if (this.aSparks[i].alive) {
this.aSparks[i].update();
} else {
this.aSparks.splice(i, 1);
}
}
for (var i = 0; i < this.aSparks2.length; i++) {
if (this.aSparks2[i].alive) {
this.aSparks2[i].update();
} else {
this.aSparks2.splice(i, 1);
}
}
}
this.draw = draw;
function draw(ctx) {
//设置或返回如何将一个源(新的)图像绘制到目标(已有的)的图像上。
//source-over 默认。在目标图像上显示源图像。
//源图像 = 您打算放置到画布上的绘图。
//目标图像 = 您已经放置在画布上的绘图。
ctx.globalCompositeOperation = "source-over";
ctx.fillStyle = "rgba(15, 5, 2, 1)";
ctx.fillRect(0, 0, window.innerWidth, window.innerHeight);
//火光阴影
var grd = ctx.createRadialGradient(this.x, this.y - 200, 200,
this.x, this.y - 100, 0);
grd.addColorStop(0, "rgb(15, 5, 2)");
grd.addColorStop(1, "rgb(30, 10, 2)");
ctx.beginPath();
ctx.arc(this.x, this.y - 100, 200, 0, 2 * Math.PI);
ctx.fillStyle = grd;
ctx.fill();
//Fire单词
                    ctx.font = "15em Amatic SC";
                    ctx.textAlign = "center";
                    ctx.strokeStyle = "rgb(50, 20, 0)";
                    ctx.fillStyle = "rgb(120, 10, 0)";
                    ctx.lineWidth = 2;
                    ctx.strokeText("Fire", w / 2, h * .72);
                    ctx.fillText("Fire", w / 2, h * .72);
ctx.globalCompositeOperation = "overlay";
for (var i = 0; i < this.aFires.length; i++) {
this.aFires[i].draw(ctx);
}
ctx.globalCompositeOperation = "soft-light";
for (var i = 0; i < this.aSparks.length; i++) {
if ((i % 2) === 0)
this.aSparks[i].draw(ctx);
}
ctx.globalCompositeOperation = "color-dodge";
for (var i = 0; i < this.aSparks2.length; i++) {
this.aSparks2[i].draw(ctx);
}
}
}可以看到在 draw 方法中,实现了绘制 4 个元素。
在 update 方法中就是生成火焰和火花的实例,以及显示状态的变化。
最后实现一个 fire 的实例,引入 fire 的 draw 和 update 方法,就可以实现火焰效果了。
var current_fire = new fire(w * .5, h * .75);function init() {
current_fire.update(current_fire.x, current_fire.y);
if (current_fire.x) {
current_fire.draw(ctx);
}
requestAnimationFrame(init);
}而随鼠标移动就是要动态改变 current_fire 的 x, y 坐标。
window.onmousemove = function(e) {
                e = e || window.event;
                current_fire.x = e.clientX;
                current_fire.y = e.clientY;
            }

            window.onmouseout = function() {
                current_fire.x = w * .5;
                current_fire.y = h * .75;
            }
最后,源码下载地址 https://github.com/sakurayj/canvas/tree/master/test 。

canvas-nest.js基于html5 canvas绘制的网页背景效果
开源地址
https://github.com/hustcc/canvas-nest.js
下载js地址
http://cdn.bootcss.com/canvas-nest.js/1.0.1/canvas-nest.min.js
<body>
<!-- 下面的js必须在body里面引入 color:设置点和线的颜色 count:设置点的个数,count的数量不宜太多,太多会拖慢加载速度 -->
<script type="text/javascript" color="0,209,178" opacity=''0.9'' zIndex="-2" count="300" src="canvas-nest.min.js"></script>
</body>
设置线条的粗细 canvas-nest.min.js的 lineWidth 属性即可
设置线条的颜色 canvas-nest.min.js的 strokeStyle 属性即可
该js只是我在github找到自己用觉得好用,并不是自己写的

canvas粒子线条效果
在正式开始之前,先上个效果图看看:
很酷炫有木有???
那么如何实现这个效果呢?
首先,我做这个特效的基本步骤是这样的:
1.将若干个粒子随机分布在画布(canvas)上,并且给他们一个初始速度
2.为了不让粒子离开画布的可视范围,当粒子移动到画布边缘时,会进行反弹
3.设定一个最大距离,若粒子间的距离超过最大距离,便不会产生连线,若小于等于最大距离,则粒子间距越小,粒子间连的线就越宽,或者说颜色越深
4.设定鼠标事件,当鼠标移动时,粒子与鼠标距离若小于等于最大距离,那么粒子将会朝着鼠标方向移动
那么我们就按照这四个步骤来进行:
1 <canvas width="1300" height="600" id="myCanvas"></canvas>正常操作,我设置了一个宽1300,高600的画布
1 let c = document.getElementById(''myCanvas'');
2 let cxt = c.getContext(''2d'');
3 let num = 100;//粒子数量
4 let balls = [];
num是我设置的粒子数量,数量可以随意设置,但要注意的是,如果粒子数量太多,因为设备的原因,可能粒子不能够流畅运动,或移动的很慢。
用balls数组来存放随机数
 1 for(let i = 0; i < num; i ++){
 2     //设置随机数(粒子横坐标,纵坐标,半径,水平移动速度,垂直移动速度)
 3     let startX = Math.random() * (c.width - 5) + 5;
 4     let startY = Math.random() * (c.height - 5) + 5;
 5     let radius = Math.random() * 2 + 1;
 6     let speedX = Math.random() * 2 - 1;
 7     let speedY = Math.random() * 2 - 1;//速度的方向(正负)大小都是随机的
 8     // let colour = `rgba(${Math.random() * 255},${Math.random() * 255},${Math.random() * 255},.7)`;
 9     balls.push({startX, startY, radius, speedX, speedY});//存入数组
10 }
接下来用for循环设置随机数
从上到下顺序是:粒子初始横坐标、纵坐标、半径、水平移动速度、和垂直移动速度
还可以设置粒子的颜色,这里我注释掉了
最后把随机出的数推入数组储存起来
 1 function change(ball){
 2     cxt.beginPath();//开始绘制粒子
 3     cxt.fill#000'';
 4     cxt.arc(ball.startX, ball.startY, ball.radius, 0, Math.PI * 2);
 5     cxt.fill();
 6
 7    //粒子碰到画布边界会自动反弹
 8    ball.speedX *= (ball.startX + ball.radius) >= c.width || (ball.startX - ball.radius) <= 0 ? -1 : 1;
 9     ball.speedY *= (ball.startY + ball.radius) >= c.height || (ball.startY - ball.radius) <= 0 ? -1 : 1;
10
11   ball.startX += ball.speedX;
12     ball.startY += ball.speedY;
13 }
先绘制粒子,然后判断粒子是否运动到画布边界,如果是,就使速度乘以-1,这样粒子会朝着相反方向运动
注意:这里不能先执行 startX/Y + speedX/Y 再执行粒子是否运动到画布边界的判断
如果这样做,那么在设置初始横坐标、纵坐标的时候就不能直接设为 Math.random() * c.width/height 或 Math.random() * c.width/height + 1
因为Math.random()随机出的数是包含0的,如果粒子的初始横坐标或纵坐标就在画布边缘,那么粒子会在边缘快速的反弹,不会移动到画布中,当然如果你有别的方法,那么请无视我这句话
function move(){
    cxt.clearRect(0, 0, c.width, c.height);//清除画布
    for(let i = 0; i < num; i ++){
        change(balls[i]);
    }
}
创建一个move函数来调用change
每当执行一遍for循环时,都要清除一次画布,不然之前粒子运动的轨迹都会显示在上面
//点与点之间划线,距离较小的连线,距离大的则不连
    function drawLines(){
        move();
        let long = 100;
        let newBalls=[];//设置新数组以便与其他粒子比较距离

        balls.forEach(function(ball){//遍历数组
            for(let i = 0; i < num; i ++){
                newBalls[i] = balls[i];//赋值给新数组
                let disX = newBalls[i].startX - ball.startX;
                let disY = newBalls[i].startY - ball.startY;
                let dis = Math.sqrt(disX * disX + disY * disY);
                if(dis <= long){
                    cxt.beginPath();
                    cxt.lineWidth = (long - dis) / long;
                    cxt.strokeStyle = `rgba(0, 0, 0, ${dis / long})`;
                    cxt.moveTo(newBalls[i].startX, newBalls[i].startY);
                    cxt.lineTo(ball.startX, ball.startY);
                    cxt.stroke();
                }
            }
            //添加鼠标事件
            c.onmousemove=function(ev){
                ev = event || window.event;
                for(let i = 0; i < num; i ++){
                    let newX =  newBalls[i].startX - ev.clientX;
                    let newY =  newBalls[i].startY - ev.clientY;
                    let newDis = Math.sqrt(newX * newX + newY * newY);
                    if(newDis <= long){//周围的点朝着鼠标方向移动
                        newBalls[i].startX -= newX * 0.04;
                        newBalls[i].startY -= newY * 0.04;
                    }
                }
            };
        });
    }
    setInterval(drawLines,20);
创建一个drawline函数来执行连线效果和鼠标移动效果
首先设置一个最大距离long,我设的是100px的长度
定义一个新数组newBalls[]便于和balls[]中的粒子做距离比较
用foreach()方法遍历balls数组,这样就可以直接和balls的所有粒子进行比较,比较方便
计算出粒子之间的距离dis,如果dis小于等于long,那么就绘制线条连接两个粒子
if(dis <= long){
      cxt.beginPath();
      cxt.lineWidth = (long - dis) / long;
      cxt.strokeStyle = `rgba(0, 0, 0, ${dis / long})`;
      cxt.moveTo(newBalls[i].startX, newBalls[i].startY);
      cxt.lineTo(ball.startX, ball.startY);
      cxt.stroke();
 }
线条的宽度和透明度是根据long和dis的关系来设置的
这样的效果更加自然
 1 c.onmousemove=function(ev){
 2      ev = event || window.event;
 3      for(let i = 0; i < num; i ++){
 4         let newX =  newBalls[i].startX - ev.clientX;
 5         let newY =  newBalls[i].startY - ev.clientY;
 6         let newDis = Math.sqrt(newX * newX + newY * newY);
 7         if(newDis <= long){//周围的点朝着鼠标方向移动
 8             newBalls[i].startX -= newX * 0.04;
 9             newBalls[i].startY -= newY * 0.04;
10         }
11     }
12 };
设置鼠标事件,仍然是一样的操作
先算出鼠标和粒子之间的距离,如果粒子和鼠标距离小于等于最大距离,就朝着鼠标的方向移动
这个效果是我自己做的,和网上的很多效果感觉不太一样,如果发现了更酷炫的效果,那么之后我会更新
")
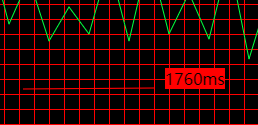
Canvas绘制心电图——画线测量距离(Canvas鼠标点击画线+标签跟随鼠标移动)
本篇文档记录绘制心电图之后,通过鼠标点击,绘制出一条线,同时鼠标旁边浮动出来字符长度。
想了解心电图的同学可以查看我之前的技术文档,里面有完整的代码,
但看此篇文档看懂之后可以理解如何通过鼠标点击拖拽就能画出图形,以及如何让标签跟着鼠标移动。
首先,我们在HTML页新建一个canvas标签画布。大小与之前的心电图相同,并且给出一个标签,该标签设置跟着鼠标移动。
1 <div>
2 <canvas id="celiang" width="750px" height="750px"></canvas>
3 </div>
4 <span id="mouseTip"></span>
然后需要考虑到,我们心电图所要用到的线条,在鼠标按下的时候开始绘制、鼠标移动既是路径,鼠标释放时候,所画的线条和记录距离的标签都应该消失。
故需要加一条css语句,来实现初期隐藏画线以及对span做block显示以及隐藏
 1 .heartBeat {
 2   width: 750px;
 3   height: 750px;
 4   background: black;
 5 }
 6
 7 #celiang {
 8   position: fixed;
 9   top: 20px;
10   z-index: 5;
11   display: none;
12 }
13
14 #mouseTip {
15   background: red;
16   display: none;
17   position: absolute;
18   pointer-events: none;
19 }
CSS设置完成之后,开始编辑JS,这里代码我给出画线和标签跟着鼠标移动的,利用注释划分
 1 //根据网格单位测量心电图相关距离
 2 var canvas = document.getElementById("celiang"); // 得到画布
 3 var cl = canvas.getContext("2d"); // 得到画布的上下文对象
 4 var flag = false;
 5 var x = 0; // 鼠标开始移动的位置X
 6 var y = 0; // 鼠标开始移动的位置Y
 7 var url = ""; // canvas图片的二进制格式转为dataURL格式
 8 /* 为canvas绑定mouse事件 */
 9
10 $("canvas")
11   .mousedown(function(e) {
12     flag = true;
13     x = e.offsetX; // 鼠标落下时的X
14     y = e.offsetY; // 鼠标落下时的Y
15     // console.log(x, y);
16
17     $("#mouseTip").css("display", "block");
18     $("#celiang").css("display", "block");
19     //当点击鼠标,让该canvas和span标签出现
20   })
21   .mouseup(function(e) {
22     flag = false;
23     url = $("#celiang")[0].toDataURL();
24     // 每次 mouseup 都保存一次画布状态
25     cl.clearRect(0, 0, canvas.width, canvas.height);
26     $("#mouseTip").css("display", "none");
27     $("#celiang").css("display", "none");
28     //当松开鼠标,让该canvas和sapn标签消失
29   })
30   .mousemove(function(e) {
31     drawrule(e); // 绘制方法+
32   });
33 function drawPencil(e) {
34   if (flag) {
35     cl.lineTo(e.offsetX, e.offsetY);
36     cl.stroke();
37     // 调用绘制方法
38   } else {
39     cl.beginPath();
40     cl.moveTo(x, y);
41   }
42 }
43 function drawrule(e) {
44   if (flag) {
45     cl.clearRect(0, 0, canvas.width, canvas.height);
46     cl.beginPath();
47     cl.stroke;
48     cl.moveTo(x, y);
49     cl.lineTo(e.offsetX, e.offsetY);
50     cl.stroke();
51     var xline = e.offsetX - x;
52     var yline = e.offsetY - y;
53     //定义两个变量来记录横纵坐标的点击点和拖动至的点的距离
54     var print;
55     //定义变量记录输出值
56     // console.log(xline + "X");
57     // console.log(yline + "Y");
58     if (xline > -yline) {
59       //判断横向距和纵向距离大小区别,发生变化时给出不同的单位
60       xline *= 200 / 15;
61       print = xline + "ms";
62     } else {
63       yline *= 0.5 / 15;
64       print = yline + "mv";
65     }
66     document.getElementById("mouseTip").innerHTML = print;
67   } //横向15px=200ms,纵向15px=0.5mv
68 }
69
70 //标签跟着鼠标移动
71 document.onmousemove = function(ev) {
72   var oEvent = ev || event;
73   var oDiv = document.getElementById("mouseTip");
74   oDiv.style.left = oEvent.clientX + 10 + "px";
75   oDiv.style.top = oEvent.clientY - 20 + "px";
76   //距离鼠标的位置,
77 };
到此,完成设置利用鼠标绘制一条直线到canvas画布,并且旁边带有跟动鼠标移动的标签。
如果小伙伴们想了解完整的心电图代码,可以关注订阅我之前的文档进行学习
实现方法不唯一,这里只是给出我的一个比较奇葩的方法,希望在部分方面可以帮助到大家!
心电图项目到此完毕!!
关于html 出现粒子线条,鼠标移动会以鼠标为中心吸附的特效之canvas-nest.js插件的问题我们已经讲解完毕,感谢您的阅读,如果还想了解更多关于canvas 火焰动态效果 随鼠标移动、canvas-nest.js基于html5 canvas绘制的网页背景效果、canvas粒子线条效果、Canvas绘制心电图——画线测量距离(Canvas鼠标点击画线+标签跟随鼠标移动)等相关内容,可以在本站寻找。
本文标签:


