想了解ElasticSearchJava高级客户端索引操作~的新动态吗?本文将为您提供详细的信息,我们还将为您解答关于javaelasticsearchapi的相关问题,此外,我们还将为您介绍关于02
想了解ElasticSearch Java 高级客户端索引操作~的新动态吗?本文将为您提供详细的信息,我们还将为您解答关于java elasticsearch api的相关问题,此外,我们还将为您介绍关于02. ElasticSearch (Spring Data ElasticSearch)、appsync 使用 elasticsearch 作为数据源:Elasticsearch 响应错误:禁止、Docker 中部署 ElasticSearch+ElasticSearch-Head、docker 部署 elasticsearch + elasticsearch-head + elasticsearch-head 跨域问题 + IK 分词器的新知识。
本文目录一览:- ElasticSearch Java 高级客户端索引操作~(java elasticsearch api)
- 02. ElasticSearch (Spring Data ElasticSearch)
- appsync 使用 elasticsearch 作为数据源:Elasticsearch 响应错误:禁止
- Docker 中部署 ElasticSearch+ElasticSearch-Head
- docker 部署 elasticsearch + elasticsearch-head + elasticsearch-head 跨域问题 + IK 分词器
")
ElasticSearch Java 高级客户端索引操作~(java elasticsearch api)
松哥原创的 Spring Boot 视频教程已经杀青,感兴趣的小伙伴戳这里-->Spring Boot+Vue+微人事视频教程
继续 Es 客户端~今天我们来看看 high level rest client ~
以下是视频笔记:
注意,笔记只是视频内容的一个简要记录,因此笔记内容比较简单,完整的内容可以查看视频。
28.1 索引管理
28.1.1 创建索引
首先创建一个普通的 Maven 项目,然后引入 high level rest client 依赖:
<dependencies>
    <dependency>
        <groupId>org.elasticsearch.client</groupId>
        <artifactId>elasticsearch-rest-high-level-client</artifactId>
        <version>7.10.0</version>
    </dependency>
</dependencies>
需要注意,依赖的版本和 Es 的版本要对应。
创建一个索引:
public class HighLevelTest {
    public static void main(String[] args) throws IOException {
        RestHighLevelClient client = new RestHighLevelClient(RestClient.builder(
                new HttpHost("localhost", 9200, "http"),
                new HttpHost("localhost", 9201, "http"),
                new HttpHost("localhost", 9202, "http")
        ));
        //删除已经存在的索引
        DeleteIndexRequest deleteIndexRequest = new DeleteIndexRequest("blog");
        client.indices().delete(deleteIndexRequest, RequestOptions.DEFAULT);
        //创建一个索引
        CreateIndexRequest blog1 = new CreateIndexRequest("blog");
        //配置 settings,分片、副本等信息
        blog1.settings(Settings.builder().put("index.number_of_shards", 3).put("index.number_of_replicas", 2));
        //配置字段类型,字段类型可以通过 JSON 字符串、Map 以及 XContentBuilder 三种方式来构建
        //json 字符串的方式
        blog1.mapping("{\"properties\": {\"title\": {\"type\": \"text\"}}}", XContentType.JSON);
        //执行请求,创建索引
        client.indices().create(blog1, RequestOptions.DEFAULT);
        //关闭 client
        client.close();
    }
}
mapping 的配置,还有另外两种方式:
第一种,通过 map 构建 mapping:
public class HighLevelTest {
    public static void main(String[] args) throws IOException {
        RestHighLevelClient client = new RestHighLevelClient(RestClient.builder(
                new HttpHost("localhost", 9200, "http"),
                new HttpHost("localhost", 9201, "http"),
                new HttpHost("localhost", 9202, "http")
        ));
        //删除已经存在的索引
        DeleteIndexRequest deleteIndexRequest = new DeleteIndexRequest("blog");
        client.indices().delete(deleteIndexRequest, RequestOptions.DEFAULT);
        //创建一个索引
        CreateIndexRequest blog1 = new CreateIndexRequest("blog");
        //配置 settings,分片、副本等信息
        blog1.settings(Settings.builder().put("index.number_of_shards", 3).put("index.number_of_replicas", 2));
        //配置字段类型,字段类型可以通过 JSON 字符串、Map 以及 XContentBuilder 三种方式来构建
        //json 字符串的方式
//        blog1.mapping("{\"properties\": {\"title\": {\"type\": \"text\"}}}", XContentType.JSON);
        //map 的方式
        Map<String, String> title = new HashMap<>();
        title.put("type", "text");
        Map<String, Object> properties = new HashMap<>();
        properties.put("title", title);
        Map<String, Object> mappings = new HashMap<>();
        mappings.put("properties", properties);
        blog1.mapping(mappings);
        //执行请求,创建索引
        client.indices().create(blog1, RequestOptions.DEFAULT);
        //关闭 client
        client.close();
    }
}
第二种,通过 XContentBuilder 构建 mapping:
public class HighLevelTest {
    public static void main(String[] args) throws IOException {
        RestHighLevelClient client = new RestHighLevelClient(RestClient.builder(
                new HttpHost("localhost", 9200, "http"),
                new HttpHost("localhost", 9201, "http"),
                new HttpHost("localhost", 9202, "http")
        ));
        //删除已经存在的索引
        DeleteIndexRequest deleteIndexRequest = new DeleteIndexRequest("blog");
        client.indices().delete(deleteIndexRequest, RequestOptions.DEFAULT);
        //创建一个索引
        CreateIndexRequest blog1 = new CreateIndexRequest("blog");
        //配置 settings,分片、副本等信息
        blog1.settings(Settings.builder().put("index.number_of_shards", 3).put("index.number_of_replicas", 2));
        //配置字段类型,字段类型可以通过 JSON 字符串、Map 以及 XContentBuilder 三种方式来构建
        //json 字符串的方式
//        blog1.mapping("{\"properties\": {\"title\": {\"type\": \"text\"}}}", XContentType.JSON);
        //map 的方式
//        Map<String, String> title = new HashMap<>();
//        title.put("type", "text");
//        Map<String, Object> properties = new HashMap<>();
//        properties.put("title", title);
//        Map<String, Object> mappings = new HashMap<>();
//        mappings.put("properties", properties);
//        blog1.mapping(mappings);
        //XContentBuilder 方式
        XContentBuilder builder = XContentFactory.jsonBuilder();
        builder.startObject();
        builder.startObject("properties");
        builder.startObject("title");
        builder.field("type", "text");
        builder.endObject();
        builder.endObject();
        builder.endObject();
        blog1.mapping(builder);
        //执行请求,创建索引
        client.indices().create(blog1, RequestOptions.DEFAULT);
        //关闭 client
        client.close();
    }
}
还可以给索引配置别名:
public class HighLevelTest {
    public static void main(String[] args) throws IOException {
        RestHighLevelClient client = new RestHighLevelClient(RestClient.builder(
                new HttpHost("localhost", 9200, "http"),
                new HttpHost("localhost", 9201, "http"),
                new HttpHost("localhost", 9202, "http")
        ));
        //删除已经存在的索引
        DeleteIndexRequest deleteIndexRequest = new DeleteIndexRequest("blog");
        client.indices().delete(deleteIndexRequest, RequestOptions.DEFAULT);
        //创建一个索引
        CreateIndexRequest blog1 = new CreateIndexRequest("blog");
        //配置 settings,分片、副本等信息
        blog1.settings(Settings.builder().put("index.number_of_shards", 3).put("index.number_of_replicas", 2));
        //配置字段类型,字段类型可以通过 JSON 字符串、Map 以及 XContentBuilder 三种方式来构建
        //json 字符串的方式
//        blog1.mapping("{\"properties\": {\"title\": {\"type\": \"text\"}}}", XContentType.JSON);
        //map 的方式
//        Map<String, String> title = new HashMap<>();
//        title.put("type", "text");
//        Map<String, Object> properties = new HashMap<>();
//        properties.put("title", title);
//        Map<String, Object> mappings = new HashMap<>();
//        mappings.put("properties", properties);
//        blog1.mapping(mappings);
        //XContentBuilder 方式
        XContentBuilder builder = XContentFactory.jsonBuilder();
        builder.startObject();
        builder.startObject("properties");
        builder.startObject("title");
        builder.field("type", "text");
        builder.endObject();
        builder.endObject();
        builder.endObject();
        blog1.mapping(builder);
        //配置别名
        blog1.alias(new Alias("blog_alias"));
        //执行请求,创建索引
        client.indices().create(blog1, RequestOptions.DEFAULT);
        //关闭 client
        client.close();
    }
}
如果觉得调 API 太麻烦,也可以直接上 JSON:
public class HighLevelTest2 {
    public static void main(String[] args) throws IOException {
        RestHighLevelClient client = new RestHighLevelClient(RestClient.builder(
                new HttpHost("localhost", 9200, "http"),
                new HttpHost("localhost", 9201, "http"),
                new HttpHost("localhost", 9202, "http")
        ));
        //删除已经存在的索引
        DeleteIndexRequest deleteIndexRequest = new DeleteIndexRequest("blog");
        client.indices().delete(deleteIndexRequest, RequestOptions.DEFAULT);
        //创建一个索引
        CreateIndexRequest blog1 = new CreateIndexRequest("blog");
        //直接同构 JSON 配置索引
        blog1.source("{\"settings\": {\"number_of_shards\": 3,\"number_of_replicas\": 2},\"mappings\": {\"properties\": {\"title\": {\"type\": \"keyword\"}}},\"aliases\": {\"blog_alias_javaboy\": {}}}", XContentType.JSON);
        //执行请求,创建索引
        client.indices().create(blog1, RequestOptions.DEFAULT);
        //关闭 client
        client.close();
    }
}
另外还有一些其他的可选配置:
public class HighLevelTest2 {
    public static void main(String[] args) throws IOException {
        RestHighLevelClient client = new RestHighLevelClient(RestClient.builder(
                new HttpHost("localhost", 9200, "http"),
                new HttpHost("localhost", 9201, "http"),
                new HttpHost("localhost", 9202, "http")
        ));
        //删除已经存在的索引
        DeleteIndexRequest deleteIndexRequest = new DeleteIndexRequest("blog");
        client.indices().delete(deleteIndexRequest, RequestOptions.DEFAULT);
        //创建一个索引
        CreateIndexRequest blog1 = new CreateIndexRequest("blog");
        //直接同构 JSON 配置索引
        blog1.source("{\"settings\": {\"number_of_shards\": 3,\"number_of_replicas\": 2},\"mappings\": {\"properties\": {\"title\": {\"type\": \"keyword\"}}},\"aliases\": {\"blog_alias_javaboy\": {}}}", XContentType.JSON);
        //请求超时时间,连接所有节点的超时时间
        blog1.setTimeout(TimeValue.timeValueMinutes(2));
        //连接 master 节点的超时时间
        blog1.setMasterTimeout(TimeValue.timeValueMinutes(1));
        //执行请求,创建索引
        client.indices().create(blog1, RequestOptions.DEFAULT);
        //关闭 client
        client.close();
    }
}
前面所有的请求都是同步的,会阻塞的,也可以异步:
public class HighLevelTest2 {
    public static void main(String[] args) throws IOException {
        RestHighLevelClient client = new RestHighLevelClient(RestClient.builder(
                new HttpHost("localhost", 9200, "http"),
                new HttpHost("localhost", 9201, "http"),
                new HttpHost("localhost", 9202, "http")
        ));
        //删除已经存在的索引
        DeleteIndexRequest deleteIndexRequest = new DeleteIndexRequest("blog");
        client.indices().delete(deleteIndexRequest, RequestOptions.DEFAULT);
        //创建一个索引
        CreateIndexRequest blog1 = new CreateIndexRequest("blog");
        //直接同构 JSON 配置索引
        blog1.source("{\"settings\": {\"number_of_shards\": 3,\"number_of_replicas\": 2},\"mappings\": {\"properties\": {\"title\": {\"type\": \"keyword\"}}},\"aliases\": {\"blog_alias_javaboy\": {}}}", XContentType.JSON);
        //请求超时时间,连接所有节点的超时时间
        blog1.setTimeout(TimeValue.timeValueMinutes(2));
        //连接 master 节点的超时时间
        blog1.setMasterTimeout(TimeValue.timeValueMinutes(1));
        //执行请求,创建索引
//        client.indices().create(blog1, RequestOptions.DEFAULT);
        //异步创建索引
        client.indices().createAsync(blog1, RequestOptions.DEFAULT, new ActionListener<CreateIndexResponse>() {
            //请求成功
            @Override
            public void onResponse(CreateIndexResponse createIndexResponse) {
                //关闭 client
                try {
                    client.close();
                } catch (IOException e) {
                    e.printStackTrace();
                }
            }

            //请求失败
            @Override
            public void onFailure(Exception e) {

            }
        });
        //关闭 client
//        client.close();
    }
}
ElasticSearch 基础知识:
-
打算出一个 ElasticSearch 教程,谁赞成,谁反对? -
ElasticSearch 从安装开始 -
ElasticSearch 第三弹,核心概念介绍 -
ElasticSearch 中的中文分词器该怎么玩? -
ElasticSearch 索引基本操作 -
ElasticSearch 文档的添加、获取以及更新 -
ElasticSearch 文档的删除和批量操作 -
ElasticSearch 文档路由,你的数据到底存在哪一个分片上? -
ElasticSearch 并发的处理方式:锁和版本控制 -
ElasticSearch 中的倒排索引到底是什么? -
ElasticSearch 动态映射与静态映射 -
ElasticSearch 四种字段类型详解 -
ElasticSearch 中的地理类型和特殊类型 -
ElasticSearch 23 种映射参数详解 -
ElasticSearch 如何配置某个字段的权重? -
ElasticSearch 23 种映射参数详解【3】 -
ElasticSearch 映射模版 -
ElasticSearch 搜索入门 -
ElasticSearch 全文搜索怎么玩? -
ElasticSearch 打错字还能搜索到?试试 fuzzy query! -
ElasticSearch 复合查询,理解 Es 中的文档评分策略! -
想搜索附近评分较高的餐厅,ElasticSearch 大显身手! -
ElasticSearch 如何像 MySQL 一样做多表联合查询? -
ElasticSearch 地理位置查询与特殊查询 -
ElasticSearch 搜索高亮与排序 -
ElasticSearch 指标聚合 -
ElasticSearch 桶聚合 -
ElasticSearch 管道聚合 -
Java 操作 ElasticSearch,so easy!
50+ 需求文档免费下载!
Spring Security 教程合集
接了两个私活,都是血汗钱
本文分享自微信公众号 - 江南一点雨(a_javaboy)。
如有侵权,请联系 support@oschina.cn 删除。
本文参与“OSC源创计划”,欢迎正在阅读的你也加入,一起分享。
")
02. ElasticSearch (Spring Data ElasticSearch)
1. 概述
-
Spring Data Elasticsearch 对原生的 Elasticsearch 简化
-
特点:
- 基于Configuration配置,只要在yml文件中配置,项目就可以使用
- 工具类 ElasticsearchTemplate ES模板,类似于通用mapper,通过对象操作ES
- 提供持久层接口 Repository,无需编写基本操作代码(类似于mybatis,根据接口自动得到实现),也支持自定义查询
2. 环境搭建
-
步骤一: 修改pom.xml文件,导入坐标
-
步骤二: 修改yml文件,添加Elasticsearch配置信息
-
步骤三: 创建一个配置类,项目启动时时,设置一个参数,防止运行时异常
-
步骤四: 编写测试方法
-
步骤一: 修改pom.xml文件,导入坐标
<dependencies> <!--redis--> <dependency> <groupId>org.springframework.boot</groupId> <artifactId>spring-boot-starter-data-redis</artifactId> </dependency> <dependency> <groupId>redis.clients</groupId> <artifactId>jedis</artifactId> </dependency> <!--测试--> <dependency> <groupId>org.springframework.boot</groupId> <artifactId>spring-boot-starter-test</artifactId> </dependency> <dependency> <groupId>com.czxy</groupId> <artifactId>changgou_common</artifactId> <version>1.0-SNAPSHOT</version> </dependency> <!--es--> <dependency> <groupId>org.springframework.boot</groupId> <artifactId>spring-boot-starter-data-elasticsearch</artifactId> </dependency> </dependencies> -
步骤二: 修改yml文件,添加Elasticsearch配置信息
spring: redis: database: 1 #确定使用库 host: 127.0.0.1 #redis服务地址 port: 6379 #redis 端口号 data: elasticsearch: cluster-name: elasticsearch cluster-nodes: 127.0.0.1:9300 -
步骤三: 创建一个配置类,项目启动时时,设置一个参数,防止运行时异常
package com.czxy.config; import org.springframework.context.annotation.Configuration; import javax.annotation.PostConstruct; /** * Created by Pole丶逐. */ @Configuration public class ESConfig { /** * 项目启动时,设置一个参数 */ @PostConstruct public void init() { System.setProperty("es.set.netty.runtime.available.processors", "false"); } } -
步骤四: 编写测试方法
package com.czxy.test;

import com.czxy.TestApplication;
import org.junit.Test;
import org.junit.runner.RunWith;
import org.springframework.boot.test.context.SpringBootTest;
import org.springframework.test.context.junit4.SpringRunner;

/**
 * [@Author](https://my.oschina.net/arthor) Pole丶逐
 * [@Date](https://my.oschina.net/u/2504391) 2020/4/13 20:39
 * [@E-mail](https://my.oschina.net/rosolio)
 */
@RunWith(SpringRunner.class)
@SpringBootTest(classes = TestApplication.class)
public class Demo01 {

    @Test
    public void test(){
        System.out.println("AAA");
    }
}
3. 索引操作
3.1 创建映射类
-
映射类: 用于表示java数据和Elasticsearch中数据对应关系.在Spring Data Elasticsearch使用注解完成
名称 修饰位置 参数 @Document 表示java数据和Elasticsearch中数据对应关系 indexName: 对应索引名称<br/>type: 对应索引库中的类型 <br/>shards: 分片数量 <br/>replicas: 副本数量 @Id 唯一标识 无 @Field java属性和es字段的对应关系 type: 字段类型<br/>analyzer: 分词器名称<br/>index: 是否索引,默认为true<br/>store: 是否存储,默认为false -
实现类:
package com.czxy.vo;

import lombok.AllArgsConstructor;
import lombok.Data;
import lombok.NoArgsConstructor;
import org.springframework.data.annotation.Id;
import org.springframework.data.elasticsearch.annotations.Document;
import org.springframework.data.elasticsearch.annotations.Field;
import org.springframework.data.elasticsearch.annotations.FieldType;

/**
 * @Author Pole丶逐
 * @Date 2020/4/13 20:55
 * @E-mail
 */
@NoArgsConstructor
@AllArgsConstructor
@Data
@Document(indexName = "czxy56",type = "book",shards = 4,replicas = 2)
public class ESBook {

    @Id
    private Long id;

    @Field(type = FieldType.Text,analyzer = "ik_max_word")
    private String title;

    @Field(type = FieldType.Keyword)
    private String images;

    @Field(type = FieldType.Float)
    private Double price;
}
3.2 创建索引,添加映射,删除索引
-
ElasticsearchTemplate工具类提供对应方法完成以下功能
-
步骤一: 直接注入ElasticsearchTemplate,spring容器中自动创建
-
步骤二: 调用对应API操作
package com.czxy.test;

import com.czxy.TestApplication;
import com.czxy.vo.ESBook;
import org.junit.Test;
import org.junit.runner.RunWith;
import org.springframework.boot.test.context.SpringBootTest;
import org.springframework.data.elasticsearch.core.ElasticsearchTemplate;
import org.springframework.test.context.junit4.SpringRunner;

import javax.annotation.Resource;

/**
 * @Author Pole丶逐
 * @Date 2020/4/13 21:00
 * @E-mail
 */
@RunWith(SpringRunner.class)
@SpringBootTest(classes = TestApplication.class)
public class TestES {

    @Resource
    private ElasticsearchTemplate elasticsearchTemplate;

    @Test
    public void test1(){
        // 创建索引
        elasticsearchTemplate.createIndex(ESBook.class);
    }

    @Test
    public void test2(){
        //创建映射
        elasticsearchTemplate.putMapping(ESBook.class);
    }

    @Test
    public void test3(){
        //删除索引
        elasticsearchTemplate.deleteIndex(ESBook.class);
    }


}
4. 文档操作(增删改)
-
实现接口: ElasticsearchRepository,实现了所有功能
-
只需要继承 **ElasticsearchRepository **接口即可,Spring Data 自动加载
-
参数类型: 泛型
-
第一个: 映射类(ESBook)
-
第二个: 映射类唯一标识的类型(Id)
package com.czxy.repository;

import com.czxy.vo.ESBook;
import org.springframework.data.elasticsearch.repository.ElasticsearchRepository;

import java.util.List;

/**
 * @Author Pole丶逐
 * @Date 2020/4/13 21:15
 * @E-mail
 */
public interface ESBookRepository extends ElasticsearchRepository<ESBook,Long> {


}
-
4.1 添加数据
| 方法名 | 描述 |
|---|---|
| save() | 添加一个数据 |
| saveAll() | 添加一组数据 |
package com.czxy.test;

import com.czxy.TestApplication;
import com.czxy.repository.ESBookRepository;
import com.czxy.vo.ESBook;
import org.junit.Test;
import org.junit.runner.RunWith;
import org.springframework.boot.test.context.SpringBootTest;
import org.springframework.test.context.junit4.SpringRunner;

import javax.annotation.Resource;
import java.util.ArrayList;
import java.util.Iterator;
import java.util.List;
import java.util.Optional;

/**
 * @Author Pole丶逐
 * @Date 2020/4/13 21:14
 * @E-mail
 */
@RunWith(SpringRunner.class)
@SpringBootTest(classes = TestApplication.class)
public class TestESData {

    @Resource
    private ESBookRepository esBookRepository;

    @Test
    public void test1(){
        //添加一个数据
        esBookRepository.save(new ESBook(1L,"时间简史","01.jpg",35.0));
    }

    @Test
    public void test2(){
        ArrayList<ESBook> eslist = new ArrayList<>();
        eslist.add(new ESBook(1L,"时间简史","01.jpg",35.0));
        eslist.add(new ESBook(2L,"三体","02.jpg",40.0));
        eslist.add(new ESBook(3L, "人类简史","03.jpg",35.5));
        //添加一个集合
		esBookRepository.saveAll(eslist);
    }


}
4.2 修改数据
-
修改和添加使用的是一个方法
- 如果id存在则为修改
- 如果id不存在则为添加
@Test
public void test1(){
    //修改数据,id必须存在,否则为添加
    esBookRepository.save(new ESBook(1L,"空间简史","01.jpg",35.0));
}
4.2 删除数据
@Test
public void test3(){
    //  根据对象删除
    //esBookRepository.delete();
    // 根据id删除
    //esBookRepository.deleteById(1L);
    //  删除所有
    //esBookRepository.deleteAll();
}
5. 查询
5.1 基本查询
| 方法 | 描述 |
|---|---|
| findAll() | 查询所有 |
| findById() | 根据id查询 |
@Test
public void test4(){
    //查询所有
    Iterable<ESBook> iterable = esBookRepository.findAll();
    Iterator<ESBook> iterator = iterable.iterator();
    while (iterator.hasNext()){
        ESBook esBook = iterator.next();
        System.out.println(esBook);
    }
}

@Test
public void test5(){
    //根据id查询
    Optional<ESBook> optional = esBookRepository.findById(1L);
    ESBook esBook = optional.get();
    System.out.println(esBook);
}
5.2 自定义方法
-
Spring Data 根据约定的方法名进行自动查询
- 要求: findBy字段 | 关键字
-
实例:
package com.czxy.repository;

import com.czxy.vo.ESBook;
import org.springframework.data.elasticsearch.repository.ElasticsearchRepository;

import java.util.List;

/**
 * @Author Pole丶逐
 * @Date 2020/4/13 21:15
 * @E-mail
 */
public interface ESBookRepository extends ElasticsearchRepository<ESBook,Long> {

    //根据title查询
    List<ESBook> findByTitle(String title);
	//根据price查询区间
    List<ESBook> findByPriceBetween(Double start, Double end);
	//查询大于等于price
    List<ESBook> findByPriceGreaterThanEqual(Double price);
}
5.3 自定义查询
5.3.1 关键字查询: match
-
查询条件构造器: NativeSearchQueryBuilder
-
查询: queryBuilder.withQuery( ... )
-
match条件: QueryBuilders.matchQuery("字段","值")
-
查询: esBookRepository.search( 条件 )
-
返回值: Page,容器,可以直接遍历获取数据
package com.czxy.test;

import com.czxy.TestApplication;
import com.czxy.repository.ESBookRepository;
import com.czxy.vo.ESBook;
import org.elasticsearch.index.query.BoolQueryBuilder;
import org.elasticsearch.index.query.QueryBuilders;
import org.elasticsearch.search.sort.SortBuilders;
import org.elasticsearch.search.sort.SortOrder;
import org.junit.Test;
import org.junit.runner.RunWith;
import org.springframework.boot.test.context.SpringBootTest;
import org.springframework.data.domain.Page;
import org.springframework.data.domain.PageRequest;
import org.springframework.data.elasticsearch.core.query.NativeSearchQueryBuilder;
import org.springframework.test.context.junit4.SpringRunner;

import javax.annotation.Resource;

/**
 * @Author Pole丶逐
 * @Date 2020/4/14 15:55
 * @E-mail
 */
@RunWith(SpringRunner.class)
@SpringBootTest(classes = TestApplication.class)
public class TestData {

    @Resource
    private ESBookRepository esBookRepository;

    @Test
    public void test1(){
        //创建条件构造器器
        NativeSearchQueryBuilder queryBuilder = new NativeSearchQueryBuilder();
        //把条件查询match放到查询条件中
        queryBuilder.withQuery(QueryBuilders.matchQuery("title","简史"));
        //创建构造对象并查询
        Page<ESBook> page = esBookRepository.search(queryBuilder.build());

        System.out.println("总条数: " + page.getTotalElements());
        System.out.println("总页数: " + page.getTotalPages());

        for (ESBook esBook : page) {
            System.out.println(esBook);
        }
    }

}
5.3.2 多条件查询: bool -- must/mustNot(交集)
-
多条件拼凑: BoolQueryBuilder对象
- QueryBuilders.boolQuery()
-
并集操作: must()/mustNot()
@Test
public void test2(){
    //  创建条件查询构建器
    NativeSearchQueryBuilder queryBuilder = new NativeSearchQueryBuilder();
    //  获得bool查询条件
    BoolQueryBuilder boolQueryBuilder = QueryBuilders.boolQuery();
    //  拼接查询条件
    boolQueryBuilder.must(QueryBuilders.matchQuery("title","简史"));
    boolQueryBuilder.mustNot(QueryBuilders.matchQuery("title","时间"));
    //  把条件放入查询条件中
    queryBuilder.withQuery(boolQueryBuilder);
    //  构建对象并查询
    Page<ESBook> page = esBookRepository.search(queryBuilder.build());
    //  循环遍历
    page.forEach( esBook -> {
        System.out.println(esBook);
    });

}
5.3.3 多条件查询: bool -- should (并集)
-
交集操作: boolQueryBuilder.should()
@Test
public void test3(){
    NativeSearchQueryBuilder queryBuilder = new NativeSearchQueryBuilder();

    BoolQueryBuilder boolQueryBuilder = QueryBuilders.boolQuery();

    boolQueryBuilder.should(QueryBuilders.matchQuery("title","人类"));
    boolQueryBuilder.should(QueryBuilders.matchQuery("title","简史"));

    queryBuilder.withQuery(boolQueryBuilder);

    Page<ESBook> page = esBookRepository.search(queryBuilder.build());

    page.forEach( esBook -> {
        System.out.println(esBook);
    });
}
5.3.4 精准查询: term
-
精准查询: QueryBuilders.termQuery( 字段,值 )
@Test
public void test4(){
    NativeSearchQueryBuilder queryBuilder = new NativeSearchQueryBuilder();

    queryBuilder.withQuery(QueryBuilders.termQuery("title","简史"));

    Page<ESBook> page = esBookRepository.search(queryBuilder.build());

    page.forEach(esBook -> {
        System.out.println(esBook);
    });

}
5.3.5 区间查询: range
-
区间查询: QueryBuilders.rangeQuery( 字段 )
- lt(): 小于
- lte(): 小于等于
- gt(): 大于
- gte(): 大于等于
@Test
public void test5(){
    NativeSearchQueryBuilder queryBuilder = new NativeSearchQueryBuilder();

    queryBuilder.withQuery(QueryBuilders.rangeQuery("price").gte(35.5).lte(40.0));

    Page<ESBook> page = esBookRepository.search(queryBuilder.build());

    page.forEach(esBook -> {
        System.out.println(esBook);
    });

}
5.3.6 分页查询:
-
分页查询: queryBuilder.withPageable()
- 分页工具类: PageRequest.of(pageNum,pageSIze)
@Test
public void test6(){
    NativeSearchQueryBuilder queryBuilder = new NativeSearchQueryBuilder();

    queryBuilder.withPageable(PageRequest.of(1,2));

    Page<ESBook> page = esBookRepository.search(queryBuilder.build());

    page.forEach(esBook -> {
        System.out.println(esBook);
    });

}
5.3.7 排序查询:
-
排序查询: queryBuilder.withSort()
- 排序工具类: SortBuilders.fieldSort(排序字段)
- 排序方式: order(SortOrder.DESC | SortOrder.ASC)
@Test
public void test7(){
    NativeSearchQueryBuilder queryBuilder = new NativeSearchQueryBuilder();

    queryBuilder.withSort(SortBuilders.fieldSort("price").order(SortOrder.DESC));

    Page<ESBook> page = esBookRepository.search(queryBuilder.build());

    page.forEach(esBook -> {
        System.out.println(esBook);
    });

}
6. 总结
- 查询条件构造器: NativeSearchQueryBuilder
- 查询条件: queryBuilder.withQuery()
- 分页条件: queryBuilder.withPageable()
- 排序条件: queryBuilder.withSort()
- 构造: build()
- 查询条件,通过工具类QueryBuilders 获得
- 关键字查询: matchQuery(字段,值)
- 多条件查询: boolQuery()
- 必须有: must()
- 必须没有; mustNot()
- 并集: should()
- 精准查询: termQuery(字段,值)
- 区间查询: rangeQuery(字段)
- 大于: gt()
- 大于等于: gte()
- 小于: lt()
- 小于等于: lte()
- 分页条件: 工具类PageRequest
- 设置分页参数: PageRequest.of(pageNum,pageSize)
- 排序字段,通过工具类SortBuilders
- 排序字段: SortBuilders.fieldSort("字段")
- 排序方式: order(SortOrder.DESC | SortOrder.ASC)
- 查询结果: Page对象
- 总条数: getTotalElements()
- 总页数: getTotalPages()
- 第几页: getNumber()
- 每页个数: getSize()
- 过得内容: getContent()
- Page 对象可以直接遍历

appsync 使用 elasticsearch 作为数据源:Elasticsearch 响应错误:禁止
我已经为同样的问题苦苦挣扎了几天。 就我而言,问题是自动生成的 IAM 角色被授予 ES 端点的权限,并且通过更改对整个 ES 域的“资源”引用来解决。例如:
之前:
"Resource": [
    "arn:aws:es:us-east-1:11111:domain/search-foo-bar-search-someid123.us-east-1.es.amazonaws.com"
]
之后:
"Resource": [
    "arn:aws:es:us-east-1:11111:domain/foo-bar-search/*"
]

Docker 中部署 ElasticSearch+ElasticSearch-Head
Docker 中部署 ElasticSearch+ElasticSearch-Head
一、Docker 部署 ElasticSearch
1、拉取 es 镜像:
[root@TrueDei ~]# docker pull elasticsearch:7.10.1
2、运行容器
ElasticSearch的默认端口是 9200,我们把宿主环境 9200 端口映射到Docker容器中的 9200 端口,就可以访问到Docker容器中的ElasticSearch服务了,同时我们把这个容器命名为truedei-es。
[root@TrueDei ~]#
[root@TrueDei ~]# docker images
REPOSITORY                TAG       IMAGE ID       CREATED         SIZE
elasticsearch             7.10.1    558380375f1a   3 weeks ago     774MB
hello-world               latest    bf756fb1ae65   12 months ago   13.3kB
centos/mysql-57-centos7   latest    f83a2938370c   14 months ago   452MB
[root@TrueDei ~]#
[root@TrueDei ~]# docker run -d --name truedei-es -p 9200:9200 -p 9300:9300 -e "discovery.type=single-node" elasticsearch:7.10.1
ad6e6d2914272a131ce904e8d1ed9c5580e077c68464cd6cd8bbc00c353098e0
[root@TrueDei ~]#
[root@TrueDei ~]#
3、进入到 es:
因为要对 es 进行配置,所以要进入到容器才可以
[root@TrueDei ~]#
[root@TrueDei ~]# docker exec -it truedei-es /bin/bash
[root@ad6e6d291427 elasticsearch]#
4、进行配置
加入跨域配置
[root@TrueDei ~]#
[root@TrueDei ~]# docker exec -it truedei-es /bin/bash
[root@ad6e6d291427 elasticsearch]#
[root@ad6e6d291427 elasticsearch]#
[root@ad6e6d291427 elasticsearch]# ls
LICENSE.txt  NOTICE.txt  README.asciidoc  bin  config  data  jdk  lib  logs  modules  plugins
[root@ad6e6d291427 elasticsearch]#
[root@ad6e6d291427 elasticsearch]#
[root@ad6e6d291427 elasticsearch]# cd config/
[root@ad6e6d291427 config]#
[root@ad6e6d291427 config]# ls
elasticsearch.keystore  elasticsearch.yml  jvm.options  jvm.options.d  log4j2.properties  role_mapping.yml  roles.yml  users  users_roles
[root@ad6e6d291427 config]#
[root@ad6e6d291427 config]#
[root@ad6e6d291427 config]# vi elasticsearch.yml
[root@ad6e6d291427 config]#
[root@ad6e6d291427 config]# cat elasticsearch.yml
cluster.name: "docker-cluster"
network.host: 0.0.0.0
http.cors.enabled: true
http.cors.allow-origin: "*"
[root@ad6e6d291427 config]#
5、退出重启 es
[root@ad6e6d291427 config]#
[root@ad6e6d291427 config]# exit
exit
[root@TrueDei ~]#
[root@TrueDei ~]# docker restart truedei-es
truedei-es
[root@TrueDei ~]#
[root@TrueDei ~]#
6、查看是否启动成功
[root@TrueDei ~]# docker ps -a
CONTAINER ID   IMAGE                     COMMAND                  CREATED         STATUS                   PORTS                              NAMES
ad6e6d291427   elasticsearch:7.10.1      "/tini -- /usr/local…"   4 minutes ago   Up 27 seconds            0.0.0.0:9200->9200/tcp, 9300/tcp   truedei-es
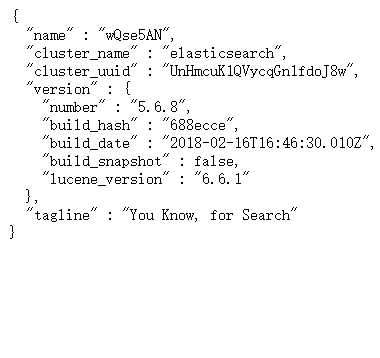
7、测试是否成功
浏览器输入:http://IP:9200
二、Docker 部署 ElasticSearch-Head
为什么要安装 ElasticSearch-Head 呢,原因是需要有一个管理界面进行查看 ElasticSearch 相关信息
1、拉取镜像
[root@TrueDei ~]# docker pull mobz/elasticsearch-head:5
2、运行容器
[root@TrueDei ~]#
[root@TrueDei ~]# docker run -d --name truedei-es-head -p 9100:9100 mobz/elasticsearch-head:5
2433913241a2504981088d8ec6c1cc10f7457c1d3abfdb99255e8b2111c81922
[root@TrueDei ~]#
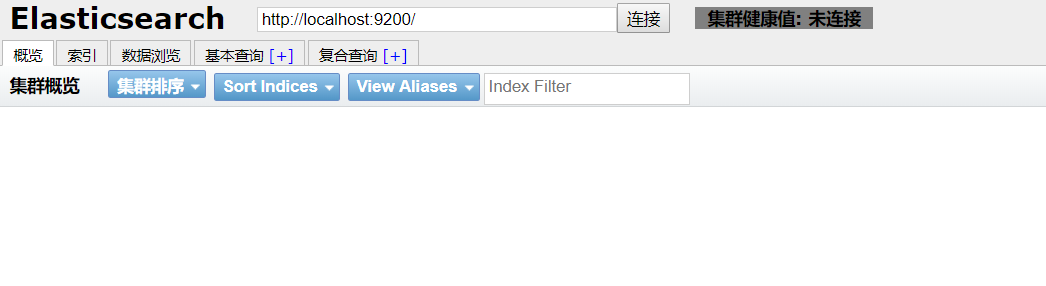
3、测试
浏览器访问:http://IP:9100
然后输入你 ES 服务的地址即可链接
在创建索引的时候发现存在问题
解决办法以及步骤:
进入 ElasticSearch-Head 中修改配置文件;
1、进入 ElasticSearch-Head 容器:
[root@TrueDei ~]#
[root@TrueDei ~]#
[root@TrueDei ~]# docker exec -it truedei-es-head /bin/bash
root@2433913241a2:/usr/src/app#
root@2433913241a2:/usr/src/app#
root@2433913241a2:/usr/src/app#
root@2433913241a2:/usr/src/app# cd
root@2433913241a2:~#
root@2433913241a2:~#
root@2433913241a2:~# cd /usr/src/app/
root@2433913241a2:/usr/src/app# ll
bash: ll: command not found
root@2433913241a2:/usr/src/app# ls
Dockerfile    LICENCE         _site                               elasticsearch-head.sublime-workspace  index.html    package.json                  src
Gruntfile.js  README.textile  elasticsearch-head.sublime-project  grunt_fileSets.js                     node_modules  plugin-descriptor.properties  test
root@2433913241a2:/usr/src/app#
root@2433913241a2:/usr/src/app#
root@2433913241a2:/usr/src/app# cd _site/
root@2433913241a2:/usr/src/app/_site#
root@2433913241a2:/usr/src/app/_site# vi vendor.js
bash: vi: command not found
root@2433913241a2:/usr/src/app/_site#
在编辑 vendor.js 的时候说 vi 编辑器不存在,那么就需要安装一下 vim 了:
apt-get update
apt-get install vim
1、进入 head 安装目录;
2、cd _site/
3、编辑 vendor.js 共有两处
6886 行 /contentType: "application/x-www-form-urlencoded
改成
contentType: "application/json;charset=UTF-8"
7574 行 var inspectData = s.contentType === "application/x-www-form-urlencoded" &&
改成
var inspectData = s.contentType === "application/json;charset=UTF-8" &&
然后重启一下即可
此时创建索引也是 OK 的
查询也 ok 了: