如果您对用dvaJS实现todolist(增删改)和vuetodolist增删改查感兴趣,那么这篇文章一定是您不可错过的。我们将详细讲解用dvaJS实现todolist(增删改)的各种细节,并对vue
如果您对用dvaJS实现todolist(增删改)和vue todolist增删改查感兴趣,那么这篇文章一定是您不可错过的。我们将详细讲解用dvaJS实现todolist(增删改)的各种细节,并对vue todolist增删改查进行深入的分析,此外还有关于02慕课网《vue.js2.5入门》——Vue中的组件,实现todolist、07.React实现Todolist练习 (上)、08.React实现Todolist练习 Todolist 待办事项 已经完成 (中)、09.React的模块化以及封装Storage实现todolist 待办事项 已经完成事项 以及实现数据持久化(下)的实用技巧。
本文目录一览:- 用dvaJS实现todolist(增删改)(vue todolist增删改查)
- 02慕课网《vue.js2.5入门》——Vue中的组件,实现todolist
- 07.React实现Todolist练习 (上)
- 08.React实现Todolist练习 Todolist 待办事项 已经完成 (中)
- 09.React的模块化以及封装Storage实现todolist 待办事项 已经完成事项 以及实现数据持久化(下)
(vue todolist增删改查)")
用dvaJS实现todolist(增删改)(vue todolist增删改查)
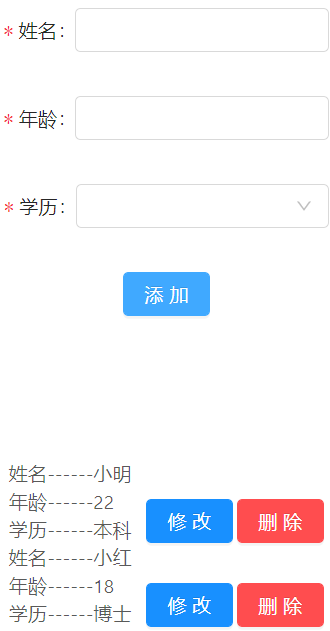
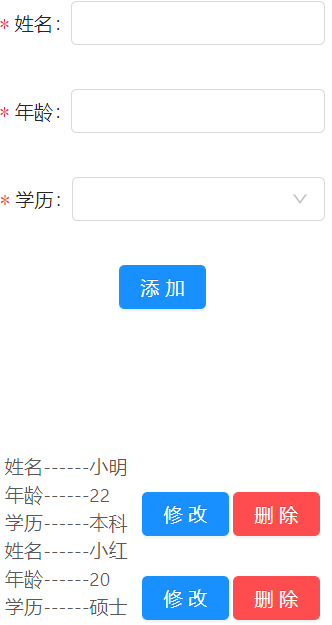
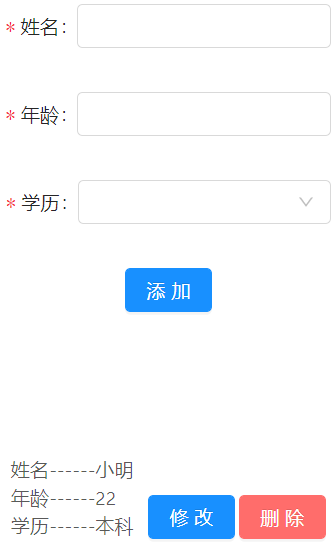
效果图

这几天在看dvaJS,dva 首先是一个基于 redux和 redux-saga的数据流方案,然后为了简化开发体验,dva 还额外内置了 react-router和 fetch,所以也可以理解为一个轻量级的应用框架。
要想学好dva你要对ES6有一些了解,对React有些了解,上手的时候就比较容易。
写这个todolist首先得安装dva-cli
通过npm安装dva-cli
npm install dva-cli -g
安装完成后输入dva -v查看版本号
创建新应用
安装完dva-cli后,可以在命令行访问到dva命令
通过dva new dva-quickstart创建新应用
这会创建dva-quickstart目录,包含项目初始化目录和文件,并提供开发服务器、构建脚本、数据mock服务、代理服务器等功能。
然后我们cd进入dva-quickstart目录,并启动开发服务器
cd dva-quickstart
npm start
components模块
add.js
import React, { Component } from ''react''
import { Form, Input, Button, Select } from ''antd''

import { connect } from ''dva''
import styles from ''./input.css''
const { Option } = Select;
class Add extends Component {
    render() {
        const { getFieldDecorator } = this.props.form
        return (
            <div>
                <Form onSubmit={this.handleAdd} className={styles.form}>
                    <Form.Item label="姓名" className={styles.formItem}>
                        {getFieldDecorator(''name'', {
                            rules: [
                                {
                                    required: true,
                                    message: ''不能为空''
                                },
                                {
                                    pattern: /^[\u4E00-\u9FA5\uf900-\ufa2d·s]{2,20}$/,
                                    message: ''输入中文名字''
                                }
                            ]
                        })(<Input width=''100'' />)}

                    </Form.Item>
                    <Form.Item label="年龄" className={styles.formItem}>
                        {getFieldDecorator(''age'', {
                            rules: [
                                {
                                    required: true, message: ''不能为空''
                                },
                                {
                                    pattern: /^(?:[1-9][0-9]?|1[01][0-9]|120)$/,
                                    message: ''请输入年龄''
                                }
                            ]
                        })(<Input width=''100'' />)}

                    </Form.Item>
                    <Form.Item label="学历" className={styles.formItem}>
                        {getFieldDecorator(''xl'', {
                            rules: [
                                {
                                    required: true, message: ''不能为空''
                                }
                            ]
                        })(
                            <Select style={{ width: 184 }}>
                                <Option value="本科">本科</Option>
                                <Option value="硕士">硕士</Option>
                                <Option value="博士">博士</Option>
                                <Option value="专科">专科</Option>
                            </Select>
                        )}

                    </Form.Item>
                    <Form.Item className={styles.formItem}>
                        <Button htmlType="submit" type="primary">添加</Button>
                    </Form.Item>
                </Form>

            </div>
        )
    }
    handleAdd = (e) => {
        e.preventDefault();
        this.props.form.validateFields((err, values) => {
            if (!err) {
                //与后台进行数据交互
                const list = {}
                list.name = values.name
                list.age = values.age
                list.xl = values.xl
                this.props.form.setFieldsValue({ name: '''', age: '''', xl: '''' })//点击确定让input输入框中的值为空
                this.props.dispatch({
                    type: ''todo/add'',
                    payload: list
                })

            }
        })
    }
}
const mapStateToProps = (state) => {
    return {
        list: state.todo.list
    }
}

export default connect(mapStateToProps)(Form.create()(Add))
modify.js
import React, { Component } from ''react''
import { Form, Input, Button,Select } from ''antd''
import { connect } from ''dva''
import styles from ''./input.css''
const {Option} = Select
class Add extends Component {
    render() {
        console.log(this.props)
        let { list, toIndex } = this.props
        const todoList = list[toIndex]
        const { getFieldDecorator} = this.props.form

        return (
            <div>
                <Form onSubmit={this.handleUpdate} className={styles.form}>
                    <Form.Item label="姓名" className={styles.formItem}>
                        {getFieldDecorator(''name'', {
                            initialValue:todoList.name,//设置初始的值
                            rules: [
                                {
                                    required: true,
                                    message: ''不能为空''
                                },
                                {
                                    pattern: /^[\u4E00-\u9FA5\uf900-\ufa2d·s]{2,20}$/,
                                    message: ''输入中文名字''
                                }
                            ]
                        })(<Input/>)}

                    </Form.Item>
                    <Form.Item label="年龄" className={styles.formItem}>
                        {getFieldDecorator(''age'', {
                            initialValue:todoList.age,
                            rules: [
                                {
                                    required: true, message: ''不能为空''
                                },
                                {
                                    pattern: /^(?:[1-9][0-9]?|1[01][0-9]|120)$/,
                                    message: ''请输入年龄''
                                }
                            ]
                        })(<Input/>)}

                    </Form.Item>
                    <Form.Item label="学历" className={styles.formItem}>
                        {getFieldDecorator(''xl'', {
                            initialValue:todoList.xl,
                            rules: [
                                {
                                    required: true, message: ''不能为空''
                                }
                            ]
                        })(
                            <Select style={{ width: 184 }}>
                            <Option value="本科">本科</Option>
                            <Option value="硕士">硕士</Option>
                            <Option value="博士">博士</Option>
                            <Option value="专科">专科</Option>
                        </Select>
                        )}

                    </Form.Item>
                    <Form.Item className={styles.formItem}>
                        <Button htmlType="submit" type="primary">修改</Button>
                    </Form.Item>
                </Form>

            </div>
        )
    }

    handleUpdate = (e) => {
        e.preventDefault();
        this.props.form.validateFields((err, values) => {
            if (!err) {
                //与后台进行数据交互
                const list = {}
                list.name = values.name
                list.age = values.age
                list.xl = values.xl
                this.props.form.setFieldsValue({name:'''',age:'''',xl:''''})//点击确定让input输入框中的值为空
                this.props.dispatch({
                    type:''todo/update'',
                    payload:list
                })

            }
        })
    }
}
const mapStateToProps = (state) => {
    return {
        list: state.todo.list,
        toIndex: state.todo.toIndex
    }
}

export default connect(mapStateToProps)(Form.create()(Add))
list.js
import React, { Component } from ''react''
import { connect } from "dva"
import { Button } from ''antd''
import styles from ''./input.css''

class List extends Component {

    render() {
        let { list } = this.props
        return (
            <div>
                {
                    list ? list.map((item, index) => (
                        <li key={index}  className={styles.list}>
                            <div>
                            <span>姓名------{item.name}</span><br />
                            <span>年龄------{item.age}</span><br />
                            <span>学历------{item.xl}</span> <br />
                            </div>

                            <div className={styles.btn}>
                            <Button htmlType=''submit'' type=''primary'' onClick={() => this.handleModify(index)}>修改</Button>
                            <Button htmlType=''submit'' type=''danger'' onClick={() => this.handleDelete(index)}>删除</Button>
                            </div>

                        </li>
                    )) : ''''
                }
            </div>
        )
    }
    handleModify(index) {
        this.props.dispatch({
            type: ''todo/modify'',
            payload: index
        })
    }
    handleDelete(index) {
        this.props.dispatch({
            type: ''todo/delete'',
            payload: index
        })
    }
}
const mapStateToProps = (state) => {
    return {
        list: state.todo.list
    }
}

export default connect(mapStateToProps)(List)
routes模块(相当于pages)
input.js
import React, { Component } from ''react''
import Add from "../components/add"
import ListTo from ''./list''
import Modify from "../components/modify"
import {connect} from ''dva''

    class InputList extends Component {
        render() {
          let {flag} = this.props
            return (
                <div>
                   {
                      flag? <Add/>:<Modify/>
                   }
                        <ListTo/>
                </div>
            )
        }
    }
    const mapStateToProps=(state)=>{
        return {
            flag:state.todo.flag
        }
    }
export default connect(mapStateToProps)(InputList)
models模块
input.js
import queryString from ''query-string'';
import { add } from ''../services/todolist''


export default {
    namespace: ''todo'',
    state: {
        list: [],
        flag:true,
        toIndex:''''
    },

    subscriptions: {
        setup({ dispatch, history }) {
            history.listen(location => { })
        }
    },
    effects: {
        *add({ payload: value }, { call, put, select }) {
            const data = yield call(add, value)
            let templist = yield select(state => state.todo.list)
            let list = []
            list = list.concat(templist)
            const tempObj = {};
            tempObj.name = value.name
            tempObj.age = value.age
            tempObj.xl = value.xl
            list.push(tempObj)
            yield put({ type: ''updateState'', payload: { list } })

        },
        *delete({ payload: index }, { call, put, select }) {
            const data = yield call(add, index)
            let templist = yield select(state => state.todo.list)
            let list = []
            list = list.concat(templist)
            list.splice(index, 1)
            yield put({ type: ''updateState'', payload: { list } })
        },
        *modify({payload:index},{call,put,select}){
            const data = yield call(add,index)
            let templist = yield select(state => state.todo.list)
            let list = []
            list = list.concat(templist)
            yield put({ type: ''updateState'', payload: { flag:false,list,toIndex:index } })
        },
        *update({payload:value},{call,put,select}){
            const data = yield call(add,value)
            let templist = yield select(state => state.todo.list)
            let toIndex = yield select(state => state.todo.toIndex)
            let list = []
            list = list.concat(templist)
            list.splice(toIndex,1,value)
            yield put({ type: ''updateState'', payload: { flag:true,list } })
        },

    },
    reducers: {
        updateState(state, action) {
            return { ...state, ...action.payload }
        }
    },

}
在根目录下的index.js里注册一下models

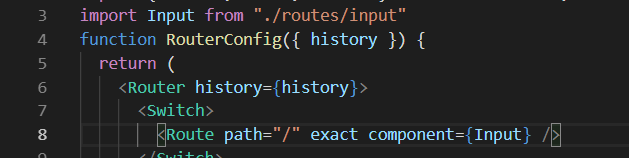
同样是在根目录下的router.js里注册路由
欢迎评论,共同交流,一起进步
源码链接:gitHub

02慕课网《vue.js2.5入门》——Vue中的组件,实现todolist
TodoList功能开发
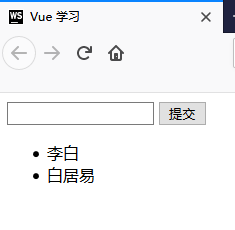
例子:输入字符,在列表中显示;
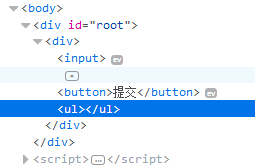
由于有v-for属性,<li>不会被渲染,它已经和数据绑定在一起,有数据来决定
input和button上都有事件监听器,input是通过v-model对数据进行双向绑定;button是监听click事件绑定
<body>
<div id="root">
    <div>
        <input v-model="inputValue"/>
        <button @click="handleSubmit">提交</button>
        <ul>
            <li v-for="(item,index) of list" :key="index">
                {{item}}
            </li>
        </ul>
    </div>
</div>
<script>
    // vue实例
    new Vue({
        el: "#root",
        data: {
            inputValue: '''',
            list: []
        },
        methods: {
            handleSubmit: function () {
                this.list.push(this.inputValue);
                this.inputValue = '''';
            }
        }
    })
</script>
</body>
无数据时:
有数据时:
TodoList中组件拆分
组件:页面上的某一部分,将大型网页拆分成几个部分
定义组件:
全局:Vue.component(''todo-list(组件名称)'',{ });只用组件<todo-list></todo-list>
局部:定义var+声明componts
组件之间的通信:父子组件之间
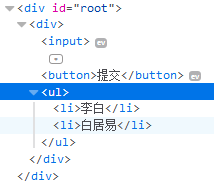
组件实现的例子:将<li>标签拆成一个组件
(item,index) of list;固定写法 (内容,下标) of 数组 ,和item,index名称无关
父组件Vue根实例,通过数据list的改变,调用子组件todo-itemfull,并且通过属性:content 来传值,子组件li标签的渲染任然通过数据list来决定,实现父组件向子组件之间的通信<body>
<div id="root">
<div>
<input v-model="inputValue"/>
<button @click="handleSubmit">提交</button>
<ul>
<!--使用全局组件-->
<todo-itemfull v-for="(item,index) of list" :key="index" :content="item"></todo-itemfull>
</ul>
<ul>
<!--使用局部组件-->
<todo-itemonly></todo-itemonly>
</ul>
</div>
</div>
<script>
// 定义全局组件
Vue.component(''todo-itemfull'', {
// 接受名为content的属性
props:[''content''],
// 组件模板
template: ''<li>{{content}}</li>''
});
// 定义局部组件
var TodoItem = {
template: ''<li>局部组件</li>''
}
// vue实例
new Vue({
el: "#root",
data: {
inputValue: '''',
list: []
},
// 声明局部组件
components: {
''todo-itemonly'': TodoItem
},
methods: {
handleSubmit: function () {
this.list.push(this.inputValue);
this.inputValue = '''';
}
}
})
</script> 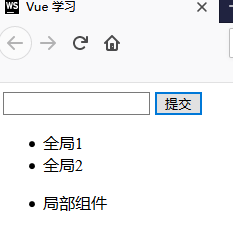
组件与实例之间的关系
每个组件都是Vue的一个实例
Vue项目就是由一个个实例构建成的
每个实例或者组件都有:props、data、template、methods等属性
根实例的模板若没有定义,则挂载点中的内容就是它的模板
实现TodoList的删除功能
子组件显示与否,取决于父组件的list;实现子组件向父组件之间的通信
- 父组件通过属性向子组件传递数据;通过数据渲染子组件的模板,数据list为空时,页面中没有子组件的内容,
- $emit子组件向外部进行发布delet事件,并且带上参数
- 父组件在子组件创建时,绑定监听delete事件
- 监听到子组件的delete删除事件,修改数据list
- 数据list改变,子组件的渲染内容发生改变
<body>
<div id="root">
    <div>
        <input v-model="inputValue"/>
        <button @click="handleSubmit">提交</button>
        <ul>
            <!--使用全局组件-->
            <todo-itemfull
                    v-for="(item,index) of list"
                    :key="index"
                    :content="item"
                    :index="index"
                    @delete="handleDelete"
            ></todo-itemfull>
        </ul>
    </div>
</div>
<script>
    // 定义全局组件
    Vue.component(''todo-itemfull'', {
        // 接受名为content的属性
        props: [''content'', ''index''],
        // 组件模板
        template: ''<li @click="handleClick">{{content}}  {{index}} </li>'',
        methods: {
            handleClick: function () {
                // $emit子组件向外部进行发布
                this.$emit(''delete'', this.index,this.content);
            },
            handleDelete:function(){
                return ''子组件方法'';
            }
        }
    });
    // vue实例
    new Vue({
        el: "#root",
        data: {
            inputValue: '''',
            list: []
        },
        methods: {
            handleSubmit: function () {
                this.list.push(this.inputValue);
                this.inputValue = '''';
            },
            handleDelete: function (index,content) {
                alert(content);
                this.list.splice(index);
            }
        }
    })
</script>
</body>
")
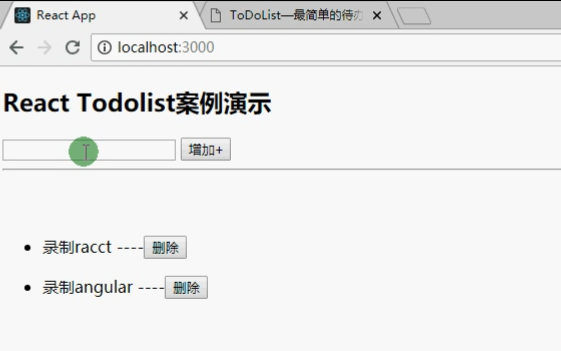
07.React实现Todolist练习 (上)
一.效果图
目标效果图

本章完成效果图
完整代码
import React  from ''react'';

class Home extends React.Component {
    constructor(){

        super();  // 用在构造函数中,必须在使用this之前调用

        this.state = {
            name:''张三'',
            value:''我是一个表单''
        }
    }
    run=(event)=>{
        // console.log()
        event.target.style.background="red"

        alert( event.target.getAttribute(''id''))
    }

    setData=(event)=>{


        console.log(event);


        this.setState({

            name: event.target.value
        })

    }

    getData=()=>{

        // alert(this.state.name)


        alert(this.refs.msg.value);
    }

    keydown(e){
        console.log(e.keyCode);

        if(e.keyCode==13){
            alert(''回车''+e.target.value);
        }

    }

    inputChage=(event)=>{

        this.setState({
            value: event.target.value

        })

    }

    render() {


        return (
            <div>


                <button id=''btn'' onClick={this.run}>执行事件</button>

                <br />
                <br />

                 <input type="text" onChange={this.setData} />

                 <br />
                 <br />


                 <input type="text"  ref="msg"/>

                 <button onClick={this.getData}>获取input的值</button>
                 <br />
                 <br />

                <input type="text" onKeyDown={this.keydown} />

                <br />
                 <br />


                {/* 双休数据绑定 */}


                <input type="text" value={this.state.value} onChange={this.inputChage} />

                {this.state.value}


            </div>
        );
    }
}

export default Home;
完整代码
import React  from ''react'';

class TodoList extends React.Component{

    constructor(){

        super();  // 用在构造函数中,必须在使用this之前调用

        this.state = {

            username:'''',
            list: [

                {
                  title: ''录制nodejs'',
                  checked: true
                },
                {
                  title: ''录制ionic'',
                  checked: false
                },
                {
                    title: ''录制nodejs11'',
                    checked: true
                },
                {
                    title: ''录制ionic1'',
                    checked: false
                }
            ]
        }
    }
    addData=()=>{
        // alert(this.refs.username.value);

        var temp=this.state.list;  /*获取list的值*/

        temp.push(this.refs.username.value);

        this.setState({  /*改变数据*/
            list:temp
        })

    }
    removeData=(key)=>{

        // alert(key)
        var temp=this.state.list;  /*获取list的值*/

        temp.splice(key,1);

         this.setState({  /*重新复制*/
            list:temp
        })


    }


    checkboxChange=(key,checked)=>{


        console.log(key,checked)

        var list=this.state.list;


        list[key].checked=!checked;


        this.setState({

            list:list
        })

    }

    render() {


        return (
            <div>

                    <input type="text" ref="username"/>

                    <button onClick={this.addData}>+增加</button>

                    <br />

                    <hr />

                    <br />
                    <h2>进行中</h2>
                    <ul>
                        {

                            this.state.list.map((value,key)=>{

                                if(value.checked){
                                    return(


                                        <li key={key}>

                                            <input type="checkbox" checked={value.checked} onChange={this.checkboxChange.bind(this,key,value.checked)}/>

                                            {value.title}


                                            ----- <button onClick={this.removeData.bind(this,key)}>删除</button>


                                        </li>


                                    )
                                }

                            })
                        }
                    </ul>


                    <h2>已完成</h2>
                    <ul>
                        {

                            this.state.list.map((value,key)=>{

                                if(!value.checked){
                                    return(


                                        <li key={key}>

                                            <input type="checkbox" checked={value.checked} onChange={this.checkboxChange.bind(this,key,value.checked)}/>

                                            {value.title}


                                            ----- <button onClick={this.removeData.bind(this,key)}>删除</button>


                                        </li>
                                    )
                                }

                            })
                        }
                    </ul>


            </div>
        );
    }


}

export default TodoList;
")
08.React实现Todolist练习 Todolist 待办事项 已经完成 (中)
完整代码
import React, {Component} from ''react'';

import ''../assets/css/index.css'';

class Todolist extends Component {
    constructor(props) {
        super(props);
        this.state = {
            list: [
                {
                    title: ''录制ionic'',
                    checked: true
                },
                {
                    title: ''录制nodejs'',
                    checked: false
                }
                ,
                {
                    title: ''录制egg.js'',
                    checked: true
                },
                {
                    title: ''录制vue'',
                    checked: false
                }
            ]
        };
    }

    addData = (e) => {
        //按下回车的时候在增加

        if (e.keyCode == 13) {
            // alert(title);
            let title = this.refs.title.value;
            let tempList = this.state.list;
            tempList.push({
                title: title,
                checked: false
            })
            //改变后的值赋值给list
            this.setState({
                list: tempList
            })
            //表单置为空
            this.refs.title.value = '''';
        }
    }
    checkboxChage = (key) => {
        // alert(''111'');
        let tempList = this.state.list;
        tempList[key].checked = !tempList[key].checked;
        this.setState({
            list: tempList
        })
    }
    removeData = (key) => {
        let tempList = this.state.list;
        tempList.splice(key, 1);
        this.setState({
            list: tempList
        })
    }
    render() {
        return (
            <div>
                <header className="title">TodoList: <input ref="title" onKeyUp={this.addData}/></header>
                <h2>待办事项</h2>
                <hr/>
                <ul>
                    {
                        this.state.list.map((value, key) => {
                            if (!value.checked) {
                                return (
                                    <li>
                                        <input type="checkbox" checked={value.checked}
                                               onChange={this.checkboxChage.bind(this, key)}/>
                                        {value.title}
                                        -- <button onClick={this.removeData.bind(this, key)}>删除</button>
                                    </li>
                                )
                            }
                        })
                    }
                </ul>
                <h2>已完成事项</h2>
                <hr/>
                <ul>
                    {
                        this.state.list.map((value, key) => {
                            if (value.checked) {
                                return (
                                    <li>
                                        <input type="checkbox" checked={value.checked}
                                               onChange={this.checkboxChage.bind(this, key)}/>
                                        {value.title}
                                        -- <button onClick={this.removeData.bind(this, key)}>删除</button>
                                    </li>
                                )
                            }
                        })
                    }
                </ul>
            </div>
        );
    }
}
export default Todolist;
")
09.React的模块化以及封装Storage实现todolist 待办事项 已经完成事项 以及实现数据持久化(下)
一.添加缓存数据
//执行缓存数据
localStorage.setItem(''todolist'',JSON.stringify(tempList));
二.页面加载的时候加载数据
生命周期函数(页面加载的时候就会触发)
    //生命周期函数  页面加载就会触发

    componentDidMount(){

        //获取缓存的数据

        var todolist=JSON.parse(localStorage.getItem(''todolist''));   /*字符串*/

        if(todolist){

            this.setState({

                list:todolist
            })
        }

    }
完整代码
import React,{Component} from ''react'';

import ''../assets/css/index.css'';

class Todolist extends Component {
    constructor(props) {
        super(props);
        this.state = {
            list:[
                // {
                //     title:''录制ionic'',
                //     checked:true
                // },
                // {
                //     title:''录制nodejs'',
                //     checked:false
                // }
                // ,
                // {
                //     title:''录制egg.js'',
                //     checked:true
                // } ,
                // {
                //     title:''录制vue'',
                //     checked:false
                // }
            ]
        };
    }

    addData=(e)=>{
        //按下回车的时候在增加

        if(e.keyCode==13){


            // alert(title);

            let title=this.refs.title.value;
            let tempList=this.state.list;

            tempList.push({
                title:title,
                checked:false
            })
            //改变后的值赋值给list

            this.setState({

                list:tempList
            })

            //表单置为空
            this.refs.title.value='''';

            //执行缓存数据
            localStorage.setItem(''todolist'',JSON.stringify(tempList));


        }
    }
    checkboxChage=(key)=>{

        // alert(''111'');
        let tempList=this.state.list;

        tempList[key].checked=!tempList[key].checked;


        this.setState({

            list:tempList
        })

        //执行缓存数据
        localStorage.setItem(''todolist'',JSON.stringify(tempList));

    }
    removeData=(key)=>{

        let tempList=this.state.list;


        tempList.splice(key,1);


         this.setState({

            list:tempList
        })
        //执行缓存数据
        localStorage.setItem(''todolist'',JSON.stringify(tempList));


    }

    //生命周期函数  页面加载就会触发

    componentDidMount(){

        //获取缓存的数据

        var todolist=JSON.parse(localStorage.getItem(''todolist''));   /*字符串*/

        if(todolist){

            this.setState({

                list:todolist
            })
        }

    }
    render() {
        return (
            <div>

                <header className="title">TodoList:  <input ref="title" onKeyUp={this.addData} /> </header>

                <h2>待办事项</h2>

                <hr />

                <ul>
                    {
                        this.state.list.map((value,key)=>{

                            if(!value.checked){

                                return (

                                    <li key={key}>

                                        <input type="checkbox" checked={value.checked} onChange={this.checkboxChage.bind(this,key)} />

                                        {value.title}


                                        -- <button onClick={this.removeData.bind(this,key)}>删除</button>
                                    </li>
                                )
                            }

                        })


                    }
                </ul>


                <h2>已完成事项</h2>

                <hr />
                <ul>
                    {
                        this.state.list.map((value,key)=>{

                            if(value.checked){

                                return (

                                    <li key={key}>

                                        <input type="checkbox" checked={value.checked} onChange={this.checkboxChage.bind(this,key)} />

                                        {value.title}


                                        -- <button onClick={this.removeData.bind(this,key)}>删除</button>
                                    </li>
                                )
                            }

                        })
                    }
                </ul>


            </div>
        );
    }
}
export default Todolist;
三.封装Storage
定义自定义模块
var storage={


    set(key,value){

        localStorage.setItem(key,JSON.stringify(value));
    },
    get(key){

        return JSON.parse(localStorage.getItem(key));

    },
    remove(key){

        localStorage.removeItem(key)
    }
};

export default storage;
页面完整代码
import React,{Component} from ''react'';

import ''../assets/css/index.css'';

//引入自定义模块
import storage from ''../model/storage'';

class Todolist extends Component {
    constructor(props) {
        super(props);
        this.state = {
            list:[

            ]
        };
    }

    addData=(e)=>{
        //按下回车的时候在增加

        if(e.keyCode==13){


            // alert(title);

            let title=this.refs.title.value;
            let tempList=this.state.list;

            tempList.push({
                title:title,
                checked:false
            })
            //改变后的值赋值给list

            this.setState({

                list:tempList
            })

            //表单置为空
            this.refs.title.value='''';

            //执行缓存数据

            storage.set(''todolist'',tempList);


        }
    }
    checkboxChage=(key)=>{

        // alert(''111'');
        let tempList=this.state.list;

        tempList[key].checked=!tempList[key].checked;


        this.setState({

            list:tempList
        })

        //执行缓存数据
        storage.set(''todolist'',tempList);

    }
    removeData=(key)=>{

        let tempList=this.state.list;


        tempList.splice(key,1);


         this.setState({

            list:tempList
        })
        //执行缓存数据
        storage.set(''todolist'',tempList);


    }

    //生命周期函数  页面加载就会触发

    componentDidMount(){

        //获取缓存的数据

        var todolist=storage.get(''todolist'');

        if(todolist){

            this.setState({

                list:todolist
            })
        }

    }
    render() {
        return (
            <div>

                <header className="title">TodoList:  <input ref="title" onKeyUp={this.addData} /> </header>

                <h2>待办事项</h2>

                <hr />

                <ul>
                    {
                        this.state.list.map((value,key)=>{

                            if(!value.checked){

                                return (

                                    <li key={key}>

                                        <input type="checkbox" checked={value.checked} onChange={this.checkboxChage.bind(this,key)} />

                                        {value.title}


                                        -- <button onClick={this.removeData.bind(this,key)}>删除</button>
                                    </li>
                                )
                            }

                        })


                    }
                </ul>


                <h2>已完成事项</h2>

                <hr />
                <ul>
                    {
                        this.state.list.map((value,key)=>{

                            if(value.checked){

                                return (

                                    <li key={key}>

                                        <input type="checkbox" checked={value.checked} onChange={this.checkboxChage.bind(this,key)} />

                                        {value.title}


                                        -- <button onClick={this.removeData.bind(this,key)}>删除</button>
                                    </li>
                                )
                            }

                        })
                    }
                </ul>


            </div>
        );
    }
}
export default Todolist;
我们今天的关于用dvaJS实现todolist(增删改)和vue todolist增删改查的分享就到这里,谢谢您的阅读,如果想了解更多关于02慕课网《vue.js2.5入门》——Vue中的组件,实现todolist、07.React实现Todolist练习 (上)、08.React实现Todolist练习 Todolist 待办事项 已经完成 (中)、09.React的模块化以及封装Storage实现todolist 待办事项 已经完成事项 以及实现数据持久化(下)的相关信息,可以在本站进行搜索。
本文标签:


