iphone app(''+ ip +''). ''+Date.now()+''\n'');
}).listen(1337, ip);
console.log(''Server running at http://'' + ip + '':1337/'');
运行程序,即可在xcode的log信息里面看到iphone的ip,然后通过网页就可以浏览网页。
Node.js 搭建本地文件服务器
因为想在项目中做一个 mock 数据服务器,目前,作为项目中的 mock 数据服务器呢,还有几个问题需要处理。所以先把目前仅仅 “Node.js 搭建本地文件服务器” 的源码贴出来。
效果
访问 http://localhost:3000/ 显示 mock/mockapi/ 下的所有目录以及文件;
访问 http://localhost:3000/getUsersInfo.json 显示 mock/mockapi/getUsersInfo.json 文件数据。
源码
// mock/index.js
const http = require(''http'');
const processRequest = require(''./server'');
const port = 3000;

const httpServer = http.createServer((req, res) => {
  processRequest(req, res)
})

httpServer.listen(port, () => {
  console.log(`app is running at port: ${port}`);
});
// mock/server.js
const fs = require(''fs'')
const url = require(''url'')
const path = require(''path'')
const mime = require(''./mime'')

const headers = {
  ''Access-Control-Allow-Origin'': ''*'', // 允许跨域
  ''Content-Type'': ''text/plain''
}

const processRequest = (request, response) => {

  let pathName = url.parse(request.url).pathname
  // 防止中文乱码
  pathName = decodeURI(pathName)
  // 获取资源文件的绝对路径
  let filePath = path.resolve(__dirname + ''/mockapi/'' + pathName)

  // 文件后缀名
  let ext = path.extname(pathName)
  ext = ext ? ext.slice(1) : ''unknown''
  // 未知类型一律用 "text/plain" 类型
  headers[''Content-Type''] = mime[ext] || "''text/plain''"

  // 301重定向
  if (!pathName.endsWith(''/'') && path.extname(pathName) === '''') {
    pathName += ''/''
    var redirect = ''http://'' + request.headers.host + pathName

    response.writeHead(301, { location: redirect })
    response.end()
  }

  fs.stat(filePath, (err, stats) => {
    // 未找到文件
    if (err) {
      headers[''Content-Type''] = ''text/html''
      response.writeHead(404, headers)
      response.end("<h1>404 Not Found</h1>")
    }

    // 文件
    if (!err && stats.isFile()) {
      fs.readFile(filePath, (err, data) => {
        if (err) {
          response.writeHead(500, headers)
          response.end(''<h1>500 Server Error</h1>'')
        }

        response.writeHead(200, headers);
        response.end(data)
      })
    }

    // 目录
    if (!err && stats.isDirectory()) {
      var html = ''<head><meta charset="utf-8" /></head>''

      fs.readdir(filePath, (err, files) => {
        if (err) {

          html += `<div>读取路径失败!</div>`
          response.writeHead(404, headers)
          response.end(html)

        } else {
          headers[''Content-Type''] = ''text/html''
          response.writeHead(200, headers)

          for (var file of files) {
            if (file === ''index.html'') {
              response.end(file)
              break
            }

            html += `<div><a href="${file}">${file}</a></div>`
          }
          response.end(html)
        }
      })
    }
  })
}

module.exports = processRequest
// mock/mime.js
module.exports = {
    "css": "text/css",
    "gif": "image/gif",
    "html": "text/html",
    "ico": "image/x-icon",
    "jpeg": "image/jpeg",
    "jpg": "image/jpeg",
    "js": "text/javascript",
    "json": "application/json",
    "pdf": "application/pdf",
    "png": "image/png",
    "svg": "image/svg+xml",
    "swf": "application/x-shockwave-flash",
    "tiff": "image/tiff",
    "txt": "text/plain",
    "wav": "audio/x-wav",
    "wma": "audio/x-ms-wma",
    "wmv": "video/x-ms-wmv",
    "xml": "text/xml"
};
说明
知识点
- http - HTTP
- fs - 文件系统
- path - 路径
- url - 网址
创建服务器
http.createServer([options][, requestListener]) 返回一个新得 http.Server 实例;
http.Server类 继承自 net.Server;
net.Server类 用于创建 TCP 或 IPC server。
server.listen(options[, callback]) 开启 HTTP 服务器监听链接。
mock/server.js 文件 把对 response 和 request 的处理封装成一个匿名函数,传入 http.createServer() 中。
// mock/index.js
const http = require(''http'');
const processRequest = require(''./server'');
const port = 3000;

const httpServer = http.createServer((req, res) => {
  processRequest(req, res)
})

httpServer.listen(port, () => {
  console.log(`app is running at port: ${port}`);
})
获取请求资源的路径
// mock/server.js
const url = require(''url'')
const path = require(''path'')

const processRequest = (request, response) => {
  let pathName = url.parse(request.url).pathname
  // 防止中文乱码
  pathName = decodeURI(pathName)
  // 获取资源文件的绝对路径
  let filePath = path.resolve(__dirname + ''/mockapi/'' + pathName)
}
url.parse()
请求 http://localhost:3000/api/users.json 地址,其中,request.url 为 /api/users.json;
请求 http://localhost:3000/api/users.json?a=1 地址,其中,request.url 为 /api/users.json?a=1。
所以这里需要用到,url 模块 解析URL。
url 模块提供了一些实用函数,用于 URL 处理与解析。
url.parse() 方法会解析一个 URL 字符串并返回一个 URL 对象。
下图中,网址 http://user:pass@sub.host.com:8080/p/a/t/h?query=string#hash 由 url.parse()返回的对象的属性。

这里,我们可以 pathName 即查找文件 相对于 mock/mockapi/ 的路径。
path.resolve()
有了 pathName,现在就需要获取资源文件的绝对路径filePath,方便之后的文件查找以及文件读取。
path 模块提供了一些工具函数,用于处理文件与目录的路径。
path.resolve([...paths]) 方法会把一个路径或路径片段的序列解析成一个绝对路径。
例子:
path.resolve(''/foo/bar'', ''./baz'');
// 返回 ''/foo/bar/baz''

path.resolve(''/foo/bar'', ''/tmp/file/'');
// 返回 ''/tmp/file''

path.resolve(''wwwroot'', ''static_files/png/'', ''../gif/image.gif'');
// 如果当前工作目录为 /home/myself/node,
// 则返回 ''/home/myself/node/wwwroot/static_files/gif/image.gif''
重定向
如果是访问目录文件,且未以 ''/'' 结尾,这里做一下处理,重定向到 访问路径尾部添加 ''/'' 的地址。
// 301重定向
if (!pathName.endsWith(''/'') && path.extname(pathName) === '''') {
  pathName += ''/''
  var redirect = ''http://'' + request.headers.host + pathName

  response.writeHead(301, { location: redirect })
  response.end()
}
响应头
后面在返回数据的时候,需要用到 response.writeHead(statusCode[, statusMessage][, headers]) 方法,发送一个响应头给请求。
状态码是一个三位数的 HTTP 状态吗,如404。最后一个参数 headers 是响应头。第二个参数 statusMessage 是可选的状态描述。
这里,需要设置响应头的 Access-Control-Allow-Origin 和 Content-Type。
Content-Type,内容类型,一般是指网页中存在的 Content-Type,用于定义网络文件的类型和网页的编码,决定浏览器将以什么形式,什么编码读取这个文件。
Access-Control-Allow-Origin: <orgin> 指定了该响应的资源是否被允许 与 给定的orgin共享;
* 作为通配符,允许所有域都具有访问资源的权限。
const headers = {
  ''Access-Control-Allow-Origin'': ''*'', // 允许跨域
  ''Content-Type'': ''text/plain''
}
const processRequest = (request, response) => {

  let pathName = url.parse(request.url).pathname
  // 防止中文乱码
  pathName = decodeURI(pathName)

   // 文件后缀名
  let ext = path.extname(pathName)
  ext = ext ? ext.slice(1) : ''unknown''
  // 未知类型一律用 "text/plain" 类型
  headers[''Content-Type''] = mime[ext] || "''text/plain''"
}
读取文件
fs 模块提供了一些 API,用于以一种类似标准 POSIX 函数的方式与文件系统进行交互。
fs.Stats 对象提供了一个文件的信息。可以从 fs.stat() 返回。
stats.isDirectory() 如果 fs.Stats 对象表示一个文件系统目录,则返回 true 。
stats.isFile() 如果 fs.Stats 对象表示一个普通文件,则返回 true 。
fs.readFile(path[, options], callback) 异步地读取一个文件的全部内容。
fs.readdir(path[, options], callback)异步地读取一个目录的内容
fs.stat(filePath, (err, stats) => {
  // 未找到文件
  if (err) {
    headers[''Content-Type''] = ''text/html''
    response.writeHead(404, headers)
    response.end("<h1>404 Not Found</h1>")
  }

  // 文件
  if (!err && stats.isFile()) {
    fs.readFile(filePath, (err, data) => {
      if (err) {
        response.writeHead(500, headers)
        response.end(''<h1>500 Server Error</h1>'')
      }

      response.writeHead(200, headers);
      response.end(data)
    })
  }

  // 目录
  if (!err && stats.isDirectory()) {
    var html = ''<head><meta charset="utf-8" /></head>''

    fs.readdir(filePath, (err, files) => {
      if (err) {

        html += `<div>读取路径失败!</div>`
        response.writeHead(404, headers)
        response.end(html)

      } else {
        headers[''Content-Type''] = ''text/html''
        response.writeHead(200, headers)

        for (var file of files) {
          if (file === ''index.html'') {
            response.end(file)
            break
          }

          html += `<div><a href="${file}">${file}</a></div>`
        }
        response.end(html)
      }
    })
  }
})
返回数据
response.end([data][, encoding][, callback])
该方法会通知服务器,所有响应头和响应主题都已被发送,即服务器将其视为已完成。每次响应都必须调用 response.end() 方法。
如果指定了 data,则相当于调用 response.write(data, encoding) 之后再调用 response.end(callback)。
如果指定了 callback,则当响应流结束时被调用。
response.writeHead(404, headers)
response.end(''<h1>500 Server Error</h1>'')
Node.js 中文网

node.js搭建本地服务器的代码分享
一共存在四个文件: 1. index.js 入口文件, 采用exports 模块化开发 代码:
var server = require(''./server'');
var router = require(''./router'');
var routerplay = require(''./routerplay'');
var ccd = {};
ccd[''/''] = router.index;
ccd[''/index''] = router.index;
ccd[''/file''] = router.file;
server.start(ccd, routerplay.routerplay);
2 .server.js 用来引入http启动服务 :
var http = require("http");
var url = require("url");
var qs = require(''querystring'');
var start = function (ccd, routerplay) {
 http.createServer(function (request, response) {
   var lu = url.parse(request.url).pathname;
   var query = url.parse(request.url, true).query;
   console.log(typeof query);
   if(query.id){
     routerplay(ccd, lu, request, response,query);
   }else{
     routerplay(ccd, lu, request, response,qs);
   }
 }).listen(8888);
 console.log("服务器已启动,监听8888端口");
}
exports.start = start;
3. routerPlay.js 做分别路由使用 如果不具备这个路由 发送404:
function routerplay(ccd, pathname, request, response,query) {
  if(typeof ccd[pathname] === ''function''){
    return ccd[pathname](request, response,query);
  }else{
    console.log("没有找到网页" + pathname);
    response.writeHead(404, {"Content-Type": "text/plain"});
    response.write("404 Not found");
    response.end();
  }
}
exports.routerplay = routerplay;
4. router.js 各个路由下面的逻辑:
var fs = require(''fs'');
var url = require(''url'');

function index(request, response, query) {
    response.writeHead(200, {
        "Content-Type": "text/html",
        "Access-Control-Allow-Origin": "http://localhost",
        "Access-Control-Allow-Methods": "GET",
        "Access-Control-Allow-Headers": "x-requested-with,content-type"
    });
    if (query.id) {
        var url = ''./file/'' + query.id + ''.txt'';
        fs.exists(url, function(ss) {
            if (ss) {
                fs.readFile(url, ''utf8'', function(error, data) {
                    response.write(data);
                    response.end();
                });
            } else {
                new Error(0, "没有找到文件");
            }
        })
    } else {
        response.write(''参数错误请验证'');
        response.end();
    }

    console.log(''已响应/'' + query.id);
}

function file(request, response, query) {
    var postData = '''';
    request.addListener(''data'', function(postDataChunk) {
        postData += postDataChunk;
    });
    request.addListener(''end'', function() {
        console.log(''数据接收完成'');
        if (postData) {
            var params = query.parse(postData);
            if (!params.name) {
                params = JSON.parse(postData);
            }
            if (params && params.name && params.data) {
                console.log(''开始存储'');
                var url = ''./file/'' + params.name + ''.txt'';
                fs.writeFile(url, params.data, function(err, data) {
                    if (err) {
                        console.log(err);
                        response.writeHead(501, {
                            "Content-Type": "text/html",
                            "Access-Control-Allow-Origin": "http://localhost",
                            "Access-Control-Allow-Methods": "GET",
                            "Access-Control-Allow-Headers": "x-requested-with,content-type"
                        });
                        response.write(''服务器错误'');
                        response.end();
                        return;
                    }
                    response.writeHead(200, {
                        "Content-Type": "text/html"
                    });
                    response.write(''success'');
                    response.end();
                })
            } else {
                response.writeHead(500, {
                    "Content-Type": "text/html",
                    "Access-Control-Allow-Origin": "http://localhost",
                    "Access-Control-Allow-Methods": "GET",
                    "Access-Control-Allow-Headers": "x-requested-with,content-type"
                });
                response.write("数据解析错误, 请确认");
                response.end();
            }
        } else {
            console.log(''没有数据'')
            response.writeHead(200, {
                "Content-Type": "text/html",
                "Access-Control-Allow-Origin": "http://localhost",
                "Access-Control-Allow-Methods": "GET",
                "Access-Control-Allow-Headers": "x-requested-with,content-type"
            });
            response.write("没有数据请确认!");
            response.end();
        }
    });

}
exports.index = index;
exports.file = file;

nodeJs anywhere搭建本地服务器环境案例分享
这次给大家带来nodeJs anywhere搭建本地服务器环境案例分享,nodeJs anywhere搭建本地服务器环境的注意事项有哪些,下面就是实战案例,一起来看一下。
公司有个微信端项目,需要前端在手机上随时查看网页,于是乎用Node搭建了一个本地服务器环境,把网页地址发到QQ并用手机打开来查看。
首先去nodeJs官网下载最新版nodeJs https://nodejs.org/en/
安装成功后win+r打开cmd 输入node -help 或者node -v查看是否安装成功

装好后输入 npm install anywhere -g来安装anywhere。注意如果是mac系统会提示你权限不够,需要在代码前加上 sudo获取管理员权限。即sudo npm install anywhere -g。
装好后如图所示。
然后找到你需要打开的网页文件夹 用命令行的CD命令 再把文件夹拖进去进入相应目录
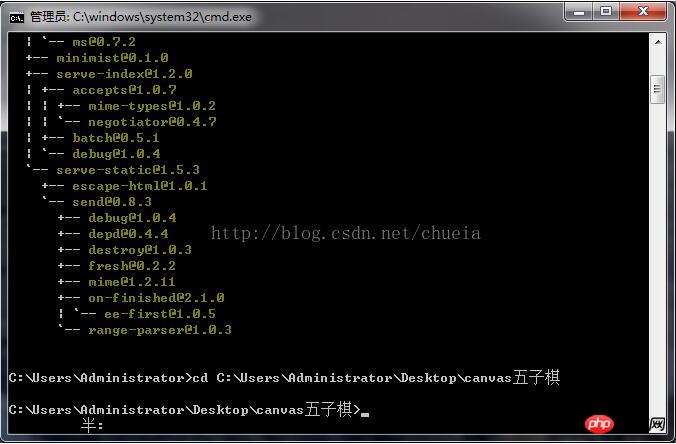
如图我进入了桌面上一个叫canvas五子棋的文件夹
再输入anywhere命令
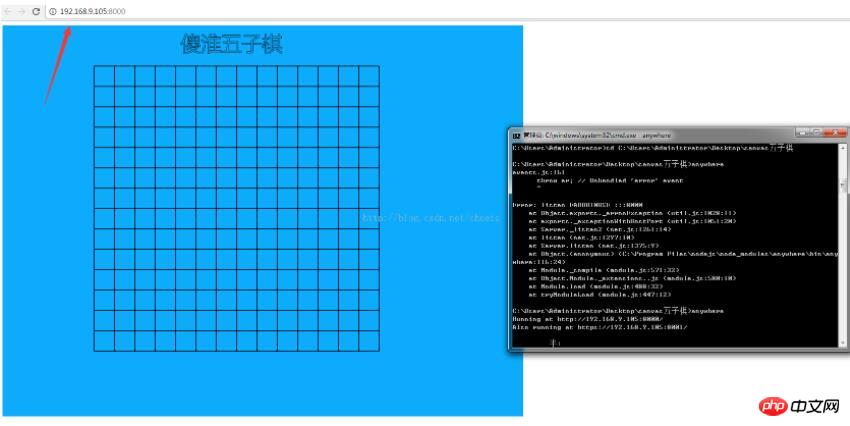
就能创建一个本地服务器了 这时候把上图地址192.168.9.105:8000发到手机上就能在手机端查看自己的网页了。 也能发给其他处于同一个内网的同事,让他们看到你的网页。这时候可以在编辑器修改JS CSS HTML,保存后能都同步反映到这个地址上,是不是很方便。
相信看了本文案例你已经掌握了方法,更多精彩请关注php中文网其它相关文章!
推荐阅读:
jQuery实现无缝轮播与左右点击步骤详解
node搭建服务器,写接口,调接口,跨域方法详解
以上就是nodeJs anywhere搭建本地服务器环境案例分享的详细内容,更多请关注php中文网其它相关文章!
今天关于搭建本地nodeJs服务器和node搭建本地服务器运行html的分享就到这里,希望大家有所收获,若想了解更多关于iPhone手机上搭建nodejs服务器步骤方法_node.js、Node.js 搭建本地文件服务器、node.js搭建本地服务器的代码分享、nodeJs anywhere搭建本地服务器环境案例分享等相关知识,可以在本站进行查询。
")


![[转帖]Ubuntu 安装 Wine方法(ubuntu如何安装wine)](https://www.gvkun.com/zb_users/cache/thumbs/4c83df0e2303284d68480d1b1378581d-180-120-1.jpg)

