本文的目的是介绍原生JS运动实现轮播图的详细情况,特别关注原生js轮播图实现原理的相关信息。我们将通过专业的研究、有关数据的分析等多种方式,为您呈现一个全面的了解原生JS运动实现轮播图的机会,同时也不
本文的目的是介绍原生JS运动实现轮播图的详细情况,特别关注原生js轮播图实现原理的相关信息。我们将通过专业的研究、有关数据的分析等多种方式,为您呈现一个全面的了解原生JS运动实现轮播图的机会,同时也不会遗漏关于css3如何实现轮播图?css3实现轮播图片的方法、JS -- 记一种用原生JS 实现轮播图的方法(非无限循环不自动切换)、js 原生JS实现轮播图、JS 原生实现轮播图的知识。
本文目录一览:- 原生JS运动实现轮播图(原生js轮播图实现原理)
- css3如何实现轮播图?css3实现轮播图片的方法
- JS -- 记一种用原生JS 实现轮播图的方法(非无限循环不自动切换)
- js 原生JS实现轮播图
- JS 原生实现轮播图
")
原生JS运动实现轮播图(原生js轮播图实现原理)
原生JS运动实现轮播图
**基本原理:**通过控制包含n张图片的ul的left值来实现图片自动运动的效果,其中列表中li元素的个数为n,第一个li和最后一个li里存放的图片应为同一张图片,当图片运动到最后一张时,将ul的left值设为0,即可达到图片无线轮播的效果。
运动函数的实现
函数需传入元素(即需要参与运动的元素)、目标值(以对象的形式呈现,如{left: 300})、callback(回调函数)。
//多物体多值运动+回调机制
function startMove(dom, attrObj, callback) {


    var key = true;
    var iSpeed = null,
        iCur = null;
    clearInterval(dom.timer);
    if (key) {


        dom.timer = setInterval(function() {


        //bStop用来判断是否开始执行回调函数
            var bStop = true;
            //判断传入目标值中的“键”类型是否为opacity
            for (var attr in attrObj) {


            //若要改变的样式为opacity,则将元素的opacity扩大100被进行操作
                if (attr === ''opacity'') {


                    iCur = parseFloat(getStyle(dom, attr)) * 100;
                } else {


                    iCur = parseInt(getStyle(dom, attr));
                }
                //运动速度设为目标值减去当前值的一半,即当前状态离目标值越接近,运动速度越小
                iSpeed = (attrObj[attr] - iCur) / 2;
                //对速度进行取整
                iSpeed = iSpeed > 0 ? Math.ceil(iSpeed) : Math.floor(iSpeed);
                if (attr === ''opacity'') {


                    dom.style.opacity = (iCur + iSpeed) / 100;
                } else {


                    dom.style[attr] = iCur + iSpeed + ''px'';
                }
                if (iCur !== attrObj[attr]) {


                    bStop = false;
                }
            }
            //当bStop为true时,元素的所有样式均已达到目标值,清理定时器并执行回调函数
            if (bStop) {


                clearInterval(dom.timer);
                typeof callback == ''function'' && callback();
            }
        }, 30)
    }
    if (!key) {


    }
}
//用来获取元素实时的样式值
function getStyle(elem, prop){


    if (window.getComputedStyle){


        return window.getComputedStyle(elem, null)[prop];
    }
}
HTML部分
HTML中包含一个div,用来显示当前要播放的图片,该div中又包含一个ul(用来存放所有包含图片的li)、三个div(其中两个充当图片左右切换的按钮,第三个存放图片索引点,通过点击索引也可切换到要查看的图片),代码如下:
<div class="wrapper">
<ul class="sliderPage">
<li>
<img src="./image/dog/阿拉斯加.jpeg"/>
</li>
<li>
<img src="./image/dog/比熊.jpeg"/>
</li>
<li>
<img src="./image/dog/边牧.jpeg"/>
</li>
<li>
<img src="./image/dog/柯基.jpeg"/>
</li>
<li>
<img src="./image/dog/阿拉斯加.jpeg"/>
</li>
</ul>
<div class="btn leftBtn"><</div>
<div class="btn rightBtn">></div>
<div class="sliderIndex">
<span class="active"></span>
<span></span>
<span></span>
<span></span>
</div>
</div>
CSS代码
此处采用的为内联样式表
<style>
    *{


        margin: 0;
        padding: 0;
        list-style: none;
    }
    .wrapper{


        position: relative;
        margin: 100px auto 0;
        width: 600px;
        height: 360px;
        overflow: hidden;
    }
    .wrapper .sliderPage{


        position: absolute;
        left: 0;
        width: 3000px;
        height: 360px;
    }
    .wrapper .sliderPage li{


        width: 600px;
        height: 360px;
        float: left;
    }
    .wrapper .sliderPage li img{


        width: 100%;
        height: 100%;
    }
    .btn{


        position: absolute;
        top: 50%;
        width: 20px;
        height: 20px;
        color: #fff;
        text-align: center;
        line-height: 20px;
        background-color: #000;
        opacity: 0.2;
        cursor: pointer;
    }
    .leftBtn{


        left: 5px;
    }
    .rightBtn{


        right: 5px;
    }
    .wrapper:hover .btn{


        opacity: 0.8;
    }
    .sliderIndex{


        position: absolute;
        width: 100%;
        bottom: 10px;
        cursor: pointer;
        text-align: center;
    }
    span{


        width: 8px;
        height: 8px;
        background-color: #cccccc;
        border-radius: 50%;
        display: inline-block;
        margin-right: 5px;
    }
    .active{


        background-color: orange;
    }
</style>
图片自动运动及点击运动事件绑定
要点:
1、当图片运动到最后一张时(显示图片为第一张图片),将ul的left值设为0即可实现无限轮播;
2、图片每次运动的值为li的宽度;
3、图片的运动需要一定的时间,因此在图片运动过程中应禁止产生其它定时器,否则会造成运动尺寸混乱而导致图片轮播出现问题,这里用lock来进行实现,在ul运动过程中将lock值设为false,运动结束后又将lock值设为true;
4、通过index值来实现索引显示图片功能,图片轮播过程中,index初始值为0,当图片向右轮播时index值加1,图片向左轮播时,index值减1,index值为0时,若让图片向左轮播,则将index值设为n(li个数)并进行轮播,而当index值为3且图片向右轮播时,在ul运动完成后将index值设为0;
var timer = null;
var sliderPage = document.getElementsByTagName(''ul'')[0];
var moveWidth = sliderPage.children[0].offsetWidth;
var num = sliderPage.children.length - 1;
var leftBtn = document.getElementsByClassName(''leftBtn'')[0];
var rightBtn = document.getElementsByClassName(''rightBtn'')[0];
var lock = true;
var index = 0;
var indexArray = document.getElementsByClassName(''sliderIndex'')[0].getElementsByTagName(''span'');
//索引切换
for (var i = 0; i < indexArray.length; i ++){


    (function(myindex){


        indexArray[myindex].onclick = function(){


            lock = false;
            clearTimeout(timer);
            index = myindex;
            changeIndex(index);
            startMove(sliderPage, {

   left: -index * moveWidth}, function(){


                lock = true;
                timer = setTimeout(autoMove, 3000);
            })
        }
    }(i))
}
//图片运动过程中改变index点的样式
function changeIndex(index){


    for (var i = 0; i < indexArray.length; i++){


        indexArray[i].className = '''';
    }
    indexArray[index].className = ''active'';
}
timer = setTimeout(autoMove, 3000);
//向左翻
leftBtn.onclick = function (){


    autoMove(''right->left'');
}
//向右翻
rightBtn.onclick = function (){


    autoMove(''left->right'');
}
//direction
//默认轮播方向  ''left->right'' / undefined
//点击left按钮 ''right->left''
function autoMove(direction){


    clearTimeout(timer);
    if (lock){


        lock = false;

        if (!direction || direction === ''left->right''){


            index++;
            startMove(sliderPage, {

   left: sliderPage.offsetLeft - moveWidth}, function(){


                if (sliderPage.offsetLeft === - num * moveWidth){


                    index = 0;
                    sliderPage.style.left = ''0px'';
                }
                timer = setTimeout(autoMove, 3000);
                lock = true;
                changeIndex(index);
            });
        }else if(direction === ''right->left''){


            if (sliderPage.offsetLeft === 0){


                index = num;
                sliderPage.style.left = - num * moveWidth + ''px'';
            }
            index--;
            startMove(sliderPage, {

   left: sliderPage.offsetLeft + moveWidth}, function () {


                timer = setTimeout(autoMove, 3000);
                lock = true;
                changeIndex(index);
            })
        }
    }
}
以上即为通过原生JS运动所实现的图片轮播。

css3如何实现轮播图?css3实现轮播图片的方法
我们在网页上经常会看到有一块位置会有很多的图片来回切换,这就是轮播图,轮播图的出现,让重要的信息可以在一个位置显现,那么,轮播图是如何实现的呢?轮播图的实现用js或者css都可以,本篇文章就来给大家介绍css3如何来实现轮播图效果。
css3实现轮播图效果可以利用CSS3 animation 属性和 @keyframes 规则。
ainimation实现动画效果主要由两部分组成:
1、通过类似Flash动画中的帧来声明一个动画;
2、在animation属性中调用关键帧声明的动画。
animation 属性是一个简写属性 (推荐视频课程:css教程)
语法:animation: name duration timing-function delay iteration-count direction。
立即学习“前端免费学习笔记(深入)”;
animation属性值在这里就不多介绍了,需要的话可以参考css手册。
那下面我们就来直接看一个例子:
html:
<div id="container">
    <div id="photo">
        <img  src="http://img.zcool.cn/community/0117e2571b8b246ac72538120dd8a4.jpg@1280w_1l_2o_100sh.jpg" / alt="css3如何实现轮播图?css3实现轮播图片的方法" >
        <img  src="http://img.zcool.cn/community/01b34f58eee017a8012049efcfaf50.jpg@1280w_1l_2o_100sh.jpg" / alt="css3如何实现轮播图?css3实现轮播图片的方法" >
        <img  src="http://img.zcool.cn/community/01c60259ac0f91a801211d25904e1f.jpg@1280w_1l_2o_100sh.jpg" / alt="css3如何实现轮播图?css3实现轮播图片的方法" >
    </div>
</div>css:
#container {
    width: 400px;
    height: 300px;
    overflow: hidden;
}
#photo {
    width: 1200px;
    animation: switch 5s ease-out infinite;
}
#photo > img {
    float: left;
    width: 400px;
    height: 300px;
}
@keyframes switch {
    0%, 25% {
        margin-left: 0;
    }
    35%, 60% {
        margin-left: -400px;
    }
    70%, 100% {
        margin-left: -800px;
    }
}说明:
展示容器大小和图片大小一致
图片添加 float 效果,不用考虑麻烦的 margin 问题
由于示例只有三个图片,所以添加了三个动画阶段,每一阶段都是通过设置递增的 margin-left 值达到切换的效果
设置的动画阶段(如:35%~60%)是动画停留部分,和上一阶段空余时间(如25%~35%)即为动画切换部分,各部分时间长短需要自己把控。
本篇文章为大家简单介绍了关于css轮播图效果的实现,更多关于css轮播图的效果,大家可以去看看php中文网的特效下载。
相关推荐:
CSS3 实现简单轮播图
Bootstrap图片轮播功能的实现
jQuery实现图片轮播幻灯片效果
以上就是css3如何实现轮播图?css3实现轮播图片的方法的详细内容,更多请关注php中文网其它相关文章!
")
JS -- 记一种用原生JS 实现轮播图的方法(非无限循环不自动切换)
实现一个非无限循环不自动切换的轮播图
只需要几张图片和两个按钮(简化)
HTML部分
两个按钮,几张图片(假如有四张图)
 <span id=''s1''>右侧按钮</span>
 <ul id=''ul''>
     <liactive''><img src="img/1.png" alt=""></li>
     <li><img src="img/2.png" alt=""></li>
     <li><img src="img/3.png" alt=""></li>
     <li><img src="img/4.png" alt=""></li>
 </ul>
 <span id=''s2''>左侧按钮</span>
CSS部分
动态添加删除li的class属性(native)
    span{ cursor: pointer; }
    #s1,#s2{
        position: absolute;
        top: 130px;
    }
    #s1{ right: 0;}
    #s2{ left:0; }
    ul{
        width: 460px;
        height: 280px;
        margin: auto;
        overflow: hidden;
        }
    li{
        float: left;
        display: none;
        background-color: orange;
    }
    .active{
        background-color: #dddddd;
        display: block;
    }
JS部分
         window.onload=function(){
            var index = 0,
                imgs =  document.getElementsByTagName("li");
            s1.onclick = function(e){
               index++;
               if(index >= imgs.length){
                    imgs[imgs.length-1].setAttribute("class", "active");
                    alert("已是最后一张图")
                    return index = imgs.length-1;;
                }else{
                    imgs[index-1].removeAttribute("class");
                    imgs[index].setAttribute("class", "active");
                    return index;
                }
            }

            s2.onclick=function(){
                if(index>0){
                    imgs[index].removeAttribute("class");
                    imgs[index-1].setAttribute("class", "active");
                    index--;
                    return index-1;
                }else{
                    imgs[0].setAttribute("class", "active");
                    alert("这是第一张图")
                    return index = 0;
                }
            }
        }
js 原生JS实现轮播图
<!DOCTYPE html>
<html lang="en">
<head>
<meta charset="UTF-8">
<title>Title</title>
<style type="text/css">
* {
padding: 0;
margin: 0;
list-style: none;
border: 0;
}
.all {
width: 500px;
height: 200px;
padding: 7px;
border: 1px solid #ccc;
margin: 100px auto;
position: relative;
}
.screen {
width: 500px;
height: 200px;
overflow: hidden;
position: relative;
}
.screen li {
width: 500px;
height: 200px;
overflow: hidden;
float: left;
}
.screen ul {
position: absolute;
left: 0;
top: 0px;
width: 3000px;
}
.all ol {
position: absolute;
right: 10px;
bottom: 10px;
line-height: 20px;
text-align: center;
}
.all ol li {
float: left;
width: 20px;
height: 20px;
background: #fff;
border: 1px solid #ccc;
margin-left: 10px;
cursor: pointer;
}
.all ol li.current {
background: #DB192A;
}
#arr {
display: none;
}
#arr span {
width: 40px;
height: 40px;
position: absolute;
left: 5px;
top: 50%;
margin-top: -20px;
background: #000;
cursor: pointer;
line-height: 40px;
text-align: center;
font-weight: bold;
font-family: ''微软雅黑'';
font-size: 30px;
color: #fff;
opacity: 0.3;
border: 1px solid #fff;
}
#arr #right {
right: 5px;
left: auto;
}
</style>
</head>
<body>
<divid=''box''>
<div><!--相框-->
<ul>
<li><img src="images/1.jpg" width="500" height="200"/></li>
<li><img src="images/2.jpg" width="500" height="200"/></li>
<li><img src="images/3.jpg" width="500" height="200"/></li>
<li><img src="images/4.jpg" width="500" height="200"/></li>
<li><img src="images/5.jpg" width="500" height="200"/></li>
</ul>
<ol>
</ol>
</div>
<div id="arr">
<span id="left">
<
</span>
<span id="right">
>
</span>
</div>
</div>
<script src="common.js"></script>
<script>
var box = my$(''box'');
//最外层div
var screen = box.children[0];
//相框
var screenWidth = screen.offsetWidth;
//相框的宽度
var ulobj = screen.children[0];
//整个ul
var list = ulobj.children;
//ul里面的每个li
var olobj = screen.children[1];
//ol
var arr = my$(''arr'');
//获取左右按键
//设置一个全局变量为了后面可以使用
var index = 0;
//根据ui里的li的个数 循环添加ol里面的小按钮
for (var i = 0; i < list.length; i++) {
//创建一个li
var liobj = document.createElement(''li'');
//追加到ol里面
olobj.appendChild(liobj);
//设置li的内容
liobj.innerHTML = (i + 1);
//为每个li添加自定义属性 保存其索引值
liobj.setAttribute("index", i);
//为每个li注册鼠标进入事件
liobj.onmouseover = function () {
//排他功能
for (var j = 0; j < olobj.children.length; j++) {
//移除全部li的样式
olobj.children[j].removeAttribute(''class'');
}
//设置当前的li的样式
this.className = ''current'';
//获取当前li的索引值
index = this.getAttribute("index");
//调用动画函数 传入要移动的ul 和 位置(移动的是负数)
animate(ulobj, -index * screenWidth);
};
}
//设置ol中第一个li有背景颜色
olobj.children[0].className = "current";
//克隆一个第一个li到最后cloneNode() 方法克隆所有属性以及它们的值。
// 如果您需要克隆所有后代,请把 deep 参数设置 true,否则设置为 false。
ulobj.appendChild(list[0].cloneNode(true));
//自动播放
var timeId = setInterval(clickHandle, 1000);
//鼠标进入
box.onmouseover = function () {
//显示两边的按钮
arr.style.display = ''block'';
//鼠标进入时候就清理定时器
clearInterval(timeId);
}
//鼠标离开
box.onmouseout = function () {
//隐藏两边的按钮
arr.style.display = ''none'';
//鼠标离开时重新设置定时器(自动播放 其他就是右键的点击事件)
timeId = setInterval(clickHandle, 1000);
}
//为右键注册点击事件
my$(''right'').onclick = clickHandle
//右键事件函数
function clickHandle() {
//先判断当前的索引值是否等于5 那就说明已经看到最后一张(也是第一张)那么立刻将索引重置为第一张 且将当前的最后一张切换到第一张
if (index == list.length - 1) {
index = 0;
ulobj.style.left = 0 + "px";
}
//索引加1
index++;
//移动图片
animate(ulobj, -index * screenWidth);
//判断索引是不是第五个 如果是就说明是最后一张也是第一张 把最后一个索引的样式取消 设置第一个的样式
if (index == list.length - 1) {
olobj.children[olobj.children.length - 1].className = "";
olobj.children[0].className = ''current'';
} else {
//索引不是最后一个就正常按照索引值设置样式
for (var j = 0; j < olobj.children.length; j++) {
olobj.children[j].removeAttribute(''class'');
}
olobj.children[index].className = ''current'';
}
}
//为左键注册事件
my$("left").onclick = function () {
//判断是不是第一张图 如果是就立刻把索引改完最后一张的索引(最后一张与第一张一样)切换成最后一张
if (index == 0) {
index = 5;
ulobj.style.left = -index * screenWidth + "px";
}
index--;
animate(ulobj, -index * screenWidth);
//正常设置样式
for (var j = 0; j < olobj.children.length; j++) {
olobj.children[j].removeAttribute(''class'');
}
//设置当前索引对于的样式
olobj.children[index].className = ''current'';
}
//设置任意的一个元素,移动到指定的目标位置
function animate(element, target) {
clearInterval(element.timeId);
//定时器的id值存储到对象的一个属性中
element.timeId = setInterval(function () {
//获取元素的当前的位置,数字类型
var current = element.offsetLeft;
//每次移动的距离
var step = 10;
step = current < target ? step : -step;
//当前移动到位置
current += step;
if (Math.abs(current - target) > Math.abs(step)) {
element.style.left = current + "px";
} else {
//清理定时器
clearInterval(element.timeId);
//直接到达目标
element.style.left = target + "px";
}
}, 5);
}
</script>
</body>
</html>

JS 原生实现轮播图

转:
JS 原生实现轮播图
轮播图
主要思想就是:
在大的容器里,装着一个很长的表,表是容器宽度的整数倍。
然后通过更改列表样式里的 left 属性来实现左右滑动。
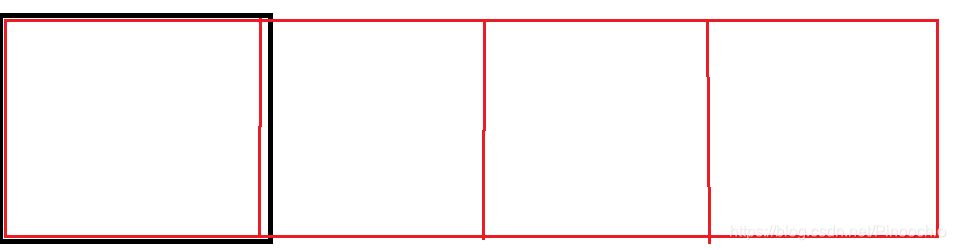
本文旨在控制滑动五张图片,但在 html 中使用了七张图片,第一张和最后一张是有重复的,至于原因会在下面解释。
通过给容器设定 overflow:hidden 属性来保证只显示容器视口大小的一张图片。
<body>
  <div id="container">   /*容器*/
    <div id="wrap" style="left: -400px;">    /*存放图片的列表*/
      <div class="item item5">l5

       div>
      <div class="item item1">1

        div>
      <div class="item item2">2
         div>
      <div class="item item3">3
          div>
      <div class="item item4">4
           div> <div class="item item5">5
            div> <div class="item item1">r1
             div>
              div>
               div> <div id="key"> /*设置按钮*/ <div id="list"> /*点击小圆圈切换到固定图片*/ <div class="btn1 btnNum">1
                div> <div class="btn2 btnNum">2
                 div> <div class="btn3 btnNum">3
                  div> <div class="btn4 btnNum">4
                   div> <div class="btn5 btnNum">5
                    div>
                     div> <div id="btn"> /*向左切换和向右切换的按钮*/ <button class="left">←
                      button> <button class="right">→
                       button>
                        div>
                         div>
                          body>
CSS:
可以给 wrap 列表设置 flex 属性,让图片在一行显示。其他布局可以按自己需求来做。
注意在定义 id="wrap"d 的节点中设置了内联样式 left。因为在切换图片的时候我用到的是 left 属性,而如果不设置 left 的话,在 DOM 设置 style 时是找不到 left 属性的。
<style>
    #container {


      width: 400px;
      height: 300px;
      border: 8px rgb(8, 8, 8) solid;
      margin: 0 auto;
      margin-top: 150px;
      overflow: hidden;
      position: relative;
    }
    #wrap {


      width: 2800px;
      height: 300px;
      display: flex;
      position: relative;
    }
    .item {


      flex: 1;
      width: 400px;
      height: 300px;
    }
    .item1 {


      background-color: rosybrown;
    }
    .item2 {


      background-color: rgb(12, 226, 37);
    }
    .item3 {


      background-color: rgb(212, 221, 29);
    }
    .item4 {


      background-color: rgb(61, 27, 182);
    }
    .item5 {


      background-color: rgb(221, 23, 145);
    }
    #key {


      width: 400px;
      height: 300px;
      margin: 0 auto;
    }
    #list {


      width: 400px;
      height: 40px;
      display: flex;
      justify-content: center;
    }
    #list div {


      margin-top: 10px;
      margin-left: 10px;
      width: 20px;
      height: 20px;
      background-color: rgb(13, 162, 221);
      text-align: center;
      border-radius: 45%;
      opacity: 0.6;
    }
    #list div:hover {


      cursor: pointer;
      opacity: 1;
    }
    #btn {


      width: 400px;
      text-align: center;
    }


       style>
这是完整的样式

每种颜色代表一张图片,且按序标了序号。起始位置是第二张图片。
至于为什么第一张和最后一张有额外重复的一张放在两端,是为了在做滑动效果的时候,最后一张(倒数第二张,粉紫色)可以继续向右顺滑的滑到第一张(其实是本图的第二张,浅棕色的)。第一张(本图第二张,浅棕色)向左滑动时可以顺滑的滑到最后一张(实则倒数第二张)。继续往下看。
1. 多种轮播方式
轮播必然离开不了定位,以及修改 wrap 列表的 left 属性,使其移动。
先初始化几个数据
var wrap = document.getElementById(''wrap'');
var nowleft = -400;          //用于存放当前列表的left的值
var currIndex = 1;			//用于存放当前是第几个图片
//定位到几个按钮
var btnNum = document.getElementsByClassName(''btnNum'');  //小圆圈

var right = document.getElementsByClassName(''right'')[0];  //向右滑的按钮
var left = document.getElementsByClassName(''left'')[0];		//向左滑的按钮
1.1 定时自动轮播效果
只讲向左自动滑动的效果
既然是自动轮播的,那必然少不了 setInterval () 定时器让其持续轮播。
function next() {


    setInterval(function() {

                //设置每两秒切换一次图片
        wrap.style.transition = ''left 1s''  //设定有过渡滑动的效果
		nowleft = parseInt(wrap.style.left) - 400;    //切换一次后nowleft应该减少(即向左滑)一个图片的宽度
        wrap.style.left = nowleft + ''px'';      //然后将nowleft赋值给wrap的left属性
        if(parseInt(wrap.style.left) == -2400) {

       //判断到最后一个后,偷偷变回到最开头的位置
            setTimeout(() => {


              wrap.style.transition = ''none''   //因为是偷偷变回去,所以要取消过渡效果
              nowleft = -400;
              wrap.style.left = nowleft + ''px''
            },1200)  //保证定时器的时间大于过度的时间且小于每次轮换的时间
          }
    },2000)
}
/ 由于 wrap.style.left 返回的是带 px 的字符串,所以用 parseInt 可以取得前面的数值 /
1.2 按向右滑动按钮
right.addEventListener(''click'',function() {


    if(nowleft >= -2000){

           //判断是否到最后一个图了,没有的话就开始滑动
      nowleft -= 400;
      wrap.style.transition = ''left 1s'';
      wrap.style.left = nowleft + ''px'';
    }
    if(nowleft == -2400) {

          //如果到最后一个图了,就偷偷换回第一张图
      setTimeout(() => {


        wrap.style.transition = ''none'';
        nowleft = -400;
        wrap.style.left = nowleft + ''px'';
      },1020)
    }
})
1.3 小圆圈切换图片
for(let i = 0; i < btnNum.length; i++) {


    btnNum[0].style.opacity = 1;
    btnNum[i].addEventListener(''click'',function() {


      wrap.style.transition = ''left 1s'';
      for(let j = 0; j < btnNum.length; j++) {


        btnNum[j].style.opacity = ''0.6'';
      }
      btnNum[i].style.opacity = 1;
      nowleft = nowleft - (i+1 - currIndex)*400;
      currIndex = i + 1;
      wrap.style.left = nowleft + ''px'';
})
其实本文在控制从最后一个图偷偷换回第一张图的操作是有缺陷的,因为要把控序号 5 的图滑动到序号为 r1 的图是需要 1s 的,然而 wrap.style.left 是直接发生变化的,不会随着过渡期间发生位移而 left 一直变化。所以把控序号 5 完整滑动到 r1 后再偷偷切换到序号 1 的时间是有些难控制的。
而且比如从序号 1 连续点击 3 下是可以切换到序号 4 的。然是从序号 5 连续点击 3 下是不可以的,在 r1 切换到序号 1 的时候是无法响应点击效果的,因此此处交互差异会容易感到别扭。
如果想改善这个别扭的 bug,可以用下防抖来改善。
转:
JS 原生实现轮播图
--Posted from Rpc
关于原生JS运动实现轮播图和原生js轮播图实现原理的问题我们已经讲解完毕,感谢您的阅读,如果还想了解更多关于css3如何实现轮播图?css3实现轮播图片的方法、JS -- 记一种用原生JS 实现轮播图的方法(非无限循环不自动切换)、js 原生JS实现轮播图、JS 原生实现轮播图等相关内容,可以在本站寻找。
本文标签:


