对于想了解配置低的电脑取消Eclipse验证js的读者,本文将提供新的信息,我们将详细介绍取消eclipse校验,并且为您提供关于configurationforeclipseMEplugininec
对于想了解配置低的电脑取消 Eclipse 验证 js的读者,本文将提供新的信息,我们将详细介绍取消eclipse校验,并且为您提供关于configuration for eclipseME plugin in eclipse 3.1[eclipse ME 在eclipse 3.1中的配置(以MOTO为例)]、Eclipse CDT" (Eclipse C++) 安装 与 配置 (支持C++11)、eclipse installer 安装的新版本 eclipse 导入旧版本 eclipse 插件、Eclipse myeclipse下配置HanLP的教程的有价值信息。
本文目录一览:- 配置低的电脑取消 Eclipse 验证 js(取消eclipse校验)
- configuration for eclipseME plugin in eclipse 3.1[eclipse ME 在eclipse 3.1中的配置(以MOTO为例)]
- Eclipse CDT" (Eclipse C++) 安装 与 配置 (支持C++11)
- eclipse installer 安装的新版本 eclipse 导入旧版本 eclipse 插件
- Eclipse myeclipse下配置HanLP的教程
")
配置低的电脑取消 Eclipse 验证 js(取消eclipse校验)
<?xml version="1.0" encoding="UTF-8"?><projectDescription>
<name>pad-pac-wfm</name>
<comment></comment>
<projects>
</projects>
<buildSpec>
<buildCommand>
<name>org.eclipse.wst.jsdt.core.javascriptValidator</name>
<arguments>
</arguments>
</buildCommand>
<buildCommand>
<name>org.eclipse.jdt.core.javabuilder</name>
<arguments>
</arguments>
</buildCommand>
<buildCommand>
<name>org.eclipse.wst.common.project.facet.core.builder</name>
<arguments>
</arguments>
</buildCommand>
<buildCommand>
<name>org.eclipse.wst.validation.validationbuilder</name>
<arguments>
</arguments>
</buildCommand>
</buildSpec>
<natures>
<nature>org.eclipse.jem.workbench.JavaEMFNature</nature>
<nature>org.eclipse.wst.common.modulecore.ModuleCoreNature</nature>
<nature>org.eclipse.wst.common.project.facet.core.nature</nature>
<nature>org.eclipse.jdt.core.javanature</nature>
<nature>org.eclipse.wst.jsdt.core.jsNature</nature>
</natures>
</projectDescription>
![configuration for eclipseME plugin in eclipse 3.1[eclipse ME 在eclipse 3.1中的配置(以MOTO为例)]](http://www.gvkun.com/zb_users/upload/2025/03/0afa7795-8472-4479-999d-15fc4cf459d21742459082906.jpg "configuration for eclipseME plugin in eclipse 3.1[eclipse ME 在eclipse 3.1中的配置(以MOTO为例)]")
configuration for eclipseME plugin in eclipse 3.1[eclipse ME 在eclipse 3.1中的配置(以MOTO为例)]
- install eclipseME plugin
- install sun''s wireless tool kit 2.1 or other compatible toolkits
- enter windows->preference->platform components, right click wireless ToolKits and select add..... Select the right directory(sample: C:/WTK21)
- for Moto SDK,
- you may choose to add one profile. sample(MOTOM1--add midp.zip in M1 lib as external jar)
- Add platform definition. Sample(MOTOM1--select the profile MOTOM1)
- Enter Run->External Tools->External Tools.. and create a new configuration by clicking button(NEW) Parameters are set as below sample for V600(j2me-v600):
- Location: C:/Program Files/Motorola/SDK v4.3 for J2ME/EmulatorA.1/bin/emujava.exe
- working directory: c:/Program Files/Motorola/SDK v4.3 for J2ME/EmulatorA.1/bin
- arguments: ${project_loc}/deployed/${project_name}.jad -deviceFile resources/V600.props
- you may get working information by run "C:/Program Files/Motorola/SDK v4.3 for J2ME/launchpad.exe"
- To create a new J2ME project, you may first create a j2me project and then create a midlet
- To test it with MOTO V600 simulator, you need to create the package first and then select run->external tools->j2me-v600
- To test it with sun''s simulator, just enter run->run as->Emulated J2ME Midlet
原文链接: http://blog.csdn.net/swingseagull/article/details/711979

Eclipse CDT" (Eclipse C++) 安装 与 配置 (支持C++11)
1. Eclipse CDT (C/C++ Development Tooling): 下载地址:
选择: Windows 32 Bit;

2. MinGW (Minimalist GNU for Windows) : 下载地址:
下载, 默认安装即可, 目前(2013.11.2)版本为GCC4.6.2;
3. Eclipse是压缩包形式, 解压即可使用; 需要配置的地方有:
(1). 目录: .\MinGW\bin 中, 把mingw32-make.exe复制为make.exe; 解决: "Program "make" not found in PATH" 问题;
(2). IDE: Project -> Properties -> C/C++ Build -> Settings ->Binary Parsers: 选择: PE Windows Parser; 解决: "Launch failed. Binary not found."问题;
右键"Run as"即可出现, 原因: windows和linux的解析器(Parser)不同, windows需要选择"PE Windows Parser";
(3). IDE: Run -> Run Configurations -> Environment -> New:Name: Path; Value: D\MinGW\bin; (如果你安装在D盘); 解决: "Console无法显示输出" 问题;
(4). IDE: Project -> Properties -> C/C++ Build -> Settings -> Tool Settings ->Cross G++ Complier -> Miscellaneous -$amp;>amp;$nbsp;Other flags:
添加: "-c -fmessage-length=0 -std=c++11"; GCC在make时, 添加C++11的特性.
解决: "This file requires compiler and library support for the ISO C++ 2011 standard." 问题, 支持C++11;

以上问题均为当前版本出现的问题, 截止: 2013-11-01.
4. 常用设置及命令:
(1) Windows -> Preferences -> C/C++ -> Editor->Content Assist: 修改: delay (ms) 为 "1", 则提示速度加快;
(2) "Run as " 快捷键 Ctrl+F11, 不是F11, F11是debug ; 自动补全快捷键: Alt+/ ;
测试:
#include <iostream> #include <array> #include <vector> int main(void) { std::vector<int> iv = {1, 2, 3, 4, 5}; for(const auto& i : iv) std::cout $amp;

eclipse installer 安装的新版本 eclipse 导入旧版本 eclipse 插件
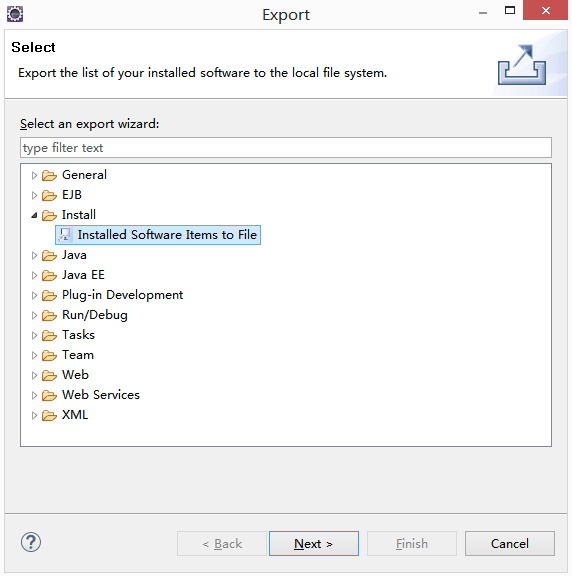
打开旧版本eclipse,选择File -> Export... -> Install -> Installed Software Items to File,点击Next
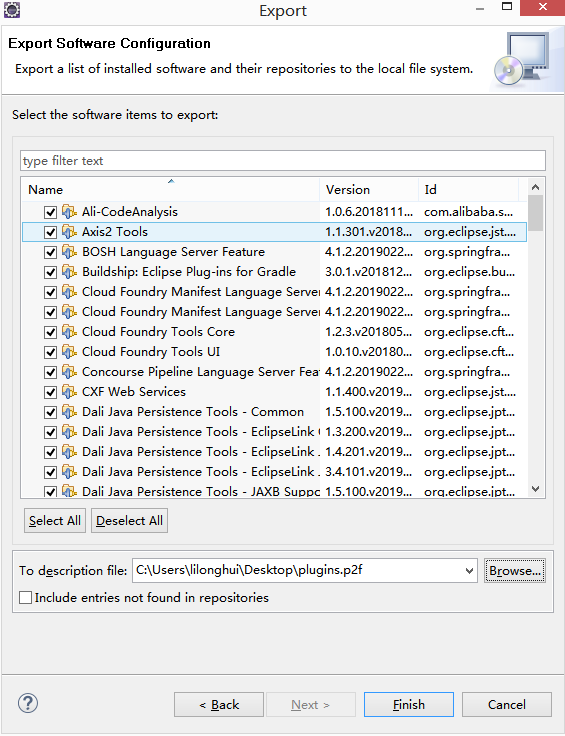
点击Select All选中所有插件,点击Browse...选择一个路径,点击Finish导出.p2f文件
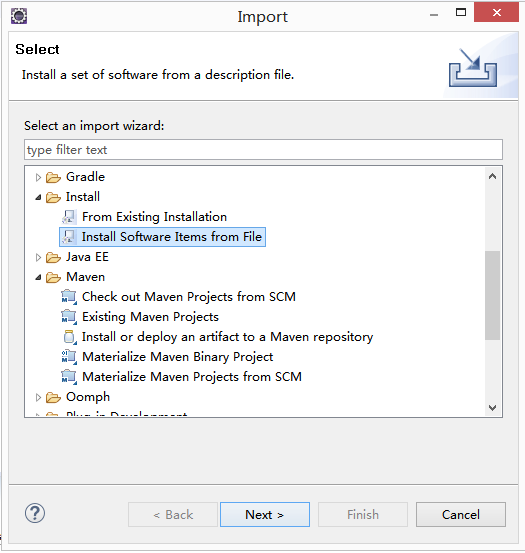
打开新下载的eclipse,选择File -> import... -> Install -> Install Software Items from File,点击Next
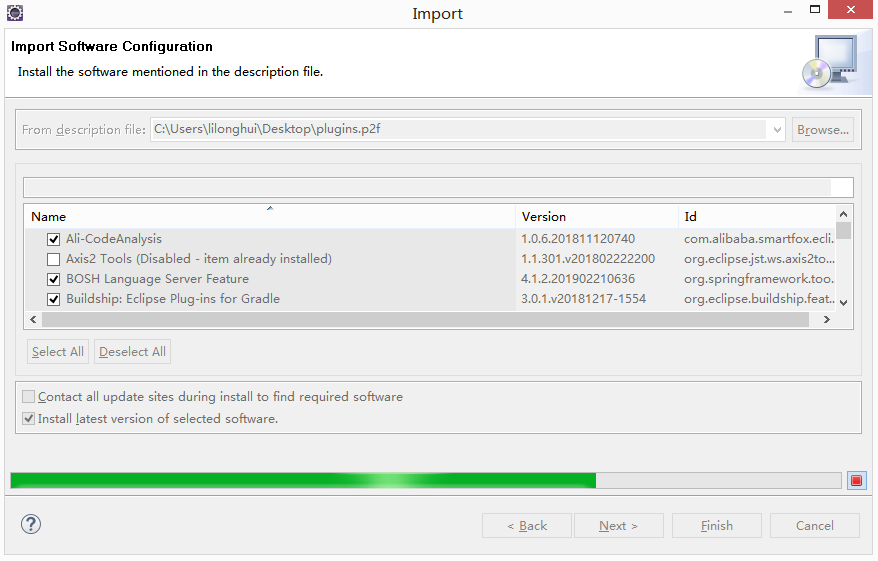
点击Browse...选择刚才导出的.p2f文件,点击Next
导入完成后,点击Next
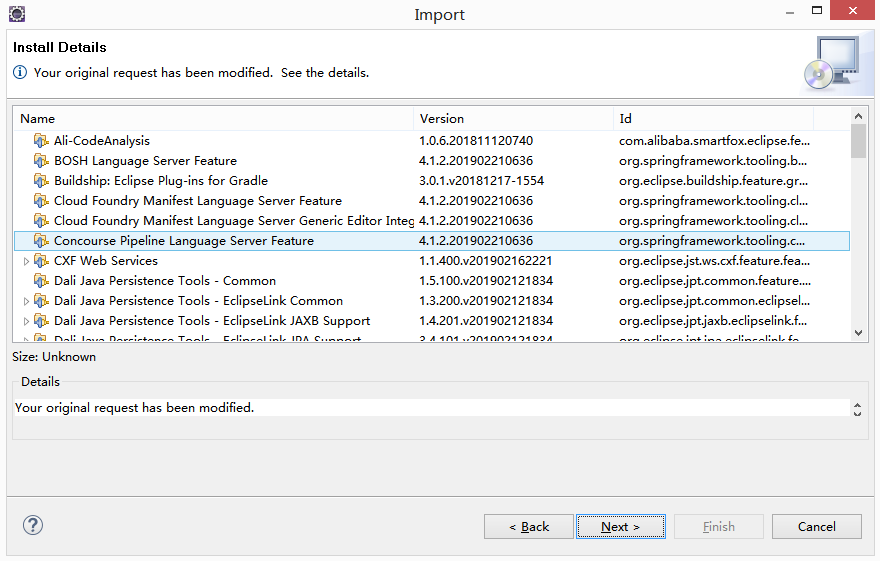
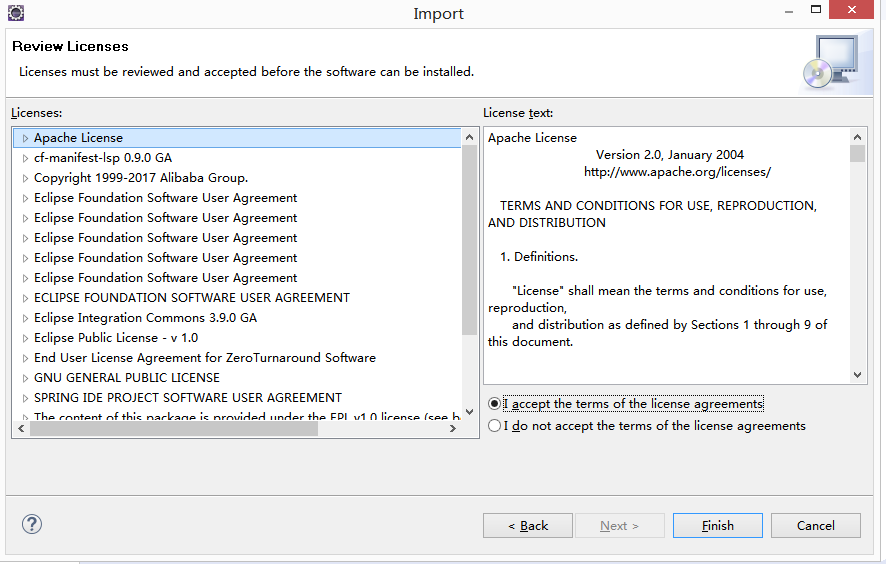
选择I accept the terms of the license agreements,点击Finish安装插件
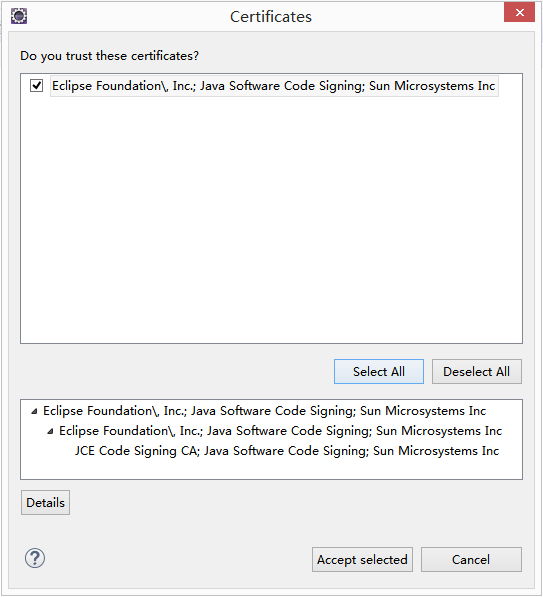
安装完成后弹出如下对话框,选择Install anyway

接着弹出如下对话框,选择Select All,然后点击Accept selected
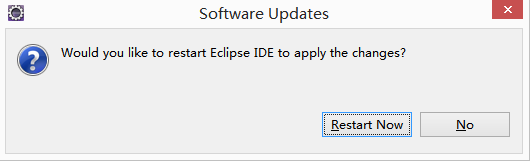
安装完成后重启eclipse
eclipse除了插件之外的其余配置都是跟着workspace走,启动新eclipse后选择旧版本的workspace路径即可

Eclipse myeclipse下配置HanLP的教程
一、说明
博主的配置
1:window10
2:myeclipse
3:jdk1.8
备注:文章分享自贾继康的博客,博客使用的hanlp是1.6.8的版本。大家可以去下载最新的1.7版本了,也比较推荐使用最新的这个版本!
二、资源获取
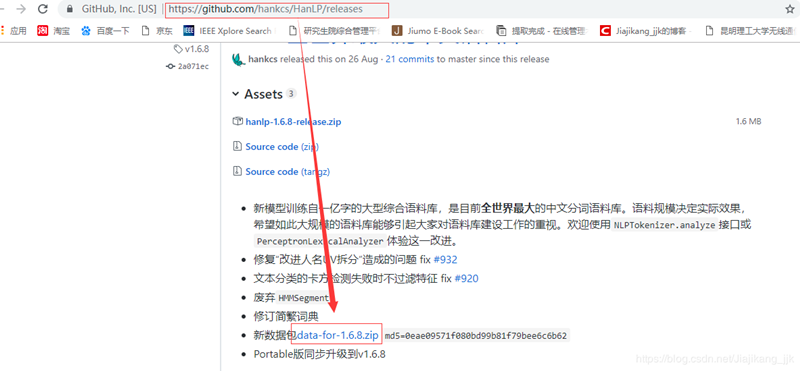
1、hanlp jar包获取:可以github上下载。本文中使用的是hanlp-1.6.8.zip版本

2、数据包获取
三、配置说明
1、配置jar包
获取hanlp-1.6.8.zip中的jar包添加到eclipse项目中
A:在自己的项目(java_national_languange)中新建一个jar文件夹,将获取的hanlp-1.6.8.zip中jar包复制到新建的文件夹(jar文件夹)中,如下图所示:
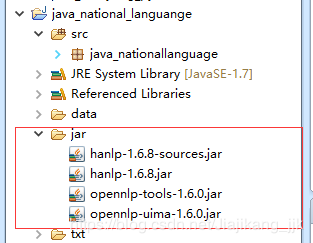
B:将A步骤中添加的jar包(jar文件夹中添加的hanlp-1.6.8.zip中的jar包)右键—>Build path ---->add build path 如下图所示结果:

到此配置eclipse中导入第三方jar包结束!!!
2、放置数据包
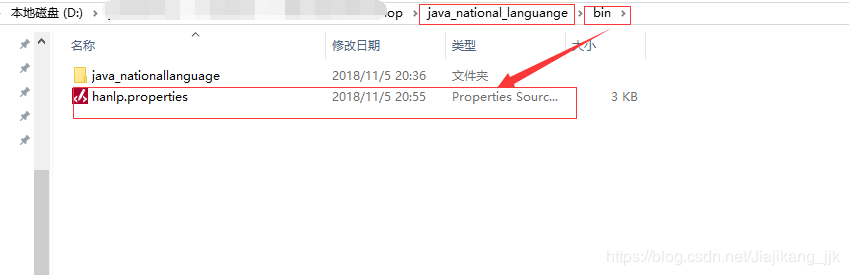
将获取的数据包放到自己指定的路径如下图所示是博主的放置路径:

3、放置获取hanlp-1.6.8压缩文件中的 hanlp.properties
废话不多,将 hanlp.properties放置在自己创建的项目下的bin目录下就妥妥的啦
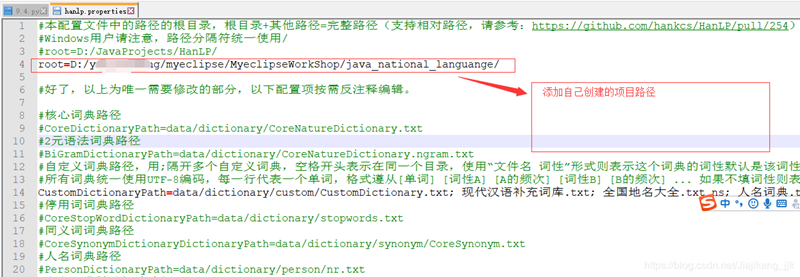
4、修改步骤3中放置的hanlp.properties文件
使用记事本打开hanlp.properties文件,修改root,如下所示是博主修改自己的配置路径。
四、测试配置结果

关于配置低的电脑取消 Eclipse 验证 js和取消eclipse校验的问题我们已经讲解完毕,感谢您的阅读,如果还想了解更多关于configuration for eclipseME plugin in eclipse 3.1[eclipse ME 在eclipse 3.1中的配置(以MOTO为例)]、Eclipse CDT" (Eclipse C++) 安装 与 配置 (支持C++11)、eclipse installer 安装的新版本 eclipse 导入旧版本 eclipse 插件、Eclipse myeclipse下配置HanLP的教程等相关内容,可以在本站寻找。
本文标签:


