这篇文章主要围绕使用Bus.js进行兄弟(非父子)组件通信和非父子组件传值展开,旨在为您提供一份详细的参考资料。我们将全面介绍使用Bus.js进行兄弟(非父子)组件通信的优缺点,解答非父子组件传值的相
这篇文章主要围绕使用Bus.js进行兄弟(非父子)组件通信和非父子组件传值展开,旨在为您提供一份详细的参考资料。我们将全面介绍使用Bus.js进行兄弟(非父子)组件通信的优缺点,解答非父子组件传值的相关问题,同时也会为您带来event bus非父子组件怎样相互通信、eventBus兄弟组件通信详解、Flutter 组件通信(父子、兄弟)、Flutter基础-组件通信(父子、兄弟)的实用方法。
本文目录一览:- 使用Bus.js进行兄弟(非父子)组件通信(非父子组件传值)
- event bus非父子组件怎样相互通信
- eventBus兄弟组件通信详解
- Flutter 组件通信(父子、兄弟)
- Flutter基础-组件通信(父子、兄弟)
组件通信(非父子组件传值)")
使用Bus.js进行兄弟(非父子)组件通信(非父子组件传值)
首先需要在任意地方添加一个bus.js;
在bus.js里面 写入下面信息
import Vue from ''vue''
 export default new Vue;
在需要通信的组件都引入Bus.js
如果你的bus.js是自定义一个bus的文件那from后面就改成你的所放的位置
import Bus from ''./bus.js''
接下来就是要组件通信了
添加一个 触发 #emit的事件按钮
<template>
    <div id="emit">
        <button @click="bus">按钮</button>
    </div>
 </template>

import Bus from ''./bus.js''
export default {
    data() {
        return {
            message: ''''"
        }
     },

  methods: {
       bus () {
          Bus.$emit(''msg'', ''我要传给兄弟组件们,你收到没有'')
       }
    }
}
打开要和$emit通信的另外一个组件
在钩子函数中监听msg事件
<template>
    <div id="on">
            <p>{{message}}</p>
    </div>
</template>

import Bus from ''./bus.js''
export default {
    data() {
      return {
        href:  ''www.dddddd//d/d/d''
      }
    },
    mounted() {
      $("body").on("click",".router_itme",function(){
//发送方})
}
}打开要和$emit通信的另外一个组件 ,在钩子函数中监听msg事件
<template>
<div id="on">
<p>{{message}}</p>
</div>
</template>
import Bus from ''./bus.js''
export default {
data() {
return {
href : ''''
}
},
mounted(){
// this.href = location.href.split(''#'')[1]
// 接收传header组件传过来的路径
let self = this;
Bus.$on(''hrefs'', (e) => {
self.href = e.split(''#'')[1]
})
     }
   }

event bus非父子组件怎样相互通信
这次给大家带来event bus非父子组件怎样相互通信,event bus非父子组件相互通信的注意事项有哪些,下面就是实战案例,一起来看一下。
有时候非父子关系的组件也需要通信。在简单的场景下,使用一个空的Vue实例作为中央事件总线:
var bus = new Vue()
// 触发组件 A 中的事件
bus.$emit(''id-selected'', 1)
// 在组件 B 创建的钩子中监听事件
bus.$on(''id-selected'', function (id) {
 // ...
})在更多复杂的情况下,你应该考虑使用专门的 状态管理模式.就是用到了vuex
eventBus是作为兄弟关系的组件之间的通讯中介。
代码示例:
nbsp;html>
<title>eventBus</title><script></script><p>
</p><h1>todo app</h1>
<new-todo></new-todo><todo-list></todo-list><script>
var eventHub = new Vue( {
data(){
return{
todos:['A','B','C']
}
},
created:function () {
this.$on('add', this.addTodo)
this.$on('delete', this.deleteTodo)
},
beforeDestroy:function () {
this.$off('add', this.addTodo)
this.$off('delete', this.deleteTodo)
},
methods: {
addTodo: function (newTodo) {
this.todos.push(newTodo)
},
deleteTodo: function (i) {
this.todos.splice(i,1)
}
}
})
var newTodo = {
template:`<p><input type="text" autofocus v-model="newtodo"/><button @click="add">add`,
data(){
return{
newtodo:''
}
},
methods:{
add:function(){
eventHub.$emit('add', this.newtodo)
this.newtodo = ''
}
}
}
var todoList = {
template:`<ul><li v-for="(index,item) in items">{{item}} \
<button @click="rm(index)">X \
`,
data(){
return{
items:eventHub.todos
}
},
methods:{
rm:function(i){
eventHub.$emit('delete',i)
}
}
}
var app= new Vue({
el:'#todo-app',
components:{
newTodo:newTodo,
todoList:todoList
}
})
</script>相信看了本文案例你已经掌握了方法,更多精彩请关注php中文网其它相关文章!
推荐阅读:
JS怎样检测浏览器内的脚本
Popup弹出框绑定添加数据事件(步奏详解)
以上就是event bus非父子组件怎样相互通信的详细内容,更多请关注php中文网其它相关文章!

eventBus兄弟组件通信详解
这次给大家带来eventBus兄弟组件通信详解,eventBus兄弟组件通信的注意事项有哪些,下面就是实战案例,一起来看一下。
vue1.0中,组件之间的通信主要通过vm.$dispatch沿着父链向上传播和用vm.$broadcast向下广播来实现。然而在vue2.0中,已经废除了这种用法。
vuex加入后,对组件之间的通信有了更加清晰的操作,对于中大型的项目来说,一开始就把vuex的使用计划在内是明智的选择。
然而在一些小型的项目,或者说像我这样写到一半才发现vue2.0用不了$.broadcast和$dispatch的人来说,就需要一个比较便捷的解决方法。那么,eventBus的作用就体现出来了。
主要是现实途径是在要相互通信的兄弟组件之中,都引入一个新的vue实例,然后通过分别调用这个实例的事件触发和监听来实现通信和参数传递。
这里来看一个简单的例子:
比如,我们这里有三个组件,main.vue、click.vue、show.vue。click和show是父组件main下的兄弟组件,而且click是通过v-for在父组件中遍历在了多个列表项中。这里要实现,click组件中触发点击事件后,由show组件将点击的是哪个dom元素console出来。
首先,我们给click组件添加点击事件
<p></p>
想要在doClick()方法中,实现对show组件的通信,我们需要新建一个js文件,来创建出我们的eventBus,我们把它命名为bus.js
import Vue from ''vue'';
export default new Vue();
这样我们就创建了一个新的vue实例。接下来我们在click组件和show组件中import它。
import Bus from ''common/js/bus.js'';
接下来,我们在doClick方法中,来触发一个事件:
methods: {
  addCart(event) {
  Bus.$emit(''getTarget'', event.target);
  }
}这里我们在click组件中每次点击,都会在bus中触发这个名为''getTarget''的事件,并将点击事件的event.target顺着事件传递出去。
接着,我们要在show组件中的created()钩子中调用bus监听这个事件,并接收参数:
created() {
    Bus.$on(''getTarget'', target => {
      console.log(target);
    });
}这样,在每次click组件的点击事件中,就会把event.target传递到show中,并console出来。
所以eventBus的使用还是非常便捷的,但是如果是中大型项目,通信比较复杂,还是建议大家直接使用vuex。
相信看了本文案例你已经掌握了方法,更多精彩请关注php中文网其它相关文章!
推荐阅读:
vue数组与对象的赋值问题
Bootstrap与Vue操作用户信息的添加与删除
源生JS怎样实现文件异步上传
以上就是eventBus兄弟组件通信详解的详细内容,更多请关注php中文网其它相关文章!
")
Flutter 组件通信(父子、兄弟)
一,概述
flutter一个重要的特性就是组件化。组件分为两种状态,一种是StatefulWidget有状态组件,一种是StatelessWidget无状态组件。 无状态组件不能更新状态,有状态组件具有类似刷新的机制,可更改状态。
功能模块都可以通过继承两种状态组件实现功能模块封装。组件间通信,一般存在一下两种关系。
-
-
- 父子组件通信
- 兄弟组件通信
-
二, 通信实现方式
- 回调通信
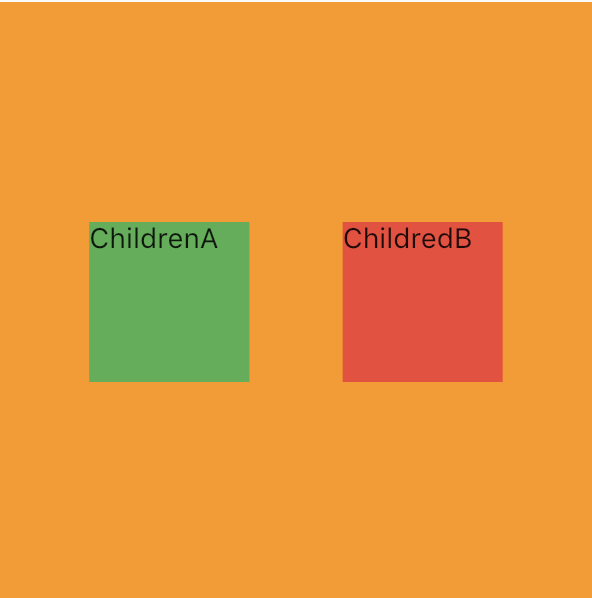
- 需求“点击子组件,修改父组件的背景颜色与子组件背景颜色一致”
- 代码实现

//父组件

class ParentWidget extends StatefulWidget {
  final String title;
  ParentWidget({Key key,this.title}):super(key:key);

  @override
  State<StatefulWidget> createState() {
    return new ParentWidgetState();
  }
}

class ParentWidgetState extends State<ParentWidget> {
  Color  containerBg  = Colors.orange;
  //回调函数
  void changeBackgroundColor(Color newColor){
        setState(() {
           containerBg = newColor;//修改状态
        });
  }

  @override
  Widget build(BuildContext context) {
    return new Scaffold(
      appBar: new AppBar(
        title: new Text(widget.title),
      ),
      body: new Center(
        child: new GestureDetector(
          onTap: (){
              changeBackgroundColor(Colors.orange);
          },
          child: new Container(
            width: 300,
            height: 300,
            color: containerBg,
            alignment: Alignment.center,
            child: new Row(
              mainAxisAlignment: MainAxisAlignment.spaceEvenly,
              children: <Widget>[
                new childrenA(childrenACallBack: changeBackgroundColor),
                new childrenB(childrenBCallBack: changeBackgroundColor),
              ],
            ),
          ),
        )
        ),
      );
   }
}

//子组件(组件A)
class childrenA extends StatelessWidget {
  //定义接收父类回调函数的指针
final ValueChanged<Color> childrenACallBack; childrenA({Key key,this.childrenACallBack}):super(key:key);@override Widget build(BuildContext context) { return new GestureDetector( onTap: (){ //调用回调函数传值 childrenACallBack(Colors.green); }, child: new Container( width: 80, height: 80, color: Colors.green, child: new Text(''ChildrenA''), ), ); } } //子组件(组件B) class childrenB extends StatelessWidget { final ValueChanged<Color> childrenBCallBack; childrenB({Key key,this.childrenBCallBack}):super(key:key); @override Widget build(BuildContext context) { return new GestureDetector( onTap:(){ childrenBCallBack(Colors.red); }, child: new Container( width: 80, height: 80, color: Colors.red, child: new Text(''ChildredB''), ), ); } } -
功能实现


- 使用场景:一般用于子组件对父组件传值。
-
InheritedWidget 数据共享
- 场景:业务开发中经常会碰到这样的情况,多个Widget需要同步同一份全局数据,比如点赞数、评论数、夜间模式等等。
- 代码实现:
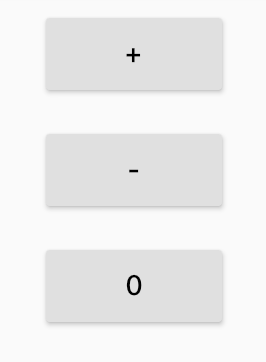
import ''package:flutter/material.dart''; void main() => runApp(MyApp()); class MyApp extends StatelessWidget { // This widget is the root of your application. @override Widget build(BuildContext context) { return MaterialApp( title: ''Flutter Demo'', theme: ThemeData( primarySwatch: Colors.blue, ), home: new InheritedWidgetTestContainer(), ); } } //模型数据 class InheritedTestModel { final int count; const InheritedTestModel(this.count); } //哨所(自定义InheritedWidget类) class InheritedContext extends InheritedWidget { //构造函数 InheritedContext({ Key key, @required this.inheritedTestModel, @required this.increment, @required this.reduce, @required Widget child }):super(key:key,child:child); //变量 final InheritedTestModel inheritedTestModel; final Function() increment; final Function() reduce; //静态方法 static InheritedContext of(BuildContext context){ InheritedContext contexts = context.inheritFromWidgetOfExactType(InheritedContext); return context.inheritFromWidgetOfExactType(InheritedContext); } //是否重建取决于Widget组件是否相同 @override bool updateShouldNotify(InheritedContext oldWidget) { return inheritedTestModel != oldWidget.inheritedTestModel; } } class TestWidgetA extends StatelessWidget { @override Widget build(BuildContext context) { final inheritedContext = InheritedContext.of(context); return new Padding( padding: const EdgeInsets.only(left: 10.0,top: 10.0,right: 10.0), child: new RaisedButton( textColor: Colors.black, child: new Text(''+''), onPressed:inheritedContext.increment ), ); } } class TestWidgetB extends StatelessWidget { @override Widget build(BuildContext context) { final inheritedContext = InheritedContext.of(context); return new Padding( padding: const EdgeInsets.only(left: 10,top: 10,right: 10.0), child: new RaisedButton( textColor: Colors.black, child: new Text(''-''), onPressed: inheritedContext.reduce ), ); } } class TestWidgetC extends StatelessWidget { @override Widget build(BuildContext context) { final inheritedContext = InheritedContext.of(context); final inheritedTestModel = inheritedContext.inheritedTestModel; return new Padding( padding: const EdgeInsets.only(left: 10.0,top: 10.0,right: 10.0), child: new RaisedButton( textColor: Colors.black, child: new Text(''${inheritedTestModel.count}''), onPressed: (){ }, ), ); } } class InheritedWidgetTestContainer extends StatefulWidget { @override State<StatefulWidget> createState() { return new InheritedWidgetTestContainerState(); } } class InheritedWidgetTestContainerState extends State<InheritedWidgetTestContainer> { InheritedTestModel _inheritedTestModel; _initData(){ _inheritedTestModel = new InheritedTestModel(0); } @override void initState() { _initData(); super.initState(); } _incrementCount(){ setState(() { _inheritedTestModel = new InheritedTestModel(_inheritedTestModel.count + 1); }); } _reduceCount(){ setState(() { _inheritedTestModel = new InheritedTestModel(_inheritedTestModel.count - 1); }); } @override Widget build(BuildContext context) { return new InheritedContext( inheritedTestModel: _inheritedTestModel, increment: _incrementCount, reduce: _reduceCount, child: new Scaffold( appBar: new AppBar( title: new Text(''InheritedWidgetTest''), ), body: new Center( child: new Column( children: <Widget>[ new TestWidgetA(), new TestWidgetB(), new TestWidgetC(), ], ), ) ), ); } } - 功能实现


-
使用场景
一般用于父组件对子组件的跨组件传值。
- Global Key通信
GlobalKey能够跨Widget访问状态。- 需求“点击A子组件,修改B子组件的背景颜色为指定的‘蓝色”
- 代码实现
//父组件 class ParentWidget extends StatefulWidget { @override State<StatefulWidget> createState() { return new ParentWidgetState(); } } class ParentWidgetState extends State<ParentWidget> { @override Widget build(BuildContext context) { return new Scaffold( appBar: new AppBar( title: new Text(''组件化''), ), body: new Center( child: new Container( color: Colors.grey, width: 200, height: 200, child: new Row( mainAxisAlignment: MainAxisAlignment.spaceEvenly, children: <Widget>[ new SubWidgetA(key: subAkey), new SubWidgetB(key: subBkey) ], ), ), ), ); } } //子组件A class SubWidgetA extends StatefulWidget { SubWidgetA({Key key}):super(key:key); @override State<StatefulWidget> createState() { return new SubWidgetAState(); } } class SubWidgetAState extends State <SubWidgetA> { Color _backgroundColors = Colors.red;//红色 void updateBackGroundColors(Color colos){ setState(() { _backgroundColors = colos; }); } @override Widget build(BuildContext context) { return new GestureDetector( onTap: (){ subBkey.currentState.updateBackGroundColors(Colors.blue); setState(() { _backgroundColors = Colors.red; }); }, child: new Container( width: 80, height: 80, color:_backgroundColors, alignment: Alignment.center, child: new Text(''SubWidgetA''), ), ); } } //子组件B class SubWidgetB extends StatefulWidget { SubWidgetB({Key key}):super(key:key); @override State<StatefulWidget> createState() { // TODO: implement createState return new SubWidgetBState(); } } class SubWidgetBState extends State<SubWidgetB> { Color _backgroundColors = Colors.green;//绿色 void updateBackGroundColors(Color colos){ setState(() { _backgroundColors = colos; }); } @override Widget build(BuildContext context) { return new GestureDetector( onTap: (){ subAkey.currentState.updateBackGroundColors(Colors.blue); setState(() { _backgroundColors = Colors.green; }); }, child: new Container( width: 80, height: 80, color: _backgroundColors, alignment: Alignment.center, child: new Text(''SubWidgetB''), ), ); } } - 功能实现


- 使用场景:一般用于跨组件访问状态
- ValueNotifier通信
ValueNotifier是一个包含单个值的变更通知器,当它的值改变的时候,会通知它的监听。
- 定义ValueNotifierData类,继承ValueNotifier
class ValueNotifierData extends ValueNotifier<String> {
  ValueNotifierData(value) : super(value);
}
- 定义
_WidgetOne,包含一个ValueNotifierData的实例。class _WidgetOne extends StatefulWidget { _WidgetOne({this.data}); final ValueNotifierData data; @override _WidgetOneState createState() => _WidgetOneState(); }
_WidgetOneState中给ValueNotifierData实例添加监听。@override initState() { super.initState(); widget.data.addListener(_handleValueChanged); info = ''Initial mesage: '' + widget.data.value; } void _handleValueChanged() { setState(() { info = ''Message changed to: '' + widget.data.value; });
- 在
ValueNotifierCommunication组件中实例化_WidgetOne,可以通过改变ValueNotifierData实例的value来触发_WidgetOneState的更新。@override Widget build(BuildContext context) { ValueNotifierData vd = ValueNotifierData(''Hello World''); return Scaffold( appBar: AppBar(title: Text(''Value Notifier Communication''),), body: _WidgetOne(data: vd), floatingActionButton: FloatingActionButton(child: Icon(Icons.refresh),onPressed: () { vd.value = ''Yes''; }), ); }
- 定义ValueNotifierData类,继承ValueNotifier
- 第三方插件
在这里运用event_bus来实现传值,用于组件与组件之间的传值。- event_bus
- 引入插件
import ''package:event_bus/event_bus.dart''; -
event_bus用法。
-
新建消息监测类
import ''package:event_bus/event_bus.dart''; EventBus eventBus = new EventBus(); class TransEvent{ String text; TransEvent(this.text); } -
监测类变化
eventBus.on<TransEvent>().listen((TransEvent data) => show(data.text)); void show(String val) { setState(() { data = val; }); } -
触发消息变化
eventBus.fire(new TransEvent(''$inputText''));
-
- 使用场景:这样我们就可以根据这些来实现组件之间的传值。
- 引入插件
- event_bus
")
Flutter基础-组件通信(父子、兄弟)
上一篇中讲了如何通过父组件给子组件传值: 传送门
这一篇的内容会讲述如何实现:
1. 父子组件之间的传值方法
2. 兄弟组件之间的传值方法 —— eventbus
实现后的效果如下图,
实现效果.png
有一些朋友在使用的过程中,可能没有找到比较好的方法,那么我们就一起来撸一个demo吧。
这个demo我们重头开始,先flutter create demo (你的项目名称), 我们就在官方的demo上面进行修改。
首先我们整体的目录结构是这样的
image
然后mian.dart中我们放入parent父组件
class _MyHomePageState extends State<MyHomePage> {
  @override
  Widget build(BuildContext context) {
    return new Scaffold(
      appBar: new AppBar(
        title: new Text(widget.title),
      ),
      body: new Center(
        child: new Column(
          mainAxisAlignment: MainAxisAlignment.center,
          children: <Widget>[
            new Parent()
          ],
        ),
      ),
    );
  }
}
父组件中加入childOne, childTwo 两个子组件
接下来我们来实现父子组件的相互传值:
void onDataChange(val) {
  setState(() {
    data = val;
  });
}
@override
  Widget build(BuildContext context) {
    return new Center(
      child: new Column(
        mainAxisAlignment: MainAxisAlignment.center,
        children: <Widget>[
          new ChildOne(),
          new ChildTwo(data4Two: data4Two, callback: (val) => onDataChange(val)),
          new Container(
            width: 400.0,
            margin: const EdgeInsets.all(10.0),
            padding: const EdgeInsets.only(top:30.0, bottom: 50.0),
            decoration: BoxDecoration(
            color: Colors.blue[100]),
            child: new Column(
              children: <Widget>[
                new Container(
                  padding: new EdgeInsets.only(bottom: 15.0),
                  child:  new Text(''父组件''),
                ),
                new Text(''子组件2, 传过来的值: '' + ''$data''),
              ]
            ),
          )
        ],
      ),
    );
  }
通过给childTwo传入
传值:data4Two和callback方法
callback方法被调用parent中的callback方法,对data进行赋值
接下来我们就只需要在childTwo子组件中触发callback方法就可以实现传值了,其实这个和vue的方式很相似u,看代码
class ChildTwo extends StatefulWidget {

  ChildTwo({Key key, this.data4Two, this.callback})
    :super(key: key);
  final callback;
  String data4Two;

  @override
  ChildTwoState createState() => new ChildTwoState();
}
在childTwo组件中,在firedA() 中触发callback, 就搞定了
void firedA() {
  widget.callback(''$inputTxt'');
}
new Container(
  child: new RaisedButton(
    onPressed: firedA,
    child: new Text(''to父组件'')
  )
)
接下来我们来实现兄弟组件的传值。
这里我们使用eventBus来实现兄弟组件的传值
eventBus使用流程:
- 引入
import ''package:event_bus/event_bus.dart'';
- 创建实例
EventBus eventBus = new EventBus();
- 定义event, 任意一个Dart class都可以作为一个event
class UserLoggedInEvent {
  User user;
  UserLoggedInEvent(this.user);
}
- 注册监听
监听特定的event
eventBus.on<UserLoggedInEvent>().listen((event) {
  print(event.user);
});
监听所有的event
eventBus.on().listen((event) {
  print(event. runtimeType);
});
- 发送一个event
eventBus.fire(new UserLoggedInEvent(myUser));
好的那我们根据上面的步骤,在我们的代码中进行实现
1. 首先在pubspec.yaml中加入event_bus, 然后flutter会自动下载的
dependencies:
  flutter:
    sdk: flutter

  # The following adds the Cupertino Icons font to your application.
  # Use with the CupertinoIcons class for iOS style icons.
  cupertino_icons: ^0.1.2
  event_bus: ^1.0.1
dev_dependencies:
  flutter_test:
    sdk: flutter
2. 然后我们在common中新建eventBus.dart文件
加入以下代码:
import ''package:event_bus/event_bus.dart'';

EventBus eventBus = new EventBus();

class MyEvent {
  String text;

  MyEvent(this.text);
}
我们new了一个eventbus对象,然后新建一个叫myEvent的类, 我们就使用myEvent这个类,来实现。
先在childTwo这个组件里引入eventbus, 并且通过firedB() 方法,调用eventBus.fire(), 发送了一个myEvent()
import ''../common/eventBus.dart'';
void firedB() {
  eventBus.fire(new MyEvent(''$inputTxt''));
}
new Container(
  child: new RaisedButton(
    onPressed: firedB,
    child: new Text(''to兄弟组件'')
  )
)
下面的方法是eventBus的监听事件,
eventBus.on().listen() //监听eventBus中所有的事件。
eventBus.on<MyEvent>().listen() //只监听MyEvent。
我们在childOne这个组件里同样引入eventBus, 在initState() 初始化方法中,
void initState() {
  eventBus.on<MyEvent>().listen((MyEvent data) =>
    show(data.text)
  );
}

void show(String val) {
  setState(() {
    data= val;
  });
}
在initState中我们激活了eventBus对MyEvent的监听,这样eventBus.fire()方法调用一次,我们便可以获取fire发送过来的值了。
eventBus是通过Dart Streams来实现的,那么我们可以通过对Dart Stream的控制,来实现对eventBus的控制
StreamSubscription subscription = eventBus.on<UserLoggedInEvent>().listen((event) {
  print(event.user);
});

subscription.resume();  //  开
subscription.pause();    //  暂停
subscription.cancel();   //  取消
这里我就不一一实现了,有需要的朋友可以根据业务进行使用。
git地址:https://gitlab.com/carter0624/flutter-eventBus.git
作者:偏罗
链接:https://www.jianshu.com/p/25a85c02d586
來源:简书
简书著作权归作者所有,任何形式的转载都请联系作者获得授权并注明出处。
今天关于使用Bus.js进行兄弟(非父子)组件通信和非父子组件传值的讲解已经结束,谢谢您的阅读,如果想了解更多关于event bus非父子组件怎样相互通信、eventBus兄弟组件通信详解、Flutter 组件通信(父子、兄弟)、Flutter基础-组件通信(父子、兄弟)的相关知识,请在本站搜索。
本文标签:


