以上就是给各位分享SpringBoot2-更改Jar名称,其中也会对修改springbootjar包文件进行解释,同时本文还将给你拓展JavaSpringBoot整合shiro-spring-boot
以上就是给各位分享Spring Boot 2-更改Jar名称,其中也会对修改springboot jar包文件进行解释,同时本文还将给你拓展Java SpringBoot整合shiro-spring-boot-starterqi项目报错解决、Java-Springboot - 集成 spring-security 简单示例 (Version-springboot-2-1-3-RELEASE、JAVA入门教学之快速搭建基本的springboot(从spring boot到spring cloud)、java版spring cloud+spring boot 社交电子商务平台 (二十四)springboot整合docker等相关知识,如果能碰巧解决你现在面临的问题,别忘了关注本站,现在开始吧!
本文目录一览:- Spring Boot 2-更改Jar名称(修改springboot jar包文件)
- Java SpringBoot整合shiro-spring-boot-starterqi项目报错解决
- Java-Springboot - 集成 spring-security 简单示例 (Version-springboot-2-1-3-RELEASE
- JAVA入门教学之快速搭建基本的springboot(从spring boot到spring cloud)
- java版spring cloud+spring boot 社交电子商务平台 (二十四)springboot整合docker
")
Spring Boot 2-更改Jar名称(修改springboot jar包文件)
我在Gradle项目中使用Spring Boot 2在Jenkins中进行jar的构建,我想更改该jar文件的名称。
默认情况下,Spring Boot 2使用Gradle属性rootProject.name,可以在/settings.gradle文件中设置该属性。
但是,我想更改jar文件名,而不更改rootProject.name。
这是我bootJar和文件的springBoot各个部分build.gradle:
bootJar { launchScript()}。
springBoot { buildInfo { properties { artifact = "jarName" group = "groupName" name = "projectName" version = "1.0" } }}注意: artifact阅读后没有设置jar名称,正如我期望的那样:https :
//docs.spring.io/spring-boot/docs/current/gradle-
plugin/reference/html/#integrating-with-
actuator
答案1
小编典典bootJar {
baseName “jarName”
launchScript()
}
。
springBoot { buildInfo { properties { group = "groupName" name = "projectName" version = "1.0" } }}
Java SpringBoot整合shiro-spring-boot-starterqi项目报错解决
1、项目启动时报错如下
Description:
The bean ''securityManager'', defined in class path resource [org/apache/shiro/spring/config/web/autoconfigure/ShiroWebAutoConfiguration.class], could not be registered. A bean with that name has already been defined in class path resource [com/ncwu/common/infrastructure/config/ShiroConfig.class] and overriding is disabled.
Action:
Consider renaming one of the beans or enabling overriding by setting spring.main.allow-bean-definition-overriding=true
2、原因分析
我的自定义ShiroConfig配置类中添加的安全管理器,
代码如下:
@Bean
public SecurityManager securityManager(JwtRealm jwtRealm) {
    DefaultWebSecurityManager securityManager = new DefaultWebSecurityManager();
    //配置realm
    securityManager.setRealm(jwtRealm);
    return securityManager;
}
根据异常信息查看ShiroWebAutoConfiguration源码时发现其中已经定义了securityManager方法,我们在ShiroConfig配置类中再次定义securityManager方法,因返回的类与其不一样导致出错,
ShiroWebAutoConfiguration类中定义的securityManager方法代码如下:
@Bean
@ConditionalOnMissingBean
@Override
protected SessionsSecurityManager securityManager(List<Realm> realms) {
    return super.securityManager(realms);
}下面这些为补充知识:我们都知道@ConditionalOnBean作用是根据value属性按bean的类型或则bean的名称判断bean是否在IOC容器中,如果在就返回true,否则返回false。而@ConditionalOnMissingBean的作用与@ConditionalOnBean相反。如果@ConditionalOnBean和@ConditionalOnMissingBean这两个注解没有参数,那这两个注解以何种方式来判断呢?在Spring Boot官方文档中找出了答案。

意思是:在@ConditionalOnMissingBean没有参数的情况下,目标类型默认为方法的返回类型,如果IOC容器中没有类型为MyService及其子类的Bean,那么myServiceBean将被创建。
从源代码中可以看出@ConditionalOnMissingBean没有参数,那么如果IOC容器中没有类型为SessionsSecurityManager及其子类的Bean,那么该方法则会执行,并且源码securityManager方法返回的是SessionsSecurityManager,而自己定义的ShiroConfig中返回的是SecurityManager(因为@Bean注解会指定改bean的类型为该方法的返回类型),所以它会判断出IOC容器中没有类型为SessionsSecurityManager及其子类的Bean,源码中的方法执行,故IOC容器中有两个名为securityManager的Bean,因而报错。所以如果要自定义securityManager方法,返回类型只能是SessionsSecurityManager及其子类,而SessionsSecurityManager的子类是DefaultSecurityManager,DefaultWebSecurityManager又继承DefaultSecurityManager,
相关类图如下:

故而正确的代码应该是:
@Bean
public SessionsSecurityManager securityManager(JwtRealm jwtRealm) {
    DefaultWebSecurityManager securityManager = new DefaultWebSecurityManager();
    //配置realm
    securityManager.setRealm(jwtRealm);
    return securityManager;
}

//或者如下,将方法返回类型改为DefaultWebSecurityManager
/*@Bean
public DefaultWebSecurityManager securityManager(JwtRealm jwtRealm) {
    DefaultWebSecurityManager securityManager = new DefaultWebSecurityManager();
    //配置realm
    securityManager.setRealm(jwtRealm);
    return securityManager;
}*/
3、测试@ConditionalOnMissingBean注解
新建下面3个类:
//动物
@Data
public class Animal {
    private String name;
    private Integer age;
}

//狗
@EqualsAndHashCode(callSuper = true)
@Data
public class Dog extends Animal {
    private String type;
}

//二哈
@EqualsAndHashCode(callSuper = true)
@Data
public class TwoHa extends Dog {
    private String a;
}
启动类:
@SpringBootApplication
//扫描下面的接口生成代理实现类
@MapperScan("com.ncwu.**.domain.mapper")
public class ShiroApplication {
    public static void main(String[] args) {
        SpringApplication.run(ShiroApplication.class, args);
    }

    //若IOC容器中没有Animal类型及其子类Dog类型的bean时,该方法才会执行
    @Bean
    @ConditionalOnMissingBean
    public Animal twoHa(JwtRealm realm) {
        TwoHa twoHa = new TwoHa();
        twoHa.setType("twoHa1");
        twoHa.setAge(10);
        twoHa.setName("twoHa1");
        return twoHa;
    }

    @Bean
    public Dog twoHa() {
        TwoHa twoHa = new TwoHa();
        twoHa.setType("twoHa2");
        twoHa.setAge(20);
        twoHa.setName("twoHa2");
        return twoHa;
    }
}
测试类:
@RunWith(SpringRunner.class)
@SpringBootTest(classes = ShiroApplication.class)
public class TestDao {
    @Autowired
    private ApplicationContext appContext;
    @Test
    public void test() throws Exception{
        /*String[] beanNamesForType = appContext.getBeanNamesForType(Animal.class);
        for (String s : beanNamesForType) {
            System.out.println(s);
        }*/
        appContext.getBean(Animal.class);
        //appContext.getBean("dog");
    }
}
测试结果:

到此这篇关于Java SpringBoot整合shiro-spring-boot-starterqi项目报错解决的文章就介绍到这了,更多相关Java SpringBoot 内容请搜索以前的文章或继续浏览下面的相关文章希望大家以后多多支持!
- Java Apache Shiro安全框架快速开发详解流程
- Java安全框架——Shiro的使用详解(附springboot整合Shiro的demo)
- 详解Java springboot 整合Shiro框架
- Java中基于Shiro,JWT实现微信小程序登录完整例子及实现过程
- java shiro实现退出登陆清空缓存
- Java中SSM+Shiro系统登录验证码的实现方法
- Java shiro安全框架使用介绍

Java-Springboot - 集成 spring-security 简单示例 (Version-springboot-2-1-3-RELEASE
- 使用 Idea 的 Spring Initializr 或者 SpringBoot 官网下载 quickstart
添加依赖
1
2
3
4<dependency>
<groupId>org.springframework.boot</groupId>
<artifactId>spring-boot-starter-security</artifactId>
</dependency>新建控制器
1
2
3
4
5
6
7
8
9
import org.springframework.web.bind.annotation.GetMapping;
import org.springframework.web.bind.annotation.RestController;
@RestController
public class UserController {
@GetMapping("/user")
public String getUsers() {
return "Hello Spring Security";
}
}logback.xml
1
2
3
4
5
6
7
8
9
10
11
12
13
14
15
16
17
18
19
20
21
22
<?xml version="1.0" encoding="UTF-8"?>
<configuration>
<appender name="FILE" class="ch.qos.logback.core.FileAppender">
<file> 大专栏 Java-Springboot-集成spring-security简单示例(Version-springboot-2-1-3-RELEASE/data/www/file/logs/springboot.log</file>
<encoder>
<pattern>%date %d{HH: mm:ss.SSS} %level [%thread] %logger{10} [%file:%line] %msg%n</pattern>
</encoder>
</appender>
<appender name="STDOUT" class="ch.qos.logback.core.ConsoleAppender">
<encoder>
<pattern>%date %d{HH: mm:ss.SSS} %level [%thread] %logger{10} [%file:%line] %msg%n</pattern>
</encoder>
</appender>
<root level="debug">
<appender-ref ref="FILE" />
<appender-ref ref="STDOUT" />
</root>
</configuration>application.properties
1
2
3
# Server Domain-Port
server.address=127.0.0.1
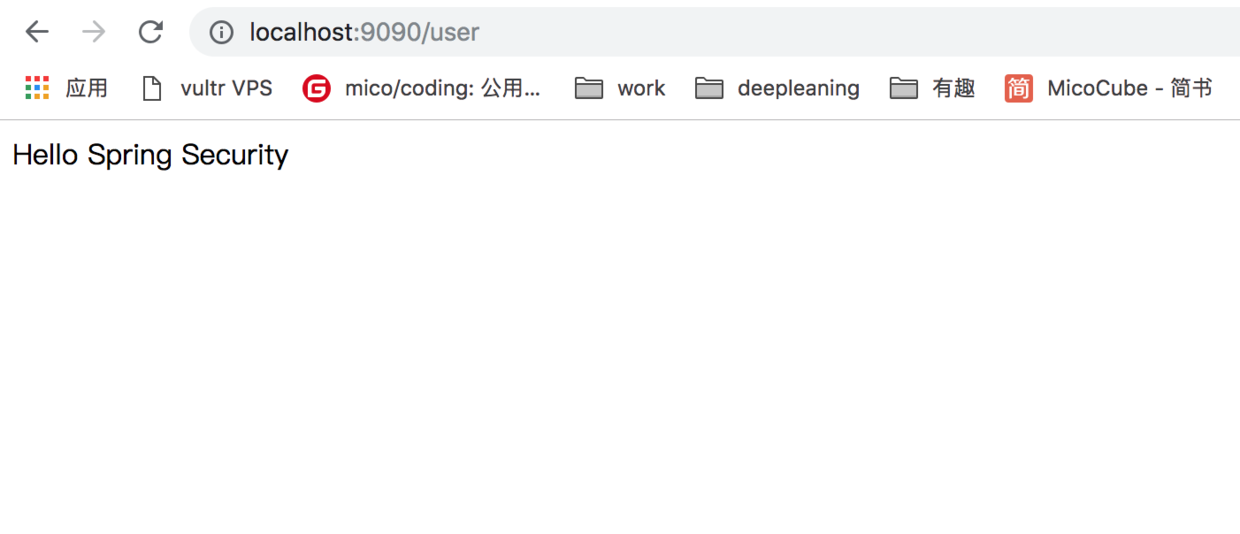
server.port=9090启动 SpringBootApplication,springboot 已经和 spring-security 集成了,如果直接访问
http://localhost:9090/user会跳到登陆页面,这是 spring-security 自带的,但是我们并没有创建任何用户啊,spring-security 有个默认的用户名user,密码在控制台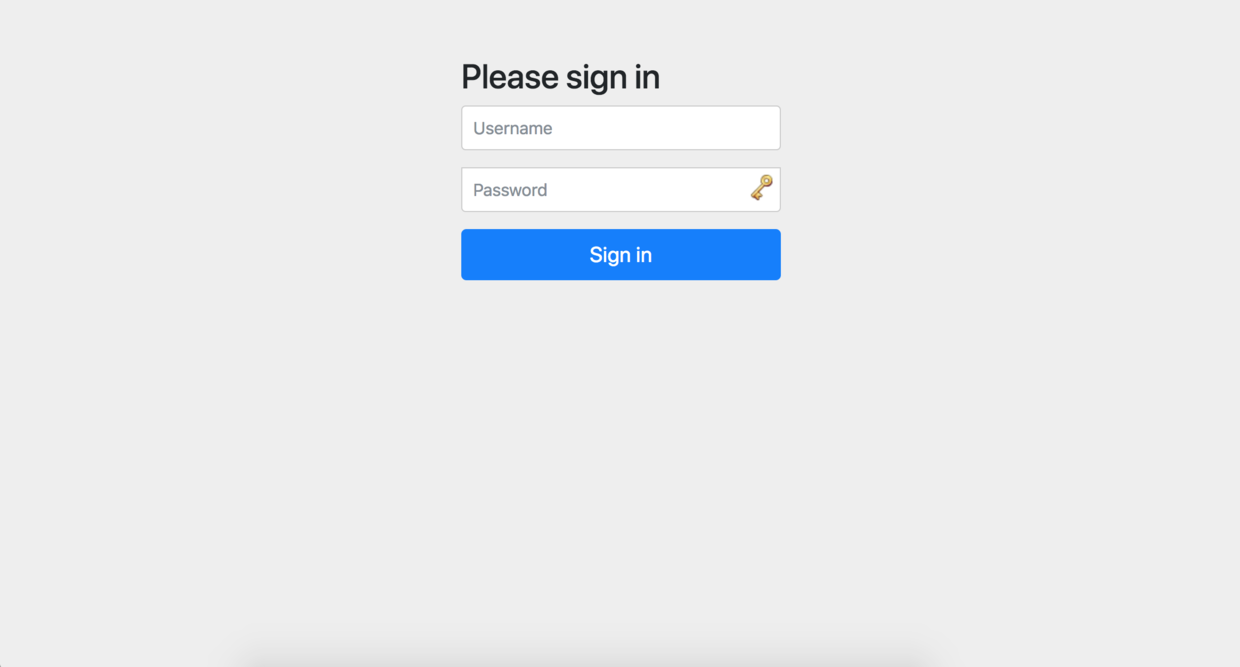
默认密码在控制信息里,在控制台信息里搜索
Using generated,当然你的程序生成的密码肯定和我的不一样1Using generated security password: 6ae529ee-2281-4b66-8f30-b1ba0e7fec97使用用户名和密码登陆后:
源码
")
JAVA入门教学之快速搭建基本的springboot(从spring boot到spring cloud)
本文主要入门者介绍怎么搭建一个基础的springboot环境,本文通过图文并茂的形式给大家介绍从spring boot到spring cloud的完美搭建过程,适用java入门教学,需要的朋友可以参考下
安装JDK
https://www.oracle.com/java/technologies/javase/javase-jdk8-downloads.html

使用的是jdk8,这里使用的是windows10 64位的操作系统,所以下载对应的jdk版本

点击链接会要你登录,登录以后才可以下载。

下载安装以后找到jdk的安装目录,我这里是C:Program FilesJavajdk1.8.0_211

配置JAVA_HOME,值就是你安装jdk的地址C:Program FilesJavajdk1.8.0_211 千万不要加bin
这个时候还没有完成配置,还需要打开path环境变量在最后加

加到bin目录


如果输入javac显示帮助信息证明配置成功了。
下面来下载springboot的IDE,建议新手不要去搞那些插件,直接装一个完整版本的,可以在下面的连接下载完整版。
https://spring.io/tools#main

这种下下来的jar包可以直接用解压软件解开,里面有直接可以执行的exe执行文件,直接用就可以了。


这里就勾选springweb 也就是springmvc
完成以后会发现下载包的速度会很慢
这时候就要自己修改maven了
http://maven.apache.org/download.cgi

修改 confsettings.xml 设置成阿里的库,把下载源从国外转到国内
alimavenaliyun maven http://maven.aliyun.com/nexus/content/groups/public/central

修改maven配置地址。重启IDE就可以了。

package com.example.demo; import org.springframework.boot.SpringApplication; import org.springframework.boot.autoconfigure.SpringBootApplication; import org.springframework.context.annotation.ComponentScan; @ComponentScan(basePackages={"com.example.demo"})//spring服务扫描目录。可以用*替换com.example.* @SpringBootApplication public class CeshiApplication { public static void main(String[] args) { SpringApplication.run(CeshiApplication.class, args); } }
package com.example.demo; import java.io.FileWriter; import java.io.IOException; import java.util.Date; import java.util.HashMap; import java.util.Map; import java.util.UUID; import javax.servlet.http.HttpServletRequest; import javax.servlet.http.HttpSession; import org.springframework.beans.factory.annotation.Autowired; import org.springframework.stereotype.Controller; import org.springframework.util.ResourceUtils; import org.springframework.web.bind.annotation.GetMapping; import org.springframework.web.bind.annotation.PathVariable; import org.springframework.web.bind.annotation.RequestBody; import org.springframework.web.bind.annotation.RequestMapping; import org.springframework.web.bind.annotation.ResponseBody; import org.springframework.web.bind.annotation.RestController; @RestController @RequestMapping("/user") public class HtuserController { @RequestMapping("/hi") @ResponseBody public Returnben getsession(HttpServletRequest request, HttpSession session) { Returnben returnben = new Returnben(); returnben.setMsg("成功"); returnben.setSuccess("1"); return returnben; } }
package com.example.demo; public class Returnben { private String success = "0"; public String getSuccess() { return success; } public void setSuccess(String success) { this.success = success; } public String getMsg() { return msg; } public void setMsg(String msg) { this.msg = msg; } public Object getobj() { return obj; } public Object getData() { return data; } public void setData(Object data) { this.data = data; } public void setobj(Object obj) { this.obj = obj; } private String msg = ""; private Object obj = null; private Object data = null; private Long count; private int code; public int getCode() { return code; } public void setCode(int code) { this.code = code; } public Long getCount() { return count; } public void setCount(Long count) { this.count = count; } }

没配置端口的话就是8080端口

基本的springboot就完成了,后续再说集成各个框架和cloud其他组件
到此这篇关于JAVA入门教学之快速搭建基本的springboot(从spring boot到spring cloud)的文章就介绍到这了,更多相关springboot入门搭建内容请搜索小编以前的文章或继续浏览下面的相关文章希望大家以后多多支持小编!
springboot整合docker")
java版spring cloud+spring boot 社交电子商务平台 (二十四)springboot整合docker
这篇文篇介绍,怎么为 springboot程序构建一个docker镜像。docker 是一个开源的应用容器引擎,基于 Go 语言 并遵从Apache2.0协议开源。Docker 可以让开发者打包他们的应用以及依赖包到一个轻量级、可移植的容器中,然后发布到任何流行的 Linux 机器上,也可以实现虚拟化。容器是完全使用沙箱机制,相互之间不会有任何接口(类似 iPhone 的 app),更重要的是容器性能开销极低。
准备工作
环境:
- linux环境或mac,不要用windows
- jdk 8
- maven 3.0
- docker
对docker一无所知的看docker教程。
创建一个springboot工程
引入web的起步依赖,创建一个 Controler:
@SpringBootApplication
@RestController
public class SpringbootWithDockerApplication {

    @RequestMapping("/")
    public String home() {
        return "Hello Docker World";
    }
    public static void main(String[] args) {
        SpringApplication.run(SpringbootWithDockerApplication.class, args);
    }
}
将springboot工程容器化
Docker有一个简单的dockerfile文件作为指定镜像的图层。让我们先创建一个 dockerFile文件:
src/main/docker/Dockerfile:
FROM frolvlad/alpine-oraclejdk8:slim
VOLUME /tmp
ADD springboot-with-docker-0.0.1-SNAPSHOT.jar app.jar
RUN sh -c 'touch /app.jar'
ENV JAVA_OPTS=""
ENTRYPOINT [ "sh", "-c", "java $JAVA_OPTS -Djava.security.egd=file:/dev/./urandom -jar /app.jar" ]
我们通过maven 构建docker镜像。
在maven的pom目录,加上docker镜像构建的插件
<properties>
   <docker.image.prefix>springio</docker.image.prefix>
</properties>
<build>
    <plugins>
        <plugin>
            <groupId>com.spotify</groupId>
            <artifactId>docker-maven-plugin</artifactId>
            <version>0.4.11</version>
            <configuration>
                <imageName>${docker.image.prefix}/${project.artifactId}</imageName>
                <dockerDirectory>src/main/docker</dockerDirectory>
                <resources>
                    <resource>
                        <targetPath>/</targetPath>
                        <directory>${project.build.directory}</directory>
                        <include>${project.build.finalName}.jar</include>
                    </resource>
                </resources>
            </configuration>
        </plugin>
    </plugins>
</build>
通过maven 命令:
第一步:mvn clean
第二步: mvn package docker:bulid ,如下:
Step 2/6 : VOLUME /tmp
—> Running in a98be3878053
—> 8286e98b54c5
Removing intermediate container a98be3878053
Step 3/6 : ADD springboot-with-docker-0.0.1-SNAPSHOT.jar app.jar
—> c6ce13e50bbd
Removing intermediate container a303a3058869
Step 4/6 : RUN sh -c ‘touch /app.jar’
—> Running in cf231afe700e
—> 9a0ec8936c00
Removing intermediate container cf231afe700e
Step 5/6 : ENV JAVA_OPTS “”
—> Running in e192597fc881
—> 2cb0d73bbdb0
Removing intermediate container e192597fc881
Step 6/6 : ENTRYPOINT sh -c java $JAVA_OPTS -Djava.security.egd=file:/dev/./urandom -jar /app.jar
—> Running in ab85f53fcdd8
—> 60fdb5c61692
Removing intermediate container ab85f53fcdd8
Successfully built 60fdb5c61692
[INFO] Built forezp/springboot-with-docker
[INFO] ————————————————————————
[INFO] BUILD SUCCESS
[INFO] ————————————————————————
[INFO] Total time: 01:45 min
[INFO] Finished at: 2017-04-19T05:37:44-07:00
[INFO] Final Memory: 19M/48M
[INFO] ————————————————————————
spring cloud b2b2c电子商务社交平台源码请加企鹅求求:叁五叁六贰四柒贰五九
我们今天的关于Spring Boot 2-更改Jar名称和修改springboot jar包文件的分享就到这里,谢谢您的阅读,如果想了解更多关于Java SpringBoot整合shiro-spring-boot-starterqi项目报错解决、Java-Springboot - 集成 spring-security 简单示例 (Version-springboot-2-1-3-RELEASE、JAVA入门教学之快速搭建基本的springboot(从spring boot到spring cloud)、java版spring cloud+spring boot 社交电子商务平台 (二十四)springboot整合docker的相关信息,可以在本站进行搜索。
本文标签:


