如果您对数据绑定感兴趣,那么本文将是一篇不错的选择,我们将为您详在本文中,您将会了解到关于数据绑定的详细内容,我们还将为您解答四使用DataContext作为Binding的Source的相关问题,并
如果您对数据绑定感兴趣,那么本文将是一篇不错的选择,我们将为您详在本文中,您将会了解到关于数据绑定的详细内容,我们还将为您解答四使用DataContext作为Binding的Source的相关问题,并且为您提供关于.net – 在WPF中,如何从包含ListBox的DataTemplate内部数据绑定到Window DataContext?、Access context of data source and work center view do not match、Android 官方 DataBinding(四):BindingAdapter、android-DataBindingUtil.setContentView(this,resource)返回null的有价值信息。
本文目录一览:- 数据绑定(四)使用DataContext作为Binding的Source(data context)
- .net – 在WPF中,如何从包含ListBox的DataTemplate内部数据绑定到Window DataContext?
- Access context of data source and work center view do not match
- Android 官方 DataBinding(四):BindingAdapter
- android-DataBindingUtil.setContentView(this,resource)返回null
使用DataContext作为Binding的Source(data context)")
数据绑定(四)使用DataContext作为Binding的Source(data context)
DataContext属性被定义在FrameworkElement类里,这个类是WPF控件的基类,这意味着所有WPF控件都具备这个属性,当一个Binding只知道自己的Path而不知道自己的Source时,它会沿着UI元素树一路向输的根部找过去,没路过一个节点,就看看这个节点的DataContext有没有指定的Path,如果有,就把这个对象作为自己的Source,看看例子,首先定义一个类
    class Student
    {
        public int Id { get; set; }
        public string Name { get; set; }
        public int Age { get; set; }
    }
XAML如下:
    <StackPanel>
        <StackPanel.DataContext>
            <local:Student Id="10001" Name="daijun" Age="20" />
        </StackPanel.DataContext>
        <TextBlock Background="LightBlue" Text="{Binding Path=Id}"></TextBlock>
        <TextBlock Background="LightBlue" Text="{Binding Path=Name}"></TextBlock>
        <TextBlock Background="LightBlue" Text="{Binding Path=Age}"></TextBlock>
    </StackPanel>
运行效果如下:
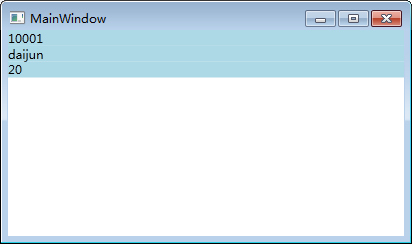
实际上DataContext对象是一个依赖属性,依赖属性有个重要特点就是当没有为控件的某个依赖属性显示赋值时,控件会把自己容器的属性值当作自己的属性值,所以实际上,属性值是沿着UI元素树向下传递了

.net – 在WPF中,如何从包含ListBox的DataTemplate内部数据绑定到Window DataContext?
查看型号:
using System.Collections.Generic;

namespace Example
{
    class Member
    {
        public string Name { get; set; }
        public int Age { get; set; }
    }

    class Team
    {
        private List<Member> members = new List<Member>();

        public string TeamName { get; set; }
        public List<Member> Members { get { return members; } }
    }
}
MainWindow.xaml:
<Window x:xmlns="http://schemas.microsoft.com/winfx/2006/xaml/presentation"
    xmlns:x="http://schemas.microsoft.com/winfx/2006/xaml"
 xmlns:l="clr-namespace:Example"
    Title="Example" Height="300" Width="300" Name="Main">

 <Window.DataContext>
  <l:Team TeamName="The best team">
   <l:Team.Members>
    <l:Member Name="John Doe" Age="23"/>
    <l:Member Name="Jane Smith" Age="20"/>
    <l:Member Name="Max Steel" Age="24"/>
   </l:Team.Members>
  </l:Team>
 </Window.DataContext>

 <ListBox ItemsSource="{Binding Path=Members}">
  <ListBox.ItemTemplate>
   <DataTemplate>
    <StackPanel Orientation="Horizontal">
     <TextBlock Text="{Binding Path=TeamName}" Margin="4"/>
     <TextBlock Text="{Binding Path=Name}" Margin="4"/>
    </StackPanel>
   </DataTemplate>
  </ListBox.ItemTemplate>
 </ListBox>
</Window>
当然,TeamBox的TeamName属性不会显示在ListBox项中,因为LisBox的每个项都是List.ItemTemplate的DataContext,它会覆盖Window的DataContext.
问题是:如何从ListBox的DataTemplate中数据绑定到视图模型(Window.DataContext)的TeamName属性?
<Window x:xmlns="http://schemas.microsoft.com/winfx/2006/xaml/presentation"
    xmlns:x="http://schemas.microsoft.com/winfx/2006/xaml"
 xmlns:l="clr-namespace:Example"
    Title="Example" Height="300" Width="300" Name="Main">

 <Window.Resources>
  <l:Team x:Key="data" TeamName="The best team">
   <l:Team.Members>
    <l:Member Name="John Doe" Age="23"/>
    <l:Member Name="Jane Smith" Age="20"/>
    <l:Member Name="Max Steel" Age="24"/>
   </l:Team.Members>
  </l:Team>
 <Window.Resources>

 <Window.DataContext>
     <StaticResource ResourceKey="data"/>
 </Window.DataContext>

 <ListBox ItemsSource="{Binding Path=Members}">
  <ListBox.ItemTemplate>
   <DataTemplate>
    <StackPanel Orientation="Horizontal">
     <TextBlock Text="{Binding Source={StaticResource data},Path=TeamName}" Margin="4"/>
     <TextBlock Text="{Binding Path=Name}" Margin="4"/>
    </StackPanel>
   </DataTemplate>
  </ListBox.ItemTemplate>
 </ListBox>
</Window>

Access context of data source and work center view do not match
这个错误消息提示我们,data source的access context和待分配到工作中心的access context必须匹配:
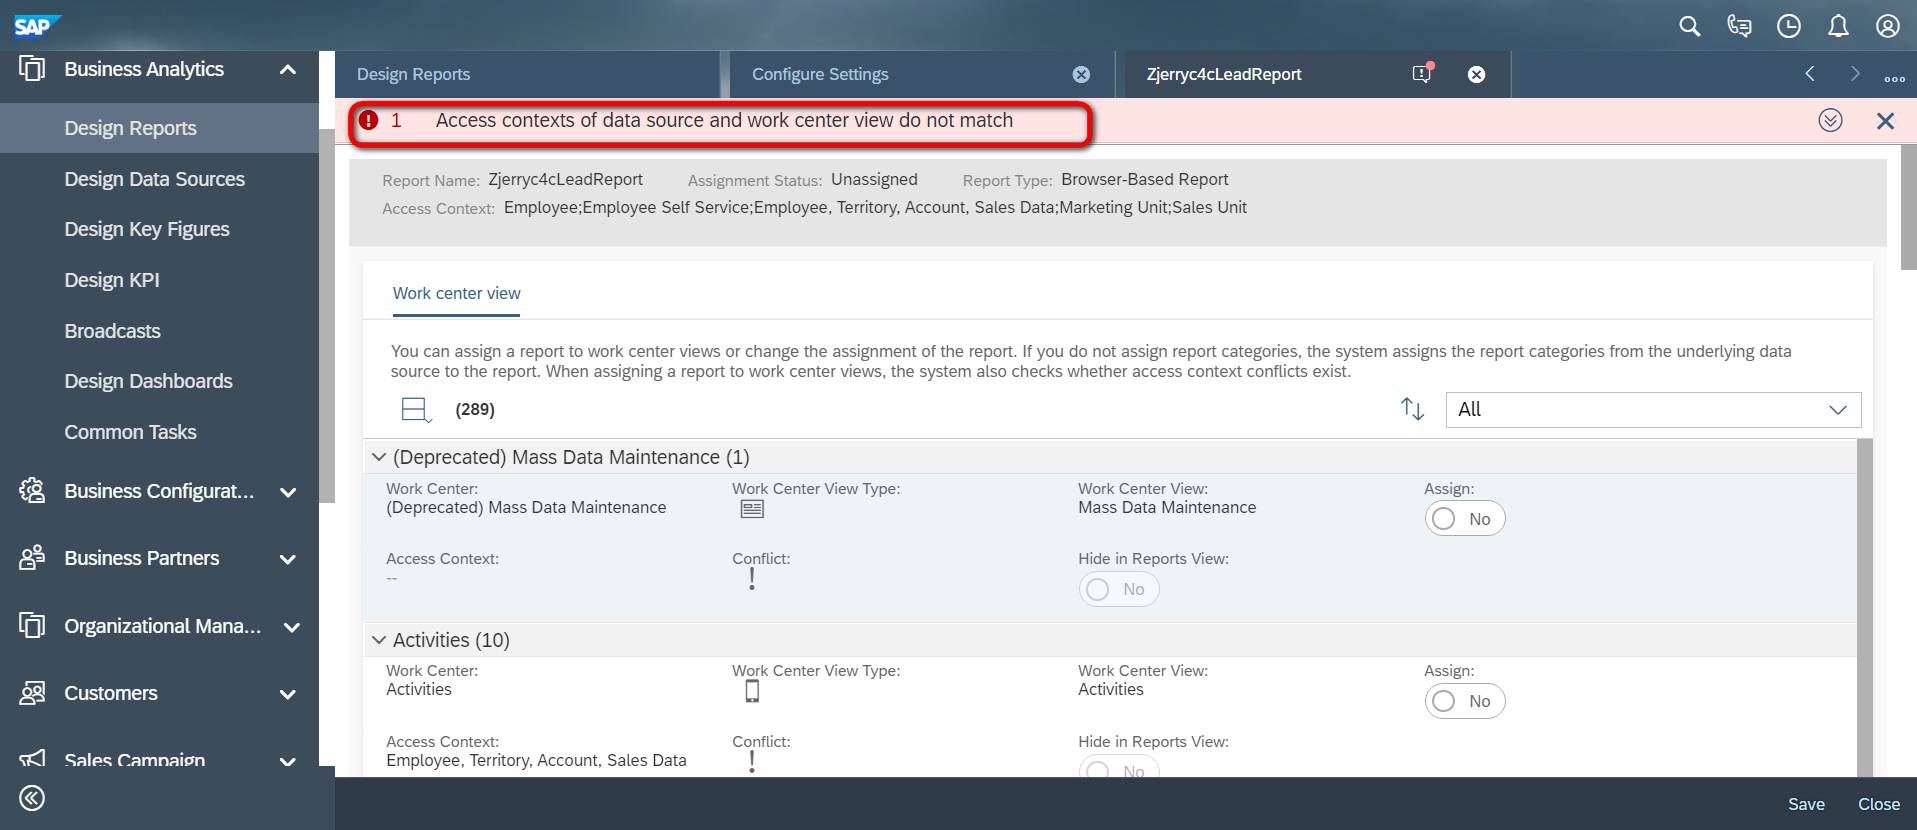
而另一个错误消息:Save not possible; wrong XRepository layer strategy selected, 意思是当前操作的用户分配有PDI_Development,这不是一个business user;
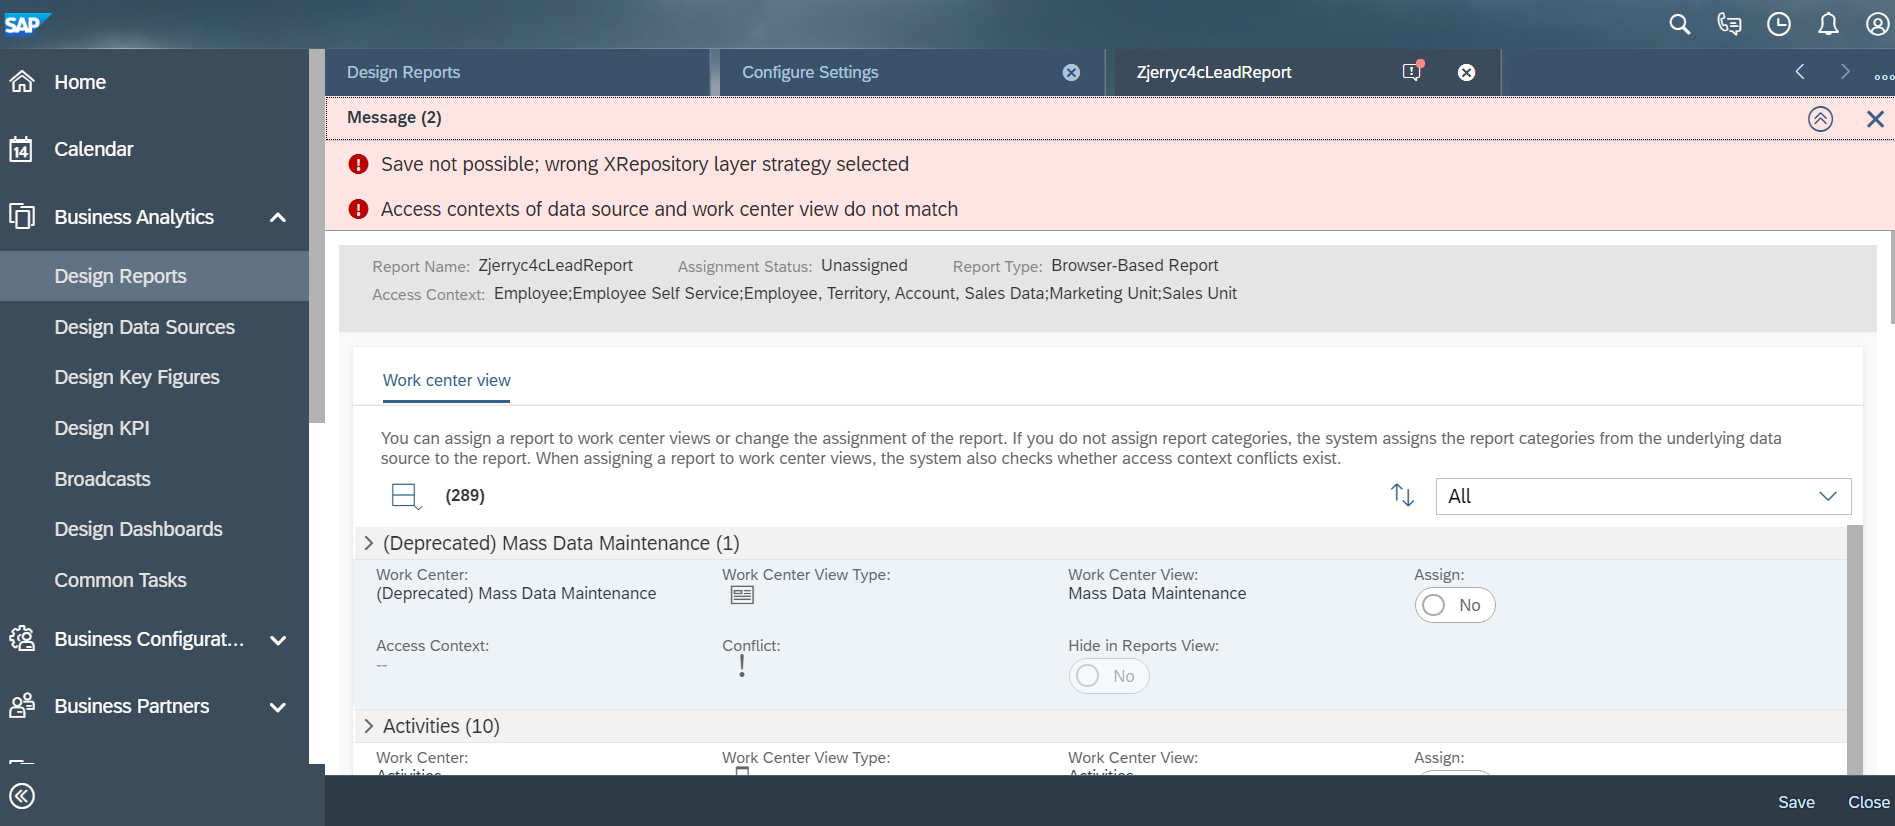
https://apps.support.sap.com/sap/support/knowledge/public/en/2530322
按照上述SAP官方帮助文档的说法,切换成一个business user登录操作,错误即消失。

要获取更多Jerry的原创文章,请关注公众号"汪子熙":
本文分享 CSDN - 汪子熙。
如有侵权,请联系 support@oschina.cn 删除。
本文参与“OSC源创计划”,欢迎正在阅读的你也加入,一起分享。
:BindingAdapter")
Android 官方 DataBinding(四):BindingAdapter
(1)和附录 1,2,3 一样,毫无例外,先写一个数据模型 User.java:
package zhangphil.test;

import android.databinding.BaseObservable;
import android.databinding.ObservableField;
import android.databinding.ObservableInt;

/**
 * Created by Phil on 2017/8/17.
 */

public class User extends BaseObservable {
    public final ObservableInt id = new ObservableInt();
    public final ObservableField<String> name = new ObservableField<>();
    public final ObservableField<String> url = new ObservableField<>();
}
(2)写 activity_main.xml:
<?xml version="1.0" encoding="utf-8"?>
<layout xmlns:android="http://schemas.android.com/apk/res/android"
    xmlns:app="http://schemas.android.com/apk/res-auto">

    <data>
        <variable
            name="user"
            type="zhangphil.test.User" />
    </data>

    <LinearLayout
        android:layout_width="match_parent"
        android:layout_height="match_parent"
        android:orientation="vertical">

        <TextView
            android:layout_width="wrap_content"
            android:layout_height="wrap_content"
            android:text="@{String.valueOf(user.id)}"
            android:textColor="@android:color/holo_red_light" />

        <TextView
            android:layout_width="wrap_content"
            android:layout_height="wrap_content"
            android:text="@{user.name}"
            android:textColor="@android:color/holo_red_light" />

        <ImageView
            android:layout_width="100dp"
            android:layout_height="100dp"
            app:imageUrl="@{user.url}" />
    </LinearLayout>
</layout>(3)任意定义一个类,比如叫做 Util.java,在这个类里面的方法通过 BindingAdapter,imageUrl 和 loadImage 方法绑定:
package zhangphil.test;

import android.databinding.BindingAdapter;
import android.widget.ImageView;

import com.bumptech.glide.Glide;
import com.bumptech.glide.Priority;
import com.bumptech.glide.load.engine.DiskCacheStrategy;
import com.bumptech.glide.load.resource.drawable.DrawableTransitionOptions;
import com.bumptech.glide.request.RequestOptions;


/**
 * Created by Phil on 2017/8/18.
 */

public class Util {
    @BindingAdapter({"imageUrl"})
    public static void loadImage(ImageView view, String u) {
        RequestOptions options = new RequestOptions()
                .centerCrop()
                .placeholder(R.mipmap.ic_launcher_round)
                .error(R.mipmap.ic_launcher)
                .priority(Priority.HIGH)
                .diskCacheStrategy(DiskCacheStrategy.NONE);

        Glide.with(view.getContext()).applyDefaultRequestOptions(options).load(u).transition(new DrawableTransitionOptions().crossFade(1000)).into(view);
    }
}(4)上层 MainActivity.java:
package zhangphil.test;

import android.databinding.DataBindingUtil;
import android.support.v7.app.AppCompatActivity;
import android.os.Bundle;

import zhangphil.test.databinding.ActivityMainBinding;

public class MainActivity extends AppCompatActivity {

    @Override
    protected void onCreate(Bundle savedInstanceState) {
        super.onCreate(savedInstanceState);
        //setContentView(R.layout.activity_main);

        ActivityMainBinding binding = DataBindingUtil.setContentView(this, R.layout.activity_main);
        User user = new User();
        binding.setUser(user);

        user.id.set(1);
        user.name.set("zhangphil");
        //user.url.set("http://avatar.csdn.net/9/7/A/1_zhangphil.jpg");
        user.url.set("https://www.baidu.com/img/bd_logo1.png");
    }
}
代码运行结果:
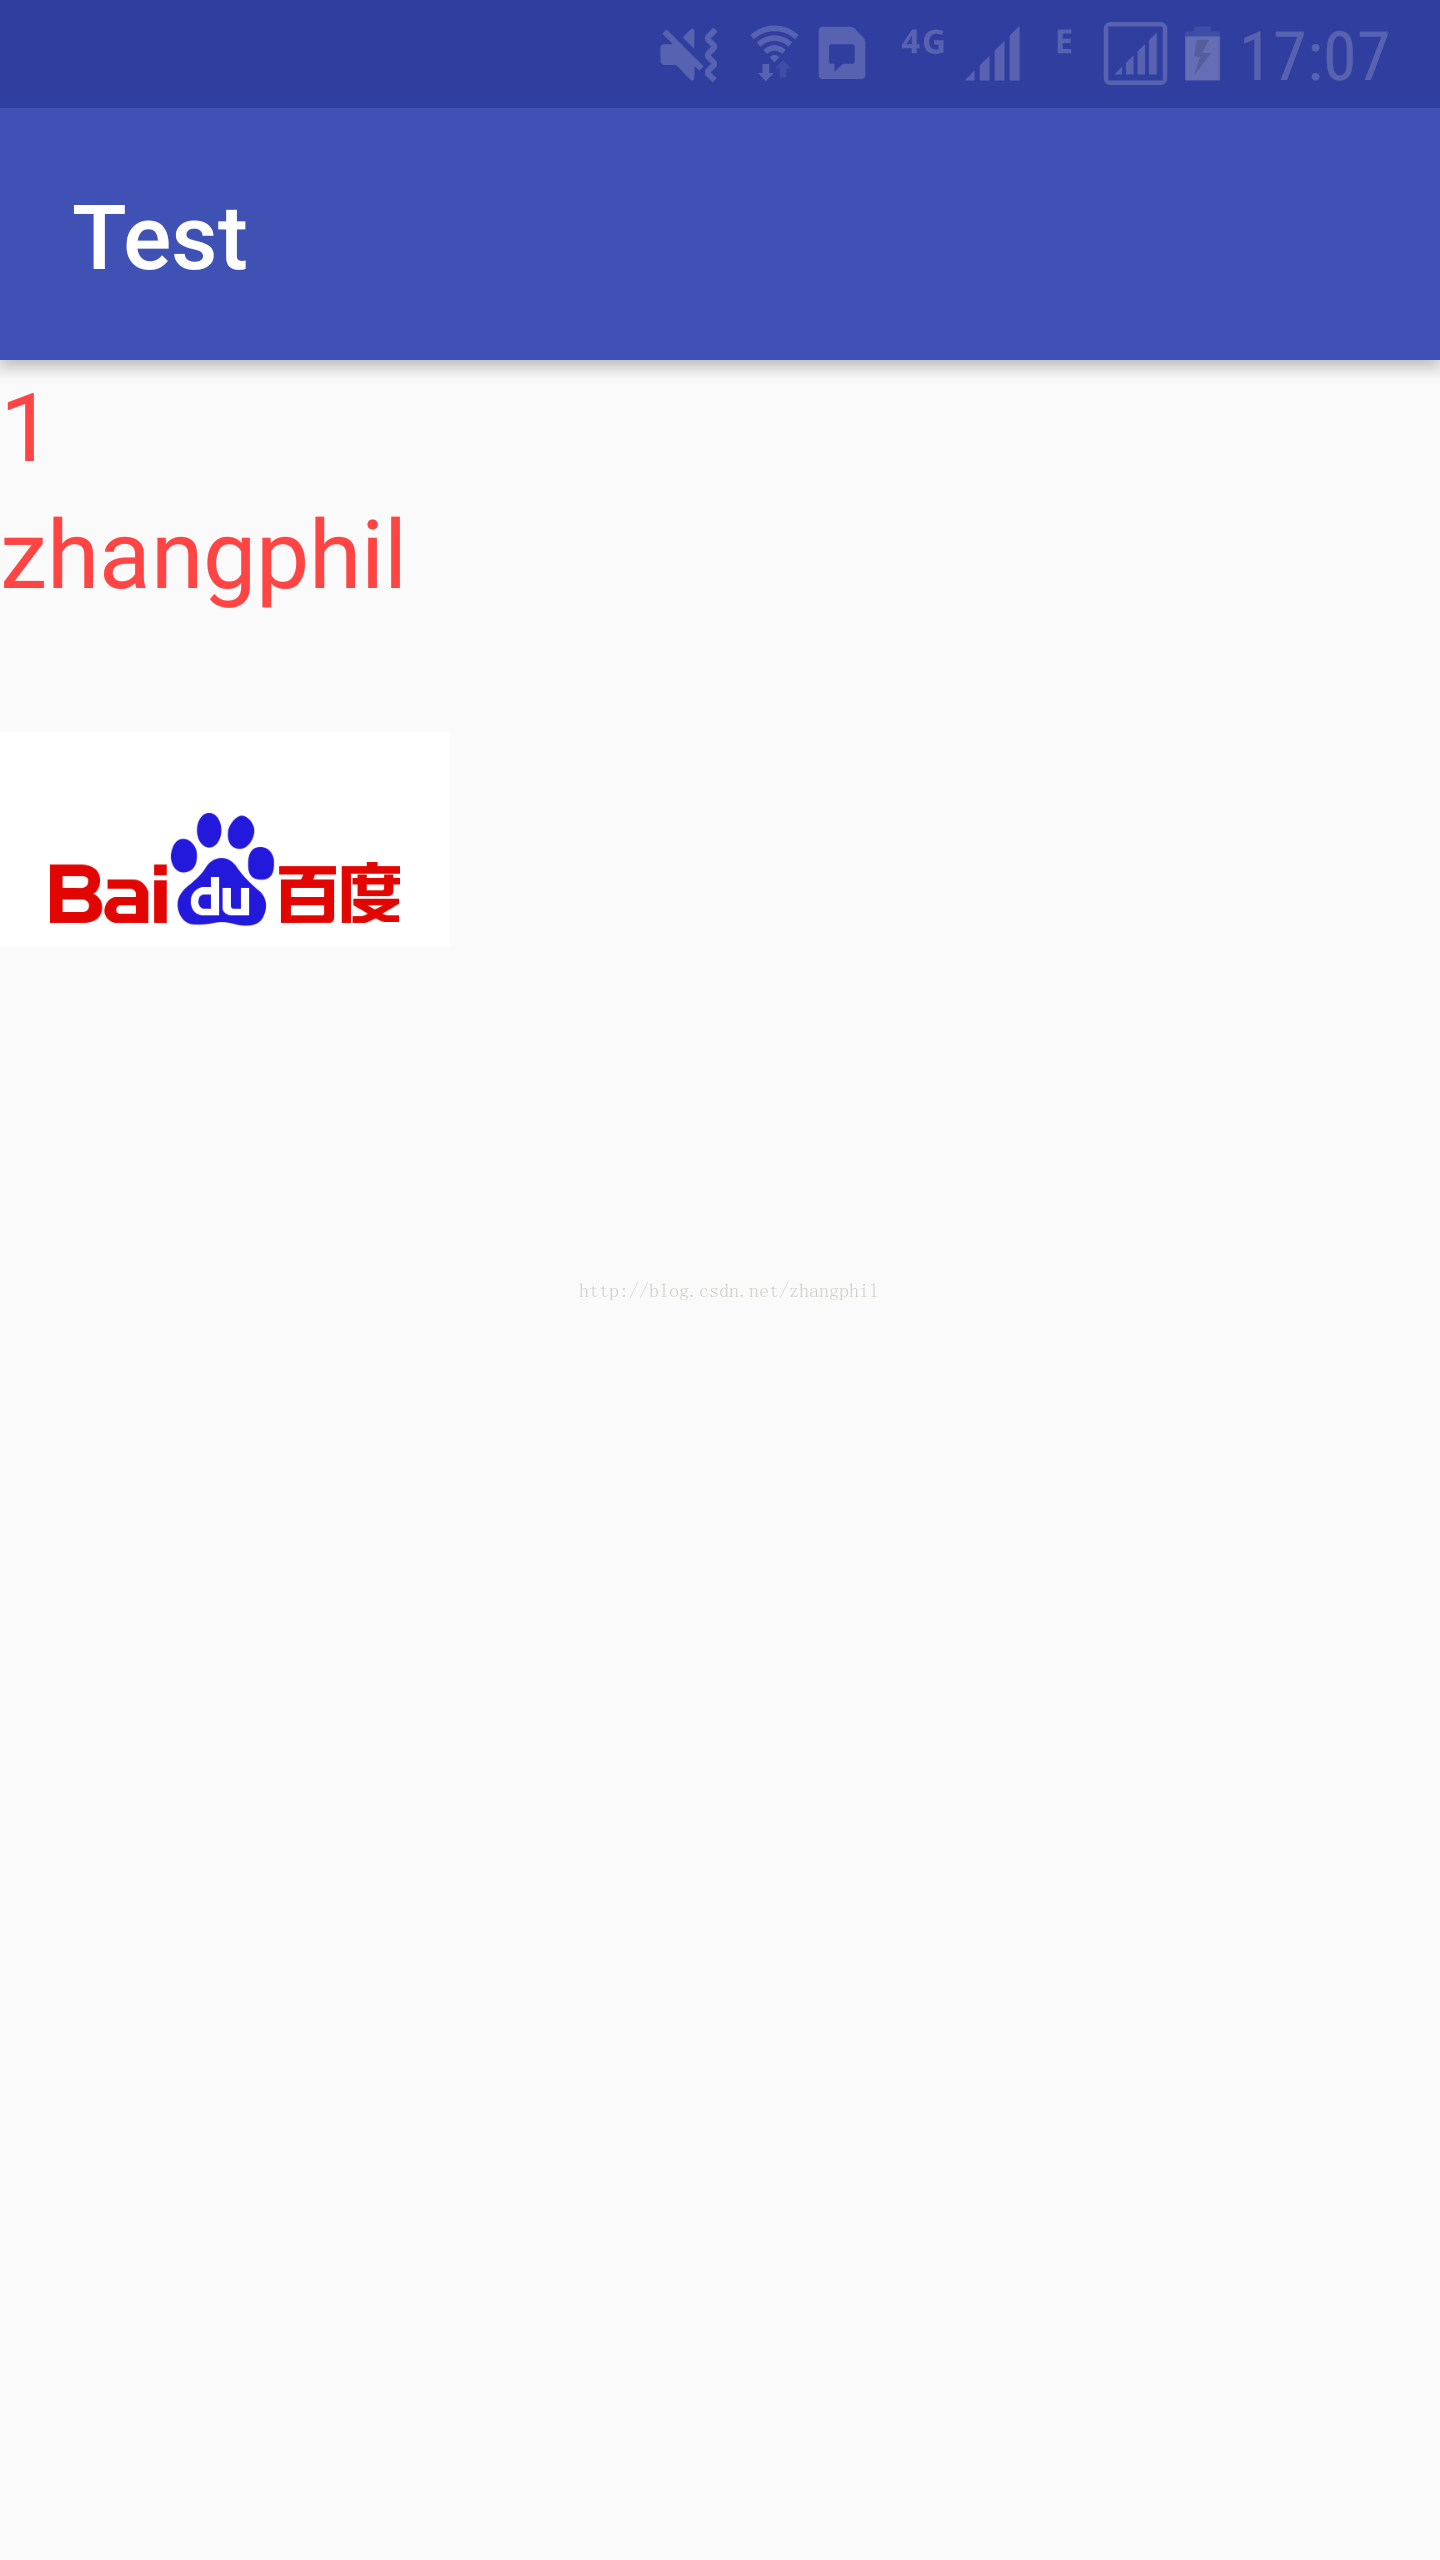
在 activity_main.xml 里面的 ImageView,由于定义了 app:imageUrl="@{user.url}"
这使得 user.url 这个数据字段成为方法 imageUrl 的被观察者,BindingAdapter 两者绑定在一起,user.url 的动态变化,直接导致 imageUrl 的调用。同时,user.url 将作为一个字符串变量传递给 imageUrl 方法,在 imageUrl 方法里面,反向的将 Glide 加载的图片赋值给绑定的 ImageView。
附录:
1,《Android 官方 DataBinding 简例(一)》链接:http://blog.csdn.net/zhangphil/article/details/77322530
2,《Android 官方 DataBinding(二):动态数据更新 notifyPropertyChanged》链接:http://blog.csdn.net/zhangphil/article/details/77328688
3,《Android 官方 DataBinding(三):RecyclerView 使用 ViewDataBinding 更新数据》链接:http://blog.csdn.net/zhangphil/article/details/77367432
返回null")
android-DataBindingUtil.setContentView(this,resource)返回null
我开始使用Android数据绑定,但是没有成功.我已经按照documentation中的建议进行了所有操作,但是当我必须设置方法值时,我会得到null.
我正在使用Android Studio 2.1.2,并且放入了gradle
dataBinding {
    enabled = true
}
在布局中,我执行完全相同的放置布局,在内部放置标签数据:
<data>
    <variable name="order" type="com.example.Order"/>
</data>
当我想要绑定变量时
setRequestedOrientation(ActivityInfo.SCREEN_ORIENTATION_PORTRAIT);
ActivityOrderOnePaneBinding binding = DataBindingUtil.setContentView(this, R.layout.activity_order_one_pane);
binding.setorder(mOrder);
绑定为空,我没有编译错误.
解决方法:
由于您要在Activity中覆盖setContentView,因此需要替换:
ActivityOrderOnePaneBinding binding = DataBindingUtil.setContentView(this, R.layout.activity_order_one_pane);
同
ActivityOrderOnePaneBinding binding = DataBindingUtil.inflate(getLayoutInflater(), R.layout.activity_order_one_pane, getContentFrame(), false);
setContentView(binding.getRoot());
我遇到了同样的问题,因为我覆盖了基本Activity中的setContentView并对其进行了修复.
如果覆盖setContentView,则getContentFrame()是包含内容的ViewGroup,不包括AppBarLayout和Toolbar.这是一个示例,如果您的基本布局类似于以下内容,则getContentFrame()的样子:
<?xml version="1.0" encoding="utf-8"?>
<android.support.design.widget.CoordinatorLayout
    xmlns:android="http://schemas.android.com/apk/res/android"
    xmlns:app="http://schemas.android.com/apk/res-auto"
    android:layout_width="match_parent"
    android:layout_height="match_parent">
    <android.support.design.widget.AppBarLayout
        ...>
        <android.support.design.widget.CollapsingToolbarLayout
           ...>
                <android.support.v7.widget.Toolbar
                   .../>
        </android.support.design.widget.CollapsingToolbarLayout>
    </android.support.design.widget.AppBarLayout>

    <android.support.v7.widget.ContentFrameLayout
        android:layout_width="match_parent"
        android:layout_height="match_parent">
        <FrameLayout
            android:id="@+id/content_frame"
            android:layout_width="match_parent"
            android:layout_height="match_parent" />
    </android.support.v7.widget.ContentFrameLayout>
</android.support.design.widget.CoordinatorLayout>
getContentFrame()仅返回上述布局中的FrameLayout.
protected ViewGroup getContentFrame() {
    return (ViewGroup) findViewById(R.id.content_frame);
}
我希望这有帮助.
今天的关于数据绑定和四使用DataContext作为Binding的Source的分享已经结束,谢谢您的关注,如果想了解更多关于.net – 在WPF中,如何从包含ListBox的DataTemplate内部数据绑定到Window DataContext?、Access context of data source and work center view do not match、Android 官方 DataBinding(四):BindingAdapter、android-DataBindingUtil.setContentView(this,resource)返回null的相关知识,请在本站进行查询。
本文标签:


![[转帖]Ubuntu 安装 Wine方法(ubuntu如何安装wine)](https://www.gvkun.com/zb_users/cache/thumbs/4c83df0e2303284d68480d1b1378581d-180-120-1.jpg)

