在这篇文章中,我们将为您详细介绍springboot使用策略模式实现一个基本的促销的内容,并且讨论关于spring策略模式实现的相关问题。此外,我们还会涉及一些关于JAVA入门教学之快速搭建基本的sp
在这篇文章中,我们将为您详细介绍springboot使用策略模式实现一个基本的促销的内容,并且讨论关于spring 策略模式实现的相关问题。此外,我们还会涉及一些关于JAVA入门教学之快速搭建基本的springboot(从spring boot到spring cloud)、Maven 搭建一个基本的 SpringBoot 工程、Spring Boot - 快速构建一个基本的 Restful 程序、Spring boot 运用策略模式实现避免多次使用if的知识,以帮助您更全面地了解这个主题。
本文目录一览:- springboot使用策略模式实现一个基本的促销(spring 策略模式实现)
- JAVA入门教学之快速搭建基本的springboot(从spring boot到spring cloud)
- Maven 搭建一个基本的 SpringBoot 工程
- Spring Boot - 快速构建一个基本的 Restful 程序
- Spring boot 运用策略模式实现避免多次使用if
")
springboot使用策略模式实现一个基本的促销(spring 策略模式实现)
- 策略模式
定义了算法族,分别封装起来,让它们之间可以互相替换,
此模式让算法的变化独立于使用算法的客户
源码:https://github.com/youxiu326/sb_promotion.git
- 实体层
一共三个实体,分别为商品实体,促销实体,促销结果实体
商品实体定义了商品的销售价 优惠金额 优惠后金额 数量。。。
促销实体定义了促销类型 名称 参与该促销的商品集合


package com.youxiu326.entity;

import java.io.Serializable;
import java.math.BigDecimal;

/**
 * 商品:
 *
 * <br>优惠金额    <span color="red">discountAmount</span>
 * <br>优惠后价格 -1(默认等于销售金额) <span color="red">finalAmount</span>
 * <br>销售价       <span color="red">amount</span>
 *
 */
public class Product implements Serializable {

    private String code;

    private String name;

    /**
     * 销售价
     */
    private BigDecimal amount = BigDecimal.ZERO;

    /**
     * 优惠了多少金额
     */
    private BigDecimal discountAmount = BigDecimal.ZERO;

    /**
     * 优惠后金额
     */
    private BigDecimal finalAmount = new BigDecimal("-1");


    private Integer quantity;

    public Product(){}

    public Product(String code, String name, BigDecimal amount, Integer quantity) {
        this.code = code;
        this.name = name;
        this.amount = amount;
        this.quantity = quantity;
    }

    public String getCode() {
        return code;
    }

    public void setCode(String code) {
        this.code = code;
    }

    public String getName() {
        return name;
    }

    public void setName(String name) {
        this.name = name;
    }

    public BigDecimal getAmount() {
        return amount;
    }

    public double getAmountDouble(){
        return amount.doubleValue();
    }

    public void setAmount(BigDecimal amount) {
        this.amount = amount;
    }

    public Integer getQuantity() {
        return quantity;
    }

    public void setQuantity(Integer quantity) {
        this.quantity = quantity;
    }

    public BigDecimal getDiscountAmount() {
        return discountAmount;
    }

    public void setDiscountAmount(BigDecimal discountAmount) {
        this.discountAmount = discountAmount;
    }

    /**
     * 优惠后金额(默认等于交易金额)
     * @return
     */
    public BigDecimal getFinalAmount() {
        if(finalAmount.compareTo(new BigDecimal("-1"))==0) {
            finalAmount = amount;
        }
        return finalAmount;
    }

    public void setFinalAmount(BigDecimal finalAmount) {
        this.finalAmount = finalAmount;
    }
}

package com.youxiu326.entity;

import java.io.Serializable;
import java.util.List;

/**
 * 促销实体类
 */
public class Promotion implements Serializable {

    /**
     *  <span color="red">促销类型:</span>
     *  <br>FREEONE  免最低一件
     *  <br>REBATE   八折
     *  <br>REDUCE   满100减20
     */
    public static enum Type{
        FREEONE,REBATE,REDUCE
    }

    private Type type;

    private String name;

    /**
     * 哪些商品应用促销
     */
    private List<Product> products;

    public Promotion(){}
    public Promotion(Type type, String name,List<Product> products) {
        this.type = type;
        this.name = name;
        this.products = products;
    }

    public Type getType() {
        return type;
    }

    public void setType(Type type) {
        this.type = type;
    }

    public String getName() {
        return name;
    }

    public void setName(String name) {
        this.name = name;
    }

    public List<Product> getProducts() {
        return products;
    }

    public void setProducts(List<Product> products) {
        this.products = products;
    }
}

package com.youxiu326.entity;

import java.io.Serializable;

/**
 * 促销结果
 */
public class PromotionResult implements Serializable {

    private String name;

    private Promotion.Type type;

    private Object result;

    public String getName() {
        return name;
    }

    public void setName(String name) {
        this.name = name;
    }

    public Promotion.Type getType() {
        return type;
    }

    public void setType(Promotion.Type type) {
        this.type = type;
    }

    public Object getResult() {
        return result;
    }

    public void setResult(Object result) {
        this.result = result;
    }
}


package com.youxiu326.exception;

/**
 * 自定义异常
 */
public class ServiceException extends Exception {

    private Exception exception;

    public ServiceException(String message, Exception exception) {
        super(message);
        this.exception = exception;
    }

    public ServiceException(String message) {
        this(message, null);
    }

    public ServiceException(Exception exception) {
        this(null, exception);
    }

    public Exception getException() {
        return exception;
    }

    public Exception getRootCause() {
        if (exception instanceof ServiceException) {
            return ((ServiceException) exception).getRootCause();
        }
        return exception == null ? this : exception;
    }

    @Override
    public String toString() {
        if (exception instanceof ServiceException) {
            return ((ServiceException) exception).toString();
        }
        return exception == null ? super.toString() : exception.toString();
    }
}
- 促销实体类
定义了一个抽象类 PromotionStrategy.java
定义了三个促销策略:
/**
 * 满足价格大于等于500
 * <br>减免价格最低一件商品促销
 */
@Component
public class FreeOneStrategy extends PromotionStrategy
/**
* 满足大于200
* <br>八折促销
*/
@Component
public class RebateStrategy extends PromotionStrategy/**
* 满足满100
* <br>减10促销
*/
@Component
public class ReduceStrategy extends PromotionStrategy
package com.youxiu326.abst;
import com.youxiu326.entity.Product;
import com.youxiu326.entity.Promotion;
import com.youxiu326.entity.PromotionResult;
import java.math.BigDecimal;
import java.util.List;
/**
* 促销抽象类
* 定义公共方法,让子类继承
* 定义抽象方法,让子类实现
*/
public abstract class PromotionStrategy {
public abstract Promotion.Type getType();
/**
* 定义执行促销方法
* @param promotion 促销
* @param products 参加促销的商品集合
* @return
*/
public abstract List<PromotionResult> execute(Promotion promotion, List<Product> products);
/*
//加法
BigDecimal result1 = num1.add(num2);
//减法
BigDecimal result2 = num1.subtract(num2);
//乘法
BigDecimal result3 = num1.multiply(num2);
//除法
BigDecimal result5 = num2.divide(num1,20,BigDecimal.ROUND_HALF_UP);
//绝对值
BigDecimal result4 = num3.abs();
比较大小
结果是: -1:小于; 0 :等于; 1 :大于;
BigDecimal b1 = new BigDecimal("-121454125453.145");
if(b1.compareTo(BigDecimal.ZERO)==-1) {
System.out.println("金额为负数!");
}
*/
//优惠金额 discountAmount
//优惠后价格 -1(默认等于销售金额) finalAmount
//销售价 amount
/**
* <span color="red">平摊优惠金额</span>
* @param products
* @param disAmount
*/
protected void sharedAmount(List<Product> products,BigDecimal disAmount){
//计算总金额
double totalAmountTemp = products.stream().mapToDouble(it->(
it.getFinalAmount().multiply(new BigDecimal(it.getQuantity().toString()))).doubleValue()
).sum();
//总金额
BigDecimal totalAmount = new BigDecimal(totalAmountTemp+"");
//已分摊金额
BigDecimal sharedAmount = new BigDecimal("0");;
//平摊金额到明细
for(int i=0;i<products.size();i++) {
Product product = products.get(i);
if(i == products.size() - 1) {
//② 如果是最后一件商品 ,将剩余优惠金额计算到这个商品内
//例如:
// 商品001 销售价10 数量1 商品002 销售价20 数量2 商品001,002 总共优惠了5元
// 商品001 已经确定可优惠1元
// 那么最后一个商品002 可以优惠 6-1 5元
product.setDiscountAmount(product.getDiscountAmount().add(disAmount).subtract(sharedAmount));
}else {
//该商品总数量
BigDecimal quantity = new BigDecimal(product.getQuantity().toString());
//① 将总优惠金额 * (该商品销售价/总销售价) 得出该商品所占优惠金额
// 例如:
// 商品001 销售价10 数量1 商品002 销售价20 数量2 商品001,002 总共优惠了5元
// 商品001可优惠金额= 5*(10*1/50) 1元
// 商品002可优惠金额= 5*(20*2/50) 4元
//得出该商品可优惠金额
BigDecimal itemDisAmount = disAmount.multiply(
(product.getAmount().multiply(quantity).divide(totalAmount,2,BigDecimal.ROUND_HALF_UP))
);
product.setDiscountAmount(product.getDiscountAmount().add(itemDisAmount));
sharedAmount =sharedAmount.add(itemDisAmount);
}
}
// ③计算出 商品优惠后的价格 finalAmount
products.stream().forEach(it->{
BigDecimal quantity = new BigDecimal(it.getQuantity().toString());
it.setFinalAmount(it.getAmount().multiply(quantity).subtract(it.getDiscountAmount()));
});
}
}


package com.youxiu326.strategy;
import com.youxiu326.abst.PromotionStrategy;
import com.youxiu326.entity.Product;
import com.youxiu326.entity.Promotion;
import com.youxiu326.entity.PromotionResult;
import org.springframework.stereotype.Component;
import java.math.BigDecimal;
import java.util.ArrayList;
import java.util.List;
import java.util.OptionalDouble;
/**
* 满足价格大于等于500
* <br>减免价格最低一件商品促销
*/
@Component
public class FreeOneStrategy extends PromotionStrategy {
/**
* 指定促销类型为:FREEONE
* @return
*/
@Override
public Promotion.Type getType() {
return Promotion.Type.FREEONE;
}
@Override
public List<PromotionResult> execute(Promotion promotion, List<Product> products) {
List<PromotionResult> results = new ArrayList<PromotionResult>();
//计算总金额 总数量
double totalAmount = products.stream().mapToDouble(it->(
(it.getAmount().multiply(new BigDecimal(it.getQuantity().toString())))).subtract(it.getDiscountAmount()).doubleValue()
).sum();
int totalQuantity = products.stream().mapToInt(it->it.getQuantity()).sum();
//TODO 这儿简单处理定死了规则
//不满足促销规则的返回空促销
if (totalAmount<500 || totalQuantity<=1){
return results;
}
//获得可优惠金额
double reduceAmount = products.stream().mapToDouble(Product::getAmountDouble).min().orElse(0);
//平摊金额
sharedAmount(products, new BigDecimal(reduceAmount+""));
//创建减免促销信息
PromotionResult result = new PromotionResult();
result.setName(promotion.getName());
result.setType(Promotion.Type.FREEONE);
result.setResult(reduceAmount);
results.add(result);
return results;
}
}


package com.youxiu326.strategy;
import com.youxiu326.abst.PromotionStrategy;
import com.youxiu326.entity.Product;
import com.youxiu326.entity.Promotion;
import com.youxiu326.entity.PromotionResult;
import org.springframework.stereotype.Component;
import java.math.BigDecimal;
import java.util.ArrayList;
import java.util.List;
/**
 * 满足大于200
 * <br>八折促销
 */
@Component
public class RebateStrategy extends PromotionStrategy {
/**
* 指定促销类型为:REBATE
* @return
*/
@Override
public Promotion.Type getType() {
return Promotion.Type.REBATE;
}
@Override
public List<PromotionResult> execute(Promotion promotion, List<Product> products) {
List<PromotionResult> results = new ArrayList<PromotionResult>();
//计算总金额 总数量
double totalAmount = products.stream().mapToDouble(it->(
(it.getAmount().multiply(new BigDecimal(it.getQuantity().toString())))).subtract(it.getDiscountAmount()).doubleValue()
).sum();
int totalQuantity = products.stream().mapToInt(it->it.getQuantity()).sum();
//TODO 这儿简单处理定死了规则
//不满足促销规则的返回空促销
if (totalAmount<200){
return results;
}
//获得可优惠金额
double reduceAmount = totalAmount * 0.2;
//平摊金额
sharedAmount(products, new BigDecimal(reduceAmount+""));
//创建减免促销信息
PromotionResult result = new PromotionResult();
result.setName(promotion.getName());
result.setType(Promotion.Type.REBATE);
result.setResult(reduceAmount);
results.add(result);
return results;
}
} 

package com.youxiu326.strategy;
import com.youxiu326.abst.PromotionStrategy;
import com.youxiu326.entity.Product;
import com.youxiu326.entity.Promotion;
import com.youxiu326.entity.PromotionResult;
import org.springframework.stereotype.Component;
import java.math.BigDecimal;
import java.util.ArrayList;
import java.util.List;
/**
 * 满足满100
 * <br>减10促销
 */
@Component
public class ReduceStrategy extends PromotionStrategy {
/**
* 指定促销类型为:REDUCE
* @return
*/
@Override
public Promotion.Type getType() {
return Promotion.Type.REDUCE;
}
@Override
public List<PromotionResult> execute(Promotion promotion, List<Product> products) {
List<PromotionResult> results = new ArrayList<>();
//计算总金额 总数量
double totalAmount = products.stream().mapToDouble(it->(
(it.getAmount().multiply(new BigDecimal(it.getQuantity().toString())))).subtract(it.getDiscountAmount()).doubleValue()
).sum();
int totalQuantity = products.stream().mapToInt(it->it.getQuantity()).sum();
//TODO 这儿简单处理定死了规则
//不满足促销规则的返回空促销
if (totalAmount<100){
return results;
}
//获得可优惠金额
double reduceAmount = 10;
//平摊金额
sharedAmount(products, new BigDecimal(reduceAmount+""));
//创建减免促销信息
PromotionResult result = new PromotionResult();
result.setName(promotion.getName());
result.setType(Promotion.Type.REDUCE);
result.setResult(reduceAmount);
results.add(result);
return results;
}
}
package com.youxiu326.context;

import com.youxiu326.abst.PromotionStrategy;
import com.youxiu326.entity.Product;
import com.youxiu326.entity.Promotion;
import com.youxiu326.entity.PromotionResult;
import com.youxiu326.exception.ServiceException;
import java.util.Collection;
import java.util.List;

/**
 * 促销上下文
 */
public class PromotionContext {

    /**
     * 促销策略
     */
    private PromotionStrategy strategy;

    /**
     * 当前促销
     */
    private Promotion promotion;

    public static Collection<PromotionStrategy> strategys;

    public PromotionContext(){}

    public PromotionContext(Promotion promotion) throws ServiceException {

        this.promotion = promotion;
        //初始化促销列表
        if(strategys == null)throw new ServiceException("无可用促销");

        //根据传入的促销 找到对应的促销策略 【strategy】
        strategy = strategys.stream().filter(it->it.getType() == promotion.getType()).findFirst().orElse(null);

        if(strategy == null) throw new ServiceException("找不到符合促销类型");
    }

    public List<PromotionResult> execute(List<Product> products) throws ServiceException{
        return strategy.execute(promotion, products);
    }

    public Collection<PromotionStrategy> getStrategys() {
        return strategys;
    }

    public void setStrategys(Collection<PromotionStrategy> strategys) {
        PromotionContext.strategys = strategys;
    }
}
- 促销service
处理促销业务逻辑
package com.youxiu326.service;

import com.youxiu326.entity.Product;
import com.youxiu326.entity.Promotion;
import com.youxiu326.entity.PromotionResult;
import com.youxiu326.exception.ServiceException;
import org.springframework.stereotype.Component;
import org.springframework.stereotype.Service;
import java.util.List;
import java.util.Map;

public interface PromotionService {

    /**
     * <span color="red">结算方法</span>
     * <br>结算对象包含:
     * <br>1.商品优惠价格
     * <br>2.优惠后最终价格
     * <br>3.优惠信息
     * @param products 要结算的商品集合
     * @return Object 返回结算后的对象
     */
    public Map<String,Object> settlement(List<Product> products) throws ServiceException;

    /**
     * 查询可用的促销
     * @return
     */
    public List<Promotion> findUsablePromotions();

    /**
     * 过滤出可以参加指定促销的商品
     * @param promotion 指定促销
     * @param products 要过滤的商品集合
     * @return 返回过滤后的商品集合
     */
    public List<Product> filterProduct(Promotion promotion, List<Product> products);

    /**
     * 执行促销
     * @param promotions 促销集合
     * @param products 商品集合
     * @return
     */
    public List<PromotionResult> execute(List<Promotion> promotions, List<Product> products) throws ServiceException;

}
package com.youxiu326.service.impl;

import com.youxiu326.abst.PromotionStrategy;
import com.youxiu326.context.PromotionContext;
import com.youxiu326.entity.Product;
import com.youxiu326.entity.Promotion;
import com.youxiu326.entity.PromotionResult;
import com.youxiu326.exception.ServiceException;
import com.youxiu326.service.PromotionService;
import org.slf4j.Logger;
import org.slf4j.LoggerFactory;
import org.springframework.beans.factory.annotation.Autowired;
import org.springframework.context.ApplicationContext;
import org.springframework.stereotype.Service;
import javax.annotation.PostConstruct;
import java.util.ArrayList;
import java.util.HashMap;
import java.util.List;
import java.util.Map;

/**
 * 促销service
 */
@Service
public class PromotionServiceImpl implements PromotionService {

    private static final Logger LOGGER = LoggerFactory.getLogger(PromotionServiceImpl.class);


    //@Autowired
    //private ContextStartup contextStartup;

    @Autowired
    private ApplicationContext application;

    /**
     *  被@PostConstruct修饰的方法会在服务器加载Servlet的时候运行,并且只会被服务器调用一次,
     *  <br>类似于Serclet的inti()方法
     *  <br>被@PostConstruct修饰的方法会在构造函数之后,init()方法之前运行
     */
    @PostConstruct
    public void init() {
        PromotionContext.strategys =  application.getBeansOfType(PromotionStrategy.class).values();
    }

    @Override
    public Map<String,Object> settlement(List<Product> products) throws ServiceException{


        Map<String,Object> resultMap = new HashMap<>();

        //查询可用促销
        List<Promotion> promotions = findUsablePromotions();
        //执行促销
        List<PromotionResult> result = execute(promotions,products);

        //返回促销结果 与商品
        resultMap.put("promotionResult", result);
        resultMap.put("products", products);
        return resultMap;
    }

    /**
     * 执行促销
     * @param promotions 促销集合
     * @param products 商品集合
     * @return
     */
    @Override
    public List<PromotionResult> execute(List<Promotion> promotions, List<Product> products) throws ServiceException {
        LOGGER.info("促销开始执行 促销数量:{} 商品数量:{}",promotions.size(),products.size());

        products.stream().forEach(it->LOGGER.info("执行促销商品信息->编号:{} 价格:{} 数量:{}",it.getCode(),it.getAmount(),it.getQuantity()));

        //返回促销结果
        List<PromotionResult> promotionResults = new ArrayList<PromotionResult>();

        //遍历执行促销
        for (Promotion promotion : promotions) {

            //根据传入的促销 得到对应的促销上下文
            PromotionContext context  = new PromotionContext(promotion);

            //过滤出可以参加该促销的商品
            List<Product> filterProductList = filterProduct(promotion, products);

            //根据策略模式 执行先对应的促销规则,返回促销结果
            List<PromotionResult> result = context.execute(filterProductList);
            if (result!=null){
                promotionResults.addAll(result);
            }

        }

        //TODO 如果有的促销参加多次,应该要进行一定处理,只取一个即可


        LOGGER.info("促销执行结束");
        return promotionResults;
    }

    /**
     * 查询可用的促销
     * @return
     */
    @Override
    public List<Promotion> findUsablePromotions(){
        //TODO 这儿你可以直接查询数据库

        List<Promotion> promotions = new ArrayList<>();
        Promotion p1 = new Promotion(Promotion.Type.FREEONE,"价格大于等于500免最低一件",null);
        Promotion p2 = new Promotion(Promotion.Type.REBATE,"大于200八折",null);
        Promotion p3 = new Promotion(Promotion.Type.REDUCE,"满100减10",null);
        promotions.add(p1);
        promotions.add(p2);
        promotions.add(p3);
        LOGGER.info("查询到可用促销数量:{}",promotions.size());
        return promotions;
    }

    /**
     * 过滤出可以参加指定促销的商品
     * @param promotion 指定促销
     * @param products 要过滤的商品集合
     * @return 返回过滤后的商品集合
     */
    @Override
    public List<Product> filterProduct(Promotion promotion, List<Product> products){
        List<Product> list = new ArrayList<Product>();

        products.stream().forEach(it->{
            if (isMatching(promotion, it)) {
                list.add(it);
            }
        });

        return list;
    }

    /**
     * 判断该商品是否可以参加该促销
     * @param promotion
     * @param product
     * @return
     */
    private boolean isMatching(Promotion promotion, Product product) {
        //TODO 这里你应该查询数据库 1.看满足该促销的商品中是否包含该商品,2.如果该促销未设置商品默认所有商品都满足

        List<Product> products = null;

        //没有 所以商品都满足参加该促销的要求 返回true
        if(products == null || products.size() == 0)return true;

        //如果该商品在该促销商品集合内 则返回true 否则返回false
        long count = products.stream().filter(it->it.getCode().equals(product.getCode())).count();

        return count>0?true:false;
    }

}
- Junit
package com.youxiu326;

import com.youxiu326.entity.Product;
import com.youxiu326.exception.ServiceException;
import com.youxiu326.service.PromotionService;
import org.junit.Test;
import org.junit.runner.RunWith;
import org.springframework.beans.factory.annotation.Autowired;
import org.springframework.boot.test.context.SpringBootTest;
import org.springframework.test.context.junit4.SpringRunner;

import java.math.BigDecimal;
import java.util.ArrayList;
import java.util.List;
import java.util.Map;

@RunWith(SpringRunner.class)
@SpringBootTest
public class SbPromotionApplicationTests {

    @Autowired
    PromotionService service;

    @Test
    public void contextLoads() throws ServiceException {

        List<Product> products = new ArrayList<>();

        Product p1 = new Product("YX001", "牙刷", new BigDecimal("50"), 2);
        Product p2 = new Product("YX002", "电视", new BigDecimal("200"), 2);
        Product p3 = new Product("YX003", "圆珠笔", new BigDecimal("20"), 2);
        Product p4 = new Product("YX004", "水杯", new BigDecimal("60"), 1);
        Product p5 = new Product("YX005", "充电宝", new BigDecimal("400"), 1);
        /*products.add(p1);
        products.add(p2);
        products.add(p3);
        products.add(p4);*/
        products.add(p5);

        Map<String, Object> result = service.settlement(products);

        System.out.println(result);

    }

}
- 为了方便 写了一个简易页面
<!DOCTYPE html>
<html lang="en" xmlns:th="http://www.thymeleaf.org">
<head>
    <base th:href="${#httpServletRequest.getContextPath()+''/''}">
    <meta charset="UTF-8">
    <title>springboot+策略模式 实现简单促销</title>
</head>
<body>
<h2>提交商品</h2>

<body>

<table>
    <tr>
        <td>商品名称</td>
        <td>商品价格</td>
        <td>商品数量</td>
        <td>操作</td>
    </tr>
    <tr>
        <td><input id="name" /></td>
        <td><input id="amount" type="number" /></td>
        <td><input id="quantity" type="number" /></td>
        <td><input type="button" value="添加该商品" onclick="data()"/></td>
    </tr>
</table>


<h6>购物车商品</h6>
<div width="400px" height="400px" id="showShoop"></div>


<br>
<input  type="button" onclick="sub()" value="将这些商品进行促销"/>
<br>

<h6>参加促销信息展示</h6>
<div width="400px" height="400px" id="showPro"></div>


<h6>已添加商品信息展示</h6>
<table>
    <tr>
        <td>商品编号</td>
        <td>商品名称</td>
        <td>商品数量</td>
        <td>优惠后总价</td>
        <td>总优惠金额</td>
    </tr>
    <tbody id="showTab"></tbody>
</table>

</body>

<script src="/jquery-1.11.3.min.js"></script>
<script>

    var products = [];
    var num = 1;
    <!-- 准备数据 -->
    function data(){
        var name = $("#name").val();
        var amount = $("#amount").val();
        var quantity = $("#quantity").val();
        if(name=="" || amount=="" || quantity=="" || name==undefined || amount==undefined || quantity==undefined ){
            alert("商品格式有误");
            return ;
        }
        var code = "youxiu-"+ num;
        num=num+1;
        var product = {"code":code,"name":name,"amount":amount,"quantity":quantity};
        products.push(product);
        console.log(products);

        var em = "<span>"+product.name+"--"+product.quantity+"--"+product.amount+"</span><br>";
        $("#showShoop").append(em);
    }

    function sub(){
        if(products.length<=0){
            alert("请添加商品");
            retur;
        }
        $.ajax({
            type: ''POST'',
            url: "/data",
            data: JSON.stringify(products),
            contentType: "application/json; charset=utf-8",
            dataType: "json",
            success: function(map){
                if(map==null){
                    alert("出错了");
                }
                var promotionResult = map.promotionResult;
                var result = map.products;
                console.log("促销结果:");
                console.log(promotionResult);
                console.log();
                console.log("促销后商品信息:");
                console.log(result);

                //促销信息展示
                $("#showPro").empty();
                for(var i=0;i<promotionResult.length;i++){
                    var em = "<span>"+promotionResult[i].name+"------"+promotionResult[i].result+"</span><br>";
                    $("#showPro").append(em);
                }

                //促销商品展示
                $("#showTab").empty();
                for(var i=0;i<result.length;i++){
                    var em = "<tr><td>"+result[i].code+"</td><td>"+result[i].name+"</td><td>"+result[i].quantity+"</td><td>"+result[i].finalAmount+"</td><td>"+result[i].discountAmount+"</td></tr>";
                    $("#showTab").append(em);
                }
            },
            error:function(map){
                alert(map);
                console.log(map);
            }
        });
    }

</script>

</html>
package com.youxiu326.controller;


import com.youxiu326.entity.Product;
import com.youxiu326.exception.ServiceException;
import com.youxiu326.service.PromotionService;
import org.springframework.beans.factory.annotation.Autowired;
import org.springframework.stereotype.Controller;
import org.springframework.web.bind.annotation.*;

import java.util.List;
import java.util.Map;

/**
 * 促销controller
 */
@Controller
public class PromotionCtrl {

    @Autowired
    private PromotionService service;

    @GetMapping("/index")
    public String index(){
        return "/index";
    }


    @PostMapping("/data")
    @ResponseBody
    public Map data(@RequestBody List<Product> products){
        Map map = null;
        try {
            map = service.settlement(products);
        } catch (ServiceException e) {
            return null;
        }
        return map;
    }

}
演示地址:http://promotion.youxiu326.xin
源码:https://github.com/youxiu326/sb_promotion.git
")
JAVA入门教学之快速搭建基本的springboot(从spring boot到spring cloud)
本文主要入门者介绍怎么搭建一个基础的springboot环境,本文通过图文并茂的形式给大家介绍从spring boot到spring cloud的完美搭建过程,适用java入门教学,需要的朋友可以参考下
安装JDK
https://www.oracle.com/java/technologies/javase/javase-jdk8-downloads.html

使用的是jdk8,这里使用的是windows10 64位的操作系统,所以下载对应的jdk版本

点击链接会要你登录,登录以后才可以下载。

下载安装以后找到jdk的安装目录,我这里是C:Program FilesJavajdk1.8.0_211

配置JAVA_HOME,值就是你安装jdk的地址C:Program FilesJavajdk1.8.0_211 千万不要加bin
这个时候还没有完成配置,还需要打开path环境变量在最后加

加到bin目录


如果输入javac显示帮助信息证明配置成功了。
下面来下载springboot的IDE,建议新手不要去搞那些插件,直接装一个完整版本的,可以在下面的连接下载完整版。
https://spring.io/tools#main

这种下下来的jar包可以直接用解压软件解开,里面有直接可以执行的exe执行文件,直接用就可以了。


这里就勾选springweb 也就是springmvc
完成以后会发现下载包的速度会很慢
这时候就要自己修改maven了
http://maven.apache.org/download.cgi

修改 confsettings.xml 设置成阿里的库,把下载源从国外转到国内
alimavenaliyun maven http://maven.aliyun.com/nexus/content/groups/public/central

修改maven配置地址。重启IDE就可以了。

package com.example.demo; import org.springframework.boot.SpringApplication; import org.springframework.boot.autoconfigure.SpringBootApplication; import org.springframework.context.annotation.ComponentScan; @ComponentScan(basePackages={"com.example.demo"})//spring服务扫描目录。可以用*替换com.example.* @SpringBootApplication public class CeshiApplication { public static void main(String[] args) { SpringApplication.run(CeshiApplication.class, args); } }
package com.example.demo; import java.io.FileWriter; import java.io.IOException; import java.util.Date; import java.util.HashMap; import java.util.Map; import java.util.UUID; import javax.servlet.http.HttpServletRequest; import javax.servlet.http.HttpSession; import org.springframework.beans.factory.annotation.Autowired; import org.springframework.stereotype.Controller; import org.springframework.util.ResourceUtils; import org.springframework.web.bind.annotation.GetMapping; import org.springframework.web.bind.annotation.PathVariable; import org.springframework.web.bind.annotation.RequestBody; import org.springframework.web.bind.annotation.RequestMapping; import org.springframework.web.bind.annotation.ResponseBody; import org.springframework.web.bind.annotation.RestController; @RestController @RequestMapping("/user") public class HtuserController { @RequestMapping("/hi") @ResponseBody public Returnben getsession(HttpServletRequest request, HttpSession session) { Returnben returnben = new Returnben(); returnben.setMsg("成功"); returnben.setSuccess("1"); return returnben; } }
package com.example.demo; public class Returnben { private String success = "0"; public String getSuccess() { return success; } public void setSuccess(String success) { this.success = success; } public String getMsg() { return msg; } public void setMsg(String msg) { this.msg = msg; } public Object getobj() { return obj; } public Object getData() { return data; } public void setData(Object data) { this.data = data; } public void setobj(Object obj) { this.obj = obj; } private String msg = ""; private Object obj = null; private Object data = null; private Long count; private int code; public int getCode() { return code; } public void setCode(int code) { this.code = code; } public Long getCount() { return count; } public void setCount(Long count) { this.count = count; } }

没配置端口的话就是8080端口

基本的springboot就完成了,后续再说集成各个框架和cloud其他组件
到此这篇关于JAVA入门教学之快速搭建基本的springboot(从spring boot到spring cloud)的文章就介绍到这了,更多相关springboot入门搭建内容请搜索小编以前的文章或继续浏览下面的相关文章希望大家以后多多支持小编!

Maven 搭建一个基本的 SpringBoot 工程
一,新建 springboot 工程
springboot 工程的创建方式有好几种,可以在官网提供的工程创建页面进行创建、也可以在 eclipse 中下载插件创建 springboot 工程、或者是在创建了 Maven 工程以后将 springboot 工程依赖的 jar 包引入。当然,做 springboot 工程比较好用的还有 IDEA 等等,总之,对于工程的创建可以选择自己比较常用的方式来创建工程,这里不再赘述。
二,Maven 工程依赖配置
我们使用 eclipse IDE 创建的 springboot 工程目录结构如下面所示。
接下来,配置好 Maven 工程所需要的依赖 jar 包,打开 pom.xml 文件添加依赖。

<?xml version="1.0" encoding="UTF-8"?>
<project xmlns="http://maven.apache.org/POM/4.0.0" xmlns:xsi="http://www.w3.org/2001/XMLSchema-instance" xsi:schemaLocation="http://maven.apache.org/POM/4.0.0 https://maven.apache.org/xsd/maven-4.0.0.xsd">
  <modelVersion>4.0.0</modelVersion>
  <parent>
    <groupId>org.springframework.boot</groupId>
    <artifactId>spring-boot-starter-parent</artifactId>
    <version>2.2.0.RELEASE</version>
    <relativePath/> <!-- lookup parent from repository -->
  </parent>
  <groupId>com.example</groupId>
  <artifactId>demo</artifactId>
  <version>0.0.1</version>
  <name>demo</name>
  <description>Demo project for Spring Boot</description>
  <properties>
    <java.version>1.8</java.version>
        <spring-restdocs.version>2.0.2.RELEASE</spring-restdocs.version>
        <com.alibaba.druid>1.1.10</com.alibaba.druid>
        <swagger.version>2.9.2</swagger.version>
        <mybatis-plus.version>3.0.2</mybatis-plus.version>
        <shiro.version>1.3.2</shiro.version>
  </properties>
  <dependencies>
     <!--SpringBoot Web-->
        <dependency>
            <groupId>org.springframework.boot</groupId>
            <artifactId>spring-boot-starter-web</artifactId>
        </dependency>
        <!--SpringBoot Mybatis-->
        <dependency>
            <groupId>org.mybatis.spring.boot</groupId>
            <artifactId>mybatis-spring-boot-starter</artifactId>
            <version>2.1.1</version>
        </dependency>
        <!--Mybatis plus-->
        <dependency>
            <groupId>com.baomidou</groupId>
            <artifactId>mybatis-plus-boot-starter</artifactId>
            <version>${ mybatis-plus.version}</version>
        </dependency>
        <!--Mybatis 分页插件-->
        <dependency>
            <groupId>com.baomidou</groupId>
            <artifactId>mybatis-plus</artifactId>
            <version>${ mybatis-plus.version}</version>
        </dependency>
        <!--分页辅助配置-->
        <dependency>
            <groupId>com.github.pagehelper</groupId>
            <artifactId>pagehelper</artifactId>
            <version>5.1.6</version>
        </dependency>
        <!--MYSQL数据库驱动-->
        <dependency>
            <groupId>mysql</groupId>
            <artifactId>mysql-connector-java</artifactId>
        </dependency>
        <!--配置数据连接池-->
        <dependency>
            <groupId>com.alibaba</groupId>
            <artifactId>druid</artifactId>
            <version>${ com.alibaba.druid}</version>
        </dependency>
        <!--json-->
        <dependency>
            <groupId>com.alibaba</groupId>
            <artifactId>fastjson</artifactId>
            <version>1.2.28</version>
        </dependency>
        <!--lombok-->
        <dependency>
            <groupId>org.projectlombok</groupId>
            <artifactId>lombok</artifactId>
        </dependency>
        <!--sl4j-->
        <dependency>
            <groupId>org.slf4j</groupId>
            <artifactId>slf4j-api</artifactId>
        </dependency>
        <!--Shiro 权限框架-->
        <dependency>
            <groupId>org.apache.shiro</groupId>
            <artifactId>shiro-core</artifactId>
            <version>${ shiro.version}</version>
        </dependency>
        <!--shiro-web依赖-->
        <dependency>
            <groupId>org.apache.shiro</groupId>
            <artifactId>shiro-web</artifactId>
            <version>${ shiro.version}</version>
        </dependency>
        <!--shiro-spring 支持-->
        <dependency>
            <groupId>org.apache.shiro</groupId>
            <artifactId>shiro-spring</artifactId>
            <version>${ shiro.version}</version>
        </dependency>
        <!-- shiro 缓存 -->
        <dependency>
      <groupId>org.apache.shiro</groupId>
      <artifactId>shiro-ehcache</artifactId>
      <version>1.4.0</version>
    </dependency>
     <!--Swagger配置、支持在线接口文档-->
        <dependency>
            <groupId>io.springfox</groupId>
            <artifactId>springfox-swagger2</artifactId>
            <version>${ swagger.version}</version>
        </dependency>
        <!--Swagger UI 配置-->
        <dependency>
            <groupId>io.springfox</groupId>
            <artifactId>springfox-swagger-ui</artifactId>
            <version>${ swagger.version}</version>
        </dependency>
        <dependency>
            <groupId>org.apache.httpcomponents</groupId>
            <artifactId>httpclient</artifactId>
        </dependency>
    <!-- Mybatis 逆向工程 -->
    <dependency>
           <groupId>org.mybatis.generator</groupId>
           <artifactId>mybatis-generator-core</artifactId>
           <version>1.4.0</version>
       </dependency>

  </dependencies>

  <build>
    <plugins>
      <!-- SpringBoot Maven 插件 -->
      <plugin>
        <groupId>org.springframework.boot</groupId>
        <artifactId>spring-boot-maven-plugin</artifactId>
      </plugin>
      <!-- Mybatis 逆向工程  Maven 插件 -->
      <plugin>
               <groupId>org.mybatis.generator</groupId>
               <artifactId>mybatis-generator-maven-plugin</artifactId>
               <configuration>
                   <configurationFile>src/main/resources/generator/generatorConfig.xml</configurationFile>
                   <overwrite>true</overwrite>
                   <verbose>true</verbose>
               </configuration>
           </plugin>
    </plugins>
  </build>

</project>
三,工程配置
在 springboot 的工程中,项目相关部分的配置基本上在 application.yml 文件中都可以完成配置。
server:
  port: 9001
  servlet:
    context-path: /
  tomcat:
    uri-encoding: UTF-8

spring:
  datasource:
    driver-class-name: com.mysql.jdbc.Driver
    url: ${ jdbc.url}
    username: ${ jdbc.username}
    password: ${ jdbc.password}
    type: com.alibaba.druid.pool.DruidDataSource      # 配置当前需要使用的数据源的操作类型
    filters: stat
    initialSize: 2
    maxActive: 300
    maxWait: 60000
    timeBetweenEvictionRunsMillis: 60000
    minEvictableIdleTimeMillis: 300000
    validationQuery: SELECT 1
    testWhileIdle: true
    testOnBorrow: false
    testOnReturn: false
    poolPreparedStatements: false
    maxPoolPreparedStatementPerConnectionSize: 200
    dbcp2:
      min-idle: 5                                     # 数据库连接池的最小维持连接数
      initial-size: 5                                 # 初始化提供的连接数
      max-total: 20                                   # 最大的连接数
      max-wait-millis: 60000                          # 等待连接获取的最大超时时间
  mvc:
    view:
      suffix: .html                                   # 配置视图解析
  thymeleaf:
    cache: false                                      # 开发时设置关闭缓存、可以看到实时效果,注意在系统部署时开启缓存

mybatis-plus:
  mapper-locations: classpath*:mybatis/mapper/*.xml typeAliasesPackage: com.example.demo.entity jdbc.url: jdbc:mysql://192.168.26.10:3306/demo?useUnicode=true&characterEncoding=UTF-8&useSSL=false&autoReconnect=true&failOverReadOnly=false&serverTimezone=UTC&allowMultiQueries=true jdbc.username: sysc jdbc.password: sysc logging: level.root: debug file: /demo/demo.log
四,编写自定义配置类
自定义配置相关的部分实现一般是通过 @Configuration 的注解接口配置加上自定义实现的方法来完成的,在这个工程中使用了三处。一是对数据库监控的配置,二是对 Mybatis 分页等的配置,三是对 Swagger 接口的配置,下面分别来看这三个部分的配置类是如何编写的。
DruidConfig.java 数据库监控配置
package com.example.demo.configuration;

import org.springframework.context.annotation.Configuration;

import javax.sql.DataSource;

import org.springframework.boot.context.properties.ConfigurationProperties;
import org.springframework.boot.web.servlet.FilterRegistrationBean;
import org.springframework.boot.web.servlet.ServletRegistrationBean;
import org.springframework.context.annotation.Bean;

import com.alibaba.druid.pool.DruidDataSource;
import com.alibaba.druid.support.http.StatViewServlet;
import com.alibaba.druid.support.http.WebStatFilter;

/** * * @Title: DruidConfig * @Description: 数据库监控配置 * @author: 老王说编程 * @date 2021年2月13日 上午11:00:13 */
@Configuration
public class DruidConfig {

  @Bean
    public ServletRegistrationBean<StatViewServlet> druidServlet() {
        /** * @Description: 主要实现web监控的配置处理 * @Param: [] * @return: org.springframework.boot.web.servlet.ServletRegistrationBean * @Author: 老王说编程 * @Date: 2021年2月13日 */
        //表示进行druid监控的配置处理操作
        ServletRegistrationBean<StatViewServlet> servletRegistrationBean = new ServletRegistrationBean<StatViewServlet>(
                new StatViewServlet(), "/druid/*");
        //设置访问IP白名单
        servletRegistrationBean.addInitParameter("allow", "");
        //设置访问IP黑名单
        servletRegistrationBean.addInitParameter("deny", "");
        //设置用户名
        servletRegistrationBean.addInitParameter("loginUsername", "root");
        //设置密码
        servletRegistrationBean.addInitParameter("loginPassword", "root");
        //不允许重置数据源
        servletRegistrationBean.addInitParameter("resetEnable", "false");
        return servletRegistrationBean;

    }
    @Bean
    public FilterRegistrationBean<WebStatFilter> filterRegistrationBean(){
        /** * @Description: 监控请求、对请求进行过滤 * @Param: [] * @return: org.springframework.boot.web.servlet.FilterRegistrationBean * @Author: 老王说编程 * @Date: 2021年2月13日 */

        FilterRegistrationBean<WebStatFilter> filterRegistrationBean=new FilterRegistrationBean<WebStatFilter>();
        filterRegistrationBean.setFilter(new WebStatFilter());
        // 设置请求监控
        filterRegistrationBean.addUrlPatterns("/*");
        // 允许格式请求
        filterRegistrationBean.addInitParameter("exclusions", "*.js,*.gif,*.jpg,*.css,/druid/*");
        return filterRegistrationBean;
    }
    @Bean
    @ConfigurationProperties(prefix = "spring.datasource")
    public DataSource druidDataSource() {
        return new DruidDataSource();
    }
}
MybatisPlusConfig.java MybatisPlus 分页配置
package com.example.demo.configuration;
import com.baomidou.mybatisplus.extension.plugins.PaginationInterceptor;
import com.baomidou.mybatisplus.extension.plugins.PerformanceInterceptor;
import com.github.pagehelper.PageHelper;
import org.mybatis.spring.annotation.MapperScan;
import org.springframework.context.annotation.Bean;
import org.springframework.context.annotation.Configuration;
import java.util.Properties;
/** * * @Title: MybatisPlusConfig * @Description: Mybatis Plus 分页配置 * @author: 老王说编程 * @date 2021年2月13日 上午11:14:41 */

@Configuration
@MapperScan("com.example.demo.mapper")
public class MybatisPlusConfig {
  @Bean
    public PaginationInterceptor paginationInterceptor() {
        PaginationInterceptor page = new PaginationInterceptor();
        page.setDialectType("mysql");
        return page;
    }

    @Bean
    public PerformanceInterceptor performanceInterceptor() {
        PerformanceInterceptor page = new PerformanceInterceptor();
        page.setFormat(true);
        return page;
    }

    //配置mybatis的分页插件pageHelper
    @Bean
    public PageHelper pageHelper(){
        PageHelper pageHelper = new PageHelper();
        Properties properties = new Properties();
        properties.setProperty("offsetAsPageNum","true");
        properties.setProperty("rowBoundsWithCount","true");
        properties.setProperty("reasonable","true");
        properties.setProperty("dialect","mysql");    //配置mysql数据库的方言
        pageHelper.setProperties(properties);
        return pageHelper;
    }

}
SwaggerConfig.java SwaggerUI 接口配置
package com.example.demo.configuration;
import org.springframework.context.annotation.Bean;
import org.springframework.context.annotation.Configuration;
import org.springframework.web.bind.annotation.RestController;
import springfox.documentation.builders.ApiInfoBuilder;
import springfox.documentation.builders.PathSelectors;
import springfox.documentation.builders.RequestHandlerSelectors;
import springfox.documentation.service.ApiInfo;
import springfox.documentation.service.Parameter;
import springfox.documentation.spi.DocumentationType;
import springfox.documentation.spring.web.plugins.Docket;
import springfox.documentation.swagger2.annotations.EnableSwagger2;
import java.util.ArrayList;
import java.util.List;

/** * * @Title: SwaggerConfig * @Description: Swagger 在线接口工具配置 * @author: 老王说编程 * @date 2021年2月13日 上午11:03:18 */

@Configuration
@EnableSwagger2
public class SwaggerConfig {

  @Bean
    public Docket createRestApi() {
        List<Parameter> pars = new ArrayList<Parameter>();
        return new Docket(DocumentationType.SWAGGER_2)
                .apiInfo(apiInfo())
                .select()
                .apis(RequestHandlerSelectors.withClassAnnotation(RestController.class)) .paths(PathSelectors.any()) .build() .globalOperationParameters(pars) .apiInfo(apiInfo());
    }

    private ApiInfo apiInfo(){
        return new ApiInfoBuilder()
                .title("Demo RESTful API")
                .description("业务描述")
                .termsOfServiceUrl("https://www.cnblogs.com/xiebq/")
                .version("1.0")
                .build();
    }

}
五,项目结构
使用 DemoApplication.java 启动项目后,访问数据库监控的地址:http://localhost:9001/druid/login.html,swagger 在线接口文档访问地址:http://localhost:9001/swagger-ui.html。

关注公众号看更多精彩内容>>


Spring Boot - 快速构建一个基本的 Restful 程序
## 一、简介 最近团队中 Android 和 IOS 的童鞋向我提出来一个要求,想学习一下服务端是如何开发的。我们的后端主要是用 Spring MVC 来实现 Restful 风格的接口,业务层和数据层使用 Spring Framework+Mybatis 来实现。但是这些东西一来配置文件太多,原理也很难快速掌握,对于前端童鞋来说,门槛较高,有没有更便捷的框架供大家学习呢?经过几天的时间研究,终于找到了 Spring Boot 这个大杀器。
Spring Boot 是由 Pivotal 团队提供的全新框架,其设计目的是用来简化新 Spring 应用的初始搭建以及开发过程。该框架使用了特定的方式来进行配置,从而使开发人员不再需要定义样板化的配置。通过这种方式,Boot 致力于在蓬勃发展的快速应用开发领域(rapid application development)成为领导者。
Spring Boot 不生成代码,且完全不需要 XML 配置。其主要目标如下:
- 为所有的 Spring 开发工作提供一个更快、更广泛的入门经验。
- 开箱即用,你也可以通过修改默认值来快速满足你的项目的需求。
- 提供了一系列大型项目中常见的非功能性特性,如嵌入式服务器、安全、指标,健康检测、外部配置等。
Spring Boot 官网: http://projects.spring.io/spring-boot/
## 二、开发环境准备
- IDE:IntelliJ IDEA
官网地址:https://www.jetbrains.com/idea/download/ - JDK:1.8
- Maven
- 数据库:MySQL
我花 5 分钟开发一个 RESTful 服务端程序
## 三、第一个 Restful 程序 1. 新建一个普通 Maven 工程 


 创建项目完成后目录结构如下图所示
2. 在 POM 文件中加入对 Spring-Boot 的依赖
<?xml version="1.0" encoding="UTF-8"?>
<project xmlns="http://maven.apache.org/POM/4.0.0"
         xmlns:xsi="http://www.w3.org/2001/XMLSchema-instance"
         xsi:schemaLocation="http://maven.apache.org/POM/4.0.0 http://maven.apache.org/xsd/maven-4.0.0.xsd">
    <modelVersion>4.0.0</modelVersion>

    <groupId>com.yepit</groupId>
    <artifactId>mapp</artifactId>
    <version>1.0-SNAPSHOT</version>

    <parent>
        <groupId>org.springframework.boot</groupId>
        <artifactId>spring-boot-starter-parent</artifactId>
        <version>1.3.3.RELEASE</version>
        <relativePath /> <!-- lookup parent from repository -->
    </parent>

    <properties>
        <project.build.sourceEncoding>UTF-8</project.build.sourceEncoding>
        <java.version>1.8</java.version>
    </properties>


    <dependencies>
        <dependency>
            <groupId>org.springframework.boot</groupId>
            <artifactId>spring-boot-starter-web</artifactId>
        </dependency>

        <dependency>
            <groupId>org.springframework.boot</groupId>
            <artifactId>spring-boot-starter-test</artifactId>
            <scope>test</scope>
        </dependency>
    </dependencies>

    <build>
        <plugins>
            <plugin>
                <groupId>org.springframework.boot</groupId>
                <artifactId>spring-boot-maven-plugin</artifactId>
            </plugin>
        </plugins>
    </build>
</project>
3. 新建一个 RestController 来接收客户端的请求,我们来模拟一个登录请求
package com.yepit.mapp.rest;

import org.springframework.boot.autoconfigure.EnableAutoConfiguration;
import org.springframework.context.annotation.Configuration;
import org.springframework.web.bind.annotation.*;

/**
 * Created by qianlong on 16/7/20.
 */
@RestController
public class UserController {

	@RequestMapping(value = "/users/{username}",method = RequestMethod.GET,consumes="application/json")
    public String getUser(@PathVariable String username, @RequestParam String pwd){
        return "Welcome,"+username;
    }}
- 关键字 @RestController 代表这个类是用 Restful 风格来访问的,如果是普通的 WEB 页面访问跳转时,我们通常会使用 @Controller
- value = "/users/{username}" 代表访问的 URL 是 "http://host:PORT/users/ 实际的用户名 "
- method = RequestMethod.GET 代表这个 HTTP 请求必须是以 GET 方式访问
- consumes="application/json" 代表数据传输格式是 json
- @PathVariable 将某个动态参数放到 URL 请求路径中
- @RequestParam 指定了请求参数名称
4. 新建启动 Restful 服务端的启动类
package com.yepit.mapp;

import org.springframework.boot.SpringApplication;
import org.springframework.boot.autoconfigure.SpringBootApplication;

/**
 * Created by qianlong on 16/7/20.
 */
@SpringBootApplication
public class MappRunApplication {

    public static void main(String[] args) {
        SpringApplication.run(MappRunApplication.class, args);
    }
}
5. 执行 MappRunApplication 的 Main 方法启动 Restful 服务,可以看到控制台有如下输出
  .   ____          _            __ _ _
 /\\ / ___''_ __ _ _(_)_ __  __ _ \ \ \ \
( ( )\___ | ''_ | ''_| | ''_ \/ _` | \ \ \ \
 \\/  ___)| |_)| | | | | || (_| |  ) ) ) )
  ''  |____| .__|_| |_|_| |_\__, | / / / /
 =========|_|==============|___/=/_/_/_/
 :: Spring Boot ::        (v1.3.3.RELEASE)

2016-07-20 16:49:43.334  INFO 2106 --- [           main] com.yepit.mapp.MappRunApplication        : Starting MappRunApplication on bogon with PID 2106 (/Users/qianlong/workspace/spring-boot-samples/target/classes started by qianlong in /Users/qianlong/workspace/spring-boot-samples)
2016-07-20 16:49:43.338  INFO 2106 --- [           main] com.yepit.mapp.MappRunApplication        : No active profile set, falling back to default profiles: default
2016-07-20 16:49:43.557  INFO 2106 --- [           main] ationConfigEmbeddedWebApplicationContext : Refreshing org.springframework.boot.context.embedded.AnnotationConfigEmbeddedWebApplicationContext@543e710e: startup date [Wed Jul 20 16:49:43 CST 2016]; root of context hierarchy
2016-07-20 16:49:44.127  INFO 2106 --- [           main] o.s.b.f.s.DefaultListableBeanFactory     : Overriding bean definition for bean ''beanNameViewResolver'' with a different definition: replacing [Root bean: class [null]; scope=; abstract=false; lazyInit=false; autowireMode=3; dependencyCheck=0; autowireCandidate=true; primary=false; factoryBeanName=org.springframework.boot.autoconfigure.web.ErrorMvcAutoConfiguration$WhitelabelErrorViewConfiguration; factoryMethodName=beanNameViewResolver; initMethodName=null; destroyMethodName=(inferred); defined in class path resource [org/springframework/boot/autoconfigure/web/ErrorMvcAutoConfiguration$WhitelabelErrorViewConfiguration.class]] with [Root bean: class [null]; scope=; abstract=false; lazyInit=false; autowireMode=3; dependencyCheck=0; autowireCandidate=true; primary=false; factoryBeanName=org.springframework.boot.autoconfigure.web.WebMvcAutoConfiguration$WebMvcAutoConfigurationAdapter; factoryMethodName=beanNameViewResolver; initMethodName=null; destroyMethodName=(inferred); defined in class path resource [org/springframework/boot/autoconfigure/web/WebMvcAutoConfiguration$WebMvcAutoConfigurationAdapter.class]]
2016-07-20 16:49:44.658  INFO 2106 --- [           main] s.b.c.e.t.TomcatEmbeddedServletContainer : Tomcat initialized with port(s): 8080 (http)
2016-07-20 16:49:44.672  INFO 2106 --- [           main] o.apache.catalina.core.StandardService   : Starting service Tomcat
2016-07-20 16:49:44.673  INFO 2106 --- [           main] org.apache.catalina.core.StandardEngine  : Starting Servlet Engine: Apache Tomcat/8.0.32
2016-07-20 16:49:44.759  INFO 2106 --- [ost-startStop-1] o.a.c.c.C.[Tomcat].[localhost].[/]       : Initializing Spring embedded WebApplicationContext
2016-07-20 16:49:44.759  INFO 2106 --- [ost-startStop-1] o.s.web.context.ContextLoader            : Root WebApplicationContext: initialization completed in 1207 ms
2016-07-20 16:49:44.972  INFO 2106 --- [ost-startStop-1] o.s.b.c.e.ServletRegistrationBean        : Mapping servlet: ''dispatcherServlet'' to [/]
2016-07-20 16:49:44.977  INFO 2106 --- [ost-startStop-1] o.s.b.c.embedded.FilterRegistrationBean  : Mapping filter: ''characterEncodingFilter'' to: [/*]
2016-07-20 16:49:44.978  INFO 2106 --- [ost-startStop-1] o.s.b.c.embedded.FilterRegistrationBean  : Mapping filter: ''hiddenHttpMethodFilter'' to: [/*]
2016-07-20 16:49:44.978  INFO 2106 --- [ost-startStop-1] o.s.b.c.embedded.FilterRegistrationBean  : Mapping filter: ''httpPutFormContentFilter'' to: [/*]
2016-07-20 16:49:44.978  INFO 2106 --- [ost-startStop-1] o.s.b.c.embedded.FilterRegistrationBean  : Mapping filter: ''requestContextFilter'' to: [/*]
2016-07-20 16:49:45.184  INFO 2106 --- [           main] s.w.s.m.m.a.RequestMappingHandlerAdapter : Looking for @ControllerAdvice: org.springframework.boot.context.embedded.AnnotationConfigEmbeddedWebApplicationContext@543e710e: startup date [Wed Jul 20 16:49:43 CST 2016]; root of context hierarchy
2016-07-20 16:49:45.251  INFO 2106 --- [           main] s.w.s.m.m.a.RequestMappingHandlerMapping : Mapped "{[/users],methods=[GET],consumes=[application/json]}" onto public java.lang.String com.yepit.mapp.rest.UserController.getUser(java.lang.String,java.lang.String)
2016-07-20 16:49:45.253  INFO 2106 --- [           main] s.w.s.m.m.a.RequestMappingHandlerMapping : Mapped "{[/error]}" onto public org.springframework.http.ResponseEntity<java.util.Map<java.lang.String, java.lang.Object>> org.springframework.boot.autoconfigure.web.BasicErrorController.error(javax.servlet.http.HttpServletRequest)
2016-07-20 16:49:45.254  INFO 2106 --- [           main] s.w.s.m.m.a.RequestMappingHandlerMapping : Mapped "{[/error],produces=[text/html]}" onto public org.springframework.web.servlet.ModelAndView org.springframework.boot.autoconfigure.web.BasicErrorController.errorHtml(javax.servlet.http.HttpServletRequest,javax.servlet.http.HttpServletResponse)
2016-07-20 16:49:45.275  INFO 2106 --- [           main] o.s.w.s.handler.SimpleUrlHandlerMapping  : Mapped URL path [/webjars/**] onto handler of type [class org.springframework.web.servlet.resource.ResourceHttpRequestHandler]
2016-07-20 16:49:45.275  INFO 2106 --- [           main] o.s.w.s.handler.SimpleUrlHandlerMapping  : Mapped URL path [/**] onto handler of type [class org.springframework.web.servlet.resource.ResourceHttpRequestHandler]
2016-07-20 16:49:45.306  INFO 2106 --- [           main] o.s.w.s.handler.SimpleUrlHandlerMapping  : Mapped URL path [/**/favicon.ico] onto handler of type [class org.springframework.web.servlet.resource.ResourceHttpRequestHandler]
2016-07-20 16:49:45.380  INFO 2106 --- [           main] o.s.j.e.a.AnnotationMBeanExporter        : Registering beans for JMX exposure on startup
2016-07-20 16:49:45.462  INFO 2106 --- [           main] s.b.c.e.t.TomcatEmbeddedServletContainer : Tomcat started on port(s): 8080 (http)
2016-07-20 16:49:45.467  INFO 2106 --- [           main] com.yepit.mapp.MappRunApplication        : Started MappRunApplication in 2.573 seconds (JVM running for 3.187)
我们可以看到服务器是 Tomcat,端口为 8080
6. 验证 推荐大家使用 Google 的 Postman 插件来模拟请求
 在发起请求前,请注意需要在 Headers 中设置 Content-Type 为 application/json
到此一个基本的 Restful 风格的服务端就已经完成了,全部编码时间不会超过 5 分钟!
完整代码戳这里: Chapter 1 - 5 分钟构建一个基本的 Restful 程序

Spring boot 运用策略模式实现避免多次使用if
前言
这里就不详细去介绍策略模式是怎么样的了,想了解的可以点击下面的链接
策略模式介绍的链接:Java 设计模式中的策略模式详情
这里列出策略模式的好处
场景:某网页有个支付,其中包含了微信、支付宝等方式的支付方式 ,后续明确还会进行兼容其他的支付方式
用策略模式的好处:
- 避免多次使用if判断具体是用哪种支付策略进行操作。
- 因为每种策略(微信支付、支付宝支付)的内容都比较复杂。策略模式能将每种策略分离出来,方面后续维护管理
下面我们将使用Spring boot 运用策略模式,实现上面的需求
环境配置
- JDK8
- Spring boot 2.3.7.RELEASE
- 整合了spring-boot-starter-web
实现目标
使用策略模式后,新加一种支付策略时,只需要在策略枚举中添加新加的策略信息,外加一个策略类即可,而不再需要添加新的if判断。
准备策略接口和具体实现策略类
支付策略接口
/**
 * 支付策略
 */
public interface PayStrategy {

    /**
     * 支付(参数就没具体写了,可以定义成每个支付必须要有的参数)
     * @return
     */
     boolean pay();
}
微信支付策略类
/**
 * 第三方——微信支付(这里注意我修改了Bean的默认命名)


 */
@Component("wechatPayStrategy")
public class WeChatPayStrategyImpl implements PayStrategy{

    /**
     * 支付
     * @return
     */
    @Override
    public boolean pay() {

        //进行微信的支付逻辑
        System.out.println("正在进行微信的支付逻辑");

        return true;
    }
}
支付宝支付策略类
/**
 * 支付宝第三方支付(这里注意我修改了Bean的默认命名)
 */
@Component("alipayStrategy")
public class AliPayStrategyImpl implements PayStrategy {

    /**
     * 支付宝支付
     * @return
     */
    @Override
    public boolean pay() {

        //进行支付宝支付逻辑
        System.out.println("进行支付宝支付逻辑");
        return true;
    }
}
上述已将各自的策略的处理类进行了分离,接下来时使用支付策略工厂类和支付策略上下文将各自的策略类联系起来
准备支付策略上下文Context和支付策略工厂类
支付策略工厂类
package com.example.springboot_strategy.strategy.factory;

import com.example.springboot_strategy.enums.PayStrategyEnum;
import com.example.springboot_strategy.strategy.PayStrategy;
import org.springframework.stereotype.Component;

import javax.annotation.Resource;
import javax.swing.plaf.synth.SynthTextAreaUI;
import java.util.Map;

/**
 * 支付策略工厂类
 */
@Component
public class PayStrategyFactory {

    /**
     * 通过Spring容器的方式注入
     */
    @Resource
    private Map<String, PayStrategy> payStrategyMap;

    /**
     * 获取对应支付策略类
     * @param payStrategyEnum 支付策略枚举
     */
    public PayStrategy getPayStrategy(PayStrategyEnum payStrategyEnum){

        if(!payStrategyMap.containsKey(payStrategyEnum.getClassName())){
            System.out.println("没有对应的支付策略,无法进行支付");
            return null;
        }

        return payStrategyMap.get(payStrategyEnum.getClassName());
    }
}这里工厂类的逻辑是利用了Spring容器的处理方式,如果有多种类同时实现了某个接口,那么可以使用Map集合接收,Map对应的泛型,String是Bean名称,PayStrategy是每个具体实现类,这样我们就可以使用Bean类型去指定具体的策略类了,然后建立一个支付策略枚举去管理这些Bean名称。同时,也可以将Bean名称与客户端定义的类型进行关联。
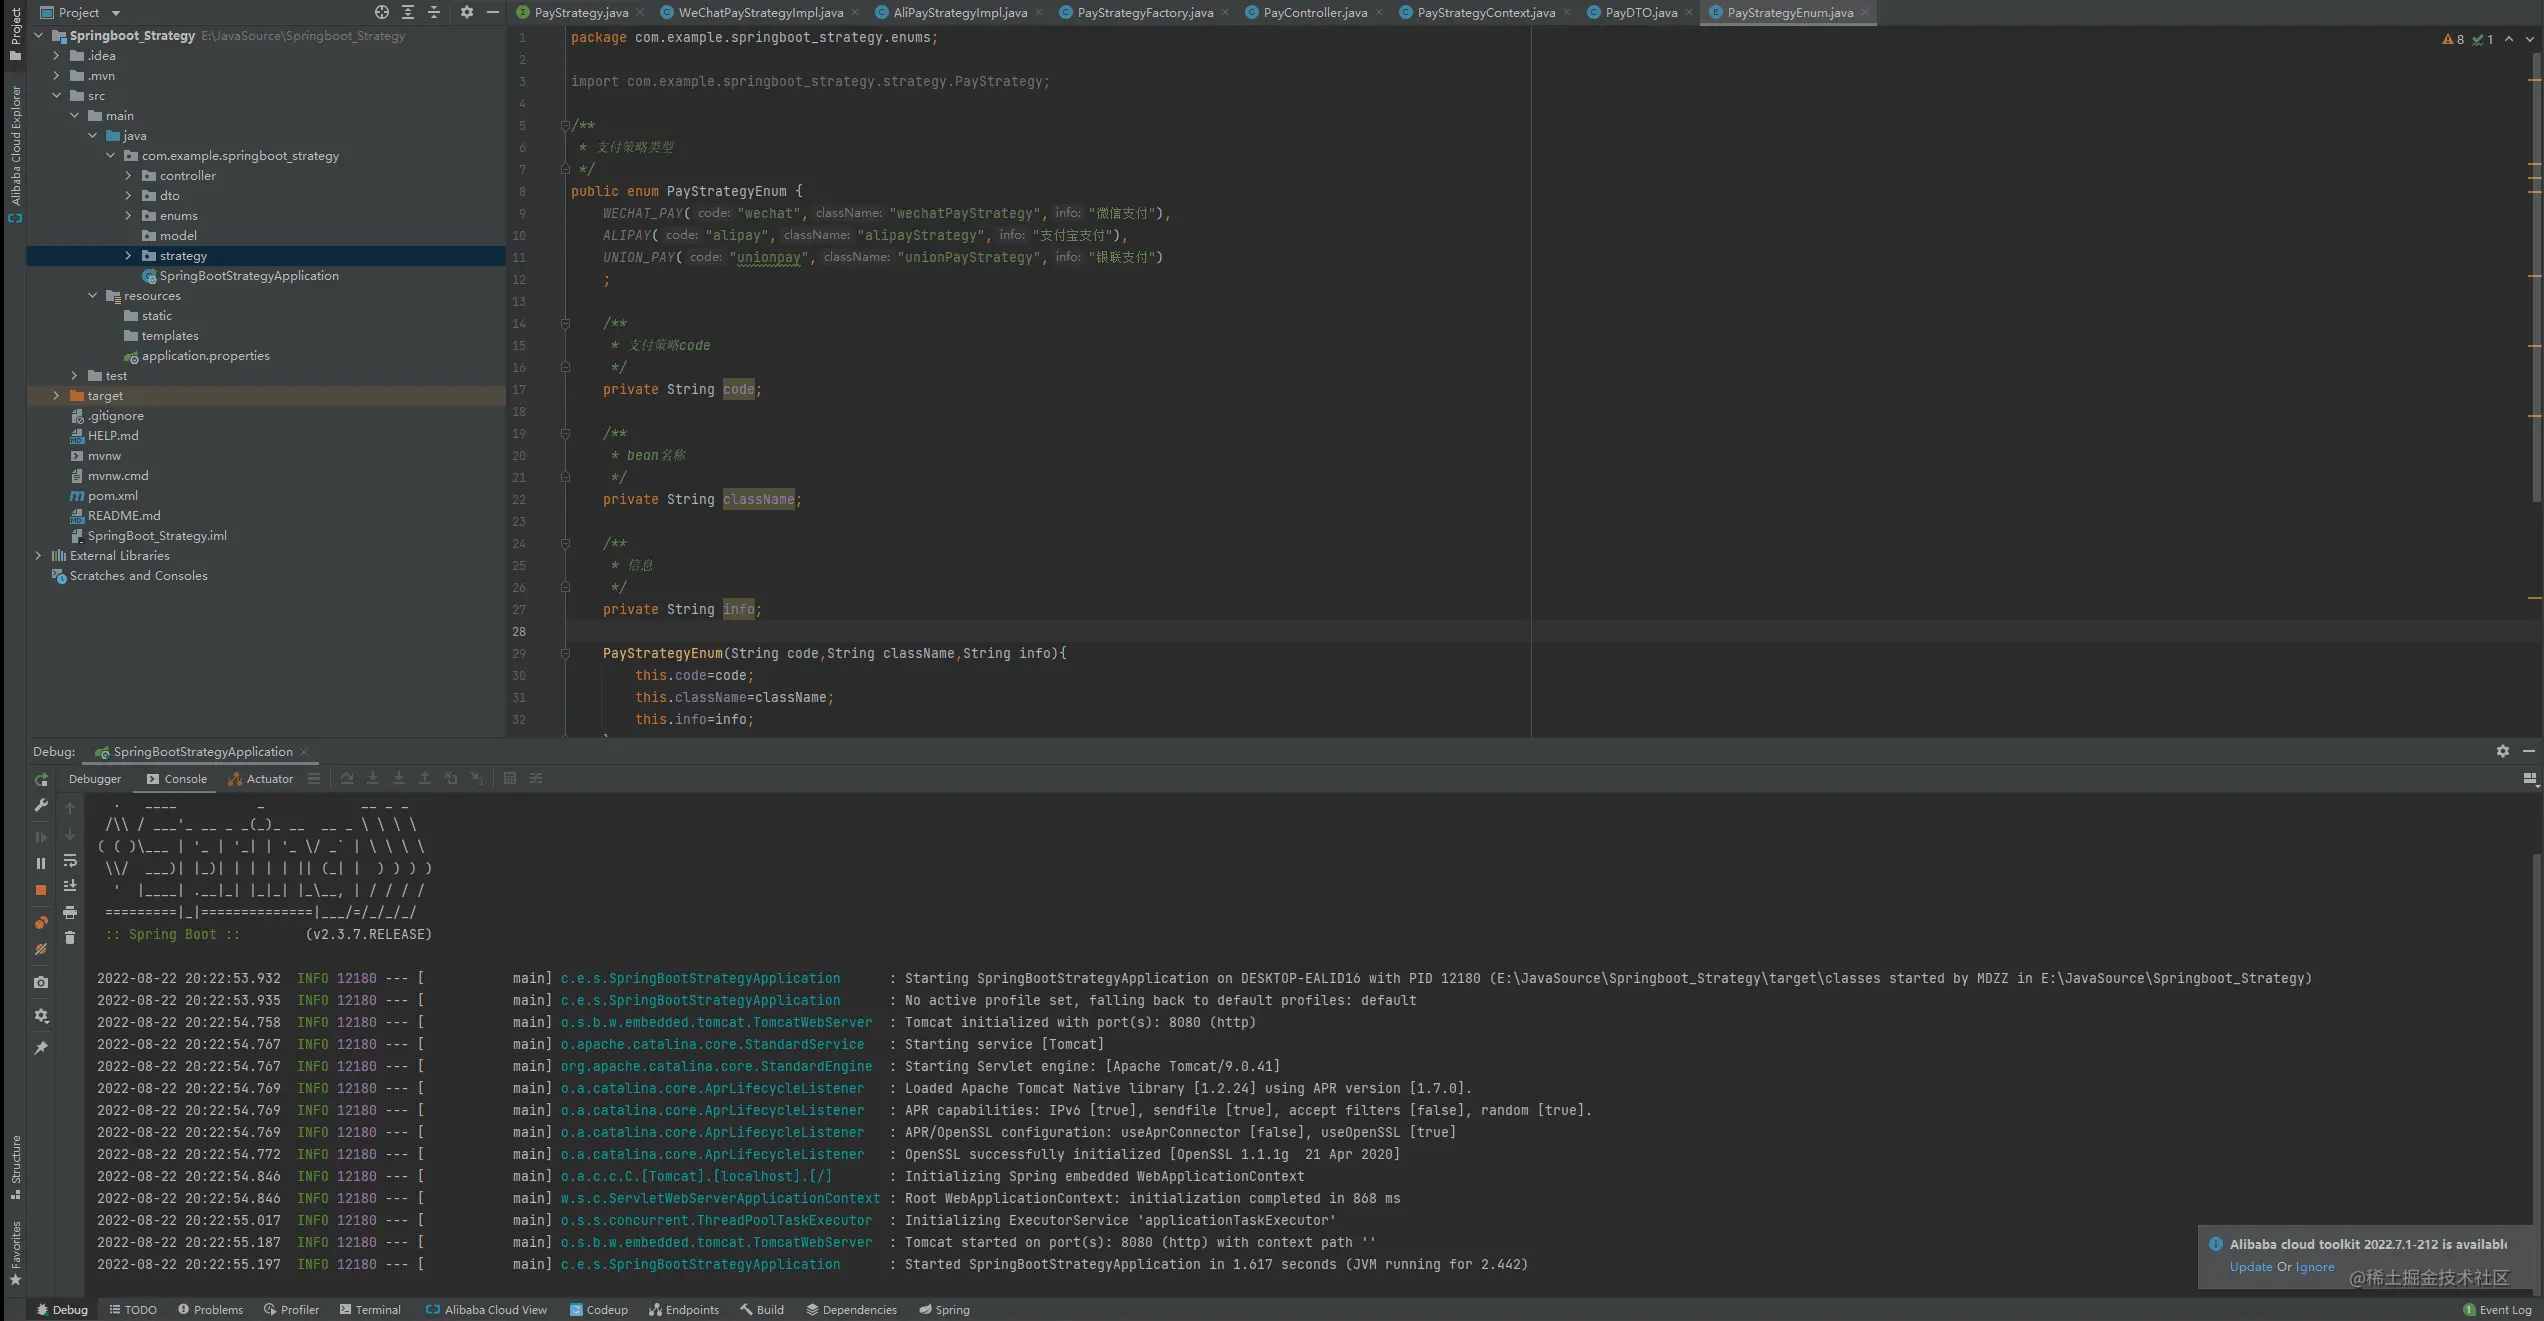
支付策略枚举类
/**
 * 支付策略类型
 */
public enum PayStrategyEnum {
    WECHAT_PAY("wechat","wechatPayStrategy","微信支付"),
    ALIPAY("alipay","alipayStrategy","支付宝支付")
    ;
    /**
     * 支付策略code
     */
    private String code;

    /**
     * bean名称
     */
    private String className;

    /**
     * 信息
     */
    private String info;
    PayStrategyEnum(String code,String className,String info){
        this.code=code;
        this.className=className;
        this.info=info;
    }
    public String getCode() {
        return code;
    }
    public String getClassName() {
        return className;
    }
    public String getInfo() {
        return info;
    }
}
上面枚举类中code代表的是客户端定义的类型(例如我从前端接收到的支付type,这个type可以是这个code),className顾名思义,指的是每种策略的bean名称,info是代表每种策略的内容
支付策略上下文
/**
 * 支付策略上下文
 */
@Component
public class PayStrategyContext {

    @Autowired
    private PayStrategyFactory payStrategyFactory;

    /**
     * 支付执行
     * @param payDTO 支付参数
     * @return
     */
    public boolean payHandle(PayDTO payDTO){

        //将某属性的值转换成具体的枚举。这里是根据payDTO的type字段对应枚举的code进行转换
        Optional<PayStrategyEnum> payStrategyEnumOptional = Arrays.stream(PayStrategyEnum.class.getEnumConstants())
                .filter((e) -> e.getCode().equals(payDTO.getType())).findAny();

        if(!payStrategyEnumOptional.isPresent()){
            System.out.println("匹配不到具体支付策略");
            return false;
        }
        PayStrategyEnum payStrategyEnum = payStrategyEnumOptional.get();

        PayStrategy payStrategy = payStrategyFactory.getPayStrategy(payStrategyEnum);

        //进行payDto参数的处理.....

        boolean pay = payStrategy.pay();

        //支付后的记录处理..


        return true;

    }
}
pageDto类
/**
 * 支付DTO
 */
public class PayDTO {

    /**
     * 支付类型
     */
    private String type;

    /**
     * 支付金额
     */
    private BigDecimal payMoney;

    /**
     * ...........
     */

    public String getType() {
        return type;
    }
    public void setType(String type) {
        this.type = type;
    }
    public BigDecimal getPayMoney() {
        return payMoney;
    }
    public void setPayMoney(BigDecimal payMoney) {
        this.payMoney = payMoney;
    }

}
这个策略上下文,则是选择策略的入口,这里会进行参数的处理,将这里我就将pageDTO类中的type字符串转换成对应的枚举类。
到这里使用策略模式的编写算是完成了,下面进行编写客户端的代码
客户端代码
支付控制器
@RestController
@RequestMapping("pay")
public class PayController {

    @Autowired
    private PayStrategyContext payStrategyContext;
    @PostMapping
    public boolean pay(@RequestBody PayDTO payDTO){

        //这里因为懒。。就没有加上Service层了,直接在控制器处理
        return payStrategyContext.payHandle(payDTO);
    }
}
效果

新需求
后续新增一个银联的支付方式,我们只需要添加银联的支付策略类和添加银联的支付枚举即可实现
添加银联的支付策略类
/**
 * 银联支付(这里注意我修改了Bean的默认命名)
 */
@Component("unionPayStrategy")
public class UnionPayStrategyImp implements PayStrategy {


    /**
     * 银联支付
     * @return
     */
    @Override
    public boolean pay() {

        //进行银联的支付

        System.out.println("进行银联的支付逻辑");
        return true;
    }

}
在枚举类中添加银联的支付枚举
/**
 * 支付策略类型
 */
public enum PayStrategyEnum {
    WECHAT_PAY("wechat","wechatPayStrategy","微信支付"),
    ALIPAY("alipay","alipayStrategy","支付宝支付"),
    UNION_PAY("unionpay","unionPayStrategy","银联支付")
    ;

    /**
     * 支付策略code
     */
    private String code;

    /**
     * bean名称
     */
    private String className;

    /**
     * 信息
     */
    private String info;

    PayStrategyEnum(String code,String className,String info){
        this.code=code;
        this.className=className;
        this.info=info;
    }


    public String getCode() {
        return code;
    }

    public String getClassName() {
        return className;
    }

    public String getInfo() {
        return info;
    }


}
复制代码
实现效果
到此这篇关于Spring boot 运用策略模式实现避免多次使用if的文章就介绍到这了,更多相关Spring boot 避免多次使用if内容请搜索以前的文章或继续浏览下面的相关文章希望大家以后多多支持!
- SpringBoot中整合knife4j接口文档的实践
- Java基础之SpringBoot整合knife4j
- Springboot整合knife4j与shiro的操作
- springboot多数据源使用@Qualifier自动注入无效的解决
- SpringBoot遇到的坑@Qualifier报红的解决
- Spring Boot项目集成Knife4j接口文档的实例代码
- Springboot中整合knife4j接口文档的过程详解
- Spring Boot 集成接口管理工具 Knife4j
今天关于springboot使用策略模式实现一个基本的促销和spring 策略模式实现的讲解已经结束,谢谢您的阅读,如果想了解更多关于JAVA入门教学之快速搭建基本的springboot(从spring boot到spring cloud)、Maven 搭建一个基本的 SpringBoot 工程、Spring Boot - 快速构建一个基本的 Restful 程序、Spring boot 运用策略模式实现避免多次使用if的相关知识,请在本站搜索。
本文标签:


