以上就是给各位分享使用SpringCloudHysterix重试,其中也会对springcloud重试机制进行解释,同时本文还将给你拓展(二十九)跟我学习SpringCloud-SpringCloud
以上就是给各位分享使用 Spring Cloud Hysterix 重试,其中也会对springcloud重试机制进行解释,同时本文还将给你拓展(二十九) 跟我学习SpringCloud-Spring Cloud Hystrix的实时监控功能、(二十八) 跟我学习SpringCloud-Spring Cloud Feign整合Hystrix实现容错处理、Spring Cloud - Hystrix、Spring Cloud ----->(负载均衡策略+重试机制+Hystrix 熔断器)等相关知识,如果能碰巧解决你现在面临的问题,别忘了关注本站,现在开始吧!
本文目录一览:- 使用 Spring Cloud Hysterix 重试(springcloud重试机制)
- (二十九) 跟我学习SpringCloud-Spring Cloud Hystrix的实时监控功能
- (二十八) 跟我学习SpringCloud-Spring Cloud Feign整合Hystrix实现容错处理
- Spring Cloud - Hystrix
- Spring Cloud ----->(负载均衡策略+重试机制+Hystrix 熔断器)
")
使用 Spring Cloud Hysterix 重试(springcloud重试机制)
如何解决使用 Spring Cloud Hysterix 重试?
Cn 任何人请指导我如何在 Spring Cloud Eureka Hysterix 命令中进行重试,如下所示?另外默认情况下,Spring Cloud 会在调用方法的第一次失败时中断电路吗?
请指教。
@HystrixCommand(fallbackMethod="getDataFallBack" )
    public ResponseEntity<CurrencyConversion> addConversionFactor(@RequestBody CurrencyConversion currencyConversion) throws Exception{
        log.info("in addConversionFactor ... " + currencyConversion);
        //some operations here
        return ResponseEntity.ok(currencyConversion);
    }
解决方法
Hystrix 充当断路器,不提供任何重试功能。由调用客户端来实现重试。借助 Spring Cloud,您可以使用 Spring Cloud Netflix @LoadBalanced RestTemplate(或 WebClient)或直接使用 Spring Retry。
@HystrixCommand 上有几个不同的配置属性,用于控制断路器何时跳闸。此处提供了所有可用属性的完整概述:https://github.com/Netflix/Hystrix/wiki/Configuration。控制错误阈值的是circuitBreaker.errorThresholdPercentage。
另请注意,不推荐使用 Spring Cloud Hystrix。如果您要创建新应用程序,则应考虑改用 Spring Cloud Circuit Breaker。
 跟我学习SpringCloud-Spring Cloud Hystrix的实时监控功能")
(二十九) 跟我学习SpringCloud-Spring Cloud Hystrix的实时监控功能
在微服务架构中,Hystrix 除了实现容错外,还提供了实时监控功能。在服务调用时,Hystrix 会实时累积关于 HystrixCommand 的执行信息,比如每秒的请求数、成功数等。
更多的指标信息请查看官方文档:https://github.com/Netflix/Hystrix/wiki/Metrics-and-Monitoring。
Hystrix 监控需要两个必备条件:
1)必须有 Actuator 的依赖,代码如下所示。
<dependency>
    <groupId>org.springframework.boot</groupId>
    <artifactId>spring-boot-starter-actuator</artifactId>
</dependency>
2)必须有 Hystrix 的依赖,Spring Cloud 中必须在启动类中添加 @EnableHystrix 开启 Hystrix,代码如下所示。
<dependency>
    <groupId>org.springframework.cloud</groupId>
    <artifactId>spring-cloud-starter-netflix-hystrix</artifactId>
</dependency>
我们改造下 hystrix-feign-demo 这个项目,加入上边两段代码的依赖,将 actuator 中的端点暴露出来,访问端点地址(http://localhost:8086/actuator/hystrix.stream),如图 1 所示:
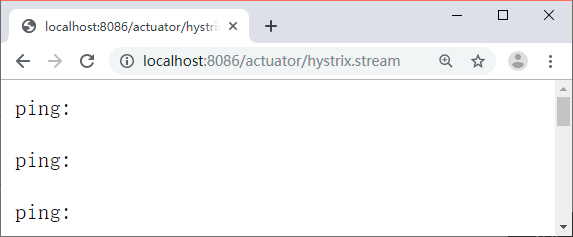
从图中可以看到一直在输出“ping:”,出现这种情况是因为还没有数据,等到 HystrixCommand 执行了之后就可以看到具体数据了。
调用一下 /callHello 接口 http://localhost:8086/callHello,访问之后就可以看到 http://localhost:8086/actuator/hystrix.stream 这个页面中输出的数据了,如图 2 所示。

给大家推荐分布式架构源码
 跟我学习SpringCloud-Spring Cloud Feign整合Hystrix实现容错处理")
(二十八) 跟我学习SpringCloud-Spring Cloud Feign整合Hystrix实现容错处理
创建一个新的 Maven 项目 hystrix-feign-demo,增加 EurekaClient,Feign,Hystrix 的依赖,然后在属性文件中开启 Feign 对 Hystrix 的支持:
feign.hystrix.enabled=true1. Fallback 方式
在 Feign 的客户端类上的 @FeignClient 注解中指定 fallback 进行回退(代码如下所示),创建一个 Feign 的客户端类 UserRemoteClient,为其配置 fallback。
@FeignClient (value = "eureka-client-user-service", fallback = UserRemoteClientFallback.class)
public interface UserRemoteClient {

    @GetMapping("/user/hello")
    String hello();
}
UserRemoteClientFallback 类需要实现 UserRemoteClient 类中所有的方法,返回回退时的内容,代码如下所示。
@Component
public class UserRemoteClientFallback implements UserRemoteClient {
    @Override
    public String hello() {
        return "fail";
    }
}
停掉所有 eureka-client-user-service 服务,然后访问 /callHello 接口,这个时候 eureka-client-user-service 服务是不可用的,必然会触发回退,返回的内容是 fail 字符串,这证明回退生效了。
在这种情况下,如果你的接口调用了多个服务的接口,那么只有 eureka-client-user-service 服务会没数据,不会影响别的服务,如果不用 Hystrix 回退处理,整个请求都将失败。
{
    code:200,
    message:"",
    data:{
        id:1,
        money:100.12,
        name:"fail"
    }
}
下面我们将启用 Hystrix 断路器禁用:
feign.hystrix.enabled=false再次访问 /callHello 可以看到返回的就是 500 错误信息了,整个请求失败。
2. FallbackFactory 方式
通过 fallback 已经可以实现服务不可用时回退的功能,如果你想知道触发回退的原因,可以使用 FallbackFactory 来实现回退功能,代码如下所示。
@Component
public class UserRemoteClientFallbackFactory implements FallbackFactory<UserRemoteClient> {
    private Logger logger = LoggerFactory.getLogger(UserRemoteClientFallbackFactory.class);
    @Override
    public UserRemoteClient create(final Throwable cause) {
        logger.error("UserRemoteClient回退:", cause);
        return new UserRemoteClient() {
            @Override
            public String hello() {
                return "fail";
            }
        };
    }
}
FallbackFactory 的使用就是在 @FeignClient 中用 fallbackFactory 指定回退处理类,代码如下所示。
@FeignClient(value = "eureka-client-user-service", configuration = FeignConfiguration.class, fallbackFactory = UserRemoteClientFallbackFactory.class)笔者在这个回退处理的时候,将异常信息通过日志输出了,我们重新调用接口,可以看到异常信息在开发工具的控制台中输出了,FallbackFactory 和 Fallback 唯一的区别就在这里。
Feign 中禁用 Hystrix
禁用 Hystrix 还是比较简单的,目前有两种方式可以禁用,一种是在属性文件中进行全部禁用,默认就是禁用的状态。
feign.hystrix.enabled=false另一种是通过代码的方式禁用某个客户端,在 Feign 的配置类中增加如下所示的代码。
@Configuration
public class FeignConfiguration {
    @Bean
    @Scope("prototype")
    public Feign.Builder feignBuilder() {
        return Feign.builder();
    }
}
给大家推荐分布式架构源码

Spring Cloud - Hystrix
服务容错和Hystrix
一旦下游服务C因某些原因变得不可用,积压了大量请求,服务B的请求线程也随之阻塞。线程资源逐渐耗尽,使得服务B也变得不可用。紧接着,服务A也变为不可用,整个调用链路被拖垮(雪崩)

主要为了解决雪崩效应
功能
-
服务降级
- 双十一,网站被挤爆了
- 网络开小差了
- 区分业务,优先核心服务,非核心服务不可用或弱可用
- HystrixCommand注解指定
- fallbackMethod(回退函数)中具体实现降级逻辑
-
服务熔断
- 开启熔断
在固定时间窗口内,接口调用超时比率达到一个阈值,会开启熔断。进入熔断状态后,后续对该服务接口的调用不再经过网络,直接执行本地的默认方法,达到服务降级的效果。
- 熔断恢复
熔断不可能是永久的。当经过了规定时间之后,服务将从熔断状态回复过来,再次接受调用方的远程调用。
- 开启熔断
- 依赖隔离
- 监控(Hystrix DashBord)

使用
-
导入pom
<dependency>
    <groupId>org.springframework.cloud</groupId>
    <artifactId>spring-cloud-starter-hystrix</artifactId>
</dependency>
-
开启注解
@EnableCircuitBreaker-
或者替换为
@EnableSpringCloud
-
-
对应方法上面使用注解(这个方法必须写)
@HystrixCommand(fallbackMethod = "fallback")-
设置全局
@DefaultProperties(defaultFallback = "defaultFallBack")
- 设置默认fallback和超时时间
-
@RestController @DefaultProperties(defaultFallback = "defaultFallBack") public class HystrixController { //@HystrixCommand(fallbackMethod = "fallback") @HystrixCommand(commandProperties = { @HystrixProperty(name = "execution.isolation.thread.timeoutInMilliseconds", value = "3000") }) @GetMapping("/getProductInfoList") public String getProductInfo() { RestTemplate restTemplate = new RestTemplate(); return restTemplate.postForObject("http://127.0.0.1:9083/product/listForOrder", Collections.singletonList("157875196366160022"), String.class); } private String fallback() { return "太拥挤了,请稍后再试~"; } private String defaultFallBack() { return "默认提示:太拥挤了,请稍后重试~"; } }- 对应配置查找


依赖隔离-线程池隔离
会自动实现依赖隔离,进行容错保护
服务熔断
参数参考:http://zyouwei.com/%E6%8A%80%...
circuitBreaker断路器
circuitBreaker.requestVolumeThreshold
circuitBreaker.sleepWindowInMilliseconds
circuitBreaker.errorThresholdPercentage
https://martinfowler.com/blik...
状态机

容错:重试机制,第一次不成功再重试一次就成功了
故障问题:使用断路器模式,故障达到一定的值,断路器断闸
熔断的三个状态
close(关闭状态)
服务没有故障时,熔断器所处的状态,对调用方的调用不做任何限制。
open(熔断器打开状态)
在固定时间窗口内(Hystrix默认是10秒),接口调用出错比率达到一个阈值(Hystrix默认为50%),会进入熔断开启状态。进入熔断状态后,后续对该服务接口的调用不再经过网络,直接执行本地的fallback方法。
half open (半熔断)
在进入熔断开启状态一段时间之后(Hystrix默认是5秒),熔断器会进入半熔断状态。所谓半熔断就是尝试恢复服务调用,允许有限的流量调用该服务,并监控调用成功率。如果成功率达到预期,则说明服务已恢复,进入熔断关闭状态;如果成功率仍旧很低,则重新进入熔断关闭状态


``
@HystrixProperty(name = "circuitBreaker.requestVolumeThreshold",value = "10"),
//时间窗口,统计时间范围
@HystrixProperty(name = "circuitBreaker.sleepWindowInMilliseconds",value = "1000"),
//错误百分比
@HystrixProperty(name = "circuitBreaker.errorThresholdPercentage",value = "60")
使用配置项
必须在对应的方法上使用注解 @HystrixCommand
hystrix:
  command:
    default:
      execution:
        isolation:
          thread:
            timeoutInMilliseconds: 3000
#      circuitBreaker:
# enabled: true给特定方法设置:commandKey

Feign-hystrix的使用
-
配置
feign: hystrix: enabled: true - 修改对应client增加fallback,类注解
@Component不要忘记了 @FeignClient(name = "product",fallback =ProductClient.FallBackClass.class ) public interface ProductClient { @PostMapping("/product/listForOrder") List<ProductInfoOutPut> listForOrder(List<String> productIdList); @PostMapping("/product/decreaseStock") void decreaseStock(List<DecreaseStockInput> CartDTO); @Component class FallBackClass implements ProductClient{ @Override public List<ProductInfoOutPut> listForOrder(List<String> productIdList) { return null; } @Override public void decreaseStock(List<DecreaseStockInput> CartDTO) { } } }- 更改扫描包的路径,能够读取到client
可视化配置
导入pom
<dependency>
    <groupId>org.springframework.cloud</groupId>
    <artifactId>spring-cloud-starter-hystrix-dashboard</artifactId>
</dependency>
开启注解
@EnableHystrixDashboard访问http://localhost:8899/hystrix


问题
使用了zuul会让类懒加载,所以第一次访问会超时,这时候我们需要把配置直接放到zuul里面
代码地址:https://github.com/zzy0-0/ord...
")
Spring Cloud ----->(负载均衡策略+重试机制+Hystrix 熔断器)
负载均衡策略 初体验:
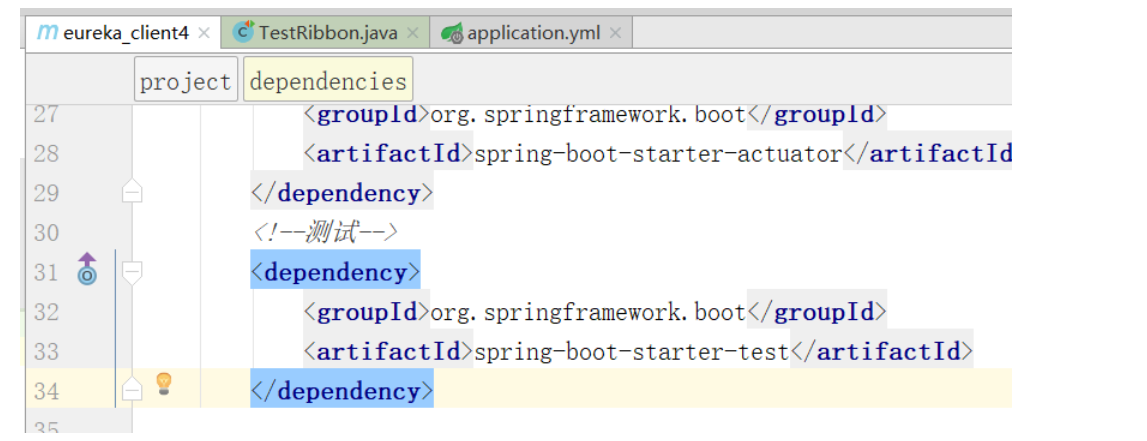
- 步骤一:修改pom文件,修改服务调用方的pom文件,添加test依赖
<!--测试-->
        <dependency>
            <groupId>org.springframework.boot</groupId>
            <artifactId>spring-boot-starter-test</artifactId>
        </dependency>
- 步骤二:编写测试类,在服务调用方编写Junit测试类
package com.czxy;

import org.junit.Test;
import org.junit.runner.RunWith;
import org.springframework.boot.test.context.SpringBootTest;
import org.springframework.cloud.client.ServiceInstance;
import org.springframework.cloud.netflix.ribbon.RibbonLoadBalancerClient;
import org.springframework.test.context.junit4.SpringRunner;

import javax.annotation.Resource;


@SpringBootTest(classes=Client4Application.class)       //Junit和Spring boot整合,将所有实例加载到spring容器。
@RunWith(SpringRunner.class)        //JUnit和Spring整合,将spring容器中的数据注入当前类
public class TestRibbon {
    @Resource
    private RibbonLoadBalancerClient client;

    @Test
    public void testDemo(){
        // 通过“服务名”获得对应服务实例
        for (int i = 0; i < 10; i++) {
            ServiceInstance instance = client.choose("service4");
            System.out.println(instance.getHost() + ":" + instance.getPort());
        }
    }
}
- 步骤三:修改提供方yml文件,支持显示IP地址,并重启8081和8082
#服务名
spring:
  application:
    name: service4
#注册地址
eureka:
  client:
    service-url:
      defaultZone: http://localhost:10086/eureka
  instance:
    prefer-ip-address: true   #显示IP地址
修改策略
给指定的“服务”设置策略
服务名.ribbon.NFLoadBalancerRuleClassName=策略实现类
service4:
  ribbon:
    NFLoadBalancerRuleClassName: com.netflix.loadbalancer.RandomRule    #随机
    #NFLoadBalancerRuleClassName : com.netflix.loadbalancer.BestAvailableRule           #并发最少
    #NFLoadBalancerRuleClassName : com.netflix.loadbalancer.WeightedResponseTimeRule    #请求时间权重
重试机制
-
重试机制:服务B访问集群环境下的服务A,某一个服务A宕机,服务B将尝试访问其他可以使用的服务A。
-
9090访问 8081和8082
-
如果8082宕机了
-
9090将尝试访问8081
-
-
步骤一:修改pom文件,添加重试retry依赖
<!--重试机制-->
        <dependency>
            <groupId>org.springframework.retry</groupId>
            <artifactId>spring-retry</artifactId>
</dependency>- 步骤二:修改yml文件,开启cloud重试机制
spring:
  cloud:
    loadbalancer:
      retry:
enabled: true #开启重试机制- 步骤三:修改yml文件,配置当前服务的重试参数
service4:
  ribbon:
    ConnectTimeout: 250               # Ribbon的连接超时时间
    ReadTimeout: 1000                 # Ribbon的数据读取超时时间
    OkToRetryOnAllOperations: true    # 是否对所有操作都进行重试
    MaxAutoRetriesNextServer: 1       # 切换实例的重试次数
    MaxAutoRetries: 1                 # 对当前实例的重试次数
Hystix熔断器
Hystrix是Netflix开源的一个延迟和容错库,用于隔离访问远程服务、第三方库,防止出现级联失败。

Hystrix 入门
-
步骤一:修改pom,添加熔断器依赖
-
步骤二:修改启动类,添加开启熔断器注解 @EnableHystrix
-
步骤三:改造dao,远程调用添加 熔断器的备选方案,添加注解 + 备用方法
-
步骤四:改变服务提供方法,添加线程sleep,0~2000随机 (测试方便)
- 步骤一:修改pom,添加熔断器依赖
<!--熔断器-->
        <dependency>
            <groupId>org.springframework.cloud</groupId>
            <artifactId>spring-cloud-starter-netflix-hystrix</artifactId>
        </dependency>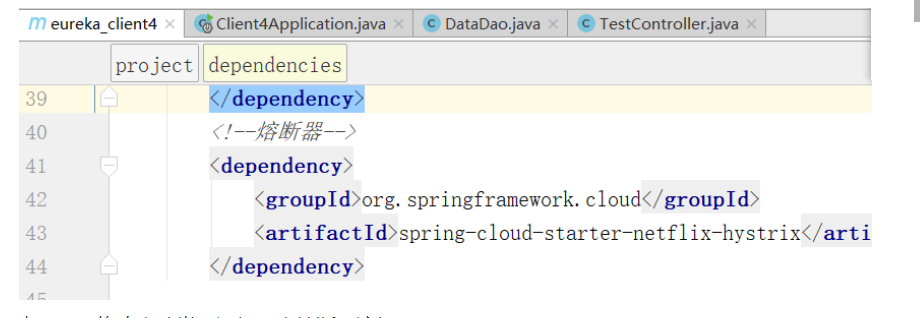
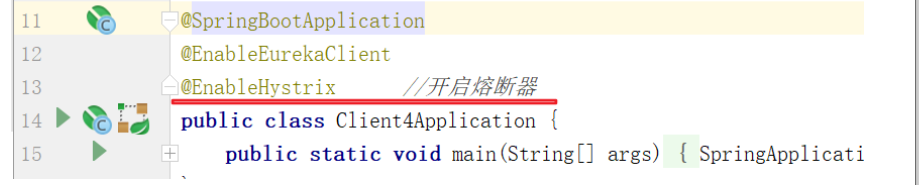
- 步骤二:修改启动类,添加开启熔断器注解 @EnableHystrix
package com.czxy;

import org.springframework.boot.SpringApplication;
import org.springframework.boot.autoconfigure.SpringBootApplication;
import org.springframework.cloud.netflix.eureka.EnableEurekaClient;
import org.springframework.cloud.netflix.hystrix.EnableHystrix;


@SpringBootApplication
@EnableEurekaClient
@EnableHystrix      //开启熔断器
public class Client4Application {
    public static void main(String[] args) {
        SpringApplication.run(Client4Application.class,args);
    }
}
- 步骤三:改造dao,远程调用添加 熔断器的备选方案,添加注解 + 备用方法
package com.czxy.dao;

import com.netflix.hystrix.contrib.javanica.annotation.HystrixCommand;
import org.springframework.http.ResponseEntity;
import org.springframework.stereotype.Component;
import org.springframework.web.client.RestTemplate;

import javax.annotation.Resource;

@Component
public class DataDao {
    @Resource
    private RestTemplate restTemplate;
    @HystrixCommand(fallbackMethod = "dataFallback")
    public ResponseEntity<String> data(){
        String url = "http://service4/test";
        return restTemplate.getForEntity(url,String.class);
    }

    /**
     * 熔断器超时处理方法
     * @return
     */
    public ResponseEntity<String> dataFallback(){
        return ResponseEntity.ok("临时数据");
    }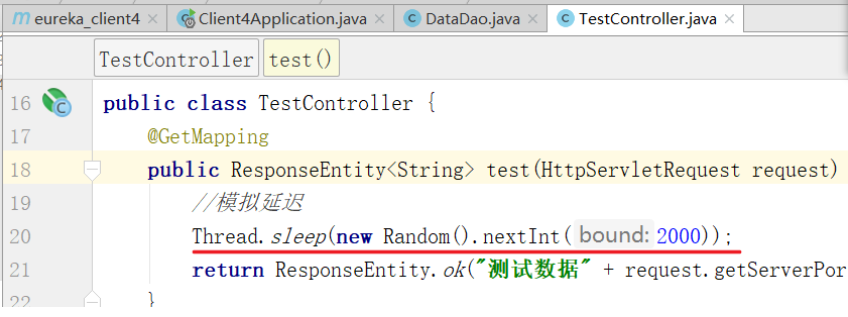
}- 步骤四:改变服务提供方法,添加线程sleep,0~~2000随机 (测试方便)
package com.czxy.controller;

import org.springframework.http.ResponseEntity;
import org.springframework.web.bind.annotation.GetMapping;
import org.springframework.web.bind.annotation.RequestMapping;
import org.springframework.web.bind.annotation.RestController;

import javax.servlet.http.HttpServletRequest;
import java.util.Random;


@RestController
@RequestMapping("/test")
public class TestController {
    @GetMapping
    public ResponseEntity<String> test(HttpServletRequest request) throws Exception {
        //模拟延迟
        Thread.sleep(new Random().nextInt(2000));
        return ResponseEntity.ok("测试数据" + request.getServerPort());
    }
}
- 步骤五:优化dao,打印耗时时间
package com.czxy.dao;

import com.netflix.hystrix.contrib.javanica.annotation.HystrixCommand;
import org.springframework.http.ResponseEntity;
import org.springframework.stereotype.Component;
import org.springframework.web.client.RestTemplate;

import javax.annotation.Resource;


@Component
public class DataDao {
    @Resource
    private RestTemplate restTemplate;
    @HystrixCommand(fallbackMethod = "dataFallback")
    public ResponseEntity<String> data(){
        //1 记录开始时间
        long start = System.currentTimeMillis();
        //2 调用
        String url = "http://service4/test";
        ResponseEntity<String> entity = restTemplate.getForEntity(url, String.class);
        //3 记录结束时间
        long end = System.currentTimeMillis();
        //4 统计耗时
        System.out.println("耗时时间:" + (end - start));
        return entity;
    }

    /**
     * 熔断器超时处理方法
     * @return
     */
    public ResponseEntity<String> dataFallback(){
        return ResponseEntity.ok("临时数据");
    }
}
(面试题)如果项目中同时使用熔断器和Ribbon重试机制,谁先执行?
-
如果时间不相同,超时时间小的,先执行。
-
如果时间相同,只执行熔断器
-
结论:如果两个都需要配置,重试机制的超时时间 小于 熔断器
下篇 学习 Spring Cloud----->(Feign(远程调用)+整合负载均衡Ribbon--熔断器Hystrix)
关于使用 Spring Cloud Hysterix 重试和springcloud重试机制的介绍现已完结,谢谢您的耐心阅读,如果想了解更多关于(二十九) 跟我学习SpringCloud-Spring Cloud Hystrix的实时监控功能、(二十八) 跟我学习SpringCloud-Spring Cloud Feign整合Hystrix实现容错处理、Spring Cloud - Hystrix、Spring Cloud ----->(负载均衡策略+重试机制+Hystrix 熔断器)的相关知识,请在本站寻找。
本文标签:


