本文将介绍基于mybatisbatch实现批量提交大量数据的详细情况,特别是关于mybatis批量处理数据的相关信息。我们将通过案例分析、数据研究等多种方式,帮助您更全面地了解这个主题,同时也将涉及一
本文将介绍基于mybatis batch实现批量提交大量数据的详细情况,特别是关于mybatis批量处理数据的相关信息。我们将通过案例分析、数据研究等多种方式,帮助您更全面地了解这个主题,同时也将涉及一些关于day63( MYBATIS框架基础1:关于Mybatis框架,创建Mybatis-Spring工程,配置开发环境,基本使用,删除与修改数据)、ibatis和mybatis中的BatchExecutor、java-mybaits-015-mybatis逆向工程最佳实践【基础mybatis-generator、tk.mybatis、mubatis-plus】、Java通过Mybatis实现批量插入数据到Oracle中的知识。
本文目录一览:- 基于mybatis batch实现批量提交大量数据(mybatis批量处理数据)
- day63( MYBATIS框架基础1:关于Mybatis框架,创建Mybatis-Spring工程,配置开发环境,基本使用,删除与修改数据)
- ibatis和mybatis中的BatchExecutor
- java-mybaits-015-mybatis逆向工程最佳实践【基础mybatis-generator、tk.mybatis、mubatis-plus】
- Java通过Mybatis实现批量插入数据到Oracle中
")
基于mybatis batch实现批量提交大量数据(mybatis批量处理数据)
这篇文章主要介绍了基于mybatis batch实现批量提交大量数据,文中通过示例代码介绍的非常详细,对大家的学习或者工作具有一定的参考学习价值,需要的朋友可以参考下
很多人在用 MyBatis 或者 通用 Mapper 时,经常会问有没有批量插入和批量更新的方法。
实际上许多时候没必要用 去实现特别复杂的批量操作。直接通过 MyBatis 的 BATCH 方式执行增删改方法即可。
下面是一个批量用法的例子:
在xml文件配置多条参数同时插入:
select SEQ_CTAS_SHARK_FLT.nextval as recId from dual insert into CTAS_SHARK_FLT () SELECT SEQ_TEST.NEXTVAL, A.* FROM ( select #{item.awbType,jdbcType=VARCHAR}, #{item.awbPre,jdbcType=VARCHAR},... from dual ) A
在Java代码中,oracle中一次执行的sql语句长度是有限制的,如果最后拼出来的sql字符串过长,会导致执行失败,所以java端还要做一个分段处理,参考下面的处理:
List data = new ArrayList(); for (TSharkFlt f : sharkFlts) { data.add(getSharkFlt(f)); } System.out.println(data.size()); long beginTime = System.currentTimeMillis(); System.out.println("开始插入..."); sqlSessionFactory sqlSessionFactory =ctx.getBean(sqlSessionFactory.class); sqlSession session = null; try { session = sqlSessionFactory.openSession(ExecutorType.BATCH, false); int a = 2000;//每次提交2000条 int loop = (int) Math.ceil(data.size() / (double) a); List tempList = new ArrayList(a); int start, stop; for (int i = 0; i
以上就是本文的全部内容,希望对大家的学习有所帮助,也希望大家多多支持小编。
")
day63( MYBATIS框架基础1:关于Mybatis框架,创建Mybatis-Spring工程,配置开发环境,基本使用,删除与修改数据)
day63( MYBATIS框架基础1:关于Mybatis框架,创建Mybatis-Spring工程,配置开发环境,基本使用,删除与修改数据)
1.关于Mybatis框架
1.概念:
Mybatis的主要作用是快速实现对关系型数据库中的数据进行访问的框架
在原生的Java技术中,需要使用JDBC实现对数据库中的数据访问,执行过程繁琐且相对固定,使用框架可以有效的提高开发效率
2.创建Mybatis-Spring工程
前提: Mybatis可以不依赖于Spring等框架直接使用的,但是,就需要进行大量的配置,前期配置工作量较大,基于Spring框架目前是业内使用的标准之一,所以,通常会整合Spring与Mybatis,以减少配置
在创建工程时,创建普通的Maven工程即可(不需要选择特定的骨架)
1. 在pom.xml中添加几个依赖项
   <dependencies>
        <!--        Mybatis的依赖项:mybatis-->
        <dependency>
            <groupId>org.mybatis</groupId>
            <artifactId>mybatis</artifactId>
            <version>3.5.6</version>
        </dependency>
        <!--        Mybatis整合Spring的依赖项:mybatis-spring-->
        <dependency>
            <groupId>org.mybatis</groupId>
            <artifactId>mybatis-spring</artifactId>
            <version>2.0.6</version>
        </dependency>
        <!--        Spring的依赖项:spring-context-->
        <dependency>
            <groupId>org.springframework</groupId>
            <artifactId>spring-context</artifactId>
            <version>5.3.14</version>
        </dependency>
        <!--        Spring JDBC的依赖项:spring-jdbc-->
        <dependency>
            <groupId>org.springframework</groupId>
            <artifactId>spring-jdbc</artifactId>
            <version>5.3.14</version>
        </dependency>
        <!--        MysqL连接的依赖项:mysql-connector-java-->
        <dependency>
            <groupId>MysqL</groupId>
            <artifactId>mysql-connector-java</artifactId>
            <version>8.0.21</version>
        </dependency>
        <!--         数据库连接池的依赖项:commons-dbcp2-->
        <dependency>
            <groupId>org.apache.commons</groupId>
            <artifactId>commons-dbcp2</artifactId>
            <version>2.8.0</version>
        </dependency>
        <!--        JUnit测试的依赖项:junit-jupiter-api-->
        <dependency>
            <groupId>org.junit.jupiter</groupId>
            <artifactId>junit-jupiter-api</artifactId>
            <version>5.8.2</version>
            <scope>test</scope>
        </dependency>
    </dependencies>
2.创建测试类
可以在src/test/java下创建测试类,并编写测试方法,例如:
package cn.tedu.mybatis;
import org.junit.jupiter.api.Test;
public class MybatisTests {
@Test
public void contextLoads() {
System.out.println("MybatisTests.contextLoads()");
}
}
由于目前尚未编写实质的代码,以上测试代码也非常简单,应该是可以成功通过测试的,如果不能通过测试,必然是开发工具、开发环境、依赖项、项目创建步骤等问题
3.配置Mybatis的开发环境
1.创建数据库
登录MysqL控制台,创建名为mall_ams的数据库:
CREATE DATABASE mall_ams;
2.在IntelliJ IDEA中配置数据库视图:
http://doc.canglaoshi.org/doc/idea_database/index.html
通过数据库视图的Console面板创建数据表:
create table ams_admin (
id bigint unsigned auto_increment,
username varchar(50) default null unique comment '用户名',
password char(64) default null comment '密码(密文)',
nickname varchar(50) default null comment '昵称',
avatar varchar(255) default null comment '头像URL',
phone varchar(50) default null unique comment '手机号码',
email varchar(50) default null unique comment '电子邮箱',
description varchar(255) default null comment '描述',
is_enable tinyint unsigned default 0 comment '是否启用,1=启用,0=未启用',
last_login_ip varchar(50) default null comment '最后登录IP地址(冗余)',
login_count int unsigned default 0 comment '累计登录次数(冗余)',
gmt_last_login datetime default null comment '最后登录时间(冗余)',
gmt_create datetime default null comment '数据创建时间',
gmt_modified datetime default null comment '数据最后修改时间',
primary key (id)
) comment '管理员' charset utf8mb4;
3.创建datasource.properties配置文件
在src/main/resources下创建datasource.properties配置文件,用于配置连接数据库的参数,例如:
datasource.url=jdbc:MysqL://localhost:3306/mall_ams?useUnicode=true&characterEncoding=UTF-8&serverTimezone=Asia/Shanghai
datasource.driver=com.MysqL.cj.jdbc.Driver
datasource.username=root
datasource.password=root
提示:以上配置中的属性名称应该添加前缀,避免与系统环境变量冲突,例如在Windows操作系统中,username则表示登录系统的用户名
4.创建SpringConfig类
在cn.tedu.mybatis包下(不存在,则创建)创建SpringConfig类,读取以上配置文件:
@Configuration
@PropertySource("classpath:datasource.properties")
public class SpringConfig {
}
提示:@PropertySource是Spring框架的注解,用于读取properties类型的配置文件,读取到的值将存入到spring容器的Environment对象中
5. 测试方法中补充测试代码:
@Test
public void contextLoads() {
System.out.println("MybatisTests.contextLoads()");
AnnotationConfigApplicationContext ac
= new AnnotationConfigApplicationContext(SpringConfig.class);ConfigurableEnvironment environment = ac.getEnvironment();
System.out.println(environment.getProperty("datasource.url"));
System.out.println(environment.getProperty("datasource.driver"));
System.out.println(environment.getProperty("datasource.username"));System.out.println(environment.getProperty("datasource.password"));ac.close();
}
6. 在SpringConfig中配置一个DataSource对象:
@Configuration
@PropertySource("classpath:datasource.properties")
public class SpringConfig {
@Bean
public DataSource dataSource(Environment env) {
BasicDataSource dataSource = new BasicDataSource();
dataSource.setUrl(env.getProperty("datasource.url"));
dataSource.setDriverClassName(env.getProperty("datasource.driver"));dataSource.setUsername(env.getProperty("datasource.username"));dataSource.setPassword(env.getProperty("datasource.password"));return dataSource;
}
}
7.测试方法中补充测试代码:
@Test
public void testConnection() throws Exception {
AnnotationConfigApplicationContext ac
= new AnnotationConfigApplicationContext(SpringConfig.class);DataSource dataSource = ac.getBean("dataSource"
, DataSource.class);Connection connection = dataSource.getConnection();
System.out.println(connection);
ac.close();
}
4.Mybatis的基本使用
1.作用:
当使用Mybatis实现数据访问时,主要:
编写数据访问的抽象方法
配置抽象方法对应的sql语句
2. 关于抽象方法:
必须定义在某个接口中,这样的接口通常使用Mapper作为名称的后缀,例如AdminMapper
Mybatis框架底层将通过接口代理模式来实现
方法的返回值类型:
如果要执行的数据操作是增、删、改类型的,统一使用int作为返回值类型,表示“受影响的行数” ,也可以使用void,但是不推荐
如果要执行的是查询操作,返回值类型只需要能够装载所需的数据即可
方法的名称:自定义,不要重载,建议风格如下:
插入数据使用insert作为方法名称中的前缀或关键字
删除数据使用delete作为方法名称中的前缀或关键字
更新数据使用update作为方法名称中的前缀或关键字
查询数据时:
如果是统计,使用count作为方法名称中的前缀或关键字
如果是单个数据,使用get或find作为方法名称中的前缀或关键字
如果是列表,使用list作为方法名称中的前缀或关键字
如果操作数据时有条件,可在以上前缀或关键字右侧添加by字段名,例如deleteById
方法的参数列表:取决于需要执行的sql语句中有哪些参数,如果有多个参数,可将这些参数封装到同一个类型中,使用封装的类型作为方法的参数类型
例如:假设当需要实现“插入一条管理员数据”,则需要执行的sql语句大致是
insert into ams_admin (username, password, nickname, avatar,phone,email, description, is_enable, last_login_ip, login_count,
gmt_last_login, gmt_create, gmt_modified) values (?,?,? ... ?);
由于以上sql语句中的参数数量较多,则应该将它们封装起来,则在cn.tedu.mybatis包下创建Admin类,声明一系列的属性,对应以上各参数值:
package cn.tedu.mybatis;
import java.time.LocalDateTime;
public class Admin {
private String username; private String password;
private String nickname; private String avatar;
private String phone; private String email;
private String description; private Integer isEnable;
private String lastLoginIp; private Integer loginCount;
private LocalDateTime gmtLastLogin; private LocalDateTime gmtCreate;
private LocalDateTime gmtModified;
// Setters & Getters // toString()
}
在cn.tedu.mybatis包下创建mapper.AdminMapper接口,并在接口中添加“插入1条管理员数据”的抽象方法:
package cn.tedu.mybatis.mapper;
import cn.tedu.mybatis.Admin;
public interface AdminMapper {
int insert(Admin admin);
}
所有用于Mybatis处理数据的接口都必须被Mybatis识别,有2种做法
在每个接口上添加@Mapper注解
【推荐】在配置类上添加@MapperScan注解,指定接口所在的根包
例如,在SpringConfig上添加配置@MapperScan:
@Configuration
@PropertySource("classpath:datasource.properties")
@MapperScan("cn.tedu.mybatis.mapper")
public class SpringConfig {
// ... ...
}
注意:因为Mybatis会扫描以上配置的包,并自动生成包中各接口中的代理对象,所以,千万不要放其它接口文件
接下来,需要配置抽象方法对应的sql语句,这些sql语句推荐配置在XML文件中
可以从 http://doc.canglaoshi.org/config/Mapper.xml.zip下载到XML文件。在项目的src/main/resources下创建mapper文件夹,并将下载得到的XML文件复制到此文件夹中,重命名为AdminMapper.xml。
打开XML文件夹,进行配置
<?xml version="1.0" encoding="UTF-8" ?>
<!DOCTYPE mapper
PUBLIC "-//mybatis.org//DTD Mapper 3.0//EN"
"http://mybatis.org/dtd/mybatis-3-mapper.dtd">
<!-- 根节点必须是mapper -->
<!-- 根节点的namespace属性用于配置此XML对应哪个接口 -->
<mapper namespace="cn.tedu.mybatis.mapper.AdminMapper">
<!-- 根据需要执行的sql语句的种类选择需要配置的节点名称-->
<!-- 配置sql的节点的id属性取值为抽象方法名称 -->
<!-- 在节点内部配置sql语句 -->
<!-- sql语句中的参数值使用 #{} 格式的占位符表示 -->
<insert id="insert">
insert into ams_admin (
username, password, nickname, avatar,
phone, email, description, is_enable,
last_login_ip, login_count, gmt_last_login, gmt_create,
gmt_modified
) values (
#{username}, #{password}, #{nickname}, #{avatar},
#{phone}, #{email}, #{description}, #{isEnable},
#{lastLoginIp}, #{loginCount}, #{gmtLastLogin}, #{gmtCreate},#{gmtModified}
)
</insert>
</mapper>
最后,还需要将DataSource配置给Mybatis框架,并且,为Mybatis配置这些XML文件的路径,这2项配置都将通过配置sqlSessionfactorybean来完成
先在datasource.properties中补充一条配置:
mybatis.mapper-locations=classpath:mapper/AdminMapper.xml
在配置类中创建sqlSessionfactorybean类型的对象:
@Bean
public sqlSessionfactorybean sqlSessionfactorybean(DataSource dataSource,@Value("${mybatis.mapper-locations}") Resource mapperLocations){sqlSessionfactorybean sqlSessionfactorybean = new sqlSessionfactorybean();sqlSessionfactorybean.setDataSource(dataSource);
sqlSessionfactorybean.setMapperLocations(mapperLocations);
return sqlSessionfactorybean;
}
在测试类中补充测试方法,以检验是否可以通过调用AdminMapper的insert()方法插入数据:
@Test
public void testInsert() {
AnnotationConfigApplicationContext ac
= new AnnotationConfigApplicationContext(SpringConfig.class);AdminMapper adminMapper = ac.getBean(AdminMapper.class);
Admin admin = new Admin();
admin.setUsername("admin001");
admin.setPassword("12345678");
adminMapper.insert(admin);
ac.close();
}
如果某数据的id是自动编号,当需要获取新增的数据的id时,需要先使得插入的数据类型中有id对应的属性,则在Admin类中添加id属性:
public class Admin {
private Long id;
// 原有其它属性及Setter & Getter
// 补充id的Setter & Getter
// 重新生成toString()
}
接下来,在节点配置2个属性,分别是useGeneratedKeys和keyProperty:
<insert id="insert" useGeneratedKeys="true" keyProperty="id">原有代码
</insert>
当配置完成后,Mybatis执行此插入数据的操作后,会将自动编号的id赋值到参数Admin admin的id属性中,以上keyProperty指的就是将自动编号的值放回到参数对象的哪个属性中!
5.删除与修改数据
1.目标(根据id删除某一条数据 )
根据id删除某一条数据
2.执行
sql
delete from ams_admin where id=?
在AdminMapper接口中添加抽象方法:
int deleteById(Long id);
在AdminMapper.xml中配置以上抽象方法映射的sql语句:
<delete id="deleteById">
delete from ams_admin where id=#{id}
</delete>
编写并执行测试:
@Test
public void testDeleteById() {
AnnotationConfigApplicationContext ac
= new AnnotationConfigApplicationContext(SpringConfig.class);
AdminMapper adminMapper = ac.getBean(AdminMapper.class);
Long id = 12L;
int rows = adminMapper.deleteById(id);
// System.out.println("删除完成,受影响的行数=" + rows);
if (rows == 1) {
System.out.println("删除成功");
} else {
System.out.println("删除失败,尝试删除的数据(id=" + id + ")不存在!");
}
ac.close();
}
3.目标(根据 id修改某一条数据 )
4.执行
sql
update ams_admin set password=? where id=?
在AdminMapper接口中添加抽象方法:
int updatePasswordById(@Param("id") Long id,
@Param("password") String password);
提示:在默认情况下,当Java程序源代码(.java文件)经过编译后,所有局部的量的名称都会丢失,为使得配置sql语句时可根据指定的名称使用方法中的参数值,需要在方法的各参数前添加@Param以指定名称
如果方法的参数只有1个,则可以不使用@Param指定名称,因为Mybatis可以直接找到此参数的值
在AdminMapper.xml中配置以上抽象方法映射的sql语句:
<update id="updatePasswordById">
update ams_admin set password=#{password} where id=#{id}</update>
提示:以上占位符中的名称是通过@Param注解指定的名称,而不是抽象方法的参数名称
编写并执行测试:
@Test
public void testUpdatePasswordById() {
AnnotationConfigApplicationContext ac
= new AnnotationConfigApplicationContext(SpringConfig.class);
AdminMapper adminMapper = ac.getBean(AdminMapper.class);
Long id = 12L;
String password = "000000";
int rows = adminMapper.updatePasswordById(id, password);
if (rows == 1) {
System.out.println("修改密码成功");
} else {
System.out.println("修改密码失败,尝试访问的数据(id=" + id + ")不存在!");
}
ac.close();
}

ibatis和mybatis中的BatchExecutor
ibatis中的的处理方法
首先在你的dao中需要继承org.springframework.orm.ibatis.support.SqlMapClientDaoSupport
然后在代码中调用getSqlMapClientTemplate方法, 获取SqlMapClientTemplate对象,然后做处理
if (null == records || records.size() == 0) {
return;
}
// 执行回调
SqlMapClientTemplate sqlMapClientTemplate = iBatisDaoLS13.getSqlMapClientTemplate();
sqlMapClientTemplate.execute(new SqlMapClientCallback() {
// 实现回调接口
public Object doInSqlMapClient(SqlMapExecutor executor) throws SQLException {
// 开始批处理, for循环里面的sql必须一致,否则会创建新的PreparedStatement
executor.startBatch();
for (Info info : records) {
executor.insert(NAMESPACE + "insertAInfo", info);
}
// 执行批处理
executor.executeBatch();
return null;
}
});
}
mybatis中的的处理方法
@Test
public void testJDBCBatch() throws SQLException {
String sql = "insert into t_user(name, mobile, email) values(?,?,?)";
try (Connection conn = dataSource.getConnection(); PreparedStatement pstmt = conn.prepareStatement(sql);) {
List<User> users = this.getUsers();
for (User user : users) {
pstmt.setString(1, user.getName());
pstmt.setString(2, user.getMobile());
pstmt.setString(3, user.getEmail());
pstmt.addBatch();
}
pstmt.executeBatch();
conn.commit();
}
}
在每一次调用的时候是调用Statement.addBatch()方法,最终所有的参数都传递完了,没有更多的参数时调用Statement.executeBatch()方法进行批量操作。在上一篇博文中我们查看了BatchExecutor的源码,它的核心代码doUpdate()方法,每次被调用的时候都是以handler.batch()结束,而handler.batch()对应的底层代码是调用对应的Statement的addBatch()方法。那它是在什么时候执行executeBatch()呢?
@Override
public int doUpdate(MappedStatement ms, Object parameterObject) throws SQLException {
final Configuration configuration = ms.getConfiguration();
final StatementHandler handler = configuration.newStatementHandler(this, ms, parameterObject, RowBounds.DEFAULT, null, null);
final BoundSql boundSql = handler.getBoundSql();
final String sql = boundSql.getSql();
final Statement stmt;
if (sql.equals(currentSql) && ms.equals(currentStatement)) {
intlast = statementList.size() - 1;
stmt = statementList.get(last);
handler.parameterize(stmt);//fix Issues 322
BatchResult batchResult = batchResultList.get(last);
batchResult.addParameterObject(parameterObject);
} else {
Connection connection = getConnection(ms.getStatementLog());
stmt = handler.prepare(connection);
handler.parameterize(stmt); //fix Issues 322
currentSql = sql;
currentStatement = ms;
statementList.add(stmt);
batchResultList.add(new BatchResult(ms, sql, parameterObject));
}
// handler.parameterize(stmt);
handler.batch(stmt);
return BATCH_UPDATE_RETURN_VALUE;
}
它的executeBatch()是在doFlushStatements()方法调用中调用的,它会在当前Executor进行commit时调用,也会在当前Executor第一次执行doQuery()时调用,在这个时候都会调用Executor的flushStatements()方法,而BaseExecutor在执行flushStatements()时最终会调用其doFlushStatements()方法。当然,我们也可以手动的调用SqlSession的flushStatements()方法,其底层实现也会调用对应的BaseExecutor的flushStatements()方法。
@Override
public List<BatchResult> doFlushStatements(boolean isRollback) throws SQLException {
try {
List<BatchResult> results = new ArrayList<BatchResult>();
if (isRollback) {
return Collections.emptyList();
}
for (int i = 0, n = statementList.size(); i < n; i++) {
Statement stmt = statementList.get(i);
BatchResult batchResult = batchResultList.get(i);
try {
batchResult.setUpdateCounts(stmt.executeBatch());
MappedStatement ms = batchResult.getMappedStatement();
List<Object> parameterObjects = batchResult.getParameterObjects();
KeyGenerator keyGenerator = ms.getKeyGenerator();
if (Jdbc3KeyGenerator.class.equals(keyGenerator.getClass())) {
Jdbc3KeyGenerator jdbc3KeyGenerator = (Jdbc3KeyGenerator) keyGenerator;
jdbc3KeyGenerator.processBatch(ms, stmt, parameterObjects);
} else if (!NoKeyGenerator.class.equals(keyGenerator.getClass())) { //issue #141
for (Object parameter : parameterObjects) {
keyGenerator.processAfter(this, ms, stmt, parameter);
}
}
} catch (BatchUpdateException e) {
StringBuilder message = new StringBuilder();
message.append(batchResult.getMappedStatement().getId())
.append(" (batch index #")
.append(i + 1)
.append(")")
.append(" failed.");
if (i > 0) {
message.append(" ")
.append(i)
.append(" prior sub executor(s) completed successfully, but will be rolled back.");
}
throw new BatchExecutorException(message.toString(), e, results, batchResult);
}
results.add(batchResult);
}
return results;
} finally {
for (Statement stmt : statementList) {
closeStatement(stmt);
}
currentSql = null;
statementList.clear();
batchResultList.clear();
}
}
下面是一个使用Mybatis的BatchExecutor进行批量操作的示例。在示例中我们创建了一个使用BatchExecutor的SqlSession,也可以是SqlSessionTemplate,其实现了SqlSession接口,底层通过一个SqlSession代理进行相应的操作。然后在循环中一次调用对应Mapper的新增操作,相当于调用BatchExecutor的doUpdate(),最后调用SqlSession的commit()方法提交事务,在SqlSession的commit()中会调用Executor的commit(),从而导致了executeBatch()的发生。
@Test
public void testExecutor() {
SqlSession session = this.sessionFactory.openSession(ExecutorType.BATCH);
UserMapper mapper = session.getMapper(UserMapper.class);
User user = null;
for (inti = 0; i < 10; i++) {
user = new User();
user.setName("Name_" + i);
user.setEmail("email");
mapper.insert(user);
}
// 批量插入User
session.commit();// 提交事务时批量操作才会写入数据库
session.close();
}

java-mybaits-015-mybatis逆向工程最佳实践【基础mybatis-generator、tk.mybatis、mubatis-plus】
一、概述
三款框架的功能对比
|
|
Mybatis-generator |
通用Mapper |
Mybatis-Plus |
| 代码生成器 |
支持自动生成Model,Mapper,Mapper XML文件 生成方式不够灵活; 生成代码功能较为简单 |
支持自动生成Entity,Mapper,Mapper XML文件; 提供通用的Mapper模板,生成方式较灵活; 生成的Model文件包含注释能够很好地与数据库表完成映射 |
支持自动生成Entity,Mapper,Mapper XML,Service,Controller文件; 提供BaseMapper接口 |
| CRUD操作 |
代码生成后每个Mapper有固定的CRUD方法; 在每个Mapper上分别扩展 |
提供通用Mapper接口;方便构造统一service 可以扩展通用接口 |
提供BaseMapper接口; 可以扩展通用接口 |
| 条件构造器 |
每个实体类自己的Example构造条件【对象方式】 |
提供通用Example【构建sql】 |
提供Wrapper进行复杂条件构造 |
| 乐观锁 |
|
支持 |
支持 |
| 主键策略 |
|
支持 |
支持 |
| 分页 |
|
|
支持 |
| 逻辑删除 |
|
|
支持 |
| 通用枚举 |
|
|
支持 |
| 攻击Sql阻断 |
|
|
支持 |
| 性能分析 |
|
|
支持 |
通用Mapper是对Mybatis-generator的升级改造,解决了使用Mybatis-generator可能需要大量重构的问题,并且在这个基础上加入了一些新的功能。
Mybatis-Plus可以看作是在另一个方向上对Mybatis的升级改造,不仅能够根据数据库表快速生成pojo实体类,还封装了大量CRUD方法,使用Wrapper解决了复杂条件构造等问题,更是根据开发中常见的问题给出了一系列解决方案。
在拥有Maven和Spring boot的开发框架下,MBG、通用Mapper和MP都可以快速地完成安装,相比于MBG和通用Mapper仅需要执行插件就可以完成基本的开发工作,MP可能需要更多的开发工作量。
最佳实践参看代码:https://github.com/bjlhx15/java_base_architecture.git
二、Mybatis-generator
MyBatis Generator(MBG)是MyBatis MyBatis 和iBATIS的代码生成器。它为所有版本的MyBatis以及版本2.2.0之后的iBATIS版本生成代码。它将根据数据库表生成可用于访问表的文件。
Mybatis-generator主要完成的工作是依据数据库表创建对应的model、dao、mapping文件,可以通过Maven插件或者mybatis-generator的jar包生成。
这里介绍Maven插件使用方法:
1、在pom.xml文件中加入mybatis-generator系列插件;
2、创建generatorConfig.xml文件,在配置文件中指定数据库连接地址、生成类的存放地址、生成对应表的类名等信息;
3、执行mybatis-generator插件,即可生成相应文件;
4、此外,mybatis-generator自动生成了example类用于构造复杂的筛选条件
Mybatis-generator使用较为简单,生成的DAO类及映射文件中包含基本的CRUD操作。
需要注意的是,在一次项目中多次执行mybatis-generator,xml文件会追加,会覆盖原本的Model、DAO;可以使用如下方式
1、每次清理要生成的xml
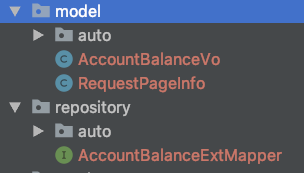
2、自动生成的写入auto,
3、个人扩展的使用上图方式
可以参看上述github代码
三、通用Mapper【tk.mybatis】
官网:https://github.com/abel533/Mapper/wiki
当数据库字段变化频繁时,使用MBG(mybatis-generator)会带来大量的重构工作,对此,通用Mapper给出的解决办法是:给予开发者一个具备丰富的单表方法并且容易扩展的通用的Mapper。
通用Mapper是对单表的CRUD操作进行了较为详细的实现,使得开发人员可以随意的按照自己的需求选择通用的方法,同时允许开发人员便捷地对通用Mapper进行扩展。
1. 在pom.xml中添加插件配置


<!-- 命令:mvn mybatis-generator:generate -->
            <plugin>
                <groupId>org.mybatis.generator</groupId>
                <artifactId>mybatis-generator-maven-plugin</artifactId>
                <version>1.3.6</version>
                <configuration>
                    <!-- 配置实际调用地址-->
                    <configurationFile>src/main/resources/mybatis_generatorConfig/generatorConfig-base.xml
                    </configurationFile>
                    <verbose>true</verbose>
                    <overwrite>true</overwrite>
                </configuration>
                <dependencies>
                    <dependency>
                        <groupId>mysql</groupId>
                        <artifactId>mysql-connector-java</artifactId>
                        <version>5.1.38</version>
                    </dependency>
                    <dependency>
                        <groupId>tk.mybatis</groupId>
                        <artifactId>mapper</artifactId>
                        <version>4.0.0</version>
                    </dependency>
                </dependencies>
</plugin>可以看到,通用Mapper的代码生成实际上是使用了MGB,因此通用Mapper的代码生成器只是调用了MGB,然后在这个基础上加入了一些元素来方便开发。
2. 配置文件generatorConfig.xml


<?xml version="1.0" encoding="UTF-8" ?>
<!DOCTYPE generatorConfiguration PUBLIC
        "-//mybatis.org//DTD MyBatis Generator Configuration 1.0//EN"
        "http://mybatis.org/dtd/mybatis-generator-config_1_0.dtd" >
<generatorConfiguration>
    <!--导入属性配置,前面我们写的一个配置文件,你也可以直接使用mybatis的jdbc的配置文件 -->
    <properties resource="jdbc.properties"></properties>
    <!-- 数据库驱动,注意,这里必须要修改成你的数据库的驱动地址 -->
    <!--    如果 pom配置这里可以不写-->
    <!--    <classPathEntry  location=".m2/repository/mysql/mysql-connector-java/5.1.8/mysql-connector-java-5.1.8.jar"/>-->

    <context id="Mysql" targetRuntime="MyBatis3Simple" defaultModelType="flat">
        <property name="beginningDelimiter" value="`"/>
        <property name="endingDelimiter" value="`"/>
        <plugin type="tk.mybatis.mapper.generator.MapperPlugin">
            <property name="mappers" value="tk.mybatis.mapper.common.Mapper"/>
            <property name="caseSensitive" value="true"/>
        </plugin>

        <!--数据库连接的信息:驱动类、连接地址、用户名、密码 -->
        <jdbcConnection driverClass="${jdbc.driver}"
                        connectionURL="${jdbc.url}"
                        userId="${jdbc.username}" password="${jdbc.password}">
        </jdbcConnection>

<!--        <javaTypeResolver>-->
<!--            <property name="forceBigDecimals" value="false"/>-->
<!--        </javaTypeResolver>-->
        <!-- targetProject:生成PO类的位置 -->
        <javaModelGenerator targetPackage="com.github.bjlhx15.mybatis.springboot.base.model.auto"
                            targetProject="../tk-mybatis-springboot-base1/src/main/java">
            <!-- enableSubPackages:是否让schema作为包的后缀 -->
            <property name="enableSubPackages" value="false"/>
            <!-- 从数据库返回的值被清理前后的空格 -->
            <property name="trimStrings" value="true"/>
        </javaModelGenerator>

        <!-- targetProject:mapper xml 映射文件生成的位置 -->
        <sqlMapGenerator targetPackage="autoxml"
                         targetProject="../tk-mybatis-springboot-base1/src/main/resources/mapper/">
            <!-- enableSubPackages:是否让schema作为包的后缀 -->
            <property name="enableSubPackages" value="false"/>
        </sqlMapGenerator>

        <!--targetPackage:mapper接口生成的位置 -->
        <javaClientGenerator type="XMLMAPPER"
                             targetPackage="com.github.bjlhx15.mybatis.springboot.base.repository.auto"
                             targetProject="../tk-mybatis-springboot-base1/src/main/java">
            <!-- enableSubPackages:是否让schema作为包的后缀 -->
            <property name="enableSubPackages" value="false"/>
        </javaClientGenerator>

        <!-- 指定数据库表 -->
        <table tableName="accountbalance" domainObjectName="AccountBalance">
            <generatedKey column="id" sqlStatement="JDBC"/>
        </table>


    </context>
</generatorConfiguration>与MGB原有的配置文件相比,这里只是多了一个插件的配置,这个插件的作用是:配置生成的Mapper接口都会自动继承这个接口,也就是说,使用通用Mapper生成的mapper接口即使看上去空空如也,但已经具备了大量的对数据库的操作方法。此外,通用 Mapper 专用代码生成器生成的 Model 会在原有基础上增加 @Table,@Id,@Column 等注解,方便自动与数据库字段进行映射。
3. 在 pom.xml 这一级目录的命令行窗口执行 mvn mybatis-generator:generate或者直接在执行mvn插件即可。
4. 通用Mapper同样有Example的设计,与MGB不同的是,MDB会对每一个表生成对应的Example类,而通用Mapper提供了一个统一的Example类,这个类和 MBG 生成的相比,需要自己设置属性名,这个类还额外提供了更多的方法。
通用Mapper可以看作是MGB的改进和扩展,一定程度上解决了使用MGB重构的问题。
可以参看上述github代码
四、Mybatis-Plus
官网地址:https://mp.baomidou.com/guide/generator.html
(以下简称MP)是Mybatis的增强工具(MBG和通用Mapper可看成插件),在Mybatis的基础上增加了很多功能,简化开发,提高效率。
在Spring Boot中的引入:
1. 在maven中添加MP启动器
<dependency>
    <groupId>com.baomidou</groupId>
    <artifactId>mybatis-plus-boot-starter</artifactId>
    <version>3.1.2</version>
</dependency>
2. 要使用代码生成器还需要添加模板引擎依赖
参看地址:AutoGenerator的使用参考 https://mybatis.plus/guide/generator.html 。
添加 模板引擎 依赖,MyBatis-Plus 支持 Velocity(默认)、Freemarker、Beetl,用户可以选择自己熟悉的模板引擎,如果都不满足您的要求,可以采用自定义模板引擎。
Velocity(默认):
<dependency>
    <groupId>org.apache.velocity</groupId>
    <artifactId>velocity-engine-core</artifactId>
    <version>2.1</version>
</dependency>
Freemarker:
<dependency>
    <groupId>org.freemarker</groupId>
    <artifactId>freemarker</artifactId>
    <version>2.3.29</version>
</dependency>
Beetl:
<dependency>
    <groupId>com.ibeetl</groupId>
    <artifactId>beetl</artifactId>
    <version>3.0.11.RELEASE</version>
</dependency>
注意!如果您选择了非默认引擎,需要在 AutoGenerator 中 设置模板引擎。


AutoGenerator generator = new AutoGenerator();

// set freemarker engine
generator.setTemplateEngine(new FreemarkerTemplateEngine());

// set beetl engine
generator.setTemplateEngine(new BeetlTemplateEngine());

// set custom engine (reference class is your custom engine class)
generator.setTemplateEngine(new CustomTemplateEngine());

// other config
...3、代码的自动生成。AutoGenerator是MP的代码生成器,通过调用AutoGenerator,进行相应的模板、策略配置可以快速生成Entity、Mapper、Mapper XML、Service、Controller各个模块的代码。
4. MP将通用的CRUD操作封装进BaseMapper接口,而自动生成的Mapper接口便自动继承了BaseMapper接口。复杂的Sql操作,则可以使用QueryWrapper(LambdaQueryWrapper) 和 UpdateWrapper(LambdaUpdateWrapper)进行动态Sql拼接。
5、此外,MP还支持分页、逻辑删除、通用枚举、Sql注入等功能,在:https://mp.baomidou.com/guide/generator.html
还有性能分析插件:https://mp.baomidou.com/guide/performance-analysis-plugin.html
与MBG不同,使用Mybatis-Plus自动生成代码需要编写代码,通过调用AutoAutoGenerator类实现代码生成,从这方面来说不如使用插件方便。但是它丰富的功能以及只是相对复杂的配置还是使它领先于MBG以及通用Mapper。
双方都

Java通过Mybatis实现批量插入数据到Oracle中
<?xml version="1.0" encoding="UTF-8" ?>
<!DOCTYPE mapper PUBLIC "-//mybatis.org//DTD Mapper 3.0//EN" "http://mybatis.org/dtd/mybatis-3-mapper.dtd">
<mapper namespace="com.oracle.mapper.AccountInfoMapper"><!--  接口的全类名 -->
    <!-- type:实体类的全类名 -->
    <resultMap id="BaseResultMap" type="com.oracle.entity.AccountInfo">
        <id column="ID" property="id" jdbcType="DECIMAL" />
        <result column="USERNAME" property="userName" jdbcType="VARCHAR" />
        <result column="PASSWORD" property="password" jdbcType="VARCHAR" />
        <result column="GENDER" property="gender" jdbcType="CHAR" />
        <result column="EMAIL" property="email" jdbcType="VARCHAR" />
        <result column="CREATE_DATE" property="createDate" jdbcType="DATE" />
    </resultMap>
    <!-- id 跟接口中的方法名称保持一致 -->
    <select id="queryAllAccountInfo" resultMap="BaseResultMap">
        select ID,
        USERNAME,PASSWORD,
        GENDER, EMAIL, CREATE_DATE from ACCOUNT_INFO
    </select>
    <insert id="batchInsertAccountInfo" parameterType="java.util.List">
        INSERT INTO ACCOUNT_INFO(ID, USERNAME,PASSWORD,GENDER, EMAIL,CREATE_DATE)
        (
        <foreach collection="list" index="" item="accountInfo"
            separator="union all">
            select
            #{accountInfo.id},
            #{accountInfo.userName},
            #{accountInfo.password},
            #{accountInfo.gender},
            #{accountInfo.email},
            #{accountInfo.createDate}
            from dual
        </foreach>
        )
    </insert>

    <insert id="batchInsertAccountInfoUseSeq" parameterType="java.util.List">
        <selectKey resultType="long" keyProperty="id" order="BEFORE">
            SELECT ACCOUNT_SEQ.NEXTVAL FROM dual
        </selectKey>
        INSERT INTO ACCOUNT_INFO(ID, USERNAME,PASSWORD,GENDER, EMAIL,CREATE_DATE)
        SELECT ACCOUNT_SEQ.NEXTVAL, m.* FROM(
        <foreach collection="list" index="" item="accountInfo"
            separator="union all">
            select
            #{accountInfo.userName},
            #{accountInfo.password},
            #{accountInfo.gender},
            #{accountInfo.email},
            sysdate
            from dual
        </foreach>
        ) m
    </insert>

    <insert id="insertOne" parameterType="com.oracle.entity.AccountInfo">
        <selectKey resultType="long" keyProperty="id" order="BEFORE">
            SELECT ACCOUNT_SEQ.NEXTVAL FROM dual
        </selectKey>
        INSERT INTO ACCOUNT_INFO(ID, USERNAME,PASSWORD,GENDER, EMAIL,CREATE_DATE)
        values(
            #{id},
            #{userName},
            #{password},
            #{gender},
            #{email},
            sysdate
        )
    </insert>
</mapper>
关于基于mybatis batch实现批量提交大量数据和mybatis批量处理数据的问题就给大家分享到这里,感谢你花时间阅读本站内容,更多关于day63( MYBATIS框架基础1:关于Mybatis框架,创建Mybatis-Spring工程,配置开发环境,基本使用,删除与修改数据)、ibatis和mybatis中的BatchExecutor、java-mybaits-015-mybatis逆向工程最佳实践【基础mybatis-generator、tk.mybatis、mubatis-plus】、Java通过Mybatis实现批量插入数据到Oracle中等相关知识的信息别忘了在本站进行查找喔。
本文标签:


