对于PforPHP,MforMySQLinLAMP,LearnTheirRolesinWebApp_MySQL感兴趣的读者,本文将提供您所需要的所有信息,并且为您提供关于11.1LAMP架构介绍11.
对于P for PHP, M for MySQL in LAMP, Learn Their Roles in Web App_MySQL感兴趣的读者,本文将提供您所需要的所有信息,并且为您提供关于11.1 LAMP 架构介绍 11.2 MySQL、MariaDB 介绍 11.3/11.4/11.5 MySQL 安装、ASP.NET Core / 5 Web API:HttpContext.User.Claims 不包含 Roles 声明、azure-web-roles – 部署Azure Web角色失败. value不能为null、CentOS 6.0 系统 LAMP(Apache+MySQL+PHP)安装步骤的宝贵知识。
本文目录一览:- P for PHP, M for MySQL in LAMP, Learn Their Roles in Web App_MySQL
- 11.1 LAMP 架构介绍 11.2 MySQL、MariaDB 介绍 11.3/11.4/11.5 MySQL 安装
- ASP.NET Core / 5 Web API:HttpContext.User.Claims 不包含 Roles 声明
- azure-web-roles – 部署Azure Web角色失败. value不能为null
- CentOS 6.0 系统 LAMP(Apache+MySQL+PHP)安装步骤

P for PHP, M for MySQL in LAMP, Learn Their Roles in Web App_MySQL
LAMP
understanding and installling the components of the lamp stack are the first steps to learning the role of linux, the apache server, mysql and php in developing web applications. to learn more, take themysql and php - developing dynamic web application training course.
You can take this 4-day, instructor-led course as a:
- Live-Virtual Event: Take this class from your own desk, no travel required. Choose from events already on the schedule to suit different time-zones. These events are delivered in English.
- In-Class Event: Travel to an education center to take this class, for example at
Location |
Date |
Delivery Location 立即学习“PHP免费学习笔记(深入)”; |
Rome, Italy |
29 September 2014 |
Italian |
Warsaw, Poland |
22 September 2014 |
Polish |
To register for an event, request an additional event, or learn more about the authentic MySQL curriculum, go tohttp://education.oracle.com/mysql.

11.1 LAMP 架构介绍 11.2 MySQL、MariaDB 介绍 11.3/11.4/11.5 MySQL 安装
11.1 LAMP 架构介绍

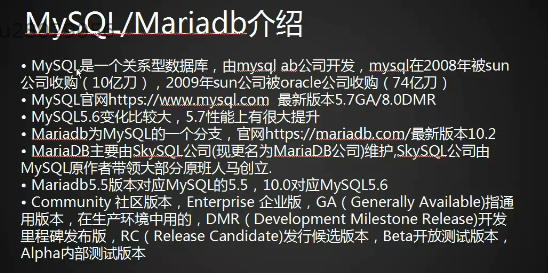
11.2 MySQL、MariaDB 介绍
11.3/11.4/11.5 MySQL 安装
MySQL 的几个常用安装包:rpm、源码、二进制免编译
cd /usr/local/src
wget http://mirrors.sohu.com/mysql/MySQL-5.6/mysql-5.6.35-linux-glibc2.5-x86_64.tar.gz
tar zxvf mysql-5.6.35-linux-glibc2.5-x86_64.tar.gz
mv mysql-5.6.36-linux-glibc2.5-x86_64 /usr/local/mysql
cd /usr/local/mysql
ls
useradd mysql
mkdir /data/
./scripts/mysql_install_db --user=mysql --datadir=/data/mysql
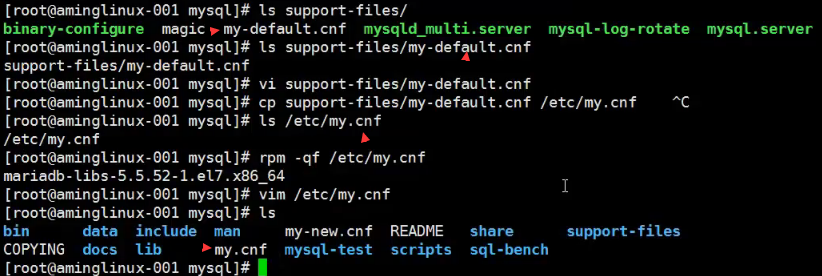
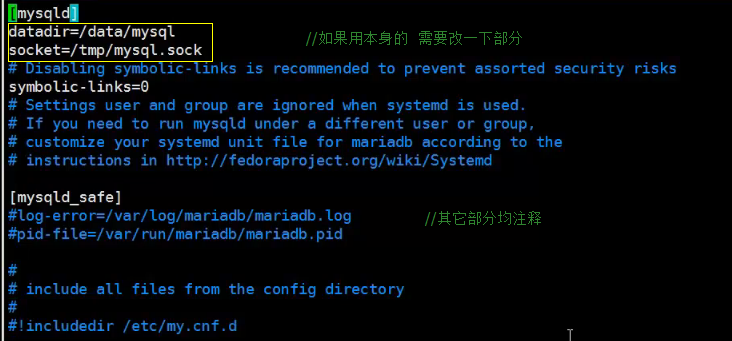
cp support-files/my-default.cnf /etc/my.cnf
datadir=/data/mysql
socket=/tmp/mysql.sock
cp support-files/mysql.server /etc/init.d/mysqld
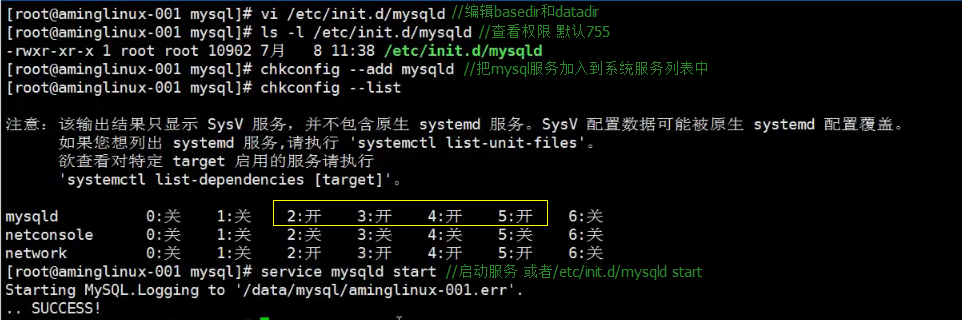
vi /etc/init.d/mysqld
定义basedir和datadir
basedir=/usr/local/mysql
datadir=/data/mysql
/etc/init.d/mysqld start
ps aux |grep mysql
[root@c-72 mysql]# chkconfig --add mysqld
[root@c-72 mysql]# chkconfig mysqld on
[root@c-72 mysql]# service mysqld stop
Shutting down MySQL.. SUCCESS!
[root@c-72 mysql]# service mysqld start
Starting MySQL. SUCCESS!
[root@c-72 mysql]#

尽量把所有源码包都安装在一个路径。安装大概需要耐心等待一下。
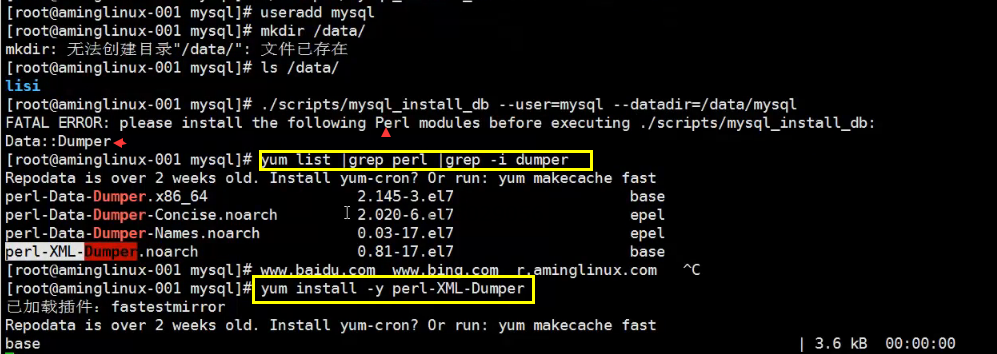


[root@c-72 mysql]# ./scripts/mysql_install_db --user=mysql --datadir=/data/mysql

Installing MySQL system tables..../bin/mysqld: error while loading shared libraries: libaio.so.1: cannot open shared object file: No such file or directory

[root@c-72 mysql]# yum install libaio* -y    //原因:缺少libaio库文件
两种方式验证下载是否正确
1. 看是否有两个 OK
- echo $? 看输出结果是否为 0 检验的是 上条命令
cp support-files/mysql.server /etc/init.d/mysqld

basedir=/usr/local/mysql
datadir=/data/mysql
ls -l /etc/init.d/mysqld
chkconfig --add mysqld
service mysqld start
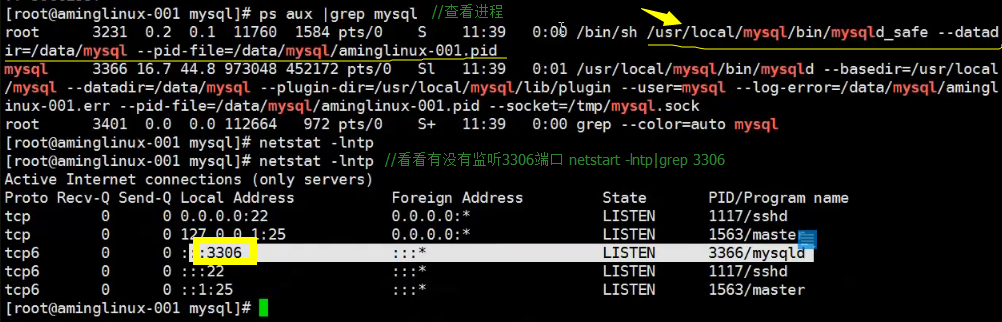
ps aux |grep mysql
netstat -lntp
假如没有办法把启动的脚本放在 /ect/init 或者说没有这样的启动脚本模板去拷贝,


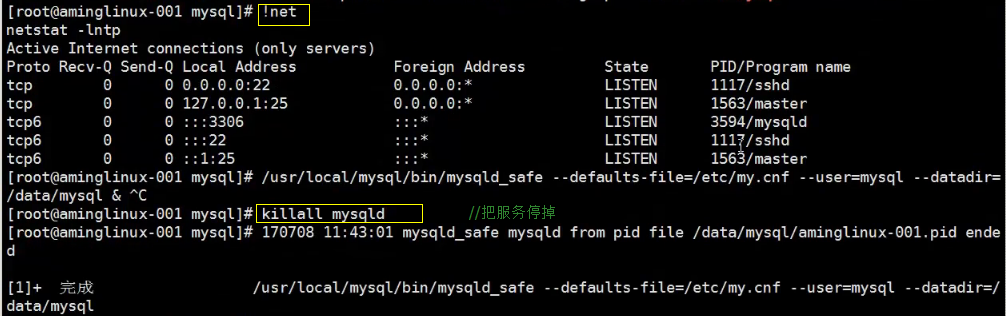
killall 先停止读写操作 尽量用 killall 慢慢等待
![]() 默认引擎
默认引擎
扩展
mysql5.5 源码编译安装 http://www.aminglinux.com/bbs/thread-1059-1-1.html
mysql5.7 二进制包安装(变化较大) http://www.apelearn.com/bbs/thread-10105-1-1.html

ASP.NET Core / 5 Web API:HttpContext.User.Claims 不包含 Roles 声明
如何解决ASP.NET Core / 5 Web API:HttpContext.User.Claims 不包含 Roles 声明
我想假设我对 ASP.Net Core/5 Web API 很陌生。 我的架构中有这种情况。
- 用户使用 Azure ActiveDirectory 通过 Web 客户端进行身份验证,他/她会收到一个 JWT 令牌,其中包含包括他/她的角色在内的多项信息。
如下图所示,在客户端级别,我可以读取 HttpContext.User.Claims 中的角色声明。

- 下一步:从 Web 客户端,我使用此方法调用 API

此时在 API 中,我想再次读取用户角色,但是当我解析 HttpContext.User.Claims 角色不再存在,即使名称等许多其他用户详细信息仍然存在。
也许我应该提一下,我使用 Microsoft Azure AD 文档中描述的过程保护了 API。 我按照此链接中描述的过程调用我的 API。 https://docs.microsoft.com/en-us/azure/active-directory/develop/scenario-web-app-call-api-call-api?tabs=aspnetcore#option-2-call-a-downstream-web-api-with-the-helper-class


azure-web-roles – 部署Azure Web角色失败. value不能为null
所有这些都已经多次出版过了,但是当我现在尝试发布其中任何一个时,我都失败了.反馈是:
Value cannot be null,Parameter name: s.
我认为这可能与微软的更新KB3211320有关,因为在此更新之前一切正常.不幸的是,它无法卸载并且系统还原失败.
Azure Webrole部署失败:

解决方法
It has already been identified as backend issue and Now I am working
with Product Team with highest severity to fix it.
他们也提供了一种解决方法:
As a temporary workaround,you can disable Diagnostic first and
redeploy again.
我个人不能禁用诊断,并且会在解决之前发布包,但如果您无法访问具有足够权限进行手动更新的门户网站,您可能会发现它很有用.
编辑:他们回滚了更改,现在它像以前一样工作.
安装步骤")
CentOS 6.0 系统 LAMP(Apache+MySQL+PHP)安装步骤
先来解释一下,什么是 LAMP。正如标题所言,LAMP 实际上就是 Linux、Apache、MysqL、PHP 四个名称的缩写,当然最后一个 “P” 还有其他说法是 Perl 或者 Python。不用多说了,本文讲解的就是 Linux、Apache、MysqL、PHP 这四个东西,所以就这样解释了。
自己很早就在做网站,最初玩的是 ASP,后来主要研究 .Net,也用 .Net 搞过类似的开发。但是自己最主要还是想把网站做起来,于是乎就将主要精力花在了网站运营上了,当然建站就选用了市面上成熟的一些 CMS 或者是博客程序。目前的 CMS 和博客程序实际上都可以融入到一起,因为其内容的表现形式上相当的接近,故选择哪一块来做,完全看自己的特长了。
由于 Linux 和 PHP 的免费,在国外是相当的流行。国内大部分主机都是 Windows 平台,而我学的 ASP 和 .Net 刚好能搭配运行起来。后来由于种种原因,我的网站都移民到了国外,而在国外找一个性价比好的 Windows 主机实在是件难事,不光语言上的阻碍,国外版权意识很好,所以很少有性价比好的 Windows 主机。我不得不转向了 Linux 平台。而且非常流行的 wordpress 吸引了我,故目前主要注意力就集中在 Linux 主机和 PHP 上。虽然自己对 PHP 基本不了解,呵呵。
虽然 Linux 平台上好的组件不止 Apache 一个,例如俄罗斯人开发的 Nginx,还有性能超强的 LiteSpeed 等等,这两者我都用过,前者以高效、资源占用低为特点,据说腾讯网就是基于此运行的,后者是以性能强大著称,同样据说这是 wordpress 官方推荐的用来运行 wordpress 最佳组件。但是呢,各种网上资料表明,虽然 Apache 性能、资源占用不如其他组件,但是 Apache 开发的目标就是以稳定为主。任何一个网站难道不是希望能够稳定运行?所以我还是选择学习 Apache 来作为网站的服务器环境。学会了一个,其他就能够举一反三了。
一般情况下,安装的都是最新的正式版,除非你有特殊需求,要安装指定的版本,本文暂不讨论。从最基础的开始,一点点完成一个可用的 Linux 主机。这里就开始介绍如何在 CentOS 6.0 上安装 LAMP 组件。经过如下语句安装,目前安装到的版本为:
PHP:5.3.2
Apache:2.2.15
MysqL:5.1.52
一、安装 MysqL
首先来进行 MysqL 的安装。打开超级终端,输入:
[root@localhost~]#yuminstallMysqLMysqL-server1
安装完毕,让 MysqL 能够随系统自动启动:
[root@localhost~]#chkconfig--levels235MysqLdon[root@localhost~]#/etc/init.d/MysqLdstart12
设置 MysqL 数据 root 账户的密码:
[root@localhost~]#MysqL_secure_installation1
当出现如下提示时候直接按回车:
Entercurrentpasswordforroot1
出现如下再次回车:
Setrootpassword?[Y/n]1
出现如下提示输入你需要设置的密码,回车后在输入一次确认:
Newpassword:1
接下来还会有四个确认,分别是:
Removeanonymoususers?[Y/n]disallowrootloginremotely?[Y/n]Removetestdatabaseandaccesstoit?[Y/n]ReloadprivilegetablesNow?[Y/n]1234
直接回车即可。
二、安装 Apache 组件
由于 CentOS 已经封装了 Apache,直接运行安装:
[root@localhost~]#yuminstallhttpd1
同样配置系统让 Apache 随系统启动:
[root@localhost~]#chkconfig--levels235httpdon1
配置完毕,启动 Apache:
[root@localhost~]#/etc/init.d/httpdstart1
此时已经可以访问你的服务器,不出意外的话,能够看到 “Apache 2 Test Page powered by CentOS” 的测试页面。注意,如果其他机器访问这台服务无法显示这个页面,而直接在这台服务器上可以访问的话,一般情况下是 CentOS 自带的防火墙禁止了。你只需要进入防火墙,将 “WWW” 对应的 “80” 端口打开即可。
三、安装 PHP 需要重新启动 Apache 服务: 四、测试 PHP 相关信息 按 “i” 键进行编辑,输入: 编辑完毕,按 “ESC” 键退出编辑模式,接着输入: 然后回车,即保存并退出。 
注意:在 CentOS 中 Apache 的默认根目录是/var/www/html,配置文件 /etc/httpd/conf/httpd.conf。其他配置存储在/etc/httpd/conf.d/ 目录。
输入如下指令安装 PHP:[root@localhost~]#yuminstallPHP1
[root@localhost~]#/etc/init.d/httpdrestart1
这步实际上可以省略,但是为了测试是否安装成功,你可以新建一个 PHP 页面进行测试,使用 vim 编辑器新建:[root@localhost~]#vi/var/www/html/info.PHP1
<?PHPPHPinfo();?>123
:wq1
此时你可以访问你的站点地址,例如 “http://192.168.1.2/info.php”,查看是否能看到相关的 PHP 信息。


