如果您对android连接mysql感兴趣,那么本文将是一篇不错的选择,我们将为您详在本文中,您将会了解到关于android连接mysql的详细内容,我们还将为您解答android连接MySQL数据库
如果您对android连接mysql感兴趣,那么本文将是一篇不错的选择,我们将为您详在本文中,您将会了解到关于android连接mysql的详细内容,我们还将为您解答android连接MySQL数据库的相关问题,并且为您提供关于Android Studio 使用JDBC连接mysql数据库、Android Studio 连接到 mysql 不断崩溃、Android Studio连接MySql实现登录注册(附源代码)、Android studio连接MySQL并完成简单的登录注册功能的有价值信息。
本文目录一览:- android连接mysql(android连接MySQL数据库)
- Android Studio 使用JDBC连接mysql数据库
- Android Studio 连接到 mysql 不断崩溃
- Android Studio连接MySql实现登录注册(附源代码)
- Android studio连接MySQL并完成简单的登录注册功能
")
android连接mysql(android连接MySQL数据库)
码
public class Test extends Activity{
    /** Called when the activity is first created. */
     @Override
        public void onCreate(Bundle savedInstanceState) {
            super.onCreate(savedInstanceState);
            //setContentView(R.layout.mainabout);
            String result = "";
          //the year data to send
          ArrayList<NameValuePair> nameValuePairs = new ArrayList<NameValuePair>();
          nameValuePairs.add(new BasicNameValuePair("year","1980"));
          InputStream is = null;
          //http post
          try{
                  HttpClient httpclient = new DefaultHttpClient();

                  HttpGet httppost = new HttpGet("http://www.pherma.net84.net/admin/getAllPeopleBornAfter.PHP");
                 // httppost.s//setEntity(new UrlEncodedFormEntity(nameValuePairs));
                  HttpResponse response = httpclient.execute(httppost);
                  httpentity entity = response.getEntity();
                   is = entity.getContent();
          }catch(Exception e){
                  Log.e("log_tag","Error in http connection "+e.toString());
          }
          //convert response to string
          try{
                  BufferedReader reader = new BufferedReader(new InputStreamReader(is,"iso-8859-1"),8);
                  StringBuilder sb = new StringBuilder();
                  String line = null;
                  while ((line = reader.readLine()) != null) {
                          sb.append(line + "\n");
                  }
                  is.close();

                  result=sb.toString();
          }
          catch(Exception e){
                  Log.e("log_tag","Error converting result "+e.toString());
          }

          try
          {
              JSONArray jArray = new JSONArray(result);
              for(int i=0;i<jArray.length();i++){
                      JSONObject json_data = jArray.getJSONObject(i);
                      Log.i("log_tag","id: "+json_data.getInt("id")+
                              ",name: "+json_data.getString("name")+
                              ",sex: "+json_data.getInt("sex")+
                              ",birthyear: "+json_data.getInt("birthyear")
                      );
              }

          }
          catch(JSONException e){
              Log.e("log_tag","Error parsing data "+e.toString());
          }
        }
    }
logcat的
PHP

<?PHP
MysqL_connect(".com","a4055820_root","");
MysqL_select_db("a4055820_pherma");

$q=MysqL_query("SELECT * FROM people WHERE birthyear>''".$_REQUEST[''year'']."''");
while($e=MysqL_fetch_assoc($q))
        $output[]=$e;

print(json_encode($output));

MysqL_close();
?>
解决方法

Android Studio 使用JDBC连接mysql数据库
Android Studio 使用JDBC连接MysqL数据库
1.下载mysql-connector-java-5.1.7
(有可能不能用,如果不能用就自己在官网下载吧)
链接:https://pan.baidu.com/s/1j5Qh7p3Y346O1ctOjthZMQ
提取码:04w2
复制这段内容后打开百度网盘手机App,操作更方便哦–来自百度网盘超级会员V1的分享
2.将jar包导入到Android Studio

3.创建数据库连接帮助类
//MysqL数据库的连接辅助类:生成连接、生成数据库操作对象
public class DbOpenHelper {
    private static  final String driver = "com.MysqL.jdbc.Driver";// MysqL驱动
    //192.168.43.65为我电脑的ip,这里要用自己电脑的ip,transportation为我电脑的数据库名,也要换。
    private static  final String url = "jdbc:MysqL://192.168.43.65:3306/transportation?serverTimezone=UTC&useUnicode=true&characterEncoding=utf8";
    private static  final String user = "root";// 用户名
    private static  final String password = "123456";// 密码

    public static Connection conn;//连接对象
    public  static Statement stmt;//命令集
    public  static PreparedStatement pStmt;//预编译命令集
    public  static ResultSet rs;//结果集


    //取得连接的方法
    public  static void getConnection(){
        try {
           Class.forName(driver);
            try {
                conn = DriverManager.getConnection(url,user,password);
            } catch (sqlException e) {
                e.printstacktrace();
            }
        } catch (ClassNotFoundException e) {
            e.printstacktrace();
        }


    }

    //关闭数据库
    public static  void closeAll(){
        if(rs!=null){
            try {
                rs.close();
            } catch (sqlException e) {
                e.printstacktrace();
            }
            rs = null;
        }
        if(stmt!=null){
            try {
                stmt.close();
            } catch (sqlException e) {
                e.printstacktrace();
            }
            stmt = null;
        }
        if(pStmt!=null){
            try {
                pStmt.close();
            } catch (sqlException e) {
                e.printstacktrace();
            }
            pStmt = null;
        }

        if(conn!=null){
            try {
                conn.close();
            } catch (sqlException e) {
                e.printstacktrace();
            }
            conn = null;
        }

    }

}
其中ip要换成自己电脑的IP,打开cmd,执行ipconfig,IPv4地址为此处的IP,数据库名称也要换,以及登录数据库的用户名、密码也要换成自己的。
PS:这里还要打开cmd登录数据库,对数据库允许访问的IP权限进行设置,具体设置方法:
grant all privileges on *.* to 'root'@'ip'identified by '密码'; #授权某个ip的用户可以通过密码访问数据库
此时Android studio就连接上了MysqL数据库了。

Android Studio 连接到 mysql 不断崩溃
如何解决Android Studio 连接到 mysql 不断崩溃?
这是我的 MainActivity.java
我是 android studio 的新手。我尝试将 android studio 与 MysqL 连接,但是当我运行模拟器时,显示 androidapp 一直停止。我调试时,它会在 void doInBackground 处停止。我的代码有什么问题吗。
package de.vogella.MysqL.androidMysqL;

import androidx.appcompat.app.AppCompatActivity;

import android.os.AsyncTask;
import android.os.Bundle;
import android.view.View;
import android.widget.Button;
import android.widget.TextView;

import org.w3c.dom.Text;

import java.sql.Connection;
import java.sql.DriverManager;
import java.sql.ResultSet;
import java.sql.Statement;

public class MainActivity extends AppCompatActivity {

    TextView text,errorText;
    Button show;

    @Override
    protected void onCreate(Bundle savedInstanceState) {
        super.onCreate(savedInstanceState);
        setContentView(R.layout.activity_main);

        text = (TextView) findViewById(R.id.textView);
        errorText = (TextView) findViewById(R.id.textView2);
        show = (Button)findViewById(`enter code here`R.id.button);

        show.setonClickListener(new View.OnClickListener() {
            @Override
            public void onClick(View view) {
                Task retrieveData = (Task) new Task().execute();
            }
        });
    }

    class Task extends AsyncTask<Void,Void,Void> {
        String records = "",error = "";

        /*final TextView textShow = findViewById(R.id.textView);
        final TextView textShow2 = findViewById(R.id.textView2);

        static final String JDBC_DRIVER = "com.MysqL.cj.jdbc.Driver";
        //static final String DB_URL = "jdbc:MysqL://" + ConnectURL.DATABASE_URL + "/" + ConnectURL.DATABASE_NAME

        @Override
        protected void onPreExcute(){
            String xmsg= "Connecting to database...";
            textShow.setText(xmsg);
        }*/
        @Override
        protected Void doInBackground(Void... voids) {
            Connection conn = null;
            Statement stmt = null;

            try {
                Class.forName("com.MysqL.cj.jdbc.Driver");

         conn =DriverManager.getConnection("jdbc:MysqL://192.168.0.124:3306/android","andro","1234");
                stmt = conn.createStatement();
                **when i debug the emulator stop here and crashed**
                ResultSet resultSet = statement.executeQuery("Select * FROM table_name");

                while (rs.next()) {
                    records += rs.getString(1) + " " + rs.getString(2) + "\n";
                }
            } catch (Exception e) {
                error = e.toString();
            }
            return null;
        }

        @Override
        protected void onPostExecute(Void aVoid) {
            text.setText(records);
            if (error != "")
                errorText.setText(error);
            super.onPostExecute(aVoid);
        }
    }
}
这是我的activity_main.xml我觉得这里没什么问题
<TextView
    android:id="@+id/textView"
    android:layout_width="wrap_content"
    android:layout_height="wrap_content"
    android:text="TextView"
    android:textSize="24sp"
    app:layout_constraintBottom_toTopOf="@+id/button"
    app:layout_constraintEnd_toEndOf="parent"
    app:layout_constraintStart_toStartOf="parent"
    app:layout_constraintTop_toTopOf="parent" />

<Button
    android:id="@+id/button"
    android:layout_width="wrap_content"
    android:layout_height="wrap_content"
    android:text="Show Records"
    android:textSize="24sp"
    app:layout_constraintBottom_toBottomOf="parent"
    app:layout_constraintEnd_toEndOf="parent"
    app:layout_constraintStart_toStartOf="parent"
    app:layout_constraintTop_toTopOf="parent" />

<TextView
    android:id="@+id/textView2"
    android:layout_width="wrap_content"
    android:layout_height="wrap_content"
    android:text="TextView2"
    android:textSize="24sp"
    app:layout_constraintBottom_toBottomOf="parent"
    app:layout_constraintEnd_toEndOf="parent"
    app:layout_constraintStart_toStartOf="parent"
    app:layout_constraintTop_toBottomOf="@+id/button" />
这里是我从 logcat 得到的
2021-04-28 15:01:32.162 5615-5660/de.vogella.MysqL.androidMysqL E/AndroidRuntime: FATAL EXCEPTION: AsyncTask #1
    Process: de.vogella.MysqL.androidMysqL,PID: 5615
    java.lang.RuntimeException: An error occurred while executing doInBackground()
        at android.os.AsyncTask$4.done(AsyncTask.java:415)
        at java.util.concurrent.FutureTask.finishCompletion(FutureTask.java:383)
        at java.util.concurrent.FutureTask.setException(FutureTask.java:252)
        at java.util.concurrent.FutureTask.run(FutureTask.java:271)
        at android.os.AsyncTask$SerialExecutor$1.run(AsyncTask.java:305)
        at java.util.concurrent.ThreadPoolExecutor.runWorker(ThreadPoolExecutor.java:1167)
        at java.util.concurrent.ThreadPoolExecutor$Worker.run(ThreadPoolExecutor.java:641)
        at java.lang.Thread.run(Thread.java:923)
     Caused by: java.lang.NoClassDefFoundError: Failed resolution of: Ljava/sql/sqlType;
        at com.MysqL.cj.jdbc.DatabaseMetaData.getInstance(DatabaseMetaData.java:765)
        at com.MysqL.cj.jdbc.ConnectionImpl.getMetaData(ConnectionImpl.java:1175)
        at com.MysqL.cj.jdbc.ConnectionImpl.<init>(ConnectionImpl.java:444)
        at com.MysqL.cj.jdbc.ConnectionImpl.getInstance(ConnectionImpl.java:246)
        at com.MysqL.cj.jdbc.NonRegisteringDriver.connect(NonRegisteringDriver.java:198)
        at java.sql.DriverManager.getConnection(DriverManager.java:580)
        at java.sql.DriverManager.getConnection(DriverManager.java:218)
        at de.vogella.MysqL.androidMysqL.MainActivity$Task.doInBackground(MainActivity.java:61)
        at de.vogella.MysqL.androidMysqL.MainActivity$Task.doInBackground(MainActivity.java:40)
        at android.os.AsyncTask$3.call(AsyncTask.java:394)
        at java.util.concurrent.FutureTask.run(FutureTask.java:266)
        at android.os.AsyncTask$SerialExecutor$1.run(AsyncTask.java:305)
        at java.util.concurrent.ThreadPoolExecutor.runWorker(ThreadPoolExecutor.java:1167)
        at java.util.concurrent.ThreadPoolExecutor$Worker.run(ThreadPoolExecutor.java:641)
        at java.lang.Thread.run(Thread.java:923)
     Caused by: java.lang.classNotFoundException: Didn''t find class "java.sql.sqlType" on path: DexPathList[[zip file "/data/app/~~X8MIj6EwtZt9_UXjh82Wmg==/de.vogella.MysqL.androidMysqL--7dPP3pspout7aIGSh_6jg==/base.apk"],nativeLibraryDirectories=[/data/app/~~X8MIj6EwtZt9_UXjh82Wmg==/de.vogella.MysqL.androidMysqL--7dPP3pspout7aIGSh_6jg==/lib/x86,/system/lib,/system_ext/lib]]
        at dalvik.system.BaseDexClassLoader.findClass(BaseDexClassLoader.java:207)
        at java.lang.classLoader.loadClass(ClassLoader.java:379)
        at java.lang.classLoader.loadClass(ClassLoader.java:312)
        at com.MysqL.cj.jdbc.DatabaseMetaData.getInstance(DatabaseMetaData.java:765)
        at com.MysqL.cj.jdbc.ConnectionImpl.getMetaData(ConnectionImpl.java:1175)
        at com.MysqL.cj.jdbc.ConnectionImpl.<init>(ConnectionImpl.java:444)
        at com.MysqL.cj.jdbc.ConnectionImpl.getInstance(ConnectionImpl.java:246)
        at com.MysqL.cj.jdbc.NonRegisteringDriver.connect(NonRegisteringDriver.java:198)
        at java.sql.DriverManager.getConnection(DriverManager.java:580)
        at java.sql.DriverManager.getConnection(DriverManager.java:218)
        at de.vogella.MysqL.androidMysqL.MainActivity$Task.doInBackground(MainActivity.java:61)
        at de.vogella.MysqL.androidMysqL.MainActivity$Task.doInBackground(MainActivity.java:40)
        at android.os.AsyncTask$3.call(AsyncTask.java:394)
        at java.util.concurrent.FutureTask.run(FutureTask.java:266)
        at android.os.AsyncTask$SerialExecutor$1.run(AsyncTask.java:305)
        at java.util.concurrent.ThreadPoolExecutor.runWorker(ThreadPoolExecutor.java:1167)
        at java.util.concurrent.ThreadPoolExecutor$Worker.run(ThreadPoolExecutor.java:641)
        at java.lang.Thread.run(Thread.java:923)
2021-04-28 15:01:32.349 5615-5660/de.vogella.MysqL.androidMysqL I/Process: Sending signal. PID: 5615 SIG: 9
解决方法
显然你的代码没问题,问题在于你正在使用的驱动程序库“com.mysql.cj.jdbc.Driver”,你确定你已经正确定义了类路径,这也可能对你有帮助https://stackoverflow.com/a/59867655/9502601
")
Android Studio连接MySql实现登录注册(附源代码)
本文主要介绍了Android Studio连接MySql实现登录注册,分享给大家,具体如下:


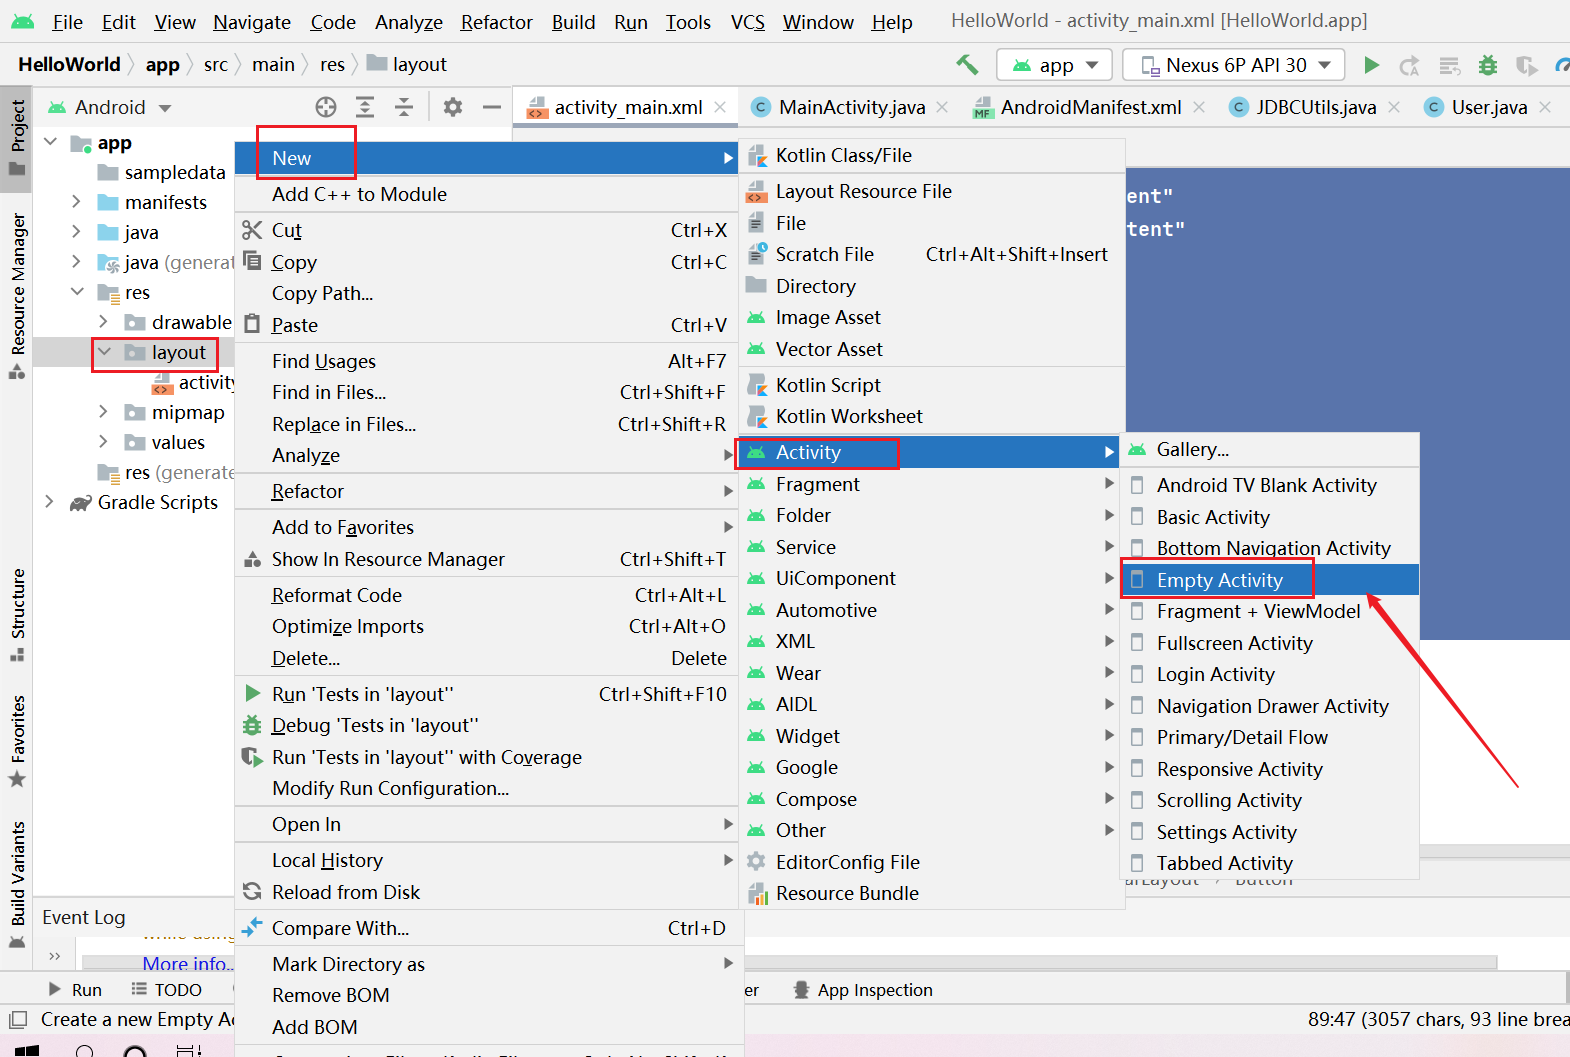
一、创建工程
1、创建一个空白工程

2、随便起一个名称

3、设置网络连接权限

<uses-permission android:name="android.permission.INTERNET"/>
二、引入Mysql驱动包
1、切换到普通Java工程

2、在libs当中引入MySQL的jar包
将mysql的驱动包复制到libs当中


三、编写数据库和dao以及JDBC相关代码
1、在数据库当中创建表

SQL语句
/*
Navicat MySQL Data Transfer

Source Server         : localhost_3306
Source Server Version : 50562
Source Host           : localhost:3306
Source Database       : test

Target Server Type    : MYSQL
Target Server Version : 50562
File Encoding         : 65001

Date: 2021-05-10 17:28:36
*/

SET FOREIGN_KEY_CHECKS=0;

-- ----------------------------
-- Table structure for `student`
-- ----------------------------
DROP TABLE IF EXISTS `student`;
CREATE TABLE `student` (
  `sid` int(11) NOT NULL AUTO_INCREMENT,
  `sname` varchar(255) NOT NULL,
  `sage` int(11) NOT NULL,
  `address` varchar(255) NOT NULL,
  PRIMARY KEY (`sid`)
) ENGINE=InnoDB AUTO_INCREMENT=3 DEFAULT CHARSET=utf8;

-- ----------------------------
-- Records of student
-- ----------------------------
INSERT INTO `student` VALUES (''1'', ''andi'', ''21'', ''21212'');
INSERT INTO `student` VALUES (''2'', ''a'', ''2121'', ''2121'');

-- ----------------------------
-- Table structure for `users`
-- ----------------------------
DROP TABLE IF EXISTS `users`;
CREATE TABLE `users` (
  `uid` int(11) NOT NULL AUTO_INCREMENT,
  `name` varchar(255) NOT NULL,
  `username` varchar(255) NOT NULL,
  `password` varchar(255) NOT NULL,
  `age` int(255) NOT NULL,
  `phone` longblob NOT NULL,
  PRIMARY KEY (`uid`)
) ENGINE=InnoDB AUTO_INCREMENT=6 DEFAULT CHARSET=utf8;

-- ----------------------------
-- Records of users
-- ----------------------------
INSERT INTO `users` VALUES (''2'', ''123'', ''HBV环保局'', ''123'', ''33'', 0x3133333333333333333333);
INSERT INTO `users` VALUES (''3'', ''1233'', ''反复的'', ''1233'', ''12'', 0x3132333333333333333333);
INSERT INTO `users` VALUES (''4'', ''1244'', ''第三代'', ''1244'', ''12'', 0x3133333333333333333333);
INSERT INTO `users` VALUES (''5'', ''1255'', ''SAS'', ''1255'', ''33'', 0x3133333333333333333333);
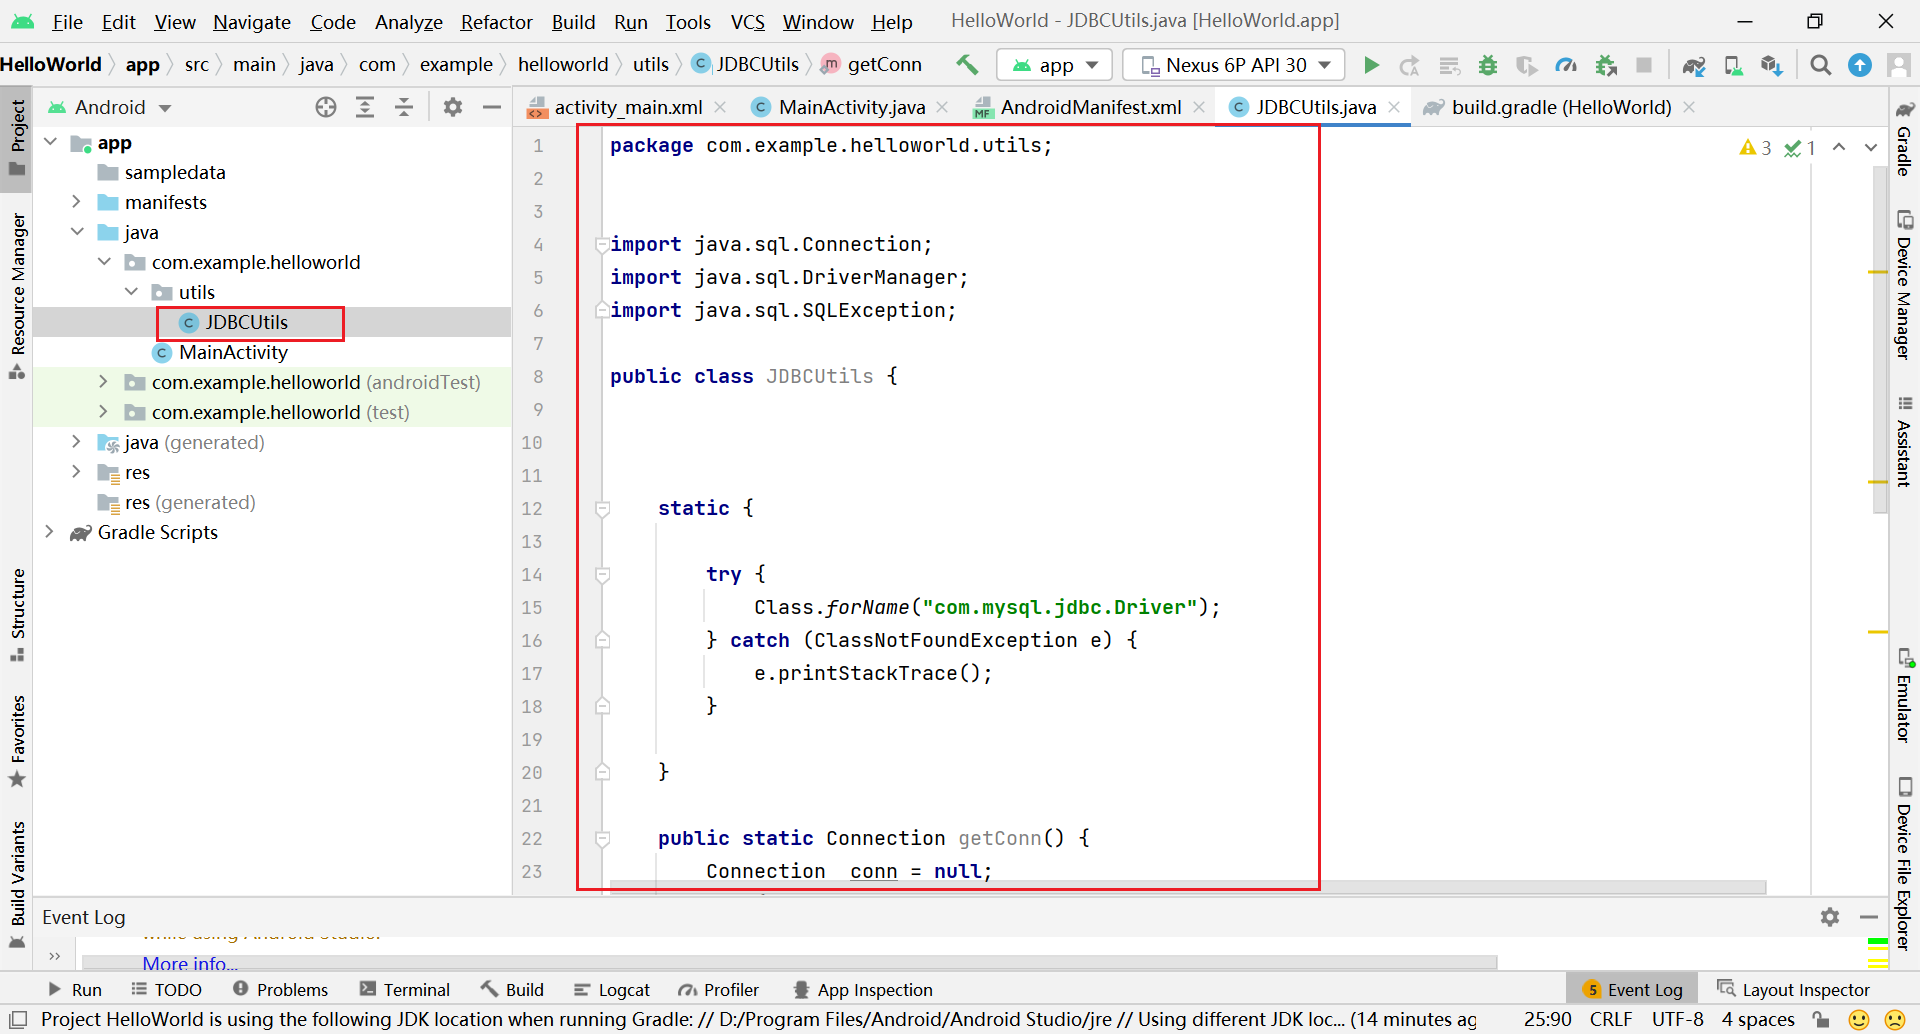
2、在Android Studio当中创建JDBCUtils类
切换会Android视图


注意链接数据库的地址是:jdbc:mysql://10.0.2.2:3306/test
package com.example.myapplication.utils;


import java.sql.Connection;
import java.sql.DriverManager;
import java.sql.SQLException;

public class JDBCUtils {


    static {

        try {
            Class.forName("com.mysql.jdbc.Driver");
        } catch (ClassNotFoundException e) {
            e.printStackTrace();
        }

    }

    public static Connection getConn() {
        Connection  conn = null;
        try {
            conn= DriverManager.getConnection("jdbc:mysql://10.0.2.2:3306/test","root","root");
        }catch (Exception exception){
            exception.printStackTrace();
        }
        return conn;
    }

    public static void close(Connection conn){
        try {
            conn.close();
        } catch (SQLException throwables) {
            throwables.printStackTrace();
        }
    }
}
3、创建User实体类

package com.example.myapplication.entity;

public class User {

    private int id;
    private String name;
    private String username;
    private String password;
    private int age;
    private String phone;


    public User() {
    }

    public User(int id, String name, String username, String password, int age, String phone) {
        this.id = id;
        this.name = name;
        this.username = username;
        this.password = password;
        this.age = age;
        this.phone = phone;
    }

    public int getId() {
        return id;
    }

    public void setId(int id) {
        this.id = id;
    }

    public String getName() {
        return name;
    }

    public void setName(String name) {
        this.name = name;
    }

    public String getUsername() {
        return username;
    }

    public void setUsername(String username) {
        this.username = username;
    }

    public String getPassword() {
        return password;
    }

    public void setPassword(String password) {
        this.password = password;
    }

    public int getAge() {
        return age;
    }

    public void setAge(int age) {
        this.age = age;
    }

    public String getPhone() {
        return phone;
    }

    public void setPhone(String phone) {
        this.phone = phone;
    }
}
4、创建dao层和UserDao

package com.example.myapplication.dao;

import com.example.myapplication.entity.User;
import com.example.myapplication.utils.JDBCUtils;

import java.sql.Connection;
import java.sql.PreparedStatement;
import java.sql.ResultSet;
import java.sql.SQLException;

public class UserDao {


    public boolean login(String name,String password){

        String sql = "select * from users where name = ? and password = ?";

        Connection  con = JDBCUtils.getConn();

        try {
            PreparedStatement pst=con.prepareStatement(sql);

            pst.setString(1,name);
            pst.setString(2,password);

            if(pst.executeQuery().next()){

                return true;

            }

        } catch (SQLException throwables) {
            throwables.printStackTrace();
        }finally {
            JDBCUtils.close(con);
        }

        return false;
    }

    public boolean register(User user){

        String sql = "insert into users(name,username,password,age,phone) values (?,?,?,?,?)";

        Connection  con = JDBCUtils.getConn();

        try {
            PreparedStatement pst=con.prepareStatement(sql);

            pst.setString(1,user.getName());
            pst.setString(2,user.getUsername());
            pst.setString(3,user.getPassword());
            pst.setInt(4,user.getAge());
            pst.setString(5,user.getPhone());

            int value = pst.executeUpdate();

            if(value>0){
                return true;
            }


        } catch (SQLException throwables) {
            throwables.printStackTrace();
        }finally {
            JDBCUtils.close(con);
        }
        return false;
    }

    public User findUser(String name){

        String sql = "select * from users where name = ?";

        Connection  con = JDBCUtils.getConn();
        User user = null;
        try {
            PreparedStatement pst=con.prepareStatement(sql);

            pst.setString(1,name);

            ResultSet rs = pst.executeQuery();

            while (rs.next()){

               int id = rs.getInt(0);
               String namedb = rs.getString(1);
               String username = rs.getString(2);
               String passworddb  = rs.getString(3);
               int age = rs.getInt(4);
                String phone = rs.getString(5);
               user = new User(id,namedb,username,passworddb,age,phone);
            }

        } catch (SQLException throwables) {
            throwables.printStackTrace();
        }finally {
            JDBCUtils.close(con);
        }

        return user;
    }


}
四、编写页面和Activity相关代码
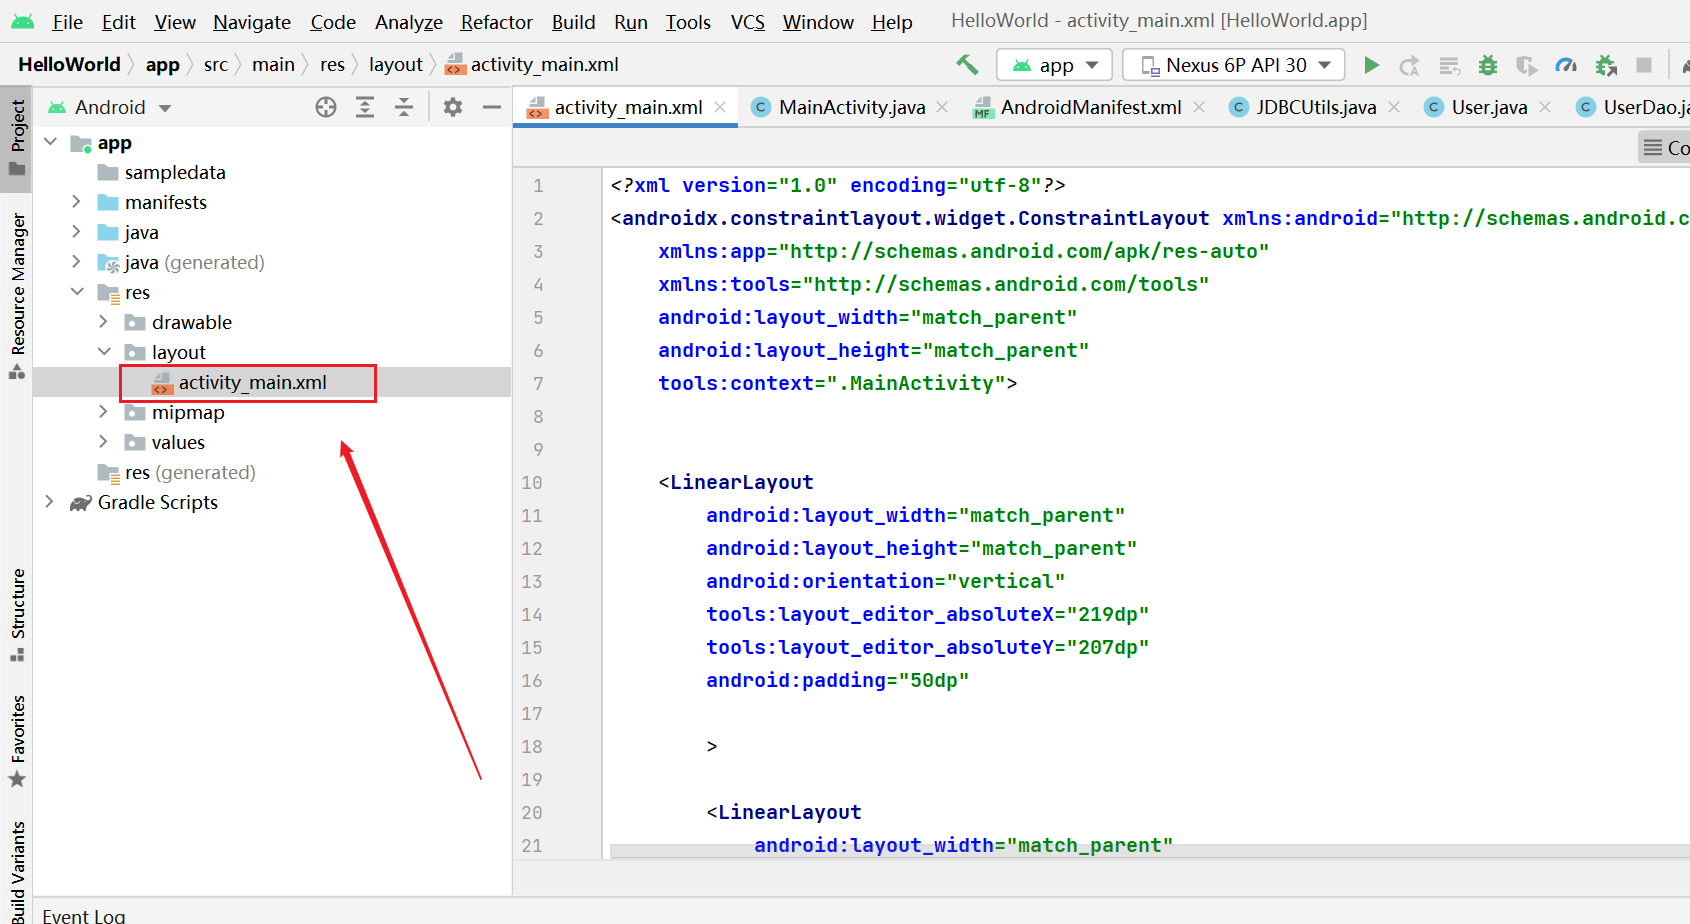
1、编写登录页面

<?xml version="1.0" encoding="utf-8"?>
<androidx.constraintlayout.widget.ConstraintLayout xmlns:android="http://schemas.android.com/apk/res/android"
    xmlns:app="http://schemas.android.com/apk/res-auto"
    xmlns:tools="http://schemas.android.com/tools"
    android:layout_width="match_parent"
    android:layout_height="match_parent"
    tools:context=".MainActivity">


    <LinearLayout
        android:layout_width="match_parent"
        android:layout_height="match_parent"
        android:orientation="vertical"
        tools:layout_editor_absoluteX="219dp"
        tools:layout_editor_absoluteY="207dp"
        android:padding="50dp"

        >

        <LinearLayout
            android:layout_width="match_parent"
            android:layout_height="wrap_content"
            android:orientation="horizontal">


            <TextView
                android:id="@+id/textView"
                android:layout_width="wrap_content"
                android:layout_height="wrap_content"
                android:layout_weight="1"
                android:textSize="15sp"
                android:text="账号:" />

            <EditText
                android:id="@+id/name"
                android:layout_width="wrap_content"
                android:layout_height="wrap_content"
                android:layout_weight="1"
                android:ems="10"
                android:inputType="textPersonName"
                android:text="" />
        </LinearLayout>
        <LinearLayout
            android:layout_width="match_parent"
            android:layout_height="wrap_content"
            android:orientation="horizontal">


            <TextView
                android:id="@+id/textView2"
                android:layout_width="wrap_content"
                android:layout_height="wrap_content"
                android:layout_weight="1"
                android:textSize="15sp"
                android:text="密码:"

                />

            <EditText
                android:id="@+id/password"
                android:layout_width="wrap_content"
                android:layout_height="wrap_content"
                android:layout_weight="1"
                android:ems="10"
                android:inputType="textPersonName"
               />
        </LinearLayout>
        <LinearLayout
            android:layout_width="match_parent"
            android:layout_height="wrap_content"
            android:orientation="horizontal">


        </LinearLayout>

        <Button
            android:layout_marginTop="50dp"
            android:id="@+id/button2"
            android:layout_width="match_parent"
            android:layout_height="wrap_content"
            android:text="登录"
            android:onClick="login"
            />

        <Button
            android:id="@+id/button3"
            android:layout_width="match_parent"
            android:layout_height="wrap_content"
            android:onClick="reg"
            android:text="注册" />
    </LinearLayout>
</androidx.constraintlayout.widget.ConstraintLayout>
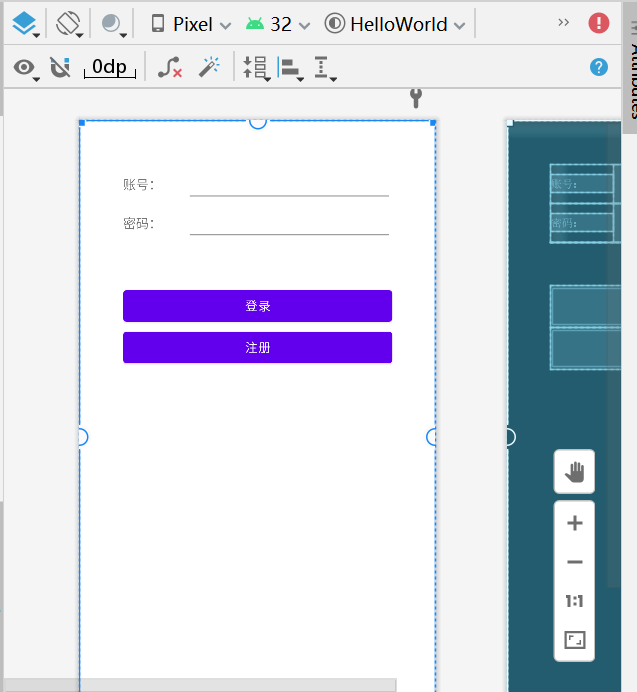
效果

2、编写注册页面代码


<?xml version="1.0" encoding="utf-8"?>
<androidx.constraintlayout.widget.ConstraintLayout xmlns:android="http://schemas.android.com/apk/res/android"
    xmlns:app="http://schemas.android.com/apk/res-auto"
    xmlns:tools="http://schemas.android.com/tools"
    android:layout_width="match_parent"
    android:layout_height="match_parent"
    tools:context=".MainActivity">


    <LinearLayout
        android:layout_width="match_parent"
        android:layout_height="match_parent"
        android:orientation="vertical"
        tools:layout_editor_absoluteX="219dp"
        tools:layout_editor_absoluteY="207dp"
        android:padding="50dp"

        >

        <LinearLayout
            android:layout_width="match_parent"
            android:layout_height="wrap_content"
            android:orientation="horizontal">


            <TextView
                android:id="@+id/textView"
                android:layout_width="wrap_content"
                android:layout_height="wrap_content"
                android:layout_weight="1"
                android:textSize="15sp"
                android:text="账号:" />

            <EditText
                android:id="@+id/name"
                android:layout_width="wrap_content"
                android:layout_height="wrap_content"
                android:layout_weight="1"
                android:ems="10"
                android:inputType="textPersonName"
                android:text="" />
        </LinearLayout>
        <LinearLayout
            android:layout_width="match_parent"
            android:layout_height="wrap_content"
            android:orientation="horizontal">


            <TextView
                android:id="@+id/textView2"
                android:layout_width="wrap_content"
                android:layout_height="wrap_content"
                android:layout_weight="1"
                android:textSize="15sp"
                android:text="密码:"

                />

            <EditText
                android:id="@+id/password"
                android:layout_width="wrap_content"
                android:layout_height="wrap_content"
                android:layout_weight="1"
                android:ems="10"
                android:inputType="textPersonName"
                />
        </LinearLayout>
        <LinearLayout
            android:layout_width="match_parent"
            android:layout_height="wrap_content"
            android:orientation="horizontal">


        </LinearLayout>

        <Button
            android:layout_marginTop="50dp"
            android:id="@+id/button2"
            android:layout_width="match_parent"
            android:layout_height="wrap_content"
            android:text="登录"
            android:onClick="login"
            />

        <Button
            android:id="@+id/button3"
            android:layout_width="match_parent"
            android:layout_height="wrap_content"
            android:onClick="reg"
            android:text="注册" />
    </LinearLayout>
</androidx.constraintlayout.widget.ConstraintLayout>
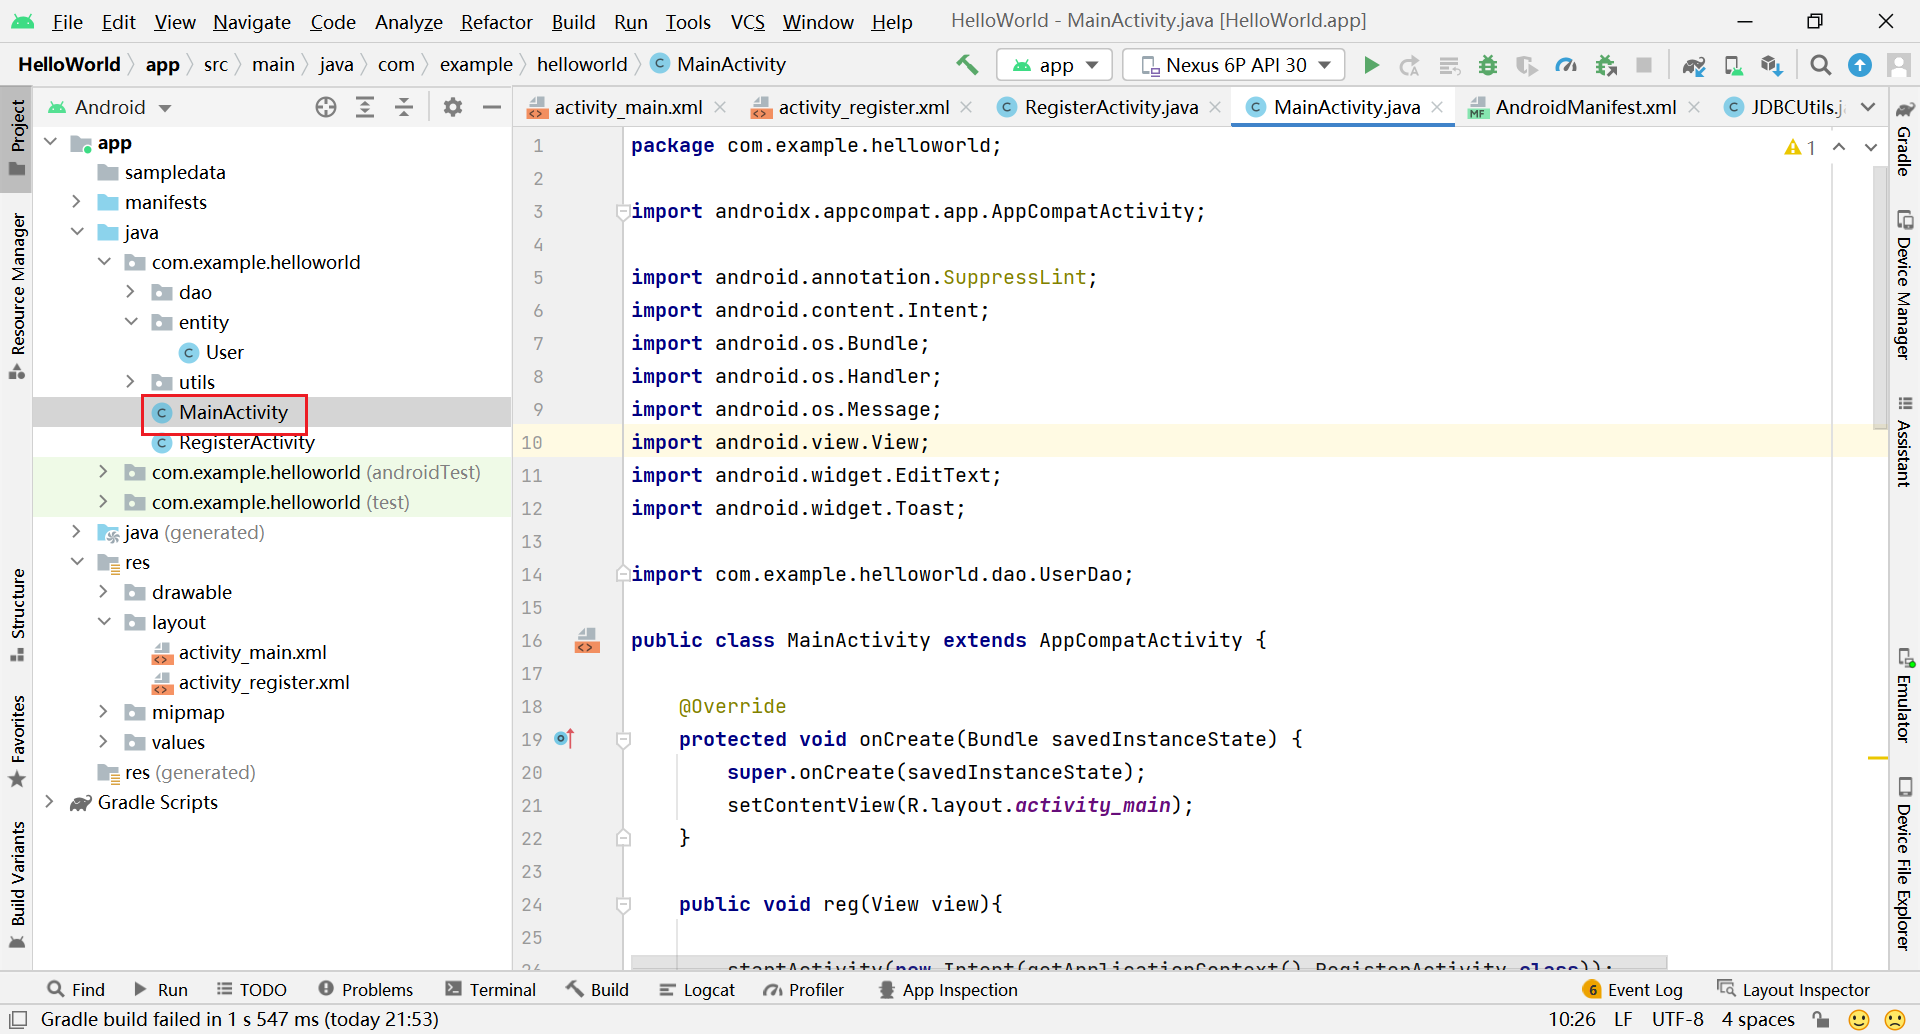
3、完善MainActivity

package com.example.application01;

import androidx.appcompat.app.AppCompatActivity;

import android.content.Intent;
import android.os.Bundle;
import android.os.Handler;
import android.os.Message;
import android.view.View;
import android.widget.EditText;
import android.widget.Toast;

import com.example.application01.dao.UserDao;

public class MainActivity extends AppCompatActivity {

    @Override
    protected void onCreate(Bundle savedInstanceState) {
        super.onCreate(savedInstanceState);
        setContentView(R.layout.activity_main);
    }

    public void reg(View view){

        startActivity(new Intent(getApplicationContext(),RegisterActivity.class));

    }


    public void login(View view){

        EditText EditTextname = (EditText)findViewById(R.id.name);
        EditText EditTextpassword = (EditText)findViewById(R.id.password);

        new Thread(){
            @Override
            public void run() {

                UserDao userDao = new UserDao();

                boolean aa = userDao.login(EditTextname.getText().toString(),EditTextpassword.getText().toString());
                int msg = 0;
                if(aa){
                    msg = 1;
                }

                hand1.sendEmptyMessage(msg);


            }
        }.start();


    }
    final Handler hand1 = new Handler()
    {
        @Override
        public void handleMessage(Message msg) {

            if(msg.what == 1)
            {
                Toast.makeText(getApplicationContext(),"登录成功",Toast.LENGTH_LONG).show();

            }
            else
            {
                Toast.makeText(getApplicationContext(),"登录失败",Toast.LENGTH_LONG).show();
            }
        }
    };
}
4、完善RegisterActivity

package com.example.application01;

import androidx.appcompat.app.AppCompatActivity;

import android.content.Intent;
import android.os.Bundle;
import android.os.Handler;
import android.os.Message;
import android.view.View;
import android.widget.EditText;
import android.widget.Toast;

import com.example.application01.dao.UserDao;
import com.example.application01.entity.User;

public class RegisterActivity extends AppCompatActivity {
    EditText name = null;
    EditText username = null;
    EditText password = null;
    EditText phone = null;
    EditText age = null;
    @Override
    protected void onCreate(Bundle savedInstanceState) {
        super.onCreate(savedInstanceState);
        setContentView(R.layout.activity_register);

         name = findViewById(R.id.name);
         username = findViewById(R.id.username);
         password = findViewById(R.id.password);
         phone = findViewById(R.id.phone);
         age = findViewById(R.id.age);
    }


    public void register(View view){


        String cname = name.getText().toString();
        String cusername = username.getText().toString();
        String cpassword = password.getText().toString();

        System.out.println(phone.getText().toString());

        String cphone = phone.getText().toString();
        int cgae = Integer.parseInt(age.getText().toString());

        if(cname.length() < 2 || cusername.length() < 2 || cpassword.length() < 2 ){
            Toast.makeText(getApplicationContext(),"输入信息不符合要求请重新输入",Toast.LENGTH_LONG).show();
            return;

        }


        User user = new User();

        user.setName(cname);
        user.setUsername(cusername);
        user.setPassword(cpassword);
        user.setAge(cgae);
        user.setPhone(cphone);

        new Thread(){
            @Override
            public void run() {

                int msg = 0;

                UserDao userDao = new UserDao();

                User uu = userDao.findUser(user.getName());

                if(uu != null){
                    msg = 1;
                }

                boolean flag = userDao.register(user);
                if(flag){
                    msg = 2;
                }
                hand.sendEmptyMessage(msg);

            }
        }.start();


    }
    final Handler hand = new Handler()
    {
        @Override
        public void handleMessage(Message msg) {
            if(msg.what == 0)
            {
                Toast.makeText(getApplicationContext(),"注册失败",Toast.LENGTH_LONG).show();

            }
            if(msg.what == 1)
            {
                Toast.makeText(getApplicationContext(),"该账号已经存在,请换一个账号",Toast.LENGTH_LONG).show();

            }
            if(msg.what == 2)
            {
                //startActivity(new Intent(getApplication(),MainActivity.class));

                Intent intent = new Intent();
                //将想要传递的数据用putExtra封装在intent中
                intent.putExtra("a","註冊");
                setResult(RESULT_CANCELED,intent);
                finish();
            }

        }
    };
}
五、运行测试效果


到此这篇关于Android Studio连接MySql实现登录注册(附源代码) 的文章就介绍到这了,更多相关Android Studio 登录注册内容请搜索以前的文章或继续浏览下面的相关文章希望大家以后多多支持!
- Android studio 利用共享存储进行用户的注册和登录验证功能
- Android Studio实现QQ的注册登录和好友列表跳转
- Android Studio+Servlet+MySql实现登录注册
- Android Studio连接SQLite数据库的登录注册实现
- Android使用Intent显示实现页面跳转
- Android Intent实现页面跳转的两种方法
- Android启动页面定时跳转的三种方法
- Android 接收推送消息跳转到指定页面的方法
- Android实现外部唤起应用跳转指定页面的方法
- Android Studio实现注册页面跳转登录页面的创建

Android studio连接MySQL并完成简单的登录注册功能
近期需要完成一个Android项目,那先从与数据库交互最简单的登陆注册开始吧,现记录过程如下:
此篇文章的小demo主要涉及数据库的连接,以及相应信息的查找与插入。
我已将源码上传至GitHub:
https://github.com/changyan-maker/LoginApp
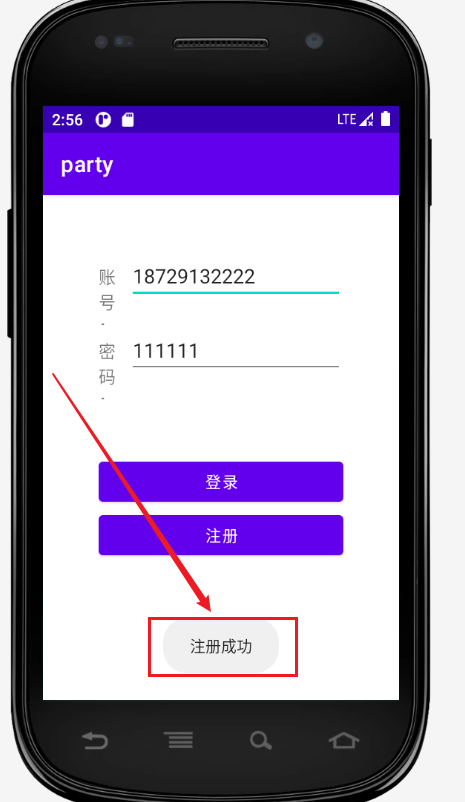
首先展示一下完成效果。
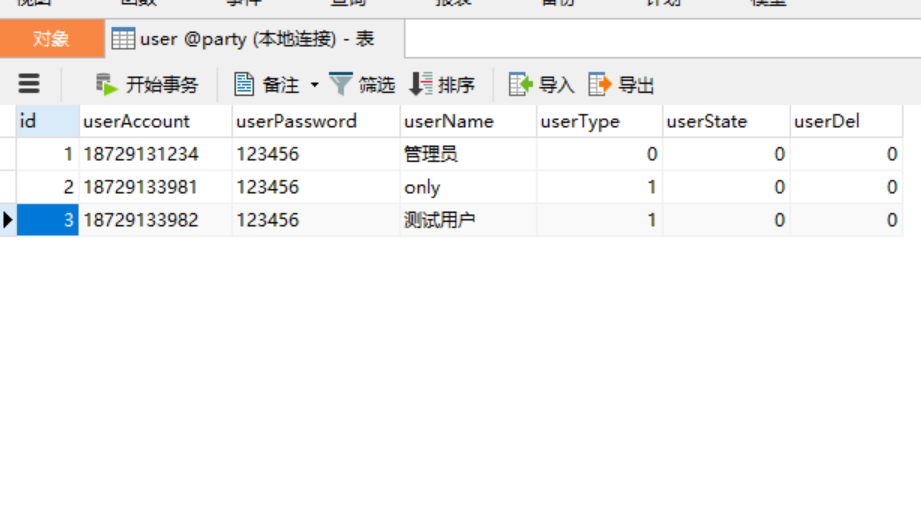
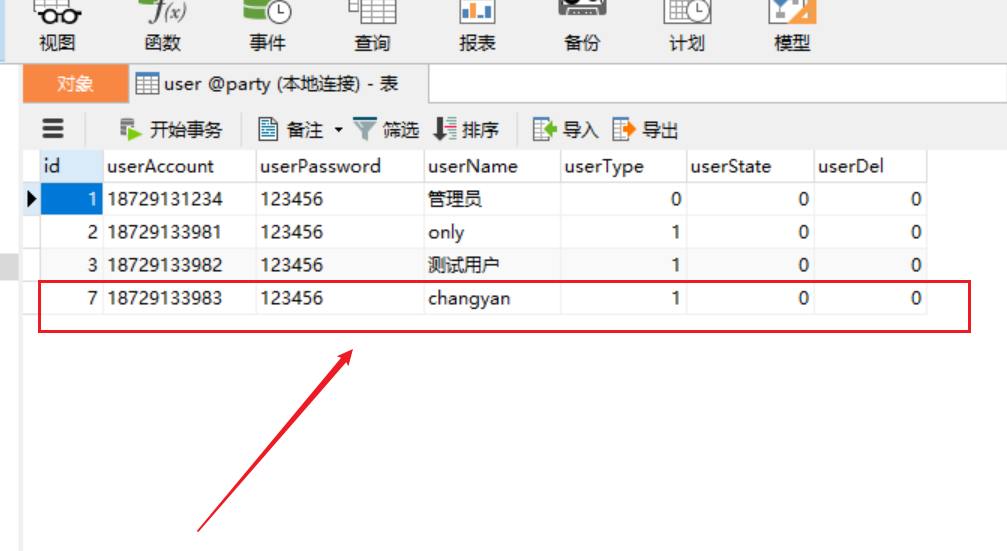
数据库设计:

数据库内容:
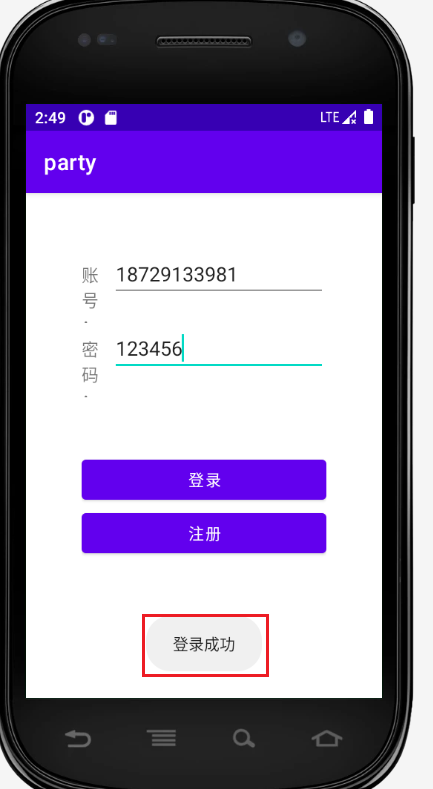
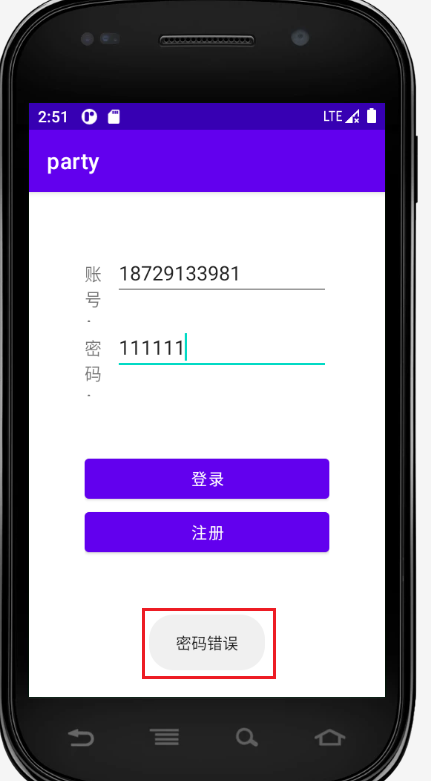
登录结果展示:


此处默认您已经安装好Android studio 与MysqL软件。
首先需要创建一个空项目,关于空的项目如何创建,请参考我本篇文章:
https://blog.csdn.net/changyana/article/details/122948513
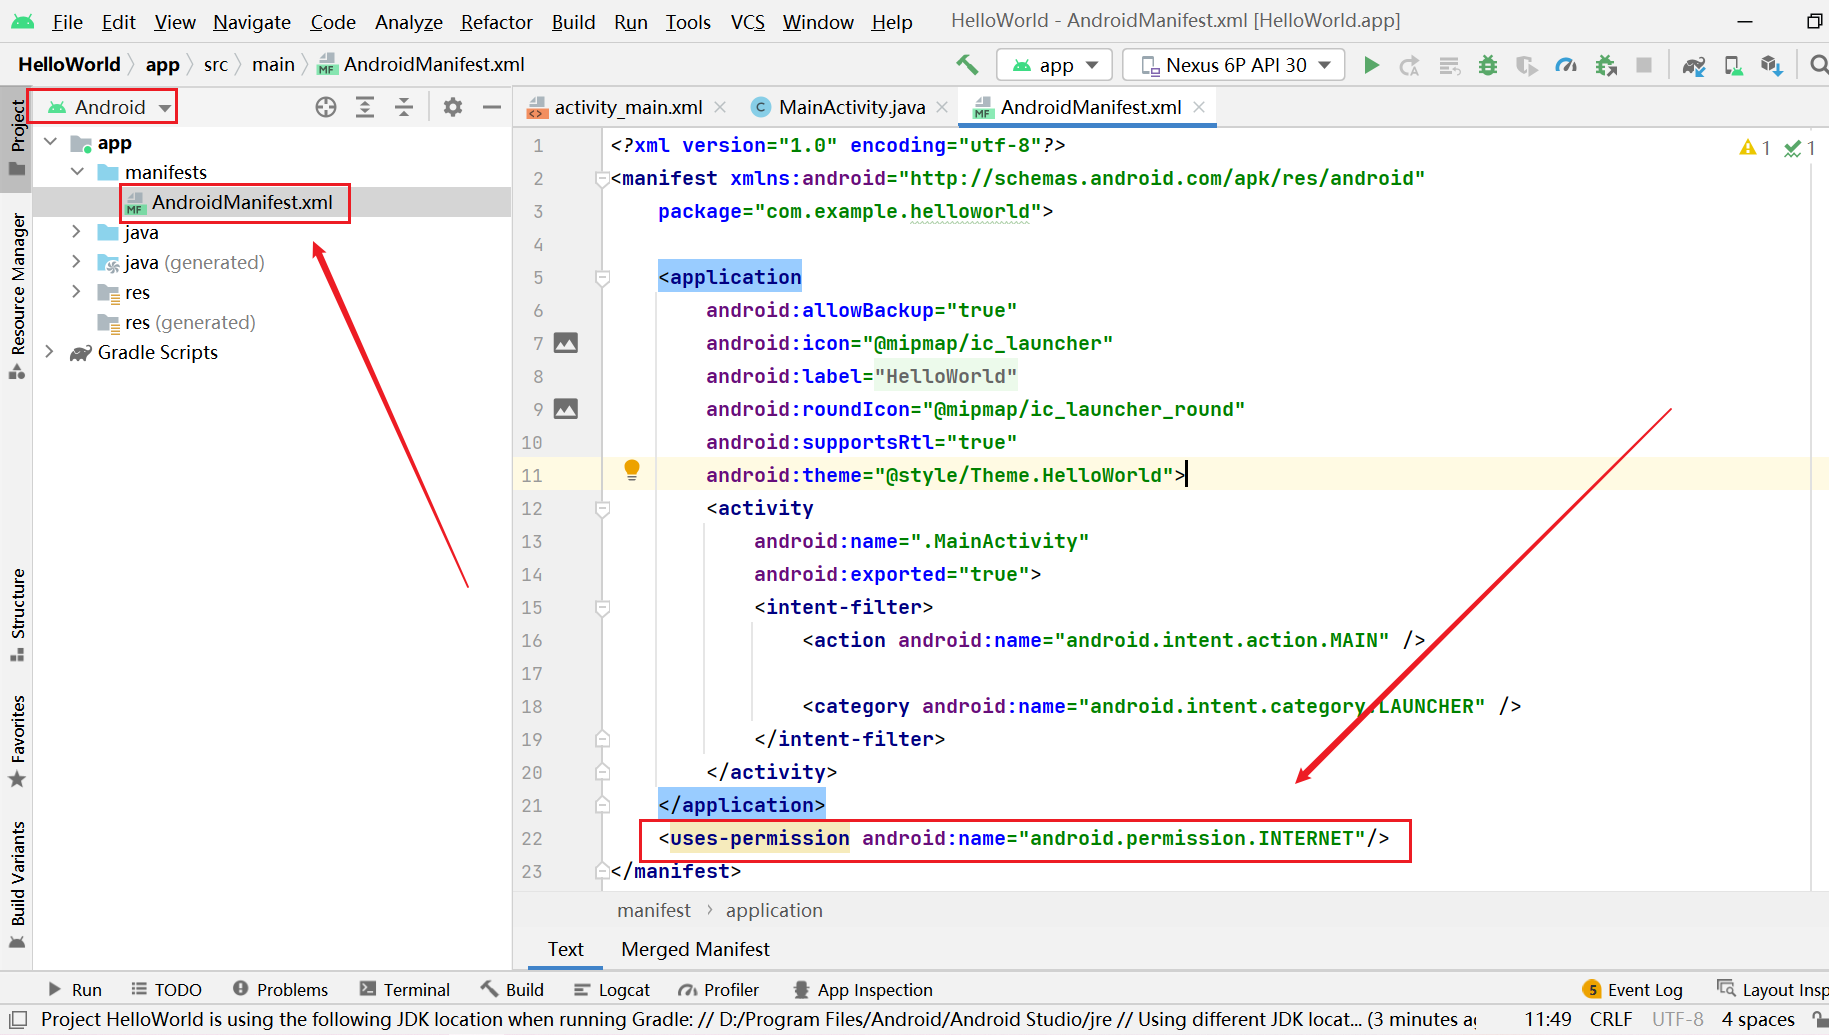
接下来需要连接MysqL,首先需要开启网络权限。需要添加一句话,具体位置如图:(将项目切换成Android模式比较好找)
之后是导入mysql-connection的jar包
关于这个jar包需要我们去官网下载:https://downloads.mysql.com/archives/c-j/
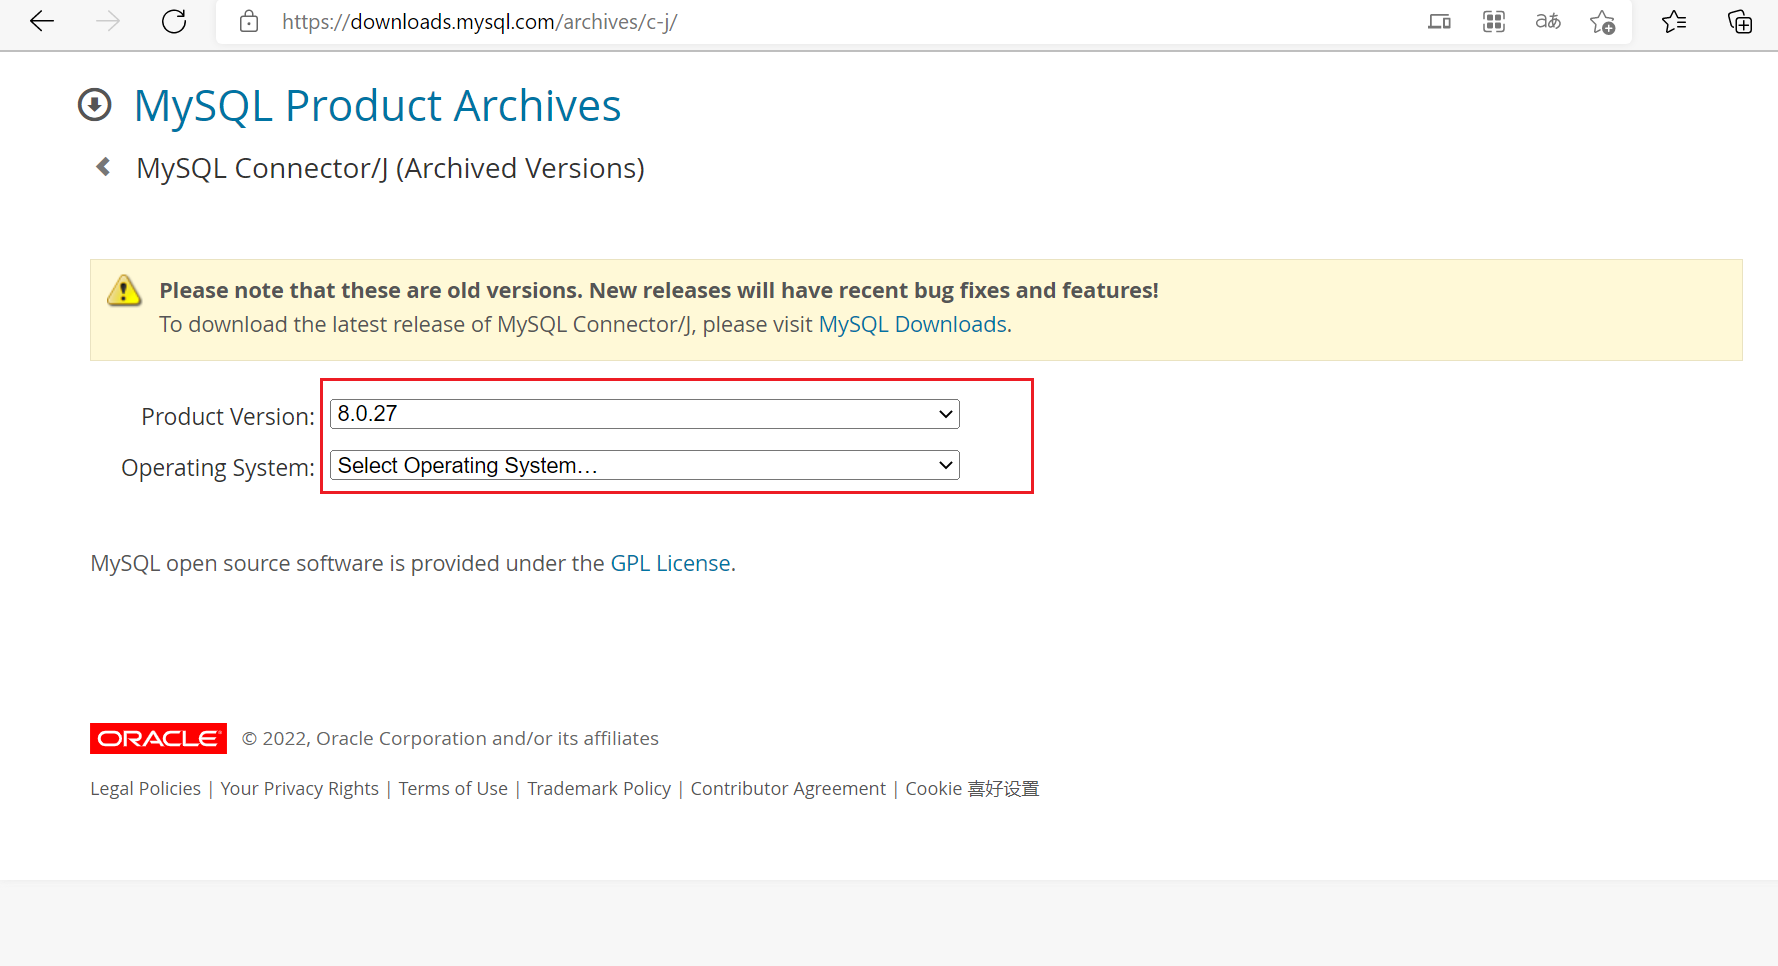
关于版本的选择个人建议选择老一点的,比较稳定。选择ZIP格式进行下载。
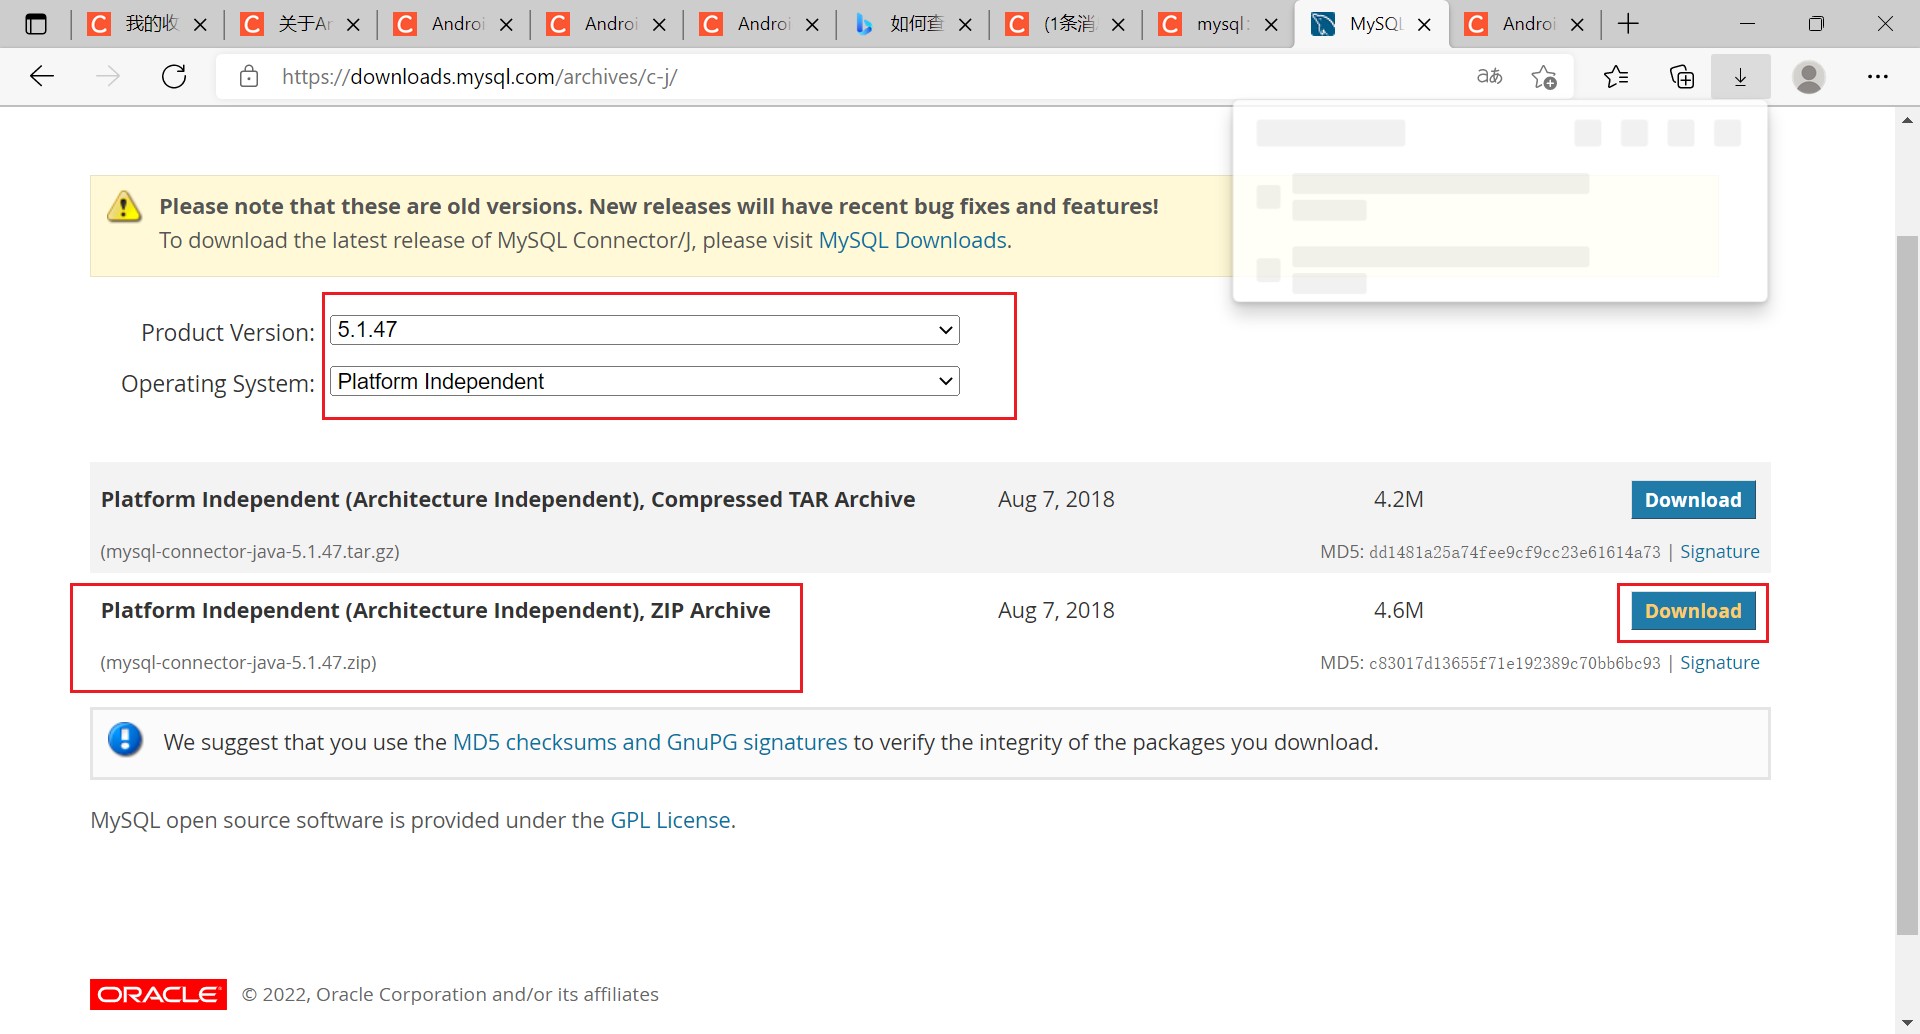
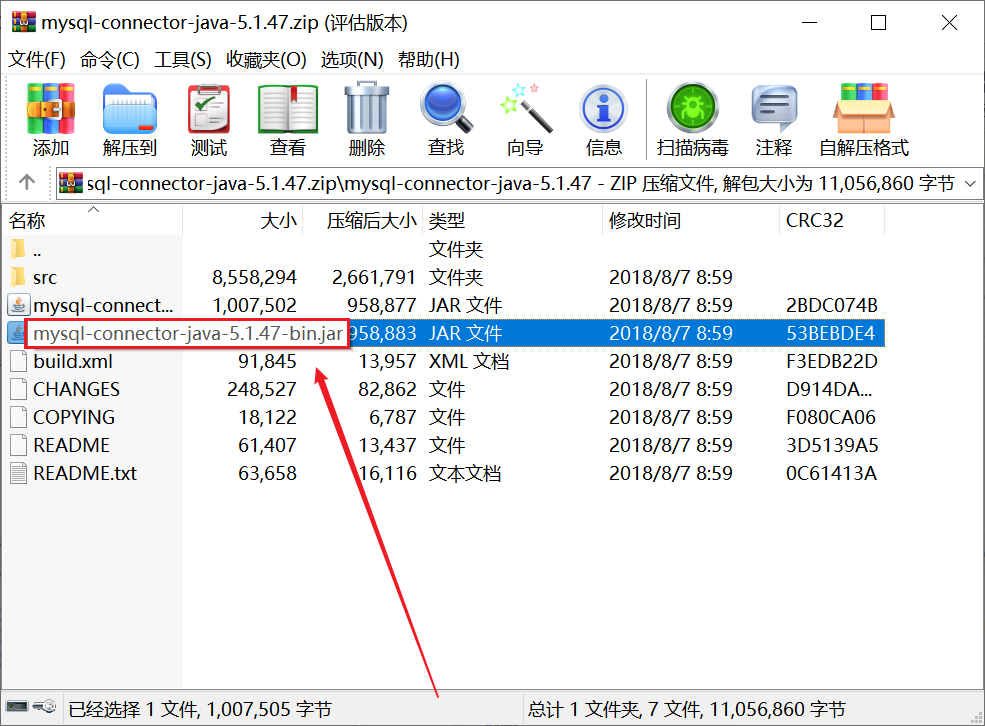
下载完成后在里边找到mysql-connector-java-5.1.47-bin.jar并复制到粘贴板。
然后将Android studio的项目页面切换到Project模式,找到如下文件的位置进行粘贴。
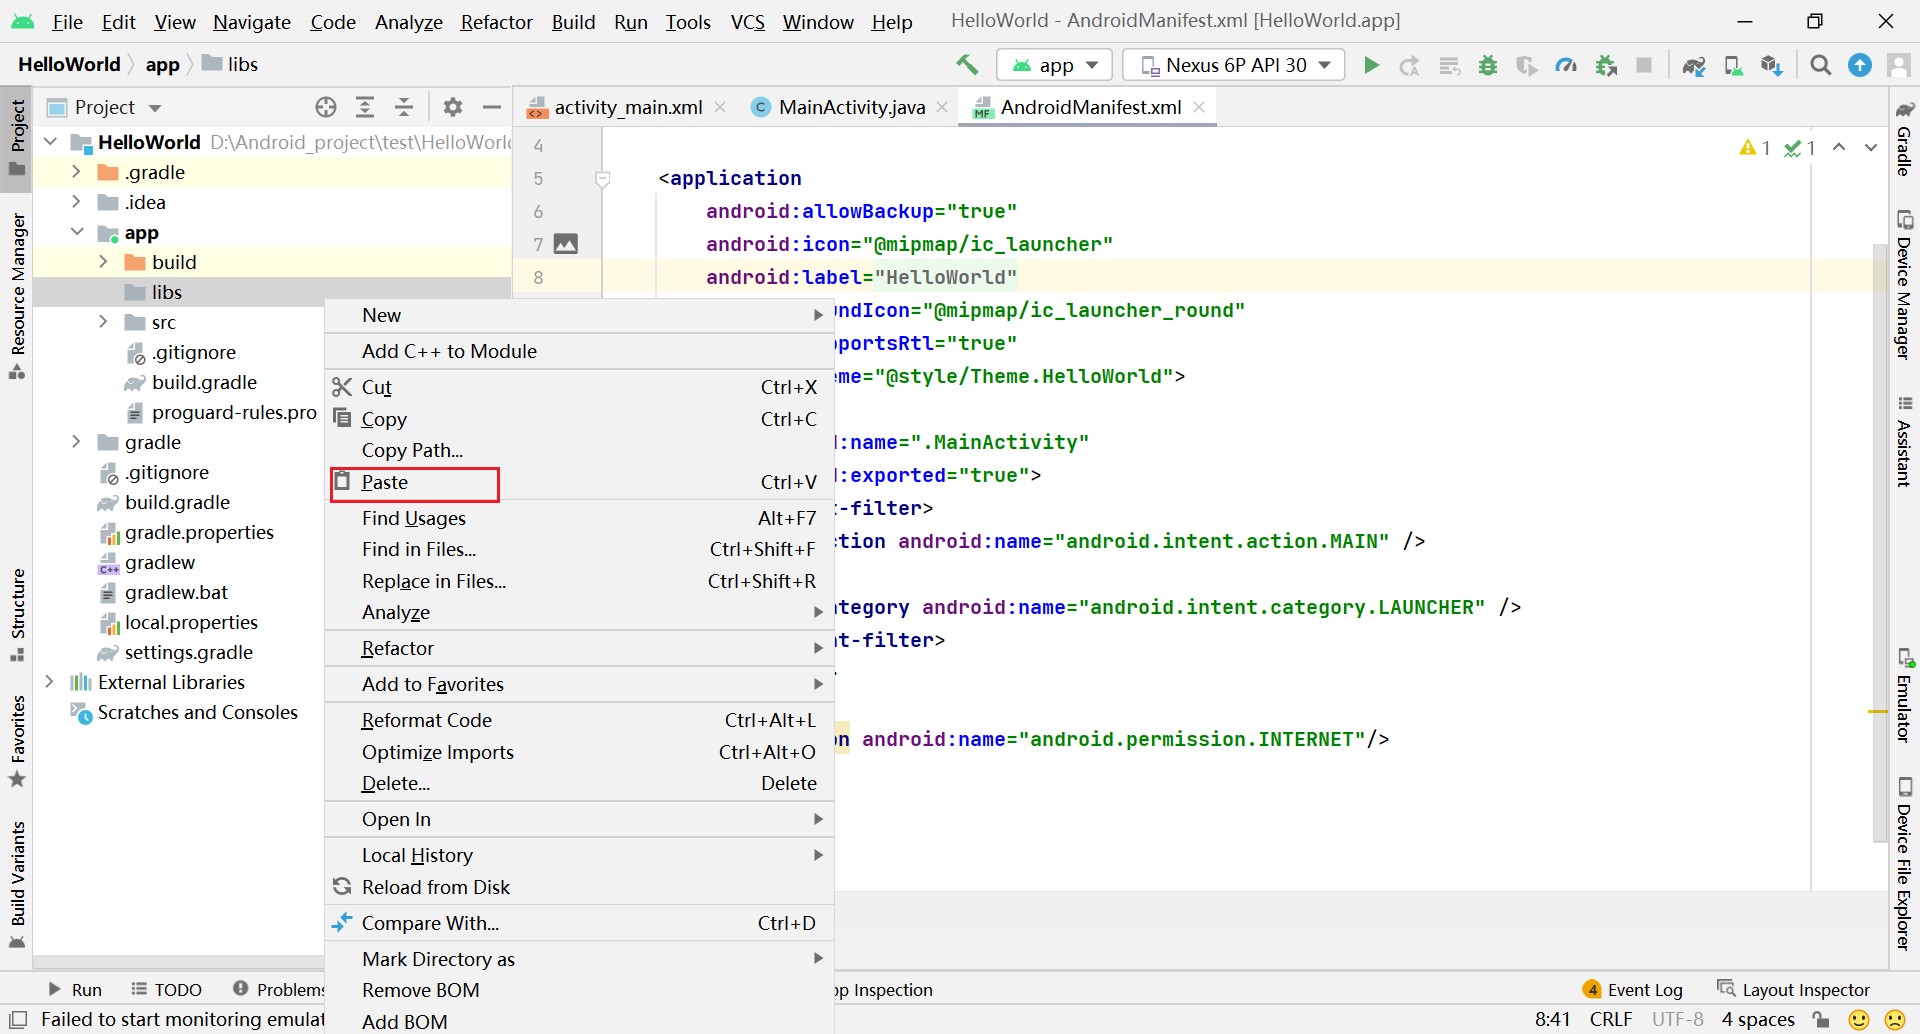
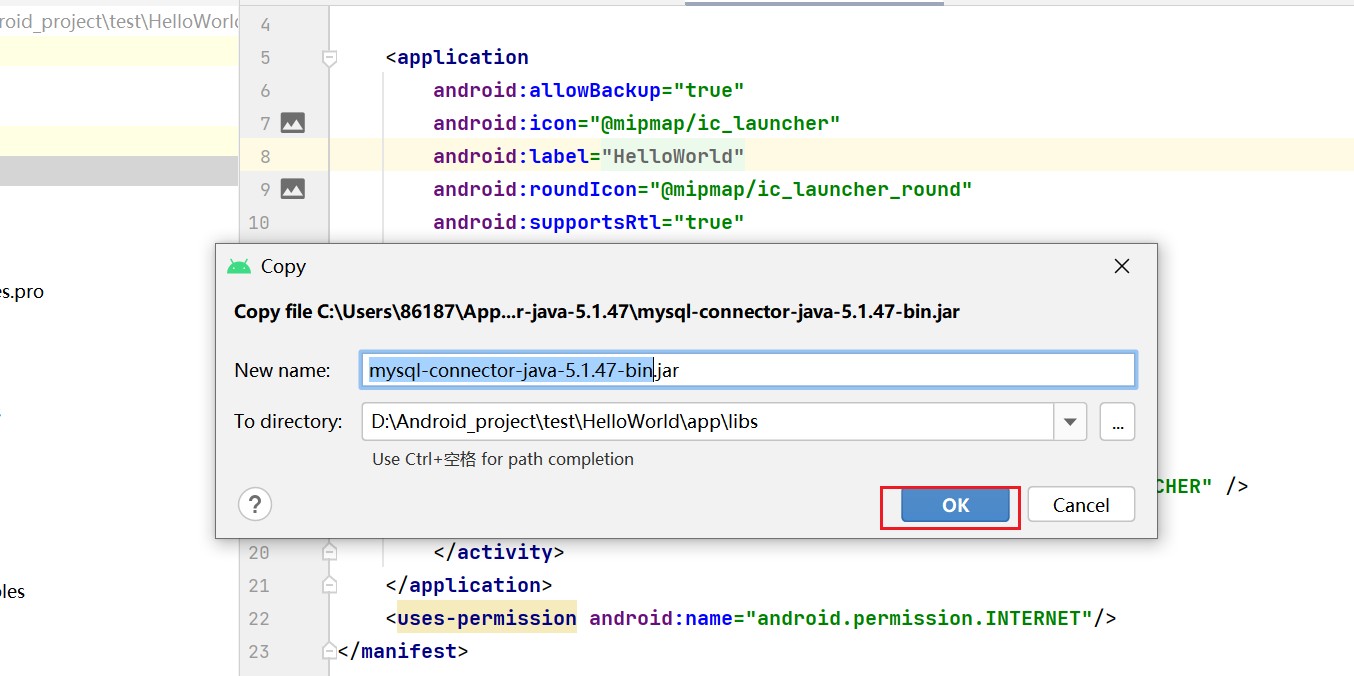
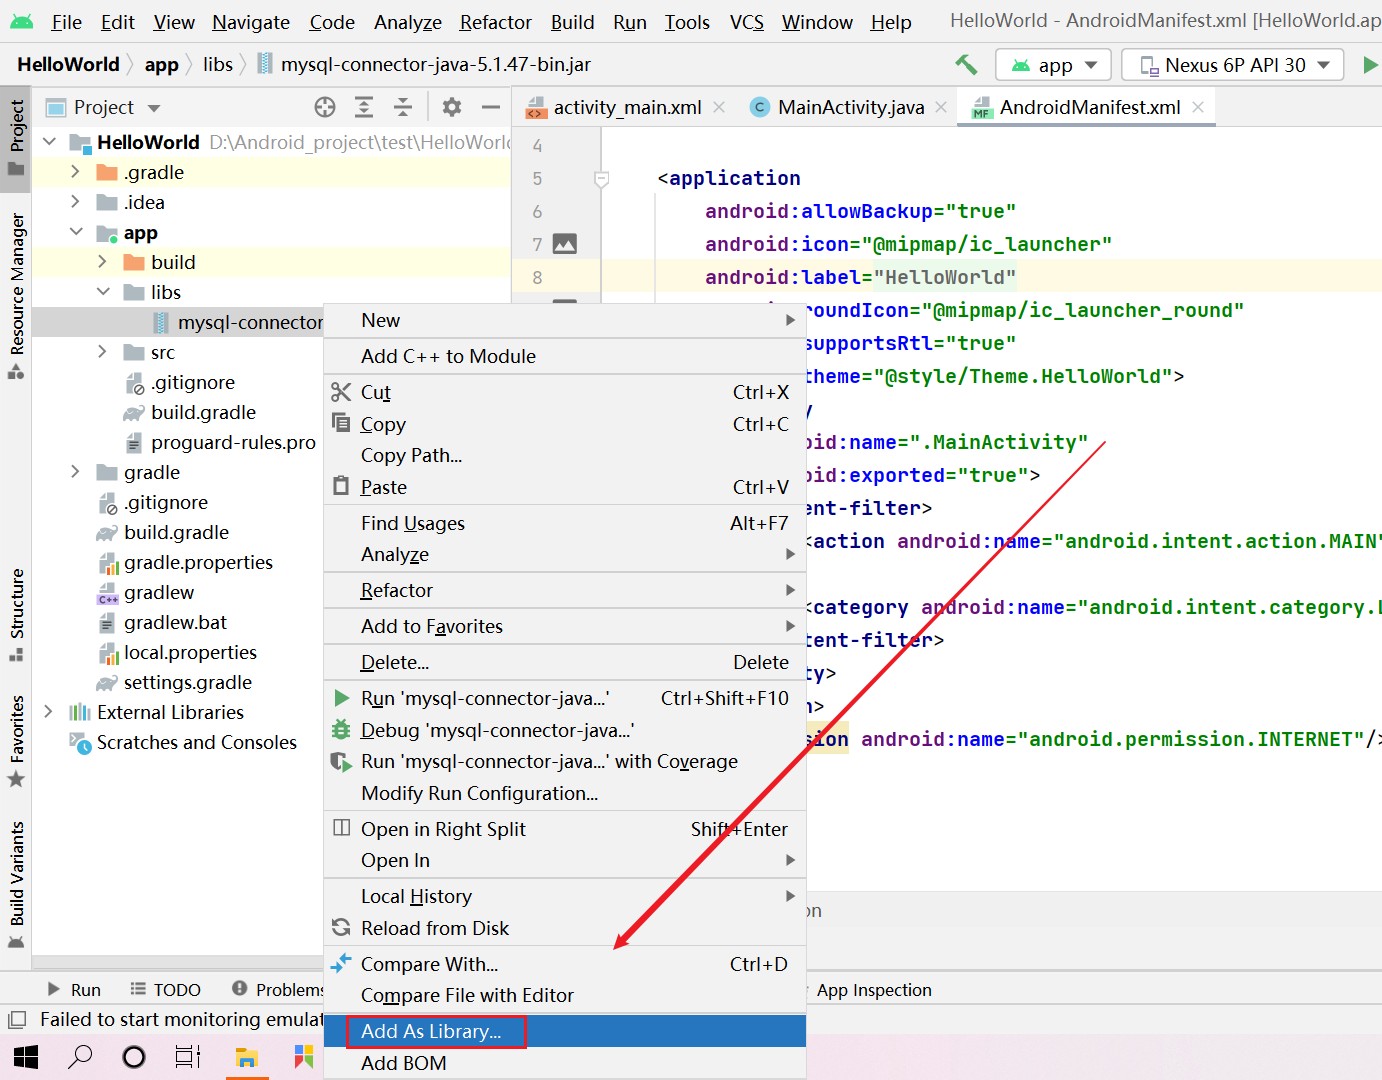
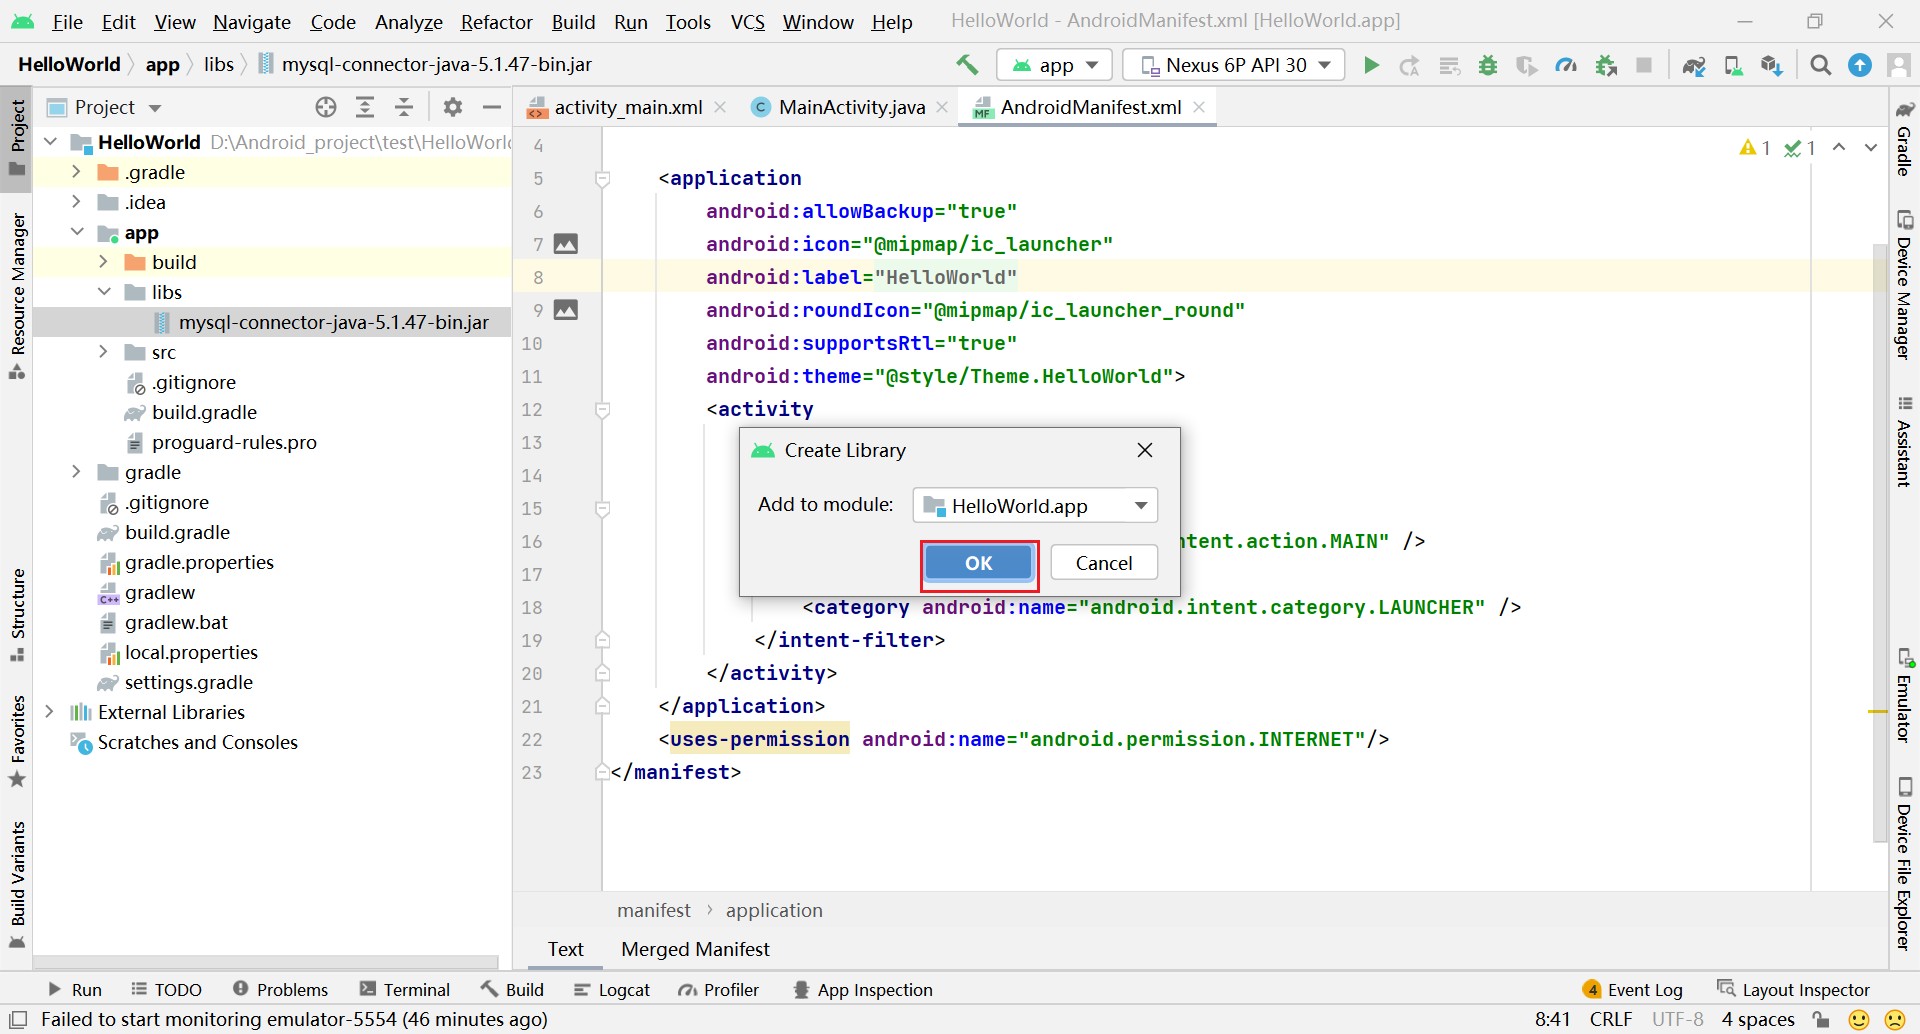
粘贴完成后需要把刚才导入的jar包右击Add as Library
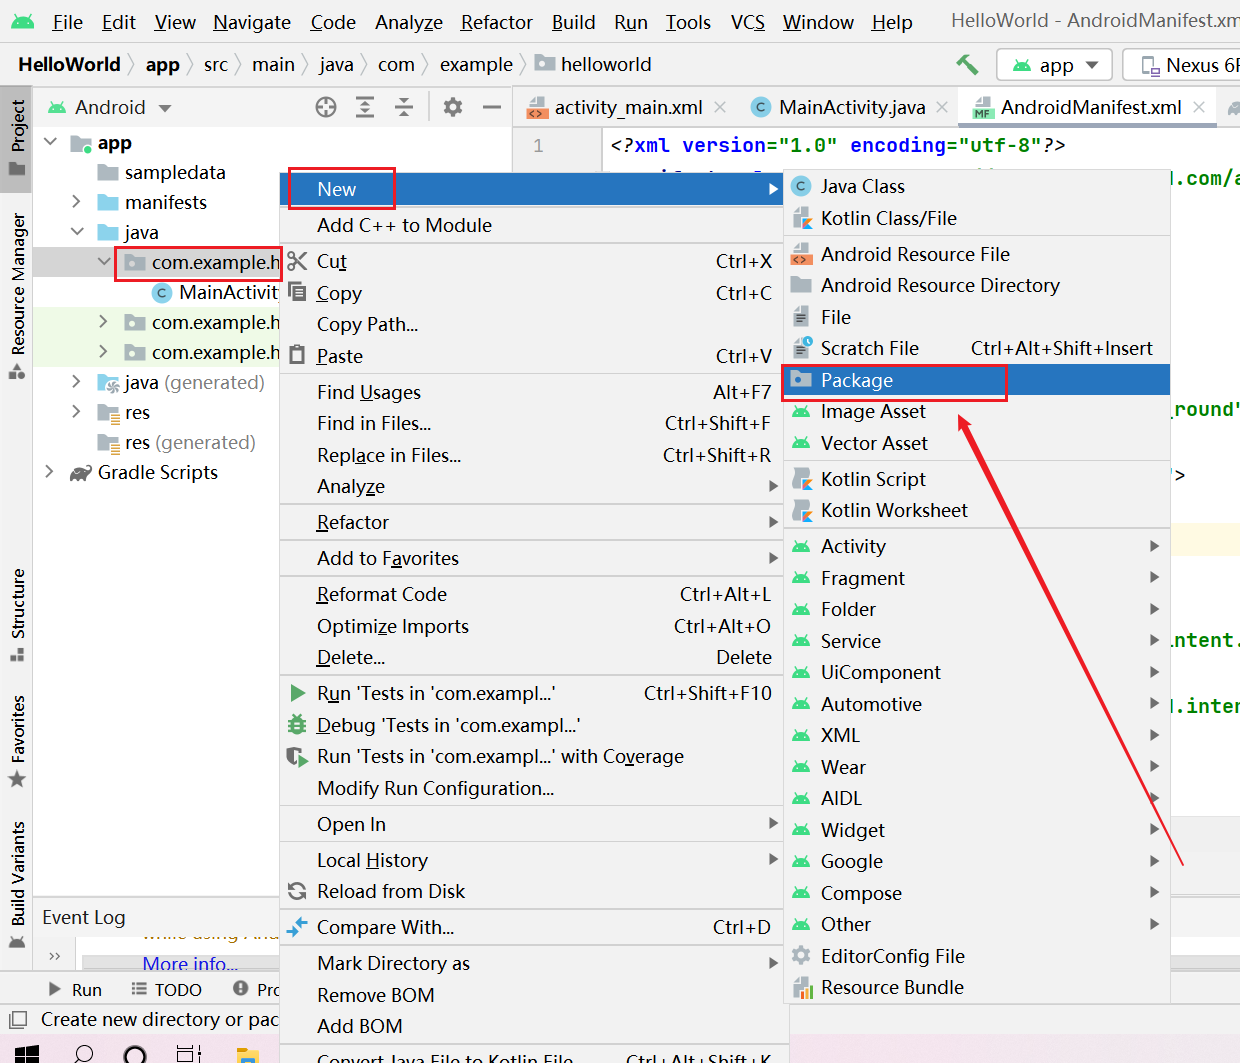
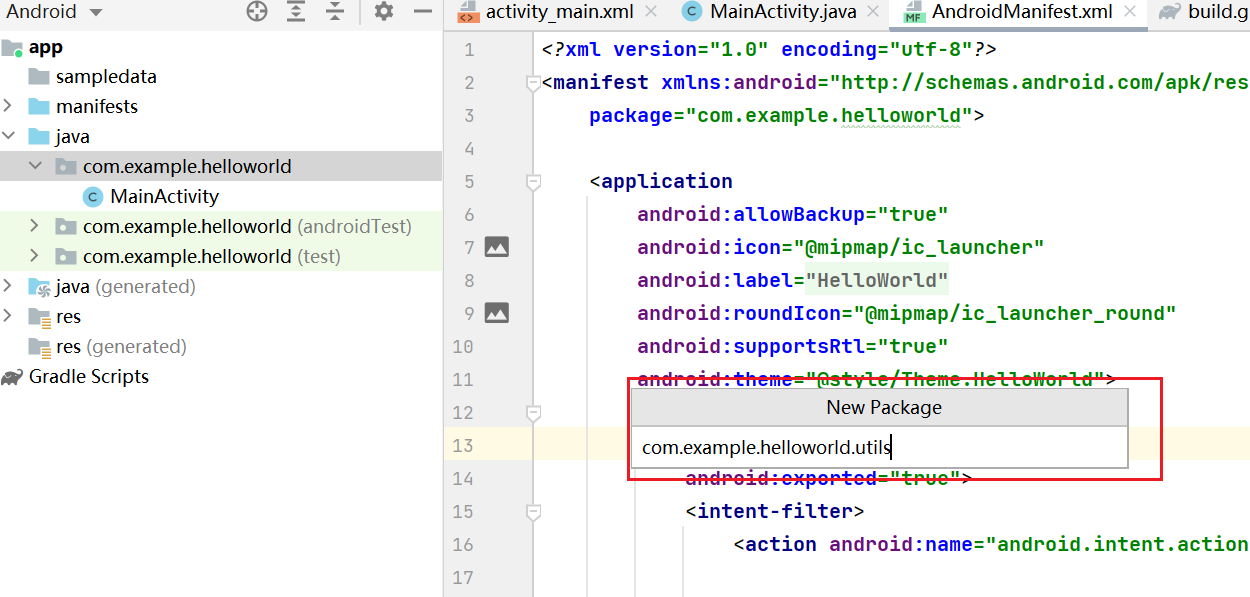
然后切换回Android视图,操作如下,新建一个package
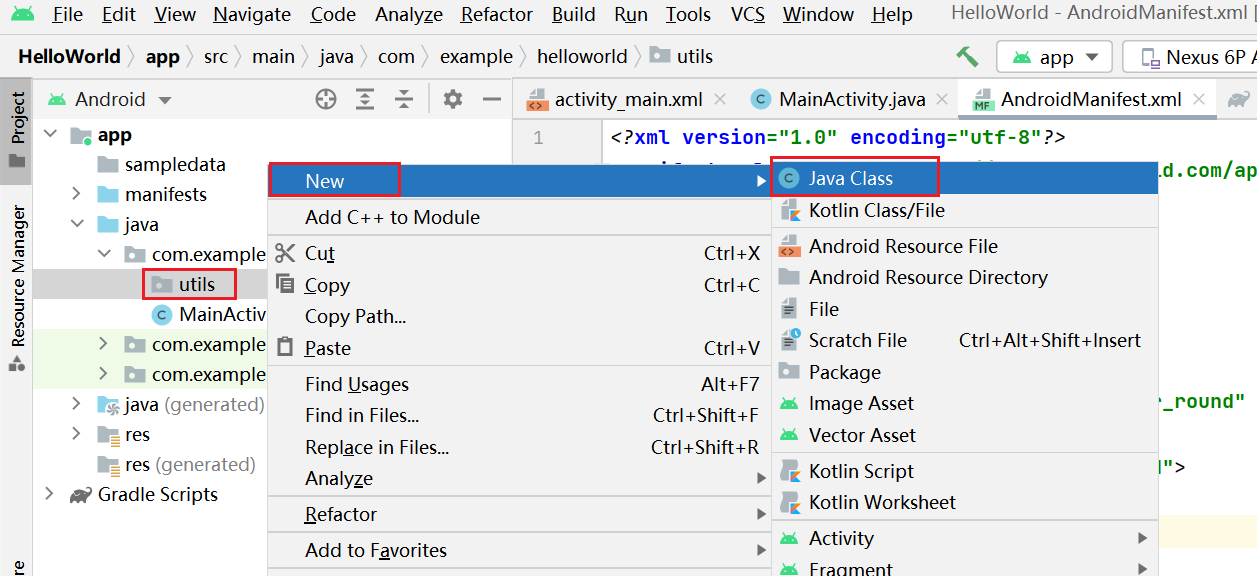
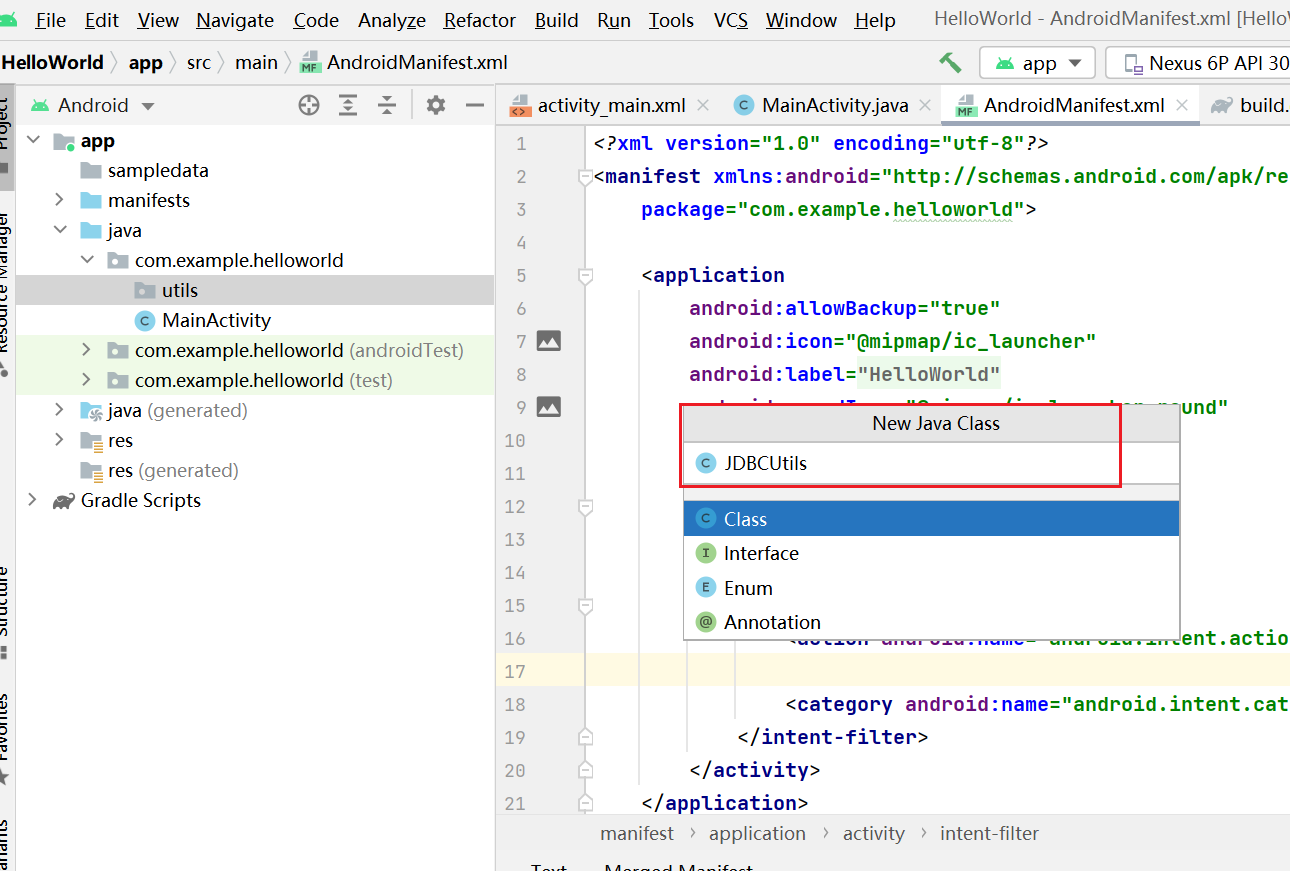
然后粘贴代码如下:
本篇文章从图片可以看到我的项目名称为HelloWorld,这个项目只是我用来做测试的。但是代码是我完善后放在另一个项目为party中的,所有的位置都是一样的,只是项目名称不一样,这个不用担心。你只需要把我的代码里的包名改成你项目的名称就好了。
注意数据库的连接:要连接的数据库,还有用户名和密码都要和自己的MysqL对应。
package com.example.party.utils;

import java.sql.Connection;
import java.sql.DriverManager;

/**
 * function: 数据库工具类,连接数据库用
 */
public class JDBCUtils {
    private static final String TAG = "MysqL-party-JDBCUtils";

    private static String driver = "com.MysqL.jdbc.Driver";// MysqL驱动

    private static String dbname = "party";// 数据库名称

    private static String user = "root";// 用户名

    private static String password = "";// 密码

    public static Connection getConn(){

        Connection connection = null;
        try{
            Class.forName(driver);// 动态加载类
            String ip = "10.0.2.2";// 写成本机地址,不能写成localhost,同时手机和电脑连接的网络必须是同一个

            // 尝试建立到给定数据库URL的连接
            connection = DriverManager.getConnection("jdbc:MysqL://" + ip + ":3306/" + dbname,
                    user, password);

        }catch (Exception e){
            e.printstacktrace();
        }
        return connection;
    }
}
接着创建entity和User
位置如图,创建方法与上述创建JDBCUtils一样

代码如下:
package com.example.party.entity;

public class User {

    private int id;
    private String userAccount;
    private String userPassword;
    private String userName;
    private int userType;
    private int userState;
    private int userDel;


    public User() {
    }

    public User(int id, String userAccount, String userPassword, String userName, int userType, int userState, int userDel) {
        this.id = id;
        this.userAccount = userAccount;
        this.userPassword = userPassword;
        this.userName = userName;
        this.userType = userType;
        this.userState = userState;
        this.userDel = userDel;
    }

    public int getId() {
        return id;
    }

    public void setId(int id) {
        this.id = id;
    }

    public String getUserAccount() {
        return userAccount;
    }

    public void setUserAccount(String userAccount) {
        this.userAccount = userAccount;
    }

    public String getUserPassword() {
        return userPassword;
    }

    public void setUserPassword(String userPassword) {
        this.userPassword = userPassword;
    }

    public String getUserName() {
        return userName;
    }

    public void setUserName(String userName) {
        this.userName = userName;
    }

    public int getUserType() {
        return userType;
    }

    public void setUserType(int userType) {
        this.userType = userType;
    }

    public int getUserState() {
        return userState;
    }

    public void setUserState(int userState) {
        this.userState = userState;
    }

    public int getUserDel() {
        return userDel;
    }

    public void setUserDel(int userDel) {
        this.userDel = userDel;
    }
}
之后创建dao和UserDao
package com.example.party.dao;

import com.example.party.entity.User;
import com.example.party.utils.JDBCUtils;
import android.util.Log;

import java.sql.Connection;
import java.sql.PreparedStatement;
import java.sql.ResultSet;
import java.util.HashMap;

/**
 * author: yan
 * date: 2022.02.17
 * **/
public class UserDao {

    private static final String TAG = "MysqL-party-UserDao";

    /**
     * function: 登录
     * */
    public int login(String userAccount, String userPassword){

        HashMap<String, Object> map = new HashMap<>();
        // 根据数据库名称,建立连接
        Connection connection = JDBCUtils.getConn();
        int msg = 0;
        try {
            // MysqL简单的查询语句。这里是根据user表的userAccount字段来查询某条记录
            String sql = "select * from user where userAccount = ?";
            if (connection != null){// connection不为null表示与数据库建立了连接
                PreparedStatement ps = connection.prepareStatement(sql);
                if (ps != null){
                    Log.e(TAG,"账号:" + userAccount);
                    //根据账号进行查询
                    ps.setString(1, userAccount);
                    // 执行SQL查询语句并返回结果集
                    ResultSet rs = ps.executeQuery();
                        int count = rs.getMetaData().getColumnCount();
                        //将查到的内容储存在map里
                        while (rs.next()){
                            // 注意:下标是从1开始的
                            for (int i = 1;i <= count;i++){
                                String field = rs.getMetaData().getColumnName(i);
                                map.put(field, rs.getString(field));
                            }
                        }
                        connection.close();
                        ps.close();

                    if (map.size()!=0){
                        StringBuilder s = new StringBuilder();
                        //寻找密码是否匹配
                        for (String key : map.keySet()){
                            if(key.equals("userPassword")){
                                if(userPassword.equals(map.get(key))){
                                    msg = 1;            //密码正确
                                }
                                else
                                    msg = 2;            //密码错误
                                break;
                            }
                        }
                    }else {
                        Log.e(TAG, "查询结果为空");
                        msg = 3;
                    }
                }else {
                    msg = 0;
                }
            }else {
                msg = 0;
            }
        }catch (Exception e){
            e.printstacktrace();
            Log.d(TAG, "异常login:" + e.getMessage());
            msg = 0;
        }
        return msg;
    }


    /**
     * function: 注册
     * */
    public boolean register(User user){
        HashMap<String, Object> map = new HashMap<>();
        // 根据数据库名称,建立连接
        Connection connection = JDBCUtils.getConn();

        try {
            String sql = "insert into user(userAccount,userPassword,userName,userType,userState,userDel) values (?,?,?)";
            if (connection != null){// connection不为null表示与数据库建立了连接
                PreparedStatement ps = connection.prepareStatement(sql);
                if (ps != null){

                    //将数据插入数据库
                    ps.setString(1,user.getUserAccount());
                    ps.setString(2,user.getUserPassword());
                    ps.setString(3,user.getUserName());
                    ps.setInt(4,user.getUserType());
                    ps.setInt(5, user.getUserState());
                    ps.setInt(6,user.getUserDel());

                    // 执行SQL查询语句并返回结果集
                    int rs = ps.executeUpdate();
                    if(rs>0)
                        return true;
                    else
                        return false;
                }else {
                    return  false;
                }
            }else {
                return  false;
            }
        }catch (Exception e){
            e.printstacktrace();
            Log.e(TAG, "异常register:" + e.getMessage());
            return false;
        }

    }

    /**
     * function: 根据账号进行查找该用户是否存在
     * */
    public User findUser(String userAccount) {

        // 根据数据库名称,建立连接
        Connection connection = JDBCUtils.getConn();
        User user = null;
        try {
            String sql = "select * from user where userAccount = ?";
            if (connection != null){// connection不为null表示与数据库建立了连接
                PreparedStatement ps = connection.prepareStatement(sql);
                if (ps != null) {
                    ps.setString(1, userAccount);
                    ResultSet rs = ps.executeQuery();

                    while (rs.next()) {
                        //注意:下标是从1开始
                        int id = rs.getInt(1);
                        String userAccount1 = rs.getString(2);
                        String userPassword = rs.getString(3);
                        String userName = rs.getString(4);
                        int userType = rs.getInt(5);
                        int userState = rs.getInt(6);
                        int userDel = rs.getInt(7);
                        user = new User(id, userAccount1, userPassword, userName, userType, userState, userDel);
                    }
                }
            }
        }catch (Exception e){
            e.printstacktrace();
            Log.d(TAG, "异常findUser:" + e.getMessage());
            return null;
        }
        return user;
    }

}
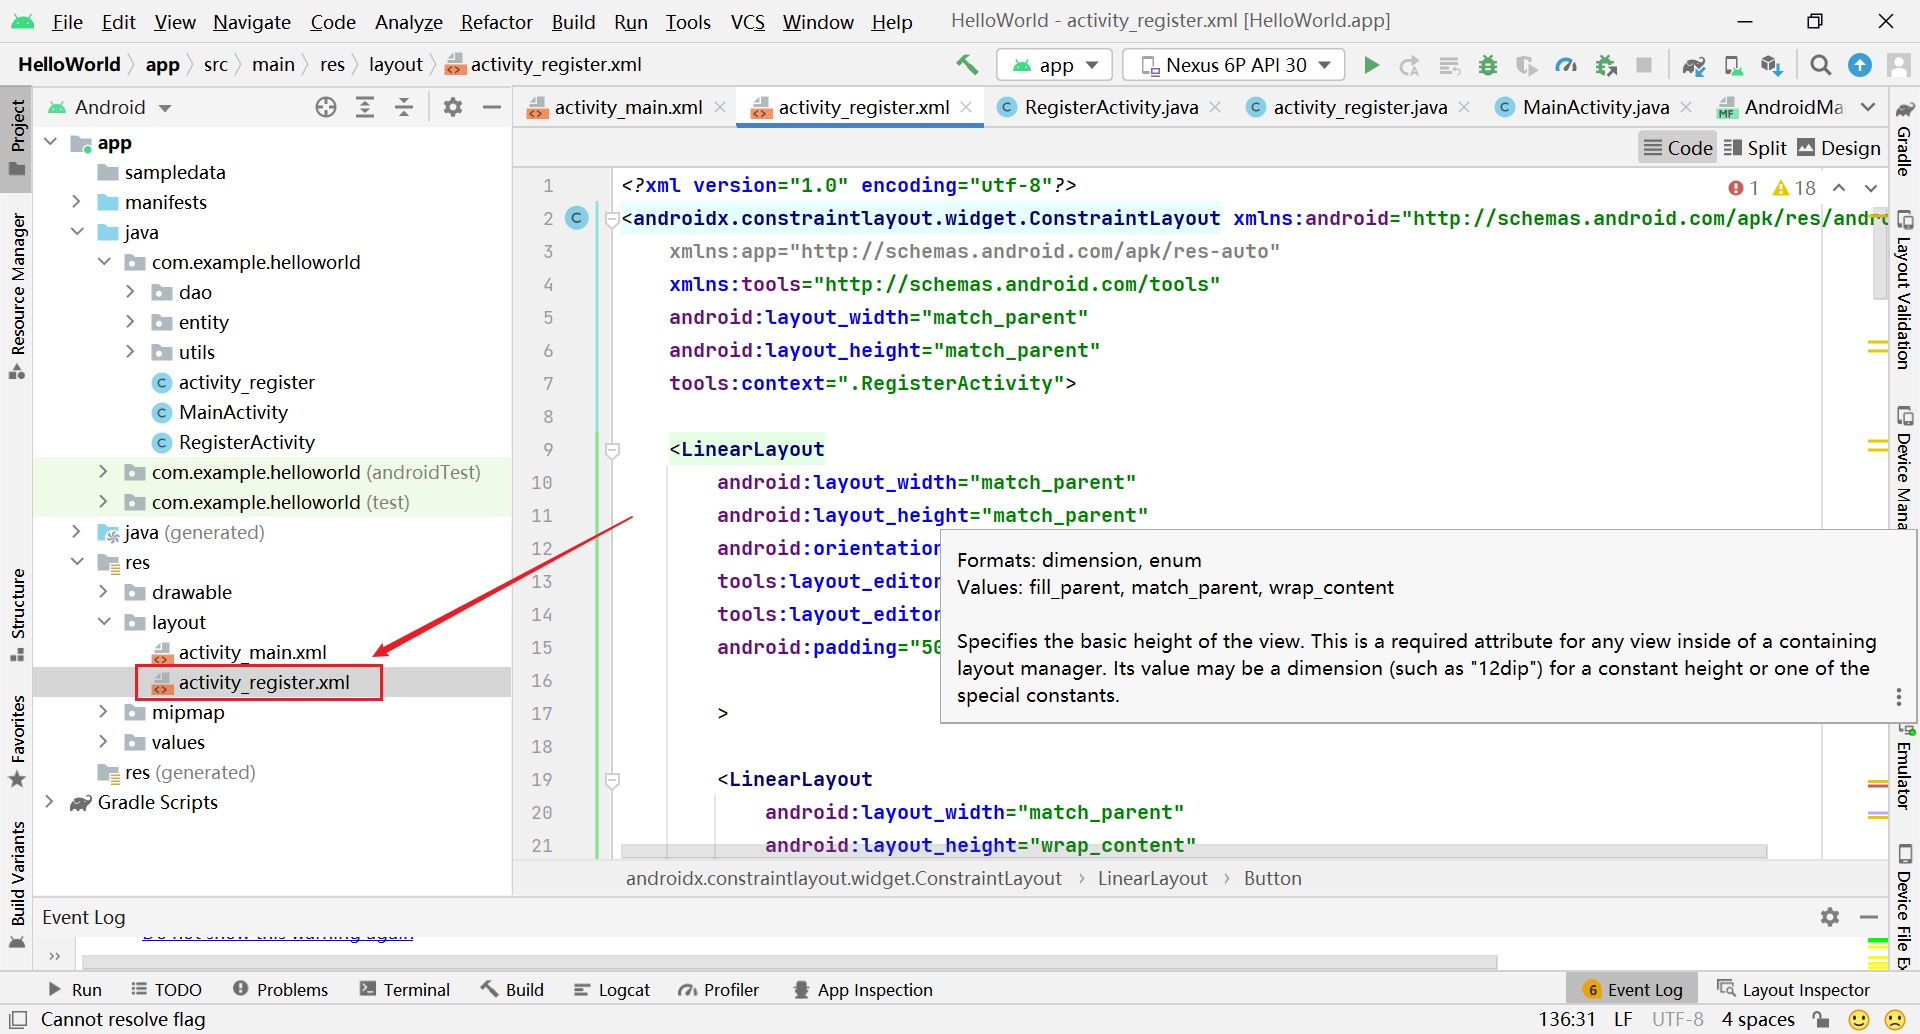
编写登录页面
<?xml version="1.0" encoding="utf-8"?>
<androidx.constraintlayout.widget.ConstraintLayout xmlns:android="http://schemas.android.com/apk/res/android"
    xmlns:app="http://schemas.android.com/apk/res-auto"
    xmlns:tools="http://schemas.android.com/tools"
    android:layout_width="match_parent"
    android:layout_height="match_parent"
    tools:context=".MainActivity">


    <LinearLayout
        android:layout_width="match_parent"
        android:layout_height="match_parent"
        android:orientation="vertical"
        tools:layout_editor_absoluteX="219dp"
        tools:layout_editor_absoluteY="207dp"
        android:padding="50dp"

        >

        <LinearLayout
            android:layout_width="match_parent"
            android:layout_height="wrap_content"
            android:orientation="horizontal">


            <TextView
                android:id="@+id/textView"
                android:layout_width="wrap_content"
                android:layout_height="wrap_content"
                android:layout_weight="1"
                android:textSize="15sp"
                android:text="账号:" />

            <EditText
                android:id="@+id/uesrAccount"
                android:layout_width="wrap_content"
                android:layout_height="wrap_content"
                android:layout_weight="1"
                android:ems="10"
                android:inputType="phone"
                android:text="" />
        </LinearLayout>
        <LinearLayout
            android:layout_width="match_parent"
            android:layout_height="wrap_content"
            android:orientation="horizontal">


            <TextView
                android:id="@+id/textView2"
                android:layout_width="wrap_content"
                android:layout_height="wrap_content"
                android:layout_weight="1"
                android:textSize="15sp"
                android:text="密码:"

                />

            <EditText
                android:id="@+id/userPassword"
                android:layout_width="wrap_content"
                android:layout_height="wrap_content"
                android:layout_weight="1"
                android:ems="10"
                android:inputType="textPersonName"
                />
        </LinearLayout>
        <LinearLayout
            android:layout_width="match_parent"
            android:layout_height="wrap_content"
            android:orientation="horizontal">


        </LinearLayout>

        <Button
            android:layout_marginTop="50dp"
            android:id="@+id/button2"
            android:layout_width="match_parent"
            android:layout_height="wrap_content"
            android:text="登录"
            android:onClick="login"
            />

        <Button
            android:id="@+id/button3"
            android:layout_width="match_parent"
            android:layout_height="wrap_content"
            android:onClick="reg"
            android:text="注册" />
    </LinearLayout>
</androidx.constraintlayout.widget.ConstraintLayout>
效果如图:
完善MainActivity
package com.example.party;

import androidx.appcompat.app.AppCompatActivity;
import android.annotation.SuppressLint;
import android.content.Intent;
import android.os.Bundle;
import android.os.Handler;
import android.os.Message;
import android.util.Log;
import android.view.View;
import android.widget.EditText;
import android.widget.Toast;
import com.example.party.dao.UserDao;
/**
 * function:连接页面加载首页
 */
public class MainActivity extends AppCompatActivity {
    private static final String TAG = "MysqL-party-MainActivity";

    @Override
    protected void onCreate(Bundle savedInstanceState) {
        super.onCreate(savedInstanceState);
        setContentView(R.layout.activity_main);
    }

    public void reg(View view){
        startActivity(new Intent(getApplicationContext(),register.class));
    }


    /**
     * function: 登录
     * */
    public void login(View view){

        EditText EditTextAccount = findViewById(R.id.uesrAccount);
        EditText EditTextPassword = findViewById(R.id.userPassword);

        new Thread(){
            @Override
            public void run() {
                UserDao userDao = new UserDao();
                int msg = userDao.login(EditTextAccount.getText().toString(),EditTextPassword.getText().toString());
                hand1.sendEmptyMessage(msg);
            }
        }.start();

    }

    @SuppressLint("HandlerLeak")
    final Handler hand1 = new Handler() {
        @Override
        public void handleMessage(Message msg) {
            if (msg.what == 0){
                Toast.makeText(getApplicationContext(), "登录失败", Toast.LENGTH_LONG).show();
            } else if (msg.what == 1) {
                Toast.makeText(getApplicationContext(), "登录成功", Toast.LENGTH_LONG).show();
            } else if (msg.what == 2){
                Toast.makeText(getApplicationContext(), "密码错误", Toast.LENGTH_LONG).show();
            } else if (msg.what == 3){
                Toast.makeText(getApplicationContext(), "账号不存在", Toast.LENGTH_LONG).show();
            }
        }
    };
}
编写注册页面

<?xml version="1.0" encoding="utf-8"?>
<androidx.constraintlayout.widget.ConstraintLayout xmlns:android="http://schemas.android.com/apk/res/android"
    xmlns:app="http://schemas.android.com/apk/res-auto"
    xmlns:tools="http://schemas.android.com/tools"
    android:layout_width="match_parent"
    android:layout_height="match_parent"
    tools:context=".register">

    <LinearLayout
        android:layout_width="match_parent"
        android:layout_height="match_parent"
        android:orientation="vertical"
        tools:layout_editor_absoluteX="219dp"
        tools:layout_editor_absoluteY="207dp"
        android:padding="50dp"

        >

        <LinearLayout
            android:layout_width="match_parent"
            android:layout_height="wrap_content"
            android:orientation="horizontal">


            <TextView
                android:id="@+id/textView"
                android:layout_width="wrap_content"
                android:layout_height="wrap_content"
                android:layout_weight="1"
                android:textSize="15sp"
                android:text="账号:" />

            <EditText
                android:id="@+id/userAccount"
                android:layout_width="wrap_content"
                android:layout_height="wrap_content"
                android:layout_weight="1"
                android:ems="10"
                android:inputType="phone"
                />
        </LinearLayout>
        <LinearLayout
            android:layout_width="match_parent"
            android:layout_height="wrap_content"
            android:orientation="horizontal">


            <TextView
                android:layout_width="wrap_content"
                android:layout_height="wrap_content"
                android:layout_weight="1"
                android:textSize="15sp"
                android:text="昵称:" />

            <EditText
                android:id="@+id/userName"
                android:layout_width="wrap_content"
                android:layout_height="wrap_content"
                android:layout_weight="1"
                android:ems="10"
                android:inputType="textPersonName"
                />
        </LinearLayout>
        <LinearLayout
            android:layout_width="match_parent"
            android:layout_height="wrap_content"
            android:orientation="horizontal">


            <TextView
                android:id="@+id/textView2"
                android:layout_width="wrap_content"
                android:layout_height="wrap_content"
                android:layout_weight="1"

                android:textSize="15sp"
                android:text="密码:"

                />

            <EditText
                android:id="@+id/userPassword"
                android:layout_width="wrap_content"
                android:layout_height="wrap_content"
                android:layout_weight="1"
                android:ems="10"
                android:inputType="textPassword"
                />
        </LinearLayout>
        <LinearLayout
            android:layout_width="match_parent"
            android:layout_height="wrap_content"
            android:orientation="horizontal">

        </LinearLayout>

        <Button
            android:layout_marginTop="50dp"
            android:id="@+id/button2"
            android:layout_width="match_parent"
            android:layout_height="wrap_content"
            android:text="注册"
            android:onClick="register"
            />
    </LinearLayout>
</androidx.constraintlayout.widget.ConstraintLayout>
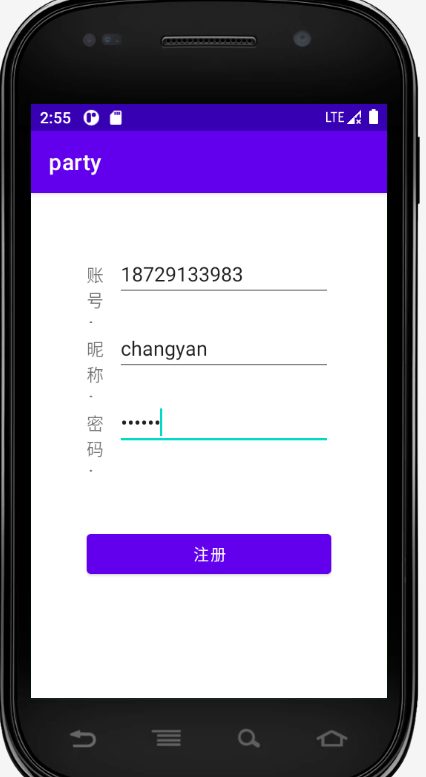
页面如图

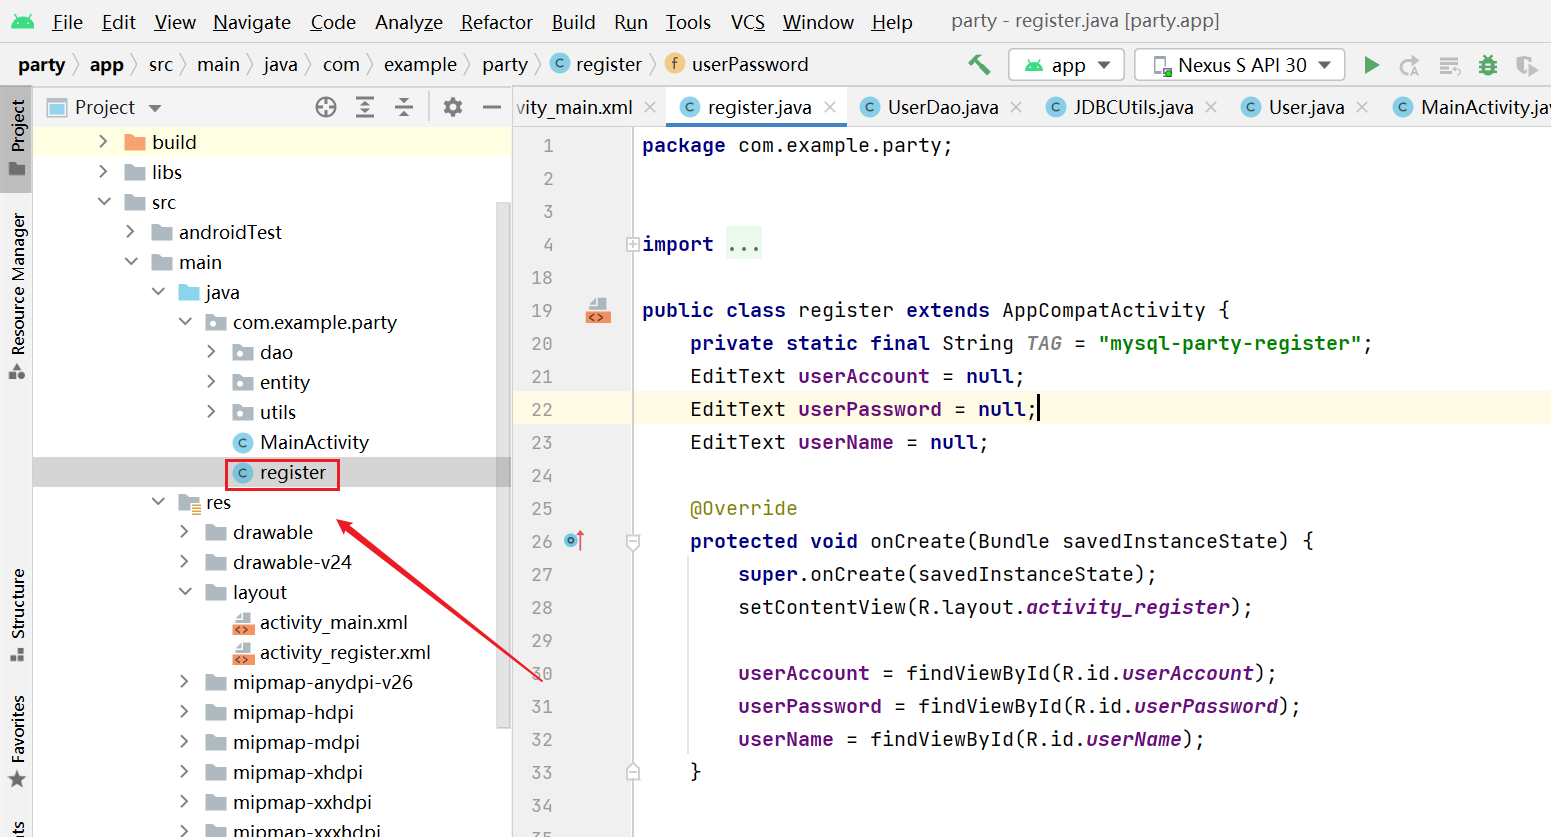
完善register
上一步创建activity_register.xml的时候会自动生成一个Class,位置如图,如果没有的话自己右键创建一个Class就可以。
package com.example.party;

import androidx.appcompat.app.AppCompatActivity;
import android.annotation.SuppressLint;
import android.content.Intent;
import android.os.Bundle;
import android.os.Handler;
import android.os.Message;
import android.util.Log;
import android.view.View;
import android.widget.EditText;
import android.widget.Toast;

import com.example.party.dao.UserDao;
import com.example.party.entity.User;

/**
 * function:连接注册页面
 */
public class register extends AppCompatActivity {
    private static final String TAG = "MysqL-party-register";
    EditText userAccount = null;
    EditText userPassword = null;
    EditText userName = null;

    @Override
    protected void onCreate(Bundle savedInstanceState) {
        super.onCreate(savedInstanceState);
        setContentView(R.layout.activity_register);

        userAccount = findViewById(R.id.userAccount);
        userPassword = findViewById(R.id.userPassword);
        userName = findViewById(R.id.userName);
    }


    public void register(View view){

        String userAccount1 = userAccount.getText().toString();
        String userPassword1 = userPassword.getText().toString();
        String userName1 = userName.getText().toString();


        User user = new User();

        user.setUserAccount(userAccount1);
        user.setUserPassword(userPassword1);
        user.setUserName(userName1);
        user.setUserType(1);
        user.setUserState(0);
        user.setUserDel(0);

        new Thread(){
            @Override
            public void run() {

                int msg = 0;

                UserDao userDao = new UserDao();

                User uu = userDao.findUser(user.getUserAccount());
                if(uu != null){
                    msg = 1;
                }
                else{
                    boolean flag = userDao.register(user);
                    if(flag){
                        msg = 2;
                    }
                }
                hand.sendEmptyMessage(msg);

            }
        }.start();


    }
    @SuppressLint("HandlerLeak")
    final Handler hand = new Handler()
    {
        public void handleMessage(Message msg) {
            if(msg.what == 0) {
                Toast.makeText(getApplicationContext(),"注册失败",Toast.LENGTH_LONG).show();
            } else if(msg.what == 1) {
                Toast.makeText(getApplicationContext(),"该账号已经存在,请换一个账号",Toast.LENGTH_LONG).show();
            } else if(msg.what == 2) {
                Toast.makeText(getApplicationContext(), "注册成功", Toast.LENGTH_LONG).show();
                Intent intent = new Intent();
                //将想要传递的数据用putExtra封装在intent中
                intent.putExtra("a","注册");
                setResult(RESULT_CANCELED,intent);
                finish();
            }
        }
    };
}
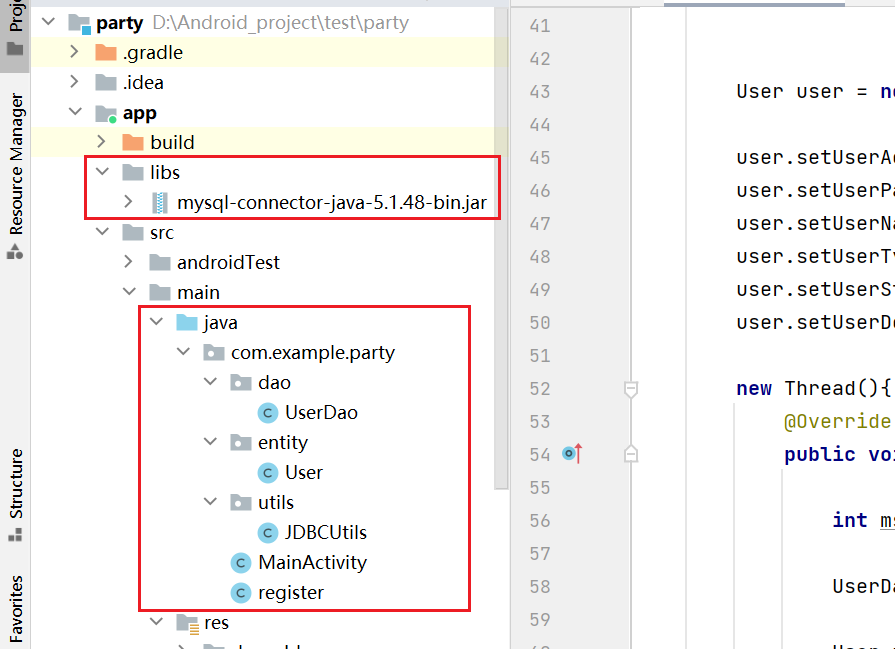
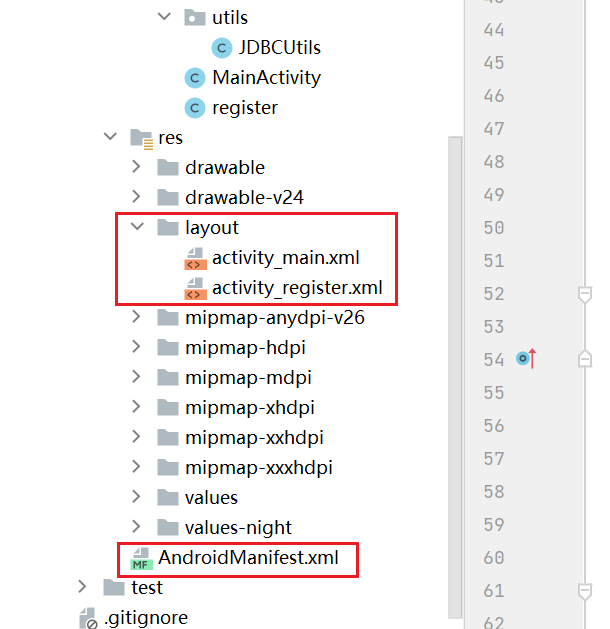
下面汇总一下都需要改变的文件!
然后运行就可以啦!
心得建议
我的大部分时间感觉都是花费在了连接数据库上。刚开始数据库一直连接无法连接,原因是连接的请求要放在一个新的线程里,不能直接在当前线程请求连接数据库。之后解决了连接问题后得到数据进行匹配都是比较简单的事情。
个人建议:如果出问题可以先建一个临时的项目然后按照【连接数据库】–> 【请求数据并在控制台输出】 --> 【建立前端页面交互】这样的过程一步一步进行调试。
祝成功!
关于android连接mysql和android连接MySQL数据库的问题我们已经讲解完毕,感谢您的阅读,如果还想了解更多关于Android Studio 使用JDBC连接mysql数据库、Android Studio 连接到 mysql 不断崩溃、Android Studio连接MySql实现登录注册(附源代码)、Android studio连接MySQL并完成简单的登录注册功能等相关内容,可以在本站寻找。
本文标签:


