在这篇文章中,我们将为您详细介绍Computex2022将以实体展的形式举办的内容,并且讨论关于实体展览会的相关问题。此外,我们还会涉及一些关于2018-11-21ko.pureComputed的使用
在这篇文章中,我们将为您详细介绍Computex 2022将以实体展的形式举办的内容,并且讨论关于实体展览会的相关问题。此外,我们还会涉及一些关于2018-11-21 ko.pureComputed 的使用、AI 风暴席卷:七彩虹 AIPC 新品亮相 COMPUTEX 2024、Ampere Computing 将以每月为周期发布开源固件、COMP2001J Computer Network的知识,以帮助您更全面地了解这个主题。
本文目录一览:- Computex 2022将以实体展的形式举办(实体展览会)
- 2018-11-21 ko.pureComputed 的使用
- AI 风暴席卷:七彩虹 AIPC 新品亮相 COMPUTEX 2024
- Ampere Computing 将以每月为周期发布开源固件
- COMP2001J Computer Network
")
Computex 2022将以实体展的形式举办(实体展览会)
今年年初,确定了今年的Computex 2022将以实体展览活动和线上内容的形式举办。并在确认展期为5月24日至27日后,即日起开放预约登记参观。
Computex 2022 将专注于六个主题:创新计算、加速智能、数字弹性、互联 X 体验、创新和初创公司以及可持续性。参与的厂商包括宏碁、AMD、宇瞻、Arm、华硕、ATEN、台达、技嘉)、IBM、英飞凌、铠侠、微软、微星、英伟达,软硬件厂商如恩智浦、高通、广达云科技、美超微、德州仪器和索泰。

今年,Computex 2022 将扩大到 5 场 CEO 演讲。预计行业趋势将通过国内外技术领先者进行解释。同时,“构建全球技术生态系统”将是本次Computex展会的主题。
其中,Computex论坛的首场活动将聚焦技术创新。“科技赋能,构建产业生态链”的核心内容,分析高效计算、5G、物联网等技术如何驱动人工智能的变革和机遇。第二场活动侧重于技术应用,探索虚拟世界、智能生活、远程工作机会,以及如何利用数字技术实施 ESG 管理趋势。
此次,通过实体展会活动与线上内容相结合,期待对接各类资源,举办多元化活动,助力展商深化国际联系,对接国际市场机遇。

2018-11-21 ko.pureComputed 的使用

以前一直在想,ko.pureComputed 好像用不上。看起来高大上。
今天在修复一个 bug 时,发现了它的妙处。
在修改商品列表的页面,弹出一个新增商品的页面。关闭之后,怎么通知修改商品列表的页面发生改变。
也许都会说用 root.vm 里面的列表。这样的改动就太大了。
因为商品列表是有序号的,我刚好用到了 index (),出现了跳号,
原来是
商品列表:
viewmodel(params){
var items = vm.getitems(typeno);
this.items = items;
this.typeno = typeno
}
template
<!--ko foreach:vm.orderitems-->
<!--ko if:$data.typeno === this.typeno-->
<span data-bind="text:$index()+1"></span>
<!--/ko-->
<!--/ko-->
改成了
<!--ko foreach:items-->
<span data-bind="text:$index()+1"></span><!--/ko-->
<!--/ko-->
但是修改了之后,通知了 vm.orderitems 改变,却无法通知 this.items 改变。
后面使用了 ko.pureComputed
完美解决这个问题。
viewmodel(params){
this.items = ko.pureComputed(function(){
return items = vm.getitems(typeno);
}
}

AI 风暴席卷:七彩虹 AIPC 新品亮相 COMPUTEX 2024
本站6月5日消息,一年一度的台北国际电脑展(computex 2024)于6月4日正式拉开帷幕。在人工智能与大模型应用蓬勃发展的这一年,ai技术正以前所未有的迅猛势头,并重塑着各行各业的格局。
在台北南港展馆1馆4楼的展位L0417a位置,展示了七彩虹紧以"AI风帆 超感创玩"为展区主题,呈现出众多贴合市场需求、引领行业潮流的AIPC相关新品。

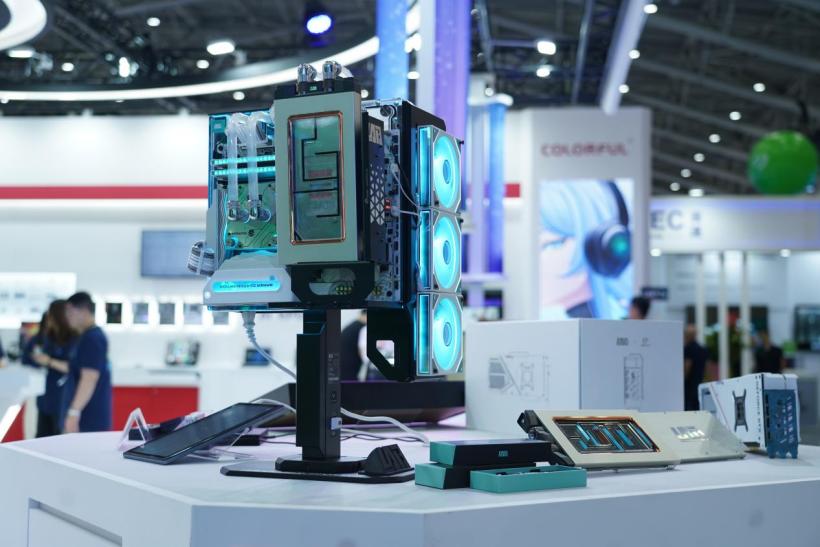
走进七彩虹展区,首先映入眼帘是 iGame Lab 产品展区。
这次台北展,七彩虹结合最新研发的水冷产品,打造了专属的 LAB 水冷卡 MOD 展示器。展示器以全套 iGame 产品为基础,以开放式水道板机箱作为承载主体,并进行了一定程度上的 MOD 改装。

全金属的工艺加持,喷射式的冷头设计,再加上全铜底的完全展示,“LAB 显卡专用水冷头”尽显高端与精致。
位于七彩虹展区一侧的赛车
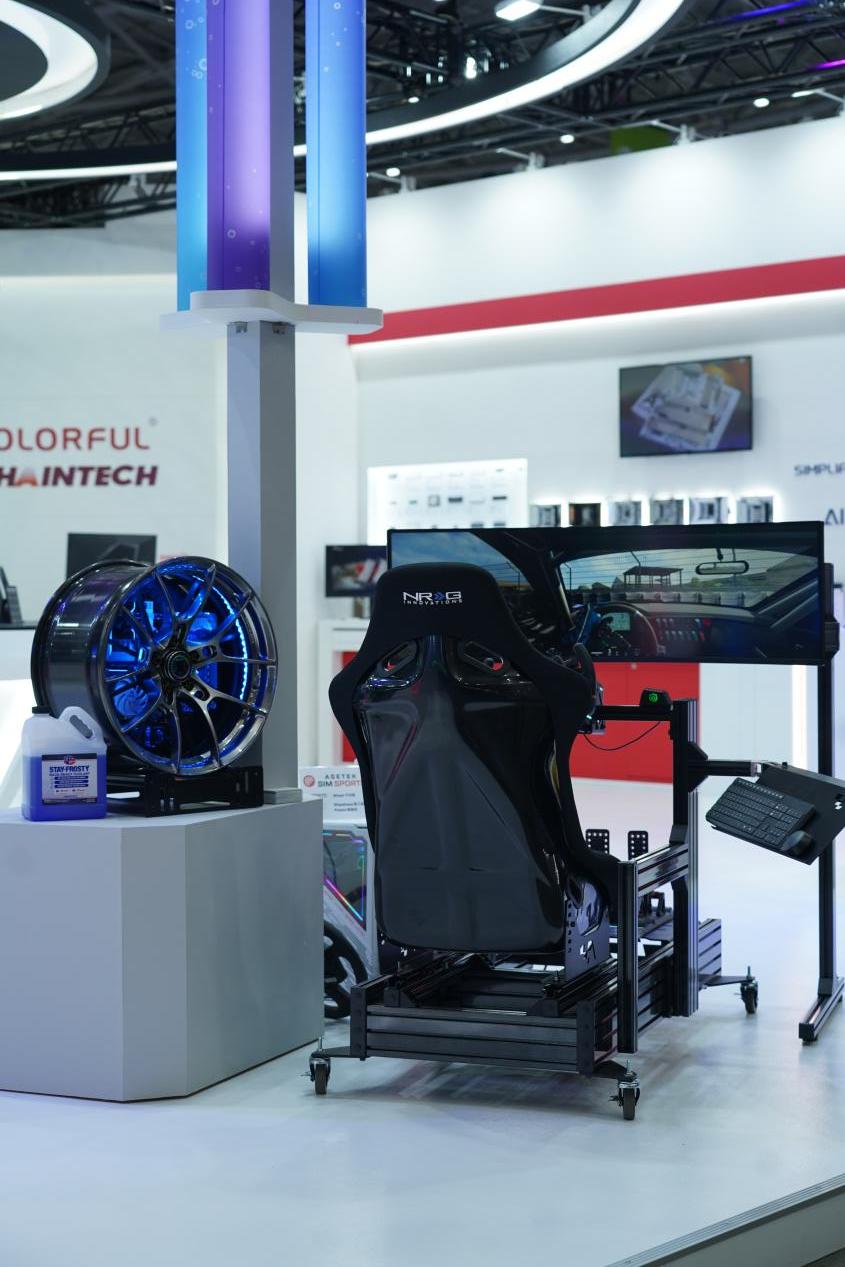
在赛车模拟器一旁众人围观的赛车轮毂 Mod 机器,便是 iGame 实验室中的 DIY 爱好者们的突发奇想。赛车轮毂 MOD 主机搭载 iGame GeForce RTX 4060 Ti Mini OC 16GB 和 CVN B760I D5 登陆舰,个性帅气的轮毂外观之外,更拥有强劲的性能和算力。
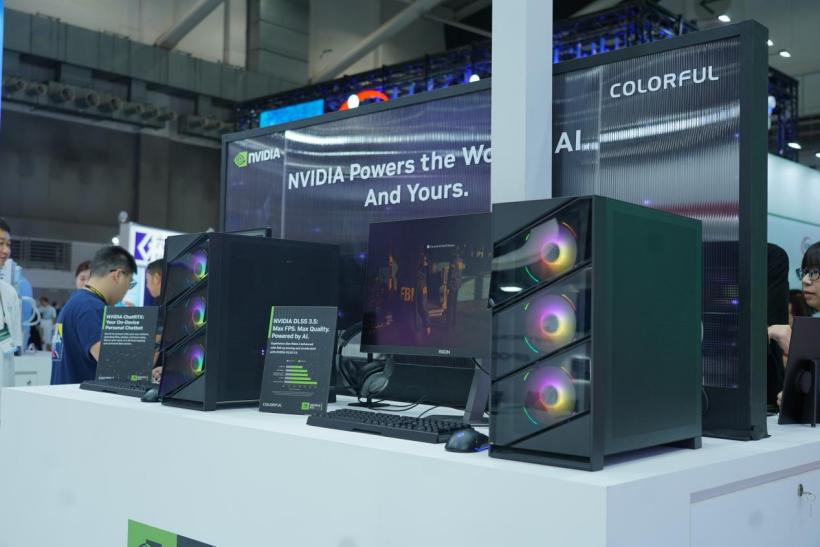
COLORFUL 展台搭载了 GeForce RTX 40 系列 GPU 的 NVIDIA AI Zone,畅享精彩绝伦的游戏和创作体验,感受更高效的生产力演示内容。
COLORFUL GeForce RTX GPU 可提供高达 1,321 TOPS 的 AI 算力,并可借助 NVIDIA RTX AI 平台,为超过 500 款 AI 加速的游戏和应用程序提供独特的性能和加速。
作为国创新生代高端硬件品牌 iGame 的高端旗舰之选 ——iGame Vulcan 和 iGame Neptune 系列,携家族系列新品登场。
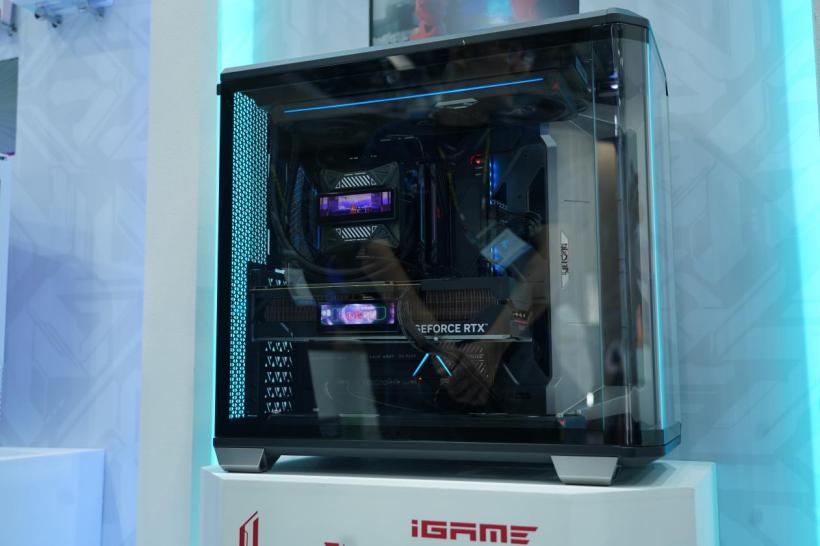
首发的 Vulcan 主板以 iGame Z790D5 Vulcan X 和白色版 W 为主,采用 277mm 宽的 E-ATX 板型设计,搭载行业顶级的供电、散热及扩展功能,为未来硬件升级预留充足空间。Vulcan 内存首发 DDR5 16*2 GB 7200MHz 规格,采用散热片加高设计和火神专属造型,兼具高频率与美观性。

独具亚特兰蒂斯风格设计的 Neptune 系列家族新品也在展会首发亮相,Neptune 系列家族主机以其独特的“ALL IN ONE”设计理念,将主板、处理器等核心部件的水冷头水排、水流循环通道等模块全部集成于一块全金属水道板中。
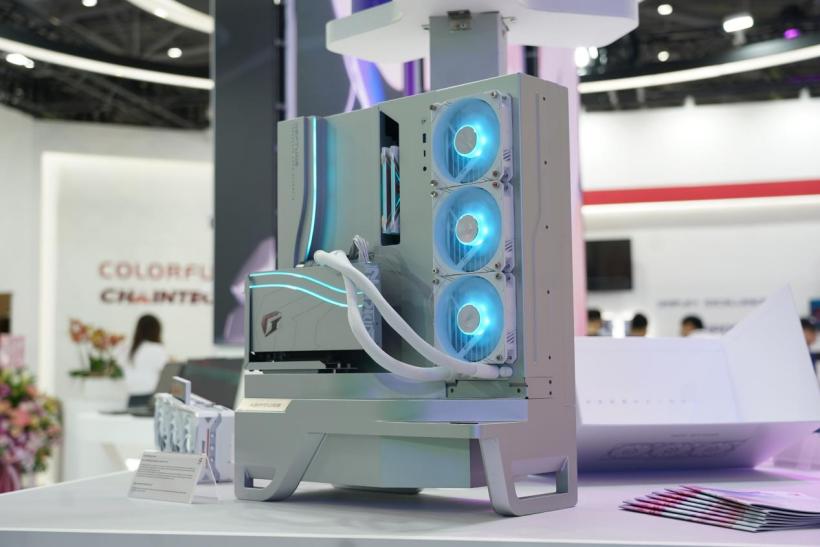
Neptune 系列显卡与套件均采用一体式水冷与金属冷头外盖,同系列显卡与主机设计相得益彰,打造细腻金属质感与未来科技感的梦幻主机。
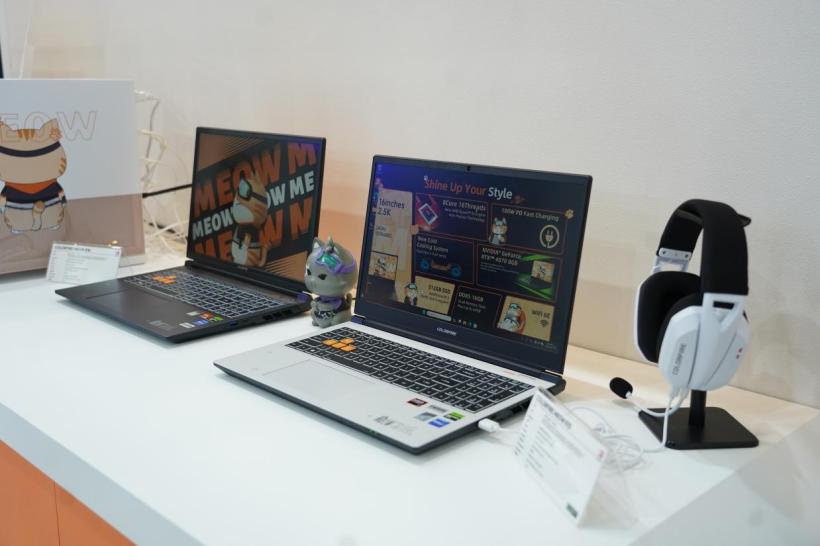
在 2024 COMPUTEX 台北展上,七彩虹首款配备 AIPC 助手的 AIPC 笔记本电脑也亮相。其拥有 14 寸小体积、极致轻薄设计、低运行噪音及卓越整机质感,至高搭载 RTX 4070 显卡。

作为品牌旗下的另一款主力游戏本,七彩虹隐星系列笔记本凭借其科技感十足的外观、主流配置和轻薄机身,也在此次展会上大放异彩。

七彩虹专为萌宠文化打造的 COLORFIRE 品牌 MEOW 系列产品,在七彩虹 MEOW 桌搭专区萌趣亮相。COLORFIRE 设计师以“橘宝”电竞萌猫的形象为灵感,打造橘宝家族产品,让“猫奴”同时享受“吸猫”与电竞的双倍快乐。
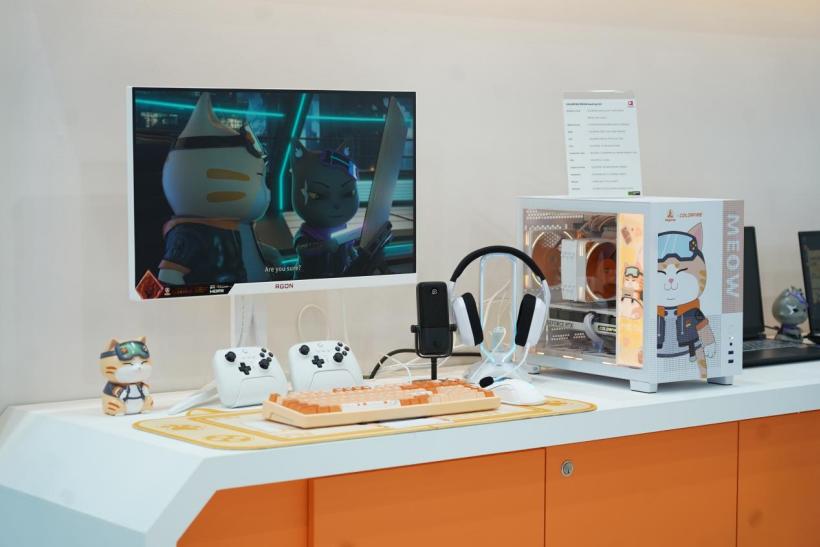
MEOW 系列游戏本将异次元萌趣文化与笔记本电脑巧妙融合,A 面采用鲜明的暖调“橘影橙”配色,搭配 IP 丝印进行光影叠加,彰显非凡辨识度。首发搭载 AMD 锐龙 7 8845HS 处理器,搭配 NVIDIA GeForce RTX 4070 笔记本电脑 GPU,支持光追和 DLSS 3.5 技术,轻松应对各种大型游戏和高负载任务。
除了令人惊喜的性能产品展示与体验区,七彩虹还特别设立了一个充满趣味的 AI 互动区域。基于 iGame Ultra 家族主机后台强大的运算能力,无需复杂的操作,只需玩家站在摄像机前方,轻触拍照按钮,画面便会生成各种风格的 AI 生成效果,并支持多人同时拍摄变身,玩家在生成 AI 效果图后可自行下载保存。

在 COMPUTEX 2024 上,七彩虹以其全新发布的 AIPC 笔记本电脑及 iGame Vulcan 和 Neptune 家族系列产品的亮相,无疑为整个电脑硬件市场注入了新的活力。
让我们共同期待七彩虹在 COMPUTEX 2024 的后续精彩表现,共同见证 AI 时代和电脑科技的未来发展。
以上就是AI 风暴席卷:七彩虹 AIPC 新品亮相 COMPUTEX 2024的详细内容,更多请关注php中文网其它相关文章!

Ampere Computing 将以每月为周期发布开源固件
今年年初,Ampere Computing 宣布将致力于支持固件生态系统中的开源,并为他们的 Ampere Altra 处理器和 Mount Jade 平台开发开源固件,如今他们承诺将每月发布一次开源固件。
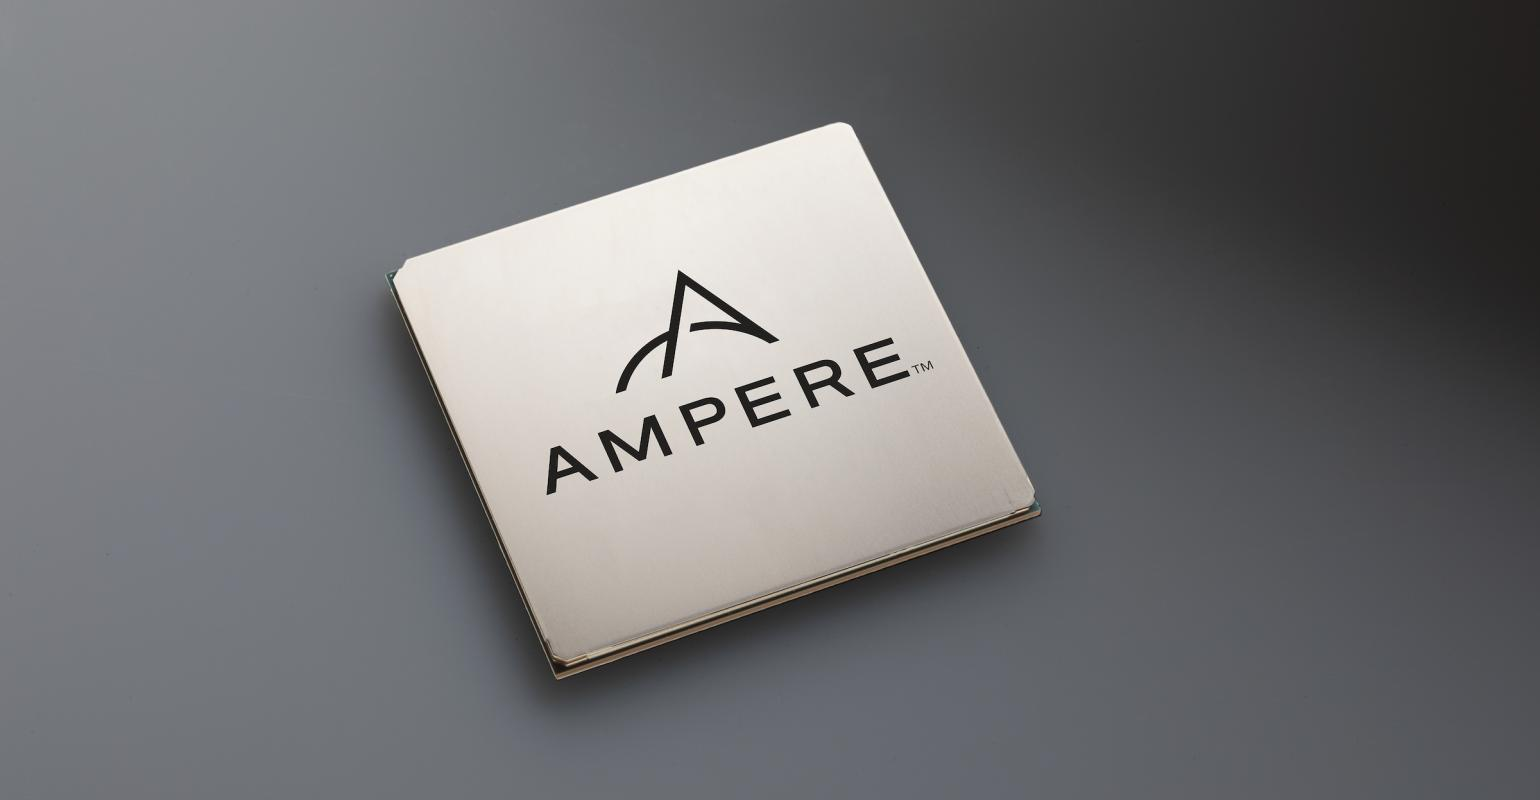
Ampere Computing(以下简称 Ampere)是一家由 Renee James(英特尔前总裁) 在 2017 年于美国成立的半导体公司,总部设在圣克拉拉。专注于开发以 ARM 为基础的计算机处理器。2019 年,Arm 与甲骨文先后向 Ampere 投资,为 Ampere 后续的发展提供了支持。
Ampere 专注于云和边缘计算数据中心领域,并凭借 Ampere Altra 处理器杀入了已被英特尔和 AMD 统治的服务器领域。
通过近几年时间的发展,Ampere 已经证明了自己是迄今为止最有能力的 AArch64 服务器供应商,他们的新产品 Ampere Altra Max 拥有 128 个内核,在性能上可以与 AMD 和英特尔的最新产品竞争,而且由于 ARM 架构的特性,Ampere Altra Max 在能耗上显著优于竞争对手。
Ampere 在其官方博客上写道:"Ampere 致力于支持其平台上的开源固件。开源固件对数据中心的生态和未来的创新至关重要。我们的客户需要这些解决方案以在他们的平台上无缝运行。我们已经建立了一个月度发布周期,这使得 Mount Jade 平台上的 Ampere Altra 以及 Altra Max SOC 未来将具有更加丰富的功能。"
目前 Ampere 合作的顶级客户包括微软、甲骨文等。相关固件目前已托管至 GitHub 平台,开发者可以点击链接查看更多详情。
近年来,我们很少在现代硬件平台上看到更多的开源固件,如今 Ampere 这家市场上主要的服务器供应商正朝着这个方向进行转变是我们十分愿意看到的行业趋势,当然这在一定程度上也归功于行业对安全和透明度的要求越来越高。

COMP2001J Computer Network
COMP2001J Computer Network 2024
1
Packet Tracer Lab: Introduction
Abstract:
You will learn the basics of setting up networks of computers in Packet Tracer by the following steps:
- Create a network by physically connecting two computers
- Get these two computers to communicate with each other
- Add more computers using a switch
- Add a router to allow communication outside of the network you have created
Note: All steps described in this lab note have been successfully tested using Packet Tracer 7.3 MacOS 64-
bit version.
Build a basic network
First, we create a basic network by adding two computers to the simulation and connecting them. When we
connect them together, we use a cross-over cable because we are connecting two devices of the same type.
This image with two green dots on both sides shows two computers have already been physically connected.
The dashed cable shows that it is a cross-over cable.
Basic network configuration
Before they can actually communicate, we must set up the network on each device.
By clicking on each individual component, we can configure the network settings of devices. In PC0, we set
its IP address 192.168.1.1 and its subnet mask 255.255.255.0.
In PC1, we set its IP address 192.168.2.1 and its subnet mask 255.255.255.0. Now send a message from PC0
to PC1 (click “add simple PDU”->click “pc0”->click “pc1”). Because the two computers are not in the same
subnet (why?), they cannot communicate with each other, and messages cannot be sent.
To solve this, we either change the subnet mask in both devices or change the IP address代 写 COMP2001J Computer Networkof one of the
computers to keep them in the same subnet. The easiest solution is to change the IP address of PC1 to
192.168.1.2.
COMP2001J Computer Network 2024
2
Adding more computers using a switch
A single cable is enough for two computers to communicate with each other. However, in reality, we usually
want more computers to be able to communicate and work together. To do this, we can add a switch. There
are many types of switches that can be added to the network simulations, we choose an empty switch
(Switch-PT-Empty) to get started.
Then, we need to add the necessary ports to this switch. In this example, we will connect four devices, so
we must add four ports to the switch (after we have powered it off). There are different types of ports:
ethernet (10 Mbps), fast ethernet (100 Mbps), and gigabit ethernet (1 Gbps). These are labeled ending in CE,
CFE, and CGE, respectively. As the computers we have created all have fast ethernet connections, we should
drag 4 of these to the switch and power it back on.
Now we can add some more devices (e.g., a laptop and a printer). These should all be connected to the
switch using a straight copper cable. Just like the previous example. we need to set the IP address of each
of the devices and their subnet masks. They should be set to the following values (192.168.1.1 reserved for
the gateway later):
• PC0: 192.168.1.2; 255.255.255.0
• PC1: 192.168.1.3; 255.255.255.0
• Laptop0: 192.168.1.4; 255.255.255.0
• Printer0: 192.168.1.5; 255.255.255.0
Now, you should send messages between any of the devices to test if they are connected.
Connecting to other networks using a router
We are going to add a router such that we can communicate with other devices outside our network. Routers
are more complicated to set up and configure than simple switches, so we must learn how to configure them.
First, we add an empty router to our simulation. We should add two fast ethernet ports to this empty router,
one for connecting to our switch and the other for connecting to something else in the other network. We
remove the “printer0” to free a port of the switch in our network. Connect the switch to the router using a
straight copper cable and click on the router to configure the device. Remember which port number in the
router that we connected the switch to.
Power it off COMP2001J Computer Network 2024
3
Router Configuration
To configure the router, we need to type commands into the CLI (Command Line Interface). This can be
opened by choosing the CLI tab and pressing enter. We should see a terminal like this:
This allows us to type the command into the system to change the settings. If we are unsure what the correct
command is, we can type “?” or add it to a command that we are not sure of.
- Before changing settings, we have to enable the privileged mode by typing the command enable (or
en). This gives us more options so that we can execute to change the settings.
- To start setting up the device, we use the configure terminal command. This allows us to configure
the different network interfaces.
- After this, we must select the correct interface and define the type of connection and the port
number. The switch is connected to this router using fastEthernet over port 0/0 so the command is:
interface fastEthernet 0/0
- Now we have selected the interface, we can set details like the IP address and subnet mask. This is
done with the command ip address followed by the ip address and the subnet mask. Here we are
going to give the address 192.168.1.1 to the network interface connected to the switch and give it
the same subnet mask as the other devices in the network.
Lastly, we need to activate the interface so that it is operational. This is done with the command no
shutdown. This means that the interface will remain on when the device is powered up.- Assuming that everything else is done correctly, you should see a message ending ‘changed state to
up’. Finally, we need to exit the interface (so we can configure another interface).
COMP2001J Computer Network 2024
4
Adding a server
Now, we will add a Server to our simulation and connect it to the second port on the router. These should
be connected using a cross-over cable. We will go through the same steps to set the IP address of this
network interface to 10.1.1.1 with a subnet of 255.255.255.0.
After this, we need to set the IP address of the server to 10.1.1.2 with a subnet of 255.255.255.0.
Additionally, we need to set the gateway to the IP address of the router in this network (10.1.1.1). Lastly,
we need to change the settings of all devices in the first network so that the default gateway is set to the
IP address of the router in the first network (192.168.1.1). Now, we should be able to send messages to
WX:codinghelp
今天关于Computex 2022将以实体展的形式举办和实体展览会的介绍到此结束,谢谢您的阅读,有关2018-11-21 ko.pureComputed 的使用、AI 风暴席卷:七彩虹 AIPC 新品亮相 COMPUTEX 2024、Ampere Computing 将以每月为周期发布开源固件、COMP2001J Computer Network等更多相关知识的信息可以在本站进行查询。
本文标签:


