对于想了解pygameplatformer-如何使底部稳定?的读者,本文将提供新的信息,并且为您提供关于10awesomecollaborationplatformfordesigners、2Duni
对于想了解pygame platformer-如何使底部稳定?的读者,本文将提供新的信息,并且为您提供关于10 awesome collaboration platform for designers、2D unity platformer 玩家移动问题、appium+android 各配置参数获取 ''platformName''、''platformVersion''、appActivity、deviceName、webd...、Developing Flash Platform games with PushButton Engine的有价值信息。
本文目录一览:- pygame platformer-如何使底部稳定?
- 10 awesome collaboration platform for designers
- 2D unity platformer 玩家移动问题
- appium+android 各配置参数获取 ''platformName''、''platformVersion''、appActivity、deviceName、webd...
- Developing Flash Platform games with PushButton Engine

pygame platformer-如何使底部稳定?
所以我当时在做一个pygame平台游戏,却陷入了一件事情。我找不到找到使平台基础坚实的方法。玩家可以降落在它的顶部,但是当它试图穿过底部时,它会弹跳回去。我试过了,但是没用:
hits = pg.sprite.spritecollide(player, platforms, False)if hits: if player.pos.y == hits[0].rect.top: player.vel.y = 10 else: player.pos.y = hits[0].rect.top + 1 player.vel.y = 0有人为我提供解决方案吗?这是完整的程序。
答案1
小编典典这是一个简短的平台游戏示例。机芯尤其重要。您必须首先沿x轴移动,检查播放器是否与墙壁碰撞,然后在发生碰撞时将其移回墙壁。然后,对y轴执行相同的操作。如果您不将机芯分为这两个部分,那么如果您同时按下多个机芯键,则玩家将跳到墙的侧面,顶部或底部。
import pygame as pgpg.init()WINDOW_WIDTH, WINDOW_HEIGHT = 800, 600screen = pg.display.set_mode((WINDOW_WIDTH, WINDOW_HEIGHT))GRAY = pg.Color(''gray24'')GRAVITY = 800class Player(pg.sprite.Sprite): def __init__(self, pos, blocks): super().__init__() self.image = pg.Surface((30, 50)) self.image.fill(pg.Color(0, 110, 170)) self.rect = self.image.get_rect(topleft=pos) self.vel = pg.math.Vector2(0, 0) self.pos = pg.math.Vector2(pos) self.blocks = blocks self.on_ground = False def update(self, dt): # Move along x-axis. self.pos.x += self.vel.x * dt self.rect.x = self.pos.x collisions = pg.sprite.spritecollide(self, self.blocks, False) for block in collisions: # Horizontal collision occurred. if self.vel.x > 0: # Moving right. self.rect.right = block.rect.left # Reset the rect pos. elif self.vel.x < 0: # Moving left. self.rect.left = block.rect.right # Reset the rect pos. self.pos.x = self.rect.x # Update the actual x-position. # Move along y-axis. self.pos.y += self.vel.y * dt # +1 to check if we''re on a platform each frame. self.rect.y = self.pos.y + 1 # Prevent air jumping when falling. if self.vel.y > 0: self.on_ground = False collisions = pg.sprite.spritecollide(self, self.blocks, False) for block in collisions: # Vertical collision occurred. if self.vel.y > 0: # Moving down. self.rect.bottom = block.rect.top # Reset the rect pos. self.vel.y = 0 # Stop falling. self.on_ground = True elif self.vel.y < 0: # Moving up. self.rect.top = block.rect.bottom # Reset the rect pos. self.vel.y = 0 # Stop jumping. self.pos.y = self.rect.y # Update the actual y-position. # Stop the player at screen bottom. if self.rect.bottom >= WINDOW_HEIGHT: self.vel.y = 0 self.rect.bottom = WINDOW_HEIGHT self.pos.y = self.rect.y self.on_ground = True else: self.vel.y += GRAVITY * dt # Gravityclass Block(pg.sprite.Sprite): def __init__(self, rect): super().__init__() self.image = pg.Surface(rect.size) self.image.fill(pg.Color(''paleturquoise2'')) self.rect = rectdef main(): clock = pg.time.Clock() done = False dt = 0 all_sprites = pg.sprite.Group() blocks = pg.sprite.Group() player = Player((300, 100), blocks) all_sprites.add(player) rects = ((300, 200, 30, 70), (100, 350, 270, 30), (500, 450, 30, 170), (400, 570, 270, 30), (500, 150, 70, 170), (535, 310, 270, 70)) for rect in rects: # Create the walls/platforms. block = Block(pg.Rect(rect)) all_sprites.add(block) blocks.add(block) while not done: for event in pg.event.get(): if event.type == pg.QUIT: done = True elif event.type == pg.KEYDOWN: if event.key == pg.K_a: player.vel.x = -220 elif event.key == pg.K_d: player.vel.x = 220 elif event.key == pg.K_w: # Jump if player.on_ground: player.vel.y = -470 player.pos.y -= 20 player.on_ground = False elif event.type == pg.KEYUP: if event.key == pg.K_a and player.vel.x < 0: player.vel.x = 0 elif event.key == pg.K_d and player.vel.x > 0: player.vel.x = 0 all_sprites.update(dt) screen.fill(GRAY) all_sprites.draw(screen) pg.display.flip() dt = clock.tick(60) / 1000if __name__ == ''__main__'': main() pg.quit()这是您在注释中发布的代码的有效版本(仅对于垂直碰撞,还需要添加水平碰撞)。因此,当玩家跳跃并与平台碰撞时,您必须将设置player.rect.top为platform.rect.bottom并更改vel.y。
import pygame as pgfrom pygame.math import Vector2 as vecpg.init()WIDTH, HEIGHT = 800, 600YELLOW = pg.Color(''yellow'')GREEN = pg.Color(''green'')BLACK = pg.Color(''gray11'')screen = pg.display.set_mode((WIDTH,HEIGHT))clock = pg.time.Clock()FPS = 60PLAYER_FRICTION = .95PLAYER_ACC = .2class Player(pg.sprite.Sprite): def __init__(self): pg.sprite.Sprite.__init__(self) self.image = pg.Surface((30, 40)) self.image.fill(YELLOW) self.rect = self.image.get_rect(center=(WIDTH/2, HEIGHT-30)) self.pos = vec(WIDTH/2, HEIGHT/2) self.vel = vec(0,0) self.acc = vec(0,0) def jump(self): self.rect.y += 1 hits = pg.sprite.spritecollide(self, platforms, False) self.rect.y -= 1 if hits: self.vel.y = -13 def update(self): self.acc = vec(0, 0.5) keys = pg.key.get_pressed() if keys[pg.K_a]: self.acc.x = -PLAYER_ACC if keys[pg.K_d]: self.acc.x = PLAYER_ACC # apply friction self.vel.x *= PLAYER_FRICTION self.vel += self.acc self.pos += self.vel # wrap around the sides of the screen if self.pos.x > WIDTH: self.pos.x = 0 if self.pos.x < 0: self.pos.x = WIDTH self.rect.midbottom = self.posclass Platform(pg.sprite.Sprite): def __init__(self, x, y, w, h): pg.sprite.Sprite.__init__(self) self.image = pg.Surface((w, h)) self.image.fill(GREEN) self.rect = self.image.get_rect(topleft=(x, y))all_sprites = pg.sprite.Group()platforms = pg.sprite.Group()player = Player()all_sprites.add(player)# spawns and adds platforms to groupp1 = Platform(0, HEIGHT - 40, WIDTH, 40)p2 = Platform(WIDTH / 2 - 50, HEIGHT - 300, 100, 20)p3 = Platform(WIDTH / 2 - 100, HEIGHT - 150, 200, 20)all_sprites.add(p1, p2, p3)platforms.add(p1, p2, p3)running = Truewhile running: clock.tick(FPS) for event in pg.event.get(): if event.type == pg.QUIT: running = False if event.type == pg.KEYDOWN: if event.key == pg.K_SPACE: player.jump() all_sprites.update() # Check if we hit a wall/platform. hits = pg.sprite.spritecollide(player, platforms, False) for platform in hits: # Iterate over the collided platforms. if player.vel.y > 0: # We''re falling. player.rect.bottom = platform.rect.top player.vel.y = 0 elif player.vel.y < 0: # We''re jumping. player.rect.top = platform.rect.bottom player.vel.y = 3 player.pos.y = player.rect.bottom #Draw / render screen.fill(BLACK) all_sprites.draw(screen) pg.display.flip()pg.quit()顺便说一句,在跳跃方法,你必须改变self.rect.y不self.rect.x。

10 awesome collaboration platform for designers
https://smashinghub.com/10-awesome-collaboration-platform-for-designers.htm
Collaboration platforms for designers are becoming more pronounced as we see more companies launching such products in the market. On SmashingHub alone, I have already covered two such companies: Notism and Webydo. The reason for such a product is clear: it improves the workflow by enabling easy file management, real time communication and payment. All these help designers to improve their productivity, which in turn shortens turnaround time and ultimately raises the revenue for the company or individual designer.
If you are not sure about how these design collaboration platforms work, here are 10 of the latest offerings that you can try.
#1: Notism

I have covered this Notism during their giveaway collaboration with SmashingHub. You can check out the article to see what kind of benefits that you can enjoy. In summary, I was impressed with what Notism can do, which is why the giveaway was conducted to share my experience with the readers here.
#2: Webydo

SmashingHub also did a giveaway with Webydo. It manages the technical backend and the payment process for designers while they focus on creating websites for clients. A nice thing about Webydo is that all the websites created by the designers will be branded as their work, rather than being promoted as the output of Webydo’s platform.
#3: Cacoo
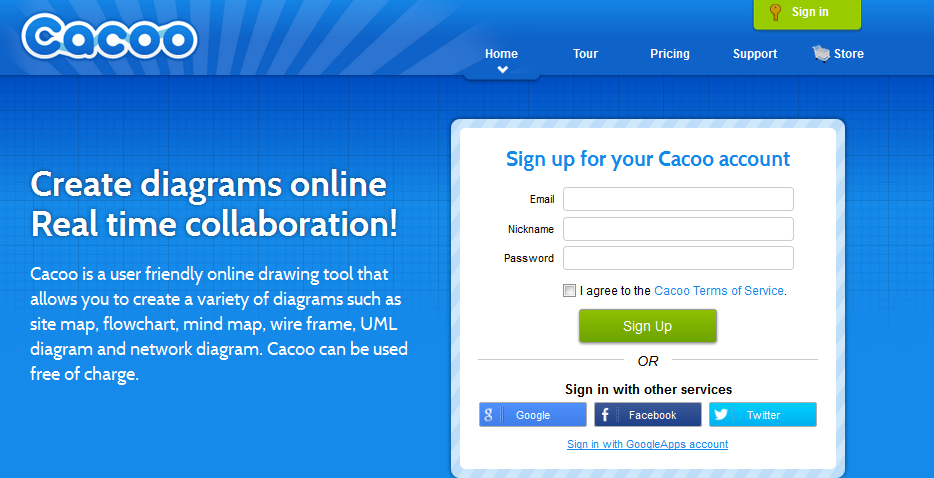
Cacoo focuses on enabling collaboration over diagrams such as site map, flowchart, mind map, wire frame etc. It has a free account for users to try out their basic service. Useful if you work with diagrams most of the time with your collaborators or clients.
#4: FrameBench

Framebench’s strength is on real time sychncing of the documents. This means your clients or team members can see the changes as you are making them. This is great for minor touchups when it is cumbersome to do so over email. It also integrates with other project software such Basecamp, thus making it much easier in terms of data portability.
#5: Mural.ly
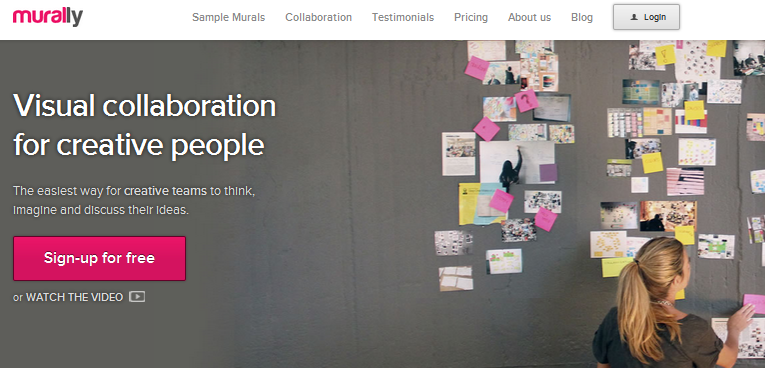
Mural.ly is ideal for designers to share ideas. It has a virtual canvas that allows your team to share any kind of media from videos to images to text. This virtual canvas works like a physical white board, except that it has unlimited borders and a lot more features.
#6: Exact.li
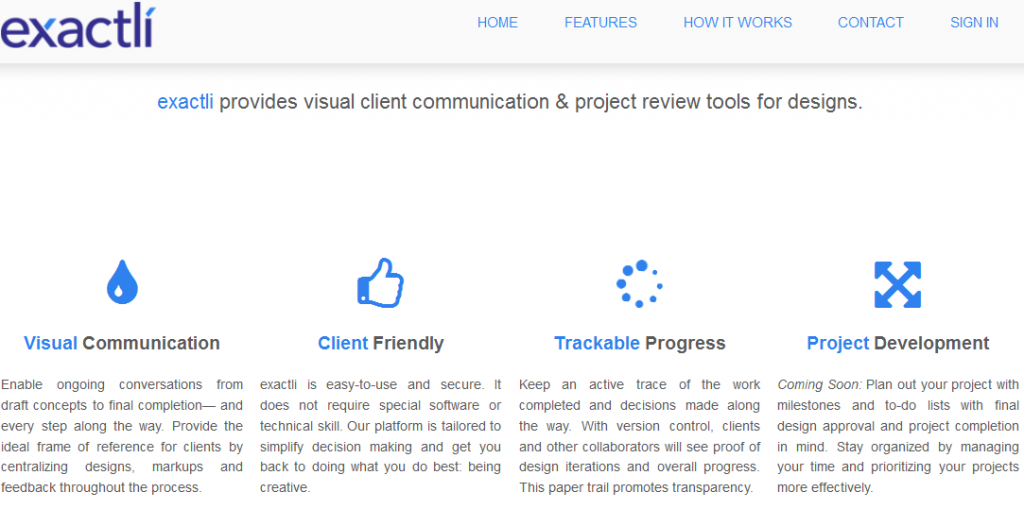
Exact.li is more of a peer review platform. It allows you to upload your documents online and invite fellow collaborators to comment on it. If you are looking for a more basic tool for review purposes, exact.li is the right fit.
#7: Marqueed

Marqueed focuses on an niche area: marking up and commenting on images. Since designers do work a lot on image, this is a nice niche that isn’t as competitive as other areas. It also has a host of other features such as taking snapshots of webpages, keep track of progress and a quick grab tool for images.
#8: 87seconds
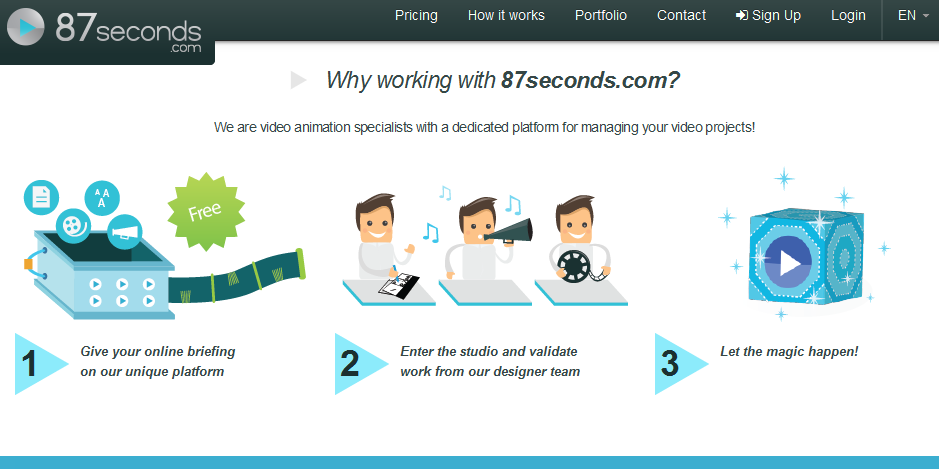
First of all, I liked the name. It is interesting and memorable. Secondly, I like its innovative. 87 seconds is on doing animated explaination videos that have become super popular. Its platform allows a certain of collaboration between designers and clients through templates and online communication.
#9: Sungalss.io
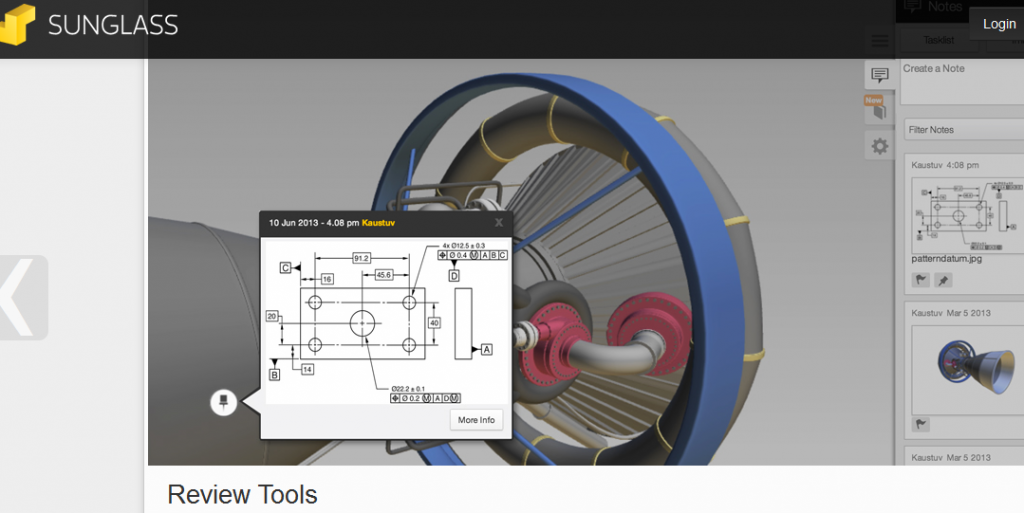
Sunglass.io is one of the first collaboration platform for 3D designers. Their platform allows collaborators to work together on producing and designing 3D models using different software.
#10: Annotree

Annotree allows collaboration between mobile app developers and designers. The innovation is in allowing the changes to be marked directly on the app, using mobile devices. These mark ups can be then be shared in a dashboard so that every member knows what needs to be done.

2D unity platformer 玩家移动问题
如何解决2D unity platformer 玩家移动问题?
我正在尝试制作一个向鼠标方向发射弹丸的 2D 统一平台游戏。
所以,我试图让玩家移动。但有个问题。它没有像我预期的那样跳跃。当我按下跳转键时,它有时会跳转,但有时不会。我认为在移动时跳跃通常不起作用,但我不知道如何解决这个问题。
我尝试将跳转函数放入 if 语句中,更改变量,但它仍然无法像我想的那样工作。
我使用精灵渲染来翻转精灵,这样子对象就不会在游戏进程后期随玩家一起翻转(因为当我第一次尝试通过矢量和旋转来完成时,它并没有很好地结束)
public class playerMovement : MonoBehavIoUr
{
    //movement variables
    public float speed;
    private float moveInput;

    //player components
    private Rigidbody2D rb;
    private SpriteRenderer spriteRender;

    //jump variables
    private float jumpInput;
    public float jumpForce;

    //ground variables

    // Start is called before the first frame update
    void Start()
    {
        rb = GetComponent<Rigidbody2D>();
        spriteRender = GetComponent<SpriteRenderer>();
    }

    // Update is called once per frame
    void FixedUpdate()
    {
        moving();
        jumping();
    }

    //move left & right function
    void moving()
    {
        moveInput = Input.GetAxis("Horizontal");
        if (moveInput > 0)
        {
            rb.veLocity = new Vector2(moveInput * speed,rb.veLocity.y);
            spriteRender.flipX = false;
        }
        else if (moveInput < 0)
        {
            rb.veLocity = new Vector2(moveInput * speed,rb.veLocity.y);
            spriteRender.flipX = true;
        }
    }

    //jump function
    void jumping()
    {
        //this input is what i tried for the jump function at the first
        //jumpInput = Input.GetAxis("Jump");
        //rb.veLocity = new Vector2(rb.veLocity.x,jumpInput * jumpForce);
        //but it fell down slowly so i made this line of code
        if (Input.GetButtonDown("Jump"))
        {
            rb.veLocity = new Vector2(rb.veLocity.x,jumpForce);
        }
    }
}
解决方法
他我也犯了同样的错误。你只需要在“Update()”中加上“jumping()”!
因为如果它在 Fixedupdate 中,它只会允许你每秒跳跃或类似的东西。
,https://docs.unity3d.com/ScriptReference/Rigidbody2D.AddForce.html 或者,您可以使用 rb.AddForce 使角色跳跃。

appium+android 各配置参数获取 ''platformName''、''platformVersion''、appActivity、deviceName、webd...

图中 1 的获取 --''platformName''、''platformVersion''
点击 appium 右上角的运行按钮,可通过上面查看 platformName 和 platformVersion

平台版本这边填写的是 API 的版本,用最新版的 AppiumDesktop 运行时一直报下面的错误:
An unknown server-side error occurred while processing the command. Original error: Unable to find an active device or emulator with OS 23. The following are available: M************O (5.1.1)
这时候将平台版本改为 “5.1.1” 后再次运行,结果正常.
图中 2 的获取 --appActivity
appActivity 的获取:
Cmd-->adb shell-->dumpsys package < 包名 >
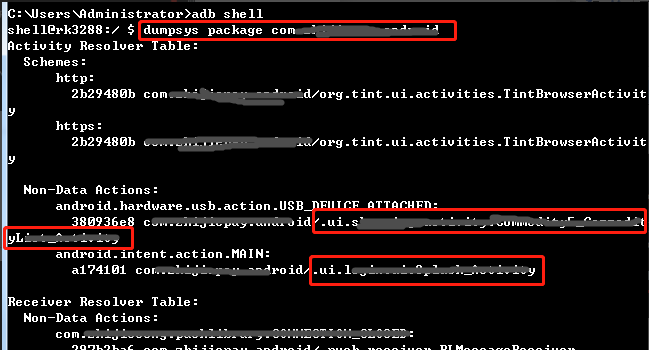
或者
appPackage 和 appActivity 的获取
“adb shell dumpsys window w |findstr \/ |findstr name=” 命令获取 (需要提前将 APP 在手机上打开)

但是通过验证,上面方式获取到的 appActivity,运行时启动页 activity 会报错(目前不知道该问题出在哪里)
图中 3 的获取 --deviceName
adb devices 即可

图中 4 的获取 --webdriver.Remote
远程控制,通过 appium 可设置;若是真机,直接填写 http://localhost:4723/wd/hub 或者 http://127.0.0.1:4723/wd/hub 即可

Developing Flash Platform games with PushButton Engine
by Samuel Asher Rivello
Articles this issue
● Edge featured video: Onsite at FITC / Innovating with Flash
● Getting started with Adobe AIR for Android
● Preview: Adobe MAX 2010
● The edge of Flash
● OSMF: Simplifying the media player development process
● Working with CSS starter layouts in Adobe Dreamweaver CS5
● Developing Flash Platform games with PushButton Engine
● Authoring Adobe Flash content for DROID X and DROID 2
With the recent release of the PushButton Engine (PBE) from PushButton Labs,game developers finally have a community-created framework to help organize code and set industry standards. PBE is an open-source Flash game engine and framework that makes it easy to bring together great existing libraries and components for building Flash games. The idea is to spend less time on code,and more time on building fun games. In this article,we''ll explore PBE technology,and then use it to create a simple game.
As of Q2,2010 over 60 million player experiences have been served up on PBE technology. It is already in use inside many major game development companies such as Zinga, Playdom, RockYou Games,and Game House as well as many indie-developers and freelance developers. The PBE website''s game showcase has several games proving the technology too including the recently released SocialCity Facebook simulation game and the highly-anticipated Grunts: Skirmish RTS game.
The creators of PBE, PushButton Labs,have vast expertise in the console and PC game industry and decided to target the Flash Platform for the PBE project. They want to enable game developers to more rapidly create game projects of any genre. Fifteen developers have contributed to the code-base and the group of PBE developer community who is actively using the technology,writing on the forums,and creating tutorials is already 1500 strong.
Benefits of PBE
PBE and the Flash Platform are a perfect combination. Professional game development teams can rapidly create rich,robust game experiences. Benefits include:
● The flexibility and power of PBE''s component-based development paradigm
● The standardization and interoperability of third-party game kits and add-ons; coupled with the vibrant,helpful community,game developers Now have a way to contribute and utilize truly plug and play libraries
● Proven game-specific development tools,including a Console,Logger, Profiler, ResourceManager,and more
● The ubiquity of the Flash Platform (it is everywhere!) and its tight integration with the Adobe Creative Suite (limitless asset creation!)
Even a non-PBE project can be quickly modified to take advantage of these tools. See the following code for a simple "PBHelloWorld." A few of these lines added to the beginning of your existing project can empower you with some of PBE''s benefits:
/***************************************************************************************************
 * copyright (C) 2007 - 2010  : Rivello Multimedia Consulting
 * For more information email : presentations2010@RivelloMultimediaConsulting.com
 * For more information see   : http://www.RivelloMultimediaConsulting.com
 *
 * This file and/or its constituents are licensed under the terms of the MIT license,* which is included in the License.html file at the root directory of this SDK.
 ***************************************************************************************************/

//Marks the right margin of code *******************************************************************
package
{
   //--------------------------------------
   //  Imports
   //--------------------------------------
   import com.pblabs.engine.PBE;
   import com.pblabs.engine.debug.Logger;

   import flash.display.Sprite;


   //--------------------------------------
   //  Class
   //--------------------------------------
   /**
    * <p>CLASS   : PBHelloWorld: Main Class</p>
    *
    * <p>DATE    : May 02,2010</p>
    * <p>AUTHOR  : Samuel Asher Rivello</p>
    * <p>CONTACT : presentations2010@RivelloMultimediaConsulting.com</p>
    *
    */
   public class PBHelloWorld extends Sprite
   {

      //--------------------------------------
      //  Properties
      //--------------------------------------
      //PUBLIC GETTER/SETTERS

      //PUBLIC CONST
      public static var WIDTH    : Number = 800;
      public static var HEIGHT   : Number = 600;

      //PRIVATE

      //--------------------------------------
      //  Constructor
      //--------------------------------------
      /**
       * FLASH: Setup the Project!
       *
       */
      [SWF(width="800",height="600",frameRate="60")]
      public function PBHelloWorld ()
      {
         //SUPER
         super ();

         //   STARTUP PBE: CONSOLE,LOGGER,& RESOURCE MANAGER
         PBE.startup(this);

         //   TEST THE LOGGER
         Logger.print(this,"PB Hello World!");

      }
   }
}
However these tools are just the start. One must develop a game from inception with PBE in mind to truly exploit its power. At the core of the PBE engine is a ''component-based'' development paradigm and property referencing system that showcase the engines stated goal of providing a ''spectrum of rigidity''. Basically this means PBE gives you scalable tools to start your game prototypes fast and get a playable game ready quickly,yet continue to offer a clear migration path from a light-and-easy prototype to a robust,standards-compliant finished game project.
Under the hood of PBE
The PushButton engine is an ActionScript 3 library that can be added to any Flash or Flex Based project. The two projects included in this article for download feature the full editable source to facilitate learning,but PBE comes as a precompiled SWC file too for more rapid project compilation. The library is fit for deployment on the desktop,the browser,or on mobile devices. Anywhere Flash can play,PBE can play!
PBE is made of three general types of classes. There may be many of each type in each game project:
● Manager — Managers are the brains of the operation — each one has a unique task; for instance one focuses on the spatial area of the screen and the objects within it and one on graphics rendering of visible objects. Depending on its role in the game,a manager may or may not relate to entities and components directly.
● Entity — Each visual element in your game is represented by an entity. This Could be anything; your player,the enemies,collectible items,etc....
● Component — Each entity contains components. This is where the bulk of your game code lies. Each components handle a specific responsibility. For instance perhaps one component handles rendering the entity in which it resides.
Managers can be created by developers,but PBE ships with managers for our most common needs. Here is a partial list of the managers packaged with the core PBE library:
● ProcessManager — Controls game logic and rendering logic and makes sure the right stuff is called at the right time. The API supports decelerating,accelerating,pausing,and stopping ''time'' too.
● SpatialManager — Keeps track of simple objects in 2d space (width and height). The developer may choose a basic implementation or one with built-in Box2D physics. Plug-n-play game-physics? Yes! Developers can customize this manager to work in 3D too.
● ScreenManager — This is a simple way to swap game UI in and out as you move through your game. e.g. front menu screen,game screen with HUD,game-over screen,etc.
● SoundManager — Control all your game audio from a centralized location.
Entities are essentially empty shells. As a developer you fill them with the components needed. Each component has access to any Flash API desired,custom PBE events,as well as the following built-in PBE events:
● onFrame — Best used just for graphics rendering-routines. Each PBE ''frame'' occurs in sync with a Flash ''frame'' (e.g. 60 frames per second)
● onTick — Ticks are guaranteed to happen at a fixed interval. If the Flash Player slows down due to some number-crunching or heavy rendering,PBE will attempt to ''catch up'' by calling more ticks. It balances the run-time experience well. As Lavon Woods of HybridMindset.com points out "Finally,PBE has gotten around Flayer Player''s well kNown elastic racetrack issue".
● onThink — Based on an arbitrary,per-use timer. This is ideal for AI code which can be processed slowly (e.g. every 1–5 seconds)
● onCollision — Based on built-in collision checking routines. Highly customizable and very useful!
PBE theory
The core,unique difference with PBE game development is its ''component-based'' code organization. Components here are not user interface components such as a Button or DropDownList,here components mean a reusable,modular class used for gaming. Typically flash game developers begin their career with inheritance-based game development and may evolve to creating a custom framework for their games. These Object-oriented styles are are different from the system in PBE. In the following sections we see 3 approaches to game development from least evolved to most.
"Quick and dirty" game development
I created the Flyer game in a prevIoUs Edge article, An introduction to developing games on the Adobe Flash Platform. The game-play style is similar to the 1980''s Frogger game for Atari. In it all the code for the game is placed on Frame 1 of the ActionScript timeline. This approach is easy to create and easy to understand,making it ideal for an intro-level article. However more complex games beg for better code organization — breaking up the code into separate classes.
OOP game development
The Flash Platform''s ActionScript 3 (AS3) programming language supports object-oriented programming (OOP). A principal advantage with OOP compared to the quick-and-dirty approach is that code is organized into ''inheritance-chains'' where if a ''child-class'' is to act similar to its ''parent-class''. The ''extends'' keyword is used to establish this parent-child relationship. Once ''extended'' the child behaves exactly like the parent. Then more customized abilities can be given to the new child. OOP is how the majority of Flash Platform development works. For RIAs this is a well suited technique for code organization. However due to the unique needs of game development OOP can present challenges.

figure 1. Bloated classes in a game''s class inheritance chain will become overburdened and difficult to maintain.
OOP has drawbacks too. Using OOP for the Flyer game we''d likely start with two classes representing the onscreen objects; FlyerMC and BiPlaneMC. Both would take advantage of MovieClip,extending that built-in class to handle rendering and other tasks. Then game-specific,common code would necessitate the creation of a custom MoverItem class. What often happens is that so much of the game code is shared by classes that the ''MoverItem'' gets very bulky. The bulky classes in the inheritance chain will become difficult to maintain and will become a challenge to debug. Adding new features is slow because new code must be added carefully. This is a simple example,but illustrates a problem that rings true in so many game projects; bloated overburdened parent-classes. A better solution is using component-based development for games.
Component-based game development: The Flyer Game
Ben Garney,Lead Developer of PBE kNows from experience,"The biggest shift is thinking in terms of components,not monolithic classes. The rest is straightforward." To understand more about how the component-based game development works,let''s continue with the examples above. I created a PBE version of the Flyer game. Here the game logic is spread between entities for Flyer,BiPlane,Blimp. The first two entities are shown in figure 2. BlimpEntity works just like BiPlaneEntity so it is not shown. The two entities shown share a render component,but the flexibility of PBE allows them to vary greatly in the other components used. FlyerEntity has 4 components of its own. BiplaneEntity as two of its own (the same two used by BlimpEntity). What is evident from this simple example is by entities composed of reusable components we have great flexibility without creating any overly-bulky classes like in the OOP example above. Very nice!

figure 2. The eight reusable components of the PBE Flyer game.
Development
This article shows the playable Flyer game below and also shows much of the code below too. To see even more you may download the source code too.
- Download and unzip the source file.
- Open Adobe Flash Professional CS5.
- Open PBFlyerGame/src/PBFlyerGame_v1.fla using File > Open.
- Publish the project using File > Publish Preview > Default.
The resulting Flash application is shown in figure 3. Use the arrow keys to play. Simple and fun!
figure 3. The PBE Flyer Game. Click anywhere to play. Use the arrow keys to move to the top of the screen. Avoid hitting obstacles. Refresh the page to restart.
The core game code can be seen below. This is the main PBFlyerGame.as class containing the entry point into the coding. Reviewing the code and code-comments is a great introduction to PBE. More explanation follows in the article below the code:
/***************************************************************************************************
* copyright (C) 2007 - 2010 : Rivello Multimedia Consulting
* For more information email : presentations2010@RivelloMultimediaConsulting.com
* For more information see : http://www.RivelloMultimediaConsulting.com
*
* This file and/or its constituents are licensed under the terms of the MIT license,* which is included in the License.html file at the root directory of this SDK.
***************************************************************************************************/
//Marks the right margin of code *******************************************************************
package com.rmc.projects.pbflyergame
{
//--------------------------------------
// Imports
//--------------------------------------
import com.pblabs.Box2D.Box2DManagerComponent;
import com.pblabs.engine.PBE;
import com.pblabs.engine.debug.Logger;
import com.pblabs.engine.entity.IEntity;
import com.pblabs.engine.entity.PropertyReference;
import com.pblabs.rendering2D.AnimationController;
import com.pblabs.rendering2D.AnimationControllerInfo;
import com.pblabs.rendering2D.SpriteSheetRenderer;
import com.pblabs.rendering2D.spritesheet.SWFSpriteSheetComponent;
import com.pblabs.rendering2D.ui.SceneView;
import com.rmc.projects.pbflyergame.components.CollisionDetectComponent;
import com.rmc.projects.pbflyergame.components.FaceForwardComponent;
import com.rmc.projects.pbflyergame.components.GameOverComponent;
import com.rmc.projects.pbflyergame.components.MoveByKeyboardInputComponent;
import com.rmc.projects.pbflyergame.components.MoveHorizontallyComponent;
import com.rmc.projects.pbflyergame.components.ScreenTrapComponent;
import com.rmc.projects.pbflyergame.components.ScreenWrapComponent;
import com.rmc.projects.pbflyergame.screens.GameScreen;
import com.rmc.projects.pbflyergame.screens.IntroScreen;
import com.rmc.utils.pbe.FlyerGameHelper;
import flash.display.Sprite;
import flash.geom.Point;
//--------------------------------------
// Class
//--------------------------------------
/**
* CLASS : PBFlyerGame: Main Game Class
*
* DATE : May 02,2010
* AUTHOR : Samuel Asher Rivello
* CONTACT : presentations2010@RivelloMultimediaConsulting.com
*
*/
[SWF(width="800",frameRate="60")]
public class PBFlyerGame extends Sprite
{
//--------------------------------------
// Properties
//--------------------------------------
//PUBLIC GETTER/SETTERS
//PUBLIC CONST
public static var WIDTH : Number = 800;
public static var HEIGHT : Number = 600;
//PRIVATE
//--------------------------------------
// Constructor
//--------------------------------------
/**
* FLASH: Setup the Game and Start Playing!
*
*/
public function PBFlyerGame ()
{
//SUPER
super ();
// START PBE
PBE.startup(this);
// 0.5 = HALF-SPEED,// 2.0 = DOUBLE SPEED (SMOOTHER ANIMATION)
PBE.processManager.timeScale = 0.8;
// TEST TRACING OUTPUT MESSAGE
Logger.print(this,"PBFlyerGame - Press ''Alt/Option'' + ''~'' to Open Debugger");
// LOAD EMbedDED RESOURCS
PBE.addResources(new PBFlyerGameResources());
// Set up our screens.
PBE.screenManager.registerScreen ("intro_screen",new IntroScreen());
PBE.screenManager.registerScreen ("game_screen",new GameScreen());
// Show the intro_screen - Then wait for a user click and it calls ''restartGame()''
PBE.screenManager.goto ("intro_screen");
}
//--------------------------------------
// Methods
//--------------------------------------
//PRIVATE
/**
* PBE: Restart Game
*
* @return void
*/
public function restartGame ( ) : void
{
//PLAY SOUND
PBE.soundManager.play( PBFlyerGameResources.soUNDTRACK_SOUND,"sfx",1,9999); //loop many times,''forever''
// CLEAR SCREEN (IF ''RE''-STARTING). Not Fully Working So Restart is disabled After Gameplay
_clearEverything ();
// CREATE SCENE ENTITY
_createScene();
// CREATE BACKGROUND ENTITY
_createBackgroundEntity();
// CREATE OBSTACLE ENTITIES
_createObstacleEntities();
// CREATE FLYER ENTITY
_createFlyerEntity();
}
/**
* PBE: CLEAR SCENE
*
* @return void
*/
private function _clearEverything ( ) : void
{
//clear any screen entities
PBE.rootGroup.destroy();
PBE.rootGroup.clear();
}
/**
* PBE: CREATE SCENE ENTITY
*
* @return void
*/
private function _createScene ( ) : void
{
//make the scene
var sceneView : SceneView = new SceneView();
sceneView.width = WIDTH;
sceneView.height = HEIGHT;
PBE.initializeScene (sceneView,FlyerGameHelper.SCENE,null,Box2DManagerComponent);
// Adjust graphics for convenience
PBE.scene.setWorldCenter ( new Point (-WIDTH,-HEIGHT));
//PHYSICS ARE NOT NEEDED SO WE disABLE GraviTY
//BUT ''Box2D'' IS USED FOR ITS COLLISION DETECTION - NICE!
(PBE.spatialManager as Box2DManagerComponent).gravity = new Point (0,0);
}
/**
* PBE: CREATE FLYER ENTITY
*
* @return void
*/
private function _createFlyerEntity ( ) : void
{
//////////////////
// PROPERTIES
//////////////////
var position_point : Point = new Point (WIDTH*.65,HEIGHT-50);
var size_point : Point = new Point (.1,.1);
var zIndex_uint : uint = 10;
//////////////////
// ENTITY
//////////////////
// Allocate an entity for our background sprite
var flyer_entity:IEntity = PBE.allocateEntity();
FlyerGameHelper.createSpatialEntity ( flyer_entity,position_point,size_point);
//////////////////
// COLLISION DETECTION
//////////////////
var collisionType_str : String = "Flyer";
var collidesWithCollisionTypes_array : Array = ["Obstacle"];
FlyerGameHelper.enableCollisionDetection ( flyer_entity,collisionType_str,collidesWithCollisionTypes_array,true);
//////////////////
// RENDER
// COMPONENTS
//////////////////
// LOAD MC ASSET
var swfSpriteSheetComponent : SWFSpriteSheetComponent = new SWFSpriteSheetComponent();
FlyerGameHelper.loadMovieClipAsset (swfSpriteSheetComponent,PBFlyerGameResources.ASSETS_SWF,PBFlyerGameResources.MOVIE_CLIP_OBSTACLE_FLYER);
// USE ASSET TO RENDER
var spriteSheetRenderer:SpriteSheetRenderer = new SpriteSheetRenderer();
FlyerGameHelper.setupSpriteSheetRenderer ( spriteSheetRenderer,swfSpriteSheetComponent,zIndex_uint);
// CREATE ANIMATION LOOP #1
var idle_animationControllerInfo:AnimationControllerInfo = new AnimationControllerInfo();
idle_animationControllerInfo.loop = false;
idle_animationControllerInfo.frameRate = 1;
idle_animationControllerInfo.spriteSheet = swfSpriteSheetComponent;
// CREATE ANIMATION LOOP #2
var move_animationControllerInfo:AnimationControllerInfo = new AnimationControllerInfo();
move_animationControllerInfo.loop = true;
move_animationControllerInfo.frameRate = 1;
move_animationControllerInfo.maxFrameDelay = 250;
move_animationControllerInfo.spriteSheet = swfSpriteSheetComponent;
// SAVE ALL ANIMATION LOOPS
var animationController : AnimationController = new AnimationController ();
animationController.spriteSheetReference = new PropertyReference (FlyerGameHelper.RENDER_SPRITE_SHEET);
animationController.currentFrameReference = new PropertyReference (FlyerGameHelper.RENDER_SPRITE_INDEX);
animationController.animations [FlyerGameHelper.ANIMATION_IDLE] = idle_animationControllerInfo;
animationController.animations [FlyerGameHelper.ANIMATION_MOVE] = move_animationControllerInfo;
animationController.defaultAnimation = FlyerGameHelper.ANIMATION_IDLE;
animationController.currentAnimationName = FlyerGameHelper.ANIMATION_IDLE
animationController.changeAnimationEvent = FlyerGameHelper.ANIMATION_CHANGE_EVENT;
animationController.currentAnimationReference = new PropertyReference (FlyerGameHelper.CURRENT_ANIMATION_REFERENCE);
// ADD COMPONENTS
flyer_entity.addComponent(animationController,FlyerGameHelper.ANIMATION_CONTROLLER);
flyer_entity.addComponent(spriteSheetRenderer,FlyerGameHelper.RENDER);
//////////////////
// MOVE-BY-KEYBOARD
// COMPONENT
//////////////////
// Create an instance of our hero controller component
var moveByKeyboardInputComponent:MoveByKeyboardInputComponent = new MoveByKeyboardInputComponent();
flyer_entity.addComponent( moveByKeyboardInputComponent,MoveByKeyboardInputComponent.NAME);
//////////////////
// SCREEN-TRAP/WRAP
// COMPONENT
//////////////////
var isScreenWrapping_boolean : Boolean = false; //Try (true) and see the flexibility of PBE
if (isScreenWrapping_boolean) {
//EXPERIMENT: WRAP AROUND SCREEN (From Left Edge to Right Edge,Etc...)
var screenWrapComponent : ScreenWrapComponent = new ScreenWrapComponent();
flyer_entity.addComponent ( screenWrapComponent,ScreenWrapComponent.NAME );
} else {
//EXPERIMENT: BE ''TRAPPED'' AND STAY IN SCREEN''S BOUNDS
var screenTrapComponent : ScreenTrapComponent = new ScreenTrapComponent();
flyer_entity.addComponent ( screenTrapComponent,ScreenTrapComponent.NAME );
}
//////////////////
// FACE-FORWARD
// COMPONENT
//////////////////
var faceForwardComponent : FaceForwardComponent = new FaceForwardComponent();
flyer_entity.addComponent ( faceForwardComponent,FaceForwardComponent.NAME );
//////////////////
// COLLISION-DETECTION
// COMPONENT
//////////////////
var collisionDetectComponent : CollisionDetectComponent = new CollisionDetectComponent();
flyer_entity.addComponent ( collisionDetectComponent,CollisionDetectComponent.NAME );
//////////////////
// GAME-OVER
// COMPONENT
//////////////////
var gameOverComponent : GameOverComponent = new GameOverComponent ();
flyer_entity.addComponent ( gameOverComponent,GameOverComponent.NAME );
//////////////////
// INITIALIZE
//////////////////
flyer_entity.initialize ("flyer_entity");
}
/**
* PBE: CREATE OBSTACLE ENTITIES
*
* @return void
*/
private function _createObstacleEntities ( ) : void
{
// CREATE OBSTACLE ENTITY (MOVIE_CLIP_APPEaraNCE,POSITION,AND DRAWING DEPTH)
_createObstacleEntity ( PBFlyerGameResources.MOVIE_CLIP_OBSTACLE_BIPLANE,new Point (WIDTH*.0,HEIGHT*0.20),30);
_createObstacleEntity ( PBFlyerGameResources.MOVIE_CLIP_OBSTACLE_BLIMP,new Point (WIDTH*.20,HEIGHT*0.40),2,-1,25);
_createObstacleEntity ( PBFlyerGameResources.MOVIE_CLIP_OBSTACLE_BIPLANE,new Point (WIDTH*.35,HEIGHT*0.55),3,15);
_createObstacleEntity ( PBFlyerGameResources.MOVIE_CLIP_OBSTACLE_BLIMP,new Point (WIDTH*.50,HEIGHT*0.70),4,35);
}
/**
* PBE: CREATE OBSTACLE ENTITIES
*
* @return void
*/
private function _createObstacleEntity (aMovieClipName_str : String,aPosition_point : Point,aZIndex_uint : uint,aHorizontalDirection_int : int,aHorizontalSpeed_num : Number) : void
{
//////////////////
// ENTITY
//////////////////
// Allocate an entity
var obstacle_entity:IEntity = PBE.allocateEntity();
FlyerGameHelper.createSpatialEntity ( obstacle_entity,aPosition_point);
//////////////////
// COLLISION DETECTION
//////////////////
var collisionType_str : String = "Obstacle";
var collidesWithCollisionTypes_array : Array = ["Flyer"];
FlyerGameHelper.enableCollisionDetection (obstacle_entity,false);
//////////////////
// RENDER
// COMPONENTS
//////////////////
// LOAD MC ASSET
var swfSpriteSheetComponent : SWFSpriteSheetComponent = new SWFSpriteSheetComponent();
FlyerGameHelper.loadMovieClipAsset (swfSpriteSheetComponent,aMovieClipName_str);
// USE ASSET TO RENDER
var spriteSheetRenderer:SpriteSheetRenderer = new SpriteSheetRenderer();
FlyerGameHelper.setupSpriteSheetRenderer (spriteSheetRenderer,aZIndex_uint);
// ADD AS RENDERER
obstacle_entity.addComponent( spriteSheetRenderer,FlyerGameHelper.RENDER );
//////////////////
// MOVE-HORIZONTALLY
// COMPONENT
//////////////////
var moveHorizontallyComponent:MoveHorizontallyComponent = new MoveHorizontallyComponent();
moveHorizontallyComponent.horizontalDirection_int = aHorizontalDirection_int;
moveHorizontallyComponent.horizontalSpeed_num = aHorizontalSpeed_num;
obstacle_entity.addComponent ( moveHorizontallyComponent,MoveHorizontallyComponent.NAME );
//////////////////
// SCREEN-WRAP
// COMPONENT
//////////////////
var screenWrapComponent : ScreenWrapComponent = new ScreenWrapComponent();
obstacle_entity.addComponent ( screenWrapComponent,ScreenWrapComponent.NAME );
//////////////////
// FACE-FORWARD
// COMPONENT
//////////////////
var faceForwardComponent : FaceForwardComponent = new FaceForwardComponent();
obstacle_entity.addComponent ( faceForwardComponent,FaceForwardComponent.NAME );
//////////////////
// INITIALIZE
//////////////////
obstacle_entity.initialize("obstacle_entity" + aZIndex_uint);
}
/**
* PBE: CREATE BACKGROUND ENTITY
*
* @return void
*/
private function _createBackgroundEntity ( ) : void
{
//////////////////
// PROPERTIES
//////////////////
var position_point : Point = new Point (0,0);
var zIndex_uint : uint = 1;
//////////////////
// ENTITY
//////////////////
// Allocate an entity for our background sprite
var background_entity:IEntity = PBE.allocateEntity();
background_entity.initialize ("background_entity");
FlyerGameHelper.createSpatialEntity ( background_entity,position_point);
//////////////////
// RENDER
// COMPONENTS
//////////////////
// LOAD MC ASSET
var swfSpriteSheetComponent : SWFSpriteSheetComponent = new SWFSpriteSheetComponent();
FlyerGameHelper.loadMovieClipAsset (swfSpriteSheetComponent,PBFlyerGameResources.MOVIE_CLIP_BACKGROUND_GAME_SCREEN);
// USE ASSET TO RENDER
var spriteSheetRenderer:SpriteSheetRenderer = new SpriteSheetRenderer();
FlyerGameHelper.setupSpriteSheetRenderer (spriteSheetRenderer,zIndex_uint);
// ADD AS RENDERER
background_entity.addComponent( spriteSheetRenderer,FlyerGameHelper.RENDER );
}
}
}
Component communication
In figure 2 we see the four components used by FlyerEntity. required of every PBE game,components must communicate. One component responsible for the rendering of the entity,must check the position and rotation from another component before drawing itself onscreen. PBE is flexible in this communication.
Three types of component-to-component communication exist in PBE:
● Direct-Access — Here one component holds a reference to another component hard-coded and calls methods as needed. This is simple to use but it introduces dependencies and makes code less portable. Generally it is to be avoided.
● Events — Useful for broadcasting info,just like in ActionScript and Flex. Typically events are broadcast from a component via the Entity. Other components ''listen'' to the Entity for those events. This is more favorable than direct-access because it requires less ''kNowledge'' between components; thus more independence.
● Property References — This is the best way to communicate. There is a simple Syntax and there are no hard-coded dependencies. Code is more flexible and reusable. Property references are heavily used in the Flyer game. Available in the download to this article is the ''ScreenWrapComponent.as'' class. Reviewing this class,it will be evident how a property reference to position and a property reference to size are used to keep the Flyer within the screen''s bounds at all times.
To recap,the PBE world is full of entities. Each entity has components. To communicate between any two components in the world the preferred manner is to use property references.
Where to next?
With deeper exploration into PBE its XML Level loading system and its ResourceManager the power of PBE become more evident. There is certainly much to learn but the rewards are many. To learn more,download and investigate the Flyer game from this article,checkout the PBE website,and then get started by developing a very simple game or two.
There is a wealth of information available to PBE developers:
● Games Showcase — See great games created by the community to get inspired
● Community Forum — Post questions and learn from others; project leaders regularly offer advice and code samples,too
● Component Store — Download and upload free and premium components
● Documentation — Learn basic and advanced info with tutorials,AsDocs,and more
Conclusion
I wish PBE existed in every [programming] language.- Phil Peron,Professional Game Developer
PBE comes packed with great game-specific tools that are ready right out-of-the-Box. We''ve seen the promise of power and flexibility in PBE''s component-based development methodology. The scalability and speed-of-use of the property referencing systems is tricky at first will be well worth the effort. Get your feet wet with a simple game or two and then set out to create your next Flash Platform game masterpiece with the PushButton Engine.
Visit the Adobe Flash Platform Gaming Technology Center
AckNowledgements: I want to offer a special thanks to the contributors of this article,to Autumn Rain Turkel ofTangledDreams who created all art for the Flyer game,and to all of the developers and community leaders who provided valuable insight and expertise for this article. I''d also like to thank Minimal Noise for providing the sound track used in the Flyer game.
关于pygame platformer-如何使底部稳定?的介绍已经告一段落,感谢您的耐心阅读,如果想了解更多关于10 awesome collaboration platform for designers、2D unity platformer 玩家移动问题、appium+android 各配置参数获取 ''platformName''、''platformVersion''、appActivity、deviceName、webd...、Developing Flash Platform games with PushButton Engine的相关信息,请在本站寻找。
本文标签:


