在本文中,我们将给您介绍关于ASimpleIntroductiontoLinuxDaemon(withexa...的详细内容,此外,我们还将为您提供关于1:VersionControlSystems(
在本文中,我们将给您介绍关于A Simple Introduction to Linux Daemon (with exa...的详细内容,此外,我们还将为您提供关于1: Version Control Systems( Introduction to Git )、A Beginner-Level Introduction to MongoDB with Node.js、A plain english introduction to CAP Theorem、A simple introduction to systemd的知识。
本文目录一览:- A Simple Introduction to Linux Daemon (with exa...
- 1: Version Control Systems( Introduction to Git )
- A Beginner-Level Introduction to MongoDB with Node.js
- A plain english introduction to CAP Theorem
- A simple introduction to systemd

A Simple Introduction to Linux Daemon (with exa...
Daemon
In Unix and other multitasking computer operating systems, a daemon is a computer program that runs as a background process, rather than being under the direct control of an interactive user. Alternate terms for daemon are service (Microsoft Windows NT), subsystem (IBM z/OS), server virtual machine (IBM VM), ghost job (XDS UTS).
Systems often start daemons at boot time: they often serve the function of responding to network requests, hardware activity, or other programs by performing some task. Daemons can also configure hardware (like udevd on some GNU/Linux systems), run scheduled tasks (like cron), and perform a variety of other tasks.
In a strictly technical sense, a Unix-like system process is a daemon when its parent process terminates and the daemon is assigned the init process (process number 1) as its parent process and has no controlling terminal. However, more commonly, a daemon may be any background process, whether a child of init or not.
In a word, a daemon has two major characteristics which distinguish a daemon from other normal processes. It runs in background, and it has no direct interactive control interface.
Linux Daemon
The common method for a process to become a daemon involves:
- Dissociating from the controlling tty
- Becoming a session leader
- Becoming a process group leader
- Executing as a background task by forking and exiting (once or twice). This is required sometimes for the process to become a session leader. It also allows the parent process to continue its normal execution.
- Setting the root directory ("/") as the current working directory so that the process does not keep any directory in use that may be on a mounted file system (allowing it to be unmounted).
- Changing the umask to 0 to allow open(), creat(), et al. operating system calls to provide their own permission masks and not to depend on the umask of the caller
- Closing all inherited files at the time of execution that are left open by the parent process, including file descriptors 0, 1 and 2 (stdin, stdout, stderr). Required files will be opened later.
- Using a logfile, the console, or /dev/null as stdin, stdout, and stderr
SYNOPSIS
#include <unistd.h>
int daemon(int nochdir, int noclose);
nochdir == 0 => chdir to ‘/’
noclose == 0 => close all inherited files
HowTo
A daemon should do one thing, and do it well. That one thing may be as complex as managing hundreds of mailboxes on multiple domains, or as simple as writing a report and calling sendmail to mail it out to an admin.
Daemons should never have direct communication with a user through a terminal. In fact, a daemon shouldn''t communicate directly with a user at all. All communication should pass through some sort of interface (which you may or may not have to write), which can be as complex as a GTK+ GUI, or as simple as a signal set.
To conclude, we have to plan job and interface for a daemon.
When a daemon starts up, it has to do some low-level housework to get itself ready for its real job. This involves a few steps:
- Fork off the parent process
- Change file mode mask (umask)
- Open any logs for writing
- Create a unique Session ID (SID)
- Change the current working directory to a safe place
- Close standard file descriptors
- Enter actual daemon code
One Golden Principle: Program Defensively!
//Example 1 (use daemon(3) library function to create a daemon)
#include <unistd.h>
#include <stdio.h>
#include <stdlib.h>
#include <assert.h>

int main(int argc, char *argv[])
{
        assert(argc == 3);
        int nochdir = atoi(argv[1]);
        int noclose = atoi(argv[2]);
        printf("Start Test Daemon\n");
        int ret = daemon(nochdir, noclose);
        if (ret < 0)
                exit(EXIT_FAILURE);
        while(1)
        {
                sleep(1);
                printf("Test Daemon Running ...\n");
        }
        printf("End Test Daemon\n");
        exit(EXIT_SUCCESS);
}
It seems that a daemon(3) is a simple encapsulation of forking off the parent process, change the file mode mask, creating a unique session ID, changing the current working directory and closing the standard file descriptors.
//Example 2 (use fork, umask, setsid, chdir, close, syslog …)
#include <sys/types.h>
#include <sys/stat.h>
#include <unistd.h>
#include <stdio.h>
#include <stdlib.h>
#include <fcntl.h>
#include <errno.h>
#include <assert.h>
#include <time.h>
#include <string.h>

#define LOG_FILE "/var/log/test_daemon.log"
#define LOCK_FILE "/var/lock/test_daemon"
static void CQ_log(FILE *fp, const char *msg)
{
        assert(fp != NULL);
        assert(msg != NULL);
        struct tm *current_time = NULL;
        char *time_string = NULL;
        time_t t = time(NULL);
        current_time = gmtime(&t); /* the return value of gmtime is statically allocated, no need for free */
        assert(current_time != NULL);
        time_string = asctime(current_time);
        assert(time_string != NULL);
        fwrite(time_string, sizeof(char), strlen(time_string)+1, fp);
        fwrite(msg, sizeof(char), strlen(msg), fp);
        fwrite("\n", sizeof(char), strlen("\n"), fp);
        fflush(fp);
}

int main(void)
{
        /* process ID and session ID */
        pid_t pid, sid;

        /* create a lock file to prevent the daemon from running twice */
        int lock_fd = open(LOCK_FILE, O_RDWR | O_CREAT | O_EXCL, 0640);
        if (lock_fd < 0)
        {
                exit(EXIT_FAILURE);
        }

        /* fork off the parent process */
        pid = fork();
        if (pid < 0)
        {
                exit(EXIT_FAILURE);
        }
        if (pid > 0)
        {
                exit(EXIT_SUCCESS);
        }
        /* change the file mode mask */
        umask(0);

        /* open log here */
        FILE* fp_log = fopen(LOG_FILE, "a");
        if (fp_log == NULL)
        {
                exit(EXIT_FAILURE);
        }

        /* create a new sid for child process */
        sid = setsid();
        if (sid < 0)
        {
                CQ_log(fp_log, "FAILURE: create a new session id");
                exit(EXIT_FAILURE);
        }

        /* change the current working directory */
        if ((chdir("/"))<0)
        {
                CQ_log(fp_log, "FAILURE: chdir to / failed");
                exit(EXIT_FAILURE);
        }

        /* close out the standard file descriptors */
        close(STDIN_FILENO);
        close(STDOUT_FILENO);
        close(STDERR_FILENO);

        /* daemon specific initialization goes here */
        CQ_log(fp_log, "Start Initializing Test Daemon");
        CQ_log(fp_log, "End Initializing Test Daemon");

        /* the big loop */
        while(1)
        {
                /* do something here */
                CQ_log(fp_log, "Test Daemon Running ...");
                sleep(10);
        }
        exit(EXIT_SUCCESS);
}
root@localhost :/home/James/mypro/Linux-Pro/daemon# cat /var/log/test_daemon.log
Wed Jun 13 07:52:47 2012
Start Initializing Test Daemon
Wed Jun 13 07:52:47 2012
End Initializing Test Daemon
Wed Jun 13 07:52:47 2012
Test Daemon Running ...
root@localhost :/home/James/mypro/Linux-Pro/daemon# ./test_daemon
root@localhost :/home/James/mypro/Linux-Pro/daemon# echo $?
1
References
http://en.wikipedia.org/wiki/Daemon_(computer_software)
man daemon
man 3 setsid
man start-stop-daemon
http://www-theorie.physik.unizh.ch/~dpotter/howto/daemonize
http://www.netzmafia.de/skripten/unix/linux-daemon-howto.html
http://wenku.baidu.com/view/73a4771b227916888486d77a.html
")
1: Version Control Systems( Introduction to Git )
1: Version Control Systems
When you''re working with teams, you''ll generally be making changes to the same files. Imagine you''re working on a project to make a Python script, and have a folder with the following two files:
script.py
README.md
Here are the contents of script.py:
if __name__ == "__main__":
print("Welcome to a script!")
Imagine that you and a coworker are both working on the project at the same time. You modify script.py like this:
if __name__ == "__main__":
print("Welcome to a script!")
print("Here''s my amazing contribution to
this project!")
And your coworker does this:
import math
print(10 + 10)
if __name__ == "__main__":
print("Welcome to a script!")
Imagine you both have the folder on your local machine. To modify files, you make changes, then upload the entire folder to a centralized location, like Dropbox or Google Drive, to enable collaboration. If you didn''t have a distributed version control system, whoever changed the file last will overwrite the changes of the other person. This gets extremely frustrating and impossible to manage as you start dealing with larger and larger chunks of code. What if the folder had 100 files, and you modified 10, and your coworker modified 30 at the same time? You don''t want to lose your changes every time your coworker uploads his version of the folder. Now, imagine that instead of just you and a coworker, it''s a project with 10 or 100 contributors.
Companies face this problem every day, which is why distributed version control systems exist. With a distributed version control system, software will "merge" changes together intelligently, and enable multiple developers to work on a project at the same time.
Going back to the script.py file, if we intelligently merged the two versions, it would end up looking like this:
import math
print(10 + 10)
if __name__ == "__main__":
print("Welcome to a script!")
print("Here''s my amazing contribution to
this project!")
There are a few distributed version control systems, including Mercurial, and Subversion. However, Git is by far the most popular.
Git is a command line tool that we can access by typing git in the shell. The first step in using Git is to initialize a folder as a repository. A repository tracks multiple versions of the files in the folder, and enables collaboration.
You can initialize a repository by typing git init inside the folder you want to initialize as a repository.
Instructions
- Create a folder named
random_numbers. - Navigate into this folder and initialize a git repository
/home/dq$ mkdir random_numbers
/home/dq$ cd random_numbers
/home/dq/random_numbers$ git init
Initialized empty Git repository in /home/dq/random_numbers/.git/

A Beginner-Level Introduction to MongoDB with Node.js
http://stackabuse.com/a-beginner-level-introduction-to-mongodb-with-node-js/
Introduction
In this article, we are going to talk about how to use the MongoDB database with Node.js. There are couple of ways to do this, including the a popular approach - using an Object Modeling Library. Mongoose is an example of such a library in Node.js, however, we will be using the official MongoDB driver for Node.js.
In this article, we will be connecting to a MongoDB server, create documents, retrieve them from the database and finally delete some.
This will be done through a few scripts, though you''d typically integrate them with a web server/application rather than having them in standalone scripts.
What is MongoDB?
MongoDB is a cross-platform (runs on multiple operating systems), document-oriented database management system (DBMS). MongoDB is also a NoSQL database, which means it does not use SQL to perform operations on a database.
MongoDB uses documents that are in JSON-like format, known as BSON, which is the binary encoding of JSON.
It''s developed as an open-source project by MongoDB Inc. under the Server Side Public License.
Node and MongoDB work very-well together, in part because Mongo uses a JavaScript engine built into the database since JavaScript is good at handling JSON objects.
Compared to other databases, such as MySQL, MongoDB is fast for storing certain types of data and can be automatically scaled. It''s very simple to implement and get running.
With Mongo being a NoSQL database, it has its own way of storing data. Here are some of the constructs that make up the database structure:
- Database: The container that holds a set of collections.
- Collection: A set of documents. This is similar to a table in an SQL database. However, unlike an SQL database, a collection does not have a set structure or pre-configured data types.
- Documents: A JSON-like object. This is similar to a row in an SQL database. A JSON object may also contain child objects, an array, etc.
- _id: Mandatory unique field in every document. It separates one document from another, so we can identify each document independently. If this value is not provided, MongoDB automatically assigns a random value for the field.
Configuration of the Project
Let''s start off with the project and skip the npm prompts:
$ npm init -y
Then, let''s install the official MongoDB driver:
$ npm install --save mongodb
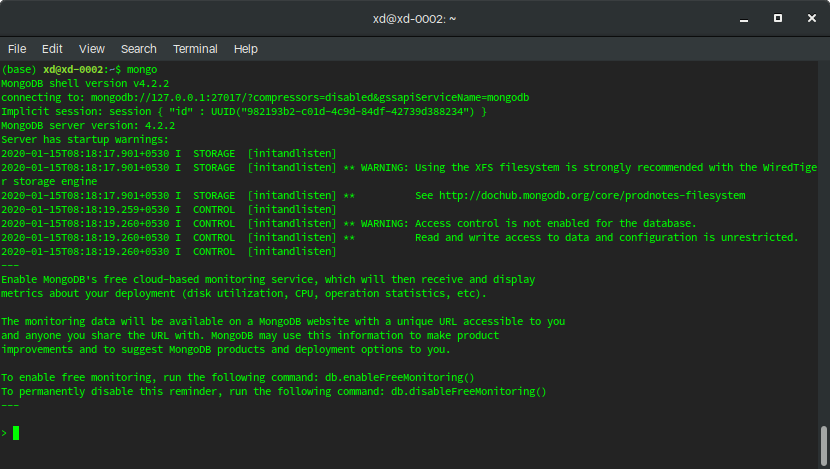
In order to actually connect to the databse, you''ll need to make sure your MongoDB service is running in the background or your development machine. Run the command mongo on your command prompt to enter the Mongo shell:
Running the command show dbs; will present a list of the current databases:

You can exit the shell by running the exit command.
Unlike SQL databases, which require a database to be created before usage - there''s no need to create a database or a collection beforehand. They''ll automatically be created when required.
Implementing CRUD Operations
With our project initialized and MongoDB installed, we can get down to writing some CRUD logic.
Connecting to the Database
Of course, to use MongoDB in code, we need to import the module:
const mongodb = require(''mongodb'');
Then, let''s instantiate a client:
const MongoClient = mongodb.MongoClient;
The client needs to know where to connect, so we''ll supply it with a url and dbName:
// Connection URL
const url = ''mongodb://localhost:27017'';

// Database Name
const dbName = ''userdb'';
Finally, let''s try connecting to the database:
// Use the connect method to create a connection w/ the database
MongoClient.connect(url, (err, client) => {
    if (err) {
        throw err;
    }

    console.log(''Database connection successful'');

    // This objects holds the refrence to the db
    const db = client.db(dbName);

    client.close();
});
As you can see in the example, the MongoClient.connect method takes two parameters, the URL of the database and the callback function.
The callback function has two parameters: err and client.
The first parameter would contain an error if there is any network issue or any other issue with connecting to the database. If there are no issues, the error will be null.
The second parameter is the client object, which we use to interact with the database.
The db property of the client holds a reference to the database. To perform any action on that database, we use this reference.
Create a Document
To perform any action on the database, you have to be connected to it, obviously. With Mongo, there are two ways of inserting documents into the database. The first way is to add a single document at a time. We can use the insertOne() method to achieve this:
const collection = db.collection(''userdb'');

// Insert one document
collection.insertOne({
    firstName: ''john'',
    lastName: ''doe'',
    age: 21,
    hobbies: [
        ''Reading books'',
        ''Collecting stamps''
    ]
}, (err, result) => {
    if (err) {
        throw err;
    }
    console.log(result);
});
You don''t have to excplicitly create a database named userdb, or a collection named users before inserting the document. The database and the collection will be automatically created.
The second method allows you to add multiple documents at once. We can use the insertMany() method to achieve this:
// Insert few documents
collection.insertMany([
    {
        firstName: ''john'',
        lastName: ''doe'',
        age: 21,
        hobbies: [
            ''Reading books'',
            ''Collecting stamps''
        ]
    }, {
        firstName: ''anna'',
        lastName: ''dias'',
        age: 20,
        hobbies: []
    }
], (err, result) => {
    if (err) {
        throw err;
    }
    console.log(result.ops);
});
Since we have not defined an _id for either of these documents, we can fetch the assigned _id from the result[''ops''] object if we ever need access to the generated _id.
In addition to that, you can define the _id yourself:
// Insert one document
collection.insertOne({
    _id: ''someuniqueid'',    // Our specified ID
    firstName: ''john'',
    lastName: ''doe'',
    age: 21,
    hobbies: [
        ''Reading books'',
        ''Collecting stamps''
    ]
}, (err, result) => {
    if (err) {
        throw err;
    }
    console.log(result);
});
Retrieving Documents
Retrieve all Documents
First, let''s look at how to fetch all documents from a collection:
// Find all documents
collection.find({}).toArray((err, docs) => {
    if (err) {
        throw err;
    }
    console.log(docs)
});
As you can see in the example, we have passed an empty object ({}) as the query. According to the documentation, the toArray() method returns an array that contains all the documents from a cursor. The method iterates the cursor completely, loading all the documents into RAM and exhausting the cursor.
The documents fetched by the collection will be assigned to the docs parameter in the callback function.
Find Documents with a Query Filter
The next method of finding a document is to use a query filter. For example, the following query selects the users with the first name john:
{
    ''firstName'': ''john''
}
And to do this in code:
collection.find({
    firstName: ''john''
}).toArray((err, docs) => {
    if (err) {
        throw err;
    }
    console.log(docs)
});
Updating a Document
The next operation we are going to talk about is updating a document. To update a single document, similar to retrieving a document, we can use the updateOne() method:
collection.updateOne(
    // The query filter
    {
        firstName: ''john''
    },
    // The update values
    {
        $set: {
            lastName: ''well'',
            edited: true
        }
    },
    (err, result) => {
        if (err) {
            throw err;
        }
        console.log(result.result);
    }
);
As you can see in the example, the updateOne() method accepts three parameters. The first one is the query filter. The second one are the update values. The third one is the callback function, which accepts the error and the results as parameters.
Using this query, we have selected one document where the field firstName is john and we have changed the lastName of that document to well. Also, we have added a field called edited and set it as true. Notice how we have not needed to specify or follow any schema during this whole process. Mongo just accepts any data you send it.
If you are using the updateOne() method, the query will select the first document with the matching field. If there are multiple documents with a field of the same value, using the updateMany() method will update them all, which in some cases might not be what we want to do.
Note: If you are using the updateOne() method, ideally the query should only select a single document. Otherwise, we cannot predict the document that might get udpated. So keep this in mind and be cautious when using a query filter that could match multiple documents.
We can also edit all the documents which satisfy the condition that the field firstName is john:
collection.updateMany(
    // The query filter
    {
        firstName: ''john''
    },
    // The update values
    {
        $set: {
            lastName: ''well'',
            edited: true
        }
    },
    (err, result) => {
        if (err) {
            throw err;
        }
        console.log(result.result);
    }
);
The updateMany() method is similar to the updateOne() method, except it updates all the documents that match the query filter.
Removing a Document
We can use the deleteOne() or deleteMany() methods to remove a document from a collection:
collection.deleteOne(
    // The query filter
    {
        firstName: ''john''
    },
    (err, result) => {
        if (err) {
            throw err;
        }
        console.log(result.result);
    }
);
Again, in a similar fashion to the previous examples - the first accepted parameter is the filter query and the second parameters is the callback function. The callback function returns an error or a result.
Running this piece of code will remove a document that matches the query - in this case, a document in which the firstName field is john. Again, this will only delete the first document that matches the query.
You can also use the deleteMany method to delete all the documents which are selected:
collection.deleteMany(
    // The query filter
    {
        firstName: ''john''
    },
    (err, result) => {
        if (err) {
            throw err;
        }
        console.log(result.result);
    }
);
Conclusion
MongoDB is a popular NoSQL, lightweight database that''s really easy to implement and use with Node. We wrote a very simple Node application that interacts with a MongoDB to create, retrieve and delete collections.
As always the source code is available on GitHub.

A plain english introduction to CAP Theorem
A plain english introduction to CAP Theorem
http://ksat.me/a-plain-english-introduction-to-cap-theorem/
You''ll often hear about the CAP theorem which specifies some kind of an upper limit when designing distributed systems. As with most of my other introduction tutorials, Lets try understanding CAP by comparing it with a real world situation.
Chapter 1: "Remembrance Inc" Your new ventrue:
Last night when your spouse appreciated you on remembering her birathday and bringing her a gift, a strange has idea strikes you. People are so bad in remembering things. And you''re sooo good at it. So why not start a ventrue that will put your talent to use? The more you think about it, the more you like it. In fact you even come up with a news paper ad which explains you idea.
Remembrance Inc! - Never forget,  even without remembering!
   Ever felt bad that you forget so much?  Don''t worry. Help is just a phone away!
    When you need to remember something, just call 555--55-REMEM and tell us what you need to remember. For eg., call us and let us know of your boss''s phone number, and forget to remember it. when you need to know it back.. call back the same number[(555)--55-REMEM ] and we''ll tell you what''s your boss''s phone number.
   Charges : only $0.1 per request
So, you typical phone conversation will look like this:
- Customer: Hey, Can you store my neighbor''s birathday?
- You: When is it ?
- Customer: 2nd of jan
- You:(write it down aganist the customer''s page in you paper note book)Stored. Call us any time for knowing you neighbor''s birathday again!
- Customer: Thank you !
- You: No problem! We charged you credit card with $0.1
Chapter 2: you scale up:
You venture(企业) gets funded by YCombinator. You idea is so simple, needs nothing but a paper notebook and phone, yet so effective that is spreads like wild fire. You start getting hundres of call every day.
And there starts the problem. You see that more and more of your customers have to wait in the queue to speak to you. Most of them even hang up tired of the waiting tone. Besides when you were sick the other day and could not come to work you lost a whole day business. Not to mention all those dissatisfied customers who wanted information on that day. You decide it''s time for you to scale up and bring in your wife to help you.
Your start with a simple plan:
- You and your wife both get an extension phone
- Customers still dial(555)-55-REMEM and need to remember only one number
- A pbx will route the a customers call to whoever is free and equally
Chapter3: You have you first "Bad Servie":
Two days after you implemented the new system, you get a call form you get a call from trusted cunstomr Jhon. This is how it goes:
- Jhon: Hey
- You: Glad you called “Remembrance Inc!”. What can I do for you?
- Jhon: Can you tell me when is my flight to New Delhi?
- You: Sure.. 1 sec sir (You look up your notebook) (wow! there is no entry for “flight date” in Jhon’s page)!!!!!
- You: Sir, I think there is a mistake. You never told us about your flight to delhi
- Jhon: What! I just called you guys yesterday!(cuts the call!)
How did that happen? Could Jhon be lying? You think about it for a second and the reason hits you ! Could Jhon''s call yesterday reached you wife? You go to your wife''s desk and check her notebook. Sure enough it''s there. You tell this to your wife and she realizes the problem too.
What a terrible flaw in your distributed design! Your distributed system is not consistent! There could always be a chance that a customer updates someting which goes to either your or your wife and when the next call from the customer is routed to another person there will not be a consistent reply form Remembrance Inc!
Chapter4: You fix the Consistency problem:
Well, your competitors may ignore a bad service, but not you. You think all night in the bed when your wife is sleeping and come up with a beautiful plan in the morning. You wake up your wife and tell her.
” Darling this is what we are going to do from now”
- Whenever any one of us get a call for an update(when the customer wants us to remember something) before completing the call we tell the other person
- This way both of us note down any updates
- When there is call for search(When the customer wants information he has already stored) we don’t need to talk with the other person. Since both of us have the latest updated information in both of our note books we can just refer to it..
There is only one problem though, you say, and that is an "update" request has to involve both of us and we cannot work in parallel during that time. For eg. When you get an updat request and telling me to update too. I cannot take other calls. But that''s okay becuse that most calls we get anyway are "search"(a customer updates once and asks many times). Besides, we cannot give wrong information at any cost.
"Neat" your wife says, "but there is one more flaw i this system that you haven''t thougt of. What if one of us doesn''t report to work on a paticular day? On the day, then, we won''t be able to take ''any'' update calls, because the other person cannot be updated! We will have Availability problem, i.e, for eg:if an update request comes to me I will never be able to complete that call because even though I have written the update in my note book, I can never update you. So I can never complete the call"
Chapter 5: You come up with the greatest solution Ever:
You being to realize a little bit on why distributed system might not be as easy as you thought at first. Is it that difficult to come up with a solution that could be both "Consistent and Available"? Could be difficult for others, but not for you!!! Then next morning you come up with a solution that your competitors cannpt think of in their dreams! You wake you wife up eagerly again..
"look", you tell her .. "This is what we can do to consistent and available". The plan is mostly similar to what I told you yesterday:
- Whenever any one of us get a call for an update(when the customer wants us to remember something) before completing the call, if the other person is available we tell the other person. This way both of us note down any updates
- But if the other person is not available(doesn’t report to work) we send the other person an email about the update.
- The next day when the other person comes to work after taking a day off, He first goes through all the emails, updates his note book accordingly.. before taking his first call.
Genius! You wife says! I can’t find any flaws in this systems. Let’s put it to use.. Remembrance Inc! is now both Consistent and available!
Chapter 6: Your wife gets angry:
Everyting goes well for a while. Your system is consistent. Your system works well even when one of you doesn''t report to work. But what if Both of you report to work and one fo you doesn''t update the other person? Remember all those days you''ve been waking your wife up early with your Greatest-idea-ever-bullshit? What if your wife decides to take calls but is too arnry with you adn decides not to update you for a day? Your idea totally breaks! Your idea so far is good for consistentcy and availablity but is not Partition Tolerang! You can decide to be partition tolerant by deciding not to take any calls until you patch up with your wife. Then your system will not "avaliable" during that time ...
chapter7: conslusion:
So Let''s look at CAP Theorem now. Its states that, when you are designing a distributted system you can get cannot achieve all three of Consistency, Availablity and Partition tolerance. You can pick only two of:
- Consistency: You customers, once they have updated information with you, will always get the most updated information when they call subsequently. No matter how quickly they call back
- Availability: Remembrance Inc will always be available for calls until any one of you(you and you wife)report to work even if there is a communication loss beteween you and your wife!
Bonus: Eventual Consistency with a run around clerk:
Here is another food for thought. You can have a run around clerk, who will update other''s notebook when one of your''s or your wife''s note books is updated. The greatest benefit of this is that, he can work in background and one of your or your wife''s "update" doesn''t have to block, waiting for the other one to update. This is how many NoSql systems work, on node upates itself locally and a background process synchorinizes all other nodes accordingly... The only problem is that you will lose consistency of some time. For eg., a customer''s call reaches your wife first and before the check has a chance to update your notebook. the cumstor'' calls back and it reaches you. The he won''t get a consistent reply... But that said, this is not at all a bad idea if such cases are limited. For eg. assuming a customer won''t forget things so quickly that calls back in 5 minutes.
That''s CAP and eventual consistency for you in simple english :)

A simple introduction to systemd
Systemd Basics--------------
Feature
1. compatible with SysV and LSB init scripts
2. provides aggressive parallelization
3. use socket and D-Bus activation for starting services
4. offers on-demand starting of daemons
5. Keep track of processes using Linux control groups
6. support snapshotting and restoring of system state
7. maintain mount and automount points
8. implement an elaborate transactional dependency-based service control logic
Main idea for parallelization of services in systemd
The socket-based service activation and the bus-based service activation
together enable us to start all daemons in parallel, without any further
synchronization. Activation also allows us to do lazy-loading of services: if a
service is rarely used, we can just load it the first time somebody accesses the
socket or bus name, instead of starting it during boot
Another main idea in systemd is getting rid of shell scripts. Shell scripts,
as we all know, are slow to execute and hard to oversee and control.
A good metric for measuring shell script infestation of the boot process is the
PID number of the first process you can start after the system is fully booted
up. Boot up, log in, open a terminal, and type echo $$.
Use Control Groups (aka "cgroups") to keep track of processes for babysitting purpose.
On top of that certain high-level controls can be very useful, such as setting
up read-only file system overlays based on read-only bind mounts. That way one
can run certain daemons so that all (or some) file systems appear read-only to
them, so that EROFS is returned on every write request.
Finally logging is an important part of executing services: ideally every bit of
output a service generates should be logged away. An init system should hence
provide logging to daemons it spawns right from the beginning, and connect
stdout and stderr to syslog or in some cases even /dev/kmsg which in many cases
makes a very useful replacement for syslog (embedded folks, listen up!),
especially in times where the kernel log buffer is configured ridiculously large
out-of-the-box.
systemd has a minimal transaction system which pulls in dependencies and resolves
conflicts.
We support reexecution of the init process itself at any time. The daemon state
is serialized before the reexecution and deserialized afterwards. That way we
provide a simple way to facilitate init system upgrades as well as handover from
an initrd daemon to the final daemon.
Starting the work of removing shell scripts from the boot process we have recoded
part of the basic system setup in C and moved it directly into systemd. Among
that is mounting of the API file systems (i.e. virtual file systems such as /proc,
/sys and /dev.) and setting of the host-name.
There''s an interactive mode which asks for confirmation each time a process is
spawned by systemd. You may enable it by passing systemd.confirm_spawn=1 on the
kernel command line.
More importantly however, it is also our plan to experiment with systemd not
only for optimizing boot times, but also to make it the ideal session manager,
to replace (or possibly just augment) gnome-session, kdeinit and similar daemons.
The problem set of a session manager and an init system are very similar: quick
start-up is essential and babysitting processes the focus. Using the same code
for both uses hence suggests itself. Apple recognized that and does just that
with launchd. And so should we: socket and bus based activation and
parallelization is something session services and system services can benefit
from equally.
Question
1. How does systemd set hostname?
2. Bus activation?
3. autofs?
4. SysV compatability? [LSB header]
autofs & automount
------------------
autofs is a program for automatically mounting directories on an as-needed basis.
Auto-mounts are mounted only as they are accessed, and are unmounted after a
period of inactivity.
Upstart
-------
Upstart does not share code with sysvinit, and its functionality is a super-set
of it, and provides compatibility to some degree with the well known SysV init
scripts. It''s main feature is its event-based approach: starting and stopping of
processes is bound to "events" happening in the system, where an "event" can be
a lot of different things, such as: a network interfaces becomes available or
some other software has been started.
Furthermore, the event logic turns around all dependencies, from the feet onto
their head. Instead of minimizing the amount of work (which is something that a
good init system should focus on), it actually maximizes the amount of work to
do during operations. Or in other words, instead of having a clear goal and only
doing the things it really needs to do to reach the goal, it does one step, and
then after finishing it, it does all steps that possibly could follow it.
Or to put it simpler: the fact that the user just started D-Bus is in no way an
indication that NetworkManager should be started too (but this is what Upstart
would do). It''s right the other way round: when the user asks for NetworkManager,
that is definitely an indication that D-Bus should be started too (which is
certainly what most users would expect, right?).
systemd V.S. upstart
--------------------
On-demand logic v.s. Event-based logic
Systemd V.S. Sysvinit
---------------------
The central responsibility of an init system is to bring up userspace. And a
good init system does that fast. Unfortunately, the traditional SysV init system
was not particularly fast.
Right now, on boot-up a lot of time is spent idling to wait until all devices
that are listed in /etc/fstab show up in the device tree and are then fsck''ed,
mounted, quota checked (if enabled). Only after that is fully finished we go on
and boot the actual services.
References
----------
http://0pointer.de/blog/projects/systemd.html
https://help.ubuntu.com/community/Autofs
https://access.redhat.com/knowledge/docs/en-US/Red_Hat_Enterprise_Linux/6/html/Storage_Administration_Guide/s2-nfs-config-autofs.html
http://freedesktop.org/wiki/Software/systemd/Optimizations
http://lwn.net/Articles/299483/
https://wiki.archlinux.org/index.php/Systemd
http://freedesktop.org/wiki/Software/systemd/
http://www.freedesktop.org/software/systemd/man/
http://0pointer.de/blog/projects/systemd-update.html
http://0pointer.de/blog/projects/systemd-update-2.html
http://0pointer.de/blog/projects/systemd-update-3.html
http://0pointer.de/blog/projects/why.html
https://bbs.archlinux.org/viewtopic.php?pid=1149530#p1149530
http://www.freedesktop.org/wiki/Software/systemd
http://en.wikipedia.org/wiki/Systemd
我们今天的关于A Simple Introduction to Linux Daemon (with exa...的分享就到这里,谢谢您的阅读,如果想了解更多关于1: Version Control Systems( Introduction to Git )、A Beginner-Level Introduction to MongoDB with Node.js、A plain english introduction to CAP Theorem、A simple introduction to systemd的相关信息,可以在本站进行搜索。
本文标签:


