在本文中,我们将详细介绍VUE之命令行报错:Componenttemplateshouldcontainexactlyonerootelement.Ifyouareusingv-ifonmu...的各
在本文中,我们将详细介绍VUE 之命令行报错:Component template should contain exactly one root element. If you are using v-if on mu...的各个方面,同时,我们也将为您带来关于# [译]angular中的ng-template, ng-content, ng-container、-bash: /bin/grep: Argument list too long和 find: Arguments to -type should contain only one letter...、.MySQLNonTransientConnectionException: Could not create connection to database server. Attempted reconnect 5 times. Giving up.、angular2 ng-container如何使用动态ngTemplateOutletContext的有用知识。
本文目录一览:- VUE 之命令行报错:Component template should contain exactly one root element. If you are using v-if on mu...
- # [译]angular中的ng-template, ng-content, ng-container
- -bash: /bin/grep: Argument list too long和 find: Arguments to -type should contain only one letter...
- .MySQLNonTransientConnectionException: Could not create connection to database server. Attempted reconnect 5 times. Giving up.
- angular2 ng-container如何使用动态ngTemplateOutletContext

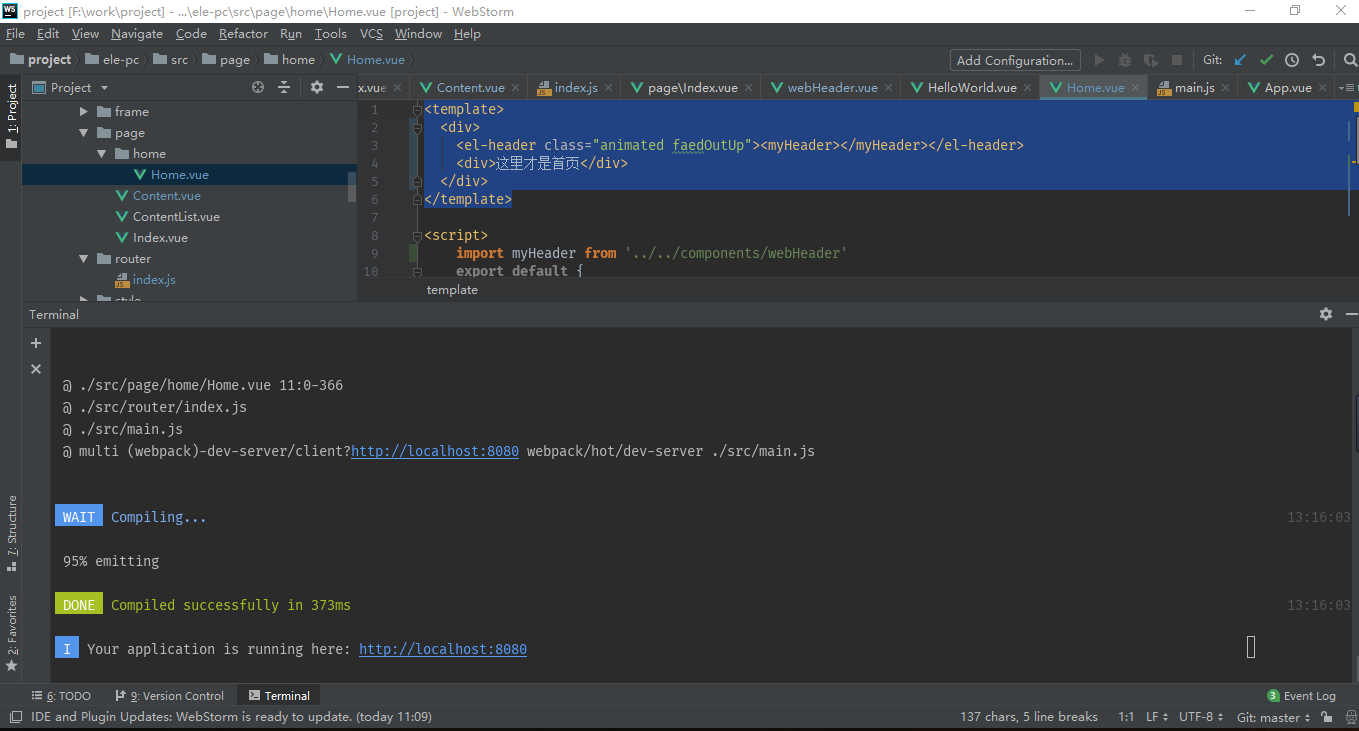
VUE 之命令行报错:Component template should contain exactly one root element. If you are using v-if on mu...
Failed to compile.
./node_modules/vue-loader/lib/template-compiler?{"id":"data-v-59926570","hasScoped":true,"transformToRequire":{"video":["src","poster"],"source":"src","img":"src","image":"xlink:href"},"buble":{"transforms":{}}}!./node_modules/vue-loader/lib/selector.js?type=template&index=0!./src/page/home/Home.vue (Emitted value instead of an instance of Error)
Error compiling template:
<div><el-header><myHeader></myHeader></el-header></div> <div > 这里才是首页 </div>
- Component template should contain exactly one root element. If you are using v-if on multiple elements, use v-else-if to chain them instead.
@ ./src/page/home/Home.vue 11:0-366
@ ./src/router/index.js
@ ./src/main.js
@ multi (webpack)-dev-server/client?http://localhost:8080 webpack/hot/dev-server ./src/main.js
写 vue 时经常被一大片报错惊了个呆
其实很多时候,都是些小毛病
比如这次,从文字翻译上来讲,其实 Component template should contain exactly one root element. If you are using v-if on multiple elements, use v-else-if to chain them instead 这句话已经讲的很明白了,直译出来 就是:组件模板应该包含一个根元素。如果在多个元素上使用 V-IF,则使用 V-ELS-IF 来链接它们。
但是这么说依然让新手有点摸不着头脑,其实就是说在模版里只能有一个主 div(根对象),如果有多个元素,请用一个主 div 包含他们
错误代码如下:
<template>
  <div><el-header class="animated faedOutUp"><myHeader></myHeader></el-header></div>
  <div>这里才是首页</div>
</template>
修改后如下
<template>
  <div>
    <el-header class="animated faedOutUp"><myHeader></myHeader></el-header>
    <div>这里才是首页</div>
  </div>
</template>
保存运行,错误解决了!
![# [译]angular中的ng-template, ng-content, ng-container](http://www.gvkun.com/zb_users/upload/2025/02/7f0b5930-e345-43b6-a852-63c375ae45571739252800858.jpg "# [译]angular中的ng-template, ng-content, ng-container")
# [译]angular中的ng-template, ng-content, ng-container

本文会包含作者一些理解,为了不和原作者意思混淆,会将个人的理解放在【】里。
原文地址
那是我忙于为我的办公项目创作新功能的日子之一。突然间,某些事情引起了我的注意。
上图是angular最终渲染出来的DOM

当我审查DOM时候,我看到这个 ngcontent 被Angular应用到了元素上。如果他们包含元素在最终的DOM里,那么<ng-container>是用来干什么的? 那是我很困惑在 <ng-container> 和 <ng-content>中。
在探寻问题答案的时候我发现了<ng-template>和 *ngTemplateOutlet的概念。现在我们有四个听起来几乎相同的概念。我开始了探寻它们的旅程。
你曾经也遇到过这种情况吗?如果是,那么你来对地方了。闲话少说,让我们一个一个来讲解他们。
1. < ng-template >
顾名思义,<ng-template> 是一个模板元素,用于Angular与结构指令结合使用(*ngIf, *ngFor, [ngSwitch]和自定义指令)
<font color=''red''>这些模板元素仅工作在结构指令存在的时候</font>。Angular包装了我们应用指令的元素。 考虑下边的一个*ngIf的例子。

【我们可以看到,在一个普通元素上添加结构指令,angular在解析时候,其实会帮我买创建一个ng-template元素,并将相关的结构指令放到ng-template上进行处理】
上面展示的是Angular对与*ngIf的解释。 最终的DOM与我们在本文开头看到的类似。

使用方法
我们已经看到了Angular使用<ng-template>的方式。但是我们如何使用它呢?由于它只和结构指令一起工作,所以我们可以这样使用:【这种是❌方式,后边会讲到】

此处的 home 设置为 true, 上述代码在DOM中的输出为:

什么都没有被渲染出来!这是为什么呢? 其实,这正是预期的结果。正如我们已经讨论过的,Angular会用注释替代ng-template【译文使用的Angular版本为6.1.10。 在Angular12版本,已经用特殊的className代替注释了】,我们的代码最终会被解释成如下代码。

我们的<ng-template>在被Angular包装之后,变成了两个。但是无论怎样,Angular都不对<ng-template>的内容进行选中。
以下是两种<font color=green>正确</font>的使用方式:

Method 1
在第一种方法中,你提供给Angular一种不需要进一步处理的方式。这样Angular将仅仅转换 <ng-template> 到注释里,并不会改变其内容。(它们不会再像之前的例子一样被放在任何<ng-template>中)。因此,它将正确的渲染内容。
要想了解更多如何使用此结构和更多的结构指令,请参考这篇文章。
Method2
这是一种很少使用的方式(使用两个<ng-template>)。这里我们在then中给出了一个模板引用,告诉他当条件为真时候应该渲染什么。
像这样使用多<ng-template>(你可以使用<ng-container>代替)是不被建议的因为这不是Angular的本意。<ng-template>应当被使用在多处重复使用的场景下。我们将在文章后面的部分更详细的讨论。
< ng-container >
你是否曾经写过或看到过类似这样的代码

我们大部分人写这样代码的原因在于Angular无法再单个元素上使用多个结构指令。现在这个代码正常工作,但是如果item.id 为false,它就会在dom中引入很多空的<div>

在简单的例子中可能不需要关心它,但如果在大型复杂的应用中时候(会展示成千上万的数据),它可能变得麻烦,因为有可能会有监听器在这些DOM上。
更糟糕的是你可能必须去嵌套你的CSS。【大概是想表达这些写会在附加样式时候需要额外的选择器】
不要担心!我们有<ng-container>可以解决。
<ng-container>是一个组元素,它不会干扰样式或布局,因为Angular不会将它们渲染到DOM中。

以上代码会渲染出这样的DOM结构

看,我们摆脱了那些空的div。我们应该使用<ng-container>当我们仅仅想使用多个结构指令而不想引入多的DOM时候。
3、< ng-content >
它用于创建可配置的组件。这意味着组件可以根据用户的意愿来配置。这就是众所周知的内容投影~
考虑一个简单的使用了<ng-content>的组件


在<project-content>组件的开始标记和结束标记之间是将要被内容投影的内容。【也就是vue和react的slot】
这些内容将被渲染在组件的<ng-content>中,这将允许自定义<project-content>组件的页脚部分。
多重投影
如果你可以决定哪些内容可以被渲染到哪些地方会怎样?您还可以使用<ng-content>的select属性来控制内容的投影方式,而不是在单个的<ng-content>中投影每个内容。它需要一个元素选择器来决定特定的<ng-content>中投影哪些内容.
方法如下:

我们修改<project-content>来演示如何使用多内容投影。Select属性选择器将在特定的<ng-content>中呈现的内容。这里我们首先选择呈现h1元素,如果投射的内容中没有h1元素,它将不会渲染任何内容。同样,第二个选择查找div。其余的内容在最后一个<ng-content>中呈现。
以上的方式应该是老版本的Angular了,现在的Angular文档中没有提到,现在的使用方式请查看最新文档
4、*ngTemplateOutlet
*ngTemplateOutlet 一般被用在两个场景:
- 不论循环或条件如何,在视图中插入一个公共模板
- 创建一个高度配置的组件
模版重用
考虑一个视图,其必须在多个位置插入模板。例如,要放置在网站中的公司logo。我们可以通过为logo编写一次模板并在视图的任何地方重用来实现它。
下面是代码片段:

正如你看到的,我们只写了一次模板代码,并使用了它三次!
<*ngTemplateOutlet> 也接受一个上下文对象,可以传递改对象来自定义通用模板输出。有关上下文的更多信息,请参阅官方文档
自定义组件
<*ngTemplateOutlet> 的第二个使用方式是高度订制组件。考虑我们之前的<project-content> 的示例。并进行一些修改。

上面是<project-content> 组件的修改版本,它接受三个属性 —— <headerTemplate> <bodyTemplate> <footerTemplate> 。下面是其代码片段:

我们在这里视图实现的是显示从<project-content>的父组件接受到的页眉,正文和页脚。如果其中任何一个未提供,我们的组件在其位置展示默认模版。因此,创建了一个高度订制的组件。
现在使用我们刚创建的组件:

这是我们如何传递一个 template refs 给我们的组件的方式。如果其中任何一个没有传递,组件将渲染默认的模板!
ng-content vs *ngTemplateOutlet
它们都帮我们实现了高度自定义的组件,但是我们该如何选择它们呢?
可以清除的看到,*ngTemplateOutlet给了我们更多的能力,例如提供默认的模板...
但 <ng-content> 智能按照原样呈现内容,借助select属性,您可以拆分内容并在视图的不同位置呈现它们。您不能有条件的呈现<ng-content>的内容。您必须限制从父组件哪里接受到的内容,而无法根据内容做出决定。
无论如何,在这两个间进行选择完全取决于你的用例。至少现在我们有了一个新的武器 *ngTemplateOutlet,它提供了更多的控制权对比<ng-content>

-bash: /bin/grep: Argument list too long和 find: Arguments to -type should contain only one letter...
由于要查找的文件太多
过滤成只找具体时间一天以内的文件
find ./ -mtime -1|xargs grep 5004964452
查找最近30分钟修改的当前目录下的.php文件

find . -name ''*.php'' -mmin -30

查找最近24小时修改的当前目录下的.php文件

find . -name ''*.php'' -mtime 0

查找最近24小时修改的当前目录下的.php文件,并列出详细信息

find . -name ''*.inc'' -mtime 0 -ls

查找当前目录下,最近24-48小时修改过的常规文件。

find . -type f -mtime 1

查找当前目录下,最近1天前修改过的常规文件。

find . -type f -mtime +1
·find   path   -option   [   -print ]   [ -exec   -ok   command ]   {} \;

find命令的参数;

pathname: find命令所查找的目录路径。例如用.来表示当前目录,用/来表示系统根目录。
-print: find命令将匹配的文件输出到标准输出。
-exec: find命令对匹配的文件执行该参数所给出的shell命令。相应命令的形式为''command'' { } \;,注意{ }和\;之间的空格。
-ok: 和-exec的作用相同,只不过以一种更为安全的模式来执行该参数所给出的shell命令,在执行每一个命令之前,都会给出提示,让用户来确定是否执行。
#-print 将查找到的文件输出到标准输出
#-exec   command   {} \;      —–将查到的文件执行command操作,{} 和 \;之间有空格
#-ok 和-exec相同,只不过在操作前要询用户

例:find . -name .svn | xargs rm -rf

====================================================

-name   filename             #查找名为filename的文件
-perm                        #按执行权限来查找
-user    username             #按文件属主来查找
-group groupname            #按组来查找
-mtime   -n +n                #按文件更改时间来查找文件,-n指n天以内,+n指n天以前
-atime    -n +n               #按文件访问时间来查GIN: 0px">

-ctime    -n +n              #按文件创建时间来查找文件,-n指n天以内,+n指n天以前
-nogroup                     #查无有效属组的文件,即文件的属组在/etc/groups中不存在
-nouser                     #查无有效属主的文件,即文件的属主在/etc/passwd中不存
-newer   f1 !f2              找文件,-n指n天以内,+n指n天以前
-ctime    -n +n               #按文件创建时间来查找文件,-n指n天以内,+n指n天以前
-nogroup                     #查无有效属组的文件,即文件的属组在/etc/groups中不存在
-nouser                      #查无有效属主的文件,即文件的属主在/etc/passwd中不存
-newer   f1 !f2               #查更改时间比f1新但比f2旧的文件
-type    b/d/c/p/l/f         #查是块设备、目录、字符设备、管道、符号链接、普通文件
-size      n[c]               #查长度为n块[或n字节]的文件
-depth                       #使查找在进入子目录前先行查找完本目录
-fstype                     #查更改时间比f1新但比f2旧的文件
-type    b/d/c/p/l/f         #查是块设备、目录、字符设备、管道、符号链接、普通文件
-size      n[c]               #查长度为n块[或n字节]的文件
-depth                       #使查找在进入子目录前先行查找完本目录
-fstype                      #查位于某一类型文件系统中的文件,这些文件系统类型通常可 在/etc/fstab中找到
-mount                       #查文件时不跨越文件系统mount点
-follow                      #如果遇到符号链接文件,就跟踪链接所指的文件
-cpio                %;      #查位于某一类型文件系统中的文件,这些文件系统类型通常可 在/etc/fstab中找到
-mount                       #查文件时不跨越文件系统mount点
-follow                      #如果遇到符号链接文件,就跟踪链接所指的文件
-cpio                        #对匹配的文件使用cpio命令,将他们备份到磁带设备中
-prune                       #忽略某个目录

=====================================================
$find   ~   -name   "*.txt"   -print    #在$HOME中查.txt文件并显示
$find   .    -name   "*.txt"   -print
$find   .    -name   "[A-Z]*"   -print   #查以大写字母开头的文件
$find   /etc   -name   "host*"   -print #查以host开头的文件
$find   .   -name   "[a-z][a-z][0–9][0–9].txt"    -print   #查以两个小写字母和两个数字开头的txt文件
$find .   -perm   755   -print
$find   .   -perm -007   -exec ls -l {} \;   #查所有用户都可读写执行的文件同-perm 777
$find   . -type d   -print
$find   .   !   -type   d   -print
$find   .   -type l   -print

$find   .   -size   +1000000c   -print        #查长度大于1Mb的文件
$find   .   -size   100c         -print       # 查长度为100c的文件
$find   .   -size   +10   -print              #查长度超过期作废10块的文件(1块=512字节)

$cd /
$find   etc   home   apps    -depth   -print   | cpio   -ivcdC65536   -o   /dev/rmt0
$find   /etc -name "passwd*"   -exec grep   "cnscn"   {}   \;   #看是否存在cnscn用户
$find . -name "yao*"   | xargs file
$find   . -name "yao*"   |   xargs   echo    "" > /tmp/core.log
$find   . -name "yao*"   | xargs   chmod   o-w

======================================================

find   -name april*                     在当前目录下查找以april开始的文件
find   -name   april*   fprint file        在当前目录下查找以april开始的文件,并把结果输出到file中
find   -name ap* -o -name may*   查找以ap或may开头的文件
find   /mnt   -name tom.txt   -ftype vfat   在/mnt下查找名称为tom.txt且文件系统类型为vfat的文件
find   /mnt   -name t.txt ! -ftype vfat   在/mnt下查找名称为tom.txt且文件系统类型不为vfat的文件
find   /tmp   -name wa* -type l            在/tmp下查找名为wa开头且类型为符号链接的文件
find   /home   -mtime   -2                 在/home下查最近两天内改动过的文件
find /home    -atime -1                  查1天之内被存取过的文件
find /home -mmin    +60                  在/home下查60分钟前改动过的文件
find /home   -amin   +30                  查最近30分钟前被存取过的文件
find /home   -newer   tmp.txt             在/home下查更新时间比tmp.txt近的文件或目录
find /home   -anewer   tmp.txt            在/home下查存取时间比tmp.txt近的文件或目录
find   /home   -used   -2                  列出文件或目录被改动过之后,在2日内被存取过的文件或目录
find   /home   -user cnscn                列出/home目录内属于用户cnscn的文件或目录
find   /home   -uid   +501                  列出/home目录内用户的识别码大于501的文件或目录
find   /home   -group   cnscn              列出/home内组为cnscn的文件或目录
find   /home   -gid 501                   列出/home内组id为501的文件或目录
find   /home   -nouser                    列出/home内不属于本地用户的文件或目录
find   /home   -nogroup                   列出/home内不属于本地组的文件或目录
find   /home    -name tmp.txt    -maxdepth   4   列出/home内的tmp.txt 查时深度最多为3层
find   /home   -name tmp.txt   -mindepth   3   从第2层开始查
find   /home   -empty                     查找大小为0的文件或空目录
find   /home   -size   +512k                查大于512k的文件
find   /home   -size   -512k               查小于512k的文件
find   /home   -links   +2                查硬连接数大于2的文件或目录
find   /home   -perm   0700                查权限为700的文件或目录
find   /tmp   -name tmp.txt   -exec cat {} \;
find   /tmp   -name   tmp.txt   -ok   rm {} \;

find    /   -amin    -10     # 查找在系统中最后10分钟访问的文件
find    /   -atime   -2        # 查找在系统中最后48小时访问的文件
find    /   -empty             # 查找在系统中为空的文件或者文件夹
find    /   -group   cat        # 查找在系统中属于 groupcat的文件
find    /   -mmin   -5         # 查找在系统中最后5分钟里修改过的文件
find    /   -mtime   -1       #查找在系统中最后24小时里修改过的文件
find    /   -nouser           #查找在系统中属于作废用户的文件
find    /   -user    fred     #查找在系统中属于FRED这个用户的文件
转自
Linux系统下用find命令查找最近修改过的文件 - luckyall - 博客园 https://www.cnblogs.com/luckyall/p/8039868.html

.MySQLNonTransientConnectionException: Could not create connection to database server. Attempted reconnect 5 times. Giving up.
com.mysql.jdbc.exceptions.jdbc4.MySQLNonTransientConnectionException: Could not create connection to database server. Attempted reconnect 5 times. Giving up.
	at sun.reflect.NativeConstructorAccessorImpl.newInstance0(Native Method)
	at sun.reflect.NativeConstructorAccessorImpl.newInstance(NativeConstructorAccessorImpl.java:62)
	at sun.reflect.DelegatingConstructorAccessorImpl.newInstance(DelegatingConstructorAccessorImpl.java:45)
	at java.lang.reflect.Constructor.newInstance(Constructor.java:408)
	at com.mysql.jdbc.Util.handleNewInstance(Util.java:411)
	at com.mysql.jdbc.Util.getInstance(Util.java:386)
	at com.mysql.jdbc.SQLError.createSQLException(SQLError.java:1015)
	at com.mysql.jdbc.SQLError.createSQLException(SQLError.java:989)
	at com.mysql.jdbc.SQLError.createSQLException(SQLError.java:975)
	at com.mysql.jdbc.SQLError.createSQLException(SQLError.java:920)
	at com.mysql.jdbc.ConnectionImpl.connectWithRetries(ConnectionImpl.java:2385)
	at com.mysql.jdbc.ConnectionImpl.createNewIO(ConnectionImpl.java:2306)
	at com.mysql.jdbc.ConnectionImpl.<init>(ConnectionImpl.java:834)
	at com.mysql.jdbc.JDBC4Connection.<init>(JDBC4Connection.java:47)
	at sun.reflect.GeneratedConstructorAccessor4.newInstance(Unknown Source)
	at sun.reflect.DelegatingConstructorAccessorImpl.newInstance(DelegatingConstructorAccessorImpl.java:45)
	at java.lang.reflect.Constructor.newInstance(Constructor.java:408)
	at com.mysql.jdbc.Util.handleNewInstance(Util.java:411)
	at com.mysql.jdbc.ConnectionImpl.getInstance(ConnectionImpl.java:416)
	at com.mysql.jdbc.NonRegisteringDriver.connect(NonRegisteringDriver.java:346)
	at com.mysql.jdbc.jdbc2.optional.MysqlDataSource.getConnection(MysqlDataSource.java:443)
	at com.mysql.jdbc.jdbc2.optional.MysqlDataSource.getConnection(MysqlDataSource.java:141)
	at com.mysql.jdbc.jdbc2.optional.MysqlDataSource.getConnection(MysqlDataSource.java:111)
	at cn.qjj.mysql.MySQLPool.getNewConnection(MySQLPool.java:72)
	at cn.qjj.mysql.MySQLPool.init(MySQLPool.java:63)
	at cn.qjj.mysql.MySQLPool.<init>(MySQLPool.java:32)
	at cn.qjj.mysql.MySQLPool.getInstance(MySQLPool.java:39)
	at cn.qjj.mysql.SqlUtils.<clinit>(SqlUtils.java:33)
	at cn.qjj.solr.MsgUtil.main(MsgUtil.java:31)
Caused by: com.mysql.jdbc.exceptions.jdbc4.MySQLNonTransientConnectionException: Data source rejected establishment of connection,  message from server: "Too many connections"
	at sun.reflect.NativeConstructorAccessorImpl.newInstance0(Native Method)
	at sun.reflect.NativeConstructorAccessorImpl.newInstance(NativeConstructorAccessorImpl.java:62)
	at sun.reflect.DelegatingConstructorAccessorImpl.newInstance(DelegatingConstructorAccessorImpl.java:45)
	at java.lang.reflect.Constructor.newInstance(Constructor.java:408)
	at com.mysql.jdbc.Util.handleNewInstance(Util.java:411)
	at com.mysql.jdbc.Util.getInstance(Util.java:386)
	at com.mysql.jdbc.SQLError.createSQLException(SQLError.java:1015)
	at com.mysql.jdbc.SQLError.createSQLException(SQLError.java:989)
	at com.mysql.jdbc.SQLError.createSQLException(SQLError.java:975)
	at com.mysql.jdbc.MysqlIO.doHandshake(MysqlIO.java:1112)
	at com.mysql.jdbc.ConnectionImpl.coreConnect(ConnectionImpl.java:2483)
	at com.mysql.jdbc.ConnectionImpl.connectWithRetries(ConnectionImpl.java:2324)
	... 18 more
java.lang.NullPointerException
	at java.util.concurrent.ConcurrentHashMap.putVal(ConcurrentHashMap.java:1011)
	at java.util.concurrent.ConcurrentHashMap.put(ConcurrentHashMap.java:1006)
	at cn.qjj.mysql.MySQLPool.init(MySQLPool.java:63)
	at cn.qjj.mysql.MySQLPool.<init>(MySQLPool.java:32)
	at cn.qjj.mysql.MySQLPool.getInstance(MySQLPool.java:39)
	at cn.qjj.mysql.SqlUtils.<clinit>(SqlUtils.java:33)
	at cn.qjj.solr.MsgUtil.main(MsgUtil.java:31)

angular2 ng-container如何使用动态ngTemplateOutletContext
<div *ngFor="let child of children; let i=index">
      <ng-container *ngTemplateOutlet="inputTpl; { $implicit: child,index: i }"></ng-container>
  </div>
这会导致错误
Unexpected token {,expected identifier,keyword,or string at column 11 in [inputTpl; { $implicit: child,index: i }]
当我在文档中使用’context:’时,这会导致
Can’t bind to ‘ngTemplateOutletContext’ since it isn’t a kNown property of ‘ng-container’
如果我使用在我的ts文件中声明的对象并设置它而不是我的对象,一切都运行正常.此外,这也很好:
<div *ngFor="let child of children; let i=index">
      <template [ngTemplateOutlet]="inputTpl" [ngOutletContext]="{ $implicit: child,index: i }" />
    </div>
有谁知道,我如何使用带有* ngTemplateOutlet的ng-container和html中生成的ngTemplateOutletContext?
解决方法
<ng-container
    [ngTemplateOutlet]="inputTpl"
    [ngTemplateOutletContext]="{ $implicit: child,index: i }"
>
</ng-container>
我们今天的关于VUE 之命令行报错:Component template should contain exactly one root element. If you are using v-if on mu...的分享就到这里,谢谢您的阅读,如果想了解更多关于# [译]angular中的ng-template, ng-content, ng-container、-bash: /bin/grep: Argument list too long和 find: Arguments to -type should contain only one letter...、.MySQLNonTransientConnectionException: Could not create connection to database server. Attempted reconnect 5 times. Giving up.、angular2 ng-container如何使用动态ngTemplateOutletContext的相关信息,可以在本站进行搜索。
本文标签:


