在本文中,您将会了解到关于VirtualBoxUbuntuLAMP堆栈开发,SVN和CruiseControl/phpUnderControl?的新资讯,同时我们还将为您解释virtualboxubu
在本文中,您将会了解到关于VirtualBox Ubuntu LAMP堆栈开发,SVN和CruiseControl / phpUnderControl?的新资讯,同时我们还将为您解释virtualbox ubuntu 铺满的相关在本文中,我们将带你探索VirtualBox Ubuntu LAMP堆栈开发,SVN和CruiseControl / phpUnderControl?的奥秘,分析virtualbox ubuntu 铺满的特点,并给出一些关于(OK) Ubuntu 15.10: KVM vs. Xen vs. VirtualBox Virtualization Performance、Config the i3wm / openbox / virtualbox / ubuntu / acme /w3m /ranger+vifm / zsh、mac 下通过virtualbox安装Ubuntu并设置share folder、Reinstall VirtualBox 6.0 on Ubuntu 18.04的实用技巧。
本文目录一览:- VirtualBox Ubuntu LAMP堆栈开发,SVN和CruiseControl / phpUnderControl?(virtualbox ubuntu 铺满)
- (OK) Ubuntu 15.10: KVM vs. Xen vs. VirtualBox Virtualization Performance
- Config the i3wm / openbox / virtualbox / ubuntu / acme /w3m /ranger+vifm / zsh
- mac 下通过virtualbox安装Ubuntu并设置share folder
- Reinstall VirtualBox 6.0 on Ubuntu 18.04
")
VirtualBox Ubuntu LAMP堆栈开发,SVN和CruiseControl / phpUnderControl?(virtualbox ubuntu 铺满)
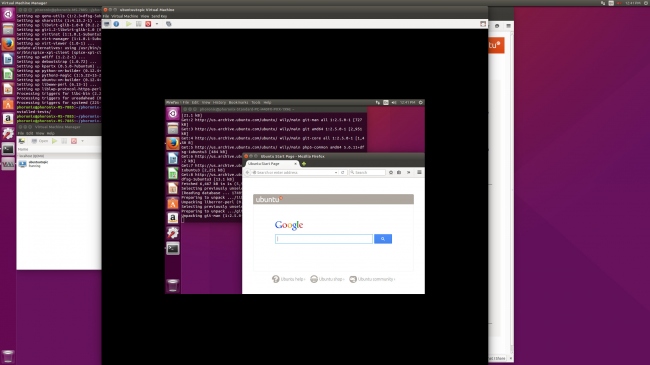
我安装了VirtualBox,Ubuntu 10.04作为客户操作系统,计划将我的PHP开发从旧的Windows / Apache / MysqL平台移动到这个虚拟映像上.除此之外,我想将CruiseControl / PHPUnderControl添加到我的PHP开发过程中.
到目前为止,我已经安装了带有LAMP堆栈的Ubuntu 10.04,以及用于PHP的Netbeans,MysqL Workbench等,这实际上与我的旧Windows开发设置相同,但我现在还安装了SVN和CruiseControl(我’尚未安装PHPUnderControl,但这是下一步).
我的问题是,我可以将此虚拟映像用作我的“本地”开发环境和构建服务器,这样我就不需要使用MysqL / PHP相关软件来混乱我的本机Windows机器(这意味着我可以保持它很好并为.NET开发干净)?
我想我需要虚拟网络服务器能够为我正在处理的任何给定项目提供“本地”开发版本,以及使用cruisecontrol / svn提交构建的暂存版本?
或者我应该将我的开发和构建服务器分开,或者将本地开发保留在Windows中,并仅将虚拟映像用于构建服务器?或者可能有两个单独的虚拟机用于不同的目的?
我很欣赏一些关于设置它的最佳方法的建议.我想要处理的其中一个项目非常复杂,所以我想确保在开始项目之前以正确的方式解决这个问题,这样我就能确保项目得到很好的维护,包括版本控制,单元测试和持续集成,我是否需要让其他开发人员参与该项目.
解决方法
这为您提供了一个很好的开发环境,更重要的是拥有一个能够反映实时服务器上代码操作的测试服务器,这将带来巨大的好处.这样,您可以使用最新的分发更新(内核,工具等)使您的开发环境VM保持最新,并将构建VM保存在实时计算机上的任何应用程序版本中.这需要进行大量的猜测,“它是库X的新版本还是我的代码?”.
如果你想略微过度,你实际上想要3.一个用于开发,一个用于SVN /持续集成,另一个用于完全镜像服务器,因此您可以测试部署/系统配置.
 Ubuntu 15.10: KVM vs. Xen vs. VirtualBox Virtualization Performance")
(OK) Ubuntu 15.10: KVM vs. Xen vs. VirtualBox Virtualization Performance
www.phoronix.com/scan.php?page=article&item=ubuntu-1510-virt&num=1
Our latest benchmarks of Ubuntu 15.10 are looking at the performance of this latest Linux distribution release when comparing the performance of guests using KVM, Xen, and VirtualBox virtualization from the same system.
The tests were all done from an Intel Xeon E5-2687W v3 + MSI X99S SLI PLUS system with 16GB of DDR4 system memory, 80GB Intel M.2 SSD, and AMD FirePro V7900 graphics. Once running our disk and processor focused benchmarks on this Ubuntu 15.10 host system, the "bare metal" results were then compared to a KVM guest setup via virt-manager using the Ubuntu Wily packages, then using the Xen 4.5 packages present on Ubuntu 15.10 with again testing the same Ubuntu 15.10 guest with virt-manager, and then lastly testing the Ubuntu 15.10 guest under VirtualBox 5.0.4 as available via the package archive.
The host system and all guests were using Ubuntu 15.10 64-bit with the Linux 4.2.0-16-generic kernel, Unity desktop, X.Org Server 1.17.2, an EXT4 file-system, and GCC 5.2.1 as the code compiler. All system settings remained the same during the testing process.
When creating the KVM/Xen/VirtualBox guests, 38GB of virtual storage on the Intel SSD, 8GB of RAM and all 20 CPU threads (ten core CPU + HT) were made available to the virtual machine under test. As each platform has near endless tunable possibilities, the testing was done with the default settings. If there''s enough interest and premium support from Phoronix readers, I can look at putting out some "tuned" VM comparisons.
All of the benchmarks for this article were carried out via the open-source Phoronix Test Suite benchmarking software.
+++++++++++++++++++++++++++++++++++++++++++
http://www.phoronix.com/scan.php?page=article&item=ubuntu-1510-virt&num=2
First up are some of the disk benchmarks for the host system and then the KVM/Xen/VirtualBox guests
With VirtualBox''s reported result outperforming the bare metal system, it looks like VirtualBox in its default configuration for this SQLite database benchmark isn''t fully honoring fsyncs to the disk compared to KVM and Xen with the performance being too good. While KVM was the slowest, if you''re doing a lot of write-intensive work in your VMs, you are better off letting the VM access a raw partition rather than just setting up a virtual disk.
With the random and sequential writes, VirtualBox was reported to be faster than KVM and Xen but again may be a matter of its different behavior.
When it comes to sequential reads, VirtualBox was slower than the competition.
Dbench is another disk benchmark showing VirtualBox''s different behavior of apparently not writing everything out to the disk during testing with the reported performance being too good.
+++++++++++++++++++++++++++++++++++++++++++
http://www.phoronix.com/scan.php?page=article&item=ubuntu-1510-virt&num=3
KVM was edging past Xen and VirtualBox for the CompileBench test.
With the Parboil OpenMP CPU test, the performance of KVM and Xen effectively matched that of the host system with minimal overhead in having access to all 20 CPU threads and having no other tasks active on the host system during testing. While VirtualBox was configured with the same hardware access, it was much slower than KVM and Xen.
The Rodinia OpenMP test was also showing VirtualBox at a similar disadvantage.
+++++++++++++++++++++++++++++++++++++++++++
http://www.phoronix.com/scan.php?page=article&item=ubuntu-1510-virt&num=4
KVM was faster than Xen at the MAFFT scientific test while VirtualBox 5.0 was nearly twice as slow.
On this Haswell Xeon system, KVM was faster than Xen and VirtualBox.
Xen scored a win past KVM when it came to the GraphicsMagick image resizing test.
There wasn''t a huge performance difference in the largely single-threaded Himeno pressure solver.
+++++++++++++++++++++++++++++++++++++++++++
http://www.phoronix.com/scan.php?page=article&item=ubuntu-1510-virt&num=5
KVM and Xen did fine on the timed kernel compilation benchmark while VirtualBox was much slower.
It seems nearly across the board that VirtualBox 5.0 performs poorly with the multi-threaded tests even though it too had access to all of the Intel Xeon v3''s threads.
There''s only small performance differences in the multimedia encoding tests.
Overall, Xen and KVM were performing well compared to the host''s performance. Xen tended to have the most wins while KVM generally came in right behind and the two were very competitive with one another, either are great solutions for Linux virtualization depending upon your specific needs. The VirtualBox results, however, were a bit concerning at least for its stock configuration with it performing poorly near universally in the multi-threaded benchmarks and the behavior in the disk benchmark also being potentially problematic.
If you would like to support our continued Linux benchmarking work at Phoronix, please consider subscribing to Phoronix Premium.

Config the i3wm / openbox / virtualbox / ubuntu / acme /w3m /ranger+vifm / zsh
Linux Mint工具学习
https://www.bookstack.cn/read/learning-linux-mint/daily-tool-autojump.md
config autojump
安装命令:
|
1
|
sudo
apt-get
install
autojump
|
安装成功后,执行 autojump 命令,提示错误:
Please source the correct autojump file in your shell''s
startup file. For more information, please reinstall autojump
and read the post installation instructions.
在~/.bashrc文件中加入如下内容,然后关闭再重新打开命令行:
|
1
|
source
/usr/share/autojump/autojump
.
bash
|
配置完成后,执行 autojump 或者 j 没有报错就说明安装成功。
config the universal-ctags
https://www.cnblogs.com/cascle/p/5133213.html
安装universal-ctags
universal-ctags是exuberant-ctags的替代者,相比gtags可以解析更多的语言,但是其他方面比如操作,数据库的组织方式等就不够好。需要自己编译安装
先用 git clone https://github.com/universal-ctags/ctags.git 下载,然后参考ctags/docs/autotools.rst,用以下命令编译(Ubuntu要先用 sudo apt-get install autoconf 安装autoconf)
$ ./autogen.sh
$ ./configure --prefix=/where/you/want # defaults to /usr/local
$ make
$ sudo make install # may require extra privileges depending on where to install
config the acme
install plan9 usrspace : https://9fans.github.io/plan9port/
我不用每次下源码编译,编好了过后,打个包,放到另个一机器上
comile issue: X11/Xlib.h: No such file or directory
A quick search using...
apt search Xlib.h
Turns up the package libx11-dev but you shouldn''t need this for pure OpenGL programming. What tutorial are you using?
You can add Xlib.h to your system by running the following...
sudo apt install libx11-dev
https://stackoverflow.com/questions/5299989/x11-xlib-h-not-found-in-ubuntu
fontconfig/fontconfig.h No such file or directory
install libfontconfig-dev
extensions/shape.h : No such file
sudo apt-get install libxtst-dev
https://www.sitepoint.com/understanding-nix-login-scripts/
if you want to switch to different windows manager, you need create ~/.xsession and/or ~/.xsessionrc
config the i3
* If you choose the Virtualbox Hotkey (Mouse Integration), then the win key (as modi) can not work. So choose Alt as modi is safe. but Alt is also for open menu shortcut?
* you can reconfigure i3 by using i3-config-wizard.
[ i3 user guide ]
https://i3wm.org/docs/userguide.html#_changing_the_container_layout
https://github.com/mudan/profile/blob/master/.i3/config
[start i3]
https://faq.i3wm.org/question/6126/how-do-i-start-i3/index.html
https://www.sitepoint.com/understanding-nix-login-scripts/
fix issue 1: after using i3 in lubuntu and exit, can not enter other desktop.
please type ''startx'' (edit ~/.xinitrc first with ''exec xfdesktop'' etc.)
fix issue 2: can not enter login screen.
please intall a windows manager and it will fix it?
config the w3m
sudo apt-get install w3m
https://github.com/janosgyerik/cheatsheets/wiki/W3m-cheat-sheet
http://wiki.ubuntu.com.cn/W3m
https://wenku.baidu.com/view/bb2e7f19fc4ffe473368ab49.html
config the openbox
intall openbox
https://wyldeplayground.net/install-openbox-on-ubuntu-server-16-04/
(need install x11-xserver-utils)
xrandr -s 1024x768
choose different windows manager
https://complete-concrete-concise.com/ubuntu-2/ubuntu-12-04-server/ubuntu-12-04-server-how-to-install-a-gui/
config the virtualbox
ubuntu server 18.04.1
更新源 https://blog.csdn.net/zhangjiahao14/article/details/80554616
https://blog.csdn.net/howell2013/article/details/16991651 拉一个源的模板,不用手动敲
vbox安装extension出错,手动弹出光盘,再来一次
https://blog.csdn.net/JCRunner/article/details/44393787
https://askubuntu.com/questions/80341/unable-to-mount-virtualbox-guest-additions-as-a-guest-win7-host
sudo mkdir --p /media/cdrom
sudo mount -t auto /dev/cdrom /media/cdrom/ (mount cd rom, interesting!)
cd /media/cdrom/
sudo sh VBoxLinuxAdditions.run
装了之后,mount -t才有vboxsf的类型
【解决】fatal error: X11/XXXX.h: No such file or directory
https://www.aliyun.com/jiaocheng/156978.html
安装库文件libx11-dev
sudo apt-get install libx11-dev
安装依赖文件
sudo apt-get install apt-filesudo apt-file updateapt-file search XXXX.h
如:安装Intrinsic.h
sudo apt-get install apt-filesudo apt-file updateapt-file search Intrinsic.h
搜索结果如下:
libxt-dev: usr/include/X11/Intrinsic.h
因此,只需安装libxt-dev即可:
sudo apt-get install libxt-dev
adjust font in acme
https://wiki.ubuntu.com/Fonts (install font by copy font folder to /usr/share/fonts/truetypes and refresh font cache)
for acme, may also need restart fontsrv
acme-font=/fonts/misc/latin1.8x13.font
Font /fonts/lucidasans/unicode.10.font
- using grep
in linux, we can use
grep -r keyword/pattern foldername
in plan9, we can not use that, instead, use the following cmd
grep createDisplay *.cpp
then we got
SurfaceFlinger.cpp:303: sp<IBinder> SurfaceFlinger::createDisplay(const String8& displayName,
and we can then just select SurfaceFlinger.cpp:303 by m1, and click m3 on that, then
a new window was created and locate to that position, great!!
奇怪,这个功能在windows上可以,但是在linux的plan9port不行, windows standalone版本可以.
linux貌似也可以,但是好像有时候会和m3的search string的功能混淆,不会当成文件名来处理
好像规则是如果没有找到这string, 就会按文件名, 否则定位到改string去了
linux版本有bug, surfaceFlinger这个上面m3有时候进不去目录(有时候需要全部选中)
所以用grep 搜索一个文件里的关键字更好用些
linux上ls不好用,可以用dir这个命令
执行win没有bash shell的上一个命令嘛?\
-> to modify configuration in "C:\Users\XXX\AppData\Roaming\acme-home\lib\profile"
install ag
-----------------------
10 CLI Tools that You Will Love – ITNEXT
https://itnext.io/10-cli-tools-that-you-will-love-d214bc73d856
# Install ag $ sudo apt install silversearcher-ag.
On Ubuntu 16.04, ack was located in package ack-grep so you have to use sudo apt install ack-grep to install it
but command name was still ack. fzf: Fuzzy Finder. fzf is a powerful file finder that can find files, processes, environment variables fast.
config the Ubuntu
- ubuntu显示字体不清晰,是因为选择了虚拟机的自动缩放模式
right ctl+c回到控制模式
- kills current ubuntu session
who -uH
kill xxxx
- install .deb
sudo dpkg -i DEB_PACKAGE
https://askubuntu.com/questions/40779/how-do-i-install-a-deb-file-via-the-command-line
- enable autojump
https://www.tecmint.com/autojump-a-quickest-way-to-navigate-linux-filesystem/
start some shell script on startup (可以用来登录编译服务器的时候,自动设置编译环境)
echo ''. /usr/share/autojump/autojump.sh'' >> ~/.bashrc
https://www.tecmint.com/autojump-a-quickest-way-to-navigate-linux-filesystem/
- install fonts
https://askubuntu.com/questions/3697/how-do-i-install-fonts
其实最简单,就是直接把字体copy到/usr/share/font/truetype下面
然后fc-cache -f -v
然后fc-list就可以看到了
- 看word
sudo apt install antiword
-看pdf
sudo apt install zathura
或者直接用xdg-open
--中文支持
https://www.linuxidc.com/Linux/2014-02/96939.htm
下面不一定ok
dpkg-reconfigure locales
保持en_US.UTF-8 UTF-8的选中状态,然后按下回车,继续保持en_US.UTF-8 UTF-8的选中状态,,再回车,就会之心设置locales。此时ubuntu就支持中文显示了
原文:https://blog.csdn.net/daguanjia11/article/details/81113487
https://blog.csdn.net/vrix/article/details/69389692
实际上装了一些window manager/desktop 以及中文字体后就自动ok了
-- samba
1. sudo apt-get install samba samba-common-bin
2. systemctrl status smbd nmbd
3. sudo smbstatus or smbd --version
........
Reference:
https://www.linuxbabe.com/ubuntu/install-samba-server-ubuntu-16-04
查看端口
netstat -tlnp |grep smb
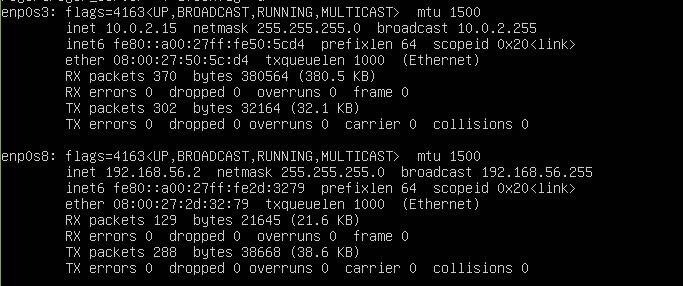
* virtualbox下光用NAT无法做到使用samba, 需要再建立一个个host only网卡, 使用192.168.56.x的ip
https://www.zhihu.com/question/19900112 为甚host-only无法设置, 主要是去添加一个virtual box host-only 的网卡在全局设定里面, 然后ipconfig就可以看到host有一个192.168.56.1了
http://www.cnblogs.com/leezhxing/p/4482659.html virtualbox中centos系统配置nat+host only上网
以上的文章比较适合ubuntu 使用ifupdown来配置网络的情况, 在ubuntu18之后使用了netplan来替代ifupdown,
所以在虚拟器的全局设置添加host-only adpater后, 在具体设置里host-only adpater网络设置里界面选择这个adapter后, 就需要用net-plan去配置
在虚拟机启动后,首先查看ifconfig -a列出所有设备, 然后sudo vim /etc/netplan/50-cloud-init.yaml,添加如下
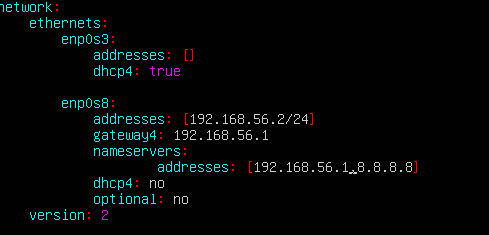
注意enp0s8里面两个填写addresses的地方的格式和含义.然后sudo netplan apply就ok了
Reference: https://www.itzgeek.com/how-tos/linux/ubuntu-how-tos/netplan-how-to-configure-static-ip-address-in-ubuntu-18-04-using-netplan.html
https://askubuntu.com/questions/293816/in-virtualbox-how-do-i-set-up-host-only-virtual-machines-that-can-access-the-in
https://blog.ubuntu.com/2017/12/01/ubuntu-bionic-netplan
https://www.linuxidc.com/Linux/2017-03/141585.htm VirtualBox虚拟机NAT模式下不能连接外网 (解决配置两张网卡, 虚拟机启动后,却不能访问外网)
--- 使用复制的虚拟机文件
注意,一台电脑上的虚拟机磁盘是有UUID的, 直接copy后导入不行, 因为virtualbox会认为导入了相同UUID的虚拟机.
要使用vitrualbox的虚拟介质管理里面的复制功能来复制到指定位置. 然后在虚拟介质里面释放原来的vdi文件, 之后在具体虚拟的操作系统的设置中加载新的磁盘就可以正常启动了.
http://derekmolloy.ie/resize-a-virtualbox-disk
使用命令也可以复制, 复制出来的是动态调整大小的虚拟磁盘, 可以resize
C:\Program Files\Oracle\VirtualBox>VBoxManage.exe clonehd "C:\Users\RXXX\VirtualBox VMs\Ubutu180401\NewVirtualDisk1.vdi" "D:\VirtualBox VM\Ubuntu180401srv\Ubuntu180401srv_01.vid"
0%...10%...20%...30%...40%...50%...60%...70%...80%...90%...100%
Clone medium created in format ''VDI''. UUID: ca8abd92-d9de-4009-a1cf-4bb743a01227
resize的过程很快, 但是必须是动态分配存储才能resieze, fixed size不能.用下面的命令.
C:\Program Files\Oracle\VirtualBox>VBoxManage.exe modifyhd --resize 30000 "D:\VirtualBox VM\Ubuntu180401srv\Ubuntu180401srv_01.vdi"
0%...10%...20%...30%...40%...50%...60%...70%...80%...90%...100%
https://www.intowindows.com/fix-resize-hard-disk-operation-for-this-format-is-not-implemented-yet-error-while-resizing-virtualbox-disk/
然后看http://derekmolloy.ie/resize-a-virtualbox-disk, 后面要调整得很复杂.
我没有仔细研究, 直接简单粗暴的下载gparted, 然后把剩余空间都给/dev/sda2了.看起来也没有问题.
ranger
http://www.mikewootc.com/wiki/linux/usage/ranger_file_manager.html
zsh
sudo apt-get install fonts-powerline
https://segmentfault.com/a/1190000006248107
https://github.com/robbyrussell/oh-my-zsh
注意网上给的方法都是下载了install.sh,不执行的话是没有安装的.
--进不了desktop
安装太多的desktop, 又删除一些, 很容易出问题
可以删除~/.XAuthority这个文件,为什么?
还可以用
sudo service lightdm restart
https://askubuntu.com/questions/15795/how-can-you-log-out-via-the-terminal
还可以
sudo pkill -u username
sudo service lightdm restart

https://www.cyberciti.biz/faq/howto-kill-unix-linux-user-session/

--使用虚拟机的技巧
  C^+P 暂停虚拟机

--fix error while installing Enlightenment
sudo dpkg --force-all -i /var/cache/apt/archives/libefl_201604022131-32022~ubuntu14.04.1_amd64.debsudo apt-get -f install
https://unix.stackexchange.com/questions/273968/apt-unmet-dependecies-libefl-bin
---SSH
sudo apt-get install openssh-serversudo service ssh statussudo nano /etc/ssh/sshd_configsudo service ssh restart orsudo systemctl restart ssh
https://help.ubuntu.com/14.04/serverguide/openssh-server.htmlhttps://help.ubuntu.com/community/SSH/OpenSSH/Configuring
https://help.ubuntu.com/community/SSH/OpenSSH/Keys

mac 下通过virtualbox安装Ubuntu并设置share folder
1. 开启Ubuntu虚拟机,安装Guest Additions
Devices > Insert Guest Additions CD image…
挂载
sudo mount /dev/cdrom /media/cdrom
安装
sudo /media/cdrom/VBoxLinuxAdditions.run
2. 开启Ubuntu虚拟机,设置共享文件夹
先在mac中创建共享文件夹ubuntu
Devices>Shared Fold settings>+>选中文件夹ubuntu>
选中Auto-mount和Make Permanent
3. 关闭Ubuntu虚拟机,在MacBook中修改共享文件夹权限
若不修改权限则将无法创建软链接。
VBoxManage setextradata VM_NAME VBoxInternal2/SharedFoldersEnableSymlinksCreate/SHARE_NAME 1
VM_NAME是虚拟机的名称, SHARE_NAME是共享文件夹名字
4. 开启Ubuntu虚拟机,创建共享文件夹的软链接
共享文件夹位于/media目录内以sf_ 为前缀
ln -s /media/sf_ubuntu mac

Reinstall VirtualBox 6.0 on Ubuntu 18.04
1. Remove the old version of virtual Box. (Note the * is required,because it will remove all the virtualBox related packages)
sudo apt purge virtualBox*
2. Execute the following commands to install.
sudo apt update
sudo apt upgrade
wget -q https://www.virtualBox.org/download/oracle_vBox_2016.asc -O- | sudo apt-key add -
wget -q https://www.virtualBox.org/download/oracle_vBox.asc -O- | sudo apt-key add -
sudo add-apt-repository "deb http://download.virtualBox.org/virtualBox/debian bionic contrib"
sudo apt update
今天关于VirtualBox Ubuntu LAMP堆栈开发,SVN和CruiseControl / phpUnderControl?和virtualbox ubuntu 铺满的介绍到此结束,谢谢您的阅读,有关(OK) Ubuntu 15.10: KVM vs. Xen vs. VirtualBox Virtualization Performance、Config the i3wm / openbox / virtualbox / ubuntu / acme /w3m /ranger+vifm / zsh、mac 下通过virtualbox安装Ubuntu并设置share folder、Reinstall VirtualBox 6.0 on Ubuntu 18.04等更多相关知识的信息可以在本站进行查询。
本文标签:


