针对docker09-Prometheus这个问题,本篇文章进行了详细的解答,同时本文还将给你拓展cockroachdbdocker-compose本地集群运行以及prometheus监控、Docke
针对docker09-Prometheus这个问题,本篇文章进行了详细的解答,同时本文还将给你拓展cockroachdb docker-compose 本地集群运行以及prometheus监控、Docker - 安装 - Prometheus - 配置文件详解、Docker Prometheus配置、docker stack部署prometheus + grafana等相关知识,希望可以帮助到你。
本文目录一览:- docker09-Prometheus
- cockroachdb docker-compose 本地集群运行以及prometheus监控
- Docker - 安装 - Prometheus - 配置文件详解
- Docker Prometheus配置
- docker stack部署prometheus + grafana

docker09-Prometheus
环境准备:
| 主机名称 | IP | 安装组件 |
| Prometheus | 192.168.1.1 | NodeEXporter、cAdvisor、Prometheus Server、Grafana |
| node1 | 192.168.1.2 | NodeEXporter、cAdvisor |
| node2 | 192.168.1.4 | NodeEXporter、cAdvisor |
注意事项:
全部关闭防火墙,禁用selinux。
需要部署的组件:
Prometheus Server: 普罗米修斯的主服务器。
NodeEXporter: 负责收集Host硬件信息和操作系统信息。
cAdvisor: 负责收集Host上运行的容器信息。
Grafana: 负责展示普罗米修斯监控界面。
1、3个节点,全部部署node-EXporter,和cAdvisor.
//部署node-EXporter,收集硬件和系统信息。
docker run -d -p 9100:9100 --name exporter -v /proc:/host/proc -v /sys:/host/sys -v /:/rootfs --net=host prom/node-exporter --path.procfs /host/proc --path.sysfs /host/sys --collector.filesystem.ignored-mount-points "^/(sys|proc|dev|host|etc)($|/)"
效果图:http://192.168.1.1:9100/ http://192.168.1.2:9100/ http://192.168.1.4:9100/

PS:注意,这里使用了--net=host不等于host网络,作用是Prometheus Server可以直接与Node-EXporter通信。
//部署安装cAdvisor,收集节点容器信息。
docker run -v /:/rootfs:ro -v /var/run:/var/run/:rw -v /sys:/sys:ro -v /var/lib/docker:/var/lib/docker:ro -p 8080:8080 --detach=true --name=cadvisor --net=host google/cadvisor访问测试:http://IP:8080/

2、在Prometheus上部署Prometheus Server服务。
在部署prometheus之前,我们需要对它的配置文件进行修改,所以我们先运行一个容器,先将其配置文件拷贝出来。
#运行普罗米修斯容器
[root@Prometheus ~]# docker run -d -p 9090:9090 --name prometheus --net=host prom/prometheus
WARNING: Published ports are discarded when using host network mode
0015d42a6f0348ff5ba6c0dd7e51cf9bac8656be346b6f433293754002012e8c
#copy配置文件到宿主机
[root@Prometheus ~]# docker cp prometheus:/etc/prometheus/prometheus.yml ./
#修改宿主机copy的配置文件
[root@Prometheus ~]# vim prometheus.yml

      static_configs:
        - targets: ['localhost:9090','localhost:8080','localhost:9100','192.168.1.5:8080','192.168.1.5:9100','192.168.1.6:8080','192.168.1.6:9100']
PS: 这里指定了prometheus的监控项,包括它也会监控自己收集到的数据。
//重新运行prometheus容器,并且挂载修改的yml文件
[root@Prometheus ~]# docker rm -f prometheus
prometheus
[root@Prometheus ~]# docker run -d -p 9090:9090 --name prometheus --net=host -v /root/prometheus.yml:/etc/prometheus/prometheus.yml prom/prometheus
WARNING: Published ports are discarded when using host network mode
2857c1a73e934ad117f0bb6be59c3cec6efe701b776df59df8f54248bcd539d2
#测试访问:IP:9090

[root@Prometheus ~]# mkdir grafana-storage
[root@Prometheus ~]# chmod 777 -R   grafana-storage/
[root@Prometheus ~]# docker run -d -p 3000:3000 --name grafana -v /root/grafana-storage:/var/lib/grafana -e "GF_Security_ADMIN_PASSWORD=123.com" grafana/grafana
b95a4c30105ed9a0b8448da49efd4e11e4505f04e2f7a4b454f0e9910bbc4e48
#上述命令中的“-e”选项是为了设置默认的登录用户admin,密码为“123.com”。
#如果启动容器的过程中,提示iptables等相关的错误信息,
#则需要执行命令systemctl restart docker,重启docker服务,然后重新运行容器
#但是需要注意,若运行容器时没有增加“--restart=always”选项的话,
#那么在重启docker服务后,还需将所有容器手动重启。
#重启所有容器命令“docker ps -a -q | xargs docker start”
#访问测试:IP:3000

//设置Grafana,添加数据来源(prometheus)


PS:看到这个提示,说明prometheus和grafana服务的是正常连接的。此时,虽然grafana收集到了数据,但怎么显示它,仍然是个问题,grafana支持自定义显示信息,不过要自定义起来非常麻烦,不过好在,grafana官方为我们提供了一些模板,来供我们使用。
https://grafana.com/grafana/dashboards

导入模板用两种方法:JSON、id!
JSON如下:


效果图:

四、配置AlertManager
接下来,我们需要启动 AlertManager 来接受 Prometheus 发送过来的报警信息,并执行各种方式的告警。同样以 Docker 方式启动AlertManager,最简单的启动命令如下
#运行报警邮件管理容器
[root@Prometheus ~]# docker run --name alertmanager -d -p9093:9093 prom/alertmanager:latest
#copy配置文件
[root@Prometheus ~]# docker cp alertmanager:/etc/alertmanager/alertmanager.yml .
#讲原来的yml改名称,修改刚copy的配置文件
[root@Prometheus ~]# cp alertmanager.yml  alertmanager.ymlbak
这里 AlertManager 默认启动的端口为 9093,启动完成后,浏览器访问http://:9093 可以看到默认提供的 UI 页面,不过现在是没有任何告警信息的,因为我们还没有配置报警规则来触发报警。

AlertManager 配置邮件告警
AlertManager 默认配置文件为 alertmanager.yml,在容器内路径为/etc/alertmanager/alertmanager.ymldocker cp alertmanager:/etc/alertmanager/alertmanager.yml /root/
简单介绍一下主要配置的作用:那么,我们就来配置一下使用 Email 方式通知报警信息,这里以 QQ 邮箱为例,当然在配置QQ邮箱之前,需要我们登录QQ邮箱,打开SMTP服务,并获取授权码。
- global: 全局配置,包括报警解决后的超时时间、SMTP 相关配置、各种渠道通知的 API 地址等等
- route: 用来设置报警的分发策略,它是一个树状结构,按照深度优先从左向右的顺序进行匹配。
- receivers: 配置告警消息接受者信息,例如常用的 email、wechat、slack、webhook 等消息通知方式。
- inhibit_rules: 抑制规则配置,当存在与另一组匹配的警报(源)时,抑制规则将禁用与一组匹配的警报(目标)。
#写入自己的QQ邮箱与效验码
[root@Prometheus ~]# vim /root/alertmanager.yml
global:
  resolve_timeout: 5m
  smtp_from: '2050753687@qq.com'
  smtp_smarthost: 'smtp.qq.com:465'
  smtp_auth_username: '2050753687@qq.com'
  smtp_auth_password: 'rxtfqkwfafoidcea'
  smtp_require_tls: false
  smtp_hello: 'qq.com'
route:
  group_by: ['alertname']
  group_wait: 5s
  group_interval: 5s
  repeat_interval: 5m
  receiver: 'email'
receivers:
- name: 'email'
  email_configs:
  - to: '2050753687@qq.com'
    send_resolved: true
inhibit_rules:
  - source_match:
      severity: 'critical'
    target_match:
      severity: 'warning'
    equal: ['alertname', 'dev', 'instance']
#重新运行
[root@Prometheus ~]#  docker rm -f alertmanager
alertmanager
[root@Prometheus ~]# docker run -d --name alertmanager -p 9093:9093 -v /root/alertmanager.yml:/etc/alertmanager/alertmanager.yml prom/alertmanager
8c56092d9ef2946f88c10e2e648e62df33bbbc2ac8d9cd503c8700e4445686a0
//访问查看

五、Prometheus 配置 AlertManager 告警规则
接下来,我们需要在 Prometheus 配置 AlertManager 服务地址以及告警规则,新建报警规则文件 node-up.rules 如下
[root@Prometheus ~]# mkdir  -p prometheus/rules
[root@Prometheus ~]# cd prometheus/rules/
[root@Prometheus rules]# vim node-up.rules
[root@Prometheus rules]# cat node-up.rules
groups:
- name: node-up
  rules:
  - alert: node-up
    expr: up{job="prometheus"} == 0
    for: 15s
    labels:
      severity: 1
      team: node
    annotations:
      summary: "{{ $labels.instance }} 已停止运行超过 15s!"
然后,修改 prometheus.yml 配置文件,添加 rules 规则文件
# Alertmanager configuration
alerting:
  alertmanagers:
  - static_configs:
    - targets:
      - 192.168.1.1:9093
      # - alertmanager:9093

# Load rules once and periodically evaluate them according to the global 'evaluation_interval'.
rule_files:
  - "/usr/local/prometheus/rules/*.rules"
  # - "first_rules.yml"
  # - "second_rules.yml"

[root@Prometheus rules]# docker rm -f prometheus
[root@Prometheus rules]#  docker run -d -p 9090:9090 -v/root/prometheus.yml:/etc/prometheus/prometheus.yml -v/root/prometheus/rules:/usr/local/prometheus/rules --name prometheus --net=host prom/prometheus
此时在prometheus主页上可以看到相应规则

触发报警发送 Email
然后开始模拟node1节点 exporter组件失败
[root@node1 ~]# docker stop exporter
exporter

切换到QQ邮箱


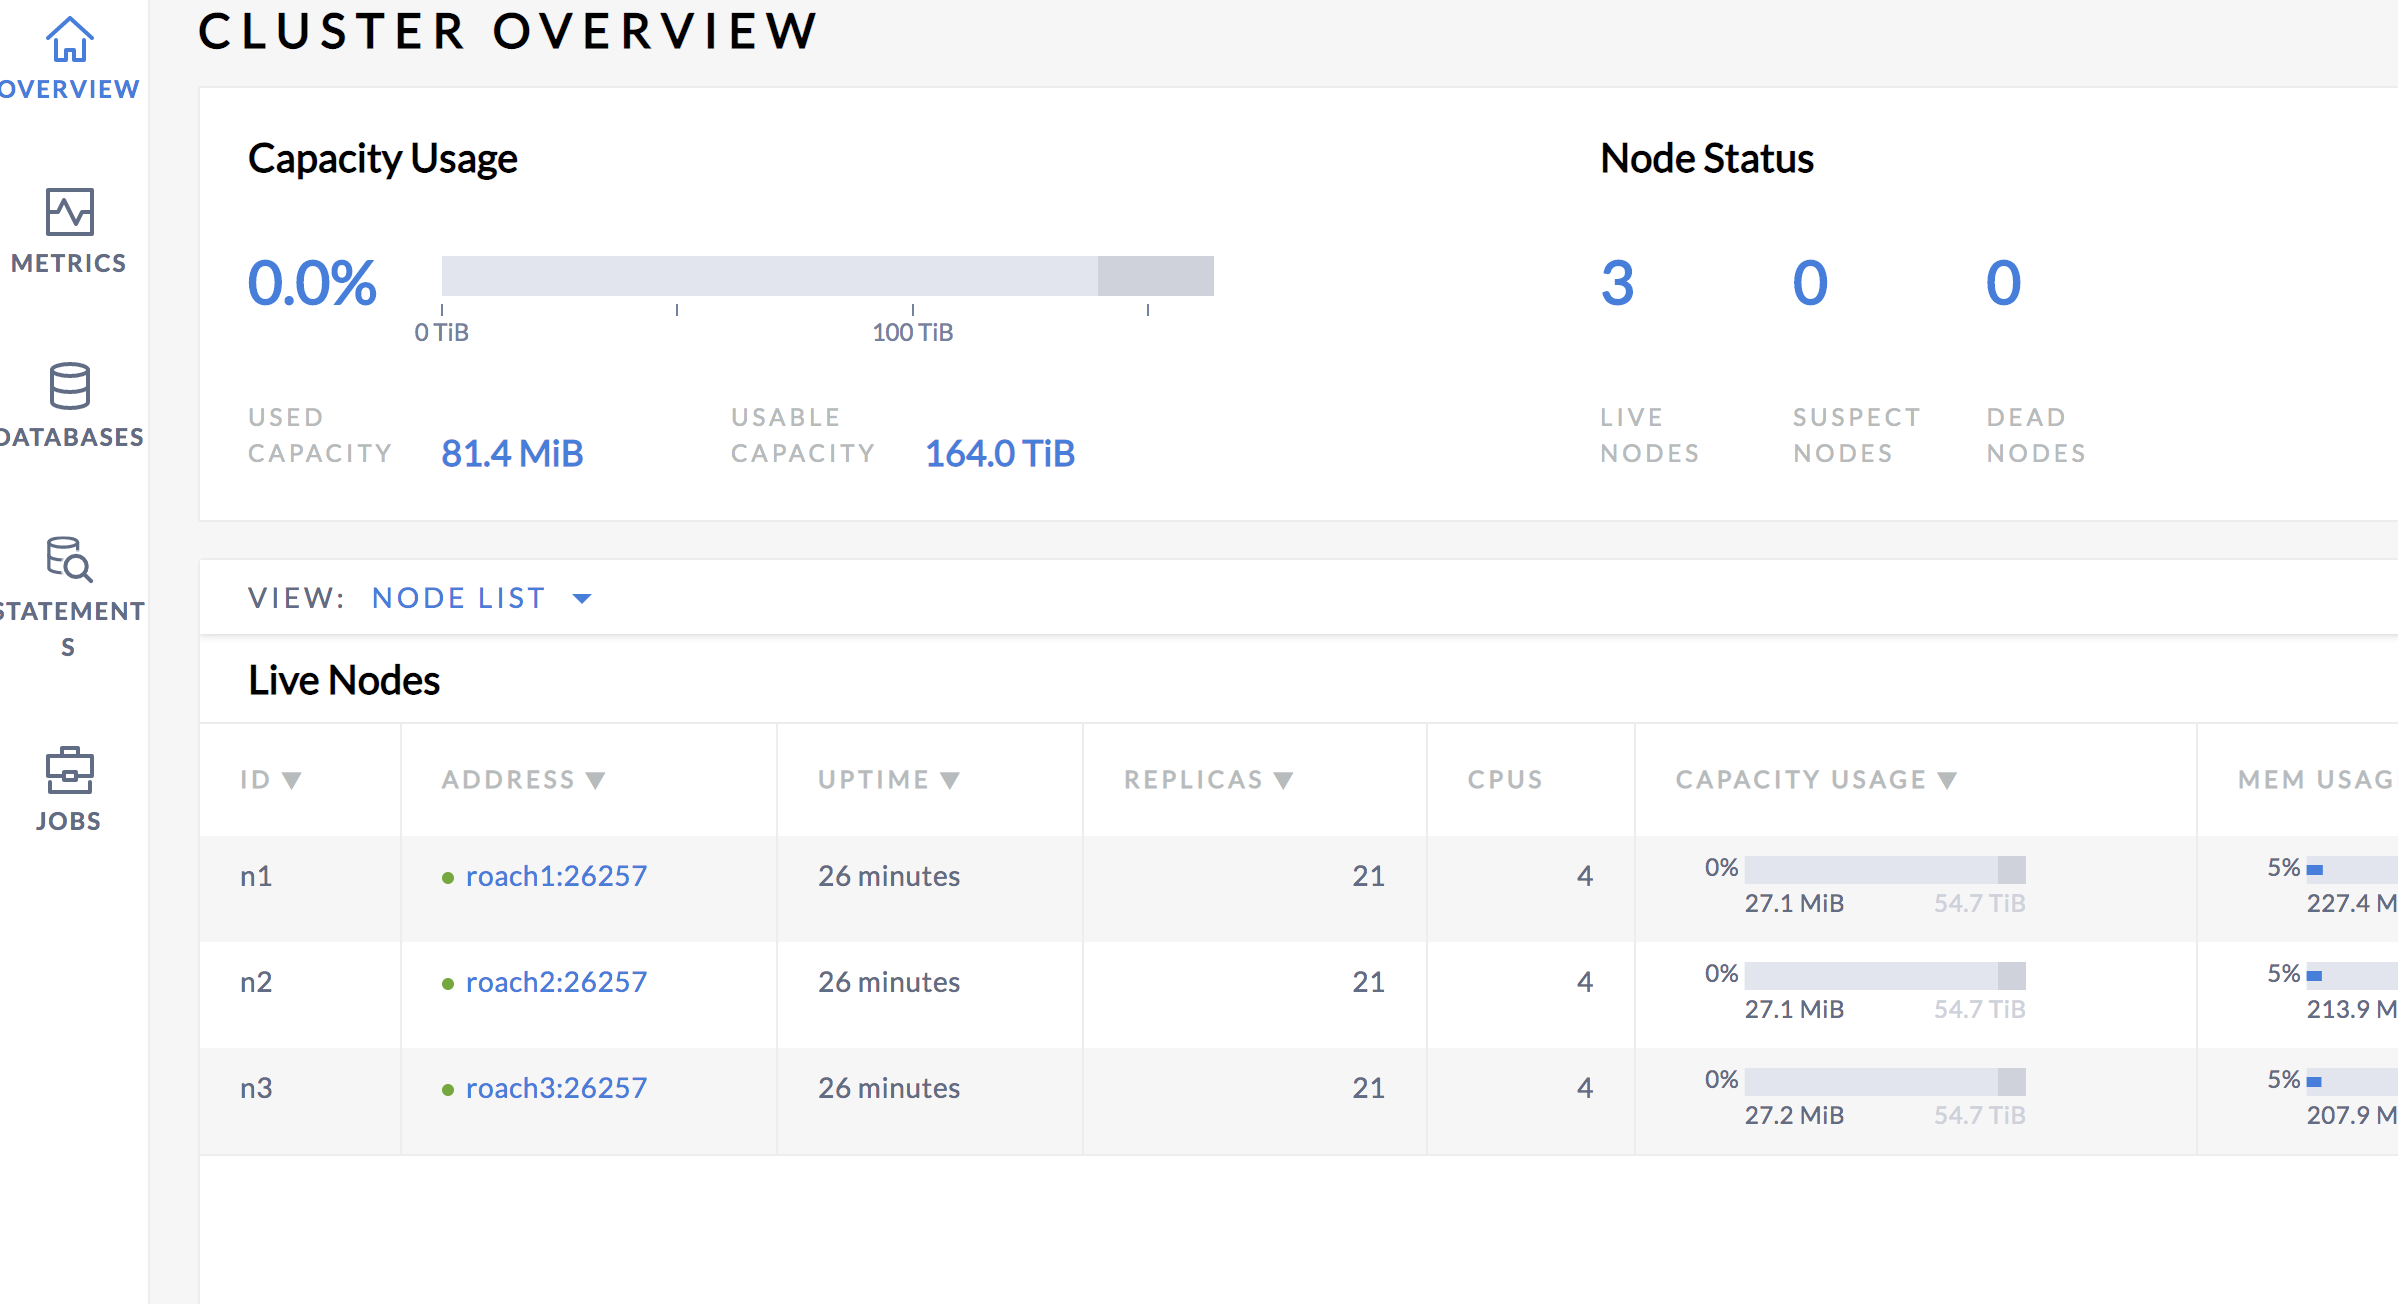
cockroachdb docker-compose 本地集群运行以及prometheus监控
cockroachdb 官方提供的是一个直接使用docker 运行的方式,但是使用docker-compose 会比较方便,可以快速搭建一个集群
同时官方也提供了prometheus 的metrics,我们可以快速的通过grafana 提供一个dashboard
docker-compose 运行
- docker-compose 文件
version: "3"services: grafana: image: grafana/grafana ports: - "3000:3000" alert: image: prom/alertmanager ports: - "9093:9093" prometheus: image: prom/prometheus volumes: - "./rules:/rules" - "./prometheus.yml:/etc/prometheus/prometheus.yml" ports: - "9090:9090" roach1: image: cockroachdb/cockroach:v19.1.5 hostname: roach1 command: start --insecure volumes: - "./data1:/cockroach/cockroach-data" ports: - "26257:26257" - "8081:8080" roach2: image: cockroachdb/cockroach:v19.1.5 hostname: roach2 command: start --insecure --join=roach1 volumes: - "./data2:/cockroach/cockroach-data" ports: - "26258:26257" - "8082:8080" roach3: image: cockroachdb/cockroach:v19.1.5 hostname: roach3 command: start --insecure --join=roach1 volumes: - "./data3:/cockroach/cockroach-data" ports: - "26259:26257" - "8083:8080"- 说明
上述集成了prometheus、alertmanager 以及grafana,集群的搭建很简单
alertmanager 以及grafana dashboard
官方已经提供好了alertmanager 的rule同时也给我们提供了grafana dashboard 的json 文件
参考https://www.cockroachlabs.com/docs/stable/monitor-cockroachdb-with-prometheus.html
prometheus.yml:
# Prometheus configuration for cockroach clusters.# Requires prometheus 2.X## Run with:# $ prometheus -config.file=prometheus.ymlglobal: scrape_interval: 10s evaluation_interval: 10srule_files:- "/rules/alerts.rules.yml"- "/rules/aggregation.rules.yml"# Alert manager running on the same host:alerting: alertmanagers: - path_prefix: "/alertmanager/" static_configs: - targets: - alert:9093scrape_configs: - job_name: ''cockroachdb'' metrics_path: ''/_status/vars'' # Insecure mode: scheme: ''http'' tls_config: insecure_skip_verify: true static_configs: - targets: [''roach1:8080'',''roach2:8080'',''roach3:8080''] labels: cluster: ''my-cockroachdb-cluster''grafana dashboard json 文件可以参考官方文档,或者github 项目
运行效果

参考资料
https://www.cockroachlabs.com/docs/stable/monitor-cockroachdb-with-prometheus.html
https://github.com/rongfengliang/cockroachdb-docker-compose-local-cluster

Docker - 安装 - Prometheus - 配置文件详解
普罗米修斯
官方下载
有的时候官方下载连接会失败,所以这里选择 docker 镜像来进行安装部署,非常的简单
详情可以去看云了解
看云
添加配置文件
[root@k8s-master deploy]# pwd
/home/deploy
[root@k8s-master deploy]#
[root@k8s-master deploy]# vim prometheus.yml
Ruby
Copy
编写配置文件 prometheus.yml
# my global config
global:
  # 设置抓取数据的时间间隔,间隔设置为每15秒一次。默认为每1分钟。
  scrape_interval:     15s
  # 设定抓取数据的超时时间,默认为10s
  scrape_timeout: 15s
  # 设置规则刷新,每15秒刷新一次规则。默认值为每1分钟。
  evaluation_interval: 15s

# 监控报警配置(需要额外安装 alertmanager组件)
alerting:
  alertmanagers:
  - static_configs:
    # 设定alertmanager和prometheus交互的接口,即alertmanager监听的ip地址和端口
    - targets: ["k8s.dev-share.top:9093"]

# 报警规则文件
rule_files:
  - ''/home/deploy/alertmanager/rules/*.yml''

# 普罗米修斯与抓取模块交互的接口配置
scrape_configs:
  # 一定要全局唯一, 采集 Prometheus 自身的 metrics
  - job_name: ''prometheus''
    # metrics_path defaults to ''/metrics''
    # scheme defaults to ''http''.
    static_configs:
      - targets: [''k8s.dev-share.top:9090'']

  # 一定要全局唯一, 采集 远程mysql的 metrics
  - job_name: ''uat-mysql''
    static_configs:
      # 因为阿里云有安全组策略,所以这里使用了外网域名
      - targets: [''k8s.dev-share.top:9104'']

  # 一定要全局唯一, 采集 远程mysql的 metrics
  - job_name: ''prod-mysql''
    static_configs:
      # 因为阿里云有安全组策略,所以这里使用了外网域名
      - targets: [''k8s.dev-share.top:9105'']
YAML
Copy
下载 Docker 镜像 / 安装 / 容器自启动 非集群用法配置
[root@k8s-master deploy]# docker pull prom/prometheus
[root@k8s-master deploy]#
[root@k8s-master deploy]# docker run -d --restart always --name prometheus -p 9090:9090 -v /home/deploy/prometheus.yml:/etc/prometheus/prometheus.yml prom/prometheus
Ruby
Copy
URL: 访问 http://k8s.dev-share.top:9090/targets

Docker Prometheus配置
问题出在您的Dockerfile和docker-compose文件中。 Dockerfile将prometheus.yml复制到/etc/prometheus目录。 docker-compose还将卷安装在同一目录中。在这种情况下,容器内目录中的现有文件将被屏蔽,因为docker将它们安装在现有文件之上。文件仍在容器中,但无法访问。从Dockerfile中删除COPY或从docker-compose中删除卷,或将它们挂载到另一个目录中。
此更新很适合我:
Dockerfile-prometheus:
...
COPY ./prometheus.yml /etc/prometheus/prometheus.yml
COPY ./prometheus.json /etc/prometheus/file_sd/prometheus.json
...
docker-compose.yml:
...
prometheus:
  container_name: grafana_prometheus_ctnr
  build:
    context: .
    dockerfile: Dockerfile-prometheus
  volumes:
    - ./prometheus-data:/etc/prometheus
  ports:
    - 9090:9090
  networks:
    - grafana-ntwk
...
prometheus.yml:
global:
  scrape_interval: 15s
  evaluation_interval: 15s
  scrape_timeout: 10s

scrape_configs:
  - job_name: 'monitoring'
    file_sd_configs:
      - files:
        - /etc/prometheus/file_sd/*.json

docker stack部署prometheus + grafana
通过docker stack部署prometheus、node-exporter、alertmanager和grafana。prometheus最新版本:2.19.2
swarm集群(一个节点):
manager 192.168.30.135
mkdir -p /home/prom/{prometheus,prometheus/data,alertmanager,grafana}chmod 777 /home/prom/{prometheus/data,grafana}cd /home/promtree ..├── alertmanager │ ├── alertmanager.yml │ └── config.yml ├── docker-stack.yml ├── grafana └── prometheus ├── alert-rules.yml ├── data └── prometheus.yml 4 directories, 5 files
Prometheus
vim /home/prom/prometheus/alert-rules.yml
groups:
  - name: node-alert    rules:
    - alert: NodeDown      expr: up{job="node"} == 0      for: 5m      labels:
        severity: critical        instance: "{{ $labels.instance }}"
      annotations:
        summary: "instance: {{ $labels.instance }} down"        description: "Instance: {{ $labels.instance }} 已经宕机 5分钟"        value: "{{ $value }}"

    - alert: NodecpuHigh      expr: (1 - avg by (instance) (irate(node_cpu_seconds_total{job="node",mode="idle"}[5m]))) * 100 > 80      for: 5m      labels:
        severity: warning        instance: "{{ $labels.instance }}"
      annotations:
        summary: "instance: {{ $labels.instance }} cpu使用率过高"        description: "cpu 使用率超过 80%"
        value: "{{ $value }}"

    - alert: NodecpuIowaitHigh      expr: avg by (instance) (irate(node_cpu_seconds_total{job="node",mode="iowait"}[5m])) * 100 > 50      for: 5m      labels:
        severity: warning        instance: "{{ $labels.instance }}"
      annotations:
        summary: "instance: {{ $labels.instance }} cpu iowait 使用率过高"        description: "cpu iowait 使用率超过 50%"
        value: "{{ $value }}"

    - alert: NodeLoad5High      expr: node_load5 > (count by (instance) (node_cpu_seconds_total{job="node",mode='system'})) * 1.2      for: 5m      labels:
        severity: warning        instance: "{{ $labels.instance }}"
      annotations:
        summary: "instance: {{ $labels.instance }} load(5m) 过高"        description: "Load(5m) 过高,超出cpu核数 1.2倍"
        value: "{{ $value }}"

    - alert: NodeMemoryHigh      expr: (1 - node_memory_MemAvailable_bytes{job="node"} / node_memory_MemTotal_bytes{job="node"}) * 100 > 90      for: 5m      labels:
        severity: warning        instance: "{{ $labels.instance }}"
      annotations:
        summary: "instance: {{ $labels.instance }} memory 使用率过高"        description: "Memory 使用率超过 90%"
        value: "{{ $value }}"

    - alert: NodediskRootHigh      expr: (1 - node_filesystem_avail_bytes{job="node",fstype=~"ext.*|xfs",mountpoint ="/"} / node_filesystem_size_bytes{job="node",fstype=~"ext.*|xfs",mountpoint ="/"}) * 100 > 90      for: 10m      labels:
        severity: warning        instance: "{{ $labels.instance }}"
      annotations:
        summary: "instance: {{ $labels.instance }} disk(/ 分区) 使用率过高"        description: "disk(/ 分区) 使用率超过 90%"
        value: "{{ $value }}"

    - alert: NodediskBootHigh      expr: (1 - node_filesystem_avail_bytes{job="node",fstype=~"ext.*|xfs",mountpoint ="/boot"} / node_filesystem_size_bytes{job="node",fstype=~"ext.*|xfs",mountpoint ="/boot"}) * 100 > 80      for: 10m      labels:
        severity: warning        instance: "{{ $labels.instance }}"
      annotations:
        summary: "instance: {{ $labels.instance }} disk(/boot 分区) 使用率过高"        description: "disk(/boot 分区) 使用率超过 80%"
        value: "{{ $value }}"

    - alert: NodediskReadHigh      expr: irate(node_disk_read_bytes_total{job="node"}[5m]) > 20 * (1024 ^ 2)      for: 5m      labels:
        severity: warning        instance: "{{ $labels.instance }}"
      annotations:
        summary: "instance: {{ $labels.instance }} disk 读取字节数 速率过高"        description: "disk 读取字节数 速率超过 20 MB/s"
        value: "{{ $value }}"

    - alert: NodediskWriteHigh      expr: irate(node_disk_written_bytes_total{job="node"}[5m]) > 20 * (1024 ^ 2)      for: 5m      labels:
        severity: warning        instance: "{{ $labels.instance }}"
      annotations:
        summary: "instance: {{ $labels.instance }} disk 写入字节数 速率过高"        description: "disk 写入字节数 速率超过 20 MB/s"
        value: "{{ $value }}"

    - alert: NodediskReadrateCountHigh      expr: irate(node_disk_reads_completed_total{job="node"}[5m]) > 3000      for: 5m      labels:
        severity: warning        instance: "{{ $labels.instance }}"
      annotations:
        summary: "instance: {{ $labels.instance }} disk iops 每秒读取速率过高"        description: "disk iops 每秒读取速率超过 3000 iops"
        value: "{{ $value }}"

    - alert: NodediskWriterateCountHigh      expr: irate(node_disk_writes_completed_total{job="node"}[5m]) > 3000      for: 5m      labels:
        severity: warning        instance: "{{ $labels.instance }}"
      annotations:
        summary: "instance: {{ $labels.instance }} disk iops 每秒写入速率过高"        description: "disk iops 每秒写入速率超过 3000 iops"
        value: "{{ $value }}"

    - alert: NodeInodeRootUsedPercentHigh      expr: (1 - node_filesystem_files_free{job="node",fstype=~"ext4|xfs",mountpoint="/"} / node_filesystem_files{job="node",fstype=~"ext4|xfs",mountpoint="/"}) * 100 > 80      for: 10m      labels:
        severity: warning        instance: "{{ $labels.instance }}"
      annotations:
        summary: "instance: {{ $labels.instance }} disk(/ 分区) inode 使用率过高"        description: "disk (/ 分区) inode 使用率超过 80%"
        value: "{{ $value }}"

    - alert: NodeInodeBootUsedPercentHigh      expr: (1 - node_filesystem_files_free{job="node",fstype=~"ext4|xfs",mountpoint="/boot"} / node_filesystem_files{job="node",fstype=~"ext4|xfs",mountpoint="/boot"}) * 100 > 80      for: 10m      labels:
        severity: warning        instance: "{{ $labels.instance }}"
      annotations:
        summary: "instance: {{ $labels.instance }} disk(/boot 分区) inode 使用率过高"        description: "disk (/boot 分区) inode 使用率超过 80%"
        value: "{{ $value }}"

    - alert: NodeFilefdAllocatedPercentHigh      expr: node_filefd_allocated{job="node"} / node_filefd_maximum{job="node"} * 100 > 80      for: 10m      labels:
        severity: warning        instance: "{{ $labels.instance }}"
      annotations:
        summary: "instance: {{ $labels.instance }} filefd 打开百分比过高"        description: "Filefd 打开百分比 超过 80%"
        value: "{{ $value }}"

    - alert: NodeNetworkNetinBitRateHigh      expr: avg by (instance) (irate(node_network_receive_bytes_total{device=~"eth0|eth1|ens33|ens37"}[1m]) * 8) > 20 * (1024 ^ 2) * 8      for: 3m      labels:
        severity: warning        instance: "{{ $labels.instance }}"
      annotations:
        summary: "instance: {{ $labels.instance }} network 接收比特数 速率过高"        description: "Network 接收比特数 速率超过 20MB/s"
        value: "{{ $value }}"

    - alert: NodeNetworkNetoutBitRateHigh      expr: avg by (instance) (irate(node_network_transmit_bytes_total{device=~"eth0|eth1|ens33|ens37"}[1m]) * 8) > 20 * (1024 ^ 2) * 8      for: 3m      labels:
        severity: warning        instance: "{{ $labels.instance }}"
      annotations:
        summary: "instance: {{ $labels.instance }} network 发送比特数 速率过高"        description: "Network 发送比特数 速率超过 20MB/s"
        value: "{{ $value }}"

    - alert: NodeNetworkNetinPacketErrorRateHigh      expr: avg by (instance) (irate(node_network_receive_errs_total{device=~"eth0|eth1|ens33|ens37"}[1m])) > 15      for: 3m      labels:
        severity: warning        instance: "{{ $labels.instance }}"
      annotations:
        summary: "instance: {{ $labels.instance }} 接收错误包 速率过高"        description: "Network 接收错误包 速率超过 15个/秒"
        value: "{{ $value }}"

    - alert: NodeNetworkNetoutPacketErrorRateHigh      expr: avg by (instance) (irate(node_network_transmit_packets_total{device=~"eth0|eth1|ens33|ens37"}[1m])) > 15      for: 3m      labels:
        severity: warning        instance: "{{ $labels.instance }}"
      annotations:
        summary: "instance: {{ $labels.instance }} 发送错误包 速率过高"        description: "Network 发送错误包 速率超过 15个/秒"
        value: "{{ $value }}"

    - alert: NodeProcessBlockedHigh      expr: node_procs_blocked{job="node"} > 10      for: 10m      labels:
        severity: warning        instance: "{{ $labels.instance }}"
      annotations:
        summary: "instance: {{ $labels.instance }} 当前被阻塞的任务的数量过多"        description: "Process 当前被阻塞的任务的数量超过 10个"
        value: "{{ $value }}"

    - alert: NodeTimeOffsetHigh      expr: abs(node_timex_offset_seconds{job="node"}) > 3 * 60      for: 2m      labels:
        severity: info        instance: "{{ $labels.instance }}"
      annotations:
        summary: "instance: {{ $labels.instance }} 时间偏差过大"        description: "Time 节点的时间偏差超过 3m"
        value: "{{ $value }}"
vim /home/prom/prometheus/prometheus.yml
global:
  scrape_interval:     15s  evaluation_interval: 15salerting:
  alertmanagers:
  - static_configs:
    - targets:
      - alertmanager:9093rule_files:
  - "*rules.yml"
  scrape_configs:
  - job_name: 'prometheus'
    static_configs:
    - targets: ['prometheus:9090']

  - job_name: 'node'
    static_configs:
    - targets: ['192.168.30.135:9100']

  - job_name: 'alertmanager'
    static_configs:
    - targets: ['alertmanager:9093']
Alertmanager
vim /home/prom/alertmanager/config.yml
targets:
  webhook:
    url: https://oapi.dingtalk.com/robot/send?access_token=xxxxxxxxxxxx             #修改为钉钉机器人的webhook
    mention:
      all: true
vim /home/prom/alertmanager/alertmanager.yml
global:
  resolve_timeout: 5m  smtp_smarthost: 'smtp.163.com:465'             #邮箱smtp服务器代理,启用SSL发信, 端口一般是465
  smtp_from: 'alert@163.com'              #发送邮箱名称
  smtp_auth_username: 'alert@163.com'              #邮箱名称
  smtp_auth_password: 'password'                #邮箱密码或授权码
  smtp_require_tls: falseroute:
  receiver: 'default'
  group_wait: 10s  group_interval: 1m  repeat_interval: 1h  group_by: ['alertname']inhibit_rules:- source_match:
    severity: 'critical'
  target_match:
    severity: 'warning'
  equal: ['alertname', 'instance']
  receivers:- name: 'default'
  email_configs:
  - to: 'receiver@163.com'
    send_resolved: true
  webhook_configs:
  - url: 'http://dingtalk:8060/dingtalk/webhook/send'
    send_resolved: true
docker-stack.yml
vim /home/prom/docker-stack.yml
version: '3.7'services:
  dingtalk:
    image: timonwong/prometheus-webhook-dingtalk:latest    ports:
      - "8060:8060"
    configs:
      - source: dingtalk_config        target: /etc/prometheus-webhook-dingtalk/config.yml    networks:
      - prom    deploy:
      mode: replicated      replicas: 1

  alertmanager:
    image: prom/alertmanager:latest    ports:
      - "9093:9093"
      - "9094:9094"
    configs:
      - source: alertmanager_config        target: /etc/alertmanager/alertmanager.yml    networks:
      - prom    deploy:
      mode: replicated      replicas: 1

  prometheus:
    image: prom/prometheus:latest    ports:
      - "9090:9090"
    configs:
      - source: prometheus_config        target: /etc/prometheus/prometheus.yml      - source: alert_rules        target: /etc/prometheus/alert-rules.yml    networks:
      - prom    deploy:
      mode: replicated      replicas: 1
      placement:
        constraints:
          - node.role == manager  grafana:
    image: grafana/grafana:latest    ports:
      - "3000:3000"
    volumes:
      - type: volume        source: grafana        target: /var/lib/grafana    networks:
      - prom    deploy:
      mode: replicated      replicas: 1
      configs:
  dingtalk_config:
    file: ./alertmanager/config.yml
  alertmanager_config:
    file: ./alertmanager/alertmanager.yml
  prometheus_config:
    file: ./prometheus/prometheus.yml
  alert_rules:
    file: ./prometheus/alert-rules.yml
volumes:
  prometheus:
    driver: local    driver_opts:
      type: none      o: bind      device: /home/prom/prometheus/data  grafana:
    driver: local    driver_opts:
      type: none      o: bind      device: /home/prom/grafana
networks:
  prom:
    driver: overlay
version: '3.7'services:
  node-exporter:
    image: prom/node-exporter:latest    ports:
      - "9100:9100"
    networks:
      - prom  dingtalk:
    image: timonwong/prometheus-webhook-dingtalk:latest    volumes:
      - type: bind        source: ./alertmanager/config.yml        target: /etc/prometheus-webhook-dingtalk/config.yml        read_only: true
    ports:
      - "8060:8060"
    networks:
      - prom  alertmanager:
    depends_on:
      - dingtalk    image: prom/alertmanager:latest    volumes:
      - type: bind        source: ./alertmanager/alertmanager.yml        target: /etc/alertmanager/alertmanager.yml        read_only: true
    ports:
      - "9093:9093"
      - "9094:9094"
    networks:
      - prom  prometheus:
    depends_on:
      - alertmanager    image: prom/prometheus:latest    volumes:
      - type: bind        source: ./prometheus/prometheus.yml        target: /etc/prometheus/prometheus.yml        read_only: true
      - type: bind        source: ./prometheus/alert-rules.yml        target: /etc/prometheus/alert-rules.yml        read_only: true
      - type: volume        source: prometheus        target: /prometheus    ports:
      - "9090:9090"
    networks:
      - prom  grafana:
    depends_on:
      - prometheus    image: grafana/grafana:latest    volumes:
      - type: volume        source: grafana        target: /var/lib/grafana    ports:
      - "3000:3000"
    networks:
      - promvolumes:
  prometheus:
    driver: local    driver_opts:
      type: none      o: bind      device: /home/prom/prometheus/data  grafana:
    driver: local    driver_opts:
      type: none      o: bind      device: /home/prom/grafana
networks:
  prom:
    driver: bridge
docker stack deploy prom --compose-file docker-stack.yml

docker stack lsNAME                SERVICES            orchestraTOR
prom                4                   Swarm

docker service lsID                  NAME                MODE                REPLICAS            IMAGE                                          PORTS
f72uewsvc8os        prom_alertmanager   replicated          1/1                 prom/alertmanager:latest                       *:9093-9094->9093-9094/tcp
qonjcrm8pf8o        prom_dingtalk       replicated          1/1                 timonwong/prometheus-webhook-dingtalk:latest   *:8060->8060/tcp
u376krlzd9o6        prom_grafana        replicated          1/1                 grafana/grafana:latest                         *:3000->3000/tcp
kjj909up7ptd        prom_prometheus     replicated          1/1                 prom/prometheus:latest                         *:9090->9090/tcp

docker psCONTAINER ID        IMAGE                                          COMMAND                  CREATED              STATUS              PORTS               NAMES
daf3f972ceea        timonwong/prometheus-webhook-dingtalk:latest   "/bin/prometheus-web…"   About a minute ago   Up About a minute   8060/tcp            prom_dingtalk.1.76ick5qr2fquysl6noztepypa
bcd8f36c78dc        grafana/grafana:latest                         "/run.sh"                About a minute ago   Up About a minute   3000/tcp            prom_grafana.1.ybv3yqburoc6olwys0xh2pqlk
160b53a9f51e        prom/prometheus:latest                         "/bin/prometheus --c…"   About a minute ago   Up About a minute   9090/tcp            prom_prometheus.1.wo8gjnlqlup2nd0ejb88pca85
709ee8176696        prom/alertmanager:latest                       "/bin/alertmanager -…"   About a minute ago   Up About a minute   9093/tcp            prom_alertmanager.1.5beu8aeyt1towanyj9wixtggr
容器启动正常,访问ip:9090,

因为docker-stack.yml不包含node-exporter,所以状态是DOWN。访问ip:3000,

可以看到,prometheus各组件状态正常。
node-exporter
通过docker单独启动node-exporter:
docker pull prom/node-exporter:latest

docker run -d -p 9100:9100 --name node-exporter prom/node-exporter:latest


增加监控主机时,修改prometheus.yml,然后更新prometheus:
docker service update prom_prometheus
测试告警
docker stop node-exporter

docker psCONTAINER ID        IMAGE                                          COMMAND                  CREATED             STATUS              PORTS                    NAMES
daf3f972ceea        timonwong/prometheus-webhook-dingtalk:latest   "/bin/prometheus-web…"   17 minutes ago      Up 17 minutes       8060/tcp                 prom_dingtalk.1.76ick5qr2fquysl6noztepypa
bcd8f36c78dc        grafana/grafana:latest                         "/run.sh"                17 minutes ago      Up 17 minutes       3000/tcp                 prom_grafana.1.ybv3yqburoc6olwys0xh2pqlk
160b53a9f51e        prom/prometheus:latest                         "/bin/prometheus --c…"   17 minutes ago      Up 17 minutes       9090/tcp                 prom_prometheus.1.wo8gjnlqlup2nd0ejb88pca85
709ee8176696        prom/alertmanager:latest                       "/bin/alertmanager -…"   17 minutes ago      Up 17 minutes       9093/tcp                 prom_alertmanager.1.5beu8aeyt1towanyj9wixtggr
收到钉钉和邮件故障告警,


docker start node-exporter

docker psCONTAINER ID        IMAGE                                          COMMAND                  CREATED             STATUS              PORTS                    NAMES
daf3f972ceea        timonwong/prometheus-webhook-dingtalk:latest   "/bin/prometheus-web…"   17 minutes ago      Up 17 minutes       8060/tcp                 prom_dingtalk.1.76ick5qr2fquysl6noztepypa
bcd8f36c78dc        grafana/grafana:latest                         "/run.sh"                17 minutes ago      Up 17 minutes       3000/tcp                 prom_grafana.1.ybv3yqburoc6olwys0xh2pqlk
160b53a9f51e        prom/prometheus:latest                         "/bin/prometheus --c…"   17 minutes ago      Up 17 minutes       9090/tcp                 prom_prometheus.1.wo8gjnlqlup2nd0ejb88pca85
709ee8176696        prom/alertmanager:latest                       "/bin/alertmanager -…"   17 minutes ago      Up 17 minutes       9093/tcp                 prom_alertmanager.1.5beu8aeyt1towanyj9wixtggr
95252704e558        prom/node-exporter:latest                      "/bin/node_exporter"     24 hours ago        Up 7 minutes        0.0.0.0:9100->9100/tcp   node-exporter
收到钉钉和邮件恢复告警,


测试宕机完成,告警没有问题。
docker stack部署 prometheus + grafana 完成,整个部署过程在swarm集群中进行。与docker-compose类似,相比传统部署方式要简便很多。
今天关于docker09-Prometheus的讲解已经结束,谢谢您的阅读,如果想了解更多关于cockroachdb docker-compose 本地集群运行以及prometheus监控、Docker - 安装 - Prometheus - 配置文件详解、Docker Prometheus配置、docker stack部署prometheus + grafana的相关知识,请在本站搜索。
本文标签:


![[转帖]Ubuntu 安装 Wine方法(ubuntu如何安装wine)](https://www.gvkun.com/zb_users/cache/thumbs/4c83df0e2303284d68480d1b1378581d-180-120-1.jpg)

