想了解井字游戏PythonTkinter显示“X”和“Y”的新动态吗?本文将为您提供详细的信息,我们还将为您解答关于井字游戏python课程设计的相关问题,此外,我们还将为您介绍关于*#【Python
想了解井字游戏 Python Tkinter 显示“X”和“Y”的新动态吗?本文将为您提供详细的信息,我们还将为您解答关于井字游戏python课程设计的相关问题,此外,我们还将为您介绍关于*#【Python】【基础知识】【模块】【tkinter】【学用 tkinter 画图 / 制作窗口】、Android Studio 井字游戏、java测试驱动开发(TDD)之《井字游戏》、LeetCode–井字游戏的新知识。
本文目录一览:- 井字游戏 Python Tkinter 显示“X”和“Y”(井字游戏python课程设计)
- *#【Python】【基础知识】【模块】【tkinter】【学用 tkinter 画图 / 制作窗口】
- Android Studio 井字游戏
- java测试驱动开发(TDD)之《井字游戏》
- LeetCode–井字游戏
")
井字游戏 Python Tkinter 显示“X”和“Y”(井字游戏python课程设计)
如何解决井字游戏 Python Tkinter 显示“X”和“Y”
我已经开始用 Python 为 Tkinter 制作井字游戏。基本上在这方面,赢取并不需要,只要具备基本功能即可。左键单击放置一个“X”并右键单击放置一个“O”。按“C”应该清除电路板,并且应该使用标签和绑定来完成。我在显示“X”和“O”时遇到问题,但我确实画了板。我尝试点击第一行,但没有任何反应。
它应该是这样工作的:https://youtu.be/0x6HKuyXAuU
from tkinter import *from tkinter import ttkroot = Tk()root.title("Tic Tac Toe")message = StringVar()# This is the portion that draws out the grid used in Tic Tac Toelabel1 = ttk.Label(root,text="")label1.grid(row=1,column=0)label2 = ttk.Label(root,text="|")label2.grid(row=1,column=1)label3 = ttk.Label(root,text="")label3.grid(row=1,column=2)label4 = ttk.Label(root,text="|")label4.grid(row=1,column=3)label5 = ttk.Label(root,text="-")label5.grid(row=4,column=1)label6 = ttk.Label(root,text="-")label6.grid(row=4,column=2)label7 = ttk.Label(root,text="-")label7.grid(row=4,column=3)label8 = ttk.Label(root,text="-")label8.grid(row=4,column=4)label9 = ttk.Label(root,text=" ")label9.grid(row=5,column=0)label10 = ttk.Label(root,text="|")label10.grid(row=5,column=1)label11 = ttk.Label(root,text=" ")label11.grid(row=5,column=2)label12 = ttk.Label(root,text="|")label12.grid(row=5,column=3)label13 = ttk.Label(root,text="-")label13.grid(row=6,column=1)label14 = ttk.Label(root,text="-")label14.grid(row=6,column=2)label15 = ttk.Label(root,text="-")label15.grid(row=6,column=3)label16 = ttk.Label(root,text="-")label16.grid(row=6,column=4)label17 = ttk.Label(root,text=" ")label17.grid(row=7,column=0)label18 = ttk.Label(root,text="|")label18.grid(row=7,column=1)label19 = ttk.Label(root,text=" ")label19.grid(row=7,column=2)label20 = ttk.Label(root,text="|")label20.grid(row=7,column=3)#This is the code that draws out the O and X in this the first rowlabel21 = ttk.Label(root,text="")label21.grid(row=1,column=0)label21.bind("<Button-1>",lambda e: message.set("X"))label21.bind("<Button-3>",lambda e: message.set("O"))label22 = ttk.Label(root,text="")label22.grid(row=1,column=1)label22.bind("<Button-1>",lambda e: message.set("X"))label22.bind("<Button-3>",lambda e: message.set("O"))label22.grid(row=1,column=3)label22.bind("<Button-1>",lambda e: message.set("O"))root.mainloop()
解决方法
试试这个:
from functools import partialimport tkinter as tkdef change_text(button,text,event=None):# Only if the button is emptyif button.cget("text") == "":# Change the button''s text to whatever is in the variable `text`button.config(text=text)def clear(event=None):for button in buttons:button.config(text="")# Create the tkinter windowroot = tk.Tk()# A list to store all of the buttonsbuttons = []for i in range(9):# Create the button:button = tk.Label(root,text="",width=3,font=("",15),bd=3,relief="groove")# 1st parameter of `partial` is the function. The rest are just argumentscommand = partial(change_text,button,"X")button.bind("<Button-1>",command) # Left clickcommand = partial(change_text,"O")button.bind("<Button-3>",command) # Right click# Display the button:button.grid(row=i//3,column=i%3)# Add the button to the list of buttons:buttons.append(button)clear_button = tk.Label(root,text="Clear screen",relief="groove")clear_button.grid(row=4,column=0,columnspan=3,sticky="news")clear_button.bind("<Button-1>",clear) # Left click# Run tkinter''s mainlooproot.mainloop()
有关 partial 工作原理的更多信息,请阅读 this。
使用循环而不是像这样创建很多变量和标签:
以下是您可以改进的示例:
from tkinter import *def updateX(event):event.widget[''text''] = ''X''def updateO(event):event.widget[''text''] = ''O''root = Tk()root.title("Tic Tac Toe")for x in range(5):for y in range(5):label = Label(root)if x%2==0:if y%2!= 0:label[''text''] = ''|''else:label.bind(''<1>'',updateX)label.bind(''<Button-3>'',updateO)root.grid_columnconfigure(y,weight=1)root.grid_rowconfigure(x,weight=1)else:label[''text'']=''-''label.grid(column=y,row=x,sticky="nsew")root.mainloop()
你的 clear 函数可以是这样的:
def clear(event):for item in root.winfo_children():if isinstance(item,Label) and item[''text''] in [''O'',''X'']:item[''text''] = ''''
也不要忘记将 <c> 绑定到 root。
您的绑定 lambda 只是更新了这些标签从未使用过的 message 变量。
您可以使用带边框的 Label 小部件来模拟游戏板。最好使用 list 或 dict 存储这些标签以供日后参考,例如通过按 c 字符清除游戏板。
以下是修改后的示例:
import tkinter as tkfrom tkinter import ttkroot = tk.Tk()root.title("Tic Tac Toe")def set_cell(lbl,mark):if lbl["text"] == "":lbl["text"] = markdef clear(event):for lbl in cells.values():lbl["text"] = ""cells = {} # for storing the labels# create the 3 x 3 board using labelsfor row in range(3):for col in range(3):lbl = ttk.Label(root,borderwidth=1,relief="solid",font="Arial 32 bold",anchor="c")lbl.grid(row=row,column=col,sticky="nsew")lbl.bind("<Button-1>",lambda e: set_cell(e.widget,"X"))lbl.bind("<Button-3>","O"))cells[row,col] = lbl # store the labelroot.bind("c",clear)root.mainloop()

*#【Python】【基础知识】【模块】【tkinter】【学用 tkinter 画图 / 制作窗口】
Python 提供了多个图形开发界面的库,几个常用 Python GUI 库如下:
Tkinter:
Tkinter 模块 (Tk 接口) 是 Python 的标准 Tk GUI 工具包的接口 .
Tk 和 Tkinter 可以在大多数的 Unix 平台下使用,同样可以应用在 Windows 和 Macintosh 系统里。
Tk8.0 的后续版本可以实现本地窗口风格,并良好地运行在绝大多数平台中。
wxPython:
wxPython 是一款开源软件
是 Python 语言的一套优秀的 GUI 图形库,允许 Python 程序员很方便的创建完整的、功能健全的 GUI 用户界面。
Jython:
Jython 程序可以和 Java 无缝集成。
除了一些标准模块,Jython 使用 Java 的模块。
Jython 几乎拥有标准的 Python 中不依赖于 C 语言的全部模块。
比如,Jython 的用户界面将使用 Swing,AWT 或者 SWT。
Jython 可以被动态或静态地编译成 Java 字节码。
------ 本专题只介绍 tkinter------
需要注意的是:
1、tkinter 是每个 python 版本都内置的一个图形库
2、在使用 turtle 库的时候 turtle 这个库是会调用 tkinter 这个库的
3、这个库在 py2 和 py3 里的名字是不一样的 python2 叫 Tkinter,python3 叫 tkinter
使用 tkinter 画图:
1、画圆形
2、画直线
3、画方形
4、制作 Windows 窗口
5、tkinter 中各属性及方法的使用介绍:
一、画圆形
原题:
使用 tkinter 库画圆形。
原题给出的代码:
#!/usr/bin/python
# encoding=utf-8
# -*- coding: UTF-8 -*-

# 画图,学用circle画圆形。
if __name__ == ''__main__'':
    from tkinter import *

    canvas = Canvas(width=800, height=600, bg=''yellow'')
    canvas.pack(expand=YES, fill=BOTH)
    k = 1
    j = 1
    for i in range(0,26):
        canvas.create_oval(310 - k,250 - k,310 + k,250 + k, width=1)
        k += j
        j += 0.3

    mainloop()
输出结果:

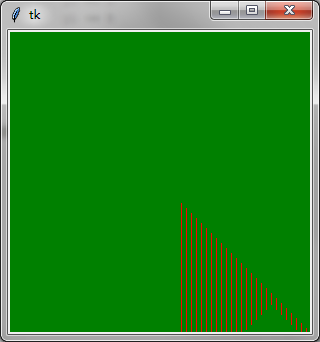
二、画直线
原题:画图,学用 line 画直线
原题给出的代码:
#!/usr/bin/python
# -*- coding: UTF-8 -*-

if __name__ == ''__main__'':
    from tkinter import *

    canvas = Canvas(width=300, height=300, bg=''green'')
    canvas.pack(expand=YES, fill=BOTH)
    x0 = 263
    y0 = 263
    y1 = 275
    x1 = 275
    for i in range(19):
        canvas.create_line(x0,y0,x0,y1, width=1, fill=''red'')
        x0 = x0 - 5
        y0 = y0 - 5
        x1 = x1 + 5
        y1 = y1 + 5

    x0 = 263
    y1 = 275
    y0 = 263
    for i in range(21):
        canvas.create_line(x0,y0,x0,y1,fill = ''red'')
        x0 += 5
        y0 += 5
        y1 += 5

    mainloop()
输出效果:
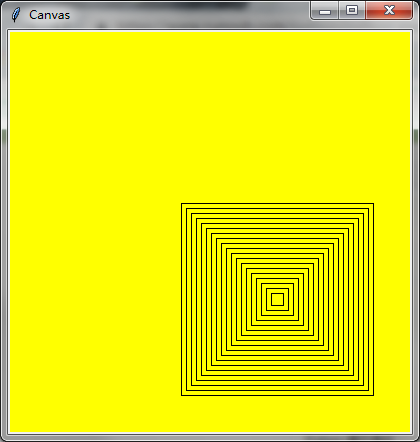
三、画方形
原题:
画图,学用 rectangle 画方形。
程序分析:
rectangle(int left, int top, int right, int bottom)参数说明:(left ,top) 为矩形的左上坐标,(right,bottom) 为矩形的右下坐标,两者可确定一个矩形的大小
原题给出的代码:
#!/usr/bin/python
# -*- coding: UTF-8 -*-

if __name__ == ''__main__'':
    from tkinter import *
    root = Tk()
    root.title(''Canvas'')
    canvas = Canvas(root,width = 400,height = 400,bg = ''yellow'')
    x0 = 263
    y0 = 263
    y1 = 275
    x1 = 275
    for i in range(19):
        canvas.create_rectangle(x0,y0,x1,y1)
        x0 -= 5
        y0 -= 5
        x1 += 5
        y1 += 5

    canvas.pack()
    root.mainloop()
输出结果:
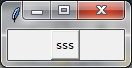
四、使用 tkinter 制作 Windows 窗口:
源码:
#!/usr/bin/python
# -*- coding: GBK -*-
import tkinter
#import tkMessageBox #Py2.0中
import tkinter.messagebox #Py3.0中
top = tkinter.Tk()
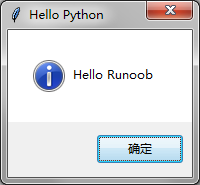
def helloCallBack():
tkinter.messagebox.showinfo( "Hello Python", "Hello Runoob")
B = tkinter.Button(top, text ="sss", command = helloCallBack)
B.pack()
# 进入消息循环
top.mainloop()
效果:
点击按钮,出现:
其中 Tkinter 库的使用还需深入学习!
五、tkinter 库的使用介绍:(上述代码中已使用的)
tkinter 包含的方法:
>>> dir(tkinter)
[''ACTIVE'', ''ALL'', ''ANCHOR'', ''ARC'', ''BASELINE'', ''BEVEL'', ''BOTH'', ''BOTTOM'', ''BROWSE'', ''BUTT'', ''BaseWidget'', ''BitmapImage'', ''BooleanVar'', ''Button'', ''CASCADE'', ''CENTER'', ''CHAR'', ''CHECKBUTTON'', ''CHORD'', ''COMMAND'', ''CURRENT'', ''CallWrapper'', ''Canvas'', ''Checkbutton'', ''DISABLED'', ''DOTBOX'', ''DoubleVar'', ''E'', ''END'', ''EW'', ''EXCEPTION'', ''EXTENDED'', ''Entry'', ''Event'', ''EventType'', ''FALSE'', ''FIRST'', ''FLAT'', ''Frame'', ''GROOVE'', ''Grid'', ''HIDDEN'', ''HORIZONTAL'', ''INSERT'', ''INSIDE'', ''Image'', ''IntVar'', ''LAST'', ''LEFT'', ''Label'', ''LabelFrame'', ''Listbox'', ''MITER'', ''MOVETO'', ''MULTIPLE'', ''Menu'', ''Menubutton'', ''Message'', ''Misc'', ''N'', ''NE'', ''NO'', ''NONE'', ''NORMAL'', ''NS'', ''NSEW'', ''NUMERIC'', ''NW'', ''NoDefaultRoot'', ''OFF'', ''ON'', ''OUTSIDE'', ''OptionMenu'', ''PAGES'', ''PIESLICE'', ''PROJECTING'', ''Pack'', ''PanedWindow'', ''PhotoImage'', ''Place'', ''RADIOBUTTON'', ''RAISED'', ''READABLE'', ''RIDGE'', ''RIGHT'', ''ROUND'', ''Radiobutton'', ''S'', ''SCROLL'', ''SE'', ''SEL'', ''SEL_FIRST'', ''SEL_LAST'', ''SEPARATOR'', ''SINGLE'', ''SOLID'', ''SUNKEN'', ''SW'', ''Scale'', ''Scrollbar'', ''Spinbox'', ''StringVar'', ''TOP'', ''TRUE'', ''Tcl'', ''TclError'', ''TclVersion'', ''Text'', ''Tk'', ''TkVersion'', ''Toplevel'', ''UNDERLINE'', ''UNITS'', ''VERTICAL'', ''Variable'', ''W'', ''WORD'', ''WRITABLE'', ''Widget'', ''Wm'', ''X'', ''XView'', ''Y'', ''YES'', ''YView'', ''__builtins__'', ''__cached__'', ''__doc__'', ''__file__'', ''__loader__'', ''__name__'', ''__package__'', ''__path__'', ''__spec__'', ''_cnfmerge'', ''_default_root'', ''_exit'', ''_flatten'', ''_join'', ''_magic_re'', ''_setit'', ''_space_re'', ''_splitdict'', ''_stringify'', ''_support_default_root'', ''_test'', ''_tkerror'', ''_tkinter'', ''_varnum'', ''commondialog'', ''constants'', ''enum'', ''getboolean'', ''getdouble'', ''getint'', ''image_names'', ''image_types'', ''mainloop'', ''messagebox'', ''re'', ''simpledialog'', ''sys'', ''wantobjects'']
>>>
tkinter 为 module 类型
tkinter.ACTIVE 为 str 类型
tkinter.ACTIVE.capitalize 为内置方法 / 函数
>>> type(tkinter)
<class ''module''>
>>> type(tkinter.ACTIVE)
<class ''str''>
>>> type(tkinter.ACTIVE.capitalize)
<class ''builtin_function_or_method''>
>>>
1、tkinter.messagebox
2、tkinter.Button
3、tkinter.Tk
————————(我是分割线)————————
参考:
1. RUNOOB.COM:
https://www.runoob.com/python/python-exercise-example56.html / 画圆
https://www.runoob.com/python/python-gui-tkinter.html / Python GUI 编程 (Tkinter)
https://www.runoob.com/python/python-tk-button.html / 制作窗口
https://www.runoob.com/python/python-exercise-example57.html / 画直线
https://www.runoob.com/python/python-exercise-example58.html / 画方形
2、https://zhidao.baidu.com/question/432270397607348804.html
备注:
初次编辑时间:2019 年 10 月 6 日 21:42:39
第一次修改时间:2019 年 10 月 7 日 10:31:36 / 除画圆外,增加了其他功能模块;
第二次修改时间:2019 年 10 月 7 日 15:45:12 / 以模块知识点命名,逐步深入学习该模块的使用方法和经典案例。
环境:Windows 7 / Python 3.7.2

Android Studio 井字游戏
如何解决Android Studio 井字游戏
免责声明,我还是个菜鸟。 我不知道为什么 c 在这个循环中总是 9,它应该是 1,然后每个循环加 1,每个数字,我检查它是否是一个整数,如果它是一个整数,我将打印符号O,如果没有生病就打印 X。
整个检查数字是否为圆形并根据数字选择什么符号,有效,我的问题是每次迭代,计数器“c”出于某种原因都是9,无论如何,它甚至没有按照我说的从 1 开始
JAVA
import androidx.appcompat.app.AppCompatActivity;import android.view.View;import android.os.Bundle;import android.util.Log;import android.widget.Button; // I kNow I don''t need all of these,it''s just easier to have all here.import android.widget.EditText;import android.widget.TextView;import android.widget.Toast;public class MainActivity extends AppCompatActivity {@Overrideprotected void onCreate(Bundle savedInstanceState) {super.onCreate(savedInstanceState);setContentView(R.layout.activity_main);}public void handle (View v){String symbol1 = "O";String symbol2 = "X";for (int c = 1; c < 10; c++) { // 9 iterations loop((TextView) findViewById(R.id.texto)).setText("c = " + c); // just checking what c is in each iteration.v.setEnabled(false); // removes option to select a Box.Button b = (Button) v; //making this so I can use setText.if ((c % 2) == 0) { // checking to see if its a whole number.b.setText(symbol1); //if round print O in the Box.} else b.setText(symbol2); //else print X in the Box.}}}
XML
<androidx.constraintlayout.widget.ConstraintLayout xmlns:android="http://schemas.android.com/apk/res/android"xmlns:app="http://schemas.android.com/apk/res-auto"xmlns:tools="http://schemas.android.com/tools"android:id="@+id/app"android:layout_width="match_parent"android:layout_height="match_parent"tools:context=".MainActivity"><Buttonandroid:id="@+id/btn1"android:layout_width="108dp"android:layout_height="101dp"android:layout_marginStart="16dp"android:layout_marginLeft="16dp"android:layout_marginTop="16dp"android:onClick="handle"android:text="INSERT"app:layout_constraintStart_toStartOf="parent"app:layout_constraintTop_toTopOf="parent" /><Buttonandroid:id="@+id/btn2"android:layout_width="109dp"android:layout_height="101dp"android:layout_marginStart="24dp"android:layout_marginLeft="24dp"android:layout_marginTop="16dp"android:onClick="handle"android:text="INSERT"app:layout_constraintStart_toEndOf="@+id/btn1"app:layout_constraintTop_toTopOf="parent" /><Buttonandroid:id="@+id/btn3"android:layout_width="108dp"android:layout_height="100dp"android:layout_marginStart="16dp"android:layout_marginLeft="16dp"android:layout_marginTop="16dp"android:layout_marginEnd="16dp"android:layout_marginRight="16dp"android:onClick="handle"android:text="INSERT"app:layout_constraintEnd_toEndOf="parent"app:layout_constraintStart_toEndOf="@+id/btn2"app:layout_constraintTop_toTopOf="parent" /><Buttonandroid:id="@+id/btn4"android:layout_width="108dp"android:layout_height="102dp"android:layout_marginStart="16dp"android:layout_marginLeft="16dp"android:layout_marginTop="16dp"android:onClick="handle"android:text="INSERT"app:layout_constraintStart_toStartOf="parent"app:layout_constraintTop_toBottomOf="@+id/btn1" /><Buttonandroid:id="@+id/btn5"android:layout_width="109dp"android:layout_height="101dp"android:layout_marginStart="24dp"android:layout_marginLeft="24dp"android:layout_marginTop="16dp"android:onClick="handle"android:text="INSERT"app:layout_constraintStart_toEndOf="@+id/btn4"app:layout_constraintTop_toBottomOf="@+id/btn2" /><Buttonandroid:id="@+id/btn6"android:layout_width="108dp"android:layout_height="103dp"android:layout_marginStart="16dp"android:layout_marginLeft="16dp"android:layout_marginTop="16dp"android:layout_marginEnd="16dp"android:layout_marginRight="16dp"android:onClick="handle"android:text="INSERT"app:layout_constraintEnd_toEndOf="parent"app:layout_constraintStart_toEndOf="@+id/btn5"app:layout_constraintTop_toBottomOf="@+id/btn3" /><Buttonandroid:id="@+id/btn7"android:layout_width="108dp"android:layout_height="101dp"android:layout_marginStart="16dp"android:layout_marginLeft="16dp"android:layout_marginTop="16dp"android:onClick="handle"android:text="INSERT"app:layout_constraintStart_toStartOf="parent"app:layout_constraintTop_toBottomOf="@+id/btn4" /><Buttonandroid:id="@+id/btn8"android:layout_width="109dp"android:layout_height="101dp"android:layout_marginStart="16dp"android:layout_marginLeft="16dp"android:layout_marginTop="16dp"android:layout_marginEnd="16dp"android:layout_marginRight="16dp"android:onClick="handle"android:text="INSERT"app:layout_constraintEnd_toStartOf="@+id/btn9"app:layout_constraintStart_toEndOf="@+id/btn7"app:layout_constraintTop_toBottomOf="@+id/btn5" /><Buttonandroid:id="@+id/btn9"android:layout_width="108dp"android:layout_height="100dp"android:layout_marginTop="16dp"android:layout_marginEnd="16dp"android:layout_marginRight="16dp"android:onClick="handle"android:text="INSERT"app:layout_constraintEnd_toEndOf="parent"app:layout_constraintTop_toBottomOf="@+id/btn6" /><TextViewandroid:id="@+id/texto"android:layout_width="wrap_content"android:layout_height="wrap_content"android:layout_marginBottom="336dp"android:text="TextView"app:layout_constraintBottom_toBottomOf="parent"app:layout_constraintEnd_toEndOf="parent"app:layout_constraintHorizontal_bias="0.526"app:layout_constraintStart_toStartOf="parent" /></androidx.constraintlayout.widget.ConstraintLayout>
解决方法
是的,这是合乎逻辑的
您的 handle 函数将在每次点击时执行,这意味着 c 将增加,直到每次点击达到 9点击单独。
如果每次点击都需要 c 加一,则需要将 c 初始化为全局变量,并仅更改 for 条件的 if 循环。>
解决方案:
public class MainActivity extends AppCompatActivity {private int c = 1;@Overrideprotected void onCreate(Bundle savedInstanceState) {super.onCreate(savedInstanceState);setContentView(R.layout.activity_main);}public void handle (View v){String symbol1 = "O";String symbol2 = "X";if (c < 10){Log.i("TAG","handle: c is : " + c);((TextView) findViewById(R.id.texto)).setText("c = " + c); // just checking what c is in each iteration.v.setEnabled(false); // removes option to select a box.Button b = (Button) v; //making this so I can use setText.if ((c % 2) == 0) { // checking to see if its a whole number.b.setText(symbol1); //if round print O in the box.} else b.setText(symbol2);c++;}}
之《井字游戏》")
java测试驱动开发(TDD)之《井字游戏》
永久更新地址:https://my.oschina.net/bysu/blog/1632393
写在前面:若有侵权,请发邮件by.su@qq.com告知。
本文主要是学习《Java测试驱动开发》过程中的记录,除了工具有点不一致之外,其他都是摘抄自书本。
转载者告知:如果本文被转载,但凡涉及到侵权相关事宜,转载者需负责。请知悉!
个人觉得这书相当不错,有兴趣的可以买来看看。
图书的相关链接:http://www.ituring.com.cn/book/1942
书中源码下载:https://download.csdn.net/download/gdzjsubaoya/10286870
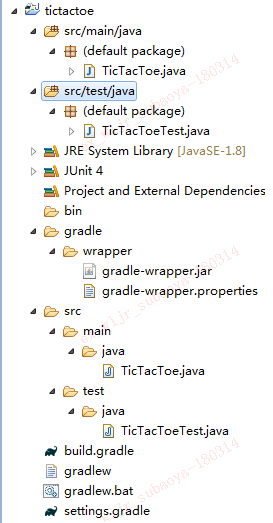
工具:eclipse(书中用的是IntelliJ IDEA)+gradle+Junit,整个项目目录如下:
这个练习中,你将根据需求编写测试,再编写满足测试期望的代码。最后,如果有必要,将对代码进行重构。也就是书中所说的:“红灯-绿灯-重构”过程。
开发“开发井字游戏”
游戏规则:双方轮流在一个3X3的网格中画X和O,最先在水平、垂直或对角线上将自己的3个标记连起来的 玩家获胜。
需求1
我们应该首先定义边界,以及将棋子放在哪些地方非法。
可将棋子放在3X3棋盘上任何没有棋子的地方。
可将这个需求分成三个测试:
1.如果棋子放在超出了X轴边界的地方,就引发RuntimeException异常;
2.如果棋子放在超出了Y轴边界的地方,就引发RuntimeException异常;
3.如果棋子放在已经有棋子的地方,就引发RuntimeException异常;
编写第一个测试前,先简单说说如何使用JUNIT测试异常。JUnit4.7引入了一项名为规则(Rule)的功能,使用它可以做很多不同的事情,但在这里我们感兴趣的是规则Expected-Exception。
import org.junit.Test;
import org.junit.Rule;
import org.junit.rules.ExpectedException;


public class TicTacToeTest {

	@Rule
	public ExpectedException exception = ExpectedException.none();
	private TicTacToe ticTacToe;
    }

    @Test
    public void whenXOutsideBoardThenRuntimeException() {
    	exception.expect(RuntimeException.class);
    	ticTacToe.play(5,2);
    }
}
1.测试
首先检查棋子是否放在3X3棋盘的边界内:
棋子放在超出X轴边界的地方时,将引发RuntimenException异常。
import org.junit.Before;
import org.junit.Rule;
import org.junit.Test;
import org.junit.rules.ExpectedException;

public class TicTacToeTest {

	@Rule
	public ExpectedException exception = ExpectedException.none();
	private TicTacToe ticTacToe;

	@Before
	public final void before(){
		ticTacToe = new TicTacToe();
	}

    @Test public void whenXOutsideBoardThenRuntimeException() {
    	exception.expect(RuntimeException.class);
    	ticTacToe.play(5,2);
    }
}
这个测试中,我们指出调用方法ticTacToe.play(5,2)时,期望的结果是引发RuntimeException异常。这个测试既简短又容易,要让它通过应该也很容易:只需创建方法paly,并确保它在参数X小于1或大于3(棋盘是3X3的)时引发RuntimeException异常。你应运行这个测试3次:第一次运行时,它应该不能通过,因为此时还没有方法play;添加这个方法后,测试也应不能通过,因为它没有引发异常RuntimeException;第三次运行时应该通过,因为实现了与这个测试相关联的所有代码。
2.实现
明确什么情况下应引发异常后,实现代码编写起来应该很简单:
public class TicTacToe {
    	public String play(int x,int y){

		    if(x < 1 || x > 3){
			    throw new RuntimeException("X is outside board");
		    }
	    }
}
3.测试
这个测试与前一个测试几乎相同,但验证的是Y轴:
 @Test public void whenYOutsideBoardThenRuntimeException() {
    	exception.expect(RuntimeException.class);
    	ticTacToe.play(5,2);
    }
4.实现
这个规范的实现几乎与前一个相同,只需在参数Y不在指定范围内时引发异常即可:
public class TicTacToe {
    	public String play(int x,int y){

		    if(x < 1 || x > 3){
			    throw new RuntimeException("X is outside board");
		    }else if(y < 1 || y >3){
                throw new RuntimeException("Y is outside board");
            }
	    }
}
为让最后一个测试通过,添加一条“检查参数Y是否在棋盘内”的else子句。
下面编写当前需求涉及的最后一个测试。
5.测试
确定棋子在棋盘边界内后,还需确保它放在未被别的棋子占据的地方:
棋子放在被别的棋子占据的地方时,将引发RuntimeException异常。
    @Test
    public void whenOccupiedThenRuntimeException() {
    	ticTacToe.play(2, 1);
    	exception.expect(RuntimeException.class);
    	ticTacToe.play(2, 1);
    }
这就是最后一个测试。编写 实现后,即可认为第一个需求完成了。
6.实现
为实现最后一个测试,应将既有棋子的位置存储在一个数组中。每当玩家放置新棋子时,都应确认棋子放在未占用的位置,否则引发异常:
public class TicTacToe {

        private Character[][] board = {{''\0'',''\0'',''\0''},{''\0'',''\0'',''\0''},{''\0'',''\0'',''\0''}};

    	public String play(int x,int y){

		    if(x < 1 || x > 3){
			    throw new RuntimeException("X is outside board");
		    }else if(y < 1 || y >3){
                throw new RuntimeException("Y is outside board");
            }
            if(board[x -1][y - 1] != ''\0''){
                throw new RuntimeException("Box is occupied");
            }else{
                board[x - 1][y - 1] = ''X'';
            }
	    }
}
我们检查要放置棋子的位置是否被占用,如果未占用,就将相应数组元素的值从空(''\0'')改为被占用的(X)。注意,我们还没有记录棋子是谁(X还是O)的。
7.重构
这些代码虽然满足了测试指定的需求,但有点令人迷惑。如果有人阅读这些代码,会搞不清方法play的母的。应重构这个方法,将其中的代码放在多个方法中。重构后代码如下:
	public String play(int x,int y){
		checkAxis(x);
		checkAxis(y);
		setBox(x,y,lastPlayer);

	}

	private void checkAxis(int axis){
		if(axis < 1 || axis > 3){
			throw new RuntimeException("X is outside board!");
		}
	}

    private void setBox(int x,int y,char lastPlayer){
		if(board[x-1][y-1] != ''\0''){
			throw new RuntimeException("Box is occupied");
		}else{
			board[x-1][y-1] = ''X'';
		}
	}
这个重构过程中,没有改变方法play的功能,其行为与以前完全相同,但代码的可读性更强了。由于我们有覆盖了所有功能的测试,因此不用害怕重构时犯错。只要确保所有测试都通过且重构时没有引入新行为,就可以放心大胆地修改代码。
需求1.完整的源码:
测试代码:
 import org.junit.Before;
 import org.junit.Rule;
 import org.junit.Test;
 import org.junit.rules.ExpectedException;

 public class TicTacToeTest {

     @Rule
     public ExpectedException exception = ExpectedException.none();
     private TicTacToe ticTacToe;

     @Before
     public final void before() {
         ticTacToe = new TicTacToe();
     }

     @Test
     public void whenXOutsideBoardThenRuntimeException() {
         exception.expect(RuntimeException.class);
         ticTacToe.play(5, 2);
     }

     @Test
     public void whenYOutsideBoardThenRuntimeException() {
         exception.expect(RuntimeException.class);
         ticTacToe.play(2, 5);
     }

     @Test
     public void whenOccupiedThenRuntimeException() {
-        ticTacToe.play(1, 1);
         ticTacToe.play(2, 1);
         exception.expect(RuntimeException.class);
         ticTacToe.play(2, 1);
     }

 }
实现代码
 public class TicTacToe {

     private Character[][] board = {{null, null, null}, {null, null, null}, {null, null, null}};

     public void play(int x, int y) {
         if (x < 1 || x > 3) {
             throw new RuntimeException("X is outside board");
         } else if (y < 1 || y > 3) {
             throw new RuntimeException("Y is outside board");
         }
         if (board[x - 1][y - 1] != null) {
             throw new RuntimeException("Y is outside board");
             throw new RuntimeException("Box is occupied");
         } else {
             board[x - 1][y - 1] = ''X'';
         }
     }

 }
需求2
现在处理轮到哪个玩家落子的问题。
需要提供一种途径,用于判断接下来该谁落子。
可将这个需求分成三个 测试:
1.玩家X先下;
2.如果上一次是X下的,接下来将轮到O下;
3.如果上一次是O下的,接下来将轮到X下。
到目前为止,我们还未使用过JUnit断言。要使用断言,需要导入org.junit.Assert类中的静态(static)方法:
import static org.junit.Assert.*;Assert类中的方法都非常简单,它们大都以assert打头。例如,assertEquals对两个对象进行比较:assertNotEquals验证两个对象不同,而assertArrayEquals验证两个数组相同。这两个断言都有很多重载版本,因此几乎能够对任何类型的java对象进行比较。
在这里,我们需要比较两个字符,其中第一个是预期的字符,而第二个是方法nextPlayer返回的实际字符。
现在编写这些测试及其实现。
先编写测试,再编写实现代码
这样做的好处是:可 确保编写的代码是可测试的,且每行代码都有对应的测试。
通过先编写或修改测试,开发人员可在编写代码前专注于需求。这是与完成实现后再编写测试的主要差别所在。测试先行的另一个好处是,可避免原本应为质量保证的测试沦为质量检查。
1.测试
玩家X先下:
 //X玩家先下
    @Test public void givenFirstTurnWhenNextPlayerThenX(){
    	assertEquals(''X'', ticTacToe.nextPlayer());
    }
应该是玩家X先下
这个测试应该是不言自明的:我们期望nextPlayer返回X。如果现在运行这个测试,将发现它都不能通过编辑,这是因为还没有方法player。我们的任务是编写方法nextPlayer,并确保它返回正确的值。
2.实现
其实根本不需要检查玩家X是否先下,因为就目前而言,只需让nextPlayer返回X就能让这个测试通过。后面的测试将要求我们修改这个方法的代码:
	public char nextPlayer(){

		return ''X'';
	}
3.测试
现在需要确保让玩家轮流下。玩家X下棋后,应轮到玩家O,然后再轮到玩家X,以此类推:
    //X玩家下完,到O玩家下
    @Test public void givenLastTurnWhenNextPlayerThenO(){
    	ticTacToe.play(1, 1);
    	assertEquals(''O'', ticTacToe.nextPlayer());
    }
如果前一次是玩家X下的,接下来应轮到玩家O。
4.实现
为跟踪接下来该谁下,需要存储前一次下棋的玩家:
	private char lastPlayer = ''\0'';

	public String play(int x,int y){
		checkAxis(x);
		checkAxis(y);
		setBox(x,y,lastPlayer);
        lastPlayer = nextPlayer();

	}

    public char nextPlayer(){
		if(lastPlayer == ''X''){
			return ''O'';
		}
		return ''X'';
	}
你很可能已经进入状态。测试很小且易于编写,有了足够的经验后,编写一个测试只需一分钟甚至几秒钟;而编写实现所需的时间也差不多,甚至更短。
5.测试
我们终于可以检查玩家O下后是不是轮到玩家X了。
如果前一次是玩家O下的,接下来应轮到玩家X下。
即使什么都不用做,这个测试也能通过。因此它毫无用处,应当删除。如果编写这个测试,将发现它存在报错问题:在没有修改实现的情况下就能通过。你可以自己试一试。编写测试后,如果它在没有编写任何实现代码时就能通过,应将其删除。
此时,测试的完整代码
 import org.junit.Before;
 import org.junit.Rule;
 import org.junit.Test;
 import org.junit.rules.ExpectedException;
 import static org.junit.Assert.*;

 public class TicTacToeSpec {

     @Rule
     public ExpectedException exception = ExpectedException.none();
     private TicTacToe ticTacToe;

     @Before
     public final void before() {
         ticTacToe = new TicTacToe();
     }

     @Test
     public void whenXOutsideBoardThenRuntimeException() {
         exception.expect(RuntimeException.class);
         ticTacToe.play(5, 2);
     }

     @Test
     public void whenYOutsideBoardThenRuntimeException() {
         exception.expect(RuntimeException.class);
         ticTacToe.play(2, 5);
     }

     @Test
     public void whenOccupiedThenRuntimeException() {
         ticTacToe.play(1, 1);
         ticTacToe.play(2, 1);
         exception.expect(RuntimeException.class);
         ticTacToe.play(2, 1);
     }

     @Test
     public void givenFirstTurnWhenNextPlayerThenX() {
         assertEquals(''X'', ticTacToe.nextPlayer());
     }

     @Test
     public void givenLastTurnWasXWhenNextPlayerThenO() {
         ticTacToe.play(1, 1);
         assertEquals(''O'', ticTacToe.nextPlayer());
     }

 }
需求3
现在考虑这个游戏的获胜规则。相比于前面的代码,这部分工作更繁琐。我们必须检查所有可能获胜的情况,只要满足其中一个,就宣布相应玩家获胜。
最先在水平、垂直或对角线上将自己的3个标记连起来的玩家获胜。
要检查同一玩家的3颗棋子是否连成了线,需要检查水平方向、垂直方向和对角线。
1.测试
下面首先定义方法play的默认返回值:
     @Test
     public void whenPlayThenNoWinner() {
         String actual = ticTacToe.play(1, 1);
         assertEquals("No winner", actual);
     }
如果不满足获胜条件,则无人获胜。
2.实现
默认返回值总是最容易实现的,这里也不例外:
    public String play(int x, int y) {
         checkAxis(x);
         checkAxis(y);
         setBox(x, y, lastPlayer);
         lastPlayer = nextPlayer();
         return "No winner";
     }
3.测试
指定默认结果(没有人获胜)后,处理各种获胜条件:
     @Test
     public void whenPlayAndWholeHorizontalLineThenWinner() {
         ticTacToe.play(1, 1); // X
         ticTacToe.play(1, 2); // O
         ticTacToe.play(2, 1); // X
         ticTacToe.play(2, 2); // O
         String actual = ticTacToe.play(3, 1); // X
         assertEquals("X is the winner", actual);
     }
一个玩家的棋子占据整条水平线就赢了。
4.实现
为让这个测试通过,需要检查是否有水平线全被当前玩家的棋子占据。到目前为止,我们根本不关心存储到数组board中的值是什么,但现在不但要记录哪些棋盘格是空的,还需记录各个棋盘格被哪个玩家占据:
    public String play(int x, int y) {
        checkAxis(x);
        checkAxis(y);
        lastPlayer = nextPlayer();
        setBox(x, y, lastPlayer);
        for(int index = 0;index < 3;index++){
		    if(board[0][index] == lastPlayer && board[1][index] == lastPlayer && board[2][index] == lastPlayer){
				return lastPlayer + " is the winner";
			}
		}
        return "No winner";
    }

    private void setBox(int x, int y, char lastPlayer) {
        if (board[x - 1][y - 1] != ''\0'') {
            throw new RuntimeException("Box is occupied");
        } else {
            board[x - 1][y - 1] = lastPlayer;
        }
    }
5.重构
前面的代码能够让测试通过,完成了尽快让测试通过的使命,但并非没有改进的空间。现在我们有了确保预期行为完整性的测试,可对代码进行重构:
    private static final int SIZE = 3;

    public String play(int x, int y) {
        checkAxis(x);
        checkAxis(y);
        lastPlayer = nextPlayer();
        setBox(x, y, lastPlayer);
        if (isWin()) {
            return lastPlayer + " is the winner";
        }
        return "No winner";
    }

    private boolean isWin() {

        for (int i = 0; i < SIZE; i++) {
            if ((board[0][i] + board[1][i] + board[2][i]) == (lastPlayer * SIZE)) {
                return true;
            }
        }
        return false;
    }
重构后的解决方案看起来更好。play依然很短,很容易理解。将实现获胜逻辑的代码移到一个独立的方法中,不仅让方法play的目的变得清晰,还能让我们独立添加检查获胜条件的代码。
6.测试
我们还需检查是否有垂直线完全被某个玩家占据:
    @Test
    public void whenPlayAndWholeVerticalLineThenWinner() {
        ticTacToe.play(2, 1); // X
        ticTacToe.play(1, 1); // O
        ticTacToe.play(3, 1); // X
        ticTacToe.play(1, 2); // O
        ticTacToe.play(2, 2); // X
        String actual = ticTacToe.play(1, 3); // O
        assertEquals("O is the winner", actual);
    }
一个玩家的棋子占据整条垂直线就赢了。
7.实现
这个实现应该与前一个类似。前面在水平方向上做了检查,现在需要在垂直方向上做同样的检查:
private boolean isWin() {
        int playerTotal = lastPlayer * SIZE;
        for (int i = 0; i < SIZE; i++) {
            if ((board[0][i] + board[1][i] + board[2][i]) == playerTotal) {
                return true;
            } else if ((board[i][0] + board[i][1] + board[i][2]) == playerTotal) {
                return true;
            }
        }
        return false;
    }
8.测试
水平线和垂直线都处理后,该将注意力转向对角线了:
    @Test
    public void whenPlayAndTopBottomDiagonalLineThenWinner() {
        ticTacToe.play(1, 1); // X
        ticTacToe.play(1, 2); // O
        ticTacToe.play(2, 2); // X
        ticTacToe.play(1, 3); // O
        String actual = ticTacToe.play(3, 3); // O
        assertEquals("X is the winner", actual);
    }
一个玩家的棋子占据从左上角到右下角的整条对角线就赢了。
9.实现
    private boolean isWin() {
        int playerTotal = lastPlayer * 3;

        for (int i = 0; i < SIZE; i++) {

            if ((board[0][i] + board[1][i] + board[2][i]) == playerTotal) {
                return true;
            } else if ((board[i][0] + board[i][1] + board[i][2]) == playerTotal) {
                return true;
            }
        }
        if (board[0][0] + board[1][1] + board[2][2] == playerTotal) {
            return true;
        }
        return false;
    }
10.测试
最后,还有最后一个可能的获胜条件需要处理:
    @Test
    public void whenPlayAndBottomTopDiagonalLineThenWinner() {
        ticTacToe.play(1, 3); // X
        ticTacToe.play(1, 1); // O
        ticTacToe.play(2, 2); // X
        ticTacToe.play(1, 2); // O
        String actual = ticTacToe.play(3, 1); // O
        assertEquals("X is the winner", actual);
    }
一个玩家的棋子占据从左下角到右上角的整条对角线就赢了。
11.实现
这个测试的实现应该与前一个几乎完全相同:
    private boolean isWin() {
        int playerTotal = lastPlayer * 3;

        for (int i = 0; i < SIZE; i++) {

            if ((board[0][i] + board[1][i] + board[2][i]) == playerTotal) {
                return true;
            } else if ((board[i][0] + board[i][1] + board[i][2]) == playerTotal) {
                return true;
            }
        }
        if (board[0][0] + board[1][1] + board[2][2] == playerTotal) {
            return true;
        }else if (board[0][2] + board[1][1] + board[2][0] == playerTotal) {
            return true;
        }
        return false;
    }
12.重构
处理对角线时,所做的计算看起来不太好,也许重用既有的循环更合适:
    private boolean isWin(){
		int playerTotal = lastPlayer * 3;
		char diagonal1 = ''\0'';
		char diagonal2 = ''\0'';

		for(int index=0;index<SIZE;index ++){
			diagonal1 += board[index][index];//从左上到右下的对角线
			diagonal2 += board[index][SIZE-index-1];//从右下到左上的对角线

			if(board[0][index] + board[1][index] + board[2][index] == playerTotal){//水平线,赢
				return true;
			}else if(board[index][0] + board[index][1] + board[index][2] == playerTotal){//垂直线,赢
				return true;
			}

			if(diagonal1 == playerTotal || diagonal2 == playerTotal){//两条对角线
				return true;
			}
		}
		return false;
	}
下面处理最后一个需求。
需求4
现在缺失的唯一一项内容是如何处理平局。
所有格子都占满则为平局。
1.测试
可以通过填满棋盘的所有格子测试平局结果:
    //平局,棋盘被占满
    @Test
    public void whenAllBoxesAreFilledThenDraw(){
    	ticTacToe.play(1, 1);
    	ticTacToe.play(1, 2);
    	ticTacToe.play(1, 3);
    	ticTacToe.play(2, 1);
    	ticTacToe.play(2, 3);
    	ticTacToe.play(2, 2);
    	ticTacToe.play(3, 1);
    	ticTacToe.play(3, 3);
    	String actual = ticTacToe.play(3, 2);
    	assertEquals("The result is draw", actual);
    }
2.实现
检查是否为平局非常简单——只需检查是否已占满整个棋盘。为此,可遍历数组board:
   public String play(int x,int y){
		checkAxis(x);
		checkAxis(y);
		lastPlayer = nextPlayer();
		setBox(x,y,lastPlayer);
		if(isWin()){
			return lastPlayer + " is the winner";
		}else if(isDraw()){
			return "The result is draw";
		}else{
			return "No winner";
		}
	}

	private boolean isDraw(){
		for(int x=0;x<SIZE;x++){
			for(int y=0;y<SIZE;y++){
				if(board[x][y] == ''\0''){
					return false;
				}
			}
		}
		return true;
	}
3.重构
	private boolean isWin(int x,int y){
		int playerTotal = lastPlayer * SIZE;
		char horizontal=''\0'',vertical=''\0'',diagonal1=''\0'',diagonal2 = ''\0'';

		for(int index=0;index<SIZE;index ++){
			horizontal += board[index][y-1];
			vertical += board[x-1][index];
			diagonal1 += board[index][index];//从左上到右下的对角线
			diagonal2 += board[index][SIZE-index-1];//从右下到左上的对角线

			if(horizontal == playerTotal || vertical == playerTotal || diagonal1 == playerTotal || diagonal2 == playerTotal){//两条对角线
				return true;
			}
		}
		return false;
	}

    //调用时isWin函数需要传对应的参数
    public String play(int x,int y){
		checkAxis(x);
		checkAxis(y);
		lastPlayer = nextPlayer();
		setBox(x,y,lastPlayer);
		if(isWin(x,y)){
			return lastPlayer + " is the winner";
		}else if(isDraw()){
			return "The result is draw";
		}else{
			return "No winner";
		}
	}
Git仓库中的源码:https://bitbucket.org/vfarcic/tdd-java-ch03-tic-tac-toe/branch/04-draw
或下面源码
测试源码
import org.junit.Before;
import org.junit.Rule;
import org.junit.Test;
import org.junit.rules.ExpectedException;
import static org.junit.Assert.*;

public class TicTacToeTest{

    @Rule
    public ExpectedException exception = ExpectedException.none();
    private TicTacToe ticTacToe;

    @Before
    public final void before() {
        ticTacToe = new TicTacToe();
    }

    @Test
    public void whenXOutsideBoardThenRuntimeException() {
        exception.expect(RuntimeException.class);
        ticTacToe.play(5, 2);
    }

    @Test
    public void whenYOutsideBoardThenRuntimeException() {
        exception.expect(RuntimeException.class);
        ticTacToe.play(2, 5);
    }

    @Test
    public void whenOccupiedThenRuntimeException() {
        ticTacToe.play(2, 1);
        exception.expect(RuntimeException.class);
        ticTacToe.play(2, 1);
    }

    @Test
    public void givenFirstTurnWhenNextPlayerThenX() {
        assertEquals(''X'', ticTacToe.nextPlayer());
    }

    @Test
    public void givenLastTurnWasXWhenNextPlayerThenO() {
        ticTacToe.play(1, 1);
        assertEquals(''O'', ticTacToe.nextPlayer());
    }

    @Test
    public void whenPlayThenNoWinner() {
        String actual = ticTacToe.play(1, 1);
        assertEquals("No winner", actual);
    }

    @Test
    public void whenPlayAndWholeHorizontalLineThenWinner() {
        ticTacToe.play(1, 1); // X
        ticTacToe.play(1, 2); // O
        ticTacToe.play(2, 1); // X
        ticTacToe.play(2, 2); // O
        String actual = ticTacToe.play(3, 1); // X
        assertEquals("X is the winner", actual);
    }

    @Test
    public void whenPlayAndWholeVerticalLineThenWinner() {
        ticTacToe.play(2, 1); // X
        ticTacToe.play(1, 1); // O
        ticTacToe.play(3, 1); // X
        ticTacToe.play(1, 2); // O
        ticTacToe.play(2, 2); // X
        String actual = ticTacToe.play(1, 3); // O
        assertEquals("O is the winner", actual);
    }

    @Test
    public void whenPlayAndTopBottomDiagonalLineThenWinner() {
        ticTacToe.play(1, 1); // X
        ticTacToe.play(1, 2); // O
        ticTacToe.play(2, 2); // X
        ticTacToe.play(1, 3); // O
        String actual = ticTacToe.play(3, 3); // O
        assertEquals("X is the winner", actual);
    }

    @Test
    public void whenPlayAndBottomTopDiagonalLineThenWinner() {
        ticTacToe.play(1, 3); // X
        ticTacToe.play(1, 1); // O
        ticTacToe.play(2, 2); // X
        ticTacToe.play(1, 2); // O
        String actual = ticTacToe.play(3, 1); // O
        assertEquals("X is the winner", actual);
    }

    @Test
    public void whenAllBoxesAreFilledThenDraw() {
        ticTacToe.play(1, 1);
        ticTacToe.play(1, 2);
        ticTacToe.play(1, 3);
        ticTacToe.play(2, 1);
        ticTacToe.play(2, 3);
        ticTacToe.play(2, 2);
        ticTacToe.play(3, 1);
        ticTacToe.play(3, 3);
        String actual = ticTacToe.play(3, 2);
        assertEquals("The result is draw", actual);
    }

}
实现源码:
    public class TicTacToe {

    private Character[][] board = {{''\0'', ''\0'', ''\0''}, {''\0'', ''\0'', ''\0''}, {''\0'', ''\0'', ''\0''}};
    private char lastPlayer = ''\0'';
    private static final int SIZE = 3;

    public String play(int x, int y) {
        checkAxis(x);
        checkAxis(y);
        lastPlayer = nextPlayer();
        setBox(x, y, lastPlayer);
        if (isWin(x, y)) {
            return lastPlayer + " is the winner";
        } else if (isDraw()) {
            return "The result is draw";
        } else {
            return "No winner";
        }
    }

    public char nextPlayer() {
        if (lastPlayer == ''X'') {
            return ''O'';
        }
        return ''X'';
    }

    private void checkAxis(int axis) {
        if (axis < 1 || axis > SIZE) {
            throw new RuntimeException("X is outside board");
        }
    }

    private void setBox(int x, int y, char lastPlayer) {
        if (board[x - 1][y - 1] != ''\0'') {
            throw new RuntimeException("Box is occupied");
        } else {
            board[x - 1][y - 1] = lastPlayer;
        }
    }

    private boolean isWin(int x, int y) {
        int playerTotal = lastPlayer * SIZE;
        char horizontal, vertical, diagonal1, diagonal2;
        horizontal = vertical = diagonal1 = diagonal2 = ''\0'';
        for (int i = 0; i < SIZE; i++) {
            horizontal += board[i][y - 1];
            vertical += board[x - 1][i];
            diagonal1 += board[i][i];
            diagonal2 += board[i][SIZE - i - 1];
        }
        if (horizontal == playerTotal
                || vertical == playerTotal
                || diagonal1 == playerTotal
                || diagonal2 == playerTotal) {
            return true;
        }
        return false;
    }

    private boolean isDraw() {
        for (int x = 0; x < SIZE; x++) {
            for (int y = 0; y < SIZE; y++) {
                if (board[x][y] == ''\0'') {
                    return false;
                }
            }
        }
        return true;
    }

}
代码覆盖率
如果需要结合JaCoCo,参考我另一篇博文,不过跟本博文中抄录的书籍无关。书中也说了JaCoCo的使用,感兴趣的可以找来阅读。
《在eclipse中使用jacoco插件对测试覆盖进行监控》
小结
我们使用“红灯-绿灯-重构”流程完成了“井字游戏”,这些示例本身都很简单,易于理解。
本章并非要深入探讨复杂的东西,而是要让你养成反复使用“红灯-绿灯-重构”流程的习惯。
你学习了如下内容:开发软件的最简单方式就是将其分成小块;设计方案脱胎于测试,而不是预先采用复杂的方法进行制定;先编写测试并确定未通过后,在着手编写实现代码;确定最后一个测试未通过后,就能肯定它是有效的(你一不小心就会犯错,编写总是能够通过的测试),要实现的功能还不存在;测试未通过后,编写其实现代码;编写实现时,力图使其尽可能简单,只要能让测试通过就行,而不试图提供完美的解决方案;不断重复这个过程,直到认为需要对代码进行重构为止;重构时不能引入任何新功能(即不改变应用程序的行为),而只是对代码进行改进,使其更容易理解和维护。

LeetCode–井字游戏
LeetCode–井字游戏
博客说明
文章所涉及的资料来自互联网整理和个人总结,意在于个人学习和经验汇总,如有什么地方侵权,请联系本人删除,谢谢!
说明
剑指offer,面试16.04
井字游戏
题目
设计一个算法,判断玩家是否赢了井字游戏。输入是一个 N x N 的数组棋盘,由字符" ","X"和"O"组成,其中字符" "代表一个空位。
以下是井字游戏的规则:
- 玩家轮流将字符放入空位(" ")中。
- 第一个玩家总是放字符"O",且第二个玩家总是放字符"X"。
- "X"和"O"只允许放置在空位中,不允许对已放有字符的位置进行填充。
- 当有N个相同(且非空)的字符填充任何行、列或对角线时,游戏结束,对应该字符的玩家获胜。
- 当所有位置非空时,也算为游戏结束。
- 如果游戏结束,玩家不允许再放置字符。
- 如果游戏存在获胜者,就返回该游戏的获胜者使用的字符("X"或"O");如果游戏以平局结束,则返回 "Draw";如果仍会有行动(游戏未结束),则返回 "Pending"。
示例 1:
输入: board = ["O X"," XO","X O"]
输出: "X"
示例 2:
输入: board = ["OOX","XXO","OXO"]
输出: "Draw"
解释: 没有玩家获胜且不存在空位
示例 3:
输入: board = ["OOX","XXO","OX "]
输出: "Pending"
解释: 没有玩家获胜且仍存在空位
提示:
1 <= board.length == board[i].length <= 100
输入一定遵循井字棋规则
Java
思路
使用求和的方法,获取到横、纵、对角线的值,判断对应的值是否达成了全部一致
代码
class Solution {
    public String tictactoe(String[] board) {
        int length = board.length;
        int heng = 0;
        int zong = 0;
        int left = 0;
        int right = 0;
        //是否出现空格
        boolean flag = false;
        for(int i = 0;i<length;i++){
            heng = 0;
            zong = 0;
            for(int j = 0;j<length;j++){
                //记录横纵的值
                heng = heng + (int)board[i].charAt(j);
                zong = zong + (int)board[j].charAt(i);
                if(board[i].charAt(j) == '' ''){
                    flag = true;
                }
            }
            //检查横纵
            if(heng == (int)''X'' * length || zong == (int)''X'' * length){
                return "X";
            }
            if(heng == (int)''O'' * length || zong == (int)''O'' * length){
                return "O";
            }
            //记录斜线的值
            left = left + board[i].charAt(i);
            right = right + board[i].charAt(length-i-1);
        }
        //检查对角线
        if(left == (int)''X'' * length || right == (int)''X'' * length){
            return "X";
        }
        if(left == (int)''O'' * length || right == (int)''O'' * length){
            return "O";
        }
        if(flag){
            return "Pending";
        }
        return "Draw";
    }
}
感谢
leetcode
以及勤劳的自己
关于井字游戏 Python Tkinter 显示“X”和“Y”和井字游戏python课程设计的介绍已经告一段落,感谢您的耐心阅读,如果想了解更多关于*#【Python】【基础知识】【模块】【tkinter】【学用 tkinter 画图 / 制作窗口】、Android Studio 井字游戏、java测试驱动开发(TDD)之《井字游戏》、LeetCode–井字游戏的相关信息,请在本站寻找。
本文标签:


