在这篇文章中,我们将为您详细介绍AndroidTabWidget切换卡的实现应用的内容,并且讨论关于android切换选项卡的相关问题。此外,我们还会涉及一些关于AndroidTabWidget、An
在这篇文章中,我们将为您详细介绍Android TabWidget切换卡的实现应用的内容,并且讨论关于android切换选项卡的相关问题。此外,我们还会涉及一些关于Android TabWidget、Android TabWidget底部显示效果、android tabwidget意图标签刷新每个命中、Android UI控件系列:TabWidget(切换卡)的知识,以帮助您更全面地了解这个主题。
本文目录一览:- Android TabWidget切换卡的实现应用(android切换选项卡)
- Android TabWidget
- Android TabWidget底部显示效果
- android tabwidget意图标签刷新每个命中
- Android UI控件系列:TabWidget(切换卡)
")
Android TabWidget切换卡的实现应用(android切换选项卡)
TabWidget类似于Android 中查看电话薄的界面,通过多个标签切换显示不同内容。要实现这一效果,首先要了解TabHost,它是一个用来存放多个Tab标签的容器。每一个Tab都可以对应自己的布局,比如,电话薄中的Tab布局就是一个List的线性布局了。
要使用TabHost,首先需要通过getTabHost方法来获取TabHost的对象,然后通过addTab方法来向TabHost中添加 Tab。当然每个Tab在切换时都会产生一个事件,要捕捉这个事件需要设置tabactivity的事件监听 setonTabChangedListener。
1、布局文件
<TabHost xmlns:android="http://schemas.android.com/apk/res/android"
android:id="@android:id/tabhost"
android:layout_width="fill_parent"
android:layout_height="fill_parent" >
<LinearLayout
android:layout_width="fill_parent"
android:layout_height="fill_parent"
android:orientation="vertical" >
<TabWidget
android:id="@android:id/tabs"
android:layout_width="fill_parent"
android:layout_height="wrap_content" />
<FrameLayout
android:id="@android:id/tabcontent"
android:layout_width="fill_parent"
android:layout_height="fill_parent" >
<TextView
android:id="@+id/textview1"
android:layout_width="fill_parent"
android:layout_height="fill_parent"
android:text="Linux"
android:textColor="#FF0000" />
<TextView
android:id="@+id/textview2"
android:layout_width="fill_parent"
android:layout_height="fill_parent"
android:text="MAC"
android:textColor="#385E0F" />
<TextView
android:id="@+id/textview3"
android:layout_width="fill_parent"
android:layout_height="fill_parent"
android:text="Windows"
android:textColor="#1E90FF" />
</FrameLayout>
</LinearLayout>
</TabHost>
2、修改MainActivity,注意是继承自tabactivity
public class MainActivity extends tabactivity {

 private TabHost tabHost;

 @Override
 protected void onCreate(Bundle savedInstanceState) {
 super.onCreate(savedInstanceState);
 setContentView(R.layout.activity_main);

 tabHost = getTabHost();

 addTab();// 添加标签
 // 设置TabHost背景颜色
 tabHost.setBackgroundColor(Color.argb(150,20,80,150));
 // 设置TabHost背景图片资源
 tabHost.setBackgroundResource(R.drawable.ic_launcher);
 // 设置当前显示哪一个标签 我的理解就是当你第一次启动程序默认显示那个标签 这里是指定的选项卡的ID从0开始
 tabHost.setCurrentTab(0);
 // 标签切换事件处理,setonTabChangedListener 注意是标签切换事件不是点击事件,而是从一个标签切换到另外一个标签会触发的事件
 tabHost.setonTabChangedListener(new OnTabchangelistener() {
  @Override
  public void onTabChanged(String tabId) {
  AlertDialog.Builder builder = new AlertDialog.Builder(MainActivity.this);
  Dialog dia;
  builder.setTitle("提示");
  builder.setMessage("当前选中了" + tabId + "标签");
  builder.setPositiveButton("确定",new OnClickListener() {
   @Override
   public void onClick(DialogInterface dialog,int which) {
   dialog.cancel();
   }
  });
  dia = builder.create();
  dia.show();
  }
 });
 }

 // 为TabHost添加标签 新建一个newTabSped(new TabSpec) 设置其标签和图标(setIndicator)、设置内容(setContent)
 // TabSpec是TabHost的内部类 TabHost对象的 newTabSpec()方法返回一个TabSpec对象
 // 源码里边是这么写的 public TabSpec newTabSpec(String tag)
 // { return new TabSpec(tag); }
 private void addTab() {
 tabHost.addTab(tabHost
  .newTabSpec("tab1")
  .setIndicator("TAB1",getResources().getDrawable(R.drawable.ic_launcher))// setIndicator()此方法用来设置标签和图表
  .setContent(R.id.textview1));
 // 指定内容为一个TextView --->public TabHost.TabSpec setContent(int viewId) 此方法需要一个 viewId 作为参数
 tabHost.addTab(tabHost
  .newTabSpec("tab2")
  .setIndicator("TAB2",getResources().getDrawable(R.drawable.ic_launcher))
  .setContent(R.id.textview2));

 tabHost.addTab(tabHost
  .newTabSpec("tab3")
  .setIndicator("TAB3",getResources().getDrawable(R.drawable.ic_launcher))
  .setContent(R.id.textview3));
 }
}
3、运行程序:如下!


Android TabWidget
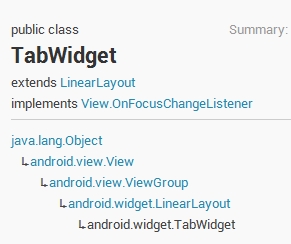
显示选项卡标签的列表,用于代表父选项卡集合的每一页。当前 widget 的容器对象是 TabHost。当用户选择一个选项卡时,此对象给父容器对象 TabHost 发送一个消息,告诉 TabHost 切换到对应的页面显示。此对象上的很多方法,你通常不会直接使用。容器 TabHost 被用来添加标签,添加并管理回调函数。你可能会调用此对象以迭代选项卡列表,或者调整选项卡列表的布局,但大多数方法应该是通过容器 TabHost 对象调用。
XML 属性
| 属性名称 |
描述 |
| android:divider |
可绘制对象,被绘制在选项卡窗口间充当分割物。 |
| android:tabStripEnabled |
确定是否在选项卡绘制 |
| android:tabStripLeft |
被用来绘制选项卡下面的分割线左边部分的可视化对象。 |
| android:tabStripRight |
被用来绘制选项卡下面的分割线右边部分的可视化对象。 |
公共方法
public void addView (View child)
增加子视图。如果子视图没有设置布局参数,那么将为子视图设置此 ViewGroup 默认的布局参数。
参数
child 新增的子视图
public void childDrawableStateChanged (View child)
如果调用 addStatesFromChildren 函数返回 true,刷新此组的可视化对象的状态(包括它的子元素的状态)。
参数
child 可视化对象状态被改变的子元素。
public void dispatchDraw (Canvas canvas)
绘制时调用此方法来绘制子视图。派生类在被绘制之前,为获取控制可能会重写此方法(但必须在它自己的视图已经被绘制之后)。
参数
canvas 绘制视图的画布 (canvas)
public void focusCurrentTab (int index)
设置当前选项卡并且让其获得焦点。此方法确保获取焦点的选项卡窗口匹配选中的窗口,一般情况下类似 setCurrentTab(int)。通常当我们通过操作 UI 实现时,这些都不是问题,
因为 UI 负责调用 TabWidget.onFocusChanged(),但如果我们通过程序控制选中选项卡窗口,那么我们就必须确认保持焦点。(译者注:setCurrentTab(int) 执行后,选中指定索引的选项卡窗口,但不获取焦点。focusCurrentTab(int) 执行后,不仅通过调用 setCurrentTab(int)
选中指定索引的选项卡窗口还获取焦点。)
参数
index 你想要设置焦点(橘色高亮)并且选中(选项卡被至于部件 widget 的前端)的选项卡。
参见
setCurrentTab(int)
public View getChildTabViewAt (int index)
返回位于指定索引位置的选项卡标识符的视图
参数
index 选项卡指示符视图返回的从零开始的索引
返回值
在提供的索引位置上的选项卡指示符视图
public int getTabCount ()
返回选项卡的数量
返回值
选项卡指示符视图的数量
public boolean isStripEnabled ()
指明选项卡指示符的底部分隔线是否绘制
public void onFocusChange (View v, boolean hasFocus)
当视图的焦点状态被改变时调用。
参数
v 状态变化的视图
hasFocus 视图的新焦点状态。
public void sendAccessibilityEventUnchecked (AccessibilityEvent event)
处理用于发送 AccessibilityEvent的请求。如果再发送之前调度事件,本方法不保证可访问性检查。可以通过调用者调用 isEnabled()检查。
参数
event 事件
public void setCurrentTab (int index)
设置当前选项卡。此方法被用来将选项卡置于 widget 的前部,并且通知其它的 UI 元素,一个不同的选项卡被调整到了前台。注意,这不同于传统的 “焦点”,是从视图逻辑的焦点。
例如,如果我们在选项卡式视图中有一个列表,一个用户可能会上下移动列表,通过列表选项移动 UI 焦点(橘色高亮)。光标的移动并不影响选项卡的选中状态,因为滚动 是在同一个选项卡上的。选中的选项卡仅仅当我们在选项卡上切换时(在此例中,从列表视图移到下一选项卡视图)更改。如果想要一次性的设置焦点并选中选项卡,请使用 setCurrentTab(int)。
正常情况下,视图逻辑关注调整焦点,除非你规避了 UI,你可能仅仅将你的兴趣集中在这里。
参数
index 你想要指做选中选项卡的选项卡索引(选项卡被显示到 widget 的前部)
参见
focusCurrentTab(int)
public void setDividerDrawable (Drawable drawable)
设置用于在选项窗口指示符间分隔的可绘制对象
参数
drawable 用于分隔的可绘制对象
public void setDividerDrawable (int resId)
设置用于在两个选项卡标识符之间进行分隔的可绘制对象
参数
resId 被用来分隔的可绘制对象的资源标识
public void setEnabled (boolean enabled)
设置当前视图的启用状态。子类的不同而其对应的启用状态的解释也不相同。
参数
enabled 是否启动
public void setLeftStripDrawable (int resId)
设置被用来当作选项卡指示符下面的分割线,左边部分的可绘制对象。
参数
resId the 被用来当作左边分隔线的可绘制对象的资源标识符
public void setLeftStripDrawable (Drawable drawable)
设置被用来当作选项卡指示符下面的分割线,左边部分的可绘制对象。
参数
drawable 左边分隔线的可绘制对象
public void setRightStripDrawable (int resId)
设置被用来当作选项卡指示符下面的分割线,右边部分的可绘制对象。
参数
resId 被用来当作右边分隔线的可绘制对象的资源标识符
public void setRightStripDrawable (Drawable drawable)
设置被用来当作选项卡指示符下面的分割线,右边部分的可绘制对象。
参数
drawable 右边分隔线的可绘制对象
public void setStripEnabled (boolean stripEnabled)
控制选项卡指示符底部的分隔线是否绘制。默认是绘制。如果用户为选项卡指示符指定一个定制的视图,那么 TabHost 类调用此方法以禁用绘制底部分割线。
参数
stripEnabled 如果需要绘制底部分割线为 true
受保护方法
protected int getChildDrawingOrder (int childCount, int i)
返回要绘制的子元素在当前迭代中的索引。如果你需要修改子元素的绘制顺序,可以覆写此方法。默认情况下返回参数 i 值。
注意:为使此方法被调用,你必须先通过调用 setChildrenDrawingOrderEnabled(boolean)启用子元素排序
参数
i 当前的迭代值
返回值
将要绘制的子元素在当前迭代的索引
protected void onSizeChanged (int w, int h, int oldw, int oldh)
布局过程中,当此视图的大小发生改变时被调用的。如果你只是添加到视图的层次结构,你调用时可以使用 0 当作之前的值(old value)。
参数
w 此视图的当前宽度
h 此视图的当前高度
oldw Old 此视图之前的宽度
oldh 此视图之前的高度
补充
术语对照
indicator 指示符
drawable 可绘制对象
iteration 迭代
strips 分割线
文章链接
Android 选项卡 (TabWidget) 例子
{Android 学习指南}TabWidget
Android 将 TAB 选项卡放在屏幕底部

Android TabWidget底部显示效果
TabHost控件默认使用LinearLayout包裹TabWidget和FrameLayout,布局文件如下:
<TabHost xmlns:android="http://schemas.android.com/apk/res/android"
 android:id="@android:id/tabhost"
 android:layout_width="match_parent"
 android:layout_height="match_parent" >

 <LinearLayout
  android:layout_width="match_parent"
  android:layout_height="match_parent"
  android:orientation="vertical" >

  <TabWidget
   android:id="@android:id/tabs"
   android:layout_width="match_parent"
   android:layout_height="wrap_content" >
  </TabWidget>

  <FrameLayout
   android:id="@android:id/tabcontent"
   android:layout_width="match_parent"
   android:layout_height="match_parent" >
  </FrameLayout>
 </LinearLayout>
</TabHost>
这样TabWidget显示在顶部,如果想把TabWidget放到底部有三种方式。
方式一:将TabHost中默认的LinearLayout换成RelativeLayout,并给TabWidget添加Android:layout_alignParentBottom="true"
<TabHost xmlns:android="http://schemas.android.com/apk/res/android"
 android:id="@+id/tabhost"
 android:layout_width="match_parent"
 android:layout_height="match_parent"
 android:layout_alignParentLeft="true"
 android:layout_alignParentTop="true" >
 <RelativeLayout
  android:layout_width="match_parent"
  android:layout_height="match_parent">

  <TabWidget
   android:id="@android:id/tabs"
   android:layout_width="match_parent"
   android:layout_height="wrap_content"
   android:layout_alignParentBottom="true">
  </TabWidget>

  <FrameLayout
   android:id="@android:id/tabcontent"
   android:layout_width="match_parent"
   android:layout_height="match_parent" >
  </FrameLayout>
 </RelativeLayout>
</TabHost>
方式二:
1、将LinearLayout中TabWidget和FrameLayout交换位置
2、设置FrameLayout的属性:android:layout_weight="1" android:layout_height="0dp"
<TabHost xmlns:android="<a target=_blank href="http://schemas.android.com/apk/res/android" rel="external nofollow" >http://schemas.android.com/apk/res/android</a>"
 android:id="@+id/tabhost"
 android:layout_width="match_parent"
 android:layout_height="match_parent"
 android:layout_alignParentLeft="true"
 android:layout_alignParentTop="true" ></p><p> <LinearLayout
  android:layout_width="match_parent"
  android:layout_height="match_parent"
  android:orientation="vertical" >

  <FrameLayout
   android:id="@android:id/tabcontent"
   android:layout_width="match_parent"
   android:layout_height="0dp"
   android:layout_weight="1" >
  </FrameLayout>

  <TabWidget
   android:id="@android:id/tabs"
   android:layout_width="match_parent"
   android:layout_height="wrap_content"
   android:layout_alignParentBottom="true">
  </TabWidget>
 </LinearLayout>
</TabHost>
方式三:
1、将TabWidget移动到LinearLayout标签以下
2、在FrameLayout中加入属性:android:layout_gravity="top"
3、在TabWidget中加入属性:android:layout_gravity="bottom"
<TabHost xmlns:android="http://schemas.android.com/apk/res/android"
 android:id="@+id/tabhost"
 android:layout_width="match_parent"
 android:layout_height="match_parent"
 android:layout_alignParentLeft="true"
 android:layout_alignParentTop="true" >

 <LinearLayout
  android:layout_width="match_parent"
  android:layout_height="match_parent"
  android:orientation="vertical" >

  <FrameLayout
   android:id="@android:id/tabcontent"
   android:layout_width="match_parent"
   android:layout_height="match_parent"
   android:layout_gravity="top" >
  </FrameLayout>
 </LinearLayout>
 <TabWidget
  android:id="@android:id/tabs"
  android:layout_width="match_parent"
  android:layout_height="wrap_content"
  android:layout_gravity="bottom">
 </TabWidget>
</TabHost>
以上三种方式在Android4.2下测试通过。
以上就是本文的全部内容,希望对大家的学习有所帮助,也希望大家多多支持编程小技巧。

android tabwidget意图标签刷新每个命中
每次用户单击选项卡时,我想刷新并调用onrereate方法的子意图选项卡.
public class Tabs3 extends tabactivity {

    @Override
    protected void onCreate(Bundle savedInstanceState) {
        super.onCreate(savedInstanceState);

        final TabHost tabHost = getTabHost();

        tabHost.addTab(tabHost.newTabSpec("tab1")
                .setIndicator("list")
                .setContent(new Intent(this,List1.class)));

        tabHost.addTab(tabHost.newTabSpec("tab2")
                .setIndicator("photo list")
                .setContent(new Intent(this,List8.class)));

        // This tab sets the intent flag so that it is recreated each time
        // the tab is clicked.
        tabHost.addTab(tabHost.newTabSpec("tab3")
                .setIndicator("destroy")
                .setContent(new Intent(this,Controls2.class)
                        .addFlags(Intent.FLAG_ACTIVITY_CLEAR_TOP)));
    }
}
解决方法
")
Android UI控件系列:TabWidget(切换卡)
tab选项卡类似与电话本的界面,通过多个标签切换不同的内容,要实现这个效果,首先要知道tabhost,它是一个用来存放多个tab标签的容器,每一个tab都可以对应自己的布局,比如,电话本中的tab布局就是一个线性布局
要使用tabhost,首先要通过gettabhost方法获取tabhost的对象,然后通过addtab方法来向tabhost中添加tab,当然每个tab在切换时都会产生一个事件,要捕捉这个事件,需要设置tabactivity的事件监听setontabchangedlistener
下面是个小例子:
tabtest.java
package org.hualang.tab;

import android.app.Activity;
import android.app.TabActivity;
import android.graphics.Color;
import android.os.Bundle;
import android.widget.TabHost;
import android.widget.Toast;
import android.widget.TabHost.OnTabChangeListener;

public class TabTest extends TabActivity {
    /** Called when the activity is first created. */
        TabHost tabhost;
    @Override
    public void onCreate(Bundle savedInstanceState) {
        super.onCreate(savedInstanceState);
        setContentView(R.layout.main);
        //取得TabHost对象
        tabhost = getTabHost();
        //为TabHost添加标签
        //新建一个newTabSpec(newTabSpec)
        //设置其标签和图标(setIndicator)
        //设置内容(setContent)
        tabhost.addTab(tabhost.newTabSpec("tab1")
                        .setIndicator("TAB 1",getResources().getDrawable(R.drawable.img1))
                        .setContent(R.id.text1));
        tabhost.addTab(tabhost.newTabSpec("tab2")
                .setIndicator("TAB 2",getResources().getDrawable(R.drawable.img2))
                .setContent(R.id.text2));
        tabhost.addTab(tabhost.newTabSpec("tab3")
                .setIndicator("TAB 3",getResources().getDrawable(R.drawable.img3))
                .setContent(R.id.text3));
        //设置TabHost的背景颜色
        //tabhost.setBackgroundColor(Color.argb(150,22,70,150));
        //设置TabHost的背景图片资源
        tabhost.setBackgroundResource(R.drawable.bg0);
        //设置当前显示哪个标签
        tabhost.setCurrentTab(0);
        //标签切换事件处理,setOnTabChangedListener
        tabhost.setOnTabChangedListener(new OnTabChangeListener()
        {
                public void onTabChanged(String tabId)
                {
                        Toast toast=Toast.makeText(getApplicationContext(), "现在是"+tabId+"标签", Toast.LENGTH_SHORT);
                        toast.show();
                }
        });

    }
}main.xml
<?xml version="1.0" encoding="utf-8"?>
<TabHost xmlns:android="http://schemas.android.com/apk/res/android"
    android:id="@android:id/tabhost"
    android:layout_width="fill_parent"
    android:layout_height="fill_parent">
    <LinearLayout
        android:orientation="vertical"
        android:layout_width="fill_parent"
        android:layout_height="fill_parent">
        <TabWidget
            android:id="@android:id/tabs"
            android:layout_width="fill_parent"
            android:layout_height="wrap_content" />
        <FrameLayout
            android:id="@android:id/tabcontent"
            android:layout_width="fill_parent"
            android:layout_height="fill_parent">
            <TextView
                android:id="@+id/text1"
                android:layout_width="fill_parent"
                android:layout_height="fill_parent"
                android:text="选项卡1" />
            <TextView
                android:id="@+id/text2"
                android:layout_width="fill_parent"
                android:layout_height="fill_parent"
                android:text="选项卡2" />
            <TextView
                android:id="@+id/text3"
                android:layout_width="fill_parent"
                android:layout_height="fill_parent"
                android:text="选项卡3" />
            </FrameLayout>
    </LinearLayout>
</TabHost>运行效果如下:

以上就是Android UI控件系列:TabWidget(切换卡)的内容。
我们今天的关于Android TabWidget切换卡的实现应用和android切换选项卡的分享已经告一段落,感谢您的关注,如果您想了解更多关于Android TabWidget、Android TabWidget底部显示效果、android tabwidget意图标签刷新每个命中、Android UI控件系列:TabWidget(切换卡)的相关信息,请在本站查询。
本文标签:


