如果您对AndroidStatusBar透明化方法(不同的版本适配)感兴趣,那么本文将是一篇不错的选择,我们将为您详在本文中,您将会了解到关于AndroidStatusBar透明化方法(不同的版本适配
如果您对Android StatusBar 透明化方法(不同的版本适配)感兴趣,那么本文将是一篇不错的选择,我们将为您详在本文中,您将会了解到关于Android StatusBar 透明化方法(不同的版本适配)的详细内容,我们还将为您解答android设置透明状态栏的相关问题,并且为您提供关于''statusBarFrame'' was deprecated in iOS 13.0: Use the statusBarManager property of the win...、(2017)Android技能状态栏(StatusBar)解析、Android - Hide the status bar、android 4.0 全屏 屏蔽下面的 status bar的有价值信息。
本文目录一览:- Android StatusBar 透明化方法(不同的版本适配)(android设置透明状态栏)
- ''statusBarFrame'' was deprecated in iOS 13.0: Use the statusBarManager property of the win...
- (2017)Android技能状态栏(StatusBar)解析
- Android - Hide the status bar
- android 4.0 全屏 屏蔽下面的 status bar
(android设置透明状态栏)")
Android StatusBar 透明化方法(不同的版本适配)(android设置透明状态栏)
透明状态栏(StatusBar)的全适配
状态栏指定android手机上顶部显示手机状态信息的位置。
透明状态栏是android 自4.4开始新加入的功能,他可以是状态栏根据我们自己想要的颜色进行定义,使titleBar能够和状态栏融为一体,增加沉浸感。
咱们需要对不同的版本适配StatusBar,下面咱们一个一个看
values/styles.xml
<resources>
  <style name="Theme.AppTheme.TranslucentStatusBar" parent="Theme.AppCompat.Light.NoActionBar" />
</resources>
values-v19/styles.xml
<resources>
  <style name="Theme.AppTheme.TranslucentStatusBar" parent="Theme.AppCompat.Light.NoActionBar">
    <item name="android:windowTranslucentStatus">true</item>
  </style>
</resources>
values-21/styles.xml
<resources>
  <style name="Theme.AppTheme.TranslucentStatusBar" parent="Theme.AppCompat.Light.NoActionBar">
    <item name="android:statusBarColor">@android:color/transparent</item>
  </style>
</resources>
values-23/styles.xml
<resources>
  <style name="Theme.AppTheme.TranslucentStatusBar" parent="Theme.AppCompat.Light.NoActionBar">
    <item name="android:statusBarColor">@android:color/transparent</item>
    <item name="android:windowLightStatusBar">true</item>
  </style>
</resources>
具体使用
public class ImagePreActivity extends AppCompatActivity {

  @Override
  protected void onCreate(Bundle savedInstanceState) {
    super.onCreate(savedInstanceState);
    if (Build.VERSION.SDK_INT >= Build.VERSION_CODES.LOLLIPOP) {
      findViewById(android.R.id.content).setsystemUIVisibility(
          View.SYstem_UI_FLAG_LAYOUT_FULLSCREEN | View.SYstem_UI_FLAG_LAYOUT_STABLE);
    }
    setContentView(R.layout.activity_image_pre_layout);
  }
}
<activity
  android:name=".ImagePreActivity"
  android:theme="@style/Theme.AppTheme.TranslucentStatusBar" />
显示效果
4.3以下

4.4

5.0

6.0

以上就是本文的全部内容,希望对大家的学习有所帮助,也希望大家多多支持编程小技巧。
您可能感兴趣的文章:
- Android实现状态栏(statusbar)渐变效果的示例
- Android编程实现禁止StatusBar下拉的方法
- Android有效获取状态栏(StatusBar)高度的方法

''statusBarFrame'' was deprecated in iOS 13.0: Use the statusBarManager property of the win...
★★★★★★★★★★★★★★★★★★★★★★★★★★★★★★★★★★★★★★★★
➤微信公众号:山青咏芝(let_us_code)
➤博主域名:https://www.zengqiang.org
➤GitHub 地址:https://github.com/strengthen/LeetCode
➤原文地址:https://www.cnblogs.com/strengthen/p/12109327.html
➤如果链接不是山青咏芝的博客园地址,则可能是爬取作者的文章。
➤原文已修改更新!强烈建议点击原文地址阅读!支持作者!支持原创!
★★★★★★★★★★★★★★★★★★★★★★★★★★★★★★★★★★★★★★★★
由于未捕获的异常 “NSInternalInconsistencyException” 而终止应用程序,原因:“在 UIApplication 上名为 - statusBar 或 - statusBarWindow 的应用程序:必须更改此代码,因为不再有状态栏或状态栏窗口。而是在窗口场景上使用 statusBarManager 对象。”
但是目前尚不清楚应如何使用它来更改颜色,因为keyWindow?.windowScene?.statusBarManager它似乎不包含与之相关的任何内容。
 1 //MARK: 扩展UIApplication
 2 extension UIApplication {
 3     var statusBarUIView: UIView? {
 4
 5         if #available(iOS 13.0, *) {
 6             let tag = 3848245
 7
 8             let keyWindow = UIApplication.shared.connectedScenes
 9                 .map({$0 as? UIWindowScene})
10                 .compactMap({$0})
11                 .first?.windows.first
12
13             if let statusBar = keyWindow?.viewWithTag(tag) {
14                 return statusBar
15             } else {
16                 let height = keyWindow?.windowScene?.statusBarManager?.statusBarFrame ?? .zero
17                 let statusBarView = UIView(frame: height)
18                 statusBarView.tag = tag
19                 statusBarView.layer.zPosition = 999999
20
21                 keyWindow?.addSubview(statusBarView)
22                 return statusBarView
23             }
24
25         } else {
26
27             if responds(to: Selector(("statusBar"))) {
28                 return value(forKey: "statusBar") as? UIView
29             }
30         }
31         return nil
32 }
Android技能状态栏(StatusBar)解析")
(2017)Android技能状态栏(StatusBar)解析
这里先说明下
- android 4.4版本以上才支持开发者对StatusBar全透明
- android 5.0版本以上支持 可以修改 StatusBar 的颜色
都知道大家都是<图片党加项目党>,所以我就用文字和工程项目给大家讲解我的理解,有误还请不吝赐教啊。
工程中的Stytes.xml文件:
  <!-- Base application theme.(APP的基本主题设置 白色底无导航栏主题) -->
    <style name="AppTheme" parent="Theme.AppCompat.Light.NoActionBar">
        <!-- Customize your theme here. -->
        <item name="colorPrimary">@color/colorPrimary</item>
        <item name="colorPrimaryDark">@color/colorPrimaryDark</item>
        <item name="colorAccent">@color/colorAccent</item>
    </style>
item的中三个参数都是啥呢? 看下面(图片党的看来)
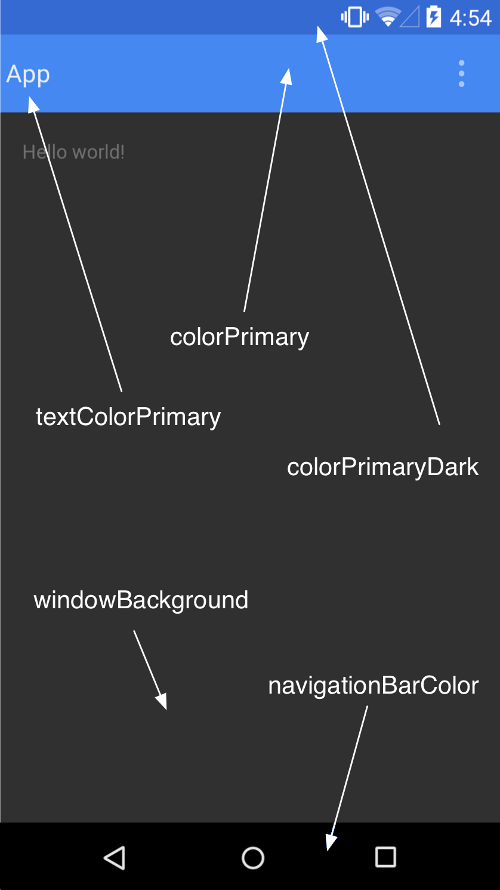
colorPrimary:顶部导航栏颜色(一般自定义布局,忽略)
colorPrimaryDark:状态栏背景颜色
colorAccent是光标,编辑框底下横线的颜色
对于属性还有很多妙用,这里在贴出一张图,大家可以去查阅下(深究的去看源码这里推荐一个网站http://androidxref.com/)或者(在你所装的SDK的这个目录android-sdk-windows\platforms\android-3\data\res\values 有个themes.xml的文件!)
<style name="Theme.Light">
<item name="windowBackground">@android:drawable/screen_background_selector_light</item>
<item name="colorBackground">@android:color/background_light</item>
<item name="colorForeground">@color/bright_foreground_light</item>
<item name="colorForegroundInverse">@android:color/bright_foreground_light_inverse</item>
<item name="textColorPrimary">@android:color/primary_text_light</item>
<item name="textColorSecondary">@android:color/secondary_text_light</item>
<item name="textColorTertiary">@android:color/tertiary_text_light</item>
<item name="textColorPrimaryInverse">@android:color/primary_text_dark</item>
<item name="textColorSecondaryInverse">@android:color/secondary_text_dark</item>
<item name="textColorTertiaryInverse">@android:color/tertiary_text_dark</item>
<item name="textColorPrimaryDisableOnly">@android:color/primary_text_light_disable_only</item>
<item name="textColorPrimaryInverseDisableOnly">@android:color/primary_text_dark_disable_only</item>
<item name="textColorPrimaryNoDisable">@android:color/primary_text_light_nodisable</item>
<item name="textColorSecondaryNoDisable">@android:color/secondary_text_light_nodisable</item>
<item name="textColorPrimaryInverseNoDisable">@android:color/primary_text_dark_nodisable</item>
<item name="textColorSecondaryInverseNoDisable">@android:color/secondary_text_dark_nodisable</item>
<item name="textColorHint">@android:color/hint_foreground_light</item>
<item name="textColorHintInverse">@android:color/hint_foreground_dark</item>
<item name="textColorHighlight">@android:color/highlighted_text_light</item>
<item name="textColorHighlightInverse">@android:color/highlighted_text_dark</item>
<item name="textColorLink">@android:color/link_text_light</item>
<item name="textColorLinkInverse">@android:color/link_text_dark</item>
<item name="editTextColor">@android:color/primary_text_light</item>
<item name="listChoiceBackgroundIndicator">@android:drawable/list_selector_background</item>
<item name="activatedBackgroundIndicator">@android:drawable/activated_background_light</item>
<item name="quickContactBadgeOverlay">@android:drawable/quickcontact_badge_overlay_light</item>
<item name="popupWindowStyle">@android:style/Widget.PopupWindow</item>
<item name="textCheckMark">@android:drawable/indicator_check_mark_light</item>
<item name="textCheckMarkInverse">@android:drawable/indicator_check_mark_dark</item>
<item name="gestureOverlayViewStyle">@android:style/Widget.GestureOverlayView.White</item>
<item name="expandableListViewStyle">@android:style/Widget.ExpandableListView.White</item>
<item name="listViewStyle">@android:style/Widget.ListView.White</item>
<item name="listDivider">@drawable/divider_horizontal_bright</item>
<item name="listSeparatorTextViewStyle">@android:style/Widget.TextView.ListSeparator.White</item>
<item name="progressBarStyle">@android:style/Widget.ProgressBar.Inverse</item>
<item name="progressBarStyleSmall">@android:style/Widget.ProgressBar.Small.Inverse</item>
<item name="progressBarStyleLarge">@android:style/Widget.ProgressBar.Large.Inverse</item>
<item name="progressBarStyleInverse">@android:style/Widget.ProgressBar</item>
<item name="progressBarStyleSmallInverse">@android:style/Widget.ProgressBar.Small</item>
<item name="progressBarStyleLargeInverse">@android:style/Widget.ProgressBar.Large</item>
<item name="actionModeCutDrawable">@android:drawable/ic_menu_cut_holo_light</item>
<item name="actionModeCopyDrawable">@android:drawable/ic_menu_copy_holo_light</item>
<item name="actionModePasteDrawable">@android:drawable/ic_menu_paste_holo_light</item>
<item name="actionModeSelectAllDrawable">@android:drawable/ic_menu_selectall_holo_light</item>
<item name="actionModeShareDrawable">@android:drawable/ic_menu_share_holo_light</item>
<item name="actionModeFindDrawable">@android:drawable/ic_menu_find_holo_light</item>
<item name="actionModeWebSearchDrawable">@android:drawable/ic_menu_search_holo_light</item>
<item name="actionModeBackground">@android:drawable/cab_background_top_holo_light</item>
<item name="actionModeSplitBackground">@android:drawable/cab_background_bottom_holo_light</item>
<!-- SearchView attributes -->
<item name="searchDropdownBackground">@android:drawable/search_dropdown_light</item>
<item name="searchViewTextField">@drawable/textfield_searchview_holo_light</item>
<item name="searchViewTextFieldRight">@drawable/textfield_searchview_right_holo_light</item>
<item name="searchViewCloseIcon">@android:drawable/ic_clear_holo_light</item>
<item name="searchViewSearchIcon">@android:drawable/ic_search_api_holo_light</item>
<item name="searchViewGoIcon">@android:drawable/ic_go_search_api_holo_light</item>
<item name="searchViewVoiceIcon">@android:drawable/ic_voice_search_api_holo_light</item>
<item name="searchViewEditQuery">@android:drawable/ic_commit_search_api_holo_light</item>
<item name="detailsElementBackground">@android:drawable/panel_bg_holo_light</item>
<item name="mediaRouteButtonStyle">@android:style/Widget.DeviceDefault.Light.MediaRouteButton</item>
<item name="findOnPageNextDrawable">@android:drawable/ic_find_next_holo_light</item>
<item name="findOnPagePreviousDrawable">@android:drawable/ic_find_previous_holo_light</item>
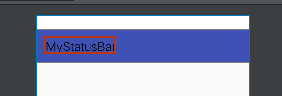
</style>项目实践:->https://git.oschina.net/huagnzhibo123/mystatusbar.git
-
状态栏为白色:
在styles.xml的指定app的主题下修改colorPrimaryDark的颜色 -
  <style name="AppTheme" parent="Theme.AppCompat.Light">
        <!-- Customize your theme here. -->
        <item name="colorPrimary">@color/colorPrimary</item>
        <item name="colorPrimaryDark">@android:color/white</item><!--单单设置状态栏bg颜色-->
        <item name="colorAccent">@color/colorAccent</item>
    </style>
效果图
这里底色是白色了,但是状态栏字体却不见了(字体颜色默认白色),这怎么能容忍呢?查了下文档,android系统中只有6.0以上支持状态栏高亮,也就是字体为黑色.
 <style name="AppTheme" parent="Theme.AppCompat.Light">
        <!-- Customize your theme here. -->
        <item name="colorPrimary">@color/colorPrimary</item>
        <item name="colorPrimaryDark">@android:color/white</item><!--单单设置状态栏bg颜色 发现字体颜色也为白色(难看)-->
       <item name="android:windowLightStatusBar">true</item><!--6.0以上(黑色字体)-->
        <item name="colorAccent">@color/colorAccent</item>
    </style>
对于低于6.0的系统只能用系统的默认字体颜色为白色了,想小米,魅族有各自提供的接口实现(http://www.jianshu.com/p/7f5a9969be53)
- 状态栏为透明(布局占用状态栏)
在很多场景中,都会使用到布局占用状态栏的高度,整个页面统一化,好看啊,比如这张: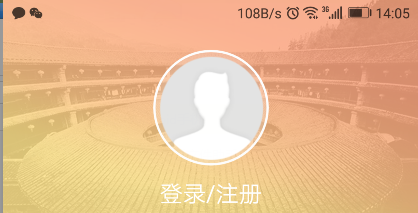
实现步骤:
1.使得布局占用状态栏高度
2.状态透明化
重新建立一个TranActivity 这里重新指定主题为:
 <style name="TranActivityTheme" parent="Theme.AppCompat.Light.NoActionBar">
        <!-- Customize your theme here. -->
    </style>


在manifest清单中为这个TranActiivty指定无导航栏主题
布局文件(使得布局占用状态栏高度):
<?xml version="1.0" encoding="utf-8"?>
<RelativeLayout xmlns:android="http://schemas.android.com/apk/res/android"
    xmlns:app="http://schemas.android.com/apk/res-auto"
    xmlns:tools="http://schemas.android.com/tools"
    android:layout_width="match_parent"
    android:layout_height="match_parent"
    android:fitsSystemWindows="false"
    tools:context="lixiaoqian.com.mystatusbar.TranActivity">
    <!--注意  fitsSystemWindows 属性:false是不考虑系统的布局,直接占用状态栏高度-->
    <ImageView
        android:id="@+id/imageView"
        android:layout_width="match_parent"
        android:layout_height="match_parent"
        android:background="@color/colorAccent"
         />
</RelativeLayout>
状态栏透明化:
这里想通过xml中的状态栏颜色改变为透明,实践是失败的,目前的方案是通过代码设置状态栏为全透明:
public class TranActivity extends AppCompatActivity {

    @Override
    protected void onCreate(Bundle savedInstanceState) {
        super.onCreate(savedInstanceState);
        tranStatusBar();
        setContentView(R.layout.activity_tran);
    }

    /**
     * 状态栏透明化
     */
    private void tranStatusBar() {
        getWindow().requestFeature(Window.FEATURE_NO_TITLE);
        if(Build.VERSION.SDK_INT >= Build.VERSION_CODES.LOLLIPOP) {
            Window window = getWindow();
            window.clearFlags(WindowManager.LayoutParams.FLAG_TRANSLUCENT_STATUS
                    | WindowManager.LayoutParams.FLAG_TRANSLUCENT_NAVIGATION);
            window.getDecorView().setSystemUiVisibility(View.SYSTEM_UI_FLAG_LAYOUT_FULLSCREEN
                    | View.SYSTEM_UI_FLAG_LAYOUT_HIDE_NAVIGATION
                    | View.SYSTEM_UI_FLAG_LAYOUT_STABLE);
            window.addFlags(WindowManager.LayoutParams.FLAG_DRAWS_SYSTEM_BAR_BACKGROUNDS);
            /*window.setStatusBarColor(Color.TRANSPARENT);
            window.setNavigationBarColor(Color.TRANSPARENT);*/ //可以不用了
        }
    }
}
代码中主要的是tranStatusBar的实现逻辑,其中有几个需要解释下:
clearFlags,setFlags,addFlags 都是对window窗体进行修改:
FLAG_TRANSLUCENT_STATUS: 透明状态栏
FLAG_TRANSLUCENT_NAVIGATION:透明底部导航栏
SYSTEM_UI_FLAG_LAYOUT_FULLSCREEN:全屏模式
SYSTEM_UI_FLAG_LAYOUT_STABLE:显示顶部状态栏
补充 :
对于华为机型中底部有虚拟导航栏,在设置全屏时,会导致导航栏遮住布局,我么的目的是 占据顶部,不占底部
所以这里提供另一种思路(5.0以上)
if (Build.VERSION.SDK_INT >= 21) {
View decorView = getWindow().getDecorView();
int option = View.SYSTEM_UI_FLAG_LAYOUT_FULLSCREEN
| View.SYSTEM_UI_FLAG_LAYOUT_STABLE;
decorView.setSystemUiVisibility(option);
getWindow().setStatusBarColor(Color.TRANSPARENT);
}
ActionBar actionBar = getSupportActionBar();
actionBar.hide();
View.setSystemUiVisibility(int visibility)中,visibility是Mode与Layout任意取值的组合,可传入的实参为:
Mode
- View.SYSTEM_UI_FLAG_LOW_PROFILE:状态栏显示处于低能显示状态(low profile模式),状态栏上一些图标显示会被隐藏。
- View.SYSTEM_UI_FLAG_FULLSCREEN:Activity全屏显示,且状态栏被隐藏覆盖掉。等同于(WindowManager.LayoutParams.FLAG_FULLSCREEN)
- View.SYSTEM_UI_FLAG_HIDE_NAVIGATION:隐藏虚拟按键(导航栏)。有些手机会用虚拟按键来代替物理按键。
- View.SYSTEM_UI_FLAG_IMMERSIVE:这个flag只有当设置了SYSTEM_UI_FLAG_HIDE_NAVIGATION才起作用。如果没有设置这个flag,任意的View相互动作都退出SYSTEM_UI_FLAG_HIDE_NAVIGATION模式。如果设置就不会退出。
- View.SYSTEM_UI_FLAG_IMMERSIVE_STICKY:这个flag只有当设置了SYSTEM_UI_FLAG_FULLSCREEN | SYSTEM_UI_FLAG_HIDE_NAVIGATION 时才起作用。如果没有设置这个flag,任意的View相互动作都坏退出SYSTEM_UI_FLAG_FULLSCREEN | SYSTEM_UI_FLAG_HIDE_NAVIGATION模式。如果设置就不受影响。
Layout
- View.SYSTEM_UI_FLAG_LAYOUT_STABLE: 保持View Layout不变,隐藏状态栏或者导航栏后,View不会拉伸。
- View.SYSTEM_UI_FLAG_LAYOUT_FULLSCREEN:让View全屏显示,Layout会被拉伸到StatusBar下面,不包含NavigationBar。
- View.SYSTEM_UI_FLAG_LAYOUT_HIDE_NAVIGATION:让View全屏显示,Layout会被拉伸到StatusBar和NavigationBar下面。
总结:
在第一种方案状态栏透明这个功能上,要注意布局和系统对底层的窗体都要设置全屏模式(缺一不可),然后在设置状态栏的背景颜色,上面所说的用xml使得状态栏透明失败是因为系统对底层的窗体没有设置全屏,大家可以自己去试试

Android - Hide the status bar
文章目录
- Hide the status bar
- Hide the Status Bar on Android 4.1 and Higher
- Make Content Appear Behind the Status Bar
- 准备
- 项目
- 参考
Hide the status bar
This lesson describes how to hide the status bar on different versions of Android. Hiding the status bar (and optionally, the navigation bar) lets the content use more of the display space, thereby providing a more immersive user experience.
figure 1 shows an app with a visible status bar:

figure 1. Visible status bar.
figure 2 shows an app with a hidden status bar. Note that the action bar is hidden too. You should never show the action bar without the status bar.

figure 2. Hidden status bar.
Hide the Status Bar on Android 4.1 and Higher
You can hide the status bar on Android 4.1 (API level 16) and higher by using setsystemUIVisibility(). setsystemUIVisibility() sets UI flags at the individual view level; these settings are aggregated to the window level. Using setsystemUIVisibility() to set UI flags gives you more granular control over the system bars than using WindowManager flags. This snippet hides the status bar:
View decorView = getwindow().getDecorView();
// Hide the status bar.
int uiOptions = View.SYstem_UI_FLAG_FULLSCREEN;
decorView.setsystemUIVisibility(uiOptions);
// Remember that you should never show the action bar if the
// status bar is hidden, so hide that too if necessary.
ActionBar actionBar = getActionBar();
actionBar.hide();
Note the following:
- Once UI flags have been cleared (for example, by navigating away from the activity), your app needs to reset them if you want to hide the bars again. See Responding to UI Visibility Changes for a discussion of how to listen for UI visibility changes so that your app can respond accordingly.
- Where you set the UI flags makes a difference. If you hide the system bars in your activity’s
onCreate()method and the user presses Home, the system bars will reappear. When the user reopens the activity,onCreate()won’t get called, so the system bars will remain visible. If you want system UI changes to persist as the user navigates in and out of your activity, set UI flags inonResume()oronWindowFocusChanged(). - The method
setsystemUIVisibility()only has an effect if the view you call it from is visible. - Navigating away from the view causes flags set with
setsystemUIVisibility()to be cleared.
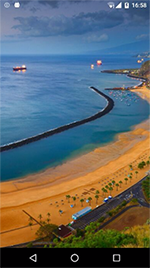
Make Content Appear Behind the Status Bar
On Android 4.1 and higher, you can set your application’s content to appear behind the status bar, so that the content doesn’t resize as the status bar hides and shows. To do this, use SYstem_UI_FLAG_LAYOUT_FULLSCREEN. You may also need to use SYstem_UI_FLAG_LAYOUT_STABLE to help your app maintain a stable layout.
When you use this approach, it becomes your responsibility to ensure that critical parts of your app’s UI (for example, the built-in controls in a Maps application) don’t end up getting covered by system bars. This Could make your app unusable. In most cases you can handle this by adding the android:fitsSystemWindows attribute to your XML layout file, set to true. This adjusts the padding of the parent ViewGroup to leave space for the system windows. This is sufficient for most applications.
In some cases, however, you may need to modify the default padding to get the desired layout for your app. To directly manipulate how your content lays out relative to the system bars (which occupy a space kNown as the window’s “content insets”), override fitSystemWindows(Rect insets). The fitSystemWindows() method is called by the view hierarchy when the content insets for a window have changed, to allow the window to adjust its content accordingly. By overriding this method you can handle the insets (and hence your app’s layout) however you want.
准备
IDE:
Android Studio 4.1.1
Build #AI-201.8743.12.41.6953283, built on November 5, 2020
Runtime version: 1.8.0_242-release-1644-b01 amd64
VM: OpenJDK 64-Bit Server VM by JetBrains s.r.o
Windows 10 10.0
Android Virtual Devices:
Name: Pixel_2_API_28
cpu/ABI: Google Play Intel Atom (x86)
Path: C:\Users\86188\.android\avd\Pixel_2_API_28.avd
Target: google_apis_playstore [Google Play] (API level 28)
Skin: pixel_2
SD Card: 512M
fastboot.chosenSnapshotFile:
runtime.network.speed: full
hw.accelerometer: yes
hw.device.name: pixel_2
hw.lcd.width: 1080
hw.initialOrientation: Portrait
image.androidVersion.api: 28
tag.id: google_apis_playstore
hw.mainKeys: no
hw.camera.front: emulated
avd.ini.displayname: Pixel 2 API 28
hw.gpu.mode: auto
hw.ramSize: 1536
PlayStore.enabled: true
fastboot.forceColdBoot: no
hw.cpu.ncore: 4
hw.keyboard: yes
hw.sensors.proximity: yes
hw.dPad: no
hw.lcd.height: 1920
vm.heapSize: 256
skin.dynamic: yes
hw.device.manufacturer: Google
hw.gps: yes
hw.audioInput: yes
image.sysdir.1: system-images\android-28\google_apis_playstore\x86\
showDeviceFrame: yes
hw.camera.back: virtualscene
AvdId: Pixel_2_API_28
hw.lcd.density: 420
hw.arc: false
hw.device.hash2: MD5:55acbc835978f326788ed66a5cd4c9a7
fastboot.forceChosenSnapshotBoot: no
fastboot.forceFastBoot: yes
hw.trackball: no
hw.battery: yes
hw.sdCard: yes
tag.display: Google Play
runtime.network.latency: none
disk.dataPartition.size: 6442450944
hw.sensors.orientation: yes
avd.ini.encoding: UTF-8
hw.gpu.enabled: yes
注意:以下示例仅在安卓虚拟设备上运行测试,并没有在真实的设备上运行测试。
项目
效果:

新建项目,选择 Empty Activity,在配置项目时,Minimum SDK 选择 API 16: Android 4.1 (Jelly Bean)
新建 Empty Activity,名名 SecondaryActivity。
编辑 src\main\java\com\mk\SecondaryActivity.java 布局文件,添加 Toolbar 和 Button 组件:
<?xml version="1.0" encoding="utf-8"?>
<androidx.constraintlayout.widget.ConstraintLayout xmlns:android="http://schemas.android.com/apk/res/android"
    xmlns:app="http://schemas.android.com/apk/res-auto"
    xmlns:tools="http://schemas.android.com/tools"
    android:layout_width="match_parent"
    android:layout_height="match_parent"
    tools:context=".SecondaryActivity">

    <androidx.appcompat.widget.Toolbar
        android:id="@+id/toolbar"
        android:layout_width="match_parent"
        android:layout_height="wrap_content"
        android:background="?attr/colorPrimary"
        android:minHeight="?attr/actionBarSize"
        android:theme="?attr/actionBarTheme"
        app:layout_constraintEnd_toEndOf="parent"
        app:layout_constraintStart_toStartOf="parent"
        app:layout_constraintTop_toTopOf="parent" />

    <Button
        android:id="@+id/buttonMakeContentAppearBehindTheStatusBar"
        android:layout_width="0dp"
        android:layout_height="wrap_content"
        android:layout_marginStart="16dp"
        android:layout_marginLeft="16dp"
        android:layout_marginTop="16dp"
        android:layout_marginEnd="16dp"
        android:layout_marginRight="16dp"
        android:text="Make Content Appear Behind the Status Bar"
        app:layout_constraintEnd_toEndOf="parent"
        app:layout_constraintStart_toStartOf="parent"
        app:layout_constraintTop_toBottomOf="@+id/toolbar" />
</androidx.constraintlayout.widget.ConstraintLayout>
编辑 SecondaryActivity 文件:
- 初始化
Toolbar(第 18 ~ 19 行); - 启用
Toolbar的向上按钮(第 23 行); - 为 ID 为
buttonMakeContentAppearBehindTheStatusBar的按钮绑定点击事件,当用户点击按钮之后,将SecondaryActivity置于 Statu Bar 之后(第 25 ~ 35 行)。
package com.mk;

import androidx.appcompat.app.AppCompatActivity;
import androidx.appcompat.widget.Toolbar;

import android.os.Build;
import android.os.Bundle;
import android.view.View;
import android.widget.Button;

public class SecondaryActivity extends AppCompatActivity {

    @Override
    protected void onCreate(Bundle savedInstanceState) {
        super.onCreate(savedInstanceState);
        setContentView(R.layout.activity_secondary);

        Toolbar toolbar = (Toolbar) findViewById(R.id.toolbar);
        setSupportActionBar(toolbar);

        // Get a support ActionBar corresponding to this toolbar,
        // and then enable the Up button
        getSupportActionBar().setdisplayHomeAsUpEnabled(true);

        Button buttonMakeContentAppearBehindTheStatusBar = (Button) findViewById(R.id.buttonMakeContentAppearBehindTheStatusBar);
        buttonMakeContentAppearBehindTheStatusBar.setonClickListener(new View.OnClickListener() {
            @Override
            public void onClick(View v) {
                if (Build.VERSION.SDK_INT >= Build.VERSION_CODES.JELLY_BEAN) {
                    // Make Content Appear Behind the Status Bar
                    View decorView = getwindow().getDecorView();
                    decorView.setsystemUIVisibility(View.SYstem_UI_FLAG_LAYOUT_FULLSCREEN);
                }
            }
        });
    }
}
编辑 src\main\res\layout\activity_main.xml 布局文件,添加一个 Toolbar 和两个 Button 组件:
<?xml version="1.0" encoding="utf-8"?>
<androidx.constraintlayout.widget.ConstraintLayout xmlns:android="http://schemas.android.com/apk/res/android"
    xmlns:app="http://schemas.android.com/apk/res-auto"
    xmlns:tools="http://schemas.android.com/tools"
    android:layout_width="match_parent"
    android:layout_height="match_parent"
    tools:context=".MainActivity">

    <androidx.appcompat.widget.Toolbar
        android:id="@+id/toolbar"
        android:layout_width="match_parent"
        android:layout_height="wrap_content"
        android:background="?attr/colorPrimary"
        android:minHeight="?attr/actionBarSize"
        android:theme="?attr/actionBarTheme"
        app:layout_constraintEnd_toEndOf="parent"
        app:layout_constraintStart_toStartOf="parent"
        app:layout_constraintTop_toTopOf="parent" />

    <Button
        android:id="@+id/buttonHideTheStatusBar"
        android:layout_width="0dp"
        android:layout_height="wrap_content"
        android:layout_marginStart="16dp"
        android:layout_marginLeft="16dp"
        android:layout_marginTop="16dp"
        android:layout_marginEnd="16dp"
        android:layout_marginRight="16dp"
        android:text="Hide the status bar "
        app:layout_constraintEnd_toEndOf="parent"
        app:layout_constraintStart_toStartOf="parent"
        app:layout_constraintTop_toBottomOf="@+id/toolbar" />

    <Button
        android:id="@+id/buttonToSecondaryActivity"
        android:layout_width="0dp"
        android:layout_height="wrap_content"
        android:layout_marginStart="16dp"
        android:layout_marginLeft="16dp"
        android:layout_marginTop="16dp"
        android:layout_marginEnd="16dp"
        android:layout_marginRight="16dp"
        android:text="To secondary activity"
        app:layout_constraintEnd_toEndOf="parent"
        app:layout_constraintStart_toStartOf="parent"
        app:layout_constraintTop_toBottomOf="@+id/buttonHideTheStatusBar" />
</androidx.constraintlayout.widget.ConstraintLayout>
编辑 MainActivity:
- 初始化
Toolbar(第 19 ~ 20 行); - 为 ID 为
buttonHideTheStatusBar的按钮绑定点击事件,当用户点击按钮之后,隐藏 Statu Bar 和 ActionBar(第 22 ~ 35 行); - 为 ID 为
buttonToSecondaryActivity的按钮绑定点击事件,当用户点击按钮之后,跳转到SecondaryActivity(第 37 ~ 44 行)。
package com.mk;

import androidx.appcompat.app.AppCompatActivity;
import androidx.appcompat.widget.Toolbar;

import android.content.Intent;
import android.os.Build;
import android.os.Bundle;
import android.view.View;
import android.widget.Button;

public class MainActivity extends AppCompatActivity {

    @Override
    protected void onCreate(Bundle savedInstanceState) {
        super.onCreate(savedInstanceState);
        setContentView(R.layout.activity_main);

        Toolbar toolbar = (Toolbar) findViewById(R.id.toolbar);
        setSupportActionBar(toolbar);

        Button buttonHideTheStatusBar = (Button) findViewById(R.id.buttonHideTheStatusBar);
        buttonHideTheStatusBar.setonClickListener(new View.OnClickListener() {
            @Override
            public void onClick(View v) {
                if (Build.VERSION.SDK_INT >= Build.VERSION_CODES.JELLY_BEAN) {
                    // Hide the status bar.
                    View decorView = getwindow().getDecorView();
                    decorView.setsystemUIVisibility(View.SYstem_UI_FLAG_FULLSCREEN);
                    // Remember that you should never show the action bar if the
                    // status bar is hidden, so hide that too if necessary.
                    getSupportActionBar().hide();
                }
            }
        });

        Button buttonToSecondaryActivity = (Button) findViewById(R.id.buttonToSecondaryActivity);
        buttonToSecondaryActivity.setonClickListener(new View.OnClickListener() {
            @Override
            public void onClick(View v) {
                Intent intent = new Intent(MainActivity.this, SecondaryActivity.class);
                startActivity(intent);
            }
        });
    }
}
编辑 src\main\AndroidManifest.xml 应用清单文件:
- 修改
android:theme的值为@style/Theme.AppCompat.Light.NoActionBar,防止应用程序使用本地ActionBar类来提供应用程序栏(第 11 行): - 为
SecondaryActivity和MainActivity建立父子关系(第 12 ~ 14 行)。
<?xml version="1.0" encoding="utf-8"?>
<manifest xmlns:android="http://schemas.android.com/apk/res/android"
    package="com.mk">

    <application
        android:allowBackup="true"
        android:icon="@mipmap/ic_launcher"
        android:label="@string/app_name"
        android:roundIcon="@mipmap/ic_launcher_round"
        android:supportsRtl="true"
        android:theme="@style/Theme.AppCompat.Light.NoActionBar">
        <activity android:name=".SecondaryActivity" android:label="Secondary Activity" android:parentActivityName=".MainActivity">
            <Meta-data android:name="android.support.PARENT_ACTIVITY" android:value=".MainActivity" />
        </activity>
        <activity android:name=".MainActivity">
            <intent-filter>
                <action android:name="android.intent.action.MAIN" />

                <category android:name="android.intent.category.LAUNCHER" />
            </intent-filter>
        </activity>
    </application>
</manifest>
参考
Hide the status bar
Set up the app bar
Add an up action

android 4.0 全屏 屏蔽下面的 status bar
做一个平板的应用,底部的 BACK HOME 还有电池 WIFI 的那一条 STATUS BAR 设置全屏后怎么也去不掉, 后来发现一个比较好的方法
在 OnCreate 里添加一行语句 ,在 setContentView 之前哦:
getWindow().getDecorView().setSystemUiVisibility(View.SYSTEM_UI_FLAG_LOW_PROFILE);
或者
getWindow().getDecorView().setSystemUiVisibility(View.STATUS_BAR_HIDDEN);
或者
getWindow().getDecorView().setSystemUiVisibility(View.SYSTEM_UI_FLAG_SHOW_FULLSCREEN);
手机上的,可以:
getWindow().getDecorView().setSystemUiVisibility(View.SYSTEM_UI_FLAG_HIDE_NAVIGATION);
status bar 这玩意很重要,所以在弹出 popupwindow 和 Dialog 时就会重现下方的黑条,要有心理准备;
方法二:
将平板 root, 然后改改两个文件
$ adb remount
$ adb shell mv /system/app/SystemUI.odex /system/app/SystemUI.odexold
$ adb shell mv /system/app/SystemUI.apk /system/app/SystemUI.apkold
$ adb reboot
或者你下一个 RE 文件管理器,把这两个文件重命名,然后重启,这样,你在任何程序里,包括在待机,都没有下面的 status bar 了!
方法三:
这个方法是参考网上 caijicheng2006 方法做的,修改的是源码
grep "status_bar_height" * -nR
将下面文件中关于 status_bar_height 定义的改为 0dip.
android4.0/frameworks/base/core/res/res/values-large/dimens.xml
android4.0/frameworks/base/core/res/res/values-sw480dp/dimens.xml
android4.0/frameworks/base/core/res/res/values-sw600dp/dimens.xml
android4.0/frameworks/base/core/res/res/values/dimens.xml
android4.0/packages/apps/Launcher2/res/values-sw480dp/dimens.xml
android4.0/packages/apps/Launcher2/res/values-sw600dp/dimens.xml
android4.0/packages/apps/Launcher2/res/values/dimens.xml
今天关于Android StatusBar 透明化方法(不同的版本适配)和android设置透明状态栏的介绍到此结束,谢谢您的阅读,有关''statusBarFrame'' was deprecated in iOS 13.0: Use the statusBarManager property of the win...、(2017)Android技能状态栏(StatusBar)解析、Android - Hide the status bar、android 4.0 全屏 屏蔽下面的 status bar等更多相关知识的信息可以在本站进行查询。
本文标签:


