在这篇文章中,我们将为您详细介绍android-为NavigationDrawer项目设置边距的内容,并且讨论关于android:viewportheight的相关问题。此外,我们还会涉及一些关于03
在这篇文章中,我们将为您详细介绍android-为NavigationDrawer项目设置边距的内容,并且讨论关于android:viewportheight的相关问题。此外,我们还会涉及一些关于034 Android NavigationView 和 DrawerLayout 实现抽屉式导航设计 (侧边栏效果)、Android DrawerLayout(带有NavigationView)状态栏后面、Android Material Design系列之Navigation Drawer、Android Navigation Drawer简记的知识,以帮助您更全面地了解这个主题。
本文目录一览:- android-为NavigationDrawer项目设置边距(android:viewportheight)
- 034 Android NavigationView 和 DrawerLayout 实现抽屉式导航设计 (侧边栏效果)
- Android DrawerLayout(带有NavigationView)状态栏后面
- Android Material Design系列之Navigation Drawer
- Android Navigation Drawer简记
")
android-为NavigationDrawer项目设置边距(android:viewportheight)
我的问题是我无法在导航抽屉中正确设置边距.我尝试更改任何视图和项目的边距,但似乎无法解决.我所得到的只是ActionBar和NavigationDrawer(以及页面的开头)之间的空间.我认为问题出在我的ListItem布局内,但我不确定.这是我所得到的照片
这是我的布局和代码文件.
主要布局
<android.support.v4.widget.DrawerLayout
xmlns:android="http://schemas.android.com/apk/res/android"
xmlns:tools="http://schemas.android.com/tools"
android:layout_height="match_parent"
android:layout_width="match_parent"
android:id="@+id/drawer_layout">

<android.support.v4.widget.SwipeRefreshLayout

android:layout_height="match_parent"
android:layout_width="match_parent"
android:id="@+id/refreshSites"
tools:context=".MyActivity">

<android.support.v7.widget.RecyclerView
xmlns:android="http://schemas.android.com/apk/res/android"
android:id="@+id/sitesList"
android:layout_width="wrap_content"
android:layout_height="wrap_content"
android:layout_marginTop="5dp"/>
</android.support.v4.widget.SwipeRefreshLayout>

<RelativeLayout
    android:layout_width="280dp"
    android:layout_height="fill_parent"
    android:id="@+id/drawerPane"
    android:layout_gravity="start">

    <LinearLayout
        android:layout_width="match_parent"
        android:layout_height="match_parent"
        android:orientation="vertical"
        android:layout_marginTop="15dp">

<ListView android:id="@+id/left_drawer"
    android:layout_width="280dp"

    android:layout_height="match_parent"
    android:layout_gravity="start"
    android:choiceMode="singleChoice"
    android:divider="@android:color/white"
    android:dividerHeight="0dp"
    android:layout_marginLeft="15dp"
    android:background="#FFF">
    </ListView>

    </LinearLayout>
</RelativeLayout>
</android.support.v4.widget.DrawerLayout>
抽屉式清单_item.xml
<?xml version="1.0" encoding="utf-8"?>
    <TextView
    xmlns:android="http://schemas.android.com/apk/res/android"
        android:layout_width="match_parent"
        android:layout_height="wrap_content"
    android:layout_marginLeft="50dp"
    android:layout_marginTop="15dp"
    android:layout_marginStart="50dp"
    android:textAppearance="?android:attr/textAppearanceLarge"
    android:textColor="#222"/>
我与NavigationDrawer一起工作的代码
 mDrawerLayout = (DrawerLayout) findViewById(R.id.drawer_layout);
    mDrawerList = (ListView) findViewById(R.id.left_drawer);
mDrawerList.setAdapter(new ArrayAdapter<String>(this,
        R.layout.drawer_list_item, mPlanetTitles)); //mPlanetTitles is String array
因此问题是:如何正确设置这些边距?
解决方法:
试试这个作为项目
<TextView xmlns:android="http://schemas.android.com/apk/res/android"
        android:layout_width="match_parent"
        android:layout_height="wrap_content"
        android:background="#fff"
        android:padding="20dp"
        android:textAppearance="?android:attr/textAppearanceLarge"
        android:textColor="#222"
        android:text="bla bla bla" />
和主要的XML这样
<android.support.v4.widget.DrawerLayout
xmlns:android="http://schemas.android.com/apk/res/android"
xmlns:tools="http://schemas.android.com/tools"
android:layout_height="match_parent"
android:layout_width="match_parent"
android:id="@+id/drawer_layout">

<android.support.v4.widget.SwipeRefreshLayout

    android:layout_height="match_parent"
    android:layout_width="match_parent"
    android:id="@+id/refreshSites"
    tools:context=".MyActivity">

    <android.support.v7.widget.RecyclerView
        xmlns:android="http://schemas.android.com/apk/res/android"
        android:id="@+id/sitesList"
        android:layout_width="wrap_content"
        android:layout_height="wrap_content"
        android:layout_marginTop="5dp"/>
</android.support.v4.widget.SwipeRefreshLayout>

<RelativeLayout
    android:layout_width="280dp"
    android:layout_height="fill_parent"
    android:id="@+id/drawerPane"
    android:layout_gravity="start">

    <LinearLayout
        android:layout_width="match_parent"
        android:layout_height="match_parent"
        android:orientation="vertical">

        <ListView android:id="@+id/left_drawer"
            android:layout_width="280dp"
            android:layout_height="match_parent"
            android:layout_gravity="start"
            android:choiceMode="singleChoice"
            android:divider="@android:color/white"
            android:dividerHeight="0dp"
            android:background="#FFF">
        </ListView>

    </LinearLayout>
</RelativeLayout>
希望这会有所帮助.
")
034 Android NavigationView 和 DrawerLayout 实现抽屉式导航设计 (侧边栏效果)
1. 创建带侧滑效果的 activity
右击,new---->activity----> 选择 NavgationDrawer Activity
2.xml 文件布局
(1)activity_main_function.xml
<?xml version="1.0" encoding="utf-8"?>
<android.support.v4.widget.DrawerLayout xmlns:android="http://schemas.android.com/apk/res/android"
    xmlns:app="http://schemas.android.com/apk/res-auto"
    xmlns:tools="http://schemas.android.com/tools"
    android:id="@+id/drawer_layout"
    android:layout_width="match_parent"
    android:layout_height="match_parent"
    android:fitsSystemWindows="true"
    tools:openDrawer="start">

    <include
        layout="@layout/app_bar_main_function"
        android:layout_width="match_parent"
        android:layout_height="match_parent" />

    <android.support.design.widget.NavigationView
        android:id="@+id/nav_view"
        android:layout_width="wrap_content"
        android:layout_height="match_parent"
        android:layout_gravity="start"
        android:fitsSystemWindows="true"
        app:headerLayout="@layout/nav_header_main_function"
        app:menu="@menu/activity_main_function_drawer" />

</android.support.v4.widget.DrawerLayout>
可以看到我们的最外层是 DrawerLayout,包含了两个内容:include 为显示内容区域,NavigationView 为侧边抽屉栏。
NavigationView 有两个 app 属性,分别为 app:headerLayout 和 app:menu,headerLayout 用于显示头部的布局(可选),menu 用于建立 MenuItem 选项的菜单。
<?xml version="1.0" encoding="utf-8"?>
<LinearLayout xmlns:android="http://schemas.android.com/apk/res/android"
    xmlns:app="http://schemas.android.com/apk/res-auto"
    android:layout_width="match_parent"
    android:layout_height="@dimen/nav_header_height"
    android:background="@drawable/side_nav_bar"
    android:gravity="bottom"
    android:orientation="vertical"
    android:paddingLeft="@dimen/activity_horizontal_margin"
    android:paddingTop="@dimen/activity_vertical_margin"
    android:paddingRight="@dimen/activity_horizontal_margin"
    android:paddingBottom="@dimen/activity_vertical_margin"
    android:theme="@style/ThemeOverlay.AppCompat.Dark">

    <ImageView
        android:id="@+id/imageView"
        android:layout_width="80dp"
        android:layout_height="80dp"
        android:contentDescription="@string/nav_header_desc"
        android:paddingTop="@dimen/nav_header_vertical_spacing"
        app:srcCompat="@mipmap/ic_account_circle_white_48dp" />

    <TextView
        android:layout_width="match_parent"
        android:layout_height="wrap_content"
        android:paddingTop="@dimen/nav_header_vertical_spacing"
        android:text="@string/nav_header_title"
        android:textAppearance="@style/TextAppearance.AppCompat.Body1" />

    <TextView
        android:id="@+id/textView"
        android:layout_width="wrap_content"
        android:layout_height="wrap_content"
        android:text="@string/nav_header_subtitle" />

</LinearLayout>
(3) activity_main_function_drawer.xml (menu 目录下)
<?xml version="1.0" encoding="utf-8"?>
<menu xmlns:android="http://schemas.android.com/apk/res/android"
    xmlns:tools="http://schemas.android.com/tools"
    tools:showIn="navigation_view">

    <group android:checkableBehavior="single">
        <item
            android:id="@+id/nav_me"
            android:title="我"
            android:icon="@mipmap/ic_mine_gray_24"/>
        <item
            android:id="@+id/nav_friend"
            android:title="好友"
            android:icon="@mipmap/ic_friends_gray_24"/>
        <item
            android:id="@+id/nav_notification"
            android:title="通知"
            android:icon="@mipmap/ic_notification_gray_24"/>
        <item
            android:id="@+id/nav_message"
            android:title="私信"
            android:icon="@mipmap/ic_messages_gray_24"
            />
    </group>

    <group android:checkableBehavior="none"
        android:id="@+id/group_manage">
        <item
            android:id="@+id/nav_manage"
            android:title="应用管理"
            android:icon="@mipmap/ic_app_management_gray_24"/>
    </group>

    <item android:title="Communicate">
        <menu>
            <item
                android:id="@+id/nav_share"
                android:icon="@drawable/ic_menu_share"
                android:title="分享" />
            <item
                android:id="@+id/nav_send"
                android:icon="@drawable/ic_menu_send"
                android:title="发送" />
        </menu>
    </item>

</menu>
3.java 后台
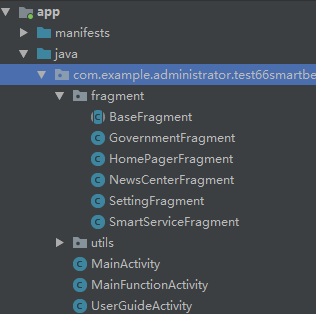
package com.example.administrator.test66smartbeijing;
import android.os.Bundle;
import android.support.annotation.NonNull;
import android.support.design.widget.BottomNavigationView;
import android.support.design.widget.NavigationView;
import android.support.v4.app.Fragment;
import android.support.v4.app.FragmentManager;
import android.support.v4.app.FragmentPagerAdapter;
import android.support.v4.view.GravityCompat;
import android.support.v4.view.ViewPager;
import android.support.v4.widget.DrawerLayout;
import android.support.v7.app.ActionBarDrawerToggle;
import android.support.v7.app.AppCompatActivity;
import android.support.v7.widget.Toolbar;
import android.view.Menu;
import android.view.MenuItem;
import android.widget.TextView;
import com.example.administrator.test66smartbeijing.fragment.GovernmentFragment;
import com.example.administrator.test66smartbeijing.fragment.HomePagerFragment;
import com.example.administrator.test66smartbeijing.fragment.NewsCenterFragment;
import com.example.administrator.test66smartbeijing.fragment.SettingFragment;
import com.example.administrator.test66smartbeijing.fragment.SmartServiceFragment;
import java.util.ArrayList;
import java.util.List;
public class MainFunctionActivity extends AppCompatActivity
implements NavigationView.OnNavigationItemSelectedListener {
ViewPager viewPager;
List<Fragment> fragments;
BottomNavigationView bottomNavigationView;
MenuItem menuItem;
TextView tv_main_title;
@Override
protected void onCreate(Bundle savedInstanceState) {
super.onCreate(savedInstanceState);
setContentView(R.layout.activity_main_function);
//设置顶部菜单栏
Toolbar toolbar = findViewById(R.id.toolbar);
setSupportActionBar(toolbar);
DrawerLayout drawer =findViewById(R.id.drawer_layout);
ActionBarDrawerToggle toggle = new ActionBarDrawerToggle(
this, drawer, toolbar, R.string.navigation_drawer_open, R.string.navigation_drawer_close);
drawer.addDrawerListener(toggle);
toggle.syncState();
NavigationView navigationView = findViewById(R.id.nav_view);
navigationView.setNavigationItemSelectedListener(this);
initBottomNavigationView();
}
@Override
public void onBackPressed() {
DrawerLayout drawer = findViewById(R.id.drawer_layout);
if (drawer.isDrawerOpen(GravityCompat.START)) {
drawer.closeDrawer(GravityCompat.START);
} else {
super.onBackPressed();
}
}
@SuppressWarnings("StatementWithEmptyBody")
@Override
public boolean onNavigationItemSelected(MenuItem item) {
// Handle navigation view item clicks here.
int id = item.getItemId();
if (id == R.id.nav_me) {
// Handle the camera action
} else if (id == R.id.nav_friend) {
} else if (id == R.id.nav_notification) {
} else if (id == R.id.nav_message) {
} else if (id == R.id.nav_share) {
} else if (id == R.id.nav_send) {
}
DrawerLayout drawer = findViewById(R.id.drawer_layout);
drawer.closeDrawer(GravityCompat.START);
return true;
}
private class Adapter extends FragmentPagerAdapter {
List<Fragment> list1;
public Adapter(FragmentManager fm, List<Fragment> fragments) {
super(fm);
this.list1=fragments;
}
@Override
public Fragment getItem(int position) {
return list1.get(position);
}
@Override
public int getCount() {
return list1.size();
}
}
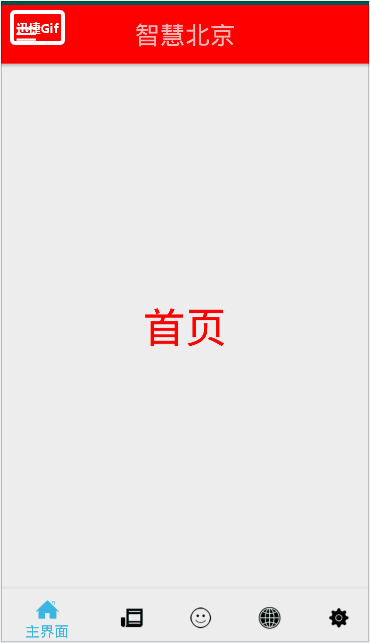
}4. 效果图
参考文献:https://www.cnblogs.com/JohnTsai/p/5172056.html
状态栏后面")
Android DrawerLayout(带有NavigationView)状态栏后面
我有一个带有DrawerLayout的应用程序,其中包含NavigationView:
activity_layout.xml:
<?xml version="1.0" encoding="utf-8"?>
<android.support.v4.widget.DrawerLayout
    xmlns:android="http://schemas.android.com/apk/res/android"
    xmlns:app="http://schemas.android.com/apk/res-auto"
    xmlns:tools="http://schemas.android.com/tools"
    android:layout_width="match_parent"
    android:layout_height="match_parent"
    android:id="@+id/drawer_layout"
    android:fitsSystemWindows="true">

    <android.support.constraint.ConstraintLayout
        android:id="@+id/activity_list"
        android:layout_width="match_parent"
        android:layout_height="match_parent"
        tools:context="com.exmaple.appname.activityname">

        <android.support.v7.widget.Toolbar
            android:id="@+id/actionbar_toolbar"
            android:layout_width="match_parent"
            android:layout_height="?attr/actionBarSize"
            android:background="?attr/colorPrimary"
            android:elevation="4dp"
            android:theme="@style/ThemeOverlay.AppCompat.ActionBar"
            app:popupTheme="@style/Theme.AppCompat"/>

        […]

    </android.support.constraint.ConstraintLayout>

    <android.support.design.widget.NavigationView
        android:id="@+id/navigation"
        android:layout_width="match_parent"
        android:layout_height="match_parent"
        android:layout_gravity="start"
        app:menu="@menu/nav_drawer"
        android:fitsSystemWindows="true"/>

</android.support.v4.widget.DrawerLayout>
我还添加了以下样式:
styles.xml:
<style name="AppTheme" parent="Theme.AppCompat.NoActionBar">
    […]

    <item name="windowActionBar">false</item>
    <item name="android:windowNoTitle">true</item>
</style>
值-21 / styles.xml:
<style name="AppTheme.NoActionBar" parent="AppTheme">
    <item name="android:windowDrawsSystemBarBackgrounds">true</item>
    <item name="android:statusBarColor">@android:color/transparent</item>
</style>
所有这些代码都基于Google I/O Schedule App,但DrawerLayout仍然不会在状态栏后面呈现.关于为什么这种解决方案组合不起作用以及可能有哪些解决方案的任何想法?我发现在状态栏后面绘制从来都不是一个通用的解决方案,但在尝试了Stack Overflow上的每个解决方案组合后,我都能想到,我仍然无法得到它.
当前抽屉图像:
解决方法:
只需添加< item name =“android:windowTranslucentStatus”> true< / item>在values-21 / styles.xml中删除此< item name =“android:statusBarColor”> @android:color / transparent< / item>
将android:fitsSystemWindows =“true”添加到xml中的NavigationView
Working example!
<style name="AppTheme" parent="Theme.AppCompat.Light.NoActionBar">
    <item name="colorPrimary">@color/colorPrimary</item>
    <item name="colorPrimaryDark">@color/colorPrimaryDark</item>
    <item name="colorAccent">@color/colorAccent</item>
    <item name="android:windowNoTitle">true</item>
    <item name="android:windowDrawsSystemBarBackgrounds">true</item>
    <item name="android:windowTranslucentStatus">true</item>
</style>
结果

Edited (main layout)
<?xml version="1.0" encoding="utf-8"?>
<android.support.v4.widget.DrawerLayout xmlns:android="http://schemas.android.com/apk/res/android"
    xmlns:tools="http://schemas.android.com/tools"
    android:id="@+id/drawer_layout"
    android:layout_width="match_parent"
    android:layout_height="match_parent"
    android:fitsSystemWindows="true" <--This is mandatory
    tools:context=".ui.activities.MainActivity">

    <FrameLayout
        android:id="@+id/frame_container"
        android:layout_width="match_parent"
        android:layout_height="match_parent"
        android:background="@color/white" />

    <android.support.design.widget.NavigationView
        android:id="@+id/navigation"
        android:layout_width="match_parent"
        android:layout_height="match_parent"
        android:layout_gravity="start"
        android:background="@color/colorPrimary"
        android:fitsSystemWindows="true" /><--This is mandatory

</android.support.v4.widget.DrawerLayout>
Current Result 07001
Update: I lookup your style-v21 and found below
<?xml version="1.0" encoding="utf-8"?>
<resources>
    <style name="AppTheme.NoActionBar" parent="AppTheme">
        <item name="android:windowDrawsSystemBarBackgrounds">true</item>
        <item name="android:windowTranslucentStatus">true</item>
    </style>
</resources>
请用它替换它
<style name="AppTheme" parent="Theme.AppCompat.Light.NoActionBar">
    <item name="colorPrimary">@color/colorPrimary</item>
    <item name="colorPrimaryDark">@color/colorPrimaryDark</item>
    <item name="colorAccent">@color/colorAccent</item>
    <item name="android:windowNoTitle">true</item>
    <item name="android:windowDrawsSystemBarBackgrounds">true</item>
    <item name="android:windowTranslucentStatus">true</item>
</style>

Android Material Design系列之Navigation Drawer
从今天开始,我们讲一个关于Material Design风格控件系列的文章。个人认为Material Design风格还是非常漂亮和好看的。关于Material Design的控件,从今天这篇开始一个一个的讲,希望能够对大家有所帮助。
Material Design系列控件,我们今天就先从侧滑菜单栏开始,侧滑菜单栏通过名字我们就知道包含两部分,一部分是侧滑(DrawerLayout),一部分是导航菜单栏(NavigationView)。DrawerLayout包含NavigationView,一设置侧滑菜单栏就形成了。因为建立一个侧滑菜单很简单,在用Android Studio新建项目时,最后选择Navigation Drawer Activity或者在新建Activity时选择Navigation Drawer Activity,就出来了。今天我们讲一下它们的自定义配置。
DrawerLayout布局
<?xml version="1.0" encoding="utf-8"?>
<android.support.v4.widget.DrawerLayout xmlns:android="http://schemas.android.com/apk/res/android"
 xmlns:app="http://schemas.android.com/apk/res-auto"
 xmlns:tools="http://schemas.android.com/tools"
 android:id="@+id/drawer_layout"
 android:layout_width="match_parent"
 android:layout_height="match_parent"
 android:fitsSystemWindows="true"
 tools:openDrawer="start">

 <include
 layout="@layout/app_bar_main"
 android:layout_width="match_parent"
 android:layout_height="match_parent" />

 <android.support.design.widget.NavigationView
 android:id="@+id/nav_view"
 android:layout_width="wrap_content"
 android:layout_height="match_parent"
 android:layout_gravity="start"
 android:fitsSystemWindows="true"
 app:headerLayout="@layout/nav_header_main"
 app:menu="@menu/activity_main_drawer" />

</android.support.v4.widget.DrawerLayout>
从上面的布局代码中我们就看出来了,DrawerLayout包含NavigationView,中间的include先不管,那是toolbar,咱改天详细讲。新建完项目,自带的布局效果是这样的,如下:

从图中,我们可以看到菜单列表,这个菜单列表是我们刚开始建项目时自动生成的,系统默认的,我们需要定制这个菜单变成我们自己的。其实就是要用到了NavigationView。
NavigationView
NavigationView分为两部分,一部分是headerLayout,一部分是menu。headerLayout就是对应菜单的顶部部分,一般用来显示用户信息什么的,menu则对应实际的菜单选项。我们从上面的布局代码中可以看出分别对应的就是 app:headerLayout和app:menu。
headerLayout
布局代码如下:
<?xml version="1.0" encoding="utf-8"?>
<LinearLayout xmlns:android="http://schemas.android.com/apk/res/android"
 android:layout_width="match_parent"
 android:layout_height="wrap_content"
 android:padding="16dp"
 android:theme="@style/ThemeOverlay.AppCompat.Dark"
 android:background="?attr/colorPrimaryDark"
 android:gravity="center"
 android:orientation="vertical">

 <ImageView
 android:id="@+id/head_iv"
 android:layout_width="60dp"
 android:layout_height="60dp"
 android:layout_marginTop="30dp"
 android:background="@drawable/head" />

 <TextView
 android:text="非著名程序员"
 android:layout_marginTop="10dp"
 android:textColor="#ffffff"
 android:layout_width="wrap_content"
 android:layout_height="wrap_content" />

</LinearLayout>
menu
<?xml version="1.0" encoding="utf-8"?>
<menu xmlns:android="http://schemas.android.com/apk/res/android">

 <group android:checkableBehavior="single">
 <item
 android:id="@+id/nav_home"
 android:icon="@drawable/nav_icon_home"
 android:title="Home" />
 <item
 android:id="@+id/nav_favorite"
 android:icon="@drawable/nav_icon_favorite"
 android:title="收藏" />
 <item
 android:id="@+id/nav_followers"
 android:icon="@drawable/nav_icon_followers"
 android:title="群组" />

 <item
 android:id="@+id/nav_settings"
 android:icon="@drawable/nav_icon_settings"
 android:title="设置" />
 </group>

 <item android:title="分享和反馈">
 <menu>
 <item
 android:id="@+id/nav_share"
 android:icon="@drawable/nav_icon_my_shares"
 android:title="分享" />
 <item
 android:id="@+id/nav_feedback"
 android:icon="@drawable/nav_icon_feedback"
 android:title="意见反馈" />
 </menu>
 </item>

</menu>
代码实现
初始化相关控件
里面的Toolbar和FloatingActionButton稍后我们在这个系列讲,对DrawerLayout和NavigationView进行了声明和初始化。
 //toolbar的设置,稍后讲这个控件
 Toolbar toolbar = (Toolbar) findViewById(R.id.toolbar);
 setSupportActionBar(toolbar);

 //悬浮按钮控件,稍后讲这个控件
 FloatingActionButton fab = (FloatingActionButton) findViewById(R.id.fab);
 fab.setOnClickListener(new View.OnClickListener() {
 @Override
 public void onClick(View view) {
 Snackbar.make(view, "Replace with your own action", Snackbar.LENGTH_LONG)
 .setAction("Action", null).show();
 }
 });

 //设置DrawerLayout
 DrawerLayout drawer = (DrawerLayout) findViewById(R.id.drawer_layout);
 ActionBarDrawerToggle toggle = new ActionBarDrawerToggle(
 this, drawer, toolbar, R.string.navigation_drawer_open, R.string.navigation_drawer_close);
 drawer.setDrawerListener(toggle);
 toggle.syncState();

 //设置NavigationView
 NavigationView navigationView = (NavigationView) findViewById(R.id.nav_view);
 navigationView.setNavigationItemSelectedListener(this);
侧滑菜单中选项按钮的点击事件
MainActivity实现了NavigationView.OnNavigationItemSelectedListener这个监听事件,然后在实现的监听方法里判断点击事件。
方法如下:
@Override
 public boolean onNavigationItemSelected(MenuItem item) {
 int id = item.getItemId();

 if (id == R.id.nav_home) {
 Toast.makeText(this, "home", Toast.LENGTH_SHORT).show();
 } else if (id == R.id.nav_favorite) {
 Toast.makeText(this, "收藏", Toast.LENGTH_SHORT).show();
 } else if (id == R.id.nav_followers) {
 Toast.makeText(this, "群组", Toast.LENGTH_SHORT).show();
 } else if (id == R.id.nav_settings) {
 Toast.makeText(this, "设置", Toast.LENGTH_SHORT).show();
 } else if (id == R.id.nav_share) {
 Toast.makeText(this, "分享", Toast.LENGTH_SHORT).show();
 } else if (id == R.id.nav_feedback) {
 Toast.makeText(this, "意见反馈", Toast.LENGTH_SHORT).show();
 }

 DrawerLayout drawer = (DrawerLayout) findViewById(R.id.drawer_layout);
 drawer.closeDrawer(GravityCompat.START);
 return true;
 }
记得实现了监听,别忘了设置监听:navigationView.setNavigationItemSelectedListener(this);
到这里就讲完了。做完之后的效果图如下:
噢,忘了,你们肯定会问,如果点击侧滑上面的头像,怎么实现呢?

headerLayout上的控件实现
如果要实现headerLayout上的控件的点击,那就得这样做了,如下:
View navHeaderView = navigationView.inflateHeaderView(R.layout.header_layout);

ImageView headIv = (ImageView) navHeaderView.findViewById(R.id.head_iv);
headIv.setOnClickListener(new View.OnClickListener() {
 @Override
 public void onClick(View view) {
 Toast.makeText(MainActivity.this, "点击我的头像", Toast.LENGTH_SHORT).show();
 }
});
但是这样做了之后,就相当于在navigationView上又添加了一个headerlayou布局,所以这时,我们需要在布局文件中把
app:headerLayout="@layout/header_layout"这行代码去掉,否则会重复的。
主题和配色
上面用到的主题和颜色,我们可以在资源文件中配置。
比如color中:
<?xml version="1.0" encoding="utf-8"?>
<resources>
 <color name="colorPrimary">#3F51B5</color>
 <color name="colorPrimaryDark">#303F9F</color>
 <color name="colorAccent">#FF4081</color>
</resources>
比如style中:
<resources>

 <!-- Base application theme. -->
 <style name="AppTheme" parent="Theme.AppCompat.Light.DarkActionBar">
 <!-- Customize your theme here. -->
 <item name="colorPrimary">@color/colorPrimary</item>
 <item name="colorPrimaryDark">@color/colorPrimaryDark</item>
 <item name="colorAccent">@color/colorAccent</item>
 </style>

 <style name="AppTheme.NoActionBar">
 <item name="windowActionBar">false</item>
 <item name="windowNoTitle">true</item>
 </style>

 <style name="AppTheme.AppBarOverlay" parent="ThemeOverlay.AppCompat.Dark.ActionBar" />

 <style name="AppTheme.PopupOverlay" parent="ThemeOverlay.AppCompat.Light" />

</resources>
在这里配置成自己想要实现的主题和颜色即可。这回是真讲完了。是不是很简单,赶紧试一试去吧。
欢迎关注微信公众号:非著名程序员(smart_android),每天每周定时推送原创技术文章。所有技术文章, 均会在微信订阅号首发,关注微信公众号可以及时获得技术文章推送。

Android Navigation Drawer简记
Navigation Drawer简记
一段时间没有接触Android开发,发现多了不少东西。比如这里的navigation drawer,现在已经有官方support library支持了。
现在来了解下怎么开发。
Drawer Layout
要想添加一个navigation drawer,需要在UI布局中将根视图声明为drawer layout。
<!-- A DrawerLayout is intended to be used as the top-level content view using match_parent for both width and height to consume the full space available. -->
<android.support.v4.widget.DrawerLayout
    xmlns:android="http://schemas.android.com/apk/res/android"
    xmlns:tools="http://schemas.android.com/tools"
    android:id="@+id/drawer_layout"
    android:layout_width="match_parent"
    android:layout_height="match_parent"
    tools:context="nerd_is.in.number_converter.MainActivity">

    <!-- As the main content view, the view below consumes the entire
         space available using match_parent in both dimensions. -->
    <FrameLayout
        android:id="@+id/container"
        android:layout_width="match_parent"
        android:layout_height="match_parent" />

    <!-- android:layout_gravity="start" tells DrawerLayout to treat
         this as a sliding drawer on the left side for left-to-right
         languages and on the right side for right-to-left languages.
         If you''re not building against API 17 or higher, use
         android:layout_gravity="left" instead. -->
    <!-- The drawer is given a fixed width in dp and extends the full height of
         the container. -->
    <fragment android:id="@+id/navigation_drawer"
        android:layout_width="@dimen/navigation_drawer_width"
        android:layout_height="match_parent"
        android:layout_gravity="start"
        android:name="nerd_is.in.number_converter.NavigationDrawerFragment" />

</android.support.v4.widget.DrawerLayout>
在drawer layout中,有两个子视图。
其中,这个Activity的主视图需要出现在drawer视图的上方。因为XML布局中视图的出现顺序与视图在z轴上的顺序有关(也就是说如果是drawer在XML布局文件上方的话,会没法遮挡住主视图)。
Drawer的view需要指定layout_gravity的值为"start"。这是为了照顾一些从从右往左阅读的语言。
Drawer view的宽度不能超过320dp,以免滑出drawer后在主视图完全消失不见。
初始化Drawer View
因为这里的例子是将一个fragment作为Drawer,所以只需要在fragment中对drawer进行需要的设置就行了。
在fragment的onCreateView()中加载view,设置事件响应等。
public View onCreateView(LayoutInflater inflater, ViewGroup container,
        Bundle savedInstanceState) {
    mDrawerListView = (ListView) inflater.inflate(
            R.layout.fragment_navigation_drawer, container, false);
    mDrawerListView.setOnItemClickListener(new AdapterView.OnItemClickListener() {
        @Override
        public void onItemClick(AdapterView<?> parent, View view, int position, long id) {
            selectItem(position);
        }
    });
    mDrawerListView.setAdapter(new ArrayAdapter<String>(
            getActionBar().getThemedContext(),
            android.R.layout.simple_list_item_1,
            android.R.id.text1,
            new String[]{
                    getString(R.string.title_section1),
                    getString(R.string.title_section2),
                    getString(R.string.title_section3),
            }));
    mDrawerListView.setItemChecked(mCurrentSelectedPosition, true);
    return mDrawerListView;
}
监听Drawer的开闭事件
与其他的事件监听一致,只需要在DrawerLayout上setDrawerListener()就可以。
这个事件可以用来重新设置菜单,因为有时候drawer打开和关闭情况下可用的菜单项是不一样的。
@Override
public void onDrawerClosed(View drawerView) {
    super.onDrawerClosed(drawerView);
    if (!isAdded()) {
        return;
    }

    getActivity().supportInvalidateOptionsMenu(); // calls onPrepareOptionsMenu()
}
当Activity中有action bar时, setDrawerListener()中可以使用ActionBarDrawerToggle类来代替DrawerListener。这样一来action bar上的图标会对drawer的状态进行正确的响应。
我们今天的关于android-为NavigationDrawer项目设置边距和android:viewportheight的分享就到这里,谢谢您的阅读,如果想了解更多关于034 Android NavigationView 和 DrawerLayout 实现抽屉式导航设计 (侧边栏效果)、Android DrawerLayout(带有NavigationView)状态栏后面、Android Material Design系列之Navigation Drawer、Android Navigation Drawer简记的相关信息,可以在本站进行搜索。
本文标签:


