在这篇文章中,我们将为您详细介绍AndroidaddednewpermissionmodelforAndroid6.0(Marshmallow).的内容。此外,我们还会涉及一些关于androidadb
在这篇文章中,我们将为您详细介绍Android added new permission model for Android 6.0 (Marshmallow).的内容。此外,我们还会涉及一些关于android adb pull/push permission denied可能的解决办法、Android adb shell 里面 ls 提示 opendir failed, Permission denied、Android AnimatorSet.cancel() 在 Marshmallow 版本设备上不起作用、Android ImageLoader(Android-Universal-Image-Loader)【1】概述及使用简介的知识,以帮助您更全面地了解这个主题。
本文目录一览:- Android added new permission model for Android 6.0 (Marshmallow).
- android adb pull/push permission denied可能的解决办法
- Android adb shell 里面 ls 提示 opendir failed, Permission denied
- Android AnimatorSet.cancel() 在 Marshmallow 版本设备上不起作用
- Android ImageLoader(Android-Universal-Image-Loader)【1】概述及使用简介
.")
Android added new permission model for Android 6.0 (Marshmallow).
http://www.captechconsulting.com/blogs/runtime-permissions-best-practices-and-how-to-gracefully-handle-permission-removal
What Are Runtime Permissions?
With Android 6.0 Marshmallow, Google introduced a new permission model that allows users to better understand why an application may be requesting specific permissions. Rather than the user blindly accepting all permissions at install time, the user is now prompted to accept permissions as they become necessary during application use. As you probably already know, such a change requires efforts on the part of the application developer, but what happens if you do not implement this new model? Will your application still run? What changes do you have to make to be sure your application will run smoothly on all the versions you support?
This blog will step you through a sample application that demonstrates implementing the new permissions model all while answering commonly asked questions about the new model and how it affects your application.
When to Implement the New Model
The Good
The big question for many is: will my existing applications still work on Marshmallow devices? The good news is the new model has backwards compatibility- i.e. it doesn’t require full support until you choose to target version 23 in your application. If you are targeting version 22 or below, your application will request all permissions at install time just as it would on any device running an OS below Marshmallow.
The Bad
Just because we can fall back on the old model, it does not mean that we can just avoid the new model by never targeting Marshmallow. A user with a Marshmallow device will now have the ability to revoke dangerous permissions via the application settings (we will get into what a dangerous permission is later). This means that even though the user accepted all your permissions at install time, they can later decide to take some of those permissions away from you.
The Ugly
If you have chosen not to implement the new permissions model, the revocation of permissions can cause unwanted user experiences and in some cases application crashes. The OS attempts to handle these scenarios as gracefully as possibly but developers should not rely on the OS to handle this scenario perfectly. In my experience, most permission revocations will not cause an application crash, but will absolutely degrade user experience. However, the side-effects of permission revocation are specific to an application’s implementation and I highly suggest at the very least running your application on a Marshmallow emulator and testing your application with permission revocation.
How To Implement – Best Practices
Backwards Compatibility
When implementing the new permissions model it is important to do so in such a way that your application supports Marshmallow and pre-Marshmallow devices. For example, devices running a pre-Marshmallow OS do not support asking for permissions at runtime, thus we need to be smart about when we do make these requests. In the example application, I use the method below to determine if the user’s device is a Marshmallow device or not. If the device they are using is not a Marshmallow device, we know the permissions are granted at install time and we do not need to ask to use the feature.
return(Build.VERSION.SDK_INT>Build.VERSION_CODES.LOLLIPOP_MR1);
}
Dangerous vs. Non-Dangerous Permissions
Just like the old permission model, the new permission model requires all permissions to be included in the applications manifest. This is required regardless of what OS you are targeting or running. If you forget to register the permission in your applications manifest, the application will not be able to ask for the runtime permission later.
Android defines some permissions as “dangerous” and some permissions as “normal.” Both are required in your application’s manifest but only dangerous permissions require a runtime request. Normal permissions are accepted at install time and cannot be revoked later. An example of a normal permission is android.permission.INTERNET. Dangerous permissions are grouped into categories that make it easier for the user to understand what they are allowing the application to do. If the user accepts one permission in a group/category they accept the entire group. The opposite is true as well, if the user denies one permission in a group, the entire group in denied. The example application demonstrates this with both FINE_LOCATION and COARSE_LOCATION of the group LOCATION. You will notice that once the user has granted permission for one, the application is automatically granted permission for the other without the need to ask. The table below lists all the current dangerous permissions and their respective groups.
How to Ask
To simplify requests for features that may need more than one dangerous permission, you may ask for multiple permissions at a given time. Below you will find a code snippet from the attached example application where I am requesting access to both the CAMERA and RECORD_AUDIO permissions. Such a request might be necessary if you are creating a custom movie recorder, for example. In some cases you might use this when prompting the user with a "warm welcome" where you ask for some permissions at app launch that support the basic functionalities of the application.
int permsRequestCode = 200;
requestPermissions(perms, permsRequestCode);
The method requestPermissions(String[] permissions, int requestCode); is a public method found inside of the Android Activity class. Note that in this scenario above both the audio and camera permissions are of different groups and will prompt the user with two different permission dialogs to accept or decline. This means that the user can choose to accept one but not the other. If these two permissions were of the same group, the user would only see one permission prompt. You will receive the results of your request in the method onRequestPermissionResult as shown below.
public void onRequestPermissionsResult( int permsRequestCode, String[] permissions, int[] grantResults){
switch(permsRequestCode){
case 200:
boolean audioAccepted = grantResults[0]==PackageManager.PERMISSION_GRANTED;
boolean cameraAccepted = grantResults[1]==PackageManager.PERMISSION_GRANTED;
break;
}
}
After receiving the results, you will need to handle them appropriately. In the case of the request above, the feature about to be used needs both the camera and audio permissions. If the user denied either of the permissions, the feature will be unusable and an appropriate message should be displayed.
Don’t Be Annoying
Once you have made a permission request to the user, you should not do so again unless the user requests you to do so. In the attached application I use the below method to determine if a specific permission has already been granted.
if(canMakeSmores()){
return(checkSelfPermission(permission)==PackageManager.PERMISSION_GRANTED);
}
return true;
}
You should use the above method each time your application is about enter a feature that requires the use of a dangerous permission. Even if the permission has been previously granted it is necessary to check again to be sure that the user did not later revoke that permission. The above method leverages the method checkSelfPermission(String perm). This method is located in the Activity class and is used to return an integer value of PERMISSION_GRANTED or PERMISSION_DENIED.
In the event that you have already requested permission to access a specific feature and the permission was either denied or later revoked, you should not prompt the user again. Rather, you should notify the user in some way that you need access to a specific permission in order to continue. In the example application, I use a snackbar to let the user know that the permission was previously denied and should be granted to move forward. From the snackbar, I allow the user to request to be asked again. Remember to try and keep permission prompts to a minimum. If you do choose to allow the user to be prompted more than once, the second time you prompt the user for that same permission they should have the ability to choose not to be asked again in the future. If the user chooses to not be asked again, the application will not have the ability to ask the user for that permission again.
Unfortunately, there is nothing out of the box with the new permissions model that stores whether you have previously asked the user for permission or not. You will need to do so on your own by leveraging the SharedPreferences. In the attached example application, I use the methods below to check whether I have previously prompted the user for a permission or not and to record when I do so.
return (sharedPreferences.getBoolean(permission, true));
}
private void markAsAsked(String permission){
sharedPreferences.edit().putBoolean(permission, false).apply;
}
Don’t Double Check
At times, just like the example we have been working with, multiple permissions are needed in order to access one feature. In the example of a movie recorder, both the camera and audio permissions are necessary. However, if the user has previously accepted either the camera or the audio permission, we should only prompt the user for the remaining permission. In the attached example application I use the below method to filter out the permissions already requested in the past to be sure we do not ask the user about a permission they have previously been prompted for. This does not mean that the permission was granted but rather that the permission was previously requested. Again, determining how many times to prompt a user for a permission they have previously denied is specific to your application but it is never necessary to prompt the user for a permission you already have access to.
ArrayList result = new ArrayList<~>();
for(String perm : wanted){
if(!hasPermission(perm) && shouldWeAsk(perm)){
result.add(perm);
}
}
return result;
}
Suggested Permissions Flow
The below diagram visually represents the implementation described above and in the attached example application. Note that this is a suggestion based on the Google guideline to keep repeated permission prompts minimal but your implementation may require a slightly different approach.
Closing
The new permissions model is definitely a step in the right direction for both the user and the developer. Users will soon have a better understanding of exactly why you need access to their contacts, which means less Play Store complaints and hopefully a higher download rate. The example application referred to in this blog can be found here. I give you permission to download and use the code!

android adb pull/push permission denied可能的解决办法
android adb pull/push permission denied可能的解决办法
1、请确保手机已root
2、打开CMD窗口,输入adb root,出现如下结果:adbd is already running as root
再输入adb remount,出现如下结果:remount succeeded
3、再使用adb pull/push命令,看是否能成功
版权声明:本文为博主原创文章,未经博主允许不得转载。

Android adb shell 里面 ls 提示 opendir failed, Permission denied
如果是已经 root 过的机器:
$adb root
$adb remount
->remount succeeded
$ adb shell
ls
 在 Marshmallow 版本设备上不起作用")
Android AnimatorSet.cancel() 在 Marshmallow 版本设备上不起作用
如何解决Android AnimatorSet.cancel() 在 Marshmallow 版本设备上不起作用?
AnimatorSet animatorSet = new AnimatorSet();
ValueAnimator anim1 = ValueAnimator.ofFloat(0f,1f);
ValueAnimator anim2 = ValueAnimator.ofFloat(1f,0f);
~~~
animatorSet.play(anim1).after(anim2);
animatorSet.addListener(new AnimatorListenerAdapter() {
    @Override
    public void onAnimationCancel(Animator animation) {
        Log.d("Testing","cancel");
    }
}

animatorSet.start();


button.setonclickListener((v) -> {
    animatorSet.cancel();
})
当 Button 被点击时,取消监听器运行良好。但是,不仅在 cancel() 版本 (API23) 中调用 Marshmallow。
有什么问题?
解决方法
尝试将您的 cancel() 方法修改为:
public void cancel() {
  if (animatorSet != null) {
    animatorSet.cancel();
  }
  if (next != null) {
    next.cancel();
    next = null;
  }
}
它也适用于 API 23。如果没有,请分享您项目的更多代码以重建它并找到其他解决方案。
【1】概述及使用简介")
Android ImageLoader(Android-Universal-Image-Loader)【1】概述及使用简介
Android ImageLoader(Android-Universal-Image-Loader)【1】概述及使用简介
一,前言:为什么要引入 Android-Universal-Image-Loader?
众所周知,简单的几个 ImageView 加载几个图像资源、或者这几个图像资源是从本地加载时无需考虑过多直接加载即可,但当成千上百个 ImageView 加载成千上百个图像、尤其是当这些图片还是从网络中异步获取,那么需要考虑的问题细节很多很繁琐且容易出错,现在随便举例其中几条:
(1)最基本的问题,网络不可靠,可能在不可靠网络加载过程中,图片加载发生难以预估的失败。
(2)已经从网络或本地中加载成功的图片,应该避免重复加载,重复加载造成网络流量浪费,以及设备计算资源的重复浪费,因此需要考虑图片缓存策略。缓存分为两级缓存:第一级:内存缓存,第二级:“硬盘” 缓存(通常是手机的外置存储如 SD 卡和内置存储)。实现这样的层级缓存策略需要自己维护和组织。内存缓存可以考虑使用 Android 的 LruCache,详情参考我的另外两篇文章:
a、《使用新式 LruCache 取代 SoftReference 缓存图片,Android 异步加载图片》,文章链接地址:http://blog.csdn.net/zhangphil/article/details/43667415
b、或者自己按照 LruCache 设计思路实现和管理内存管理,《基于 Java LinkedList, 实现 Android 大数据缓存策略》,文章链接地址:http://blog.csdn.net/zhangphil/article/details/44116885
硬盘缓存则要自己建立缓存索引和缓存文件结构(如何建立缓存目录?内存在何时机把硬盘缓存的图片加入等等问题)。
(3)设想这一种情况,在一个 Android 竖直方向上 ListView 中有成千上万条图片 item,每条 item 中的图片均需从网络获取。用户手指在屏幕上快速滑动,滑动过程中,极有可能可见视野内的图片还没有加载完成后,用户已经快速的往下滑看下面的图片去了。而上面已经消失的图片加载线程如果置之不理任由其运作,那么,当用户在不断的下拉和上拉过程中,将会造成线程不断的重建和运行,内存开销极大。而对于用户来来,最紧迫的当前可见视野的图片加载显示可能因为线程过多而被无限期拖延到最后显示。这种情况一般得应对策略师自己维护和管理一个线程池(关于 Java 线程池,详情请参考我的另外一篇文章:《Java 线程池:ExecutorService,Executors》,文章链接地址:http://blog.csdn.net/zhangphil/article/details/43898637 ),自己管理和维护多线程下载任务队列,显然,需要考虑的线程队列问题很多,很繁琐。
等等还有很多未列举出来的细节问题。
为了避免重复造轮子,这种情况下最好考虑使用一些业界比较成熟稳定的开源框架。
Android ImageLoader(Android-Universal-Image-Loader),是 github 上的一个第三方开源图像加载库。该项目在 github 上的链接地址:
https://github.com/nostra13/Android-Universal-Image-Loader
Android-Universal-Image-Loader 主要应用领域是 ImageView 加载图片。该开源框架对上述问题给予了充分的解决。并提供了其他额外的附加功能(如加载的图片尺寸,加载动画等等)。
二、Android-Universal-Image-Loader 使用简介。
首先到 Android-Universal-Image-Loader 官方网址下载项目包,使用可以分为两种方法
(1)把 Android-Universal-Image-Loader 的全部实现源代码 (*.java) 放入到自己的项目目录 src 下,当作是自己的源代码使用。
(2)导入 Android-Universal-Image-Loader 的 jar 库文件,比如 universal-image-loader-1.9.4.jar。
两种方式都可以,看个人偏好。
我用的是第一种方法,这样可以方便查阅甚至直接二次定制修改 Android-Universal-Image-Loader 的源代码为自己所用。
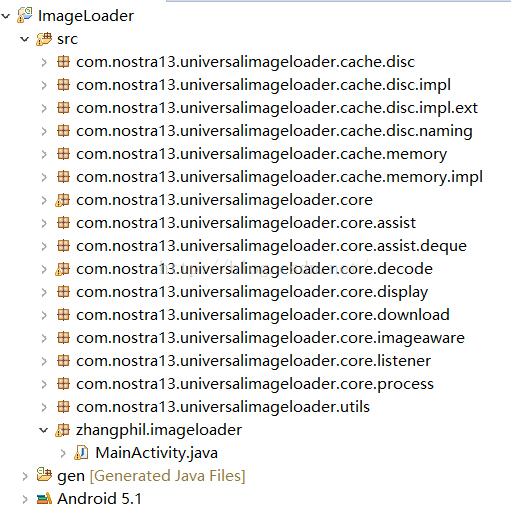
代码结构层次如图:
然后就可以直接使用,现给出一个示例。
测试用的 MainActivity.java:
package zhangphil.imageloader;

import com.nostra13.universalimageloader.core.DisplayImageOptions;
import com.nostra13.universalimageloader.core.ImageLoader;
import com.nostra13.universalimageloader.core.ImageLoaderConfiguration;
import com.nostra13.universalimageloader.core.assist.QueueProcessingType;
import com.nostra13.universalimageloader.core.display.FadeInBitmapDisplayer;

import android.app.ListActivity;
import android.content.Context;
import android.os.Bundle;
import android.view.LayoutInflater;
import android.view.View;
import android.view.ViewGroup;
import android.widget.ArrayAdapter;
import android.widget.ImageView;
import android.widget.ListView;

public class MainActivity extends ListActivity {

	private ImageLoader mImageLoader = null;

	// 加载的图片资源URL
	private final String ZHANGPHIL_CSDN_LOGO_URL = "http://avatar.csdn.net/9/7/A/1_zhangphil.jpg";

	// 加载的数目,假定数据总量很大
	private final int ITEM_COUNT = 10000;

	@Override
	protected void onCreate(Bundle savedInstanceState) {
		super.onCreate(savedInstanceState);

		ListView lv = this.getListView();
		ArrayAdapter adapter = new MyArrayAdapter(this, -1);
		lv.setAdapter(adapter);

		mImageLoader = ImageLoader.getInstance();
		mImageLoader.init(getImageLoaderConfiguration());
	}

	private ImageLoaderConfiguration getImageLoaderConfiguration() {

		ImageLoaderConfiguration config = new ImageLoaderConfiguration.Builder(
				this)
				.threadPoolSize(3)
				// 线程数量
				.threadPriority(Thread.NORM_PRIORITY)
				// 线程优先级
				.tasksProcessingOrder(QueueProcessingType.FIFO)
				.denyCacheImageMultipleSizesInMemory()
				.memoryCacheSize(1024 * 1024 * 10) // 内存缓存的容量10MB
				.diskCacheFileCount(100)// 缓存的文件数量
				.diskCacheSize(1024 * 1014 * 100)// 硬盘缓存的大小100MB
				.writeDebugLogs()// 输出日志
				.build();

		return config;
	}

	private DisplayImageOptions getDisplayImageOptions() {

		DisplayImageOptions options = new DisplayImageOptions.Builder()
				.showImageOnLoading(R.drawable.loading)
				// 加载过程中显示的图片
				.showImageForEmptyUri(R.drawable.ic_launcher)
				// 空URI显示的图片
				.showImageOnFail(R.drawable.error)
				// 加载失败时候显示内容
				.cacheInMemory(true)
				// 缓存到内存
				.cacheOnDisk(true)
				// 缓存到硬盘
				.considerExifParams(true)
				.displayer(new FadeInBitmapDisplayer(1000))// 淡入加载图片显示
				.build();

		return options;
	}

	private class MyArrayAdapter extends ArrayAdapter {

		private LayoutInflater inflater;
		private int resId = R.layout.item;
		private DisplayImageOptions mDisplayImageOptions;

		public MyArrayAdapter(Context context, int resource) {
			super(context, resource);
			inflater = LayoutInflater.from(getContext());
			mDisplayImageOptions = getDisplayImageOptions();
		}

		@Override
		public View getView(int position, View convertView, ViewGroup parent) {
			if (convertView == null)
				convertView = inflater.inflate(resId, null);

			ImageView imageView = (ImageView) convertView
					.findViewById(R.id.image);
			mImageLoader.displayImage(ZHANGPHIL_CSDN_LOGO_URL, imageView,
					mDisplayImageOptions);

			return convertView;
		}

		@Override
		public int getCount() {
			return ITEM_COUNT;
		}
	}


	// private File getMyCacheDir() {
	// File sdRoot = Environment.getExternalStorageDirectory();
	// String myImageLoaderCacheFileDir = "ImageLodaerCache";
	// File cacheFileDir = new File(sdRoot, myImageLoaderCacheFileDir);
	// return cacheFileDir;
	// }
}
Item.xml 文件:
<?xml version="1.0" encoding="utf-8"?>
<ImageView xmlns:android="http://schemas.android.com/apk/res/android"
    android:layout_width="match_parent"
    android:layout_height="match_parent"
    android:id="@+id/image" >

</ImageView>
素材 error.png 和 Loading.gif 可以根据个人的需要选取不同的图片资源。
ImageLoader 在使用之前需要做一些初始化工作,配置 ImageLoaderConfiguration 和 DisplayImageOptions 。然后就可以直接使用 ImageLoader 的 displayImage()方法从网络或本地存储中异步加载图片资源。而关于图片资源的缓存和异步下载线程池队列则交由 ImageLoader 为我们妥善在后台管理好。
关于Android added new permission model for Android 6.0 (Marshmallow).的介绍已经告一段落,感谢您的耐心阅读,如果想了解更多关于android adb pull/push permission denied可能的解决办法、Android adb shell 里面 ls 提示 opendir failed, Permission denied、Android AnimatorSet.cancel() 在 Marshmallow 版本设备上不起作用、Android ImageLoader(Android-Universal-Image-Loader)【1】概述及使用简介的相关信息,请在本站寻找。
本文标签:


