在本文中,我们将为您详细介绍Pages如何添加新页面节分页分列符-Pages添加新页面节分页分列符教程的相关知识,并且为您解答关于pages分页符的疑问,此外,我们还会提供一些关于android–在V
在本文中,我们将为您详细介绍Pages如何添加新页面节分页分列符-Pages添加新页面节分页分列符教程的相关知识,并且为您解答关于pages 分页符的疑问,此外,我们还会提供一些关于android – 在ViewPager中滑动到新页面会导致旧页面丢失状态、antd-pro添加新页面和新功能、BootStrap mvcpager分页样式(get请求,刷新页面)、CorelDraw2019怎样添加新页面 CorelDraw2019添加新页面的方法的有用信息。
本文目录一览:- Pages如何添加新页面节分页分列符-Pages添加新页面节分页分列符教程(pages 分页符)
- android – 在ViewPager中滑动到新页面会导致旧页面丢失状态
- antd-pro添加新页面和新功能
- BootStrap mvcpager分页样式(get请求,刷新页面)
- CorelDraw2019怎样添加新页面 CorelDraw2019添加新页面的方法
")
Pages如何添加新页面节分页分列符-Pages添加新页面节分页分列符教程(pages 分页符)
Pages如何添加新页面节分页分列符?下面是小编介绍Pages添加新页面节分页分列符教程,有需要的小伙伴一起来下文看看吧,希望可以帮助到大家!
在Pages页面的顶端菜单栏中找到“插入”这一项并点击进入下一步。

从下拉菜单中找到“节”并点击,此时可以看到Pages新增加了一个页面。

在新页面中找到“插入”这一个按钮并点击进入下一步。

找到“分页符”这一栏并点击,会看到页面添加了一张比之前小的新页面,这一张页面和上方的一样页面类似父子的关系。

从“插入”的下拉菜单中找到“分列符”这一栏点击,重复这个动作4次,我们输入一些文字,效果如下!在同一页面中,被分割成了4个互不影响的区域。

以上就是Pages添加新页面节分页分列符的技巧,希望大家喜欢哦。

android – 在ViewPager中滑动到新页面会导致旧页面丢失状态
我的viewpager中有3页.每个页面都有一个按钮,最初设置为一个开始按钮.按下开始按钮后,它将变为暂停按钮.我的问题是,如果我在第一页并单击开始(将其更改为暂停),然后滚动到最后一页并返回到第一页,则按钮会再次开始.它已经失去了被压迫的状态.这只发生在滚动两页之后.如果只滚动一页然后再返回,它不会丢失状态.
public Object instantiateItem(ViewGroup collection, int position) {

        RelativeLayout wholeView = new RelativeLayout(collection.getContext());

            // images
            final ImageView workoutWidget = new ImageView(collection.getContext());
            workoutWidget.setimageResource(R.drawable.workout_widget_master);

            final ImageButton resetButton = new ImageButton(collection.getContext());
            resetButton.setBackgroundDrawable(context.getResources().getDrawable(R.drawable.reset_button_master));
            RelativeLayout.LayoutParams resetButtonParams = new RelativeLayout.LayoutParams(RelativeLayout.LayoutParams.WRAP_CONTENT, RelativeLayout.LayoutParams.WRAP_CONTENT);
            resetButtonParams.addRule(RelativeLayout.ALIGN_PARENT_LEFT);
            resetButtonParams.addRule(RelativeLayout.ALIGN_PARENT_BottOM);
            resetButtonParams.height = 150;
            resetButtonParams.width = 150;
            resetButton.setLayoutParams(resetButtonParams);
            resetButton.setVisibility(View.GONE);

            final ImageButton startButton = new ImageButton(collection.getContext());
            startButton.setBackgroundDrawable(context.getResources().getDrawable(R.drawable.start_button_master));
            startButton.setTag(context.getString(R.string.wtrStartButtonTag));
            RelativeLayout.LayoutParams startButtonParams = new RelativeLayout.LayoutParams(RelativeLayout.LayoutParams.WRAP_CONTENT, RelativeLayout.LayoutParams.WRAP_CONTENT);
            startButtonParams.addRule(RelativeLayout.ALIGN_PARENT_RIGHT);
            startButtonParams.addRule(RelativeLayout.ALIGN_PARENT_BottOM);
            startButtonParams.height = 150;
            startButtonParams.width = 150;
            startButton.setLayoutParams(startButtonParams);
            startButton.setonClickListener(new View.OnClickListener() {
                @Override
                public void onClick(View view) {
                    startButton.setAlpha(1.0f);

                    if (startButton.getTag() == context.getString(R.string.wtrStartButtonTag)) {
                        startButton.setBackgroundDrawable(context.getResources().getDrawable(R.drawable.pause_button_master));
                        startButton.setTag(context.getString(R.string.wtrPauseButtonTag));
                        resetButton.setVisibility(View.VISIBLE);
                    }
                    else if (startButton.getTag() == context.getString(R.string.wtrPauseButtonTag)) {
                        startButton.setBackgroundDrawable(context.getResources().getDrawable(R.drawable.start_button_master));
                        startButton.setTag(context.getString(R.string.wtrStartButtonTag));
                    }
                }
            });

            // text labels view
            LinearLayout textLabels = new LinearLayout(collection.getContext());
            textLabels.setorientation(LinearLayout.VERTICAL);

                TextView activityDescription = new TextView(collection.getContext());
                activityDescription.setText("warm-up");
                activityDescription.setPadding(200, 200, 0, 0);
                activityDescription.setTextSize(30);
                textLabels.addView(activityDescription);

                TextView timeLeftForThisActivity = new TextView(collection.getContext());
                timeLeftForThisActivity.setText("00:00");
                timeLeftForThisActivity.setPadding(200, 0, 0, 0);
                timeLeftForThisActivity.setTextSize(60);
                textLabels.addView(timeLeftForThisActivity);

                LinearLayout elapsedLabels = new LinearLayout(collection.getContext());
                elapsedLabels.setorientation(LinearLayout.HORIZONTAL);

                    TextView elapsedtimeStatic = new TextView(collection.getContext());
                    elapsedtimeStatic.setText("Elapsed Time: ");
                    elapsedtimeStatic.setPadding(200, 0, 0, 0);
                    elapsedtimeStatic.setTextSize(20);

                    TextView elapsedtimeDynamic = new TextView(collection.getContext());
                    elapsedtimeDynamic.setText("00:00");
                    elapsedtimeDynamic.setPadding(0, 0, 0, 0);
                    elapsedtimeDynamic.setTextSize(20);

                elapsedLabels.addView(elapsedtimeStatic);
                elapsedLabels.addView(elapsedtimeDynamic);

            textLabels.addView(elapsedLabels);

        // adding images and text to overall view
        wholeView.addView(workoutWidget);
        wholeView.addView(startButton);
        wholeView.addView(resetButton);
        wholeView.addView(textLabels);

    collection.addView(wholeView, 0);

    return wholeView;
}
解决方法:
它失去了状态,因为viewpager默认只保存上一页和下一页(屏幕外页面限制为1).如果滚动到最后一页,则第一页将被销毁.
你可以使用setoffscreenPageLimit(2)增加内存中保存的页数;

antd-pro添加新页面和新功能
ant-design-pro新增页面和功能
最近用ant-design-pro在做一个后台的管理系统,因为之前使用过基于antd的antd-admin,github地址:https://github.com/zuiidea/an...,觉得挺不错的,这次于是选择了antd-pro作为后台。他们都是基于 dva 和antd的。所以需要先了解一下dva中的一些概念,例如dva中的model等。
以下是详细步骤:
- 找到 /src/common/menu.js中进行配置菜单,可以参照 自带的菜单进行配置
- 在/src/routes/ 这个文件夹下新建一个文件夹,用来存放新的页面,并且最好文件夹的命名需要和menu.js中的path相对应,然后新建一个js文件作为页面
-
在/src/common/router.js 的 routerConfig中配置路由。其中第二个参数是该页面对应的model,即数据存储的地方,第三个参数则是一个函数,返回对应的页面
'/frontUser/list':{ //第二个参数是指定model component : dynamicWrapper(app,['frontUser'],()=> import('../routes/FrontUser/List')) }, - 到这里就可以看到效果了,但是需要有数据操作。于是在 /src/models/ 这个文件夹下新建一个 frontUser.js文件,作为这个页面的model,用来定义该页面需要用到的数据,以及一些函数。
- 在model中存在 namespace(命名空间,用来区分不同的页面之间的数据),state(该命名空间下的数据),effects(一些异步请求的api方法定义在这里),reducers(用来修改state的一些函数定义在reducers下)
- 在model中不直接书写发起请求的代码,而是将请求统一放在 /src/services/下,新建一个js文件,存储各种请求的函数,将这些函数暴露出去,在model中引用。
- 到这里一个新页面和功能也就基本实现了。
总结:
整体的一个运行流程如下:
- 进入页面,在页面的componentDidMount钩子函数中调用model的effect中的方法
- 该方法调用service文件夹下的统一管理的请求函数
- 获取到服务器返回值,在model的effect中拿到,并且调用model下的reducer
- 调用model的reducers对请求的数据进行处理,将model的state进行改变,页面自动进行渲染
具体文档可看:https://pro.ant.design/docs/s...
我的文章都会在gitbook上找到,觉得不错的的可以看一下。顺便给个star,哈哈!
")
BootStrap mvcpager分页样式(get请求,刷新页面)
使用方法:
先把mvcpager.dll引用加入mvc项目中。
前台代码
前台:
@{
Layout = null;
}
@using Webdiyer.WebControls.Mvc
@model PagedList<string>
<!DOCTYPE html>
<html>
<head>
<Meta name="viewport" content="width=device-width" />
<title>Index</title>
<link href="~/Content/css_pager.css" rel="stylesheet" />
</head>
<body>
<div>
@foreach (var item in Model)
{
@item<br />
}
</div>
<div>
@Html.Pager(Model,new PagerOptions { PageIndexParameterName = "pageIndex",ContainerTagName = "ul",PrevPageText = "上页",NextPageText = "下页",FirstPageText = "首页",LastPageText = "尾页",Css,PagerItemsSeperator = "",CurrentPagerItemWrapperFormatString = "<li class=\"active\"><a href=\"#\">{0}</a></li>",PagerItemWrapperFormatString = "<li>{0}</li>" },new { id = "bootstrappager",@})
<!-- @class 可为pagination或pager 样式可自行修改样式表-->
</div>
</body>
</html>
后台代码
using System;
using System.Collections.Generic;
using System.Linq;
using System.Web;
using System.Web.Mvc;
using Webdiyer.WebControls.Mvc;
namespace MvcApplication6.Controllers
{
public class HomeController : Controller
{
//
// GET: /Home/
public ActionResult Index(int pageIndex=1,int pageSize=2)
{
List<string> list = new List<string>(){
"a","b","c","d"
};
return View(list.ToPagedList(pageIndex,pageSize));
}
}
}
@Html.Pager(Model,@})
样式更改:class为pager或pagination
如图:


样式文件:
.pagination {
border-radius: 4px;
display: inline-block;
margin: 20px 0;
padding-left: 0;
}
.pagination > li {
display: inline;
}
.pagination > li > a,.pagination > li > span {
background-color: #fff;
border: 1px solid #ddd;
color: #337ab7;
float: left;
line-height: 1.42857;
margin-left: -1px;
padding: 6px 12px;
position: relative;
text-decoration: none;
}
.pagination > li:first-child > a,.pagination > li:first-child > span {
border-bottom-left-radius: 4px;
border-top-left-radius: 4px;
margin-left: 0;
}
.pagination > li:last-child > a,.pagination > li:last-child > span {
border-bottom-right-radius: 4px;
border-top-right-radius: 4px;
}
.pagination > li > a:hover,.pagination > li > span:hover,.pagination > li > a:focus,.pagination > li > span:focus {
background-color: #eee;
border-color: #ddd;
color: #23527c;
z-index: 3;
}
.pagination > .active > a,.pagination > .active > span,.pagination > .active > a:hover,.pagination > .active > span:hover,.pagination > .active > a:focus,.pagination > .active > span:focus {
background-color: #337ab7;
border-color: #337ab7;
color: #fff;
cursor: default;
z-index: 2;
}
.pagination > .disabled > span,.pagination > .disabled > span:hover,.pagination > .disabled > span:focus,.pagination > .disabled > a,.pagination > .disabled > a:hover,.pagination > .disabled > a:focus {
background-color: #fff;
border-color: #ddd;
color: #777;
cursor: not-allowed;
}
/*.pagination-lg > li > a,.pagination-lg > li > span {
font-size: 18px;
line-height: 1.33333;
padding: 10px 16px;
}
.pagination-lg > li:first-child > a,.pagination-lg > li:first-child > span {
border-bottom-left-radius: 6px;
border-top-left-radius: 6px;
}
.pagination-lg > li:last-child > a,.pagination-lg > li:last-child > span {
border-bottom-right-radius: 6px;
border-top-right-radius: 6px;
}
.pagination-sm > li > a,.pagination-sm > li > span {
font-size: 12px;
line-height: 1.5;
padding: 5px 10px;
}
.pagination-sm > li:first-child > a,.pagination-sm > li:first-child > span {
border-bottom-left-radius: 3px;
border-top-left-radius: 3px;
}
.pagination-sm > li:last-child > a,.pagination-sm > li:last-child > span {
border-bottom-right-radius: 3px;
border-top-right-radius: 3px;
}*/
.pager {
list-style: outside none none;
margin: 20px 0;
padding-left: 0;
text-align: center;
}
.pager li {
display: inline;
}
.pager li > a,.pager li > span {
background-color: #fff;
border: 1px solid #ddd;
border-radius: 15px;
display: inline-block;
padding: 5px 14px;
text-decoration: none;
}
.pager li > a:hover,.pager li > a:focus {
background-color: #eee;
text-decoration: none;
}
.pager .next > a,.pager .next > span {
float: right;
}
.pager .prevIoUs > a,.pager .prevIoUs > span {
float: left;
}
.pager .disabled > a,.pager .disabled > a:hover,.pager .disabled > a:focus,.pager .disabled > span {
background-color: #fff;
color: #777;
cursor: not-allowed;
}
.pager > .active > a,.pager > .active > span,.pager > .active > a:hover,.pager > .active > span:hover,.pager > .active > a:focus,.pager > .active > span:focus {
background-color: #eee;
cursor: default;
z-index: 2;
}
以上所述是小编给大家介绍的BootStrap mvcpager分页样式(get请求,刷新页面),希望对大家有所帮助,如果大家有任何疑问请给我留言,小编会及时回复大家的。在此也非常感谢大家对编程小技巧网站的支持!

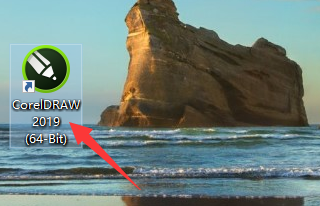
CorelDraw2019怎样添加新页面 CorelDraw2019添加新页面的方法
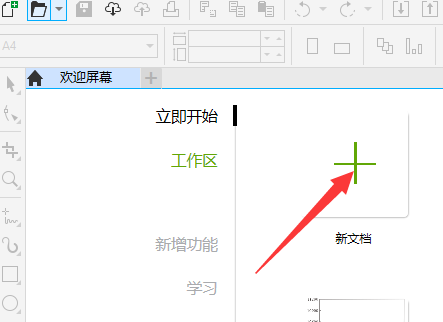
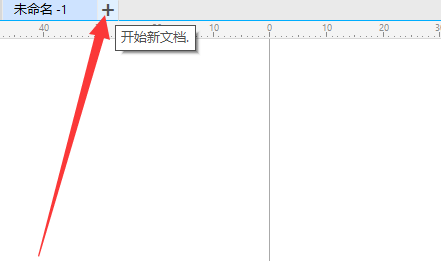
有一些刚刚接触coreldraw2019的新朋友们,并不是很熟悉coreldraw2019怎样添加新页面?下文就为各位带来了coreldraw2019添加新页面的方法,想了解详情的用户快来下文看看吧。coreldraw2019怎样添加新页面?coreldraw2019添加新页面的方法点击桌面coreldraw2019客户端。
以上就是CorelDraw2019怎样添加新页面 CorelDraw2019添加新页面的方法的详细内容,更多请关注php中文网其它相关文章!
我们今天的关于Pages如何添加新页面节分页分列符-Pages添加新页面节分页分列符教程和pages 分页符的分享已经告一段落,感谢您的关注,如果您想了解更多关于android – 在ViewPager中滑动到新页面会导致旧页面丢失状态、antd-pro添加新页面和新功能、BootStrap mvcpager分页样式(get请求,刷新页面)、CorelDraw2019怎样添加新页面 CorelDraw2019添加新页面的方法的相关信息,请在本站查询。
本文标签:


