在这篇文章中,我们将带领您了解微服务架构Day04-SpringBoot之web开发的全貌,包括微服务架构springboot的相关情况。同时,我们还将为您介绍有关java-study-springb
在这篇文章中,我们将带领您了解微服务架构Day04-SpringBoot之web开发的全貌,包括微服务架构 springboot的相关情况。同时,我们还将为您介绍有关java-study-springboot-基础学习-05-springboot web开发、Spring Boot web 简介及原理 day04、Spring Boot2.0之web开发、Spring Boot框架之Web开发的知识,以帮助您更好地理解这个主题。
本文目录一览:- 微服务架构Day04-SpringBoot之web开发(微服务架构 springboot)
- java-study-springboot-基础学习-05-springboot web开发
- Spring Boot web 简介及原理 day04
- Spring Boot2.0之web开发
- Spring Boot框架之Web开发
")
微服务架构Day04-SpringBoot之web开发(微服务架构 springboot)
引入项目
- 把html页面放在模板引擎文件夹templates下,这样能使用模板引擎的功能。
登录页面国际化
- 国际化:编写国际化配置文件
1.编写国际化配置文件,抽取页面需要显示的国际化消息
2.SpringBoot自动配置好了管理国际化资源文件的组件
    @Bean
    @ConfigurationProperties(
        prefix = "spring.messages"
    )
    public MessageSourceProperties messageSourceProperties() {
        return new MessageSourceProperties();
    }

	@Bean
    public MessageSource messageSource(MessageSourceProperties properties) {
    	/*
    	 * ResourceBoundleMessageSource extends AbstractResourceBasedMessageSource implements BeanClassLoaderAware
    	 * 该实现类允许用户通过beanName指定一个资源名:包括类路径的全限定资源名
    	 * 或者通过beanName指定一组资源名
    	 */
        ResourceBundleMessageSource messageSource = new ResourceBundleMessageSource();
        if (StringUtils.hasText(properties.getBasename())) {
        /*
         * setBasenames 设置国际化资源文件去掉语言国家代码的基础名,
         * 国际化资源文件可以直接放在类路径下叫 messages.properties,
         * 也可以在配置文件中指定基础名 spring.messages.basename
         */
	    String basename = context.getEnvironment().getProperty("spring.messages.basename", "messages");
	    messageSource.setBasenames(StringUtils.commaDelimitedListToStringArray(StringUtils.trimAllWhitespace(properties.getBasename())));
        }
        if (properties.getEncoding() != null) {
            messageSource.setDefaultEncoding(properties.getEncoding().name());
        }
		/*
		 * 如果没有找到特定语言环境的文件,是否返回系统区域设置
		 * 		默认为true
		 * 		如果是关闭的,将会使用唯一的默认文件:比如baseName的“message”的 message.properties
		 */
        messageSource.setFallbackToSystemLocale(properties.isFallbackToSystemLocale());
        Duration cacheDuration = properties.getCacheDuration();
        if (cacheDuration != null) {
            messageSource.setCacheMillis(cacheDuration.toMillis());
        }
		/*
		 * 设置是否始终应用消息格式组件,解析没有参数的消息
		 * 		比如:MessageFormat希望单引号被转义为""",
		 * 			如果消息文本全部使用这样的转义编写,即使没有定义参数占位符,也需要将此标志设为true
		 * 			否则,只有具有实际意义的参数消息文本才会用MessageFormat的转义来编写
		 */
        messageSource.setAlwaysUseMessageFormat(properties.isAlwaysUseMessageFormat());
        /*
         * 是否使用消息代码作为默认消息,而不是抛出NoSuchMessageException异常,
         * 适用于开发和调试,默认值为false
         */
        messageSource.setUseCodeAsDefaultMessage(properties.isUseCodeAsDefaultMessage());
        return messageSource;
    }
MessageSource解析:
- MessageSource架构图:
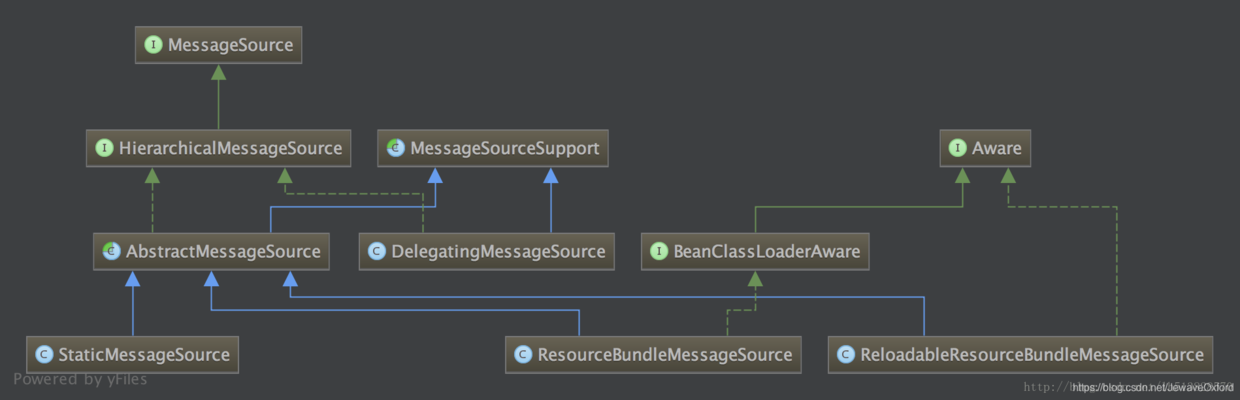
- MessageSource: 抽象化的消息接口
- HierarchicalMessageSource: 分层的消息源接口,可获取父消息源
- MessageSourceSupport: 消息源解析的抽象类,通过指定"消息格式化组件MessageFormat"格式化消息
- DelegatingMessageSource: 消息源解析委派类. 用户未指定消息源解析类时,SpringContext默认使用这个类. 功能比较简单:将字符串和参数数组格式化为一个消息字符串
- AbstractMessageSource: 支持"配置文件"的方式国际化资源的抽象类. 内部提供一个与区域设置无关的公共消息配置文件,消息代码为关键字
- StaticMessageSource: 主要用于程序测试. 允许通过编程的方式提供国际化信息
- ResourceBundleMessageSource: 该实现类允许用户通过beanName指定一个资源名,包括类的全限定资源名. 或者通过beanName指定一组资源名. 不同的区域获取加载不同资源文件,以达到国际化的目的
- ReloadableResourceBundleMessageSource:
- ReloadableResourceBundleMessageSource和ResourceBundleMessageSource的区别:
- 加载资源类型及方式:
- ReloadResourceBundleMessageSource依托Spring的ResourceLoader加载Resource资源,功能更加强大,支持 .class和 .properties文件
- ResourceBundleMessageSource依托JDK自带的ResourceBundle加载资源,支持绝对路径和工程路径,支持 .class和 .properties文件
- 缓存时间:
- ReloadResourceBundleMessageSource每次加载都会记录每个资源加载的时间点,在缓存资源过期后会再次比较文件的修改时间,如果不变则不需要加载,同时刷新本次加载时间点
- ResourceBundleMessageSource主要利用ResourceBundle.Control实现简单的自动加载
- 编码方式:
- ReloadResourceBundleMessageSource不仅可以指定统一的默认编码方式,也同时支持为每个文件单独制定编码方式
MessageSource接口:
方法 描述 String getMessage(String code, Object[] args, String defaultMessge, Locale locale) 获取消息,如果没有找到消息,就返回默认值 String getMessage(String code, Object[] args, Locale locale) throws NoSuchMessageException 获取消息,如果无法找到消息,则视为错误 String getMessage(MessageSourceResolvable resolvable, Locale locale) throws NoSuchMessageException 尝试使用传入的{@code MessageSourceResolvable}参数中包含的所有属性来解析消息. 必须在此方法上抛出{@code NoSuchMessageException}, 因为在调用此方法时,无法确定可解析的{@code defaultMessage}属性是否为空 MessageSourceResolvable解析消息要素的包装接口和类: 方法 描述 :-- :-- String[] getCode() 返回用于解决此消息的代码,按照这些代码应该尝试的顺序. 因此,最后的一个代码将是默认代码 Object[] getArguments() 返回要用于解析此消息的参数数组 String getDefaultMessage() 返回要用于解析此消息的默认消息 HierarchicalMessageSource消息源分层接口: 方法 描述 :-- :-- void setParentMessageSource(MessageSource parent) 设置将用于解决次对象无法解析的消息的父级
参数parent是将用于解析此对象无法解析的消息的父MessageSource.可能是{@code null},在这种情况下不需要解决MessageSource getParentMessageSource() 返回当前MessageSource的父级,否则返回{@Code null} MessageSourceSupport用于支持消息源解析的抽象类: 方法 描述 :-- :-- void setAlwaysUseMessageFormat(boolean alwaysUseMessageFormat) 设置是否始终应用消息格式组件,解析没有参数的消息
比如: MessageFromat希望单引号转义为"""
如果消息文本全部用这样的转义编写,即使没有定义参数占位符,只需要将此标志设为"true"
否则,只有具有实际参数的消息文本才会用MessageFormat转义类编写boolean isAlwaysUseMessageFormat() 返回是否应用消息格式组件,解析没有参数的消息 String renderDefaultMessage(String defaultMessage, Object[] args, Locale locale) 渲染给定的默认消息字符串 String formatMessage(String msg, Object[] args, Locale locale) 渲染给定的消息字符串 MessageFormat createMessageFormat(String msg, Locale locale) 为给定的消息和区域设置创建一个MessageFormat DelegatingMessageSource消息源解析委派类: 方法 描述 :-- :-- String getMessage(String code, Object[] args, String defaultMessage, Locale locale) 解析消息
父消息解析源不为null时,则采用父消息源解析消息.否则使用自身消息源解析消息String getMessage(String code, Object[] args, Locale locale) throws NoSuchMessageException 解析消息
如果父消息解析源不为null时,则采用父消息源解析消息,否则抛出异常String getMessage(MessageSourceResolvable resolvable, Locale locale) throws NoSuchMessageException 解析消息
如果父消息解析源不为null时,则采用父消息源解析消息,否则使用自身消息源解析消息AbstractMessageSourc抽象类Spring中支持配置文件的方式国际化资源的抽象类: 方法 描述 :-- :-- void setUseCodeAsDafaultMessage(boolean useCodeAsDefaultMessage) 设置是否使用消息代码作为默认消息,而不是抛出NoSuchMessageException.默认为false String getMessageInternal(String code, Object[] args, Locale locale) 将给定的代码和参数解析为给定的区域中设置的消息,如果没有找到则返回{@code null} String getMessageFromPArent(String code, Object[] args, Locale locale) 如果父MessageSource中存在消息则尝试从父MessageSource检索给定的消息 String getDefaultMessage(String code) 返回默认消息 Object[] resolveArgements(Object[] args, Locale locale) 通过给定的参数数组搜索,找到MessageSourceResolve对象并解析 String resolveCodeWithoutArguments(String code, Locale locale) 解析不带参数的消息 StaticMessageSource是AbstractMessageSource允许通过编程的方式提供国际化信息: 方法 描述 :-- :-- void addMessage(String code, Locale locale, String msg) 将给定的消息与给定的代码相关联 void addMessage(Map<String, String> messages, Locale locale) 批量将给定的消息与给定的代码相关联 ResourceBundleMessageSource是AbstractMessageSource的实现类,允许用户通过beanName指定一个资源名- 包括类路径的全限定名, 或者通过beanNames指定一组资源名: 方法 描述 :-- :-- void setBaseName(String basename) 设置资源文件 void setBaseNames(String... basenames) 批量设置资源文件 void setDefaultEncoding(String defaultEncoding) 设置用于解析绑定的资源文件的默认字符集 void setFallBackToSystemLocale(boolean fallbackToSystemLocale) 如果没有找到特定语言环境的文件,是否返回到系统区域设置
默认为true. 如果为false,唯一的备用文件将是默认文件void setCacheSeconds(int cacheSeconds) 设置缓存加载绑定的资源文件的秒数 String resolveCodeWithoutArguments(String code, Locale locale) 将给定的消息代码解析为已注册资源包中的key,按照原样返回捆绑包中的值,不使用MessageFormat解析 MessageFormat resolveCode(String code, Locale locale) 将给定的消息代码解析为注册资源包中的key,每个消息代码使用缓存的MessageFormat实例 ResourceBundle getResourceBundle(String baseName, Locale locale) 为给定的baseName和代码返回一个ResourceBundle,从缓存中提取已生成的MessageFormat ResourceBundle doGetBundle(String baseName, Locale locale) throws MissingResourceException 获取给定baseName和locale设置的资源包 MessageFormat getMessageFormat(ResourceBundle resourceBundle, String code, Locale locale) throws Missing ResourceException 为给定的包和代码返回一个MessageFormat,从缓存中提取已生成的MessageFormats String getStringOrNull(ResourceBundle resourceBundle, String key) 获取资源包中指定key所对应的值 ReloadableResourceBundleMessageSource实现类允许用户通过beanName指定一个资源名,包括类路径和全限定名.或者通过beanNames指定一组资源名: 方法 描述 -- -- String resolveCodeWithoutArguments(String code, Locale locale) 将消息代码解析为检索到的包文件中的key,按原样返回包中找到的值,不使用MessageFormat解析 MessageFormat resolveCode(String code, Locale locale) 将给定的消息代码解析为检索到的包文件中的key,每个消息代码使用缓存的MessageFormat实例 PropertiesHolder getMergedProperties(Locale locale) 获取locale所对应的持有properties对象 List< String > calculateAllFilenames(String basename, Locale locale) 计算给定的捆绑包基础名称和区域设置的所有文件名
将计算给定区域设置的文件名,系统区域设置默认文件List < String > calculateFilenamesForLocale(String basename, Locale locale) 计算给定捆绑基础包名称和区域设置的文件名 Properties loadProperties(Resource resource, String filename) 解析给定的resource资源,返回对应的properties对象 void clearCache() 清除所有资源包对应的properties文件 void clearCacheIncludingAncestors() 清除当前MessageSource及所有父资源的缓存
- MessageFormat消息组件格式化: 主要就是将消息串,参数格式化成字符串
3.在页面获取国际化的值
标签体中:
th:text="#{}"
th:placeholder="#{}"
非标签体,行内表达式
[[#{}]]
- 国际化原理:国际化中Locale(区域信息对象);LocaleResolver(获取区域信息对象)
        @Bean
        @ConditionalOnMissingBean
        @ConditionalOnProperty(
            prefix = "spring.mvc",
            name = {"locale"}
        )
        // 默认的区域信息解析器就是根据请求头的区域信息获取Locale进行国际化解析
        public LocaleResolver localeResolver() {
            if (this.mvcProperties.getLocaleResolver() == org.springframework.boot.autoconfigure.web.servlet.WebMvcProperties.LocaleResolver.FIXED) {
                return new FixedLocaleResolver(this.mvcProperties.getLocale());
            } else {
                AcceptHeaderLocaleResolver localeResolver = new AcceptHeaderLocaleResolver();
                localeResolver.setDefaultLocale(this.mvcProperties.getLocale());
                return localeResolver;
            }
        }

 		public Locale resolveLocale(HttpServletRequest request) {
        Locale defaultLocale = this.getDefaultLocale();
        if (defaultLocale != null && request.getHeader("Accept-Language") == null) {
            return defaultLocale;
        } else {
            Locale requestLocale = request.getLocale();
            List<Locale> supportedLocales = this.getSupportedLocales();
            if (!supportedLocales.isEmpty() && !supportedLocales.contains(requestLocale)) {
                Locale supportedLocale = this.findSupportedLocale(request, supportedLocales);
                if (supportedLocale != null) {
                    return supportedLocale;
                } else {
                    return defaultLocale != null ? defaultLocale : requestLocale;
                }
            } else {
                return requestLocale;
            }
        }
    }
登录
- 开发期间模板引擎修改以后,要想能够实时生效
1.禁用模板引擎缓存-spring.thymeleaf.cache=false
2.页面修改完以后ctrl+F9,进行重新编译 - 登录错误消息的显示
th:text="${msg}" th:if="${not #strings.isEmpty(msg)}"
拦截器
- 通过拦截器进行登录检查
RESTful
- 普通 CRUD:URI,/资源名称/资源标识
- RESTful CRUD:以HTTP请求方式区分对资源的CRUD操作
| 普通 CRUD(URI来区分操作) | RESTful CRUD | |
|---|---|---|
| 查询 | getEmp | emp--GET |
| 添加 | addEmp?xxx | emp--POST |
| 修改 | updateEmp?id=xx&xxx | emp/{id}--PUT |
| 删除 | deleteEmp?id=xx | emp/{id}--DELETE |
- 举例:
| 请求URI | 请求方式 | |
|---|---|---|
| 查询所有员工 | emps | GET |
| 查询某个员工(来到修改页面) | emp/{id} | GET |
| 进入添加页面 | emp | GET |
| 添加员工 | emp | POST |
| 进入修改页面(查出员工信息进行回显) | emp/{id} | GET |
| 修改员工 | emp/{id} | PUT |
| 删除员工 | emp/{id} | DELETE |
thymeleaf对公共页面元素抽取
- 抽取公共片段
<div th:fragment="copy">

</div>
- 引入公共片段
<div th:insert="~{footer :: copy}"></div>

引入公共片段的两种方式:
~{templatename::selector}	模板名::选择器
~{templatename::fragmentname}	模板名::片段名
其中模板名(公共片段来源的文件名)会使用thymeleaf的前后缀配置规则进行解析
- 引入公共片段的th属性:
1.th:insert -将公共片段整个插入到声明引入的元素中
2.th:replace-将声明引入的元素替换为公共片段
3.th:include-将被引入的片段的内容包含进这个标签中
<div th:insert="footer :: copy"></div>
<div th:replace="footer :: copy"></div>
<div th:include="footer :: copy"></div>
- 使用th属性进行引入公共片段时,可以不用写 ~ {},只有行内写法[[~ {}]],[(~{})]要写
列表 CRUD
C:
- redirect:表示重定向到一个地址 / 代表当前项目路径
- forward:表示转发到一个地址
- SpringMVC自动将请求参数和入参对象的属性进行一一绑定.要求就是请求参数的名字name和JavaBean入参的对象里的属性名一致.
- 问题:提交的数据格式不对:生日日期==日期格式化:SpringMVC将页面提交的数据需要转换为指定的类型.
U:
- 请求URI和数据id通过 + 拼接字符串
- 页面发送PUT请求:
1.在SpringMVC中配置HiddenHttpMethodFilter,可以修改页面请求,SpringBoot已经自动配置好
2.页面创建一个POST表单
3.创建一个input项,name="_method";值就是指定的请求方式
错误处理机制
- SpringBoot默认的错误处理机制
1.浏览器访问时,返回一个默认的错误页面:错误状态码,错误类型,错误提示信息,错误时间.
浏览器发送请求的请求头: text.html.
2.如果是其它客户端访问,返回默认的一个json数据
客户端发送请求的请求头:/*
3.原理:可以参照ErrorMvcAutoConfiguration
给容器中添加了如下组件:
1.DefaultErrorAttributes:在页面共享错误信息
public Map<String, Object> getErrorAttributes(WebRequest webRequest, boolean includeStackTrace) {
        Map<String, Object> errorAttributes = new LinkedHashMap();
        errorAttributes.put("timestamp", new Date());
        this.addStatus(errorAttributes, webRequest);
        this.addErrorDetails(errorAttributes, webRequest, includeStackTrace);
        this.addPath(errorAttributes, webRequest);
        return errorAttributes;
    }
2.BasicErrorController:处理默认/error请求
@Controller
@RequestMapping({"${server.error.path:${error.path:/error}}"})
public class BasicErrorController extends AbstractErrorController {
    private final ErrorProperties errorProperties;

    public BasicErrorController(ErrorAttributes errorAttributes, ErrorProperties errorProperties) {
        this(errorAttributes, errorProperties, Collections.emptyList());
    }

    public BasicErrorController(ErrorAttributes errorAttributes, ErrorProperties errorProperties, List<ErrorViewResolver> errorViewResolvers) {
        super(errorAttributes, errorViewResolvers);
        Assert.notNull(errorProperties, "ErrorProperties must not be null");
        this.errorProperties = errorProperties;
    }

    public String getErrorPath() {
        return this.errorProperties.getPath();
    }

    @RequestMapping(
        produces = {"text/html"}
    )
    //产生html数据,处理浏览器发送的请求
    public ModelAndView errorHtml(HttpServletRequest request, HttpServletResponse response) {
        HttpStatus status = this.getStatus(request);
        Map<String, Object> model = Collections.unmodifiableMap(this.getErrorAttributes(request, this.isIncludeStackTrace(request, MediaType.TEXT_HTML)));
        response.setStatus(status.value());
        // 去哪个页面作为错误页面,包含页面地址和页面内容
        ModelAndView modelAndView = this.resolveErrorView(request, response, status, model);
        return modelAndView != null ? modelAndView : new ModelAndView("error", model);
    }

    @RequestMapping	//产生json数据,处理其它客户端请求
    public ResponseEntity<Map<String, Object>> error(HttpServletRequest request) {
        Map<String, Object> body = this.getErrorAttributes(request, this.isIncludeStackTrace(request, MediaType.ALL));
        HttpStatus status = this.getStatus(request);
        return new ResponseEntity(body, status);
    }
3.ErrorPageCustomizer:系统出现4开头和5开头的错误,该组件生效,定制错误响应规则.就会来到/error请求.
	@Value("${error.path:/error}")
    private String path = "/error";	//系统出现错误以后来到error请求进行处理
4.DefaultErrorViewResolver:
 public ModelAndView resolveErrorView(HttpServletRequest request, HttpStatus status, Map<String, Object> model) {
        ModelAndView modelAndView = this.resolve(String.valueOf(status.value()), model);
        if (modelAndView == null && SERIES_VIEWS.containsKey(status.series())) {
            modelAndView = this.resolve((String)SERIES_VIEWS.get(status.series()), model);
        }

        return modelAndView;
    }

    private ModelAndView resolve(String viewName, Map<String, Object> model) {
    	// 默认SpringBoot可以找到页面-error/404
        String errorViewName = "error/" + viewName;
        // 如果模板引擎可以解析这个页面地址就使用模板引擎解析
        TemplateAvailabilityProvider provider = this.templateAvailabilityProviders.getProvider(errorViewName, this.applicationContext);
        // 模板引擎可用的话返回到errorViewName指定的视图地址;如果模板引擎不可用,就在静态资源文件夹下找errorViewName对应的页面.假如静态资源文件夹没有对应的页面则返回null
        return provider != null ? new ModelAndView(errorViewName, model) : this.resolveResource(errorViewName, model);
    }
错误处理步骤:
- 系统出现4开头和5开头的错误,该组件生效,定制错误响应规则.就会来到/error请求,就会被BasicErrorController处理.
- 响应页面:去哪个页面是由DefaultErrorViewResolver解析得到的
 protected ModelAndView resolveErrorView(HttpServletRequest request, HttpServletResponse response, HttpStatus status, Map<String, Object> model) {
        Iterator var5 = this.errorViewResolvers.iterator();

        ModelAndView modelAndView;
        do {
            if (!var5.hasNext()) {
                return null;
            }

            ErrorViewResolver resolver = (ErrorViewResolver)var5.next();
            modelAndView = resolver.resolveErrorView(request, status, model);
        } while(modelAndView == null);

        return modelAndView;
    }
- 如何定制错误响应
- 如何定制错误页面
- 模板引擎有的情况下:
1.error/错误状态码,只要将错误页面命名为"错误状态码.html"放在模板引擎文件夹里的error文件夹下,发生此状态码的错误就会来到对应的页面
2.可以使用4xx和5xx作为错误页面的文件名来匹配这种类型的所有错误 - 精确优先,即优先寻找精确的错误状态码.html
3.页面能获取哪些信息:- timstamp: 时间戳
- status: 状态码
- error: 错误提示
- exception: 异常对象
- message: 异常消息
- errors: JSR303数据校验错误
- 模板引擎没有的情况下:
1.模板引擎找不到错误页面,就在静态资源文件夹下找 - 模板引擎没有,静态资源文件夹也没有的情况下:
1.默认来到SpringBoot的错误提示页面
- 模板引擎有的情况下:
- 如何定制错误的json数据:
1.自定义异常处理并返回定制的json数据
- 如何定制错误页面
@ControllerAdvice
public class MyExceptionHandler {	//没有自适应效果-浏览器和客户端都是返回的json数据
    @ResponseBody
    @ExceptionHandler(RuntimeException.class)
    public Map<String,Object> handleException(Exception e){
        Map<String,Object> map=new HashMap<>();
        map.put("code","运行异常");
        map.put("message",e.getMessage());
        return map;

    }
}
2.转发到forward:/error进行自适应响应效果处理
@ControllerAdvice
public class MyExceptionHandler {
    @ExceptionHandler(RuntimeException.class)
    public String handleException(Exception e, HttpServletRequest request){
        Map<String,Object> map=new HashMap<>();
        // 传入自己的错误状态码,否则就不会进入定制错误页面的解析流程--------Integer statusCode = (Integer)request.getAttribute("javax.servlet.error.status_code");
        request.setAttribute("javax.servlet.error.status_code","500");
        map.put("code","运行异常");
        map.put("message",e.getMessage());
        //转发到/error,实现自适应效果
        return "forward:/error";

    }
}
3.将定制数据携带出去:出现错误以后,会来到/error请求,这个请求会被BasicErrorController处理,响应的数据是由getErrorAttributes(由AbstractErrorController(ErrorController)规定的方法)得到的
- 可以编写一个继承AbstractErrorController的子类实现类,放在容器中
- 页面上能用的数据,json上返回的数据都是通过errorAttributes.getErrorAttributes得到的,也就是容器中DefaultErrorAttributes.getErrorAttributes()进行数据处理的
- 响应是自适应的,可以通过定制ErrorAtrributes改变需要返回的内容.
@Component
public class MyErrorAttributes extends DefaultErrorAttributes {
    //返回值map是页面和json能获取的所有字段
    @Override
    public Map<String, Object> getErrorAttributes(WebRequest webRequest, boolean includeStackTrace) {
        Map<String, Object> map=super.getErrorAttributes(webRequest, includeStackTrace);
        map.put("company","oxford");
        //异常处理器携带的数据
        Map<String,Object> ext=(Map<String, Object>) webRequest.getAttribute("ext",0);
        map.put("ext",ext);
        return map;
    }
}

java-study-springboot-基础学习-05-springboot web开发
SpringBoot 之web开发
1、自动配置类说明
Web开发的自动配置类: org.springframework.boot.autoconfigure.web.WebMvcAutoConfiguration

比如:
spring mvc的前后缀配置

在WebMvcAutoConfiguration中对应方法
对应配置文件


2、静态资源配置说明
如果进入SpringMVC的规则为/时,SpringBoot的默认静态资源的路径为:
spring.resources.static-locations=classpath:/META-INF/resources/,classpath:/resources/,classpath:/static/,classpath:/public/
如果某个静态文件不在上面的配置路径中,那么从浏览器中就访问不到了
3、自定义消息转化器
- 原有的spring mvc 配置

- springboot 配置

4、自定义拦截器
- 继承org.springframework.web.servlet.config.annotation.WebMvcConfigurerAdapter
参考:https://github.com/chengbingh...

Spring Boot web 简介及原理 day04
一、SpringBoot 创建 web 开发 (三部曲)
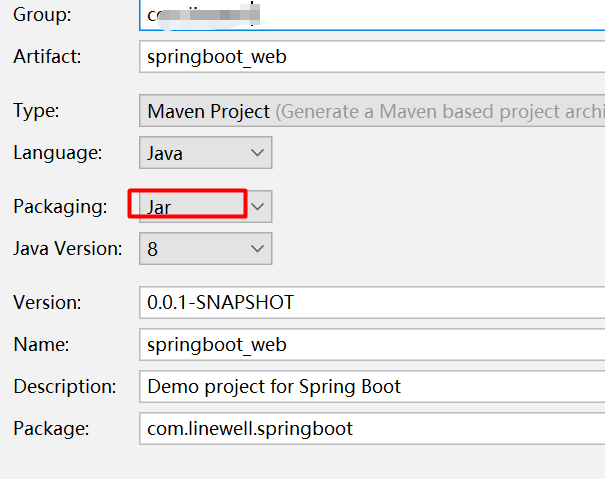
1. 快速构建 SpringBoot 项目,并以 jar 包的形式构建
2. 选择对应的功能模块 (选定场景,配置少量的配置就可运行,不配置有默认值)

3. 编写自己的逻辑代码
二、SpringBoot 对静态资源的映射规则
通过查看 WebMvcAutoConfiguration 类,可以查看 SpringBoot 对静态资源存放的位置
@Override
public void addResourceHandlers(ResourceHandlerRegistry registry) {   //添加资源映射
            if (!this.resourceProperties.isAddMappings()) {
                logger.debug("Default resource handling disabled");
                return;
            }
            Duration cachePeriod = this.resourceProperties.getCache().getPeriod();
            CacheControl cacheControl = this.resourceProperties.getCache()
                    .getCachecontrol().toHttpCacheControl();
            if (!registry.hasMappingForPattern("/webjars/**")) {
                customizeResourceHandlerRegistration(registry
                        .addResourceHandler("/webjars/**")
                        .addResourceLocations("classpath:/META-INF/resources/webjars/")   //webjars/**都存放在classpath:
                                                   /META-INF/resources/webjars

                        .setCachePeriod(getSeconds(cachePeriod))
                        .setCacheControl(cacheControl));
            }
            String staticPathPattern = this.mvcProperties.getStaticPathPattern();
            if (!registry.hasMappingForPattern(staticPathPattern)) {
                customizeResourceHandlerRegistration(
                        registry.addResourceHandler(staticPathPattern)      //   /**表示访问项目的任何资源,都去(静态资源文件夹)
                                .addResourceLocations(getResourceLocations(
                                        this.resourceProperties.getStaticLocations()))
                                .setCachePeriod(getSeconds(cachePeriod))
                                .setCacheControl(cacheControl));
            }
        }
1. 既所有的 webjars/** 资源,都在 classpath:/META-INF/resources/webjars 中找资源
什么是 webjars? 就是以 jar 形式的静态资源(如 jquery.js)https://www.webjars.org/
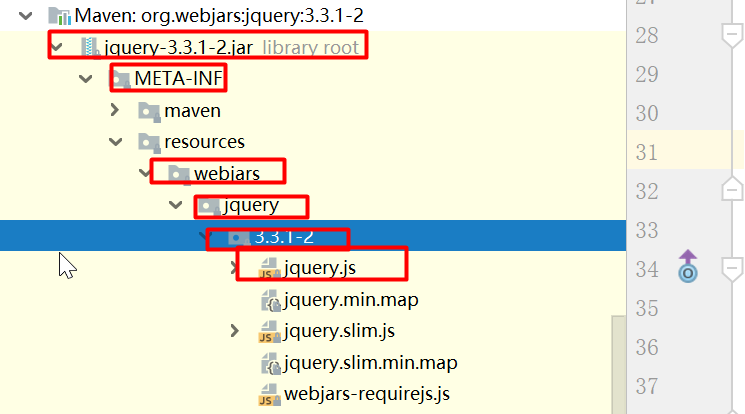
例如可以这么访问:localhost:8080/webjars/jquery/3.3.1-2/jquery.js
2.、/** 表示访问当前项目的任何资源,都去(静态资源文件夹中寻找)
静态资源文件夹(存放 js,css,image 等不包括 html,html 需要使用模板引擎)
以下是静态资源文件夹的位置

  classpath:/META-INF/resources/,
   classpath:/resources/,
   classpath:/static/,
   classpath:/public/"
  "/":  项目的根路径
3. 欢迎页(首页)

欢迎页:静态资源文件夹下的所有 index.html, 会被显示出来。名字固定。


4. 项目工程的图标

图标:在静态资源文件夹中存放.ico 文件即可显示该图标。固定名字 favicon.ico

三、模板引擎
在 SpringBoot 中不用 Jsp 页面,而是使用 thmeleaf 模板。原因是语法更加简单,强大。

使用步骤:
1. 在 pom.xml 中引入 thmeleaf 约束。将 SpringBoot 自带的 thmeleaf 版本覆盖带,使用版本 3。
  <!--切换thmeleaf版本-->
  <dependency>
          <groupId>org.springframework.boot</groupId>
          <artifactId>spring-boot-starter-thymeleaf</artifactId></dependency>
  <properties>
        <thymeleaf.version>3.0.9.RELEASE</thymeleaf.version>
        <!-- 布局功能的支持程序  thymeleaf3主程序  layout2以上版本 -->
        <!-- thymeleaf2   layout1-->
        <thymeleaf-layout-dialect.version>2.2.2</thymeleaf-layout-dialect.version>
  </properties>
2. 对 thmeleaf 的使用

只要将普通的 html 页面放在 classpath:/templates/ thmeleaf 模板引擎就会自动渲染

Spring Boot2.0之web开发
1、关于静态资源的访问
在我们开发Web应用的时候,需要引用大量的js、css、图片等静态资源。
Spring Boot默认提供静态资源目录位置需置于classpath下,目录名需符合如下规则:
/static
/public
/resources
/META-INF/resources
比如:我们可以在src/main/resources/目录下创建static,在该位置放置一个图片文件。启动程序后,访问http://localhost:8080/xx.jpg。
2、渲染web页面
在之前的示例中,我们都是通过@RestController来处理请求,所以返回的内容为json对象。那么如果需要渲染html页面的时候,要如何实现呢?
我们可以用模板引擎
在动态HTML实现上Spring Boot依然可以完美胜任,并且提供了多种模板引擎的默认配置支持,所以在推荐的模板引擎下,我们可以很快的上手开发动态网站。
Spring Boot提供了默认配置的模板引擎主要有以下几种:
- Thymeleaf
- FreeMarker
- Velocity
- Groovy
- Mustache
Spring Boot建议使用这些模板引擎,避免使用JSP,若一定要使用JSP将无法实现Spring Boot的多种特性,具体可见后文:支持JSP的配置
当你使用上述模板引擎中的任何一个,它们默认的模板配置路径为:src/main/resources/templates。当然也可以修改这个路径,具体如何修改,可在后续各模板引擎的配置属性中查询并修改。
下面介绍下 使用FreeMarker模板应请渲染web视图
首先创建maven工程,pom文件如下:
<project xmlns="http://maven.apache.org/POM/4.0.0" xmlns:xsi="http://www.w3.org/2001/XMLSchema-instance" xsi:schemaLocation="http://maven.apache.org/POM/4.0.0 http://maven.apache.org/xsd/maven-4.0.0.xsd">
  <modelVersion>4.0.0</modelVersion>
  <groupId>springboot-frameworker</groupId>
  <artifactId>com.toov5.frameworker</artifactId>
  <version>0.0.1-SNAPSHOT</version>
  <parent>
        <groupId>org.springframework.boot</groupId>
        <artifactId>spring-boot-starter-parent</artifactId>
        <version>2.0.0.RELEASE</version>
    </parent>
    <dependencies>
        <dependency>
            <groupId>org.springframework.boot</groupId>
            <artifactId>spring-boot-starter-web</artifactId>
        </dependency>
        <dependency>
         <groupId>org.springframework.boot</groupId>
          <artifactId>spring-boot-starter-freemarker</artifactId>
   </dependency>

    </dependencies>


</project>
Java类
package com.toov5.frameworker;


import java.util.Map;

import org.springframework.stereotype.Controller;
import org.springframework.web.bind.annotation.RequestMapping;


@Controller
public class index {
    @RequestMapping("/index")
	public String show(Map<String, Object> map){
	    map.put("name", "toov5");
	    map.put("age","20");
	    map.put("sex","0");
		return "index";
	}


}
启动类:
package com.toov5.frameworker;

import org.springframework.boot.SpringApplication;
import org.springframework.boot.autoconfigure.SpringBootApplication;

@SpringBootApplication
public class app {

	public static void main(String[] args){
		SpringApplication.run(app.class, args);
	}

}
然后创建freemarker文件
目录结构如下:
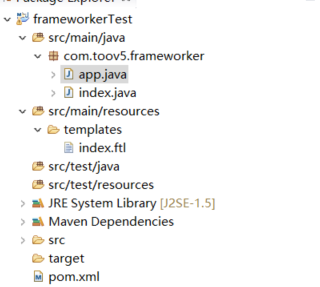
其中freemarker的名字后缀和路径默认最好这样哈,内容如下所示:
hello frameworker,

${name}*****${age}
启动项目,并且访问:
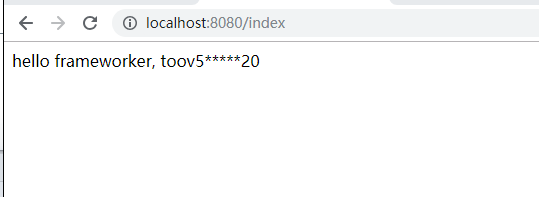
成功之,是不是很好玩呀~~关于freemaker的语法大家自己找个博客或者相应的教程看看吧,很简单。重在实践哟
PS:有小伙伴问 注解@RestController和@Controller区别
1) 如果只是使用@RestController注解Controller,则Controller中的方法无法返回jsp页面,或者html,配置的视图解析器 InternalResourceViewResolver不起作用,返回的内容就是Return 里的内容。
2) 如果需要返回到指定页面,则需要用 @Controller配合视图解析器InternalResourceViewResolver才行。
如果需要返回JSON,XML或自定义mediaType内容到页面,则需要在对应的方法上加上@ResponseBody注解。
1.使用@Controller 注解,在对应的方法上,视图解析器可以解析return 的jsp,html页面,并且跳转到相应页面
若返回json等内容到页面,则需要加@ResponseBody注解
2.@RestController注解,相当于@Controller+@ResponseBody两个注解的结合,返回json数据不需要在方法前面加@ResponseBody注解了,但使用@RestController这个注解,就不能返回jsp,html页面,视图解析器无法解析jsp,html页面
so,你可以试试,把我们这个小项目中的 注解替换下 ,你看看页面返回的啥子,自己体会下哈
顺便提及一下:

classPath是与编译后的字节码有关的目录

Spring Boot框架之Web开发
博客中涉及到的代码仓库地址:demo-springBoot
(一)简介
SpringBoot进行Web开发的基本步骤
① 创建SpringBoot应用,选中所需模块;
② SpringBoot会默认将所需的环境配置好,只需要通过配置文件进行少量的配置即可让项目运行起来;
③ 编写主要业务代码;
对SpringBoot进行配置时,配置项的信息和配置内容可以通过参考SpringBoot的自动配置原理进行配置。
SpringBoot自动配置原理的使用:
① 此场景中SpringBoot已经配置好了什么?
② 已经配置好的场景是否可以修改?能修改那些内容?
③ 是否可以对当前场景进行扩展?
xxxAutoConfiguration:SpringBoot中的自动配置类,帮我们给容器中自动配置组件;
xxxProperties:自动配置类中对应的配置属性类,配置属性类来封装配置文件的内容;
(二)SpringBoot对静态资源的映射规则
1. 静态资源的存放路径
WebMvcAutoConfiguration:WebMVC自动配置类,负责完成WebMVC的自动配置
@Configuration(proxyBeanMethods = false)
@ConditionalOnWebApplication(type = Type.SERVLET)
@ConditionalOnClass({ Servlet.class, DispatcherServlet.class, WebMvcConfigurer.class })
@ConditionalOnMissingBean(WebMvcConfigurationSupport.class)
@AutoConfigureOrder(Ordered.HIGHEST_PRECEDENCE + 10)
@AutoConfigureAfter({ DispatcherServletAutoConfiguration.class, TaskExecutionAutoConfiguration.class,ValidationAutoConfiguration.class })
public class WebMvcAutoConfiguration {
......
// 配置默认静态文件夹的位置
@Override
public void addResourceHandlers(ResourceHandlerRegistry registry) {
if (!this.resourceProperties.isAddMappings()) {
logger.debug("Default resource handling disabled");
return;
}
Duration cachePeriod = this.resourceProperties.getCache().getPeriod();
CacheControl cacheControl = this.resourceProperties.getCache().getCachecontrol().toHttpCacheControl();
// 配置webjars类型的静态资源的映射路径
if (!registry.hasMappingForPattern("/webjars/**")) {
customizeResourceHandlerRegistration(registry.addResourceHandler("/webjars/**")
.addResourceLocations("classpath:/META-INF/resources/webjars/")
.setCachePeriod(getSeconds(cachePeriod)).setCacheControl(cacheControl));
}
String staticPathPattern = this.mvcProperties.getStaticPathPattern();
// 配置普通静态资源的映射路径
if (!registry.hasMappingForPattern(staticPathPattern)) {
customizeResourceHandlerRegistration(registry.addResourceHandler(staticPathPattern)
.addResourceLocations(getResourceLocations(this.resourceProperties.getStaticLocations()))
.setCachePeriod(getSeconds(cachePeriod)).setCacheControl(cacheControl));
}
}
......
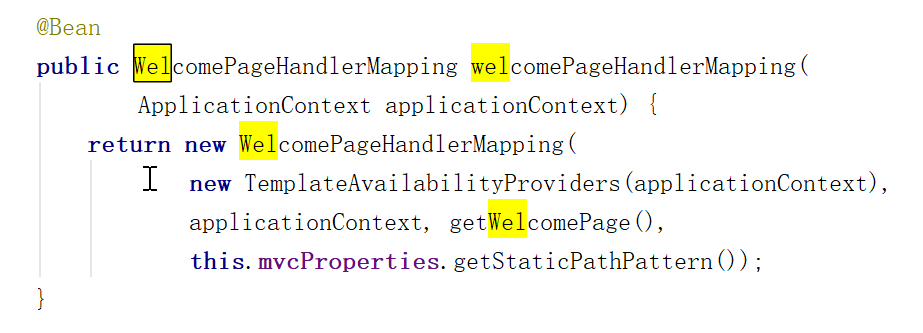
// 配置欢迎页面的查找路径
@Bean
public WelcomePageHandlerMapping welcomePageHandlerMapping(ApplicationContext applicationContext,
FormattingConversionService mvcConversionService, ResourceUrlProvider mvcResourceUrlProvider) {
WelcomePageHandlerMapping welcomePageHandlerMapping = new WelcomePageHandlerMapping(
new TemplateAvailabilityProviders(applicationContext), applicationContext, getWelcomePage(),
this.mvcProperties.getStaticPathPattern());
welcomePageHandlerMapping.setInterceptors(getInterceptors(mvcConversionService, mvcResourceUrlProvider));
welcomePageHandlerMapping.setCorsConfigurations(getCorsConfigurations());
return welcomePageHandlerMapping;
}
......
}
从上面的源码可以看出,webjars类型的静态资源的查找路径为
classpath:/META-INF/resources/webjars/webjars:通过jar包引入前端静态资源
关于webjars的博客:WebJars介绍
在自动配置类WebMvcAutoConfiguration 中 addResourceHandlers 方法调用 getStaticLocations 方法,来获取属性配置类 ResourceProperties 中配置的静态资源映射路径;
@ConfigurationProperties(prefix = "spring.resources", ignoreUnknownFields = false)
public class ResourceProperties {
private static final String[] CLASSPATH_RESOURCE_LOCATIONS = { "classpath:/META-INF/resources/","classpath:/resources/", "classpath:/static/", "classpath:/public/" };
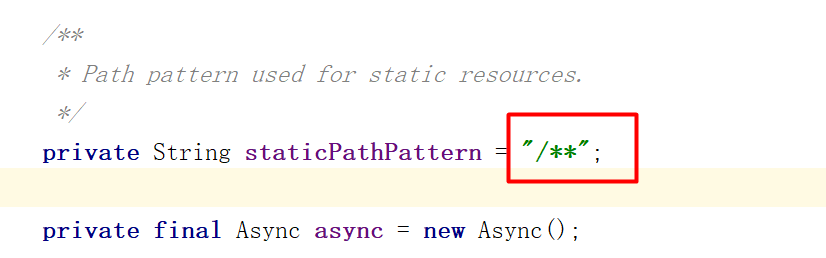
/**
* Locations of static resources. Defaults to classpath:[/META-INF/resources/,
* /resources/, /static/, /public/].
*/
private String[] staticLocations = CLASSPATH_RESOURCE_LOCATIONS;
......
public String[] getStaticLocations() {
return this.staticLocations;
}
......
// 配置欢迎页面的路径映射
@Bean
public WelcomePageHandlerMapping welcomePageHandlerMapping(ApplicationContext applicationContext,
FormattingConversionService mvcConversionService, ResourceUrlProvider mvcResourceUrlProvider) {
WelcomePageHandlerMapping welcomePageHandlerMapping = new WelcomePageHandlerMapping(
new TemplateAvailabilityProviders(applicationContext), applicationContext, getWelcomePage(),
this.mvcProperties.getStaticPathPattern());
welcomePageHandlerMapping.setInterceptors(getInterceptors(mvcConversionService, mvcResourceUrlProvider));
welcomePageHandlerMapping.setCorsConfigurations(getCorsConfigurations());
return welcomePageHandlerMapping;
}
// 获取欢迎页面所在的路径
private Optional<Resource> getWelcomePage() {
String[] locations = getResourceLocations(this.resourceProperties.getStaticLocations());
return Arrays.stream(locations).map(this::getIndexHtml).filter(this::isReadable).findFirst();
}
// 获取欢迎页面index.html文件
private Resource getIndexHtml(String location) {
return this.resourceLoader.getResource(location + "index.html");
}
......
}
通过上面的源码分析可以清晰的得到,静态资源查找的文件目录:
"classpath:/META-INF/resources/",
"classpath:/resources/",
"classpath:/static/",
"classpath:/public/"
2. 静态资源路径的映射
静态资源和存放路径
① 所有浏览器 webjars/** URI下的资源对应 classpath:/META-INF/resources/webjars/ 路径的资源,即浏览器URI localhost:8080/webjars/** 对应资源路径 classpath:/META-INF/resources/webjars/
例如:使用webjars导入jquery,并在浏览器同归URI进行访问
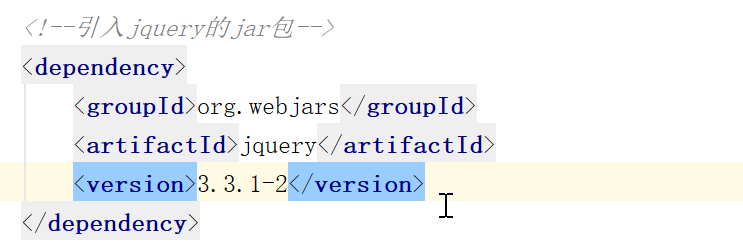
1)配置pom.xml导入jquery
<!-- 使用webjar的方式导入jQuery -->
<dependency>
    <groupId>org.webjars</groupId>
    <artifactId>jquery</artifactId>
    <version>3.2.0</version>
</dependency>
2)导入后的包结构

3)在浏览器中输入URI访问

② 所有浏览器 /** URI下的资源对应以下路径的资源
classpath:/META-INF/resources/
classpath:/resources/
classpath:/static/
classpath:/public/
例如:在static文件夹中新建 hello.html,并在浏览器访问
1)hello.html 所处的文件路径

2)浏览器的访问URI

③ 配置欢迎页;静态资源路径下所有的 index.html 都会被浏览器的 /** 路径映射
例如:在public路径下新建 index.html,并在浏览器访问
1)index.html 文件所在路径

2)浏览器访问URI

(三)模板引擎
1. 模板引擎简介
模板引擎的目标是为了将显示与数据分离,模板引擎的种类多种多样如:JSP、Velocity、Freemarker、Thymeleaf等,但本质上是将模板文件和数据通过模板引擎进行组合生成最终的HTML代码。

SpringBoot整合Thymeleaf作为模板引擎,但在前后端分离的主流环境下,为了适合灵活多变的环境越来越多的公司选择一套后端配合多套前端提供服务,服务于单体应用的模板引擎使用场景变得越来越少。此处仅对Thymeleaf模板引擎进行简单的介绍和使用。
关于模板引擎的博文:浅谈模板引擎
2. Thymeleaf模板引擎
Thymeleaf是适用于Web和独立环境的现代服务器端Java模板引擎。
Thymeleaf的主要目标是为您的开发工作流程带来优雅的_自然模板_-HTML可以在浏览器中正确显示,并且可以作为静态原型工作,从而可以在开发团队中加强协作。
Thymeleaf拥有用于Spring Framework的模块,与您喜欢的工具的大量集成以及插入您自己的功能的能力,对于现代HTML5 JVM Web开发而言,Thymeleaf是理想的选择-尽管它可以做很多事情。
Thymeleaf官网
3. Thymeleaf的语法规则
① th:text:改变当前元素内的文本内容。其中 th:xxx 可以放到任意HTML元素中,用替换原生属性的值。
th:xxx 属性的功能

② Thymeleaf中使用表达式
Simple expressions:(表达式语法)
Variable Expressions: ${...}:获取变量值;OGNL语法;
1)、获取对象的属性、调用方法
------------------------------------
2)、使用内置的基本对象:
#ctx : the context object.
#vars: the context variables.
#locale : the context locale.
#request : (only in Web Contexts) the HttpServletRequest object.
#response : (only in Web Contexts) the HttpServletResponse object.
#session : (only in Web Contexts) the HttpSession object.
#servletContext : (only in Web Contexts) the ServletContext object.
${session.foo}
------------------------------------
3)、内置的一些工具对象:
#execInfo : information about the template being processed.
#messages : methods for obtaining externalized messages inside variables expressions, in the
same way as they would be obtained using #{…} syntax.
#uris : methods for escaping parts of URLs/URIs
#conversions : methods for executing the configured conversion service (if any).
#dates : methods for java.util.Date objects: formatting, component extraction, etc.
#calendars : analogous to #dates , but for java.util.Calendar objects.
#numbers : methods for formatting numeric objects.
#strings : methods for String objects: contains, startsWith, prepending/appending, etc.
#objects : methods for objects in general.
#bools : methods for boolean evaluation.
#arrays : methods for arrays.
#lists : methods for lists.
#sets : methods for sets.
#maps : methods for maps.
#aggregates : methods for creating aggregates on arrays or collections.
#ids : methods for dealing with id attributes that might be repeated (for example, as a result of an iteration).
--------------------------------------
Selection Variable Expressions: *{...}:选择表达式:和${}在功能上是一样;
补充:配合 th:object="${session.user}:
    <div th:object="${session.user}">
    <p>Name: <span th:text="*{firstName}">Sebastian</span>.</p>
    <p>Surname: <span th:text="*{lastName}">Pepper</span>.</p>
    <p>Nationality: <span th:text="*{nationality}">Saturn</span>.</p>
    </div>
Message Expressions: #{...}:获取国际化内容
    Link URL Expressions: @{...}:定义URL;
    @{/order/process(execId=${execId},execType=''FAST'')}
    Fragment Expressions: ~{...}:片段引用表达式
    <div th:insert="~{commons :: main}">...</div>
----------------------------------------
Literals(字面量)
    Text literals: ''one text'' , ''Another one!'' ,…
    Number literals: 0 , 34 , 3.0 , 12.3 ,…
    Boolean literals: true , false
    Null literal: null
    Literal tokens: one , sometext , main ,…
----------------------------------------
Text operations:(文本操作)
    String concatenation: +
    Literal substitutions: |The name is ${name}|
-----------------------------------------
Arithmetic operations:(数学运算)
    Binary operators: + , ‐ , * , / , %
    Minus sign (unary operator): ‐
----------------------------------------
Boolean operations:(布尔运算)
    Binary operators: and , or
    Boolean negation (unary operator): ! , not
----------------------------------------
Comparisons and equality:(比较运算)
    Comparators: > , < , >= , <= ( gt , lt , ge , le )
    Equality operators: == , != ( eq , ne )
---------------------------------------
Conditional operators:条件运算(三元运算符)
    If‐then: (if) ? (then)
    If‐then‐else: (if) ? (then) : (else)
Default: (value) ?: (defaultvalue)
Special tokens:(特殊标记)
    No‐Operation: _
此处对于Thymeleaf的语法并没有介绍完全,感兴趣的同学可以参看官方文档:Thymeleaf使用参考文档
4. Thymeleaf的使用
Thymeleaf模板引擎的使用:
① 在pom.xml文件中引入thymeleaf依赖;
② 参照Thymeleaf的语法书写模板页面;
① 在pom.xml中导入依赖,导入依赖即可无需进行配置,SpringBoot会自动配置好
<!-- 导入thymeleaf包 -->
<dependency>
    <groupId>org.springframework.boot</groupId>
    <artifactId>spring-boot-starter-thymeleaf</artifactId>
</dependency>
在SpringBoot2.3.4.RELEASE中,整合的Thymeleaf版本为3.0.11.RELEASE是官网上的最新版本
② 书写模板页面 success.html
<!DOCTYPE html>
<html lang="en" xmlns:th="http://www.thymeleaf.org">
    <head>
        <meta charset="UTF-8">
        <title>success</title>
    </head>
    <body>
        <h1>Success!!!</h1>
        <div th:utext="${hello}">21313</div>
        <div>
            <h3>my name is</h3>
            <h3 th:text="${name}"></h3>
            <hr/>
            <!-- th:each每次遍历都会生成当前这个标签: 3个h4 -->
            <h4 th:text="${user}"  th:each="user:${users}"></h4>
            <hr/>
            <h4>
                <a th:each="user:${users}"> [[${user}]] </a>
            </h4>
        </div>
    </body>
</html>
③ 编写调用模板页面的方法success
@Controller
public class HelloController {

    @ResponseBody
    @RequestMapping("/hello")
    public String hello() {
        return "hello";
    }

    @RequestMapping("/success")
    public String success(Map<String,Object> map){
        map.put("name","zhangsan");
        map.put("hello","<h3>你好</h3>");
        map.put("users", Arrays.asList("zhangsan","lisi","wangwu"));
        return "success";
    }
}
④ 启动项目,在浏览器访问

(四)SpringMVC自动配置
1. SpringMVC Auto-Configuration
SpringBoot官方文档中的说明:
Spring Boot provides auto-configuration for Spring MVC that works well with most applications.
The auto-configuration adds the following features on top of Spring’s defaults:
- Inclusion of
ContentNegotiatingViewResolverandBeanNameViewResolverbeans.- Support for serving static resources, including support for WebJars (covered later in this document)).
- Automatic registration of
Converter,GenericConverter, andFormatterbeans.- Support for
HttpMessageConverters(covered later in this document).- Automatic registration of
MessageCodesResolver(covered later in this document).- Static
index.htmlsupport.- Custom
Faviconsupport (covered later in this document).- Automatic use of a
ConfigurableWebBindingInitializerbean (covered later in this document).If you want to keep those Spring Boot MVC customizations and make more MVC customizations (interceptors, formatters, view controllers, and other features), you can add your own
@Configurationclass of typeWebMvcConfigurerbut without@EnableWebMvc.If you want to provide custom instances of
RequestMappingHandlerMapping,RequestMappingHandlerAdapter, orExceptionHandlerExceptionResolver, and still keep the Spring Boot MVC customizations, you can declare a bean of typeWebMvcRegistrationsand use it to provide custom instances of those components.If you want to take complete control of Spring MVC, you can add your own
@Configurationannotated with@EnableWebMvc, or alternatively add your own@Configuration-annotatedDelegatingWebMvcConfigurationas described in the Javadoc of@EnableWebMvc.原文翻译如以下:
Spring Boot自动配置了SpringMVC,使其可以与其他应用共同使用
Spring Boot自动配置在默认配置的基础上还配置了以下特性:
- 包含
ContentNegotiatingViewResolver和BeanNameViewResolver组件;- 支持静态资源,也包含对Webjars的支持;
- 自动注册
Converter,GenericConverter, 和Formatter组件;- 支持
HttpMessageConverters;- 自动注册
MessageCodesResolver;- 支持静态的
index.html页面;- 支持用户的
Favicon;- 自动使用
ConfigurableWebBindingInitializer组件;如果您想保留Spring Boot的自定义配置并且扩展MVC自定义配置(拦截器,格式化器,视图解析器,和其他特性),你可以添加自己的
WebMvcConfigurer类型的带有@Configuration注解的配置类,并且不使用@EnableWebMvc注解接管SpringMVC。如果您想使用自定义实例
RequestMappingHandlerMapping,RequestMappingHandlerAdapter, 或ExceptionHandlerExceptionResolver并仍然使用Spring Boot MVC配置,你可以声明一个WebMvcRegistrations类型的bean,并且使用它提供的自定义配置代替原有的配置。如果您想完全控制Spring MVC,您可以添加您自己的带有
@EnableWebMvc注释的配置类,或者添加您自己的带有@Configuration注释的DelegatingWebMvcConfiguration,例如:在@EnableWebMvc的Javadoc中所描述的那样。
下面我们来看看其中提到的一些配置:
① ContentNegotiatingViewResolver:组合所有的视图解析器
@Bean
@ConditionalOnBean(ViewResolver.class)
@ConditionalOnMissingBean(name = "viewResolver", value = ContentNegotiatingViewResolver.class)
public ContentNegotiatingViewResolver viewResolver(BeanFactory beanFactory) {
    ContentNegotiatingViewResolver resolver = new ContentNegotiatingViewResolver();
    resolver.setContentNegotiationManager(beanFactory.getBean(ContentNegotiationManager.class));
    // ContentNegotiatingViewResolver uses all the other view resolvers to locate
    // a view so it should have a high precedence
    resolver.setOrder(Ordered.HIGHEST_PRECEDENCE);
    return resolver;
}
② ViewResolver:视图解析器:根据方法的返回值得到视图对象(View),视图对象决定如何渲染(转发?重定向?),SpringBoot对视图解析器进行自动化配置
public interface ViewResolver {

    /**
	 * Resolve the given view by name.
	 * <p>Note: To allow for ViewResolver chaining, a ViewResolver should
	 * return {@code null} if a view with the given name is not defined in it.
	 * However, this is not required: Some ViewResolvers will always attempt
	 * to build View objects with the given name, unable to return {@code null}
	 * (rather throwing an exception when View creation failed).
	 * @param viewName name of the view to resolve
	 * @param locale the Locale in which to resolve the view.
	 * ViewResolvers that support internationalization should respect this.
	 * @return the View object, or {@code null} if not found
	 * (optional, to allow for ViewResolver chaining)
	 * @throws Exception if the view cannot be resolved
	 * (typically in case of problems creating an actual View object)
	 */
    @Nullable
    View resolveViewName(String viewName, Locale locale) throws Exception;

}
③ Converter:转化器;当在浏览器和bean之间的转化时会用到转化器,配置了很多类型之间转化的转化器

④ Formatter:格式化器,用于格式化数据,例如:将2020-11-11格式化为Date类型的数据
@Bean
@Override
public FormattingConversionService mvcConversionService() {
    Format format = this.mvcProperties.getFormat();
    WebConversionService conversionService = new WebConversionService(new DateTimeFormatters()
                                                                      .dateFormat(format.getDate()).timeFormat(format.getTime()).dateTimeFormat(format.getDateTime()));
    addFormatters(conversionService);
    return conversionService;
}
我们可以添加自定义格式化器和转化器,只要放到容器中即可。
⑤ HttpMessageConverter:SpringMVC用来转换Http请求和响应,例如:把实体类转化为JSON数组
HttpMessageConverters 从容器中确定的,获取所有的 HttpMessageConverters
@Bean
@ConditionalOnMissingBean
public HttpMessageConverters messageConverters(ObjectProvider<HttpMessageConverter<?>> converters) {
    return new HttpMessageConverters(converters.orderedStream().collect(Collectors.toList()));
}
因此我们也可以给容器中添加
HttpMessageConverter,只需要将自己的组件注册容器中(@Bean,@Component)SpringBoot开发Web应用官方文档:SpringMVC配置
2. 扩展SpringMVC
以前没有使用SpringBoot时使用SpringMVC需要书写的配置信息
<mvc:view-controller path="/hello" view-name="success"/>
<mvc:interceptors>
    <mvc:interceptor>
        <mvc:mapping path="/hello"/>
        <bean></bean>
    </mvc:interceptor>
</mvc:interceptors>
<mvc:default-servlet-handler/>
使用配置文件对SpringMVC功能进行扩展
@Configuration
public class MyMvcConfig implements WebMvcConfigurer {

    /**
     * super.addViewControllers(registry);
     * 浏览器发送 /atguigu 请求来到 success
     * @param registry
     */
    @Override
    public void addViewControllers(ViewControllerRegistry registry) {
        registry.addViewController("/Bruce").setViewName("ok");
    }
}
有些博客可能介绍的是继承
WebMvcConfigurerAdapter类,但WebMvcConfigurerAdapter在Spring5.0 后放弃使用改为使用WebMvcConfigurer接口代替。
使用SpringBoot时我们可以编写 WebMvcConfigurer 类型的配置类(带有 @Configuration 注解的类)并且不标注 @EnableWebMvc 注解(标注此注解则意味着我们的配置全面接管SpringBoot配置)这样我们书写的配置类既保留了SpringBoot的所有自动配置,也能使用我们扩展的配置;
自动配置和自定义配置可以同时保留的原因:
WebMvcAutoConfigurationAdapter 中导入了 EnableWebMvcConfiguration 类用于加载自定义配置信息;
@Configuration(proxyBeanMethods = false)
@Import(EnableWebMvcConfiguration.class)
@EnableConfigurationProperties({ WebMvcProperties.class, ResourceProperties.class })
@Order(0)
public static class WebMvcAutoConfigurationAdapter implements WebMvcConfigurer {
    .......
}
EnableWebMvcConfiguration 类继承 DelegatingWebMvcConfiguration 类以实现加载自定义MVC配置;
@Configuration(proxyBeanMethods = false)
public static class EnableWebMvcConfiguration extends DelegatingWebMvcConfiguration implements ResourceLoaderAware {
    ......
}
DelegatingWebMvcConfiguration 类中包含 setConfigurers 方法,能够将所有自定义配置和SpringBoot自动配置同时加载,以实现自动配置和自定义配置同时生效;
@Configuration(proxyBeanMethods = false)
public class DelegatingWebMvcConfiguration extends WebMvcConfigurationSupport {

    private final WebMvcConfigurerComposite configurers = new WebMvcConfigurerComposite();


    @Autowired(required = false)
    public void setConfigurers(List<WebMvcConfigurer> configurers) {
        if (!CollectionUtils.isEmpty(configurers)) {
            this.configurers.addWebMvcConfigurers(configurers);
        }
    }
}
关于加载配置的总结:
① WebMvcAutoConfiguration是SpringMVC的自动配置类
② 在进行自动配置时,会导入 @Import(EnableWebMvcConfiguration.class)
③ 在进行配置时会加载容器中的所有的 WebMvcConfigurer 类型的配置
④ 我们自己书写的配置类因此也就被加载了
结果:SpringBoot中对SpringMVC的自动配置和我们自定义的配置信息都会起作用
自动配置和自定义配置继承关系图

3. 全面接管SpringMVC
我们可以完全不使用SpringBoot对SpringMVC的自动配置,而是使用我们自己对SpringMVC的配置内容。
我们可以在我们自己的配置类中添加 @EnableWebMVC 注解,这时时SpringBoot对SpringMVC的配置就完全失效了,只有我们自己的SpringMVC配置会生效。
@EnableWebMVC 注解让SpringBoot自动配置失效的原因:
① EnableWebMVC 注解中导入了 DelegatingWebMvcConfiguration 类
@Retention(RetentionPolicy.RUNTIME)
@Target(ElementType.TYPE)
@Documented
@Import(DelegatingWebMvcConfiguration.class)
public @interface EnableWebMvc {
}
② 而 DelegatingWebMvcConfiguration 类继承了 WebMvcConfigurationSupport ,WebMvcConfigurationSupport 仅包含SpringMVC的基本配置
@Configuration(proxyBeanMethods = false)
public class DelegatingWebMvcConfiguration extends WebMvcConfigurationSupport {
    ......
}
③ 而 WebMvcAutoConfiguration 配置类中,包含条件注解 @ConditionalOnMissingBean(WebMvcConfigurationSupport.class)
@Configuration(proxyBeanMethods = false)
@ConditionalOnWebApplication(type = Type.SERVLET)
@ConditionalOnClass({ Servlet.class, DispatcherServlet.class, WebMvcConfigurer.class })
@ConditionalOnMissingBean(WebMvcConfigurationSupport.class)
@AutoConfigureOrder(Ordered.HIGHEST_PRECEDENCE + 10)
@AutoConfigureAfter({ DispatcherServletAutoConfiguration.class, TaskExecutionAutoConfiguration.class,
		ValidationAutoConfiguration.class })
public class WebMvcAutoConfiguration {
    ......
}
总结:
@Enable注解直接中导入的DelegatingWebMvcConfiguration类中继承了WebMvcConfigurationSupport类;- 而
WebMvcAutoConfiguration配置类中的条件注解@ConditionalOnMissingBean要求不包含WebMvcConfigurationSupport类型的bean;- 所以标注
@Enable注解的自定义配置类会让WebMvcAutoConfiguration自动配置类失效,也就是SpringBoot对SpringMVC的自动配置失效;
4. 修改SpringBoot中的默认配置
SpringBoot加载组件的原理:
SpringBoot在进行自动配置组件的时候,会先查看容器中是否有用户自己配置的组件即带有 @Bean 、@Component 注解的配置类)如果没有则进行自动配置;
对组件是否加载依赖于 @Conditition 注解的扩展注解实现;
SpringBoot还支持把有些组件的自动配置和用户配置组合起来如 ViewResovler 组件;
基本思路:
xxxAutoConfiguration:是SpringBoot的自动配置类,对相关的组件进行配置,配置类所标注的条件注解可以帮助我们理解配置类的作用和要求;
xxxProperties:是SpringBoot中自动配置类的属性类,属性类中的配置项是我们可以在外部配置文件中配置的内容;
xxxConfiguration:SpringBoot中的扩展配置类,用于对自动配置进行扩展配置。我们可以查看这些扩展配置类的构成,书写我们自己的配置类来对SpringBoot配置类进行扩展配置;
xxxCustomizer:SpringBoot中的定制器类,可以用来帮助我们定制某些配置;
(五)RestfulCRUD示例项目
1. 设置默认访问首页
我们可以向容器中注入自定义WebMvc配置类对原有的WebMvc扩展配置,SpringBoot会同时加载自动配置和自定义配置。例如:书写自定义配置类配置视图映射,修改默认的首页访问模板信息。使用的原理是我们上面提到的修改默认配置的原理。
@Configuration
public class MyMvcConfig implements WebMvcConfigurer {

    /**
     * 所有的WebMVCConfiguration组件会一起加载
     * @return
     */
    @Bean
    public WebMvcConfigurer webMvcConfigurer() {
        /**
         * 添加视图映射
         */
        WebMvcConfigurer webMvcConfigurer = new WebMvcConfigurer() {
            @Override
            public void addViewControllers(ViewControllerRegistry registry) {
                // 将默认的访问修改指向login模板
                registry.addViewController("/").setViewName("login");
                registry.addViewController("/login.html").setViewName("login");
                registry.addViewController("/main.html").setViewName("dashboard");
            }
        };
        return webMvcConfigurer;
    }

}
2. 国际化配置
① 编写国际化配置文件;
② 使用 ResourceBundleMessageSource 管理国际化资源文件;
③ 在页面中使用 fmt:message 取出国际化内容;
④ 点击链接切换国际化
主要步骤:
① 编写国际化配置文件,抽取页面需要显示的配置信息

② SpringBoot自动配置管理国际化资源文件的组件 MessageSourceAutoConfiguration 配置了国际化配置内容
@Configuration(proxyBeanMethods = false)
@ConditionalOnMissingBean(name = AbstractApplicationContext.MESSAGE_SOURCE_BEAN_NAME, search = SearchStrategy.CURRENT)
@AutoConfigureOrder(Ordered.HIGHEST_PRECEDENCE)
@Conditional(ResourceBundleCondition.class)
@EnableConfigurationProperties
public class MessageSourceAutoConfiguration {

    ......

    @Bean
	public MessageSource messageSource(MessageSourceProperties properties) {
		ResourceBundleMessageSource messageSource = new ResourceBundleMessageSource();
		if (StringUtils.hasText(properties.getBasename())) {
            // 配置国际化文件默认加载位置通过basebame属性进行设置
			messageSource.setBasenames(StringUtils
				.commaDelimitedListToStringArray(StringUtils.trimAllWhitespace(properties.getBasename())));
		}
		if (properties.getEncoding() != null) {
            // 设置国际化资源文件的基础名(去除语言国家代码)
			messageSource.setDefaultEncoding(properties.getEncoding().name());
		}
		messageSource.setFallbackToSystemLocale(properties.isFallbackToSystemLocale());
		Duration cacheDuration = properties.getCacheDuration();
		if (cacheDuration != null) {
			messageSource.setCacheMillis(cacheDuration.toMillis());
		}
		messageSource.setAlwaysUseMessageFormat(properties.isAlwaysUseMessageFormat());
		messageSource.setUseCodeAsDefaultMessage(properties.isUseCodeAsDefaultMessage());
		return messageSource;
	}

    ......

}
在 MessageSourceProperties 属性配置文件中配置
public class MessageSourceProperties {

	/**
	 * Comma-separated list of basenames (essentially a fully-qualified classpath
	 * location), each following the ResourceBundle convention with relaxed support for
	 * slash based locations. If it doesn''t contain a package qualifier (such as
	 * "org.mypackage"), it will be resolved from the classpath root.
	 */
    // 这个属性是配置国际化配置文件所在位置属性的配置信息
	private String basename = "messages";

    .......
}
因此我们可以在配置文件中配置国际化语言的路径
server.port=9080
server.servlet.context-path=/crud


spring.thymeleaf.cache=false
#配置SpringBoot默认的国际化语言切换路径
spring.messages.basename=i18n.login
③ 修改登录页的显示,用国际化配置属性进行显示替换。
<!DOCTYPE html>
<html lang="en" xmlns:th="http://www.thymeleaf.org">
<head>
    <meta http-equiv="Content-Type" content="text/html; charset=UTF-8">
    <meta name="viewport" content="width=device-width, initial-scale=1, shrink-to-fit=no">
    <meta name="description" content="">
    <meta name="author" content="">
    <title>Signin Template for Bootstrap</title>
    <!-- Bootstrap core CSS -->
    <link th:href="@{/webjars/bootstrap/4.0.0/css/bootstrap.css}" rel="stylesheet"/>
    <!-- Custom styles for this template -->
    <link th:href="@{/asserts/css/signin.css}" rel="stylesheet"/>
</head>

<body>
<formaction="dashboard.html">
    <imgth:src="@{/asserts/img/bootstrap-solid.svg}" alt="" width="72" height="72">
	<!-- 配置国际化信息内容,用Thymeleaf语法调用国际化属性信息,下面的方法是一样的 -->
    <h1th:text="#{login.tip}">Please sign in</h1>
    <!-- 错误信息提示 -->
    <pth:text="${msg}" th:if="${not #strings.isEmpty(msg)}"></p>
    <labelth:text="#{login.username}">Username</label>
    <input type="text" name="username"placeholder="Username"
           th:placeholder="#{login.username}" required="" utofocus="">
    <labelth:text="#{login.password}">Password</label>
    <input type="password" name="password"placeholder="Password"
           th:placeholder="#{login.password}" required="">
    <div>
        <label>
            <input type="checkbox" value="remember-me"> [[#{login.remember}]]
        </label>
    </div>
    <buttontype="submit" th:text="#{login.btn}">Sign in</button>
    <p>© 2017-2018</p>
	<!-- 配置点击中英文切换显示信息,利用发送的请求头中的信息配置显示内容 -->
    <ath:href="@{/login.html(l=''zh_CN'')}">中文</a>
    <ath:href="@{/login.html(l=''en_US'')}">English</a>
</form>

</body>

</html>
④ 自定义配置 LocateResolver 实现点击链接切换国际化信息
public class MyLocaleRrsovler implements LocaleResolver {
    @Override
    public Locale resolveLocale(HttpServletRequest request) {
        // huu''o''qu
        String l = request.getParameter("l");
        Locale locale = Locale.getDefault();
        if (!StringUtils.isEmpty(l)) {
            String[] split = l.split("_");
            locale = new Locale(split[0], split[1]);
        }
        return locale;
    }

    @Override
    public void setLocale(HttpServletRequest request, HttpServletResponse response, Locale locale) {

    }
}
在自定义配置类 MyMvcConfig 中将我们自定义的 LocateResolver 组件加载到容器中
@Configuration
public class MyMvcConfig implements WebMvcConfigurer {

    /**
     * 所有的WebMVCConfiguration组件会一起加载
     * @return
     */
    @Bean
    public WebMvcConfigurer webMvcConfigurer() {
        /**
         * 添加视图映射
         */
        WebMvcConfigurer webMvcConfigurer = new WebMvcConfigurer() {
            @Override
            public void addViewControllers(ViewControllerRegistry registry) {
                registry.addViewController("/").setViewName("login");
                registry.addViewController("/login.html").setViewName("login");
                registry.addViewController("/main.html").setViewName("dashboard");
            }
        };
        return webMvcConfigurer;
    }

    /**
     * 将我们自定义的LocateResolver组件加载到容器中
     * @return
     */
    @Bean
    public LocaleResolver localeResolver() {
        return new MyLocaleRrsovler();
    }

}
⑤ 最终的效果:点击中英且换界面会根据语言切换显示效果
国际化切换原理:
AutoWebMvcConfiguration 中配置了国际化 Locate(区域对象)和 LocateResolver(获取区域信息对象)
@Bean
@ConditionalOnMissingBean
@ConditionalOnProperty(prefix = "spring.mvc", name = "locale")
public LocaleResolver localeResolver() {

    if (this.mvcProperties.getLocaleResolver() == WebMvcProperties.LocaleResolver.FIXED) {
        return new FixedLocaleResolver(this.mvcProperties.getLocale());
    }
    // 默认根据请求头带来的区域信息获取Locale进行国际化
    AcceptHeaderLocaleResolver localeResolver = new AcceptHeaderLocaleResolver();
    localeResolver.setDefaultLocale(this.mvcProperties.getLocale());
    return localeResolver;
}
LocateResolver 的继承关系

3. 登录配置
配置的方式:
① 修改页面的配置信息
② 书写登录相关的controller
③ 配置登录拦截器
① 修改页面的配置信息,添加action即:请求的接口并设置请求方式为post
<!DOCTYPE html>
<html lang="en" xmlns:th="http://www.thymeleaf.org">
<head>
    <meta http-equiv="Content-Type" content="text/html; charset=UTF-8">
    <meta name="viewport" content="width=device-width, initial-scale=1, shrink-to-fit=no">
    <meta name="description" content="">
    <meta name="author" content="">
    <title>Signin Template for Bootstrap</title>
    <!-- Bootstrap core CSS -->
    <link th:href="@{/webjars/bootstrap/4.0.0/css/bootstrap.css}" rel="stylesheet"/>
    <!-- Custom styles for this template -->
    <link th:href="@{/asserts/css/signin.css}" rel="stylesheet"/>
</head>

<body>
<!-- 配置提交接口action,发送post请求 -->
<formaction="dashboard.html" th:action="@{/user/login}" method="post">
    <imgth:src="@{/asserts/img/bootstrap-solid.svg}" alt="" width="72" height="72">
	<!-- 配置国际化信息内容,用Thymeleaf语法调用国际化属性信息,下面的方法是一样的 -->
    <h1th:text="#{login.tip}">Please sign in</h1>
    <!-- 错误信息提示 -->
    <pth:text="${msg}" th:if="${not #strings.isEmpty(msg)}"></p>
    <labelth:text="#{login.username}">Username</label>
    <input type="text" name="username"placeholder="Username"
           th:placeholder="#{login.username}" required="" utofocus="">
    <labelth:text="#{login.password}">Password</label>
    <input type="password" name="password"placeholder="Password"
           th:placeholder="#{login.password}" required="">
    <div>
        <label>
            <input type="checkbox" value="remember-me"> [[#{login.remember}]]
        </label>
    </div>
    <buttontype="submit" th:text="#{login.btn}">Sign in</button>
    <p>© 2017-2018</p>
	<!-- 配置点击中英文切换显示信息,利用发送的请求头中的信息配置显示内容 -->
    <ath:href="@{/login.html(l=''zh_CN'')}">中文</a>
    <ath:href="@{/login.html(l=''en_US'')}">English</a>
</form>

</body>

</html>
② 配置 LoginController 设置登陆的请求规则
@Controller
public class LoginController {

    //@RequestMapping(value = "/user/login",method = RequestMethod.POST)
    @PostMapping(value = "/user/login")
    public String login(@RequestParam("username") String username,
                        @RequestParam("password") String password,
                        Map<String,Object> map, HttpSession session){
        if(!StringUtils.isEmpty(username) && "123456".equals(password)){
            //登陆成功,防止表单重复提交,可以重定向到主页
            session.setAttribute("loginUser",username);
            return "redirect:/main.html";
        }else{
            //登陆失败
            map.put("msg","用户名密码错误");
            return  "login";
        }
    }
}
③ 配置登录拦截器 LoginHandlerInterceptor 拦截未登陆的用户的请求访问
public class LoginHandlerInterceptor implements HandlerInterceptor {
    /**
     * 在执行目标方法前进行操作
     */
    @Override
    public boolean preHandle(HttpServletRequest request, HttpServletResponse response, Object handler) throws Exception {
        Object user = request.getSession().getAttribute("loginUser");
        if(user == null){
            //未登陆,返回登陆页面
            request.setAttribute("msg","没有权限请先登陆");
            request.getRequestDispatcher("/index.html").forward(request,response);
            return false;
        }else{
            //已登陆,放行请求
            return true;
        }
    }

    @Override
    public void postHandle(HttpServletRequest request, HttpServletResponse response, Object handler, ModelAndView modelAndView) throws Exception {

    }

    @Override
    public void afterCompletion(HttpServletRequest request, HttpServletResponse response, Object handler, Exception ex) throws Exception {

    }
}
④ 在自定义配置WebMvcConfig中将拦截器注册到容器中
@Configuration
public class MyMvcConfig implements WebMvcConfigurer {

    /**
     * 所有的WebMVCConfiguration组件会一起加载
     * @return
     */
    @Bean
    public WebMvcConfigurer webMvcConfigurer() {
        /**
         * 添加视图映射
         */
        WebMvcConfigurer webMvcConfigurer = new WebMvcConfigurer() {
            @Override
            public void addViewControllers(ViewControllerRegistry registry) {
                registry.addViewController("/").setViewName("login");
                registry.addViewController("/index.html").setViewName("login");
                registry.addViewController("/main.html").setViewName("dashboard");
            }

            /**
             * 注册拦截器
             * @param registry
             */
            @Override
            public void addInterceptors(InterceptorRegistry registry) {
                // 拦截除去登陆页面的,所有的页面请求,只有登录后才能访问全部的页面
                registry.addInterceptor(new LoginHandlerInterceptor()).addPathPatterns("/**")
                        .excludePathPatterns("/index.html", "/", "/user/login");
            }
        };
        return webMvcConfigurer;
    }

    /**
     * 将我们自定义的LocateResolver组件加载到容器中
     * @return
     */
    @Bean
    public LocaleResolver localeResolver() {
        return new MyLocaleRrsovler();
    }

}
4. Restful风格请求访问
4.1 CRUD员工列表
URI:/资源名称/资源标识,使用HTTP请求的方式对资源CRUD操作。资源操作:使用POST、DELETE、PUT、GET,使用不同方法对资源进行操作。 分别对应 添加、 删除、修改、查询。
| 普通CRUD(通过uri区分操作) | RestfulCRUD | |
|---|---|---|
| 查询 | getEmployees | employee---GET |
| 添加 | addEmployee?xxx | employee---POST |
| 修改 | updateEmployee?id=xxx&xxx=xxxx | empoyee/{id}---PUT |
| 删除 | deleteEmployee?id=1 | employee/{id}---DELETE |
关于Restful风格介绍的博客:restful风格
员工CRUD的请求设计
| 请求接口的功能 | 请求URI | 请求方式 |
|---|---|---|
| 查询所有员工 | emps | GET |
| 查询某个员工(在修改页面显示) | emp/1 | GET |
| 请求添加页面 | emp | GET |
| 添加员工信息 | emp | POST |
| 进入修改页面(同时查询显示员工信息) | emp/1 | GET |
| 修改员工信息 | emp | PUT |
| 删除某个员工 | emp/1 | DELETE |
Thymeleaf公共页面抽取
1、抽取公共片段
<div th:fragment="copy">
© 2020 The Good Thymes Virtual Grocery
</div>
2、引入公共片段
<div th:insert="~{footer :: copy}"></div>
~{templatename::selector}:模板名::选择器
~{templatename::fragmentname}:模板名::片段名
3、默认效果:
insert的公共片段在div标签中
如果使用th:insert等属性进行引入,可以不用写~{}:
行内写法可以加上:[[~{}]];[(~{})];
三种引入公共片段的th属性:
th:insert:将公共片段整个插入到声明引入的元素中
th:replace:将声明引入的元素替换为公共片段
th:include:将被引入的片段的内容包含进这个标签中
代码示例:
<footer th:fragment="copy">
© 2011 The Good Thymes Virtual Grocery
</footer>
<!-- 引入方式 -->
<div th:insert="footer :: copy"></div>
<div th:replace="footer :: copy"></div>
<div th:include="footer :: copy"></div>
<!-- 效果 -->
<div>
<footer>
© 2011 The Good Thymes Virtual Grocery
</footer>
</div>
<footer>
© 2011 The Good Thymes Virtual Grocery
</footer>
<div>
© 2011 The Good Thymes Virtual Grocery
</div>
片段的引入也可以传递参数
<div th:replace="commons/bar::#sidebar(activeUri=''emps'')"></div>
4.2 页面和接口设计
具体的页面和接口的设计信息,内容较多,请查看具体的代码: Restful风格CRUD,员工基本CRUD
(六)错误处理机制
1. SpringBoot默认的错误处理机制
1)浏览器会返回默认的错误界面,并携带一些显示信息

浏览器发送请求的请求头

2)使用postman进行请求访问,会返回json数组

postman发送请求的请求头

默认处理机制的原理:
ErrorMvcAutoConfiguration 中配置了Mvc错误的处理方式,是SpringBoot中处理Mvc错误信息的自动配置,通过向IoC容器中添加组件来完成配置。
自动配置中向容器中添加了以下组件:
① DefaultErrorAttributes:默认进行错误信息处理
② BasicErrorController:处理默认/error的请求
③ ErrorPageCustomizer:指定错误页面跳转
④ DefaultErrorViewResolver:设置默认的错误视图
这些组件具体的功能:
① DefaultErrorAttributes:用于错误信息处理
@Order(Ordered.HIGHEST_PRECEDENCE)
public class DefaultErrorAttributes implements ErrorAttributes, HandlerExceptionResolver, Ordered {

    ......

        @Override
        @Deprecated
        public Map<String, Object> getErrorAttributes(WebRequest webRequest, boolean includeStackTrace) {
        Map<String, Object> errorAttributes = new LinkedHashMap<>();
        // 将时间戳存放到
        errorAttributes.put("timestamp", new Date());
        addStatus(errorAttributes, webRequest);
        addErrorDetails(errorAttributes, webRequest, includeStackTrace);
        addPath(errorAttributes, webRequest);
        return errorAttributes;
    }

    // 取出错误状态码,错误提示等
    private void addStatus(Map<String, Object> errorAttributes, RequestAttributes requestAttributes) {
        Integer status = getAttribute(requestAttributes, RequestDispatcher.ERROR_STATUS_CODE);
        if (status == null) {
            errorAttributes.put("status", 999);
            errorAttributes.put("error", "None");
            return;
        }
        errorAttributes.put("status", status);
        try {
            errorAttributes.put("error", HttpStatus.valueOf(status).getReasonPhrase());
        }
        catch (Exception ex) {
            // Unable to obtain a reason
            errorAttributes.put("error", "Http Status " + status);
        }
    }

    // 取出详细的错误信息,包括异常、获取异常路径、获取异常提示等
    private void addErrorDetails(Map<String, Object> errorAttributes, WebRequest webRequest,
                                 boolean includeStackTrace) {
        Throwable error = getError(webRequest);
        if (error != null) {
            while (error instanceof ServletException && error.getCause() != null) {
                error = error.getCause();
            }
            errorAttributes.put("exception", error.getClass().getName());
            if (includeStackTrace) {
                addStackTrace(errorAttributes, error);
            }
        }
        addErrorMessage(errorAttributes, webRequest, error);
    }

    ......

}
② BasicErrorController:处理默认/error的请求
@Controller
@RequestMapping("${server.error.path:${error.path:/error}}")
public class BasicErrorController extends AbstractErrorController {

    ......

    // 产生html类型的数据;浏览器发送的请求来到此方法处理
    @RequestMapping(produces = MediaType.TEXT_HTML_VALUE)
	public ModelAndView errorHtml(HttpServletRequest request, HttpServletResponse response) {
		HttpStatus status = getStatus(request);
		Map<String, Object> model = Collections
				.unmodifiableMap(getErrorAttributes(request, getErrorAttributeOptions(request, MediaType.TEXT_HTML)));
		response.setStatus(status.value());
        // 指定错误页面,并包含错误页面的地址和页面内容
		ModelAndView modelAndView = resolveErrorView(request, response, status, model);
		return (modelAndView != null) ? modelAndView : new ModelAndView("error", model);
	}

    // 产生json数据,其他客户端的请求来到此方法处理
	@RequestMapping
	public ResponseEntity<Map<String, Object>> error(HttpServletRequest request) {
		HttpStatus status = getStatus(request);
		if (status == HttpStatus.NO_CONTENT) {
			return new ResponseEntity<>(status);
		}
		Map<String, Object> body = getErrorAttributes(request, getErrorAttributeOptions(request, MediaType.ALL));
		return new ResponseEntity<>(body, status);
	}

    ......

}
ModelAndView 方法中调用 resolveErrorView 方法进行页面响应。
protected ModelAndView resolveErrorView(HttpServletRequest request, HttpServletResponse response, HttpStatus status,
                                        Map<String, Object> model) {
    // 遍历所有的ErrorViewResolver得到ModelAndView
    for (ErrorViewResolver resolver : this.errorViewResolvers) {
        ModelAndView modelAndView = resolver.resolveErrorView(request, status, model);
        if (modelAndView != null) {
            return modelAndView;
        }
    }
    return null;
}
具体的页面指向由
DefaultErrorViewResolver类解析得到,具体的实现方式请看下面关于DefaultErrorViewResolver类的说明。
③ ErrorPageCustomizer:配置错误页面跳转
private final DispatcherServletPath dispatcherServletPath;

protected ErrorPageCustomizer(ServerProperties properties, DispatcherServletPath dispatcherServletPath) {
    this.properties = properties;
    this.dispatcherServletPath = dispatcherServletPath;
}
ErrorPageCustomizer 类中为 dispatcherServletPath 赋值在注册错误信息相关的类中
@Override
public void registerErrorPages(ErrorPageRegistry errorPageRegistry) {
    ErrorPage errorPage = new ErrorPage(
        this.dispatcherServletPath.getRelativePath(this.properties.getError().getPath()));
    errorPageRegistry.addErrorPages(errorPage);
}
最终得到的请求路径为 /error
@Value("${error.path:/error}")
private String path = "/error";// 系统发生错误后来发送error请求进行处理,相当于以前在web.xml中的注册的错误规则
④ DefaultErrorViewResolver:配置默认的错误视图显示

在 ErrorMvcAutoConfiguration 中返回 DefaultErrorViewResolver
@Bean
@ConditionalOnBean(DispatcherServlet.class)
@ConditionalOnMissingBean(ErrorViewResolver.class)
DefaultErrorViewResolver conventionErrorViewResolver() {
    return new DefaultErrorViewResolver(this.applicationContext, this.resourceProperties);
}
DefaultErrorViewResolver 类中定义响应的页面信息
public class DefaultErrorViewResolver implements ErrorViewResolver, Ordered {

    private static final Map<Series, String> SERIES_VIEWS;

    // 定义响应码
    static {
        Map<Series, String> views = new EnumMap<>(Series.class);
        views.put(Series.CLIENT_ERROR, "4xx");
        views.put(Series.SERVER_ERROR, "5xx");
        SERIES_VIEWS = Collections.unmodifiableMap(views);
    }

    ......

        @Override
        public ModelAndView resolveErrorView(HttpServletRequest request, HttpStatus status, Map<String, Object> model) {
        ModelAndView modelAndView = resolve(String.valueOf(status.value()), model);
        if (modelAndView == null && SERIES_VIEWS.containsKey(status.series())) {
            modelAndView = resolve(SERIES_VIEWS.get(status.series()), model);
        }
        return modelAndView;
    }

    private ModelAndView resolve(String viewName, Map<String, Object> model) {
        // SpringBoot默认找到一个页面? error/以状态码命名的页面(如:error/404)
        String errorViewName = "error/" + viewName;
        // 如果模板引擎可以解析这个页面地址则用模板引擎解析
        TemplateAvailabilityProvider provider = this.templateAvailabilityProviders.getProvider(errorViewName,
                                                                                               this.applicationContext);
        if (provider != null) {
            // 模板引擎可用的情况下返回errorViewName指定的视图地址
            return new ModelAndView(errorViewName, model);
        }
        // 模板引擎不可用,则在静态资源文件夹下寻找errorViewName对应的页面。如:error/404.html
        return resolveResource(errorViewName, model);
    }
}
产生错误信息后 ErrorMvcAutoConfiguration 的处理步骤:
- 当系统中出现4xx或5xx类的错误;
ErrorPageCustomizer就会生效(用于定制错误的响应规则的bean)设置发送/error请求;/error请求会被BasicErrorController处理,响应html页面或json数据;- 响应的html页面或json数据,由
DefaultErrorViewResolver配置后返回;
2. 定制错误响应
2.1 如何定制错误页面
1)有模板引擎的情况下
error/状态码:将错误页面命名为 错误状态码.html 放在模板引擎文件夹里面的error文件夹内,发生状态码对应的错误时会进入到对应的页面。
我们也可以用4xx和5xx作为错误页面的文件名来匹配这种类型的所有错误,精确定位优先(即优先寻找和状态码对应的页面,找不到的时候才使用此类页面)
页面中能获取到的信息:
获取到的页面信息放到共享页面信息 DefaultErrorAttributes 类中
- timestamp:时间戳
- status:状态码
- error:错误提示
- exception:异常对象
- message:JSR303数据校验错误都在这里
2)没有模板引擎的情况下
模板引擎中找不到这个错误页面,则在静态资源文件夹中找
3)以上都没有的错误页面
则使用SpringBoot默认的错误提示页面
2.2 如何定制错误的数据
1)自定义异常处理&返回定制的json数据
//没有自适应效果...
@ControllerAdvice
public class MyExceptionHandler {
    @ResponseBody
    @ExceptionHandler(UserNotExistException.class)
    public Map<String,Object> handleException(Exception e){
        Map<String,Object> map = new HashMap<>();
        map.put("code","user.notexist");
        map.put("message",e.getMessage());
        return map;
    }
}
2)转发到/error进行自适应响应效果处理
@ControllerAdvice
public class MyExceptionHandler {

    @ExceptionHandler(UserNotExistException.class)
    public String handleException(Exception e, HttpServletRequest request) {
        Map<String, Object> map = new HashMap<>();
        // 传入自定义的错误状态码   4xx  5xx
        request.setAttribute("javax.servlet.error.status_code",500);
        map.put("code", "user.notexist");
        map.put("message", "用户出错啦");

        request.setAttribute("ext", map);
        // 转发到/error页面,此时浏览器和其他客户端响应的内容不同,由BasicErrorController处理
        return "forward:/error";
    }
}
2.3 将定制的数据传递出去
出现异常时Spring Boot的处理步骤:
- 当页面发生异常时,会发送/error请求;
- 发送的/error请求会被
BasicErrorController类处理; - 响应出去可以获取的数据由
getErrorAttributes获取到(ErrorController的实现类AbstractErrorController中规定的方法)
因此我们传递数据的方法:
① 书写 ErrorController 的实现类【或着编写 AbstractErrorController 的子类】注入到容器中;
② 页面上能用到的数据,或者json返回能用的数据都是通过 DefaultErrorAttributes 的getErrorAttributes 方法获取到的,容器中的 DefaultErrorAttributes 默认是进行数据处理的,因此我们可以通过自定义 ErrorAttributes ,实现错误信息传递;
代码示例:
// 给容器中注入我们自定义的ErrorAttributes
@Component
public class MyErrorAttributes extends DefaultErrorAttributes {

    // 返回值的map就是页面和json能获取到的字段
    @Override
    public Map<String, Object> getErrorAttributes(WebRequest webRequest, ErrorAttributeOptions options) {
        Map<String, Object> map = super.getErrorAttributes(webRequest, options);
        map.put("author", "Bruce");

        // 我们异常处理器携带的数据
        Map<String, Object> ext = (Map<String, Object>) webRequest.getAttribute("ext", RequestAttributes.SCOPE_REQUEST);
        map.put("ext", ext);
        return map;
    }
}
最终效果:响应是自适应的,可以通过定制ErrorAttributes改变需要返回的内容

(七)Servlet容器相关
SpringBoot默认使用的是嵌入式的servlet容器(内嵌Tomcat作为Servlet容器)

1. 嵌入式Servlet容器
1.1 修改和定制嵌入式Servlet容器的相关配置
① 通过配置文件修改,修改和server有关的配置(ServerProperties 类中规定)
# server.xxx是server相关的配置
server.port=9083
server.servlet.context-path=/servlet

# server.tomcat.xxx是tomcat相关的配置
server.tomcat.uri-encoding=utf-8
② 通过实现 WebServerFactoryCustomizer 接口进行修改,WebServerFactoryCustomizer 是嵌入式servlet容器定制器,可以用来修改Servlet容器配置
@Component
public class CustomizationBean implements WebServerFactoryCustomizer<ConfigurableWebServerFactory> {
    @Override
    public void customize(ConfigurableWebServerFactory factory) {
        factory.setPort(9000);
    }
}
③ 通过 ConfigurableServletWebServerFactory 的子类定制配置
@Configuration
public class MyServerConfig {
    /**
     * 也可以将创建tomcat定制器示例,进行更多的配置
     * @return
     */
    @Bean
    public ConfigurableServletWebServerFactory webServerFactory() {

        TomcatServletWebServerFactory factory = new TomcatServletWebServerFactory();
        factory.setPort(9090);
        return factory;

    }

}
发现Spring Boot的配置执行优先级
@component>application.properties>@bean不清楚是否准确还需要进一步的自动配置原理研究确定。
SpringBoot中对嵌入式Servlet容器的配置:Embedded Servlet Container Support
1.2 注册三大Servlet组件【Servlet、Filter、Listener】
SpringBoot默认采用jar包的方式启动嵌入式Servlet容器来启动SpringBoot的web引用,由于没有web.xml
文件,因此注册三大组件采用 @Bean 的方式进行配置。
① 注册Servlet组件,使用 ServletRegistrationBean
自定义Servlet
public class MyServlet extends HttpServlet {
    @Override
    protected void doGet(HttpServletRequest req, HttpServletResponse resp) throws ServletException, IOException {
        doPost(req,resp);
    }

    @Override
    protected void doPost(HttpServletRequest req, HttpServletResponse resp) throws ServletException, IOException {
        resp.getWriter().write("this is my servlet");
    }
}
在配置类中书写 ServletRegistrationBean 类型的配置Bean注册Servlet组件
@Bean
public ServletRegistrationBean myServlet() {

    ServletRegistrationBean servletRegistrationBean = new ServletRegistrationBean(new MyServlet(), "/myServlet");
    servletRegistrationBean.setLoadOnStartup(1);
    return servletRegistrationBean;
}
② 注册Filter组件
自定义Fliter
public class MyFilter implements Filter {
    @Override
    public void init(FilterConfig filterConfig) throws ServletException {

    }

    @Override
    public void doFilter(ServletRequest servletRequest, ServletResponse servletResponse, FilterChain filterChain) throws IOException, ServletException {
        System.out.println("MyFilter is running ......");
        filterChain.doFilter(servletRequest,servletResponse);
    }

    @Override
    public void destroy() {

    }
}
在配置类中书写 FilterRegistrationBean 类型的配置Bean注册Filter组件
@Bean
public FilterRegistrationBean myFilter() {
    FilterRegistrationBean filterRegistrationBean = new FilterRegistrationBean();
    filterRegistrationBean.setFilter(new MyFilter());
    filterRegistrationBean.setUrlPatterns(Arrays.asList("/test", "/myServlet"));
    return filterRegistrationBean;
}
③ 注册Listener组件
自定义Listener
public class MyListener implements ServletContextListener {

    @Override
    public void contextInitialized(ServletContextEvent sce) {
        System.out.println("contextInitialized web 应用启动。。。。。。");
    }

    @Override
    public void contextDestroyed(ServletContextEvent sce) {
        System.out.println("contextDestroyed web 应用销毁。。。。。。");
    }
}
在配置类中书写 ServletListenerRegistrationBean 类型的配置Bean注册Listener组件
@Bean
public ServletListenerRegistrationBean myListener() {
    ServletListenerRegistrationBean<MyListener> servletListenerRegistrationBean = new ServletListenerRegistrationBean<>(new MyListener());
    return servletListenerRegistrationBean;
}
SpringBoot在自动配置SpringMVC时,会自动注册SpringMVC前端控制器 DispatcherServlet ,通过DispatcherServletAutoConfiguration 类加载 DispatcherServlet
@Configuration(proxyBeanMethods = false)
@Conditional(DispatcherServletRegistrationCondition.class)
@ConditionalOnClass(ServletRegistration.class)
@EnableConfigurationProperties(WebMvcProperties.class)
@Import(DispatcherServletConfiguration.class)
protected static class DispatcherServletRegistrationConfiguration {

    @Bean(name = DEFAULT_DISPATCHER_SERVLET_REGISTRATION_BEAN_NAME)
    @ConditionalOnBean(value = DispatcherServlet.class, name = DEFAULT_DISPATCHER_SERVLET_BEAN_NAME)
    public DispatcherServletRegistrationBean dispatcherServletRegistration(DispatcherServlet dispatcherServlet,
                                                                           WebMvcProperties webMvcProperties, ObjectProvider<MultipartConfigElement> multipartConfig) {
        // 默认拦截:/,即所有的请求,包括静态资源,但不会拦截jsp请求。 /*会拦截jsp
        // 也可以通过在配置文件中设置spring.mvc.servlet.path修改SpringMVC前端控制器默认拦截请求路径
        DispatcherServletRegistrationBean registration = new DispatcherServletRegistrationBean(dispatcherServlet,
                                                                                               webMvcProperties.getServlet().getPath());
        registration.setName(DEFAULT_DISPATCHER_SERVLET_BEAN_NAME);
        registration.setLoadOnStartup(webMvcProperties.getServlet().getLoadOnStartup());
        multipartConfig.ifAvailable(registration::setMultipartConfig);
        return registration;
    }

}
1.3 使用其他的嵌入式Servlet容器
SpringBoot默认使用Tomcat作为内置的Servlet容器,我们也可以切换为其他的Servlet容器,如:Jetty(适合于长连接)、Undertow(不支持jsp)
Spring Boot中默认支持的Servlet容器关系图

SpringBoot中默认支持的内嵌式Servlet容器:
① Tomcat容器(默认使用)
<dependency>
    <groupId>org.springframework.boot</groupId>
    <artifactId>spring-boot-starter-web</artifactId>
</dependency>
② 使用Jetty作为Servlet容器
<dependency>
    <groupId>org.springframework.boot</groupId>
    <artifactId>spring-boot-starter-web</artifactId>
    <exclusions>
        <exclusion>
            <artifactId>spring-boot-starter-tomcat</artifactId>
            <groupId>org.springframework.boot</groupId>
        </exclusion>
    </exclusions>
</dependency>

<!--使用jetty作为Servlet容器-->
<dependency>
    <groupId>org.springframework.boot</groupId>
    <artifactId>spring-boot-starter-jetty</artifactId>
</dependency>
③ 使用Undertow作为Servlet容器
<dependency>
    <groupId>org.springframework.boot</groupId>
    <artifactId>spring-boot-starter-web</artifactId>
    <exclusions>
        <exclusion>
            <artifactId>spring-boot-starter-tomcat</artifactId>
            <groupId>org.springframework.boot</groupId>
        </exclusion>
    </exclusions>
</dependency>

<!--使用undertow作为Servlet容器-->
<dependency>
    <groupId>org.springframework.boot</groupId>
    <artifactId>spring-boot-starter-undertow</artifactId>
</dependency>
Tomcat Jetty Undertow三种Servlet容器对比介绍:Undertow,Tomcat和Jetty服务器配置详解与性能测试
1.4 嵌入式Servlet容器自动配置原理
EmbeddedWebServerFactoryCustomizerAutoConfiguration SpringBoot中嵌入式servlet容器的自动配置类,自动配置里中展示了SpringBoot支持的Servlet容器:Tomcat、Jetty、Undertow、Netty,默认使用的是Tomcat。根据pom文件导入的Starter来决定使用哪种Servlet容器。
@Configuration(proxyBeanMethods = false)
@ConditionalOnWebApplication
@EnableConfigurationProperties(ServerProperties.class)
public class EmbeddedWebServerFactoryCustomizerAutoConfiguration {

	/**
	 * Nested configuration if Tomcat is being used.
	 */
	@Configuration(proxyBeanMethods = false)
    // 条件判断,判断是否导入了Tomcat依赖
	@ConditionalOnClass({ Tomcat.class, UpgradeProtocol.class })
	public static class TomcatWebServerFactoryCustomizerConfiguration {

		@Bean
		public TomcatWebServerFactoryCustomizer tomcatWebServerFactoryCustomizer(Environment environment,
				ServerProperties serverProperties) {
			return new TomcatWebServerFactoryCustomizer(environment, serverProperties);
		}

	}

	/**
	 * Nested configuration if Jetty is being used.
	 */
	@Configuration(proxyBeanMethods = false)
	@ConditionalOnClass({ Server.class, Loader.class, WebAppContext.class })
	public static class JettyWebServerFactoryCustomizerConfiguration {

		@Bean
		public JettyWebServerFactoryCustomizer jettyWebServerFactoryCustomizer(Environment environment,
				ServerProperties serverProperties) {
			return new JettyWebServerFactoryCustomizer(environment, serverProperties);
		}

	}

	/**
	 * Nested configuration if Undertow is being used.
	 */
	@Configuration(proxyBeanMethods = false)
	@ConditionalOnClass({ Undertow.class, SslClientAuthMode.class })
	public static class UndertowWebServerFactoryCustomizerConfiguration {

		@Bean
		public UndertowWebServerFactoryCustomizer undertowWebServerFactoryCustomizer(Environment environment,
				ServerProperties serverProperties) {
			return new UndertowWebServerFactoryCustomizer(environment, serverProperties);
		}

	}

	/**
	 * Nested configuration if Netty is being used.
	 */
	@Configuration(proxyBeanMethods = false)
	@ConditionalOnClass(HttpServer.class)
	public static class NettyWebServerFactoryCustomizerConfiguration {

		@Bean
		public NettyWebServerFactoryCustomizer nettyWebServerFactoryCustomizer(Environment environment,
				ServerProperties serverProperties) {
			return new NettyWebServerFactoryCustomizer(environment, serverProperties);
		}

	}

}
Servlet容器自动配置原理:
1)ServletWebServerFactory 是Web服务器定制器(Servlet定制工厂):创建Servlet容器,根据不同的类别创建对应的Servlet容器
@FunctionalInterface
public interface ServletWebServerFactory {

	/**
	 * Gets a new fully configured but paused {@link WebServer} instance. Clients should
	 * not be able to connect to the returned server until {@link WebServer#start()} is
	 * called (which happens when the {@code ApplicationContext} has been fully
	 * refreshed).
	 * @param initializers {@link ServletContextInitializer}s that should be applied as
	 * the server starts
	 * @return a fully configured and started {@link WebServer}
	 * @see WebServer#stop()
	 */
	WebServer getWebServer(ServletContextInitializer... initializers);

}
继承关系图

2)WebServer 是Servlet容器类的父类
public interface WebServer {

	/**
	 * Starts the web server. Calling this method on an already started server has no
	 * effect.
	 * @throws WebServerException if the server cannot be started
	 */
	void start() throws WebServerException;

	/**
	 * Stops the web server. Calling this method on an already stopped server has no
	 * effect.
	 * @throws WebServerException if the server cannot be stopped
	 */
	void stop() throws WebServerException;

	/**
	 * Return the port this server is listening on.
	 * @return the port (or -1 if none)
	 */
	int getPort();

	/**
	 * Initiates a graceful shutdown of the web server. Handling of new requests is
	 * prevented and the given {@code callback} is invoked at the end of the attempt. The
	 * attempt can be explicitly ended by invoking {@link #stop}. The default
	 * implementation invokes the callback immediately with
	 * {@link GracefulShutdownResult#IMMEDIATE}, i.e. no attempt is made at a graceful
	 * shutdown.
	 * @param callback the callback to invoke when the graceful shutdown completes
	 * @since 2.3.0
	 */
	default void shutDownGracefully(GracefulShutdownCallback callback) {
		callback.shutdownComplete(GracefulShutdownResult.IMMEDIATE);
	}

}
继承关系图

以 TomcatServletWebServerFactory 为例介绍Servlet容器的自动配置原理:
① 创建Tomcat容器的工厂 TomcatServletWebServerFactory
public class TomcatServletWebServerFactory extends AbstractServletWebServerFactory
    implements ConfigurableTomcatWebServerFactory, ResourceLoaderAware {

    ......

        @Override
        public WebServer getWebServer(ServletContextInitializer... initializers) {
        if (this.disableMBeanRegistry) {
            Registry.disableRegistry();
        }
        // 创建一个Tomcat
        Tomcat tomcat = new Tomcat();
        // 配置Tomcat的基本内容
        File baseDir = (this.baseDirectory != null) ? this.baseDirectory : createTempDir("tomcat");
        tomcat.setBaseDir(baseDir.getAbsolutePath());
        Connector connector = new Connector(this.protocol);
        connector.setThrowOnFailure(true);
        tomcat.getService().addConnector(connector);
        customizeConnector(connector);
        tomcat.setConnector(connector);
        tomcat.getHost().setAutoDeploy(false);
        configureEngine(tomcat.getEngine());
        for (Connector additionalConnector : this.additionalTomcatConnectors) {
            tomcat.getService().addConnector(additionalConnector);
        }
        prepareContext(tomcat.getHost(), initializers);
        // 将配置好的Tomcat传入到getTomcatWebServer方法中,返回Tomcat容器并启动容器
        return getTomcatWebServer(tomcat);
    }

    ......

		// 将配置好的Tomcat传入到TomcatWebServer中,创建Tomcat容器并返回
        protected TomcatWebServer getTomcatWebServer(Tomcat tomcat) {
        return new TomcatWebServer(tomcat, getPort() >= 0, getShutdown());
    }

    ......

}
② TomcatWebServer 的构造器用于初始化Tomcat容器
public class TomcatWebServer implements WebServer {

    ......

        /**
	 * Create a new {@link TomcatWebServer} instance.
	 * @param tomcat the underlying Tomcat server
	 * @param autoStart if the server should be started
	 * @param shutdown type of shutdown supported by the server
	 * @since 2.3.0
	 */
        // 通过构造器初始化Tomcat容器
        public TomcatWebServer(Tomcat tomcat, boolean autoStart, Shutdown shutdown) {
        Assert.notNull(tomcat, "Tomcat Server must not be null");
        this.tomcat = tomcat;
        this.autoStart = autoStart;
        this.gracefulShutdown = (shutdown == Shutdown.GRACEFUL) ? new GracefulShutdown(tomcat) : null;
        initialize();
    }

    // 初始化Tomcat容器
    private void initialize() throws WebServerException {
        logger.info("Tomcat initialized with port(s): " + getPortsDescription(false));
        synchronized (this.monitor) {
            try {
                addInstanceIdToEngineName();

                Context context = findContext();
                context.addLifecycleListener((event) -> {
                    if (context.equals(event.getSource()) && Lifecycle.START_EVENT.equals(event.getType())) {
                        // Remove service connectors so that protocol binding doesn''t
                        // happen when the service is started.
                        removeServiceConnectors();
                    }
                });

                // Start the server to trigger initialization listeners
                this.tomcat.start();

                // We can re-throw failure exception directly in the main thread
                rethrowDeferredStartupExceptions();

                try {
                    ContextBindings.bindClassLoader(context, context.getNamingToken(), getClass().getClassLoader());
                }
                catch (NamingException ex) {
                    // Naming is not enabled. Continue
                }

                // Unlike Jetty, all Tomcat threads are daemon threads. We create a
                // blocking non-daemon to stop immediate shutdown
                startDaemonAwaitThread();
            }
            catch (Exception ex) {
                stopSilently();
                destroySilently();
                throw new WebServerException("Unable to start embedded Tomcat", ex);
            }
        }
    }

    ......
}
3)修改嵌入式Servlet容器的配置
① 修改配置文件,即配置 ServerProperties 中的配置信息,通过读取配置信息配置Servlet容器
② 通过实现 WebServerFactoryCustomizer 接口,进行自定义Servlet容器定制
对Servlet容器修改配置原理的方式
4)Spring Boot中 ServletWebServerFactoryAutoConfiguration 类进行自动配置
@Configuration(proxyBeanMethods = false)
@AutoConfigureOrder(Ordered.HIGHEST_PRECEDENCE)
@ConditionalOnClass(ServletRequest.class)
@ConditionalOnWebApplication(type = Type.SERVLET)
@EnableConfigurationProperties(ServerProperties.class)
@Import({ ServletWebServerFactoryAutoConfiguration.BeanPostProcessorsRegistrar.class,
         ServletWebServerFactoryConfiguration.EmbeddedTomcat.class,
         ServletWebServerFactoryConfiguration.EmbeddedJetty.class,
         ServletWebServerFactoryConfiguration.EmbeddedUndertow.class })
// 导入后置处理器,导入内嵌式Servlet容器的相关配置和与Servlet容器相关的配置类
public class ServletWebServerFactoryAutoConfiguration {

    @Bean
    public ServletWebServerFactoryCustomizer servletWebServerFactoryCustomizer(ServerProperties serverProperties) {
        return new ServletWebServerFactoryCustomizer(serverProperties);
    }

    @Bean
    @ConditionalOnClass(name = "org.apache.catalina.startup.Tomcat")
    public TomcatServletWebServerFactoryCustomizer tomcatServletWebServerFactoryCustomizer(
        ServerProperties serverProperties) {
        return new TomcatServletWebServerFactoryCustomizer(serverProperties);
    }

    @Bean
    @ConditionalOnMissingFilterBean(ForwardedHeaderFilter.class)
    @ConditionalOnProperty(value = "server.forward-headers-strategy", havingValue = "framework")
    public FilterRegistrationBean<ForwardedHeaderFilter> forwardedHeaderFilter() {
        ForwardedHeaderFilter filter = new ForwardedHeaderFilter();
        FilterRegistrationBean<ForwardedHeaderFilter> registration = new FilterRegistrationBean<>(filter);
        registration.setDispatcherTypes(DispatcherType.REQUEST, DispatcherType.ASYNC, DispatcherType.ERROR);
        registration.setOrder(Ordered.HIGHEST_PRECEDENCE);
        return registration;
    }

    /**
	 * Registers a {@link WebServerFactoryCustomizerBeanPostProcessor}. Registered via
	 * {@link ImportBeanDefinitionRegistrar} for early registration.
	 */
    public static class BeanPostProcessorsRegistrar implements ImportBeanDefinitionRegistrar, BeanFactoryAware {

        private ConfigurableListableBeanFactory beanFactory;

        @Override
        public void setBeanFactory(BeanFactory beanFactory) throws BeansException {
            if (beanFactory instanceof ConfigurableListableBeanFactory) {
                this.beanFactory = (ConfigurableListableBeanFactory) beanFactory;
            }
        }

        // 注册registerBeanDefinitions,调用后置处理器WebServerFactoryCustomizerBeanPostProcessor
        @Override
        public void registerBeanDefinitions(AnnotationMetadata importingClassMetadata,
                                            BeanDefinitionRegistry registry) {
            if (this.beanFactory == null) {
                return;
            }
            registerSyntheticBeanIfMissing(registry, "webServerFactoryCustomizerBeanPostProcessor",
                                           WebServerFactoryCustomizerBeanPostProcessor.class);
            registerSyntheticBeanIfMissing(registry, "errorPageRegistrarBeanPostProcessor",
                                           ErrorPageRegistrarBeanPostProcessor.class);
        }

        private void registerSyntheticBeanIfMissing(BeanDefinitionRegistry registry, String name, Class<?> beanClass) {
            if (ObjectUtils.isEmpty(this.beanFactory.getBeanNamesForType(beanClass, true, false))) {
                RootBeanDefinition beanDefinition = new RootBeanDefinition(beanClass);
                beanDefinition.setSynthetic(true);
                registry.registerBeanDefinition(name, beanDefinition);
            }
        }

    }

}
在 WebServerFactoryCustomizerBeanPostProcessor web服务工厂定制组件的后置处理器,负责在bean初始化前执行初始化工作。从IoC容器中获取类型为 WebServerFactoryCustomizer 类型的组件。
后置处理器:bean初始化前后(创建完对象,还没进行赋值,执行初始化工作)
public class WebServerFactoryCustomizerBeanPostProcessor implements BeanPostProcessor, BeanFactoryAware {

    private ListableBeanFactory beanFactory;

    private List<WebServerFactoryCustomizer<?>> customizers;

    @Override
    public void setBeanFactory(BeanFactory beanFactory) {
        Assert.isInstanceOf(ListableBeanFactory.class, beanFactory,
                            "WebServerCustomizerBeanPostProcessor can only be used with a ListableBeanFactory");
        this.beanFactory = (ListableBeanFactory) beanFactory;
    }

    // 在初始化Bean之前
    @Override
    public Object postProcessBeforeInitialization(Object bean, String beanName) throws BeansException {
        // 如果当前初始化的是WebServerFactory类型的组件
        if (bean instanceof WebServerFactory) {
            postProcessBeforeInitialization((WebServerFactory) bean);
        }
        return bean;
    }

    @Override
    public Object postProcessAfterInitialization(Object bean, String beanName) throws BeansException {
        return bean;
    }

    // 获取所有的定制器,调用每一个定制器的customize方法来给Servlet容器进行属性赋值;
    @SuppressWarnings("unchecked")
    private void postProcessBeforeInitialization(WebServerFactory webServerFactory) {
        LambdaSafe.callbacks(WebServerFactoryCustomizer.class, getCustomizers(), webServerFactory)
            .withLogger(WebServerFactoryCustomizerBeanPostProcessor.class)
            .invoke((customizer) -> customizer.customize(webServerFactory));
    }

    //
    private Collection<WebServerFactoryCustomizer<?>> getCustomizers() {
        if (this.customizers == null) {
            // Look up does not include the parent context
            this.customizers = new ArrayList<>(getWebServerFactoryCustomizerBeans());
            this.customizers.sort(AnnotationAwareOrderComparator.INSTANCE);
            this.customizers = Collections.unmodifiableList(this.customizers);
        }
        return this.customizers;
    }

    // 获取定制的Servlet容器的组件
    @SuppressWarnings({ "unchecked", "rawtypes" })
    private Collection<WebServerFactoryCustomizer<?>> getWebServerFactoryCustomizerBeans() {
        return (Collection) this.beanFactory.getBeansOfType(WebServerFactoryCustomizer.class, false, false).values();
    }

}
例如:通过后置处理器获取得到 TomcatServletWebServerFactoryCustomizer 调用 customize() 定制方法,获取Servlet容器相关的配置类 serverProperties 进行自动配置
public class TomcatServletWebServerFactoryCustomizer
		implements WebServerFactoryCustomizer<TomcatServletWebServerFactory>, Ordered {

	private final ServerProperties serverProperties;

	public TomcatServletWebServerFactoryCustomizer(ServerProperties serverProperties) {
		this.serverProperties = serverProperties;
	}

	@Override
	public int getOrder() {
		return 0;
	}

    // 通过此方法定制Servlet容器
	@Override
	public void customize(TomcatServletWebServerFactory factory) {
        // 获取配置类serverProperties中的配置信息
		ServerProperties.Tomcat tomcatProperties = this.serverProperties.getTomcat();
		if (!ObjectUtils.isEmpty(tomcatProperties.getAdditionalTldSkipPatterns())) {
			factory.getTldSkipPatterns().addAll(tomcatProperties.getAdditionalTldSkipPatterns());
		}
		if (tomcatProperties.getRedirectContextRoot() != null) {
			customizeRedirectContextRoot(factory, tomcatProperties.getRedirectContextRoot());
		}
		customizeUseRelativeRedirects(factory, tomcatProperties.isUseRelativeRedirects());
		factory.setDisableMBeanRegistry(!tomcatProperties.getMbeanregistry().isEnabled());
	}

	private void customizeRedirectContextRoot(ConfigurableTomcatWebServerFactory factory, boolean redirectContextRoot) {
		factory.addContextCustomizers((context) -> context.setMapperContextRootRedirectEnabled(redirectContextRoot));
	}

	private void customizeUseRelativeRedirects(ConfigurableTomcatWebServerFactory factory,
			boolean useRelativeRedirects) {
		factory.addContextCustomizers((context) -> context.setUseRelativeRedirects(useRelativeRedirects));
	}

}
嵌入式Servlet容器自动配置原理总结:
① SpringBoot根据导入的依赖情况,自动给容器中添加对应的 WebServerFactoryCustomizer 组件(web服务定制器)
② 当容器中某个组件创建对象时会触发后置处理器 WebServerFactoryCustomizerBeanPostProcessor
③ WebServerFactoryCustomizerBeanPostProcessor (Web工厂定制组件后置处理器)获取所有服务工厂定制组件(即实现 WebServerFactoryCustomizer 的接口,自定义的定制器组件)依次调用 customize 定制接口,定制Servlet容器配置;
④ 嵌入式Servlet容器工厂创建tomcat容器,初始化并启动Servlet容器
1.5 嵌入式Servlet容器启动原理
嵌入式Servlet容器工厂创建的时机以及获取嵌入式Servlet容器并启动Tomcat
获取嵌入式Servlet容器工厂:
1)Spring Boot应用通过main方法入口启动,并运行run方法;
2)调用 Application 类中的 run 方法,调用 refreshContext 方法刷新容器【创建IoC容器对象并初始化,创建容器中的各个组件对象】,如果是web应用则创建 AnnotationConfigServletWebServerApplicationContext 容器,否则创建默认IoC容器 AnnotationConfigApplicationContext 容器
public ConfigurableApplicationContext run(String... args) {
    StopWatch stopWatch = new StopWatch();
    stopWatch.start();
    ConfigurableApplicationContext context = null;
    Collection<SpringBootExceptionReporter> exceptionReporters = new ArrayList<>();
    configureHeadlessProperty();
    SpringApplicationRunListeners listeners = getRunListeners(args);
    listeners.starting();
    try {
        ApplicationArguments applicationArguments = new DefaultApplicationArguments(args);
        ConfigurableEnvironment environment = prepareEnvironment(listeners, applicationArguments);
        configureIgnoreBeanInfo(environment);
        Banner printedBanner = printBanner(environment);
        // 创建IoC容器,根据不同的环境创建不同的IoC容器
        context = createApplicationContext();
        exceptionReporters = getSpringFactoriesInstances(SpringBootExceptionReporter.class,
                                                         new Class[] { ConfigurableApplicationContext.class }, context);
        prepareContext(context, environment, listeners, applicationArguments, printedBanner);
        // 刷新容器,即创建容器对象并初始化,创建容器中的各个组件对象
        refreshContext(context);
        afterRefresh(context, applicationArguments);
        stopWatch.stop();
        if (this.logStartupInfo) {
            new StartupInfoLogger(this.mainApplicationClass).logStarted(getApplicationLog(), stopWatch);
        }
        listeners.started(context);
        callRunners(context, applicationArguments);
    }
    catch (Throwable ex) {
        handleRunFailure(context, ex, exceptionReporters, listeners);
        throw new IllegalStateException(ex);
    }

    try {
        listeners.running(context);
    }
    catch (Throwable ex) {
        handleRunFailure(context, ex, exceptionReporters, null);
        throw new IllegalStateException(ex);
    }
    return context;
}
关于Spring中IoC容器还有很多的内容,会在后续写博客详细介绍的。
3)调用 refresh 方法刷新容器,经过一系列的调用后达到 AbstractApplicationContext 类中的 refresh 方法。
@Override
public void refresh() throws BeansException, IllegalStateException {
    synchronized (this.startupShutdownMonitor) {
        // Prepare this context for refreshing.
        prepareRefresh();

        // Tell the subclass to refresh the internal bean factory.
        ConfigurableListableBeanFactory beanFactory = obtainFreshBeanFactory();

        // Prepare the bean factory for use in this context.
        prepareBeanFactory(beanFactory);

        try {
            // Allows post-processing of the bean factory in context subclasses.
            postProcessBeanFactory(beanFactory);

            // Invoke factory processors registered as beans in the context.
            invokeBeanFactoryPostProcessors(beanFactory);

            // Register bean processors that intercept bean creation.
            registerBeanPostProcessors(beanFactory);

            // Initialize message source for this context.
            initMessageSource();

            // Initialize event multicaster for this context.
            initApplicationEventMulticaster();

            // Initialize other special beans in specific context subclasses.
            // 在此处刷新IoC容器
            onRefresh();

            // Check for listener beans and register them.
            registerListeners();

            // Instantiate all remaining (non-lazy-init) singletons.
            finishBeanFactoryInitialization(beanFactory);

            // Last step: publish corresponding event.
            finishRefresh();
        }

        catch (BeansException ex) {
            if (logger.isWarnEnabled()) {
                logger.warn("Exception encountered during context initialization - " +
                            "cancelling refresh attempt: " + ex);
            }

            // Destroy already created singletons to avoid dangling resources.
            destroyBeans();

            // Reset ''active'' flag.
            cancelRefresh(ex);

            // Propagate exception to caller.
            throw ex;
        }

        finally {
            // Reset common introspection caches in Spring''s core, since we
            // might not ever need metadata for singleton beans anymore...
            resetCommonCaches();
        }
    }
}
4)AbstractApplicationContext 类中的 onRefresh 方法刷新IoC容器,其中web的IoC容器重写了 onRefresh 方法,调用的时候通过父类进行多态调用。
5)调用 ServletWebServerApplication 类中 createWebServer 方法,让web的IoC创建嵌入式Servlet容器
private void createWebServer() {
    WebServer webServer = this.webServer;
    ServletContext servletContext = getServletContext();
    if (webServer == null && servletContext == null) {
        // 获取嵌入式的Servlet工厂
        ServletWebServerFactory factory = getWebServerFactory();
        this.webServer = factory.getWebServer(getSelfInitializer());
        getBeanFactory().registerSingleton("webServerGracefulShutdown",
                                           new WebServerGracefulShutdownLifecycle(this.webServer));
        getBeanFactory().registerSingleton("webServerStartStop",
                                           new WebServerStartStopLifecycle(this, this.webServer));
    }
    else if (servletContext != null) {
        try {
            getSelfInitializer().onStartup(servletContext);
        }
        catch (ServletException ex) {
            throw new ApplicationContextException("Cannot initialize servlet context", ex);
        }
    }
    initPropertySources();
}
6)调用 ServletWebServerApplication 类中 getWebServerFactory 方法创建Servlet创建工厂
protected ServletWebServerFactory getWebServerFactory() {
    // Use bean names so that we don''t consider the hierarchy
    // 通过getBean方法从IoC容器中获取ServletWebServerFactory组件
    String[] beanNames = getBeanFactory().getBeanNamesForType(ServletWebServerFactory.class);
    if (beanNames.length == 0) {
        throw new ApplicationContextException("Unable to start ServletWebServerApplicationContext due to missing "
                                              + "ServletWebServerFactory bean.");
    }
    if (beanNames.length > 1) {
        throw new ApplicationContextException("Unable to start ServletWebServerApplicationContext due to multiple "
                                              + "ServletWebServerFactory beans : " + StringUtils.arrayToCommaDelimitedString(beanNames));
    }
    return getBeanFactory().getBean(beanNames[0], ServletWebServerFactory.class);
}
getWebServerFactory 方法中通过 getBeanFactory().getBeanNamesForType(ServletWebServerFactory.class); 从IoC容器中获取 ServletWebServerFactory 组件。我们通过debug调试可以看到在IoC容器中获取 tomcatServletWebServerFactory 组件。我们在SpringBoot自动配置类: ServletWebServerFactoryAutoConfiguration 类中,注入了 tomcatServletWebServerFactory 组件

我们在得到 tomcatServletWebServerFactory 组件后,就进入到了 tomcatServletWebServerFactory 类中创建Servlet容器对象此时会触发后置处理器 WebServerFactoryCustomizerBeanPostProcessor,后置处理器会获取所有的定制器来定制Servlet容器类的相关配置。
7)通过容器工厂获取嵌入式的Servlet容器,即通过 tomcatServletWebServerFactory 类创建 tomcatWebServer 类;
8)创建嵌入式Servlet容器,并启动容器。tomcatWebServer 类中包含对tomcat容器的相关配置和启动方法。
首先启动嵌入式的Servlet容器,再创建IoC容器中的其他组件,即IoC容器在启动的时候就创建了Servlet容器。
本章中涉及到的IoC容器相关的内容并没有详细说明,会在后续的博文中详细说明的。
2. 外置Servlet容器
- 嵌入式Servlet容器:应用打包成可执行的jar包,通过执行jar包启动应用。
- 优点:启动简单,不同的嵌入式Servlet容器间切换方便,且不用安装外部的Servlet容器
- 缺点:不支持jsp,优化定制比较复杂,通过配置文件进行配置或定制Servlet创建工厂
WebServerFactoryCustomizer
- 外置的Servlet容器:将应用打包成war包,通过外置的Servlet容器,如:使用安装配置好的Tomcat运行项目打包后的war包
2.1 外置Servlet容器使用方法
① 设置项目的打包方式设置为war包;
② 设置项目不使用内置的Servlet容器;
③ 必须编写 SpringBootServletInitializer 的实现类,并实现 configure 方法;
④ 通过外部的Servlet容器,启动war包;
具体的使用操作:
① 设置项目的打包方式设置为war包;(注意创建webapp的目录结构)
使用SpringBoot项目创建工具时指定,或修改项目的 pom.xml 文件
<packaging>war</packaging>
② 设置项目不使用内置的Servlet容器;
<dependency>
    <groupId>org.springframework.boot</groupId>
    <artifactId>spring-boot-starter-tomcat</artifactId>
    <scope>provided</scope>
</dependency>
③ 必须编写 SpringBootServletInitializer 的实现类,并实现 configure 方法;
public class ServletInitializer extends SpringBootServletInitializer {

    @Override
    protected SpringApplicationBuilder configure(SpringApplicationBuilder application) {
        // 调用configure方法,传入SpringBoot应用主程序
        return application.sources(Springboot04JspApplication.class);
    }

}
④ 通过外部的Servlet容器,启动war包;
关于在IDEA中配置Tomcat服务器,请查看博文:SpringBoot项目修改为外置Tomcat启动
2.2 外置Servlet容器启动原理
不同打包方式的执行步骤:
- jar包:执行SpringBoot主类的main方法,创建并启动IoC容器,创建嵌入式Servlet容器;
- war包:启动服务器,服务器启动SpringBoot应用【SpringBootServletInitializer】,创建并启动IoC容器;
Servlet 3.1 Shared libraries / runtimes pluggability 的规范:
- 服务器启动时(web应用启动时)会创建当前web应用内每个jar包里的
ServletContainerInitializer实例; ServletContainerInitializer的实现类必须放在jar包的META—INF/services文件夹内,包含一个名为javax.servlet.ServletContainerInitializer的文件,内容为ServletContainerInitializer的实现类的全类名;- 还可以使用
@HandlesTypes注解,在启动应用时加载我们感兴趣的类;
流程:
① 启动Tomcat服务器;
② org\springframework\spring-web\5.2.10.RELEASE\spring-web-5.2.10.RELEASE.jar!\META-INF\services\javax.servlet.ServletContainerInitializer Spring的web模块中包含的文件,文件的内容:org.springframework.web.SpringServletContainerInitializer,即:应用启动时需要创建这个类;
③ SpringServletContainerInitializer 将 @HandlesTypes(WebApplicationInitializer.class) 注解标注的所有 WebApplicationInitializer 类型的类都传入到 onStartup 方法中 ,为这些 WebApplicationInitializer 类型的类创建实例;
@HandlesTypes(WebApplicationInitializer.class)
public class SpringServletContainerInitializer implements ServletContainerInitializer {

    @Override
    public void onStartup(@Nullable Set<Class<?>> webAppInitializerClasses, ServletContext servletContext)
        throws ServletException {

        List<WebApplicationInitializer> initializers = new LinkedList<>();

        if (webAppInitializerClasses != null) {
            for (Class<?> waiClass : webAppInitializerClasses) {
                // Be defensive: Some servlet containers provide us with invalid classes,
                // no matter what @HandlesTypes says...
                if (!waiClass.isInterface() && !Modifier.isAbstract(waiClass.getModifiers()) &&
                    WebApplicationInitializer.class.isAssignableFrom(waiClass)) {
                    try {
                        // 为这些WebApplicationInitializer类型的类创建实例
                        initializers.add((WebApplicationInitializer)
                                         ReflectionUtils.accessibleConstructor(waiClass).newInstance());
                    }
                    catch (Throwable ex) {
                        throw new ServletException("Failed to instantiate WebApplicationInitializer class", ex);
                    }
                }
            }
        }

        if (initializers.isEmpty()) {
            servletContext.log("No Spring WebApplicationInitializer types detected on classpath");
            return;
        }

        servletContext.log(initializers.size() + " Spring WebApplicationInitializers detected on classpath");
        AnnotationAwareOrderComparator.sort(initializers);
        for (WebApplicationInitializer initializer : initializers) {
            // 每一个WebApplicationInitializer类型的类都调用自己的 `onStartup` 方法;
            initializer.onStartup(servletContext);
        }
    }

}
④ 每一个 WebApplicationInitializer 类型的类都调用自己的 onStartup 方法;
WebApplicationInitializer 接口的继承关系图

⑤ 相当于我们的 SpringBootServletInitializer 实现类会被创建对象,并执行 onStartup 方法;
⑥ SpringBootServletInitializer 实例执行 onStartup 方法时会调用 createRootApplicationContext 方法创建IoC容器;
⑦ createRootApplicationContext 方法中调用run方法启动SpringBoot应用并创建IoC容器
SpringBootServletInitializer 类源码:
public abstract class SpringBootServletInitializer implements WebApplicationInitializer {

    ......

        // 执行onStartup方法
        @Override
        public void onStartup(ServletContext servletContext) throws ServletException {
        // Logger initialization is deferred in case an ordered
        // LogServletContextInitializer is being used
        this.logger = LogFactory.getLog(getClass());
        // 创建IoC容器
        WebApplicationContext rootApplicationContext = createRootApplicationContext(servletContext);
        if (rootApplicationContext != null) {
            servletContext.addListener(new SpringBootContextLoaderListener(rootApplicationContext, servletContext));
        }
        else {
            this.logger.debug("No ContextLoaderListener registered, as createRootApplicationContext() did not "
                              + "return an application context");
        }
    }

    ......

        // 创建IoC容器的方法
        protected WebApplicationContext createRootApplicationContext(ServletContext servletContext) {
        // 创建SpringApplicationBuilder
        SpringApplicationBuilder builder = createSpringApplicationBuilder();
        builder.main(getClass());
        ApplicationContext parent = getExistingRootWebApplicationContext(servletContext);
        if (parent != null) {
            this.logger.info("Root context already created (using as parent).");
            servletContext.setAttribute(WebApplicationContext.ROOT_WEB_APPLICATION_CONTEXT_ATTRIBUTE, null);
            builder.initializers(new ParentContextApplicationContextInitializer(parent));
        }
        builder.initializers(new ServletContextApplicationContextInitializer(servletContext));
        builder.contextClass(AnnotationConfigServletWebServerApplicationContext.class);
        // 调用configure方法,子类重写此方法,将SpringBoot的主程序传入
        builder = configure(builder);
        builder.listeners(new WebEnvironmentPropertySourceInitializer(servletContext));
        // 调用build方法创建一个Spring应用
        SpringApplication application = builder.build();
        if (application.getAllSources().isEmpty()
            && MergedAnnotations.from(getClass(), SearchStrategy.TYPE_HIERARCHY).isPresent(Configuration.class)) {
            application.addPrimarySources(Collections.singleton(getClass()));
        }
        Assert.state(!application.getAllSources().isEmpty(),
                     "No SpringApplication sources have been defined. Either override the "
                     + "configure method or add an @Configuration annotation");
        // Ensure error pages are registered
        if (this.registerErrorPageFilter) {
            application.addPrimarySources(Collections.singleton(ErrorPageFilterConfiguration.class));
        }
        application.setRegisterShutdownHook(false);
        // 调用run方法启动SpringBoot应用
        return run(application);
    }

    ......

        // configure方法,子类实现后传入主启动类
        protected SpringApplicationBuilder configure(SpringApplicationBuilder builder) {
        return builder;
    }

    ......


}
因此通过外置Servlet容器启动SpringBoot应用的过程是:先启动外置Servlet容器,再启动SpringBoot应用。
关于Spring中的IoC容器相关的内容,会再写文章进行详细讲解的。这一篇博文比较长,能看到这里的小伙伴都很棒啊ヾ(≧▽≦*)o
今天关于微服务架构Day04-SpringBoot之web开发和微服务架构 springboot的分享就到这里,希望大家有所收获,若想了解更多关于java-study-springboot-基础学习-05-springboot web开发、Spring Boot web 简介及原理 day04、Spring Boot2.0之web开发、Spring Boot框架之Web开发等相关知识,可以在本站进行查询。
本文标签:


