在这篇文章中,我们将为您详细介绍XEN-InstallingandConfiguringFedoraXenVirtualization的内容。此外,我们还会涉及一些关于(OK)Ubuntu15.10:
在这篇文章中,我们将为您详细介绍XEN - Installing and Configuring Fedora Xen Virtualization的内容。此外,我们还会涉及一些关于(OK) Ubuntu 15.10: KVM vs. Xen vs. VirtualBox Virtualization Performance、<转>CentOS / Redhat: Install KVM Virtualization ...、c# – container.RegisterWebApiControllers(GlobalConfiguration.Configuration)导致InvalidOperationException、c# – ListBox VirtualizingStackPanel.VirtualizationMode =“回收”在Windows Phone 7.5中不起作用的知识,以帮助您更全面地了解这个主题。
本文目录一览:- XEN - Installing and Configuring Fedora Xen Virtualization
- (OK) Ubuntu 15.10: KVM vs. Xen vs. VirtualBox Virtualization Performance
- <转>CentOS / Redhat: Install KVM Virtualization ...
- c# – container.RegisterWebApiControllers(GlobalConfiguration.Configuration)导致InvalidOperationException
- c# – ListBox VirtualizingStackPanel.VirtualizationMode =“回收”在Windows Phone 7.5中不起作用

XEN - Installing and Configuring Fedora Xen Virtualization
http://www.techotopia.com/index.php/Installing_and_Configuring_Fedora_Xen_Virtualization
Virtualization is the ability to run multiple operating systems simultaneously on a single computer system.
Virtualization has come to prominence in recent years because it provides a way to fully utilize CPU and resource capacity of a server system whilst providing stability (in that if one virtualized guest system crashes, the host and any other guest systems continue to run).
Virtualization is also useful in terms of trying out different operating systems without having to configure dual boot environments. For example, you can try out Ubuntu Linux without having to re-partition the disk, shut down Fedora Linux and then boot from Ubuntu Linux. You simply start up a virtualized version of Ubuntu as a guest operating system.
There are a number of ways to implement virtualization on Fedora. Options include VMware and KVM. One of the most popular technologies on Fedora is called Xen. Red Hat engineers have invested considerable effort into making Xen easy to install, configure and manage on both Red Hat Enterprise Linux and Fedora. Many of these improvements appeared in Fedora 7. For these reasons, this chapter will focus on Xen Virtualization in Fedora and will assume you are using Fedora 7 or Fedora 8.
Unfortunately, support for running Xen based virtualization on Fedora releases 9, 10 and 11 is not supported. Whilst it is possible to run these versions of Fedora inside Xen virtual machines (as a domU), these newer Fedora releases cannot be used to host Xen based virtual machines (dom0). It is hoped that this support will return with the introduction Xen 3.4 in Fedora 12. If you are using one of these versions of Fedora we recommend using KVM virtualization as outlined in the chapter entitled Installing and Configuring Fedora KVM Virtualization.
For a complete online book dedicated to Xen based virtualization we recommend Xen Virtualization Essentials.
- 1 Full Virtualization vs. Para-Virtualization
- 2 Checking Xen Hardware Compatibility
- 3 Preparing Fedora for Xen Virtualization
- 4 Building a Fedora Xen Guest System
Full Virtualization vs. Para-Virtualization
There are two common approaches to virtualization - full virtualization and para-virtualization. Full virtualization provides complete abstraction between the hardware and the guest operating system. In this scenario, the guest operating system is provided a complete virtual physical environment in which to run and, as such, is unaware that it is running inside a virtual machine. One advantage of full virtualization is that the operating system does not need to be modified in order to run in a virtualized environment. This means that proprietary operating systems such as Windows can be run on Linux systems.
Disadvantages of full virtualization are that performance is slightly reduced as compared to para-virtualization, and some virtualization platforms, such as Xen, require CPUs with special virtualization support built in (such as Intel-VT and AMD-V).
Para-virtualization requires that a guest operating system be modified to support virtualization. This typically means that guest operating systems are limited to open source systems such as Linux. It is also not possible to migrate a running guest OS from one server to another. The advantage to this approach, however, is that a para-virtualized guest system comes closer to native performance than a fully virtualized guest, and the latest virtualization CPU support is not needed.
For a more detailed explanation of virtualization techniques read An Overview of Virtualization Techniques.
Checking Xen Hardware Compatibility
Before using Xen, it is important to ensure that your current hardware configuration is suitable to support Xen.Each guest operating system installed will reside on the existing filesystems of the host Fedora system. It is important, therefore, that there is enough disk space available to install your choice of guest operating system. As a guideline, a command line version of Fedora Linux requires approximately 600Mb of disk space. A full installation of Fedora (including graphical desktop) requires around 4GB of disk space.
Of further concern is physical memory. Sufficient memory is required to run both the host operating system and the guest operating systems. If the guest operating system is not using a desktop environment, then it is possible to allocate 256Mb of memory to the guest OS. A full, graphical desktop Linux installation will require considerably more (a minimum of between 300 - 400Mb will provide reasonable, but not spectacular, performance).
In order to support virtualization, the CPU must, at a minimum, support the PAE extension. To verify that your CPU supports PAE run the following command from a Terminal window:
grep pae /proc/cpuinfoIf no output is displayed, then your CPU is not able to support Xen virtualization. If, on the other hand, you see output similar to the following, then you can proceed with the Xen configuration:
flags           : fpu tsc msr pae mce cx8 apic mtrr mca cmov pat pse36 clflush dts acpi
                     mmx fxsr sse sse2 ss nx constant_tsc up pni ds_cpl
As mentioned previously, in order to support full hardware virtualization, the CPU must include Intel-VT or AMD-V support. This can be verified using the following commands:
For Intel CPUs:
grep vmx /proc/cpuinfoFor AMD CPUSs:
grep svm /proc/cpuinfoIf your system does not include this support you can still use Xen in para-virtualization mode. You will not, however, be able to run Microsoft Windows as a guest operating system.
Preparing Fedora for Xen Virtualization
Xen requires a specially modified Linux kernel and a number of tools in order to operate. By default, Fedora does not install this Kernel or these tools. The next step, therefore, is to prepare the operating system for Xen. Begin by installing the virtualization tools and kernel as follows:
su -
yum groupinstall ''Virtualization''
This command will install all the required packages, and configure the boot loader to provide a Xen virtualization option when the system is next booted.
At this point, reboot the system. When the boot screen appears hit any key to enter to boot menu and select the Fedora Xen boot option. If a Xen boot option is not provided, boot using the standard Linux kernel and execute the following commands before rebooting once again:
su -
yum install xen
When the boot has completed, log in as usual and open a Terminal window. In that window run the following command to verify that kernel with Xen support has loaded:
uname -rYou should expect to see output similar to the following:
2.6.20-2931.fc7xenYou can also check that Xen is running with the following command:
su -
/sbin/xm list
This command will list any currently running Xen machines.
It is now time to build a Xen virtual machine to contain a guest operating system:
Name                                      ID   Mem VCPUs      State   Time(s)
Domain-0                                   0   384     1     r-----   1710.0
Currently, this command lists only the host operating system. When guest operating systems are running, these too will be listed.
It is now time to build a Xen virtual machine to contain a guest operating system.
Building a Fedora Xen Guest System
Guest systems can easily be configured using either the virt-install command-line tool, or the virt-manager GUI tool. For the purposes of this chapter we will use the virt-manager tool.
Begin by launching virt-manager either by selecting the Applications->System Tools->Virtual Machine Manager or from the command-line by running /usr/sbin/virt-manager. Once loaded, the virtual manager will display the following screen:
To create a new guest system, click on the New button to display the first configuration screen. Click the Forward button to proceed to the Naming screen and enter a name for the virtual machine. This can be any name you choose.
On the next page, you can choose to configure a Full or Para-virtualized method. The Full virtualization option will only be selectable if your hardware supports it:
Select Para-virtualized and press Forward. The next screen requires information about the location of the operating system installation files. Currently guest operating systems can only be installed over a network or the internet. The easiest way is to provide the http address of the operating system installation files. To install the i386 Fedora 7 distribution you might, for example, enter:
http://download.fedora.redhat.com/pub/fedora/linux/releases/7/Fedora/i386/os/
Alternatively, select a mirror site closest to your geographical location from the Fedora mirror list.
Once an appropriate address has been entered, click the next button to assign storage space:
If you have a disk partition available for the guest operating system, enter the device path. Otherwise, select Simple file and enter the path of the file to be created and select a file size (keeping in mind the space requirements for your chosen guest OS). Click the Forward key once more.
On the Connect to network host select Shared physical device and click Forward. This will configure the guest OS to share the host operating system''s network connection.
The next screen allows configuration of memory and CPU usage:
Select a memory setting which allows sufficient memory for the host system and the guest system to co-exist. If you plan to run multiple guest operating systems, be sure to allow for this.
On a multi-CPU or multi-core CPU environment it is possible to define how many CPUs the guest OS will have access to. The final screen displays a summary of the configuration:
Click on the Finish button to begin the creation process. The virtualization manager will create the disk and configure Xen before starting the system. Once started, the guest OS installation will begin:
From this point on, simply follow the operating installation instructions to install the guest OS.
The next chapter will focus on Managing and Monitoring Fedora based Xen Guest Systems.
 Ubuntu 15.10: KVM vs. Xen vs. VirtualBox Virtualization Performance")
(OK) Ubuntu 15.10: KVM vs. Xen vs. VirtualBox Virtualization Performance
www.phoronix.com/scan.php?page=article&item=ubuntu-1510-virt&num=1
Our latest benchmarks of Ubuntu 15.10 are looking at the performance of this latest Linux distribution release when comparing the performance of guests using KVM, Xen, and VirtualBox virtualization from the same system.
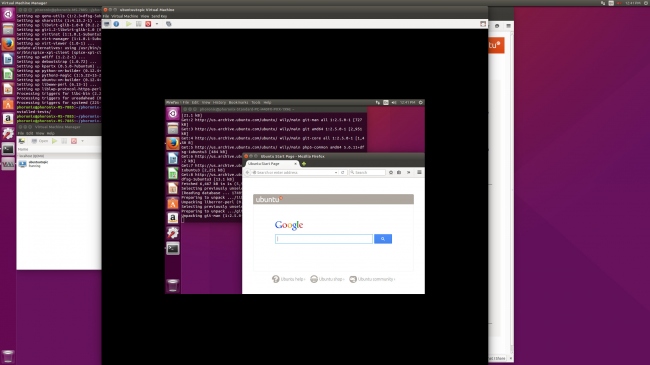
The tests were all done from an Intel Xeon E5-2687W v3 + MSI X99S SLI PLUS system with 16GB of DDR4 system memory, 80GB Intel M.2 SSD, and AMD FirePro V7900 graphics. Once running our disk and processor focused benchmarks on this Ubuntu 15.10 host system, the "bare metal" results were then compared to a KVM guest setup via virt-manager using the Ubuntu Wily packages, then using the Xen 4.5 packages present on Ubuntu 15.10 with again testing the same Ubuntu 15.10 guest with virt-manager, and then lastly testing the Ubuntu 15.10 guest under VirtualBox 5.0.4 as available via the package archive.
The host system and all guests were using Ubuntu 15.10 64-bit with the Linux 4.2.0-16-generic kernel, Unity desktop, X.Org Server 1.17.2, an EXT4 file-system, and GCC 5.2.1 as the code compiler. All system settings remained the same during the testing process.
When creating the KVM/Xen/VirtualBox guests, 38GB of virtual storage on the Intel SSD, 8GB of RAM and all 20 CPU threads (ten core CPU + HT) were made available to the virtual machine under test. As each platform has near endless tunable possibilities, the testing was done with the default settings. If there''s enough interest and premium support from Phoronix readers, I can look at putting out some "tuned" VM comparisons.
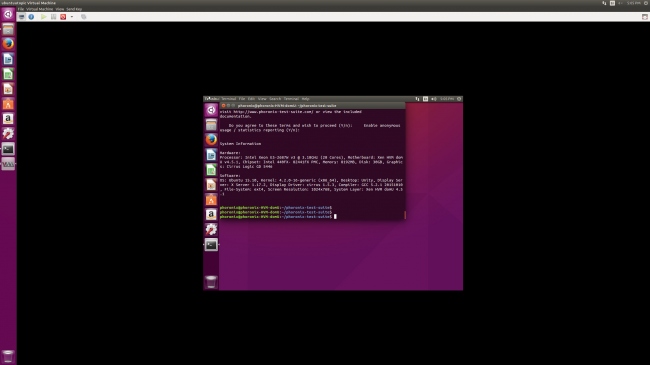
All of the benchmarks for this article were carried out via the open-source Phoronix Test Suite benchmarking software.
+++++++++++++++++++++++++++++++++++++++++++
http://www.phoronix.com/scan.php?page=article&item=ubuntu-1510-virt&num=2
First up are some of the disk benchmarks for the host system and then the KVM/Xen/VirtualBox guests
With VirtualBox''s reported result outperforming the bare metal system, it looks like VirtualBox in its default configuration for this SQLite database benchmark isn''t fully honoring fsyncs to the disk compared to KVM and Xen with the performance being too good. While KVM was the slowest, if you''re doing a lot of write-intensive work in your VMs, you are better off letting the VM access a raw partition rather than just setting up a virtual disk.
With the random and sequential writes, VirtualBox was reported to be faster than KVM and Xen but again may be a matter of its different behavior.
When it comes to sequential reads, VirtualBox was slower than the competition.
Dbench is another disk benchmark showing VirtualBox''s different behavior of apparently not writing everything out to the disk during testing with the reported performance being too good.
+++++++++++++++++++++++++++++++++++++++++++
http://www.phoronix.com/scan.php?page=article&item=ubuntu-1510-virt&num=3
KVM was edging past Xen and VirtualBox for the CompileBench test.
With the Parboil OpenMP CPU test, the performance of KVM and Xen effectively matched that of the host system with minimal overhead in having access to all 20 CPU threads and having no other tasks active on the host system during testing. While VirtualBox was configured with the same hardware access, it was much slower than KVM and Xen.
The Rodinia OpenMP test was also showing VirtualBox at a similar disadvantage.
+++++++++++++++++++++++++++++++++++++++++++
http://www.phoronix.com/scan.php?page=article&item=ubuntu-1510-virt&num=4
KVM was faster than Xen at the MAFFT scientific test while VirtualBox 5.0 was nearly twice as slow.
On this Haswell Xeon system, KVM was faster than Xen and VirtualBox.
Xen scored a win past KVM when it came to the GraphicsMagick image resizing test.
There wasn''t a huge performance difference in the largely single-threaded Himeno pressure solver.
+++++++++++++++++++++++++++++++++++++++++++
http://www.phoronix.com/scan.php?page=article&item=ubuntu-1510-virt&num=5
KVM and Xen did fine on the timed kernel compilation benchmark while VirtualBox was much slower.
It seems nearly across the board that VirtualBox 5.0 performs poorly with the multi-threaded tests even though it too had access to all of the Intel Xeon v3''s threads.
There''s only small performance differences in the multimedia encoding tests.
Overall, Xen and KVM were performing well compared to the host''s performance. Xen tended to have the most wins while KVM generally came in right behind and the two were very competitive with one another, either are great solutions for Linux virtualization depending upon your specific needs. The VirtualBox results, however, were a bit concerning at least for its stock configuration with it performing poorly near universally in the multi-threaded benchmarks and the behavior in the disk benchmark also being potentially problematic.
If you would like to support our continued Linux benchmarking work at Phoronix, please consider subscribing to Phoronix Premium.

<转>CentOS / Redhat: Install KVM Virtualization ...
VM (Kernel-based Virtual Machine) is a full virtualization solution for Linux on x86 hardware containing virtualization extensions Intel VT or AMD-V. How do I install KVM under CentOS or Red Hat Enterprise Linux version 5.5?
The Linux kernel 2.6.20 and above included KVM. RHEL 5.5 (and upcoming RHEL 6) supports KVM out of box and it has also been ported to FreeBSD as a loadable kernel module. However, this tutorial is tested on both CentOS and RHEL 5.5 only running 64 bit Intel Xeon CPU (with Intel VT) and 64 bit kernels with SELinux running in enforcing mode.

Why KVM?
XEN allows several guest operating systems to execute on the same computer hardware and it is also included with RHEL 5.5. But, why use KVM over XEN? KVM is part of the official Linux kernel and fully supported by both Novell and Redhat. Xen boots from GRUB and loads a modified host operating system such as RHEL into the dom0 (host domain). KVM do not have concept of dom0 and domU. It uses /dev/kvm interface to setup the guest operating systems and provides required drivers. See the official wiki for more information.
Required Packages
You must install the following packages:
- kmod-kvm : kvm kernel module(s)
- kvm : Kernel-based Virtual Machine
- kvm-qemu-img : Qemu disk image utility
- kvm-tools : KVM debugging and diagnostics tools
- python-virtinst : Python modules and utilities for installing virtual machines
- virt-manager : Virtual Machine Manager (GUI app, to install and configure VMs)
- virt-viewer: Virtual Machine Viewer (another lightweight app to view VM console and/or install VMs)
- bridge-utils : Utilities for configuring the Linux Ethernet bridge (this is recommended for KVM networking)
KVM Package Group
RHEL comes with KVM software group which includes full virtualization support with KVM. You can list all packages in the group as follows:
# yum groupinfo KVM
Sample outputs:
Loaded plugins: rhnplugin, security
Setting up Group Process
Group: KVM
 Description: Virtualization Support with KVM
 Mandatory Packages:
   celt051
   etherboot-zroms
   etherboot-zroms-kvm
   kmod-kvm
   kvm
   kvm-qemu-img
   qcairo
   qffmpeg-libs
   qpixman
   qspice-libs
 Default Packages:
   Virtualization-en-US
   libvirt
   virt-manager
   virt-viewer
 Optional Packages:
   celt051-devel
   etherboot-pxes
   etherboot-roms
   etherboot-roms-kvm
   gpxe-roms-qemu
   iasl
   kvm-tools
   libcmpiutil
   libvirt-cim
   qcairo-devel
   qffmpeg-devel
   qpixman-devel
   qspice
   qspice-libs-devel
A Note About libvirt
libvirt is an open source API and management tool for managing platform virtualization. It is used to manage Linux KVM and Xen virtual machines through graphical interfaces such as Virtual Machine Manager and higher level tools such as oVirt. See the official website for more information.
A Note About QEMU
QEMU is a processor emulator that relies on dynamic binary translation to achieve a reasonable speed while being easy to port on new host CPU architectures. When used as a virtualizer, QEMU achieves near native performances by executing the guest code directly on the host CPU. QEMU supports virtualization when executing under the Xen hypervisor or using the KVM kernel module in Linux. When using KVM, QEMU can virtualize x86, server and embedded PowerPC, and S390 guests. See the official website for more information.
A Note About Virtio Drivers
Virtio is paravirtualized drivers for kvm/Linux. With this you can can run multiple virtual machines running unmodified Linux or Windows VMs. Each virtual machine has private virtualized hardware a network card, disk, graphics adapter, etc. According to Redhat:
Para-virtualized drivers enhance the performance of fully virtualized guests. With the para-virtualized drivers guest I/O latency decreases and throughput increases to near bare-metal levels. It is recommended to use the para-virtualized drivers for fully virtualized guests running I/O heavy tasks and applications.
Host Operating System
Your main operating system such as CentOS or RHEL is known as host operating system. KVM is a Linux kernel module that enables a modified QEMU program to use hardware virtualization. You only need to install KVM under host operating systems.
KVM Domains
It is nothing but a guest operating system running under host operating system. Each kvm domain must have a unique name and ID (assigned by system).
Guest Operating Systems
KVM supports various guest operating systems such as
- MS-Windows 2008 / 2000 / 2003 Server
- MS-Windows 7 / Vista / XP
- FreeBSD
- OpenBSD
- Sun Solaris
- Various Linux distributions.
- NetBSD
- MINIX
- QNX
- MS DOS
- FreeDOS
- Haiku
- Amiga Research OS
Install KVM
Type the following command to install KVM under RHEL or CentOS:
# yum install kvm virt-viewer virt-manager libvirt libvirt-python python-virtinst
OR
# yum groupinstall KVM
Important Configuration And Log Files (Directories) Location
The following files are required to manage and debug KVM problems:
- /etc/libvirt/ - Main configuration directory.
- /etc/libvirt/qemu/ - Virtual machine configuration directory. All xml files regarding VMs are stored here. You can edit them manually or via virt-manager.
- /etc/libvirt/qemu/networks/ - Networking for your KVM including default NAT. NAT is only recommended for small setup or desktops. I strongly suggest you use bridged based networking for performance.
- /etc/libvirt/qemu/networks/default.xml - The default NAT configuration used by NAT device virbr0.
- /var/log/libvirt/ - The default log file directory. All VM specific logs files are stored here.
- /etc/libvirt/libvirtd.conf - Master libvirtd configuration file.
- /etc/libvirt/qemu.conf - Master configuration file for the QEMU driver.
TCP/UDP Ports
By default libvirt does not opens any TCP or UDP ports. However, you can configure the same by editing the /etc/libvirt/libvirtd.conf file. Also, VNC is configured to listen on 127.0.0.1 by default. To make it listen on all public interfaces, edit /etc/libvirt/qemu.conf file.
Our Sample Setup
+-------------> vm#1 ( 10.10.21.71 / 123.1.2.4, CentOS MySQL Server)
                                                                             |
                                                                             +-------------> vm#2 ( 10.10.21.72 / 123.1.2.5, FreeBSD 7 Web Server)
LAN --> Switch    -->  eth0 --> -+   10.10.21.70                             |
                                 | ---> br0 -+      +----------------+       +-------------> vm#3 ( 10.10.21.73 / 123.1.2.6, OpenBSD 4.x Firewall )
                                 |           | ===> |   RHEL Server  |  -----+
                                 |           |      |      KVM       |       +-------------> vm#4 ( 10.10.21.74 / 123.1.2.7, Solaris 10 Testing Server )
                                 | ---> br1 -+      +----------------+       |
Wan --> ISP Router --> eth1 --> -+   123.1.2.3                               +-------------> vm#5 ( 10.10.21.71 / 123.1.2.8, Windows Server Testing Server )
                                                                             |
                                                                             +-------------> vm#6 ( 10.10.21.71 / 123.1.2.9, RHEL Mail Server )
(Fig.01: Our sample server setup - you need to scroll to see complete diagram)
Where,
Host Configuration
- OS - RHEL / CentOS v5.5 is our host operating system.
- Host has two interface eth0 and eth1
- LAN - eth0 with private ip
- Internet - eth1 with public IPv4/IPv6 address.
- Disk - 73x4 - 15k SAS disk in RAID 10 hardware mode. All VMs are stored on same server (later I will cover SAN/NFS/NAS configuration with live migration).
- RAM - 16GB ECC
- CPU - Dual core dual Intel Xeon CPU L5320 @ 1.86GHz with VT enabled in BIOS.
Virtual Machine Configuration
- Bridged mode networking (eth0 == br0 and eth1 == br1) with full access to both LAN and Internet.
- Accelerator virtio drivers used for networking (model=virtio)
- Accelerator virtio drivers for disk (if=virtio) and disk will show up as /dev/vd[a-z][1-9] in VM.
- Various virtual machines running different guest operating systems as per requirements.
导致InvalidOperationException")
c# – container.RegisterWebApiControllers(GlobalConfiguration.Configuration)导致InvalidOperationException
但是组合根类中的这一行:
container.RegisterWebApiControllers(GlobalConfiguration.Configuration);
导致异常:
System.TypeInitializationException : The type initializer for 'MyProject.Api.Test.Integration.HttpClientFactory' threw an exception.
---- system.invalidOperationException : This method cannot be called during the application's pre-start initialization phase.
Result StackTrace:
at MyProject.Api.Test.Integration.HttpClientFactory.Create()
   at MyProject.Api.Test.Integration.Controllers.ProductControllerIntegrationTest.<GetProductBarcode_Should_Return_Status_BadRequest_When_Barcode_Is_Empty>d__0.MoveNext() in d:\Projects\My\MyProject.Api.Test.Integration\Controllers\ProductControllerIntegrationTest.cs:line 26
----- Inner Stack Trace -----
   at System.Web.Compilation.BuildManager.EnsuretopLevelFilesCompiled()
   at System.Web.Compilation.BuildManager.GetReferencedAssemblies()
   at System.Web.Http.WebHost.WebHostAssembliesResolver.System.Web.Http.dispatcher.IAssembliesResolver.GetAssemblies()
   at System.Web.Http.dispatcher.DefaultHttpControllerTypeResolver.GetControllerTypes(IAssembliesResolver assembliesResolver)
   at System.Web.Http.WebHost.WebHostHttpControllerTypeResolver.GetControllerTypes(IAssembliesResolver assembliesResolver)
   at SimpleInjector.SimpleInjectorWebApiExtensions.GetControllerTypesFromConfiguration(HttpConfiguration configuration)
   at SimpleInjector.SimpleInjectorWebApiExtensions.RegisterWebApiControllers(Container container,HttpConfiguration configuration)
   at MyProject.Api.ContainerConfig.RegisterTypes(Container container) in d:\Projects\My\MyProject.Api\App_Start\ContainerConfig.cs:line 128
   at MyProject.Api.ContainerConfig.CreateWebApiContainer() in d:\Projects\My\MyProject.Api\App_Start\ContainerConfig.cs:line 63
   at MyProject.Api.Test.Integration.HttpClientFactory..cctor() in d:\Projects\My\MyProject.Api.Test.Integration\HttpClientFactory.cs:line 17
评论后,一切正常,网络应用程序本身和测试.
所以问题是:
>例外的原因是什么?
>(这种方法真的需要吗?)
这是HttpClientFactory的代码(一个辅助类,用于创建具有适当头的HttpClient,例如api密钥或授权):
internal static class HttpClientFactory
{
    private static readonly Container _container = ContainerConfig.CreateWebApiContainer();

    public static HttpClient Create()
    {
        var client = new HttpClient { BaseAddress = GetUrl() };
        //...
        return client;
    }
}
解决方法
但是,System.Web.Compilation.BuildManager不能在ASP.NET管道的早期调用,也不能在ASP.NET的上下文之外调用.由于您正在进行测试,BuildManage将抛出您遇到的异常.
所以这里的解决方案(或’技巧’)将在单元测试时替换默认的IAssembliesResolver.我认为旋转变压器看起来像这样:
public class TestAssembliesResolver : IAssembliesResolver
{
    public ICollection<Assembly> GetAssemblies()
    {
        return AppDomain.CurrentDomain.GetAssemblies();
    }
}

[TestMethod]
public void TestMethod1()
{
    // Replace the original IAssembliesResolver.
    GlobalConfiguration.Configuration.Services.Replace(typeof(IAssembliesResolver),new TestAssembliesResolver());

    var container = SimpleInjectorWebApiInitializer.BuildContainer();

    container.Verify();
}
你不得不处理这个问题有点不幸,特别是因为Simple Injector的设计是可测试的.我们似乎忽略了这一点,将RegisterWebApiControllers扩展方法与Web API深深地集成在一起.我们必须退后一步,思考如何更轻松地验证单元测试中的Web API配置.

c# – ListBox VirtualizingStackPanel.VirtualizationMode =“回收”在Windows Phone 7.5中不起作用
这是相关的XAML:
<ListBox ItemsSource="{Binding EpisodeRows}" toolkit:TiltEffect.Suppresstilt="True" Margin="12,0" VirtualizingStackPanel.VirtualizationMode="Recycling">
    <ListBox.ItemTemplate>
        <DataTemplate>
            <Grid VerticalAlignment="Top" Height="111" VirtualizingStackPanel.VirtualizationMode="Recycling" >
                <StackPanel Orientation="Horizontal" Visibility="{Binding TilesVisibility}">
                    <landerGame:LevelTileUserControl PartText="{Binding PartText_1}" scoreText="{Binding scoreText_1}" Star1Visibility="{Binding Star1Vi
                    <landerGame:LevelTileUserControl PartText="{Binding PartText_2}" scoreText="{Binding scoreText_2}" Star1Visibility="{Binding Star1Vi
                    <landerGame:LevelTileUserControl PartText="{Binding PartText_3}" scoreText="{Binding scoreText_3}" Star1Visibility="{Binding Star1Vi
                    <landerGame:LevelTileUserControl PartText="{Binding PartText_4}" scoreText="{Binding scoreText_4}" Star1Visibility="{Binding Star1Vi
                    <landerGame:LevelTileUserControl PartText="{Binding PartText_5}" scoreText="{Binding scoreText_5}" Star1Visibility="{Binding Star1Vi
                    <landerGame:LevelTileUserControl PartText="{Binding PartText_6}" scoreText="{Binding scoreText_6}" Star1Visibility="{Binding Star1Vi
                </StackPanel>
                <TextBlock VerticalAlignment="Top" Text="{Binding EpisodeTitleText}"Margin="0,5"
            </Grid>
        </DataTemplate>
    </ListBox.ItemTemplate>
</ListBox>
这是滚动列表时我的性能分析结果的屏幕截图:
这是列表的样子(这是游戏的级别选择):
我环顾四周,发现任何解决VirtualizationMode =“回收”的文章似乎无法正常工作.在这一点上,任何见解都将是最受欢迎的.
编辑:我已经上传了这个项目的完整相关代码,任何人都可以在这里自己尝试:http://maketag.net/landerGame.rar
解决方法
我建议远离ListBox,因为你试图在这里模拟的行为实际上是WrapPanel.
由于您为每个ListBox项添加了这么多用户控件的方式,我猜它会导致性能下降.如果您切换到WrapPanel然后绑定到您的项目集合,您可能会获得更好的性能,因为每个项目将被虚拟化而不必尝试一次虚拟化六个项目(这可能不起作用).
编辑:查看代码我认为您可以进行一些改进以提高性能.首先,摆脱ListBox并使用如下的ItemsControl:
<controls:Pivot Title="LANDER GAME">
    <!--Pivot item one-->
    <controls:PivotItem Header="Episodes">
        <ScrollViewer>
            <ItemsControl ItemsSource="{Binding EpisodeRows}" toolkit:TiltEffect.Suppresstilt="True" Margin="12,0">
                <ItemsControl.ItemTemplate>
                    <DataTemplate>
                        <Grid VerticalAlignment="Top" Height="111" >
                            <StackPanel Orientation="Horizontal" Visibility="{Binding TilesVisibility}">
                                ...
                            </StackPanel>
                            <TextBlock VerticalAlignment="Top" Text="{Binding EpisodeTitleText}"Margin="0,5" Visibility="{Binding TitleVisibility}" />
                        </Grid>
                    </DataTemplate>
                </ItemsControl.ItemTemplate>
            </ItemsControl>
        </ScrollViewer>
    </controls:PivotItem>
我要做的就是摆脱硬编码的PartText_1,PartText_2类型的变量.只需创建一个项目列表,并在其他项目控件中包含另一个ItemsControl.
只是摆脱ListBox使它更顺畅.我还删除了VirtualizingStackPanel.VirtualizationMode =“Recycling”,因为它在开始时导致了性能损失,一旦加载它看起来更平滑.
今天关于XEN - Installing and Configuring Fedora Xen Virtualization的介绍到此结束,谢谢您的阅读,有关(OK) Ubuntu 15.10: KVM vs. Xen vs. VirtualBox Virtualization Performance、<转>CentOS / Redhat: Install KVM Virtualization ...、c# – container.RegisterWebApiControllers(GlobalConfiguration.Configuration)导致InvalidOperationException、c# – ListBox VirtualizingStackPanel.VirtualizationMode =“回收”在Windows Phone 7.5中不起作用等更多相关知识的信息可以在本站进行查询。
本文标签:


