对于想了解springboot-springmvc文件上传、下载、压缩打包的读者,本文将提供新的信息,我们将详细介绍springboot上传zip并解压,并且为您提供关于05SpringMVC文件上传
对于想了解springboot-springmvc 文件上传、下载、压缩打包的读者,本文将提供新的信息,我们将详细介绍springboot上传zip并解压,并且为您提供关于05 SpringMVC文件上传、下载、19. SpringBoot 扩展 SpringMVC功能、 接管、自定义SpringMVC、java day62【 响应数据和结果视图 、 SpringMVC 实现文件上传 、 SpringMVC 中的异常处理 、 SpringMVC 中的拦截器 】、MyBatis + SpringMVC上传、下载文件的有价值信息。
本文目录一览:- springboot-springmvc 文件上传、下载、压缩打包(springboot上传zip并解压)
- 05 SpringMVC文件上传、下载
- 19. SpringBoot 扩展 SpringMVC功能、 接管、自定义SpringMVC
- java day62【 响应数据和结果视图 、 SpringMVC 实现文件上传 、 SpringMVC 中的异常处理 、 SpringMVC 中的拦截器 】
- MyBatis + SpringMVC上传、下载文件
")
springboot-springmvc 文件上传、下载、压缩打包(springboot上传zip并解压)
前言
最近负责了一个需求:每天定时拉取第三方报表数据,生成文件,并可以查看、下载、压缩打包。
遂单独记录下 springmvc 中文件的上传、下载和压缩打包这三个工作常用功能。
版本信息:
<springcloud.version>Greenwich.SR2</springcloud.version>
<springboot.version>2.1.7.RELEASE</springboot.version>
(<spring.version>5.1.9.RELEASE</spring.version>)
文件上传
- 单文件上传
//单文件上传
@RequestMapping("/upload")
@ResponseBody
public BaseResult upload(@RequestParam("file") MultipartFile file) {
	//文件信息获取
    String fileName = file.getOriginalFilename();
    long size = file.getSize()/1024; //单位 B>KB
    String contentType = file.getContentType();
    logger.info(">> file info to upload: {}, {}KB, {}", fileName, size, contentType);

    //目录生成与新文件名
    String newFileName = currDateStr.substring(8, currDateStr.length()) + "_" + fileName;
    String dateDir = currDateStr.substring(0, 8); //20191220
    File destDir = new File(upload_fspath_base, dateDir);// /xxx/upload/20191220
    if(!destDir.exists()) {
    	destDir.mkdirs(); //注意不是mkdir
    }

	//文件写入
	try {
		file.transferTo(new File(destDir, newFileName));
	} catch (IllegalStateException | IOException e) {
		logger.error("保存上传文件出错!", e);
		throw new BusinessException("保存上传文件出错!", e);
	}

	return BaseResult.succ();
}
- 多文件上传
//多文件上传
@RequestMapping("/uploads")
@ResponseBody
public BaseResult uploads(@RequestParam("files") MultipartFile[] files) {
	int succSize = Arrays.stream(files).map(this::upload).collect(Collectors.toList()).size();

	return BaseResult.succData(succSize);
}
- 注意:springboot 预设的上传大小限制为 10MB,对应配置项为
spring.servlet.multipart.max-file-size=200MB
spring.servlet.multipart.max-request-size=200MB
文件下载
- 方式 1,使用 springmvc 的 ResponseEntity
//文件下载
@RequestMapping("/download/{code}")
public ResponseEntity<Resource> download(@PathVariable String code) { //上传下载码(唯一码)
	//查找上传记录
	UploadFileInfo fileInfo = uploadFileInfoRepo.findByUploadCode(code);

	if(Objects.nonNull(fileInfo)) {
		Resource resource = null;
		String contentType = null;
		try {
			//load file as Resource
			if(!RichardUtil.isStrEmpty(fileInfo.getFsPath())) {
				resource = new FileSystemResource(new File(fileInfo.getFsPath()));
			}else {
				resource = new UrlResource(fileInfo.getSrcPath());
			}
			contentType = request.getServletContext().getMimeType(resource.getFile().getAbsolutePath());
		} catch (IOException e) {
			logger.error(code, e);
			throw new BusinessException("资源读取异常!", e);
		}
		if(Objects.isNull(contentType)) contentType = "application/octet-stream";

		return ResponseEntity.ok()
				.contentType(MediaType.parseMediaType(contentType))
				.header(HttpHeaders.CONTENT_DISPOSITION, "attachment; filename=\"" + fileInfo.getFileName() + "\"")
				.body(resource);

	}else {
		throw new BusinessException("资源未找到!");
	}
}
- 方式 2,传统的 HttpServletResponse
见压缩示例一起
文件压缩 / 打包下载
- 意外发现使用传统的 response 更简洁好用,使用 springmvc 的 ResponseEntity 的话修改返回类型即可
org.springframework.core.io.Resource很好用- 代码
/**
 * 文件(压缩打包)下载,传统response版
 */
@RequestMapping("/manage-api/download/zip5s")
@ResponseBody
public void zip5s() {
	List<UploadFileInfo> collect5 = uploadFileInfoRepo.findAll().stream().limit(5).collect(Collectors.toList());
	String showName = RichardUtil.getCurrentDatetimeStrNoFlag() + ".zip";
	//java7 资源自动关闭语法糖
	try(ZipOutputStream out = new ZipOutputStream(response.getOutputStream())){
		response.setHeader(HttpHeaders.CONTENT_DISPOSITION, "attachment; filename=\"" + showName + "\"");
		response.setContentType("application/octet-stream");
		for(UploadFileInfo o:collect5) {
			//load file resource
			Resource resource = RichardUtil.isStrEmpty(o.getFsPath())?new UrlResource(o.getSrcPath()):new FileSystemResource(o.getFsPath());
			//添加压缩
			out.putNextEntry(new ZipEntry(o.getFileName()));
			//写入(方法封装,目的流暂不关闭)
			RichardUtil.dump_dest_not_close(resource.getInputStream(), out);
		}
	} catch (IOException e) {
		logger.error(">> zip压缩打包异常", e);
		throw new BusinessException(e);
	}
}
文章原链,欢迎踩点

05 SpringMVC文件上传、下载
目录
一、创建项目,配置相关配置
二、SpringMVC上传_原生方式上传
三、SpringMVC上传_SpringMVC方式上传
四、SpringMVC上传_上传多文件
五、SpringMVC上传_异步上传
六、SpringMVC文件上传_跨服务器上传
七、SpringMVC文件上传_文件下载
查询所有可下载的文件:
下载文件控制器
八、知识点整理:
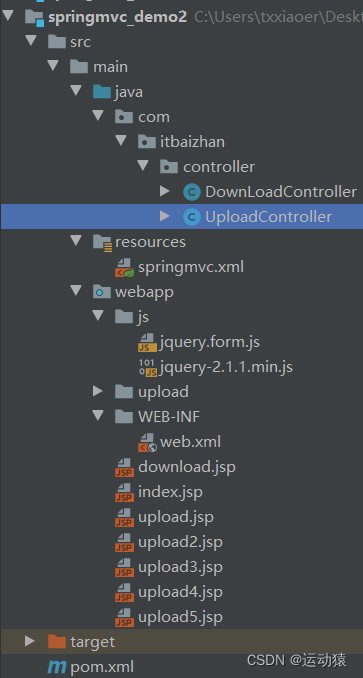
一、创建项目,配置相关配置
项目结构
1.配置web.xml
<web-app xmlns:xsi="http://www.w3.org/2001/XMLSchema-instance"
         xmlns="http://xmlns.jcp.org/xml/ns/javaee"
         xsi:schemaLocation="http://xmlns.jcp.org/xml/ns/javaee
         http://xmlns.jcp.org/xml/ns/javaee/web-app_3_1.xsd" id="WebApp_ID" version="3.1">
  <display-name>Archetype Created Web Application</display-name>

  <!--  字符编码过滤器  -->
  <filter>
    <filter-name>encFilter</filter-name>
    <filter-class>org.springframework.web.filter.CharacterEncodingFilter</filter-class>
    <init-param>
      <param-name>encoding</param-name>
      <param-value>utf-8</param-value>
    </init-param>
  </filter>
  <filter-mapping>
    <filter-name>encFilter</filter-name>
    <url-pattern>/*</url-pattern>
  </filter-mapping>

  <!--   请求方式过滤器   -->
  <filter>
    <filter-name>httpMethodFilter</filter-name>
    <filter-class>org.springframework.web.filter.HiddenHttpMethodFilter</filter-class>
  </filter>
  <filter-mapping>
    <filter-name>httpMethodFilter</filter-name>
    <url-pattern>/*</url-pattern>
  </filter-mapping>

  <!--  前端控制器  -->
  <servlet>
    <servlet-name>dispatcherServlet</servlet-name>
    <servlet-class>org.springframework.web.servlet.dispatcherServlet</servlet-class>
    <init-param>
      <param-name>contextConfigLocation</param-name>
      <param-value>classpath:springmvc.xml</param-value>
    </init-param>
    <load-on-startup>1</load-on-startup>
  </servlet>
  <servlet-mapping>
    <servlet-name>dispatcherServlet</servlet-name>
    <url-pattern>/</url-pattern>
  </servlet-mapping>
</web-app>
2.引入依赖
<dependencies>
    <!--  spring核心  -->
    <dependency>
      <groupId>org.springframework</groupId>
      <artifactId>spring-context</artifactId>
      <version>5.2.12.RELEASE</version>
    </dependency>
    <!--  spring web  -->
    <dependency>
      <groupId>org.springframework</groupId>
      <artifactId>spring-web</artifactId>
      <version>5.2.12.RELEASE</version>
    </dependency>
    <!--  springMVC  -->
    <dependency>
      <groupId>org.springframework</groupId>
      <artifactId>spring-webmvc</artifactId>
      <version>5.2.12.RELEASE</version>
    </dependency>
    <!--  servlet  -->
    <dependency>
      <groupId>javax.servlet</groupId>
      <artifactId>servlet-api</artifactId>
      <version>2.5</version>
      <scope>provided</scope>
    </dependency>
    <!--  jsp  -->
    <dependency>
      <groupId>javax.servlet.jsp</groupId>
      <artifactId>jsp-api</artifactId>
      <version>2.0</version>
      <scope>provided</scope>
    </dependency>
    <!--  jackson  -->
    <dependency>
      <groupId>com.fasterxml.jackson.core</groupId>
      <artifactId>jackson-core</artifactId>
      <version>2.9.0</version>
    </dependency>
    <dependency>
      <groupId>com.fasterxml.jackson.core</groupId>
      <artifactId>jackson-databind</artifactId>
      <version>2.9.0</version>
    </dependency>
    <dependency>
      <groupId>com.fasterxml.jackson.core</groupId>
      <artifactId>jackson-annotations</artifactId>
      <version>2.9.0</version>
    </dependency>

    <!--文件上传-->
    <dependency>
      <groupId>commons-fileupload</groupId>
      <artifactId>commons-fileupload</artifactId>
      <version>1.3.1</version>
    </dependency>
    <dependency>
      <groupId>commons-io</groupId>
      <artifactId>commons-io</artifactId>
      <version>2.4</version>
    </dependency>

    <!--跨服上传-->
    <dependency>
      <groupId>com.sun.jersey</groupId>
      <artifactId>jersey-core</artifactId>
      <version>1.18.1</version>
    </dependency>
    <dependency>
      <groupId>com.sun.jersey</groupId>
      <artifactId>jersey-client</artifactId>
      <version>1.18.1</version>
    </dependency>

    <!--JSTL-->
    <dependency>
      <groupId>org.apache.taglibs</groupId>
      <artifactId>taglibs-standard-spec</artifactId>
      <version>1.2.5</version>
    </dependency>
    <dependency>
      <groupId>org.apache.taglibs</groupId>
      <artifactId>taglibs-standard-impl</artifactId>
      <version>1.2.5</version>
    </dependency>
  </dependencies>

  <build>
    <plugins>
      <!--  tomcat插件  -->
      <plugin>
        <groupId>org.apache.tomcat.maven</groupId>
        <artifactId>tomcat7-maven-plugin</artifactId>
        <version>2.1</version>
        <configuration>
          <port>8080</port>
          <path>/</path>
          <uriEncoding>UTF-8</uriEncoding>
          <server>tomcat7</server>
          <systemProperties>
            <java.util.logging.SimpleFormatter.format>%1$tH:%1$tM:%1$tS %2$s%n%4$s: %5$s%6$s%n </java.util.logging.SimpleFormatter.format>
          </systemProperties>
        </configuration>
      </plugin>
    </plugins>
  </build>
3.在配置文件springmvc.xml中配置相关配置
<beans xmlns="http://www.springframework.org/schema/beans"
       xmlns:mvc="http://www.springframework.org/schema/mvc"
       xmlns:context="http://www.springframework.org/schema/context"
       xmlns:xsi="http://www.w3.org/2001/XMLSchema-instance"
       xsi:schemaLocation=" http://www.springframework.org/schema/beans
       http://www.springframework.org/schema/beans/spring-beans.xsd
       http://www.springframework.org/schema/mvc
       http://www.springframework.org/schema/mvc/spring-mvc.xsd
       http://www.springframework.org/schema/context
       http://www.springframework.org/schema/context/spring-context.xsd">
    <!--包扫描-->
    <context:component-scan base-package="com.itbaizhan"></context:component-scan>

    <!--开启SpringMVC注解支持-->
    <mvc:annotation-driven ></mvc:annotation-driven>
<!--    <mvc:annotation-driven conversion-service="converterFactory"></mvc:annotation-driven>-->

    <!-- 视图解析器-->
    <bean id="viewResolver">
        <!-- 视图前缀, value="/"表示在webapp目录下,如果
        .jsp在WEB-INF目录下,value="/WEB-INF/"-->
        <property name="prefix" value="/" />
        <!-- 视图后缀,value=".jsp"表示处理后缀为.jsp的文件-->
        <property name="suffix" value=".jsp" />
    </bean>

    <!-- 放行静态资源 -->
    <mvc:default-servlet-handler />

    <!--文件解析器对象,id名称必须是multipartResolver-->
    <bean id="multipartResolver">
        <!--支持一次上传文件的总容量。  单位:字节  100M = 100*1024*1024-->
        <property name="maxUploadSize" value="104857600"></property>
        <!--文件名的编码方式-->
        <property name="defaultEncoding" value="uft-8"></property>
    </bean>
</beans>
二、SpringMVC上传_原生方式上传
上传是Web工程中很常见的功能,SpringMVC框架简化了文件上传的代码,我们首先使用JAVAEE原生方式上传文件:
1.创建新的SpringMVC项目(Maven-webapp),在web.xml中将项目从2.3改为3.1,即可默认开启el表达式
<web-app xmlns:xsi="http://www.w3.org/2001/XMLSchema-instance" xmlns="http://xmlns.jcp.org/xml/ns/javaee" xsi:schemaLocation="http://xmlns.jcp.org/xml/ns/javaee http://xmlns.jcp.org/xml/ns/javaee/web-app_3_1.xsd" id="WebApp_ID" version="3.1"> </web-app>2.编写上传表单
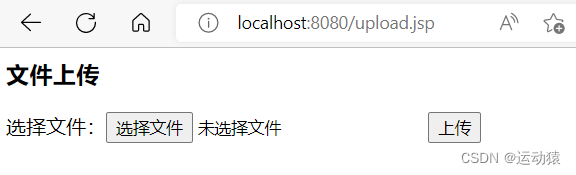
<%@ page contentType="text/html;charset=UTF-8" language="java" %> <html> <head> <title>上传</title> </head> <body> <h3>文件上传</h3> <%-- 上传表单的提交方式必须是post,get方式没有请求体,提交的数据较少,而上传文件的数据量大,所以使用post提交 --%> <%-- enctype属性为multipart/form-data,意思是不对表单数据进行编码,在使用包含文件上传控件的表单时,必须使用该值 --%> <form action="/fileUpload" method="post" enctype="multipart/form-data"> <%-- 文件选择控件,类型是file,必须要有name属性--%> 选择文件:<input type="file" name="upload"> <input type="submit" value="上传"> </form> </body> </html>3.编写控制器接收上传请求,控制器进行三步操作:
(1)创建文件夹,存放上传文件。
(2)分析请求体,找到上传文件数据。
(3)将文件数据写入文件夹。
   @RequestMapping("/fileUpload")
    public String upload(HttpServletRequest request) throws Exception {
        // 创建文件夹,存放上传文件
        // 1.设置上传文件夹的真实路径
        String realPath = request.getSession().getServletContext().getRealPath("/upload");

        // 2.判断该目录是否存在,如果不存在,创建该目录
        File file = new File(realPath);
        if(!file.exists()){
            file.mkdirs();
        }

        // 分析请求体,找到上传文件数据
        // 1.创建磁盘文件工厂
        diskFileItemFactory factory = new diskFileItemFactory();
        // 2.创建上传数据分析器对象
        ServletFileUpload servletFileUpload = new ServletFileUpload(factory);
        // 3.利用分析器对象解析请求体,返回所有数据项
        List<FileItem> fileItems = servletFileUpload.parseRequest(request);
        // 4.遍历所有数据,找到文件项(非表单项)
        for (FileItem fileItem:fileItems){
            if(!fileItem.isFormField()){
                // 将文件数据写入文件夹
                // 1.获取文件名
                String name = fileItem.getName();
                // 2.将文件写入磁盘
                fileItem.write(new File(file,name));
                // 3.删除内存中的临时文件
                fileItem.delete();
            }
        }
        return "index";
    }
4.请求路径:localhost:8080/upload.jsp
三、SpringMVC上传_SpringMVC方式上传
SpringMVC使用框架提供的文件解析器对象,可以直接将请求体中的文件数据转为multipartfile对象,从而省略原生上传中分析请求体的步骤。
1.在SpringMVC核心配置文件springmvc.xml中配置文件解析器
<!--文件解析器对象,id名称必须是multipartResolver--> <bean id="multipartResolver"> <!--支持一次上传文件的总容量。 单位:字节 100M = 100*1024*1024--> <property name="maxUploadSize" value="104857600"></property> <!--文件名的编码方式--> <property name="defaultEncoding" value="uft-8"></property> </bean>2.创建JSP表单 upload2.jsp
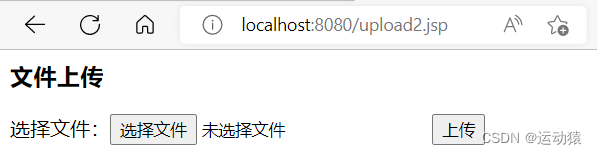
<%@ page contentType="text/html;charset=UTF-8" language="java" %> <html> <head> <title>上传</title> </head> <body> <h3>文件上传</h3> <%-- 上传表单的提交方式必须是post,get方式没有请求体,提交的数据较少,而上传文件的数据量大,所以使用post提交 --%> <%-- enctype属性为multipart/form-data,意思是不对表单数据进行编码,在使用包含文件上传控件的表单时,必须使用该值 --%> <form action="/fileUpload2" method="post" enctype="multipart/form-data"> <%-- 文件选择控件,类型是file,必须要有name属性--%> 选择文件:<input type="file" name="file"> <input type="submit" value="上传"> </form> </body> </html>3.编写控制器接收上传请求
    //multipartfile参数名必须和JSP文件控件的name属性一致,即名为file
    @RequestMapping("/fileUpload2")
    public String upload2(multipartfile file,HttpServletRequest request) throws IOException {
        // 创建文件夹,存放上传文件
        // 1.设置上传文件夹的真实路径
        String realPath = request.getSession().getServletContext().getRealPath("/upload");

        // 2.判断该目录是否存在,如果不存在,创建该目录
        File dir = new File(realPath);
        if(!dir.exists()){
            dir.mkdirs();
        }

        //将上传的数据写到文件夹的文件中
        //1.拿到上传的文件名
        String filename = file.getoriginalFilename();
        //为了避免重名的情况,可以给文件名加个前缀,当多次上传同一个文件时不重名
        filename = UUID.randomUUID()+"_"+filename;

        //2.创建空文件
        File newFile = new File(dir,filename);
        //3.将数据写入空文件中
        file.transferTo(newFile);

        return "index";
    }
4. 请求路径:localhost:8080/upload2.jsp
四、SpringMVC上传_上传多文件
SpringMVC 支持一次性上传多个文件,写法如下:1.创建JSP表单
<%@ page contentType="text/html;charset=UTF-8" language="java" %> <html> <head> <title>上传</title> </head> <body> <h3>文件上传</h3> <%-- 上传表单的提交方式必须是post,get方式没有请求体,提交的数据较少,而上传文件的数据量大,所以使用post提交 --%> <%-- enctype属性为multipart/form-data,意思是不对表单数据进行编码,在使用包含文件上传控件的表单时,必须使用该值 --%> <form action="/fileUpload3" method="post" enctype="multipart/form-data"> 用户名:<input name="username"> <%-- 文件选择控件,类型是file,必须要有name属性,name属性名都为files,因为后台是files数组接收--%> 文件1:<input type="file" name="files"> 文件2:<input type="file" name="files"> <input type="submit" value="上传"> </form> </body> </html>2.编写控制器接收上传请求
    //multipartfile参数名必须和JSP文件控件的name属性一致,即名为files
    @RequestMapping("/fileUpload3")
    public String upload3(String username,multipartfile files[],HttpServletRequest request) throws IOException {
        System.out.println(username);
        // 创建文件夹,存放上传文件
        // 1.设置上传文件夹的真实路径
        String realPath = request.getSession().getServletContext().getRealPath("/upload");

        // 2.判断该目录是否存在,如果不存在,创建该目录
        File dir = new File(realPath);
        if(!dir.exists()){
            dir.mkdirs();
        }

        for (multipartfile file:files){
            //将上传的数据写到文件夹的文件中
            //1.拿到上传的文件名
            String filename = file.getoriginalFilename();
            //为了避免重名的情况,可以给文件名加个前缀,当多次上传同一个文件时不重名
            filename = UUID.randomUUID()+"_"+filename;

            //2.创建空文件
            File newFile = new File(dir,filename);
            //3.将数据写入空文件中
            file.transferTo(newFile);
        }

        return "index";
    }
3.请求路径:localhost:8080/upload3.jsp

五、SpringMVC上传_异步上传
之前的上传方案,在上传成功后都会跳转页面。而在实际开发中,很多情况下上传后不进行跳转,而是进行页面的局部刷新,比如:上传头像成功后将头像显示在网页中。这时候就需要使用异步文件上传。
1.编写JSP页面upload4.jsp,引入jQuery和jQuery表单上传工具 jquery.form.js
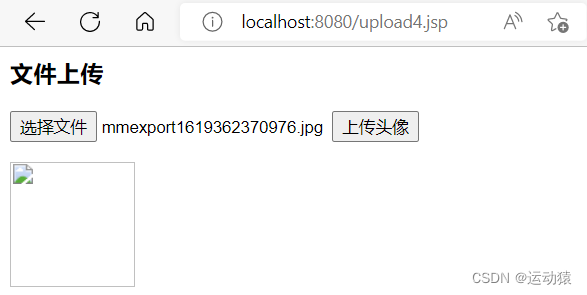
<%@ page contentType="text/html;charset=UTF-8" language="java" %> <html> <head> <title>上传</title> <script src="/js/jquery-2.1.1.min.js"></script> <script src="/js/jquery.form.js"></script> </head> <body> <h3>文件上传</h3> <form id="ajaxForm" enctype="multipart/form-data"> <input type="file" name="file"/> <%--按钮类型不能是submit,否则会刷新页面--%> <input type="button" value="上传头像" id="btn"> </form> <%--头像预览图--%> <img src="/" width="100" id="header"> <script> $(function () { $("#btn").click(function(){ //异步提交表单 $("#ajaxForm").ajaxSubmit({ url:"/fileUpload4", type:"post", success:function (data) { $("#header").attr("src",data); } }) }) }) </script> </body> </html>2.编写控制器接收异步上传请求
    @RequestMapping("/fileUpload4")
    @ResponseBody
    public String upload4(multipartfile file,HttpServletRequest request) throws IOException {
        // 创建文件夹,存放上传文件
        // 1.设置上传文件夹的真实路径
        String realPath = request.getSession().getServletContext().getRealPath("/upload");

        // 2.判断该目录是否存在,如果不存在,创建该目录
        File dir = new File(realPath);
        if(!dir.exists()){
            dir.mkdirs();
        }

        //将上传的数据写到文件夹的文件中
        //1.拿到上传的文件名
        String filename = file.getoriginalFilename();
        filename = UUID.randomUUID()+"_"+filename;

        //2.创建空文件
        File newFile = new File(dir,filename);
        //3.将数据写入空文件中
        file.transferTo(newFile);

        return "/upload"+filename;
    }
3.请求路径:localhost:8080/upload4.jsp
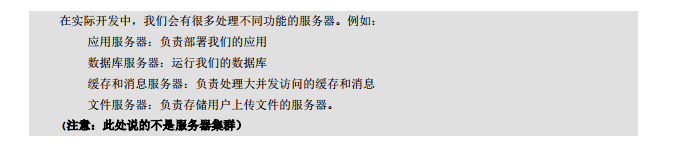
六、SpringMVC文件上传_跨服务器上传
由于文件占据磁盘空间较大,在实际开发中往往会将文件上传到其他服务器中,此时需要使用跨服务器上传文件。
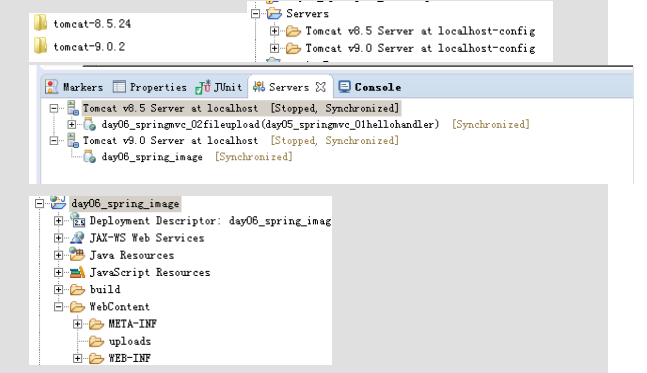
1.解压一个tomcat作为图片服务器,在tomcat的webapps下创建upload目录作为文件上传目录。
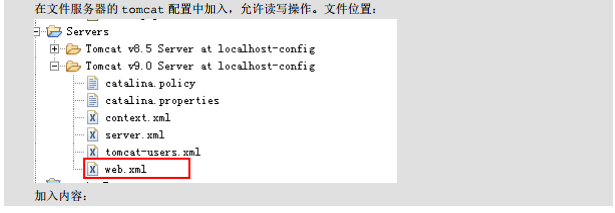
2.修改tomcat的 conf/web.xml 文件,支持跨服上传。(tomcat默认为只读,所以不能接收文件)
<servlet> <init-param> <param-name>readonly</param-name> <param-value>false</param-value> </init-param> </servlet>3.修改tomcat的 conf/server.xml 文件,修改tomcat端口,修改完开启tomcat服务器<Connector port="8081" protocol="HTTP/1.1" connectionTimeout="20000" redirectPort="8443" />4.编写JSP上传表单
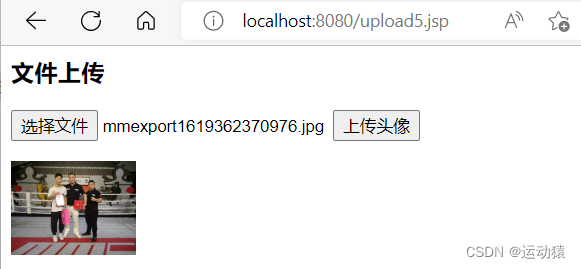
<%@ page contentType="text/html;charset=UTF-8" language="java" %> <html> <head> <title>上传</title> <script src="/js/jquery-2.1.1.min.js"></script> <script src="/js/jquery.form.js"></script> </head> <body> <h3>文件上传</h3> <form id="ajaxForm" enctype="multipart/form-data"> <input type="file" name="file"/> <%--按钮类型不能是submit,否则会刷新页面--%> <input type="button" value="上传头像" id="btn"> </form> <%--头像预览图--%> <img src="/" width="100" id="header"> <script> $(function () { $("#btn").click(function(){ //异步提交表单 $("#ajaxForm").ajaxSubmit({ url:"/fileUpload5", type:"post", success:function (data) { $("#header").attr("src",data); } }) }) }) </script> </body> </html>5.添加跨服上传依赖
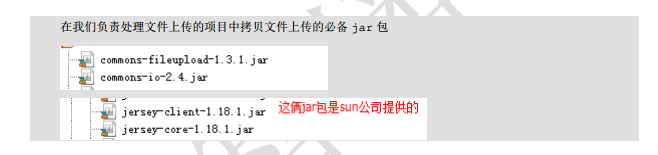
<!--跨服上传--> <dependency> <groupId>com.sun.jersey</groupId> <artifactId>jersey-core</artifactId> <version>1.18.1</version> </dependency> <dependency> <groupId>com.sun.jersey</groupId> <artifactId>jersey-client</artifactId> <version>1.18.1</version> </dependency>6.创建控制器方法,该方法在接受到上传请求后将文件保存到其他服务器上。
 @RequestMapping("/fileUpload5")
    @ResponseBody
    public String upload5(multipartfile file,HttpServletRequest request) throws IOException {
        //设置跨服上传的服务器路径
        String path = "http://localhost:8081/upload/";
        //获取上传的文件名
        String filename = file.getoriginalFilename();
        filename = UUID.randomUUID()+"_"+filename;

        //跨服上传
        //1.创建客户端对象
        Client client = Client.create();
        //2.使用客户端对象连接图片服务器
        WebResource resource = client.resource(path+filename);
        //3.传输数据
        resource.put(file.getBytes());

        return path+filename;
    }
7.请求路径:localhost:8080/upload5.jsp
注意:运行跨服务上传文件时,要先打开tomcat服务器,文件会保存到webapps下的upload文件夹中。

七、SpringMVC文件上传_文件下载
将文件上传到服务器后,有时我们需要让用户下载上传的文件,接下来我们编写文件下载功能:
查询所有可下载的文件:
1.编写控制器方法,查询所有可下载的文件,并跳转到下载页面
@Controller public class DownLoadController { //查询可下载的文件 @RequestMapping("/showFiles") public String showFileDown(HttpServletRequest request, Model model){ //1.获取下载文件路径集合。注意:跨服务器上传中,网络路径无法获取文件列表。 String path = request.getSession().getServletContext().getRealPath("/upload"); File file = new File(path); String[] files = file.list(); //2.将路径放入模型中,跳转到JSP页面 model.addAttribute("files",files); return "download"; } }2.添加JSTL依赖
<!--JSTL--> <dependency> <groupId>org.apache.taglibs</groupId> <artifactId>taglibs-standard-spec</artifactId> <version>1.2.5</version> </dependency> <dependency> <groupId>org.apache.taglibs</groupId> <artifactId>taglibs-standard-impl</artifactId> <version>1.2.5</version> </dependency> </dependencies>3.编写下载控制器
//编写下载控制器,文件下载 @RequestMapping("/download") public void fileDown(HttpServletRequest request, HttpServletResponse response,String fileName) throws IOException { //设置响应头 response.setHeader("Content-disposition","attachment;fileName="+fileName); //获取文件路径 String path = request.getSession().getServletContext().getRealPath("/upload"); File file = new File(path,fileName); //获取字节输入流 ServletoutputStream os = response.getoutputStream(); //使用输入流写出文件 os.write(FileUtils.readFiletoByteArray(file)); os.flush(); os.close(); }4.编写下载页面download.jsp
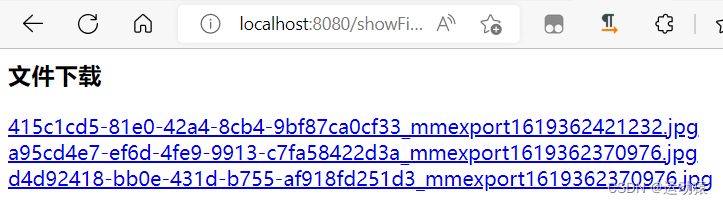
<%@ page contentType="text/html;charset=UTF-8" language="java" %>
<%@ taglib prefix="c" uri="http://java.sun.com/jsp/jstl/core" %>
<html>
<head>
    <title>下载</title>
</head>
<body>
    <h3>文件下载</h3>
    <%--遍历文件集合--%>
    <c:forEach items="${files}" var="file">
        <a href="/download?fileName=${file}">${file}</a><br/>
    </c:forEach>
</body>
</html>
5.请求路径:localhost:8080/showFiles
点击文件名即可下载。

八、知识点整理:
1.上传文件表单的提交方式必须为“POST ”
2.上传文件表单的 enctype 属性必须为“multipart/form-data”
3.SpringMVC上传文件,会将表单的文件封装为“multipartfile ”对象
4.SpringMVC上传文件, multipartfile 对象的“transferTo ”方法可以将数据写入文件
5.jQuery表单上传工具 jquery.form.js 异步表单提交方法为"ajaxSubmit"
6.修改tomcat的“只读属性为false ”才能支持跨服上传

19. SpringBoot 扩展 SpringMVC功能、 接管、自定义SpringMVC
编写一个配置类(@Configuration),是WebMvcConfigurerAdapter类型;不能标注@EnableWebMv:
既保留了所有的自动配置,也能用我们扩展的配置;
如下代码:【拓展 请求 映射 页面 功能】
//使用WebMvcConfigurerAdapter可以来扩展SpringMVC的功能
@Configuration
public class MyMvcConfig extends WebMvcConfigurerAdapter {
    @Override
    public void addViewControllers(ViewControllerRegistry registry) {
// super.addViewControllers(registry);
//浏览器发送 /bihu 请求来到 Thymeleaf 页面
        registry.addViewController("/bihu").setViewName("Thymeleaf");
    }
}
原理:
1)、WebMvcAutoConfiguration是SpringMVC的自动配置类
2)、在做其他自动配置时会导入;@Import(EnableWebMvcConfiguration.class)
@Configuration
public static class EnableWebMvcConfiguration extends DelegatingWebMvcConfiguration {
private final WebMvcConfigurerComposite configurers = new WebMvcConfigurerComposite();
//从容器中获取所有的WebMvcConfigurer
@Autowired(required = false)
public void setConfigurers(List<WebMvcConfigurer> configurers) {
if (!CollectionUtils.isEmpty(configurers)) {
this.configurers.addWebMvcConfigurers(configurers);
//一个参考实现;将所有的WebMvcConfigurer相关配置都来一起调用;
@Override
// public void addViewControllers(ViewControllerRegistry registry) {
// for (WebMvcConfigurer delegate : this.delegates) {
// delegate.addViewControllers(registry);
// }
}
}
}
EnableWebMvcConfiguration
3)、所以:容器中所有的WebMvcConfigurer都会一起起作用;
4)、我们的配置类也会被调用;
效果:SpringMVC的自动配置和我们的扩展配置都会起作用;
所以这就达成了 拓展SpringBoot 中 SpringMVC的功能
全面接管SpringBoot中的 SpringMVC:
SpringBoot对SpringMVC的自动配置不需要了,所有都是我们自己配置;所有的SpringMVC的自动配置都失效了
我们需要在配置类中添加@EnableWebMvc即可;
package com.bihu.springboot.config;

import org.springframework.context.annotation.Configuration;
import org.springframework.web.servlet.config.annotation.EnableWebMvc;
import org.springframework.web.servlet.config.annotation.ViewControllerRegistry;
import org.springframework.web.servlet.config.annotation.WebMvcConfigurerAdapter;

//使用WebMvcConfigurerAdapter可以来扩展SpringMVC的功能
//使用EnableWebMvc注解后 SpringBoot中SpringMVC的配置全部失效 都需要自己配,例如 下面的  请求bihu  跳到Thymeleaf页面 就是自己配的,,,你如果在static放(静态资源目录)html,也不可以直接访问
@EnableWebMvc
@Configuration
public class MyMvcConfig extends WebMvcConfigurerAdapter {
    @Override
    public void addViewControllers(ViewControllerRegistry registry) {
// super.addViewControllers(registry);
//浏览器发送 /bihu 请求来到 Thymeleaf
        registry.addViewController("/bihu").setViewName("Thymeleaf");
    }
}
原理: 为什么@EnableWebMvc自动配置就失效了;
1)@EnableWebMvc的核心
@Import(DelegatingWebMvcConfiguration.class)
public @interface EnableWebMvc {
2)、
@Configuration
public class DelegatingWebMvcConfiguration extends WebMvcConfigurationSupport {
3)、
@Configuration
@ConditionalOnWebApplication
@ConditionalOnClass({ Servlet.class, dispatcherServlet.class,
WebMvcConfigurerAdapter.class })
//容器中没有这个组件的时候,这个自动配置类才生效  主要看这里!!!!这个条件注解这里
@ConditionalOnMissingBean(WebMvcConfigurationSupport.class)
@AutoConfigureOrder(Ordered.HIGHEST_PRECEDENCE + 10)
@AutoConfigureAfter({ dispatcherServletAutoConfiguration.class,
ValidationAutoConfiguration.class })
public class WebMvcAutoConfiguration {
4)、@EnableWebMvc将WebMvcConfigurationSupport组件导入进来;
5)、导入的WebMvcConfigurationSupport只是SpringMVC最基本的功能;
如何修改SpringBoot的默认配置
模式: 1)、SpringBoot在自动配置很多组件的时候,先看容器中有没有用户自己配置的(@Bean、@Component)如 果有就用用户配置的,如果没有,才自动配置;如果有些组件可以有多个(ViewResolver)将用户配置的和自己默 认的组合起来;
2)、在SpringBoot中会有非常多的xxxConfigurer帮助我们进行扩展配置
3)、在SpringBoot中会有很多的xxxCustomizer帮助我们进行定制配置

java day62【 响应数据和结果视图 、 SpringMVC 实现文件上传 、 SpringMVC 中的异常处理 、 SpringMVC 中的拦截器 】
第 1 章 响应数据和结果视图
1.1 返回值分类
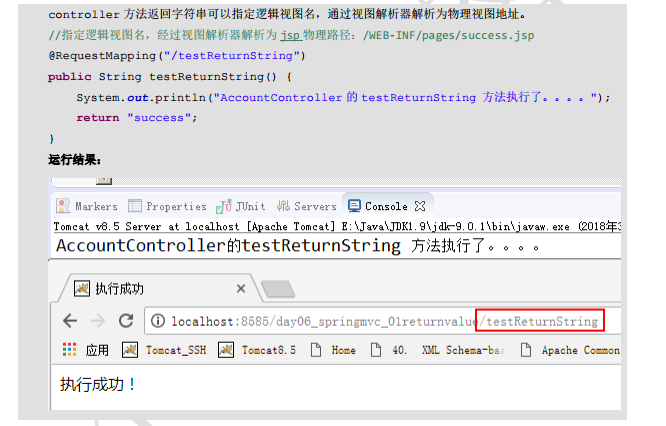
1.1.1 字符串
1.1.2 void


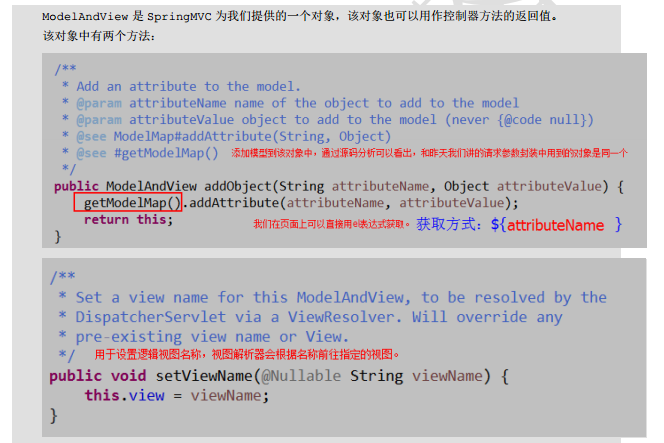
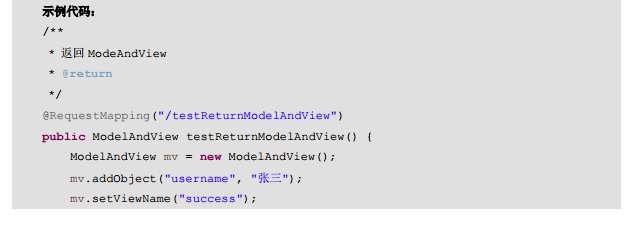
1.1.3 ModelAndView

1.2 转发和重定向
1.2.1 forward 转发


1.2.2 Redirect 重定向
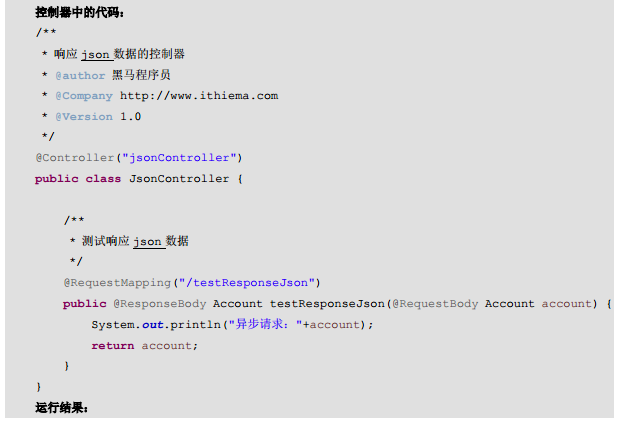
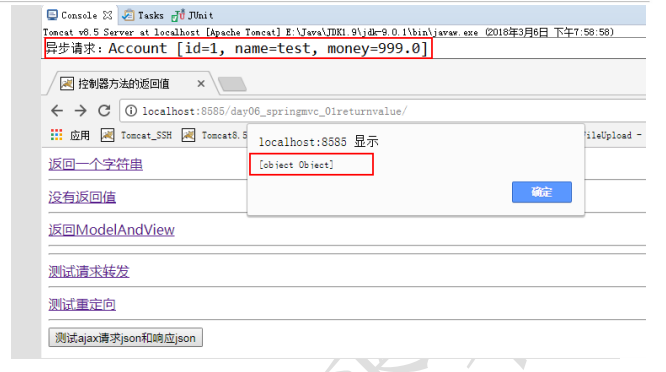
1.3ResponseBody 响应 json 数据
1.3.1 使用说明

1.3.2 使用示例


第 2 章 SpringMVC 实现文件上传
2.1 文件上传的回顾
2.1.1 文件上传的必要前提

2.1.2 文件上传的原理分析
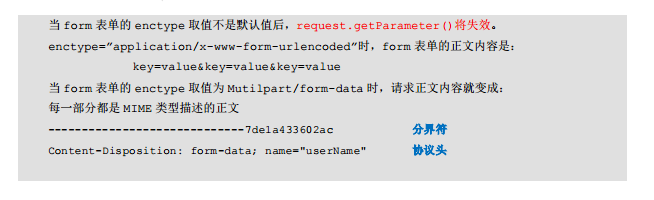

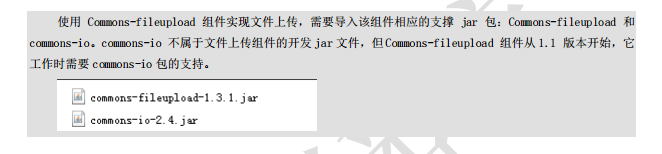
2.1.3 借助第三方组件实现文件上传
2.2springmvc 传统方式的文件上传
2.2.1 说明

2.2.2 实现步骤
2.2.2.1 第一步:拷贝文件上传的 jar 包到工程的 lib 目录

2.2.2.2 第二步:编写 jsp 页面

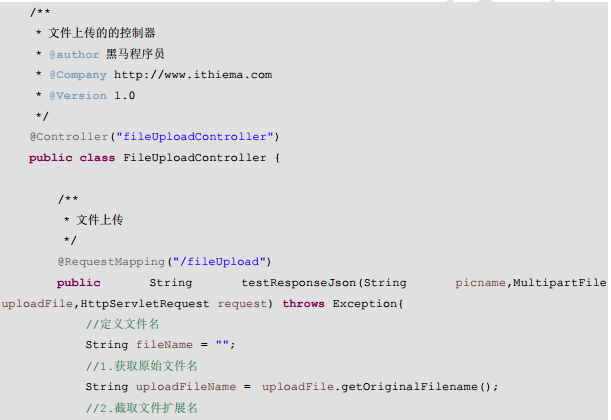
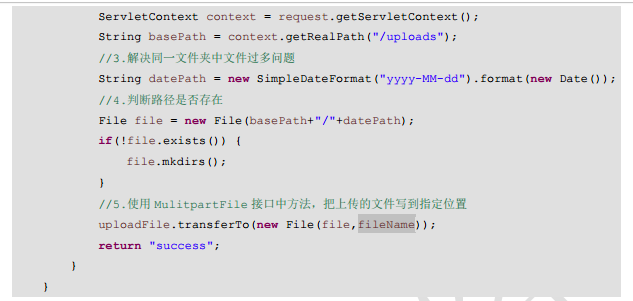
2.2.2.3 第三步:编写控制器

2.2.2.4 第四步:配置文件解析器

2.3springmvc 跨服务器方式的文件上传
2.3.1 分服务器的目的

2.3.2 准备两个 tomcat 服务器,并创建一个用于存放图片的 web 工程

2.3.3 拷贝 jar 包
2.3.4 编写控制器实现上传图片
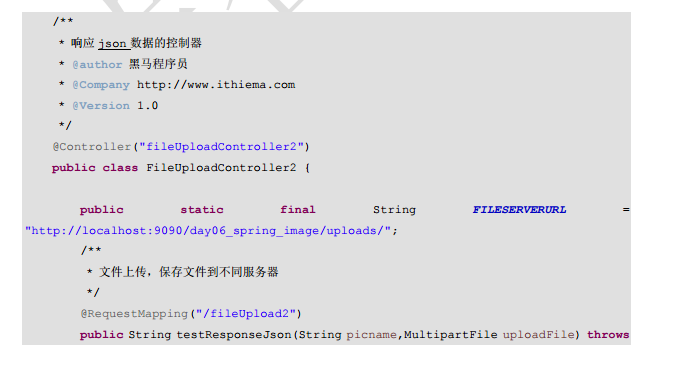


2.3.5 编写 jsp 页面

2.3.6 配置解析器


第 3 章 SpringMVC 中的异常处理
3.1 异常处理的思路

3.2 实现步骤
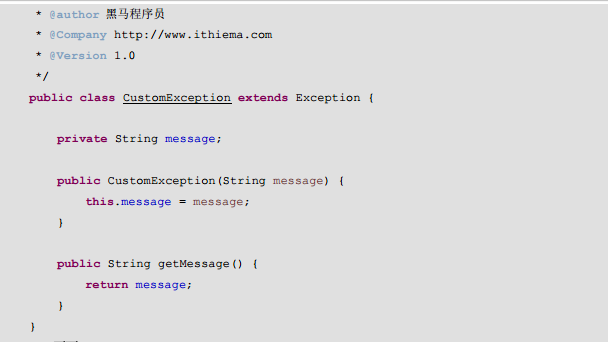
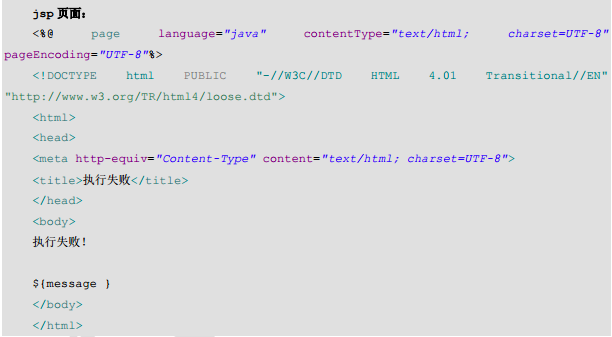
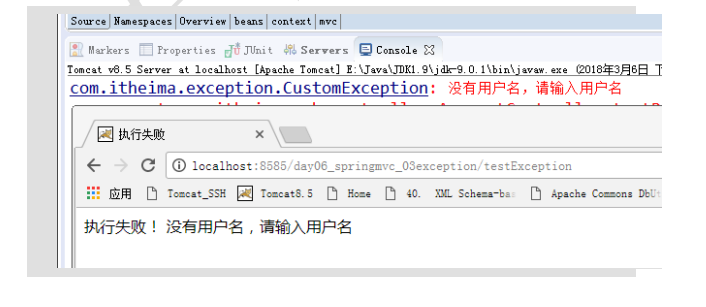
3.2.1 编写异常类和错误页面

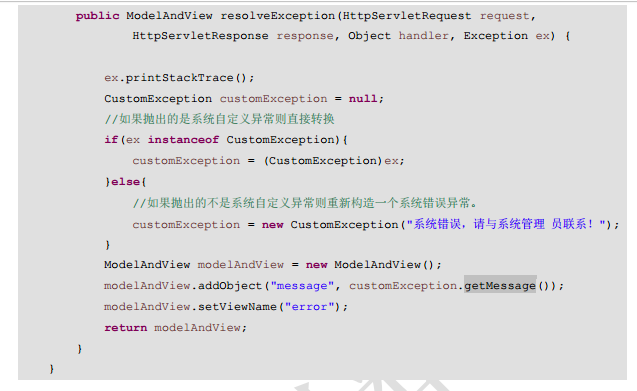
3.2.2 自定义异常处理器

3.2.3 配置异常处理器

3.2.4 运行结果:
第 4 章 SpringMVC 中的拦截器
4.1 拦截器的作用

4.2 自定义拦截器的步骤
4.2.1 第一步:编写一个普通类实现 HandlerInterceptor 接口

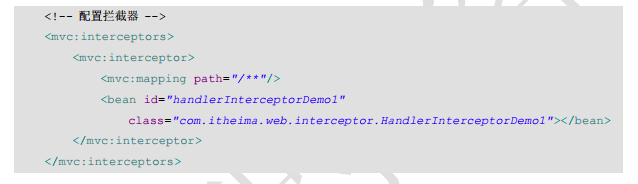
4.2.2 第二步:配置拦截器
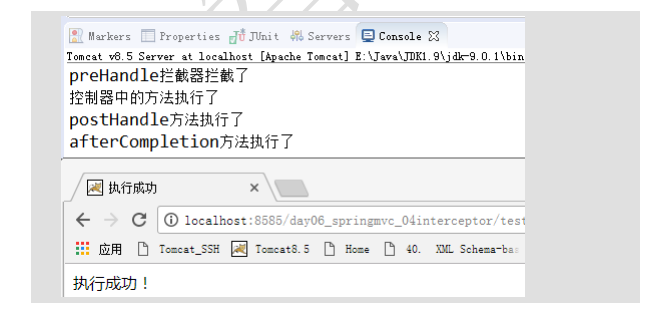
4.2.3 测试运行结果:
4.3 拦截器的细节
4.3.1 拦截器的放行

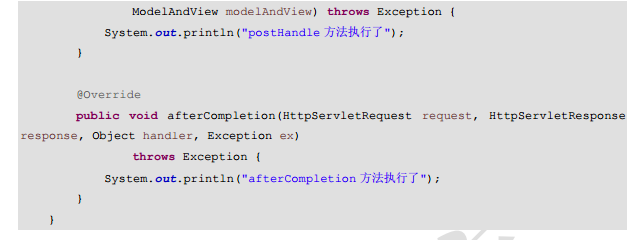
4.3.2 拦截器中方法的说明


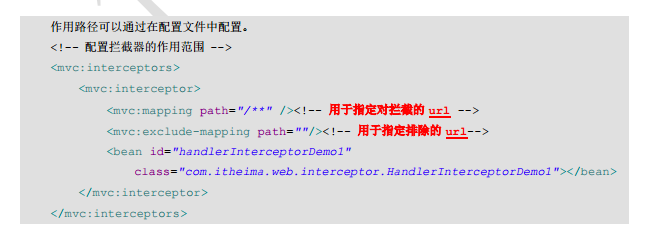
4.3.3 拦截器的作用路径
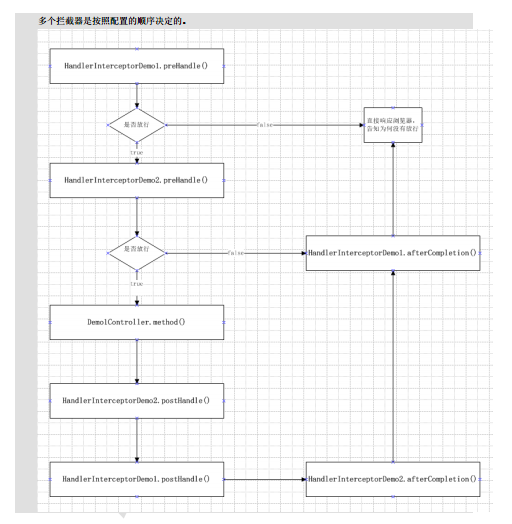
4.3.4 多个拦截器的执行顺序
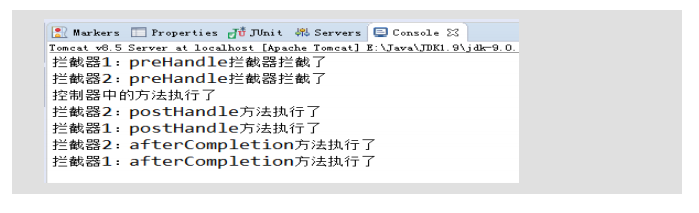
4.4 正常流程测试
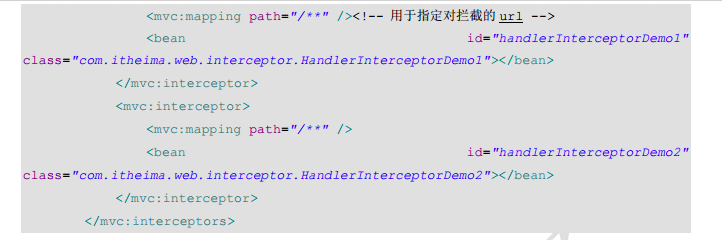
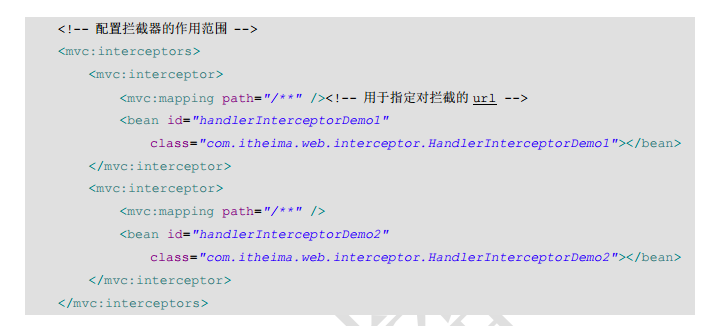
4.4.1 配置文件:

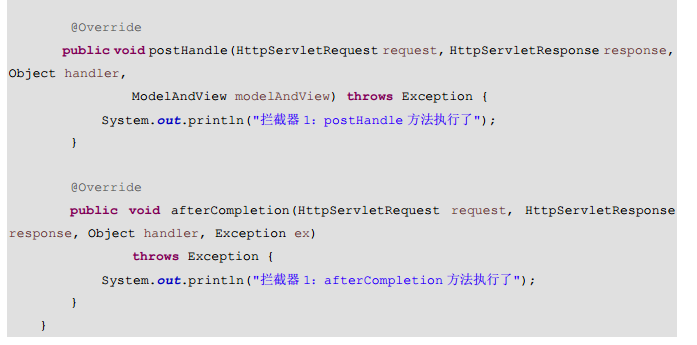
4.4.2 拦截器 1 的代码:

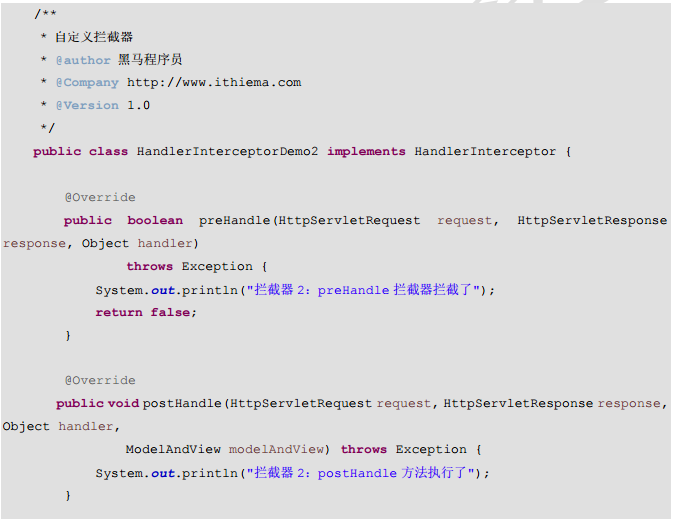
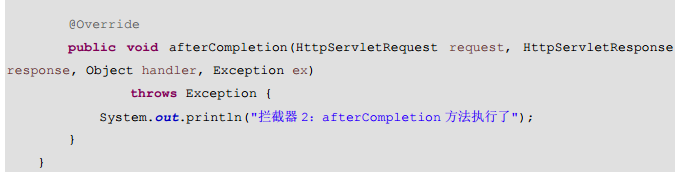
4.4.3 拦截器 2 的代码:


4.4.4 运行结果:
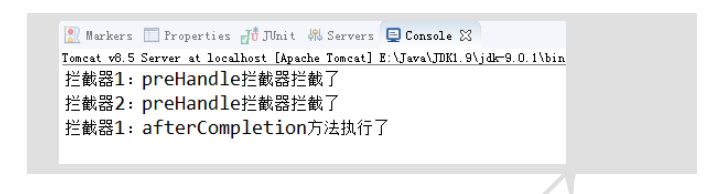
4.5 中断流程测试
4.5.1 配置文件:
4.5.2 拦截器 1 的代码:


4.5.3 拦截器 2 的代码:
4.5.4 运行结果:
4.6 拦截器的简单案例(验证用户是否登录)
4.6.1 实现思路
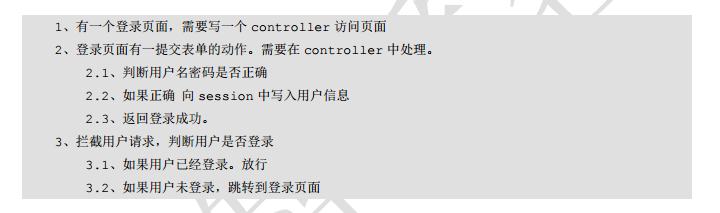
4.6.2 控制器代码
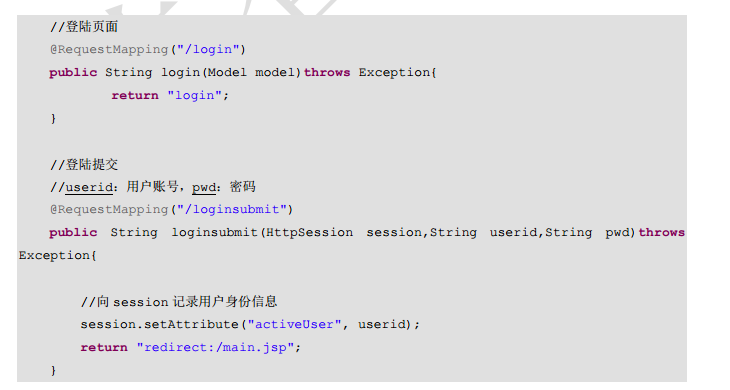

4.6.3 拦截器代码


MyBatis + SpringMVC上传、下载文件
MyBatis + SpringMVC上传、下载文件
环境:maven+SpringMVC + Spring + MyBatis + MySql
本文主要说明如何使用input上传文件到服务器指定目录,或保存到数据库中;如何从数据库下载文件,和显示图像文件并实现缩放。
将文件存储在数据库中,一般是存文件的byte数组,对应的数据库数据类型为blob。
首先要创建数据库,此处使用MySql数据库。
注意:文中给出的代码多为节选重要片段,并不齐全。
1. 前期准备
使用maven创建一个springMVC+spring+mybatis+mysql的项目。
关于如何整合Spring+mybatis+mysql,请见MyBatis简介与配置MyBatis+Spring+MySql:
MyBatis学习 之 一、MyBatis简介与配置MyBaits+Spring+MySql
关于SpringMVC环境的搭建请见:使用Eclipse构建Maven的SpringMVC项目:
使用Eclipse构建Maven的SpringMVC项目
在前台html中,form的enctype为multipart/form-data。注意input、select的name要和StudentForm中成员一一对应。
上传的url为addAction.do,此action方法的参数中使用StudentForm来映射提交的数据。此时就可以获取到提交的文件的数据。然后我们就对文件进行操作。
创建PHOTO_TBL表:PHOTO_DATA字段用于存放文件,类型为MyBatis的longblob;然后写Mapper的Java接口PhotoMapper:包括增删改查;mapper的xml文件:对应JAVA接口的sql语句。
并且需要Spring配置文件添加一个bean的声明。
下面给出html、action、StudentForm的代码片段;创建PHOTO_TBL表的sql、PhotoMapper.java接口代码、PhotoMapper.xml文件代码。
1.1 html的form表单写法
<form action="<c:url value=''addAction.do'' />" method="post" enctype="multipart/form-data">
	<table>
		<tr>
			<td width="100" align="right">照片:</td>
			<td><input type="file" name="studentPhoto"/></td>
		</tr>
	</table>
	<input type="submit">
</form>
1.2 action方法
/**
 * 新增 - 提交
 */
@RequestMapping(value = "addAction.do")
public String add_action(ModelMap model, StudentForm form) {

}
1.3 StudentForm类
package liming.student.manager.web.model;

import org.springframework.web.multipart.MultipartFile;

public class StudentForm extends GeneralForm {

	private String studentName;
	private int studentSex;
	private String studentBirthday;
	private MultipartFile studentPhoto;

}
1.4 创建PHOTO_TBL
CREATE TABLE PHOTO_TBL
(
   PHOTO_ID     VARCHAR(100) PRIMARY KEY,
   PHOTO_DATA   LONGBLOB,
   FILE_NAME    VARCHAR(10)
);
1.5 PhotoMapper接口
@Repository
@Transactional
public interface PhotoMapper {

	public void createPhoto(PhotoEntity entity);

	public int deletePhotoByPhotoId(String photoId);

	public int updatePhotoDate(@Param("photoId") String photoId, @Param("photoDate") byte[] photoDate);

	public PhotoEntity getPhotoEntityByPhotoId(String photoId);

}
1.6 PhotoMapper.xml文件
包括增、删、改、查。其中新增中的photoId使用的是mysql自定义函数自动生成主键。在操作blob时需要制定typeHandler为"org.apache.ibatis.type.BlobTypeHandler。insert、update时参数后面需要指定,resultMap中需要指定。
<?xml version="1.0" encoding="UTF-8" ?>
<!DOCTYPE mapper PUBLIC "-//mybatis.org//DTD Mapper 3.0//EN" "http://mybatis.org/dtd/mybatis-3-mapper.dtd">
<mapper namespace="liming.student.manager.data.PhotoMapper">
	<resultMap type="liming.student.manager.data.model.PhotoEntity" id="photoMapper_resultMap_photoEntity">
		<id property="photoId"			column="PHOTO_ID" 		javaType="String" jdbcType="VARCHAR" />
		<result property="photoData"	column="PHOTO_DATA" 	javaType="byte[]" jdbcType="BLOB" typeHandler="org.apache.ibatis.type.BlobTypeHandler" />
		<result property="fileName" 	column="FILE_NAME" 		javaType="String" jdbcType="VARCHAR" />
	</resultMap>

	<insert id="createPhoto" parameterType="liming.student.manager.data.model.PhotoEntity">
		<selectKey keyProperty="photoId" resultType="String" order="BEFORE">
			select nextval(''photo'')
		</selectKey>
		INSERT INTO PHOTO_TBL(PHOTO_ID,
						      PHOTO_DATA,
						      FILE_NAME)
		VALUES(#{photoId, jdbcType=VARCHAR},
			   #{photoData, javaType=byte[], jdbcType=BLOB, typeHandler=org.apache.ibatis.type.BlobTypeHandler},
			   #{fileName, jdbcType=VARCHAR})
	</insert>

	<delete id="deletePhotoByPhotoId">
		DELETE FROM PHOTO_TBL
		      WHERE PHOTO_ID = #{photoId, jdbcType=VARCHAR}
	</delete>

	<update id="updatephotoData" >
		UPDATE PHOTO_TBL
		   SET PHOTO_DATA = #{photoData, javaType=byte[], jdbcType=BLOB, typeHandler=org.apache.ibatis.type.BlobTypeHandler},
		       FILE_NAME = #{fileName, jdbcType=VARCHAR}
		 WHERE PHOTO_ID = #{photoId, jdbcType=VARCHAR}
	</update>

	<select id="getPhotoEntityByPhotoId" resultMap="photoMapper_resultMap_photoEntity">
		SELECT PHOTO_ID,
		       PHOTO_DATA,
		       FILE_NAME
		  FROM PHOTO_TBL
		 WHERE PHOTO_ID = #{photoId, jdbcType=VARCHAR}
	</select>
</mapper>
1.7 spring配置文件
需要Spring配置文件添加一个org.springframework.web.multipart.commons.CommonsMultipartResolver的bean的声明。
<bean id="multipartResolver">
	<property name="maxUploadSize" value="1073741824" />
</bean>
2. 将文件到服务器上
private static final String uploadFilePath = "d:\\temp_upload_file\\";

/**
 * 新增 - 提交 – 只保存文件到服务器上
 */
@RequestMapping(value = "addAction.do")
public String add_action(ModelMap model, StudentForm form) {
try {
		MultipartFile uploadFile = form.getStudentPhoto();
		String filename = uploadFile.getOriginalFilename();
		InputStream is = uploadFile.getInputStream();
		// 如果服务器已经存在和上传文件同名的文件,则输出提示信息
		File tempFile = new File(uploadFilePath + filename);
		if (tempFile.exists()) {
			boolean delResult = tempFile.delete();
			System.out.println("删除已存在的文件:" + delResult);
		}
		// 开始保存文件到服务器
		if (!filename.equals("")) {
			FileOutputStream fos = new FileOutputStream(uploadFilePath + filename);
			byte[] buffer = new byte[8192]; // 每次读8K字节
			int count = 0;
			// 开始读取上传文件的字节,并将其输出到服务端的上传文件输出流中
			while ((count = is.read(buffer)) > 0) {
				fos.write(buffer, 0, count); // 向服务端文件写入字节流
			}
			fos.close(); // 关闭FileOutputStream对象
			is.close(); // InputStream对象
		}
	} catch (FileNotFoundException e) {
		e.printStackTrace();
	} catch (IOException e) {
		e.printStackTrace();
	}
}
3. 将文件上传到数据库中
/**
 * 新增 - 提交 – 保存文件到数据库
 */
@RequestMapping(value = "addAction.do")
public String add_action(ModelMap model, StudentForm form) {
	InputStream is = form.getStudentPhoto().getInputStream();
	byte[] studentPhotoData = new byte[(int) form.getStudentPhoto().getSize()];
	is.read(studentPhotoData);
	String fileName = form.getStudentPhoto().getOriginalFilename();
	PhotoEntity photoEntity = new PhotoEntity();
	photoEntity.setPhotoData(studentPhotoData);
	photoEntity.setFileName(fileName);
	this.photoMapper.createPhoto(photoEntity);
}
4.下载文件
下载文件需要将byte数组还原成文件。
首先使用mybatis将数据库中的byte数组查出来,指定文件名(包括格式)。然后使用OutputStream将文件输入
@RequestMapping(value = "downPhotoById")
public void downPhotoByStudentId(String id, final HttpServletResponse response){
	PhotoEntity entity = this.photoMapper.getPhotoEntityByPhotoId(id);
	byte[] data = entity.getPhotoData();
	String fileName = entity.getFileName()== null ? "照片.png" : entity.getFileName();
	fileName = URLEncoder.encode(fileName, "UTF-8");
	response.reset();
	response.setHeader("Content-Disposition", "attachment; filename=\"" + fileName + "\"");
	response.addHeader("Content-Length", "" + data.length);
	response.setContentType("application/octet-stream;charset=UTF-8");
	OutputStream outputStream = new BufferedOutputStream(response.getOutputStream());
	outputStream.write(data);
	outputStream.flush();
	outputStream.close();
}
<a href="<%=request.getContextPath() %>/downPhotoById.do?id=8000001">下载照片</a>
5. 显示byte图片文件
@RequestMapping(value = "getPhotoById")
public void getPhotoById (String id, final HttpServletResponse response){
	PhotoEntity entity = this.photoMapper.getPhotoEntityByPhotoId(id);
	byte[] data = entity.getPhotoData();
	response.setContentType("image/jpeg");
	response.setCharacterEncoding("UTF-8");
	OutputStream outputSream = response.getOutputStream();
	InputStream in = new ByteArrayInputStream(data);
	int len = 0;
	byte[] buf = new byte[1024];
	while ((len = in.read(buf, 0, 1024)) != -1) {
		outputSream.write(buf, 0, len);
	}
	outputSream.close();
}
<img src="<%=request.getContextPath() %>/getPhotoById.do?id=8000001"/>
6. 按长宽等比例缩放图片
@RequestMapping(value = "getPhotoId")
public void getPhotoById (String id, int width, int height, final HttpServletResponse response){
	PhotoEntity entity = this.photoMapper.getPhotoEntityByPhotoId(id);
	byte[] data = entity.getPhotoData();
	if (width != 0 && height != 0) {
		data = scaleImage(data, width, height);
	}
	response.setContentType("image/jpeg");
	response.setCharacterEncoding("UTF-8");
	OutputStream outputSream = response.getOutputStream();
	InputStream in = new ByteArrayInputStream(data);
	int len = 0;
	byte[] buf = new byte[1024];
	while ((len = in.read(buf, 0, 1024)) != -1) {
		outputSream.write(buf, 0, len);
	}
	outputSream.close();
}

public static byte[] scaleImage(byte[] data, int width, int height) throws IOException {
	BufferedImage buffered_oldImage = ImageIO.read(new ByteArrayInputStream(data));
	int imageOldWidth = buffered_oldImage.getWidth();
	int imageOldHeight = buffered_oldImage.getHeight();
	double scale_x = (double) width / imageOldWidth;
	double scale_y = (double) height / imageOldHeight;
	double scale_xy = Math.min(scale_x, scale_y);
	int imageNewWidth = (int) (imageOldWidth * scale_xy);
	int imageNewHeight = (int) (imageOldHeight * scale_xy);
	BufferedImage buffered_newImage = new BufferedImage(imageNewWidth, imageNewHeight, BufferedImage.TYPE_INT_RGB);
	buffered_newImage.getGraphics().drawImage(buffered_oldImage.getScaledInstance(imageNewWidth, imageNewHeight, BufferedImage.SCALE_SMOOTH), 0, 0, null);
	buffered_newImage.getGraphics().dispose();
	ByteArrayOutputStream outPutStream = new ByteArrayOutputStream();
	ImageIO.write(buffered_newImage, "jpeg", outPutStream);
	return outPutStream.toByteArray();
}
<img src="<%=request.getContextPath() %>/getPhotoById.do?id=8000001&width=300&height=300"/>
关于springboot-springmvc 文件上传、下载、压缩打包和springboot上传zip并解压的介绍已经告一段落,感谢您的耐心阅读,如果想了解更多关于05 SpringMVC文件上传、下载、19. SpringBoot 扩展 SpringMVC功能、 接管、自定义SpringMVC、java day62【 响应数据和结果视图 、 SpringMVC 实现文件上传 、 SpringMVC 中的异常处理 、 SpringMVC 中的拦截器 】、MyBatis + SpringMVC上传、下载文件的相关信息,请在本站寻找。
本文标签:


